This is the multi-page printable view of this section. .
Documentation
- 1: Apache HugeGraph Introduction
- 2: Download Apache HugeGraph
- 3: Quick Start
- 3.1: HugeGraph (OLTP)
- 3.1.1: HugeGraph Server Quick Start
- 3.1.2: HugeGraph-PD Quick Start
- 3.1.3: HugeGraph-Store Quick Start
- 3.1.4: Deploy HugeGraph with Helm
- 3.1.5: Operate HugeGraph on Kubernetes
- 3.2: HugeGraph ToolChain
- 3.2.1: Graph visualization
- 3.2.1.1: Manage an HStore Cluster with Hubble
- 3.2.2: Graph Visualization with Hubble: Standalone Quick Start
- 3.2.3: Graph import
- 3.2.4: HugeGraph-Loader Quick Start
- 3.2.5: Graph export and migration
- 3.2.6: Tools Quick Start
- 3.2.7: HugeGraph-Spark-Connector Quick Start
- 3.2.1: Graph visualization
- 3.3: HugeGraph-AI
- 3.3.1: HugeGraph-LLM
- 3.3.2: HugeGraph-ML
- 3.3.3: HugeGraph-LLM Workflow
- 3.3.4: Configuration Reference
- 3.3.5: HugeGraph-LLM REST API
- 3.3.6: Vermeer Python Client
- 3.4: HugeGraph Computing (OLAP)
- 3.5: HugeGraph Client
- 3.1: HugeGraph (OLTP)
- 4: HugeGraph-Server Configuration
- 4.1: Server Startup Guide
- 4.2: Server Complete Configuration Manual
- 4.3: Built-in User Authentication and Authorization Configuration and Usage in HugeGraph
- 4.4: Configuring HugeGraphServer to Use HTTPS Protocol
- 4.5: Configuring the RocksDB Backend
- 4.6: Configuring the HStore Distributed Backend
- 4.7: Configuring the HBase Backend
- 5: Clients and APIs
- 5.1: HugeGraph RESTful API
- 5.1.1: Graphspace API
- 5.1.2: Schema API
- 5.1.3: PropertyKey API
- 5.1.4: VertexLabel API
- 5.1.5: EdgeLabel API
- 5.1.6: IndexLabel API
- 5.1.7: Rebuild API
- 5.1.8: Vertex API
- 5.1.9: Edge API
- 5.1.10: Traverser API
- 5.1.11: Rank API
- 5.1.12: Variable API
- 5.1.13: Graphs API
- 5.1.14: Task API
- 5.1.15: Gremlin API
- 5.1.16: Cypher API
- 5.1.17: Authentication API
- 5.1.18: Metrics API
- 5.1.19: Other API
- 5.2: HugeGraph Java Client
- 5.3: Gremlin-Console
- 5.1: HugeGraph RESTful API
- 6: GUIDES
- 6.1: HugeGraph Architecture Overview
- 6.2: HugeGraph Design Concepts
- 6.3: HugeGraph Plugin mechanism and plug-in extension process
- 6.4: HugeGraph Toolchain Local Testing Guide
- 6.5: Backup and Restore
- 6.6: HugeGraph Docker Cluster Guide
- 6.7: FAQ
- 6.8: Security Report
- 6.9: 1.8.0 shared-foundation migration
- 6.10: ToplingDB development integration
- 7: Query Languages
- 7.1: HugeGraph Gremlin
- 7.2: HugeGraph Examples
- 8: PERFORMANCE
- 9: Contribution Guidelines
- 10: CHANGELOGS
- 11: Apache Contributor Agreements
Apache HugeGraph Documentation
Apache HugeGraph includes graph database, graph computing, and graph AI components. The HugeGraph core engine manages property graphs, transactions, and real-time queries; Computer and Vermeer run graph algorithms; and HugeGraph-AI provides GraphRAG, graph machine learning, and a Python client.
Quick Navigation by Scenario
| I want to… | Start here |
|---|---|
| Run graph queries (OLTP) | HugeGraph Server Quick Start |
| Run graph algorithms (OLAP) | HugeGraph Computing |
| Build Graph + AI applications | HugeGraph-AI |
| Batch import data | HugeGraph Loader, SeaTunnel |
| Visualize and manage graphs | Hubble Web UI |
Ecosystem Overview
- Vermeer is the default graph computing entry; Computer runs Java BSP jobs.
Core Components
- HugeGraph Core Engine (OLTP): Exposes REST APIs through HugeGraph Server and supports Gremlin and Cypher queries
- HugeGraph Toolchain: Includes Java/Go clients, Loader, Hubble, Spark Connector, and Tools; the Python client is maintained in HugeGraph-AI, and a Rust client is under development
- HugeGraph Computer: Contains the distributed Computer engine and the in-memory Vermeer engine
- HugeGraph-AI: Includes GraphRAG, graph machine learning, the Python client, and the Vermeer Python client
Deployment Modes
| Mode | Core Components | Suitable Scenarios | Data Scale |
|---|---|---|---|
| Standalone | Server + RocksDB | Development, testing, Graph AI, and small to medium-scale production environments | ≤ 2 TB |
| Distributed | Server + PD + Store (HStore) | Production, horizontal scaling, and multi-replica deployment | ≤ 1 PB |
See the system introduction and the corresponding quick-start guides for each component’s scope and startup instructions.
1 - Apache HugeGraph Introduction
What Is Apache HugeGraph?
Apache HugeGraph is an easy-to-use, efficient, general-purpose open-source full-stack graph system (GitHub). It covers three major areas: graph databases (OLTP real-time queries), graph computing (OLAP large-scale analysis), and graph AI (GraphRAG and graph machine learning).
HugeGraph supports fast storage and queries for tens of billions of vertices and edges, with strong OLTP performance. Its graph engine is compatible with Apache TinkerPop 3 and supports both Gremlin and Cypher (the OpenCypher standard).
Typical use cases: deep relationship exploration, association analysis, path search, feature extraction, community detection, and knowledge graphs. Application areas: network security, telecom anti-fraud, financial risk control, advertising and recommendations, social networks, and intelligent Q&A.
Ecosystem Overview
HugeGraph Server (OLTP Graph Engine)
HugeGraph Server is the OLTP engine and service entry point for the graph database. It handles property graph modeling, transaction processing, query execution, and API access. Graph data is stored in the configured RocksDB, HStore, or HBase backend.
- Property graph and schema: Manages VertexLabel, EdgeLabel, PropertyKey, and IndexLabel definitions
- Query languages: Supports Gremlin (TinkerPop 3) and Cypher (OpenCypher)
- REST API: Provides endpoints for schemas, graph data, queries, tasks, and operations
- Indexes and queries: Supports exact, range, and compound-condition queries
- Storage backends: Versions 1.7.0 through
masterprimarily support RocksDB (standalone), HStore (distributed), and HBase
The main modules include hugegraph-core, the storage backend modules, and hugegraph-api. Core implements the graph model, transactions, and query logic; backend modules connect to specific storage systems; and the API module provides HTTP access. Current REST resource paths include the graph space and graph name, for example:
Standalone deployments commonly use RocksDB. Distributed deployments use HStore: PD manages cluster metadata and partition scheduling, while Store persists graph data and replicas. HBase can be used as a separate storage backend.
HugeGraph Toolchain
HugeGraph Toolchain provides clients, data import, visual management, Spark integration, and command-line operations. Together, these tools cover the main stages of a graph application’s lifecycle, from data ingestion to routine management.
| Module | Purpose |
|---|---|
| Client | Wraps schema management, graph data reads and writes, Gremlin, and Traverser APIs; supports Java, Python, and Go, with a Rust client under development |
| Loader | Reads data from local files, HDFS, JDBC, Kafka, or another graph, converts it into vertices and edges, and imports it into HugeGraph in batches |
| Hubble | Provides a web management interface for graph connections, schemas, data import, Gremlin queries, and visual results |
| Spark Connector | Reads and writes HugeGraph data in Spark jobs for offline big-data processing |
| SeaTunnel Sink | Imports data into HugeGraph through SeaTunnel 3.0+; see the Source guide for exports and migrations |
| Tools | Provides command-line operations for deployment, graph management, backup and restore, and Gremlin execution |
Graph Computing Engines (OLAP)
The HugeGraph-Computer repository provides two complementary OLAP graph computing engines. Start with Vermeer for general graph algorithms; use Computer when you need the Java BSP/Pregel computing model:
- Vermeer (default entry): Written in Go, it uses a master-worker architecture and primarily performs in-memory computation. It provides REST APIs, gRPC, and a web UI, and is suitable for fast small- and medium-scale graph analysis.
- Computer: Written in Java, it implements the distributed BSP/Pregel computing model and can run on Kubernetes, YARN, or local processes. It can spill data to disk when memory thresholds are exceeded and is suitable for larger graph computing workloads.
Both engines can read HugeGraph data, but their runtime architectures, resource requirements, configuration, and algorithm interfaces differ.
HugeGraph-AI (Graph + AI)
HugeGraph-AI connects graph technology with large language models and graph machine learning frameworks. The repository uses Python 3.10 or later and manages its workspace with uv. Its main modules are:
- hugegraph-llm: Provides GraphRAG, knowledge graph construction, natural-language queries, and Text2Gremlin
- hugegraph-ml: Provides models for node classification, graph classification, graph embeddings, link prediction, and fraud detection
- hugegraph-python-client: Manages schemas, graph data, and Gremlin queries from Python
- vermeer-python-client: Calls Vermeer graph computing services from Python
Deployment Modes
| Mode | Core Components | Suitable Scenarios | Data Scale |
|---|---|---|---|
| Standalone (OLTP) | Server + RocksDB | Development, testing, Graph AI, and small to medium-scale production environments | ≤ 2 TB |
| Distributed (OLTP) | Server + PD + Store (HStore) | Production, horizontal scaling, and multi-replica deployment | ≤ 1 PB |
Graph computing is an OLAP workload. Its capacity and resource requirements depend on the selected engine, graph structure, and algorithm, and do not use the OLTP storage capacity figures above.
Where to Start
| Goal | Documentation |
|---|---|
| Start the graph database and run queries | Server Quick Start |
| Import data in batches | Loader, SeaTunnel |
| Manage graphs through a web interface | Hubble |
| Run graph algorithms | HugeGraph Computing |
| Build GraphRAG or graph machine learning applications | HugeGraph-AI |
Community
- GitHub Issues
- Developer mailing list: dev@hugegraph.apache.org
- How to subscribe to the mailing list
- Security reports: security@hugegraph.apache.org
- WeChat public account: Apache HugeGraph

2 - Download Apache HugeGraph
Instructions:
- Use published packages. Java 11 is recommended for Server 1.7.0; see the Server startup guide for other supported JDKs. Check each component’s versioned quick start for Toolchain, AI, Vermeer, and other runtime requirements.
- To verify downloads, use the corresponding hash (SHA512), signature, and Project Signature Verification KEYS.
- Instructions for checking hash (SHA512) and signatures are on the Validate Release page, and you can also refer to ASF official instructions.
- Note: The version numbers of all components of HugeGraph have been kept consistent, and the version numbers of Maven repositories such as
client/loader/hubble/commonare the same. You can refer to these for dependency references maven example.- Compatibility note: after HugeGraph graduated in January 2026, download paths moved from
/incubator/hugegraphto/hugegraph. Historical release file names may still include-incubating-.- To build from source, refer to build from source.
The src suffix identifies a source archive that must be compiled according to the component guide; its directory cannot be used like a binary distribution to run startup scripts. Master may include unreleased configuration or APIs. When using release packages below or versioned container images, check the applicability notes in the documentation.
Latest Version
| Component | Type | Download (ASF mirror) | ASC | SHA512 |
|---|---|---|---|---|
| Server | Binary | apache-hugegraph-incubating-1.7.0.tar.gz | ASC | SHA512 |
| Toolchain | Binary | apache-hugegraph-toolchain-incubating-1.7.0.tar.gz | ASC | SHA512 |
| Server | Source | apache-hugegraph-incubating-1.7.0-src.tar.gz | ASC | SHA512 |
| Toolchain | Source | apache-hugegraph-toolchain-incubating-1.7.0-src.tar.gz | ASC | SHA512 |
| AI | Source | apache-hugegraph-ai-incubating-1.7.0-src.tar.gz | ASC | SHA512 |
| Computer | Source | apache-hugegraph-computer-incubating-1.7.0-src.tar.gz | ASC | SHA512 |
Source archives are the official Apache Software Foundation releases; binary packages are convenience builds made from them. All files are served from ASF mirrors, with signatures and checksums hosted on downloads.apache.org. Source archives generated automatically by GitHub are not ASF releases.
Archived Versions
Note:
1.3.0is the last major version compatible with Java8, please switch to or migrate to Java11 as soon as possible (lower versions of Java have potentially more SEC risks and performance impacts). Starting from version1.5.0, a Java11 runtime environment is required.
1.5.0
| Component | Type | Download (ASF mirror) | ASC | SHA512 |
|---|---|---|---|---|
| Server | Binary | apache-hugegraph-incubating-1.5.0.tar.gz | ASC | SHA512 |
| Toolchain | Binary | apache-hugegraph-toolchain-incubating-1.5.0.tar.gz | ASC | SHA512 |
| Server | Source | apache-hugegraph-incubating-1.5.0-src.tar.gz | ASC | SHA512 |
| Toolchain | Source | apache-hugegraph-toolchain-incubating-1.5.0-src.tar.gz | ASC | SHA512 |
| AI | Source | apache-hugegraph-ai-incubating-1.5.0-src.tar.gz | ASC | SHA512 |
| Computer | Source | apache-hugegraph-computer-incubating-1.5.0-src.tar.gz | ASC | SHA512 |
1.3.0
| Component | Type | Download (ASF mirror) | ASC | SHA512 |
|---|---|---|---|---|
| Server | Binary | apache-hugegraph-incubating-1.3.0.tar.gz | ASC | SHA512 |
| Toolchain | Binary | apache-hugegraph-toolchain-incubating-1.3.0.tar.gz | ASC | SHA512 |
| Server | Source | apache-hugegraph-incubating-1.3.0-src.tar.gz | ASC | SHA512 |
| Toolchain | Source | apache-hugegraph-toolchain-incubating-1.3.0-src.tar.gz | ASC | SHA512 |
| AI | Source | apache-hugegraph-ai-incubating-1.3.0-src.tar.gz | ASC | SHA512 |
| Common | Source | apache-hugegraph-commons-incubating-1.3.0-src.tar.gz | ASC | SHA512 |
1.2.0
| Component | Type | Download (ASF mirror) | ASC | SHA512 |
|---|---|---|---|---|
| Server | Binary | apache-hugegraph-incubating-1.2.0.tar.gz | ASC | SHA512 |
| Toolchain | Binary | apache-hugegraph-toolchain-incubating-1.2.0.tar.gz | ASC | SHA512 |
| Server | Source | apache-hugegraph-incubating-1.2.0-src.tar.gz | ASC | SHA512 |
| Toolchain | Source | apache-hugegraph-toolchain-incubating-1.2.0-src.tar.gz | ASC | SHA512 |
| Computer | Source | apache-hugegraph-computer-incubating-1.2.0-src.tar.gz | ASC | SHA512 |
| Common | Source | apache-hugegraph-commons-incubating-1.2.0-src.tar.gz | ASC | SHA512 |
1.0.0
| Component | Type | Download (ASF mirror) | ASC | SHA512 |
|---|---|---|---|---|
| Server | Binary | apache-hugegraph-incubating-1.0.0.tar.gz | ASC | SHA512 |
| Toolchain | Binary | apache-hugegraph-toolchain-incubating-1.0.0.tar.gz | ASC | SHA512 |
| Computer | Binary | apache-hugegraph-computer-incubating-1.0.0.tar.gz | ASC | SHA512 |
| Server | Source | apache-hugegraph-incubating-1.0.0-src.tar.gz | ASC | SHA512 |
| Toolchain | Source | apache-hugegraph-toolchain-incubating-1.0.0-src.tar.gz | ASC | SHA512 |
| Computer | Source | apache-hugegraph-computer-incubating-1.0.0-src.tar.gz | ASC | SHA512 |
| Common | Source | apache-hugegraph-commons-incubating-1.0.0-src.tar.gz | ASC | SHA512 |
3 - Quick Start
Choose the quick-start guide for Server, Toolchain, graph computing, or HugeGraph-AI according to your needs. Each component is released independently, so check the runtime requirements and version of the corresponding repository before installation.
3.1 - HugeGraph (OLTP)
This section covers the HugeGraph Server standalone quick start and the PD and Store guides needed for distributed deployments.
See the DeepWiki project overview. For installation, configuration, and runtime behavior, use the documentation and code for the relevant HugeGraph version.
Start with the Server standalone quick start, which distinguishes ASF 1.7.0 release packages from builds of master. HStore deployments also require PD and Store.
GitHub Access: https://github.com/apache/hugegraph
3.1.1 - HugeGraph Server Quick Start
1 HugeGraph Server Overview
apache/hugegraph is the main repository for the HugeGraph graph database. Its top-level modules include hugegraph-server, hugegraph-pd, and hugegraph-store. This page describes the hugegraph-server module and the service it runs.
The hugegraph-server module contains hugegraph-core, hugegraph-api, hugegraph-dist, and storage adapters. Core implements the property graph model, transactions, and TinkerPop interfaces. API provides the HTTP service and delegates client requests to Core. Graph data is stored in RocksDB (the default standalone backend), HStore (distributed), or HBase.
Version scope: Download examples use the ASF HugeGraph 1.7.0 release. Source builds, configuration defaults, and startup behavior follow apache/hugegraph master. A master build is not an ASF release artifact, even if its version number matches a release. This guide covers RocksDB, HStore, and HBase; see 1.5.x documentation for other legacy backends.
Naming:
HugeGraphmeans the overall project or main repository,hugegraph-serveris its Server module, andHugeGraphServeris the Java service class. Server below means the running graph database service.
flowchart TD
    A{Choose installation source}
    A -->|Release| R["HugeGraph 1.7.0 archive"]
    R --> V[Verify SHA-512]
    V --> X[Extract and use bundled configuration]
    A -->|Development| M["master source"]
    M --> B["mvn package -DskipTests"]
    B --> C[Check RocksDB configuration in conf/graphs]
    C --> I[bin/init-store.sh]
    I --> S["bin/start-hugegraph.sh -p true"]
    S --> Q["Request /versions and graph vertices"]
The map uses short labels for the repository modules described above. server, core, api, dist, pd, and store refer to the corresponding
hugegraph- modules; dist packages the distribution.
---
markmap:
  spacingHorizontal: 40
---
# HugeGraph
## server
- core
- api
- dist
## pd
## store
2 Dependency for Building/Running
2.1 Install Java 17 (JDK 17)
Starting with HugeGraph 1.8.0, use Java 17; 1.7.0 is the last release supporting Java 11.
Build all modules with JDK 17 and Maven 3.6.3 or later, and run Server, PD and Store with JDK 17.
Server security check (-s true) requires Java 17 to 23 and a readable conf/java-security.properties;
on Java 24 or later, start Server with -s false (JDK 24+ dropped Security Manager via JEP 486).
Before continuing, run java -version to confirm your JDK version.
TinkerPop 3.8.1 Compatibility & Key Changes
HugeGraph 1.8.0 upgrades to TinkerPop 3.8.1 and Groovy 4.0.25. Use the Gremlin configuration files bundled with Server.
- Serializer Packages: Driver serializer classes moved from
org.apache.tinkerpop.gremlin.driver.sertoorg.apache.tinkerpop.gremlin.util.ser. Keep HugeGraph registries. - Graph.Features:
supportsUniformListValues()returnsfalsefor properties. SchemavalueList()/LISTproperties remain supported without rewriting existing data. - Traversal Multiplicity: Mid-traversal scans retain input multiplicity (e.g. for 3 vertices,
g.V().V().count()returns9L). - Date & Time Types:
DATEproperties acceptOffsetDateTimefor writes and indexed equality/range queries (instant normalized to milliseconds). - Filtering Behavior:
P.typeOf()runs as a local filter; count filtering applies range optimizations only when predicate branches are provably safe.
For complete client configuration and migration details, see the server runtime documentation.
3 Deploy
There are four ways to deploy the Server service:
- Docker container Quickly start a Server service for testing or development.
- ASF release archive Download a released tarball and verify it before installation.
- master source Build the development branch; its output is not an ASF release archive.
- Legacy one-click deployment (outdated) Reference for the older deployment workflow.
Production requires authentication and restricted network access
HugeGraph disables user authentication by default. Enable authentication and authorization, maintain an IP allowlist, and grant minimum permissions. Do not expose Gremlin, Cypher, or other query APIs directly to the public Internet. Retain Server audit-*.log and restrict read access. auth.audit_log_rate limits per-user output rate rather than turning audit logging on or off. See the security guide.
3.1 Use Docker container (Convenient for Test/Dev)
You can refer to the Docker deployment guide.
You can use docker run -itd --name=server -p 8080:8080 -e PASSWORD=xxx hugegraph/hugegraph:1.7.0 to quickly start a Server instance using the RocksDB backend.
Optional:
- You can use
docker exec -it server bashto enter the container for troubleshooting or other maintenance operations. - You can use
docker run -itd --name=server -p 8080:8080 -e PRELOAD="true" hugegraph/hugegraph:1.7.0to preload a built-in sample graph at startup. You can verify it through theRESTful API. See 5.1.4 for details. - You can use
-e PASSWORD=xxxto enable authentication mode and set the admin password. See Config Authentication for details.
If you use Docker Desktop, you can set the options as follows:
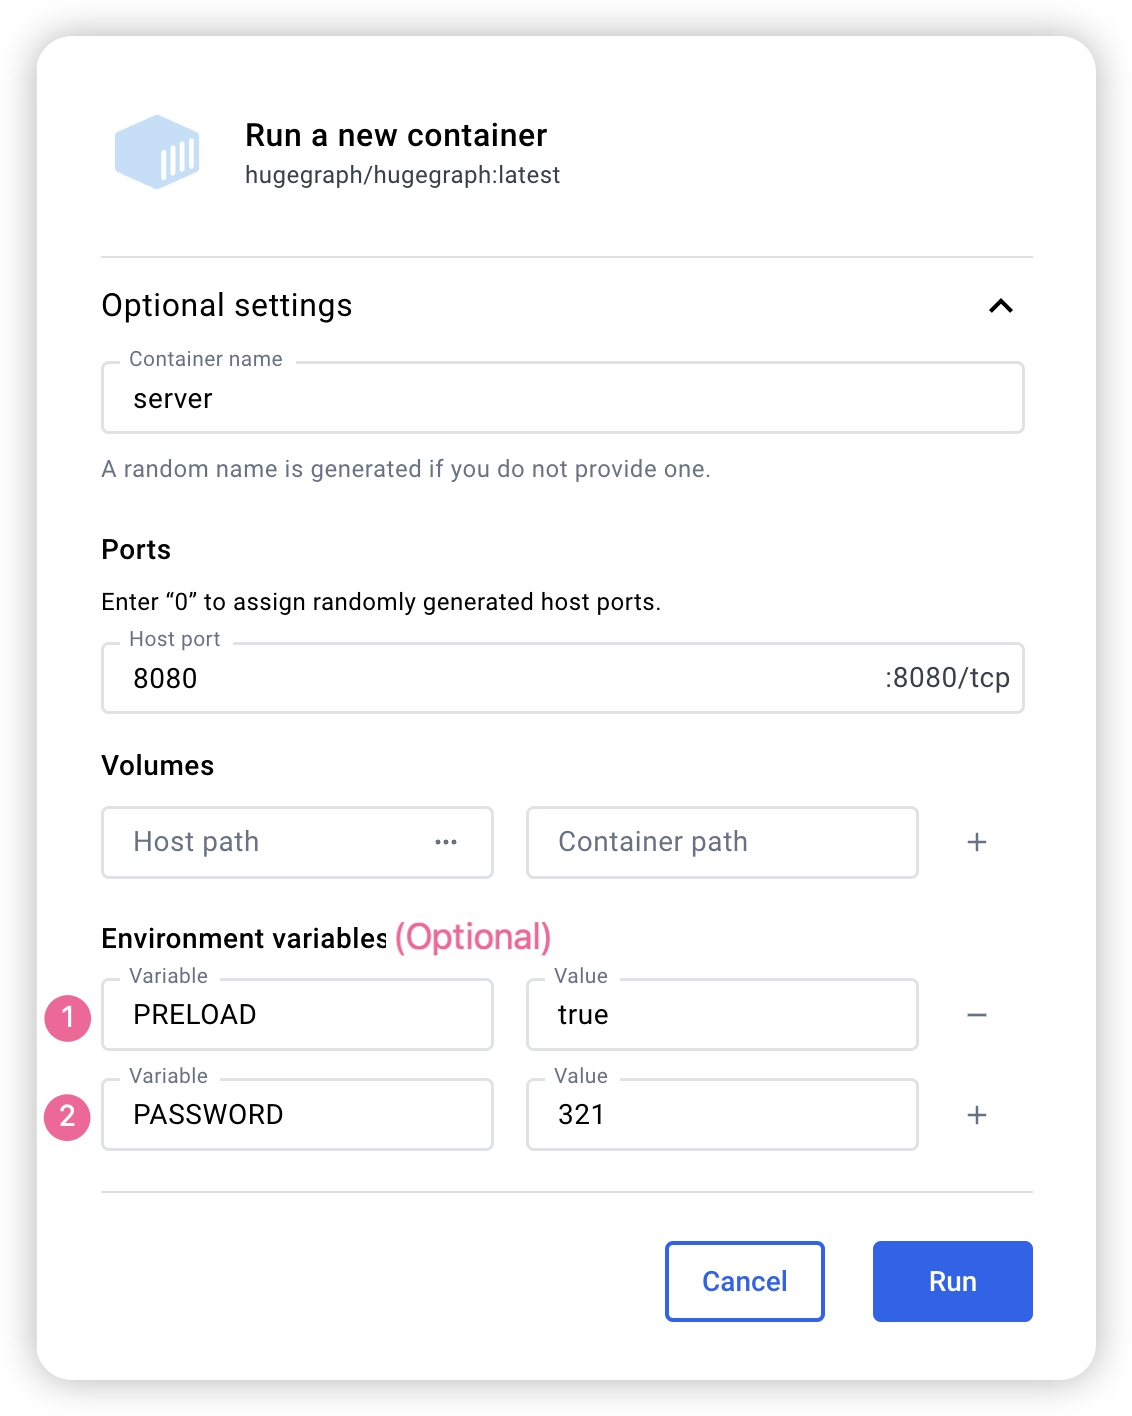
The Docker Compose files use bridge networking (hg-net) and work on Linux and Mac (Docker Desktop). For the 3-node distributed cluster on Mac (Docker Desktop), allocate at least 12 GB of memory (Settings → Resources → Memory). On Linux, Docker uses host memory directly.
Use docker compose to manage multiple HugeGraph services from one configuration. Four Compose files are available in the docker/ directory:
| Topology | Compose file | Services |
|---|---|---|
| Standalone (start here) | docker-compose.yml | 1 RocksDB Server + 1 Hubble |
| Minimal HStore (current master) | docker-compose-hstore.yml | 1 PD + 1 Store + 1 Server + 1 Hubble; locally built master images required |
| HA reference (current master) | docker-compose-3pd-3store-3server.yml | 3 PD + 3 Store + 3 Server + 1 Hubble; locally built master images required |
| Source build override for the minimal HStore topology | docker-compose.dev.yml | (used together with docker-compose-hstore.yml) |
The standalone topology publishes the Server on port 8080 and Hubble on 127.0.0.1:8088. HUGEGRAPH_VERSION selects the Server, PD, and Store image tags; Hubble is selected separately with HUBBLE_IMAGE.
The standalone docker-compose.yml example uses hugegraph/hugegraph:1.7.0; its docker/conf/hubble/standalone.properties is bundled in source. Compose reads the administrator password from HUGEGRAPH_ADMIN_PASSWORD and JWT secret from HUGEGRAPH_AUTH_TOKEN_SECRET, normally in docker/.env. A nonempty password enables authentication, automatically detected by Hubble. With docker run, use -e PASSWORD=xxx. Master HStore Compose files cannot be combined with 1.7.0 PD/Store/Server release images.
JWT version differences: Master-built Server maps HUGEGRAPH_AUTH_TOKEN_SECRET to HG_SERVER_AUTH_TOKEN_SECRET and writes startup configuration; preserve the secret across recreation. The 1.7.0 entrypoint handles older variables such as PASSWORD, ignoring HG_SERVER_AUTH_TOKEN_SECRET. To keep a stable JWT secret in 1.7.0, persist auth.token_secret in that version’s conf/graphs/hugegraph.properties. With a randomly generated default, do not assume issued JWTs survive Server restarts.
See docker/README.md for the full setup guide.
Server service identity with PD
For a PD-backed Server, the Helm chart exposes server.serviceId and server.graphSpace.
Both default to DEFAULT, which preserves the existing server.service_id and server.graphspace
values in conf/rest-server.properties. A non-default chart value injects HG_SERVER_SERVICE_ID
or HG_SERVER_GRAPHSPACE into the Server container.
These service identity chart settings (server.serviceId, server.graphSpace, and server.testGraphAlias)
apply to development 1.8.0+ builds and charts; older versions such as 1.7.0 do not support these options.
Do not use this example with older chart or image versions lacking these features.
Non-empty service IDs supplied through HG_SERVER_SERVICE_ID, SERVICE_ID, or server.serviceId
must use printable ASCII; spaces and backslashes are supported, while deployment checks reject
non-ASCII and control characters. This entrypoint restriction does not change Core Service naming
or existing manually supplied properties. Helm preserves dollar signs in server.serviceId literally,
including $(POD_IP); this field does not expand Kubernetes environment references.
The full service ID, including / and -, is retained when service metadata is reloaded or its graph space is cleared.
Set the identity through these chart values; Server extraEnv reserves both the new and legacy identity variable names.
HG_SERVER_GRAPHSPACE, the effective GRAPH_SPACE fallback,
and server.graphSpace accept DEFAULT or an existing space name of up to 48 lowercase letters, digits,
and underscores, starting with a letter:
Before deploying Servers assigned to team_a, create that graph space through an existing Server
in DEFAULT, using an account with permission to create graph spaces. The chart and these environment
variables do not create graph spaces; all replicas in the Server Deployment use the same identity.
To check a graph in that space with helm test, first create the target graph and set
--set-string server.testGraphAlias=team_a-demo to its actual Gremlin binding. Creating the graph space does not create a hugegraph graph.
For container deployments, HG_SERVER_SERVICE_ID and HG_SERVER_GRAPHSPACE write the same two
properties. The legacy SERVICE_ID and GRAPH_SPACE names remain accepted: a non-empty new variable
wins over its legacy counterpart. If both names for a property are unset or empty, its existing value
is preserved. Compose does not automatically forward these host variables; add explicit Server
environment: entries in a Compose override. See the Helm chart documentation for details.
These settings select the Server’s PD service metadata. They do not move existing graphs or change
server.path_graphspace for REST paths that omit the graph space. Use /graphspaces/team_a/... paths
and select the matching graph space and service in Hubble. When authentication is enabled, explicit paths
still require authorization.
server.testGraphAlias defaults to DEFAULT-hugegraph. The hook checks this existing local binding on every Server Pod;
it does not derive the alias from server.graphSpace. A local binding may exist independently of the Server’s assigned PD graph space,
so a successful default hook does not validate graphs in team_a. If Could not rebind appears, first check that the requested graph exists
and that its alias is correct. A Pod restart cannot create a missing graph or correct an alias.
Match the binding’s case: a local Demo.properties can bind DEFAULT-Demo, while REST-created graph names are lowercase.
Configuration rendering and entrypoint checks alone do not establish non-default Linux discovery, authentication, or isolation between graph spaces.
HugeGraph Docker images are provided as a convenient way to start HugeGraph quickly, but they are not official ASF distribution artifacts. You can find more details in the ASF Release Distribution Policy.
We recommend using a release tag (such as
1.7.0or1.x.0) for stable deployments. Use thelatesttag only if you want the newest features still under development.
3.2 Download a Released Archive
This example uses HugeGraph 1.7.0. For other versions, confirm the release and filenames in the ASF download directory. A master source build is not a released binary.
Extract only after SHA-512 verification succeeds. You can also verify the PGP signature following Apache release procedures:
Trust publisher keys only after verifying them through Apache project channels. Signature verification can complement SHA-512 checks.
3.3 Build from master Source
These commands build the development branch, not the 1.7.0 release.
Install wget or curl before building.
Download HugeGraph source:
Compile and package:
A successful build logs:
The build creates an aggregate master archive under repository-root target/ (the current source version property is 1.8.0):
The filename version comes from source revision; it does not make the build an ASF release artifact. The build also creates repository-root apache-hugegraph-1.8.0/, containing a Server directory named by that module’s final.name, currently apache-hugegraph-server-1.8.0. If retaining only the archive, first run tar zxf target/apache-hugegraph-1.8.0.tar.gz, then enter the Server directory.
Default builds bundle rocksdb, hbase, and hstore modules, listed in backends within backend.properties in the hugegraph-dist JAR. For a RocksDB-only distribution, add -Drocksdb-only:
3.4 One-click deployment (Outdated)
Outdated This status applies only to this one-click deployment entry.
HugeGraph-Tools provides a one-click deployment command that downloads, extracts, configures, and starts the Server service and HugeGraph-Hubble. These tools are included in the HugeGraph-Toolchain distribution.
Of course, you should download the tarball of HugeGraph-Toolchain first.
note:
${version}is the version, The latest version can refer to Download Page, or click the link to download directly from the Download page
The general entry script for HugeGraph-Tools is bin/hugegraph, Users can use the help command to view its usage, here only the commands for one-click deployment are introduced.
{hugegraph-version} is the Server service and HugeGraphStudio version; see conf/version-mapping.yaml for supported mappings. {install-path} is the installation directory, while {download-path-prefix} optionally overrides the tarball download location. For example, deploy version 0.6 with bin/hugegraph deploy -v 0.6 -p services.
4 Configuration
Server archives include conf/rest-server.properties, conf/gremlin-server.yaml, and conf/graphs/hugegraph.properties; source builds assemble them from hugegraph-server/hugegraph-dist/src/assembly/static/conf/. Edit them inside the extracted Server directory without a separate generation step. Defaults vary by release; the following defaults and startup behavior describe master.
For standalone RocksDB, confirm backend=rocksdb and serializer=binary in conf/graphs/hugegraph.properties. Normal Server initialization scans conf/graphs/ and loads local graphs without requiring graph.load_from_local_config=true. This option defaults to false and controls constructor preloading. Restart Server to apply graph configuration changes; do not use hot reload for maintenance.
See the configuration guide and option reference for details.
5 Startup
5.1 Use a startup script to startup
Startup is divided into “first startup” and “non-first startup”. On the first startup, you need to initialize the backend database before starting the service.
If the service was stopped manually, or needs to be started again for any other reason, you can usually start it directly because the backend database is persistent.
When HugeGraphServer starts, it connects to the backend storage and checks its version information. If the backend has not been initialized, or if it was initialized with an incompatible version (for example, old-version data), HugeGraphServer will fail to start and report an error.
If you need to access HugeGraphServer externally, modify the restserver.url configuration item in rest-server.properties (the default is http://127.0.0.1:8080) and change it to the machine name or IP address.
Since the configuration (hugegraph.properties) and startup steps required by various backends are slightly different, the following will introduce the configuration and startup of each backend one by one.
Configure authentication before production startup
Enable Server authentication and authorization with a strong, nondefault administrator password, an IP allowlist, and minimum business-user permissions.
5.1.1 Distributed Storage (HStore)
First deploy PD and Store; see the PD Quick Start and Store Quick Start.
umask 077 protects the new .env, but set-hubble-pd-password.sh sets generated .local.properties permissions to 0644, making the PD secret readable by other local users. This example assumes trusted local users. On shared hosts, set ownership and read permissions for the Hubble runtime user so Hubble can read the files while unauthorized users cannot. Keeping files untracked does not replace file permission controls.
Distributed storage, introduced after HugeGraph 1.5.0, uses HugeGraph-PD and HugeGraph-Store for distributed data storage and computing.
After PD and Store are running:
- Edit Server
hugegraph.properties:
The distribution includes conf/graphs/hstore.properties.template; copy it over conf/graphs/hugegraph.properties and adjust pd.peers.
This example uses cluster=hg in rest-server.properties and pd.cluster=hg in graph configuration, matching the master Compose cluster below. These are separate keys for the Server process and graph respectively, not one setting. Select an appropriate cluster name. Likewise, pd.peers in each file has its own configuration scope; this example supplies the same PD RPC addresses to both.
The backend selects the task scheduler: HStore uses distributed scheduling; others use local scheduling. task.scheduler_type is unnecessary and is ignored with a warning when retained for compatibility.
- Edit Server
rest-server.properties:
These addresses support multiple Server processes on one machine; 127.0.0.1 is local only. Across hosts, use routable IPs or DNS for restserver.url, gremlinserver.url, pd.peers, Gremlin host, and rpc.server_host. Advertised RPC addresses and ports must be mutually reachable.
For multiple Servers, edit each node’s rest-server.properties:
Node 1 (master):
Node 2 (worker):
Also configure each node’s gremlin-server.yaml ports:
Node 1:
Node 2:
Start Server:
Distributed startup order:
- Start HugeGraph-PD
- Start HugeGraph-Store
- Start Server
PD and Store manage HStore metadata and storage, so init-store skips that backend. With authentication enabled, init-store still creates the built-in admin account. If storage already holds this account, set init_store.enabled=false in rest-server.properties to skip the entire step, as Docker HStore topologies do.
Verify startup:
Stop in reverse order:
- Stop Server
- Stop HugeGraph-Store
- Stop HugeGraph-PD
Docker HStore HA Cluster (Current Master)
docker-compose-3pd-3store-3server.yml uses master HG_PD_*, HG_STORE_*, and HG_SERVER_* variables unsupported by 1.7.0 release images. Build PD, Store, and Server from the same master source, all tagged local:
Create the authentication environment in docker/ and generate HStore Hubble configuration. Replace the example administrator password; because .env uses single quotes, the password must contain neither single quotes nor newlines. The script generates random JWT and PD secrets and writes the PD secret to two untracked .local.properties files mounted by HStore Compose:
Start HA from docker/. HUGEGRAPH_VERSION=local selects the locally built PD, Store, and Server images; Compose pull_policy: missing uses existing local tags first. HUBBLE_IMAGE still selects Hubble independently:
Generate HG_PD_AUTH_SECRET_KEY once for new data directories and reuse it on restart or when retaining data. Do not commit .env or generated conf/hubble/*.local.properties. Services communicate through container hostnames on the hg-net bridge. Server replicas need the shared JWT secret as well as the administrator password; set HUGEGRAPH_AUTH_TOKEN_SECRET. See the Docker cluster guide and docker/README.md for all variables.
Verify the cluster:
Master PD /v1/stores requires Basic authentication; this uses the generated, loaded HG_PD_AUTH_SECRET_KEY as the hg password.
Inspect runtime logs with docker logs <container-name>, such as docker logs hg-pd0.
See docker/README.md for variables, ports, and troubleshooting.
5.1.2 RocksDB / ToplingDB
The minimal standalone flow below uses a master build and preloads sample data to verify graph reads and writes.
- Check Java against the master build requirements.
- Build master source; the commands below use its nested Server directory.
- Confirm RocksDB configuration, then enter the build output’s nested Server directory.
- Initialize storage, then start the service with sample data using the commands below.
- Request
/versionsand sample graph vertices, and check the actual response contents.
RocksDB is embedded and needs no separate deployment. GCC ≥ 4.3.0 (GLIBCXX_3.4.10) is required; upgrade first if needed.
Master conf/graphs/hugegraph.properties already sets backend=rocksdb and serializer=binary. Keep the defaults if using default data directories; otherwise check your backend and paths before initialization.
Initialize storage on first startup or after adding graph configuration under conf/graphs/:
Start Server and preload the built-in sample graph:
The startup script polls /graphs at configured restserver.url and exits nonzero on timeout or process failure. Check service version, then read sample vertices:
The first response should contain versions; the second should contain vertices with sample names such as marko and lop. A process check or HTTP status alone does not prove backend and business request health.
ToplingDB (Beta): A high-performance RocksDB alternative; see the ToplingDB Quick Start.
5.1.3 HBase
users need to install HBase by themselves, requiring version 2.0 or above,download link
Update hugegraph.properties
Initialize the database (required on the first startup, or a new configuration was manually added under ‘conf/graphs/’)
Start server
5.1.4 Create an example graph when startup
Pass the -p true argument when starting the script to enable preload, which creates a sample graph.
And use the RESTful API to request HugeGraphServer and get the following result:
This indicates the successful creation of the sample graph.
5.1.5 Startup script options
bin/start-hugegraph.sh accepts the following options. Every one of them takes a value, so write -d false, not a bare -d.
| Option | Values | Default | Purpose |
|---|---|---|---|
-d | true, false | true | Daemon mode. With -d false the script stays in the foreground and forwards SIGTERM/SIGINT to the server. |
-g | g1, G1, zgc, ZGC | JVM default | Garbage collector to use (g1/G1 sets -XX:+UseG1GC; zgc/ZGC sets -XX:+UseZGC). Omitting -g uses the JVM default collector. |
-m | true, false | false | Install the cron-based monitor task (bin/start-monitor.sh). For VM and bare-metal deployments only. |
-p | true, false | false | Preload the sample graph, as in 5.1.4. |
-s | true, false | true | Enable HugeSecurityManager; requires Java 17 to 23 and readable conf/java-security.properties. On Java 24+, start with -s false. |
-j | JVM options | empty | Extra JVM options appended to the server command line. |
-t | seconds | 30 | How long to wait for the service to answer before reporting a failed startup. |
-y | true, false | false | Enable the OpenTelemetry agent for traces. |
bin/stop-hugegraph.sh accepts -m true|false (default true), which controls whether the cron monitor task is removed along with the service.
bin/hugegraph-server.sh puts -XX:+HeapDumpOnOutOfMemoryError, -XX:HeapDumpPath and -XX:ErrorFile first in JAVA_TOOL_OPTIONS, so, whether or not
JAVA_OPTIONS is set and with the exceptions below, an out-of-memory heap dump (heapdump_<host>_<launch time>/java_pid<pid>.hprof) and a JVM crash log
(hs_err_pid<pid>_<host>_<launch time>.log) land in logs/, where <launch time> is the local time as YYYYMMDD-HHMMSS. Each start gets its own heapdump_*
directory, so the server and the JVMs it starts, such as computer jobs, write separate dumps (HotSpot names each dump and crash log after the JVM’s PID, so a
JVM that reuses an earlier PID from the same start cannot write its dump, and its crash log replaces the earlier one’s). The host name keeps servers that share
one log directory from picking the same name, and a counter (<launch time>-1, -2, …) is added when the same host already used that second. If the
directory cannot be created, for example on a full disk, the server still starts and dumps go to logs/ itself, as a best effort: a full disk may have no room
for the dump either. A heap dump can be as large as the heap. The launcher never deletes dumps or heapdump_* directories: each start that reaches Java leaves
one, empty unless something ran out of memory, and the launcher keeps it because a computer-job JVM can go on using it after the server exits. Move or delete
old ones once no HugeGraph JVM from that launch is running, but never the newest one of a running server; without it, the next dump is written as a file with
that name. The JVM reads your own JAVA_TOOL_OPTIONS, JDK_JAVA_OPTIONS (including @argfiles), the command line (JAVA_OPTIONS, or -j when JAVA_OPTIONS
is unset or empty) and _JAVA_OPTIONS after these defaults, so a value for one of these flags in any of them overrides the default. Only the environment
variables reach the JVMs the server starts: to turn dumps off for all of them, set JAVA_TOOL_OPTIONS=-XX:-HeapDumpOnOutOfMemoryError, while -j or
JAVA_OPTIONS turns them off for the server JVM only. Either way each start that reaches Java still creates its empty heapdump_* directory, unless creating
it failed and dumps fell back to logs/. If the logs path contains a double quote or %, the launcher warns and heap dumps go to logs/ itself, with no
per-launch directory and no crash log default; the JAVA_TOOL_OPTIONS opt-out still applies. A path with both quote characters gets no heap dump default at
all. Because of the defaults, the JVM prints Picked up JAVA_TOOL_OPTIONS: ... on stderr at startup.
Version scope: this applies to current development/master builds. In 1.7.0 the heap dump flags are added only when
JAVA_OPTIONSis unset, heap dumps go directly tologs/java_pid<pid>.hprof, and JVM crash logs go to the install directory.
5.2 Use Docker to startup
In 3.1 Use Docker container, we introduced how to deploy hugegraph-server with Docker. You can also switch storage backends or preload a sample graph by setting the corresponding parameters.
5.2.1 Create an example graph when starting a server
Set the environment variable PRELOAD=true when starting Docker so that sample data is loaded during startup.
Use
docker runUse
docker run -itd --name=server -p 8080:8080 -e PRELOAD=true hugegraph/hugegraph:1.7.0Use
docker-composeCreate a
docker-compose.ymlfile like the following and setPRELOAD=truein the environment.example.groovyis a predefined script used to preload sample data. If needed, you can mount a newexample.groovyscript to change the preload data.Use
docker compose up -dto start the container.
And use the RESTful API to request HugeGraphServer and get the following result:
This indicates that the sample graph was created successfully.
6. Access server
6.1 Service startup status check
Use jps to see a service process
curl request RESTfulAPI
HTTP 2xx with a JSON versions field confirms REST responsiveness. HugeGraphServer in jps confirms only process existence; verify backend health by preloading the sample graph and requesting vertices as above.
6.2 Request Server
The RESTful API of HugeGraphServer includes various types of resources, typically including graph, schema, gremlin, traverser and task.
graphcontainsvertices、edgesschemacontainsvertexlabels、propertykeys、edgelabels、indexlabelsgremlincontains variousGremlinstatements, such asg.v(), which can be executed synchronously or asynchronouslytraversercontains various advanced queries including shortest paths, intersections, N-step reachable neighbors, etc.taskcontains query and delete with asynchronous tasks
6.2.1 Get vertices and its related properties in hugegraph
explanation
Server can compress vertex, edge, and other list responses. Use
curl --compressedfor automatic decompression:The default listener is
127.0.0.1, inaccessible directly from other machines.
Changing the Server listener
Setting 0.0.0.0 listens on every interface. In production, enable authentication and authorization, an IP allowlist, and minimum permissions; retain and protect audit logs. Do not expose Gremlin or Cypher directly to the public Internet.
response body:
For the detailed API, please refer to RESTful-API
You can also visit localhost:8080/swagger-ui/index.html to check the API.
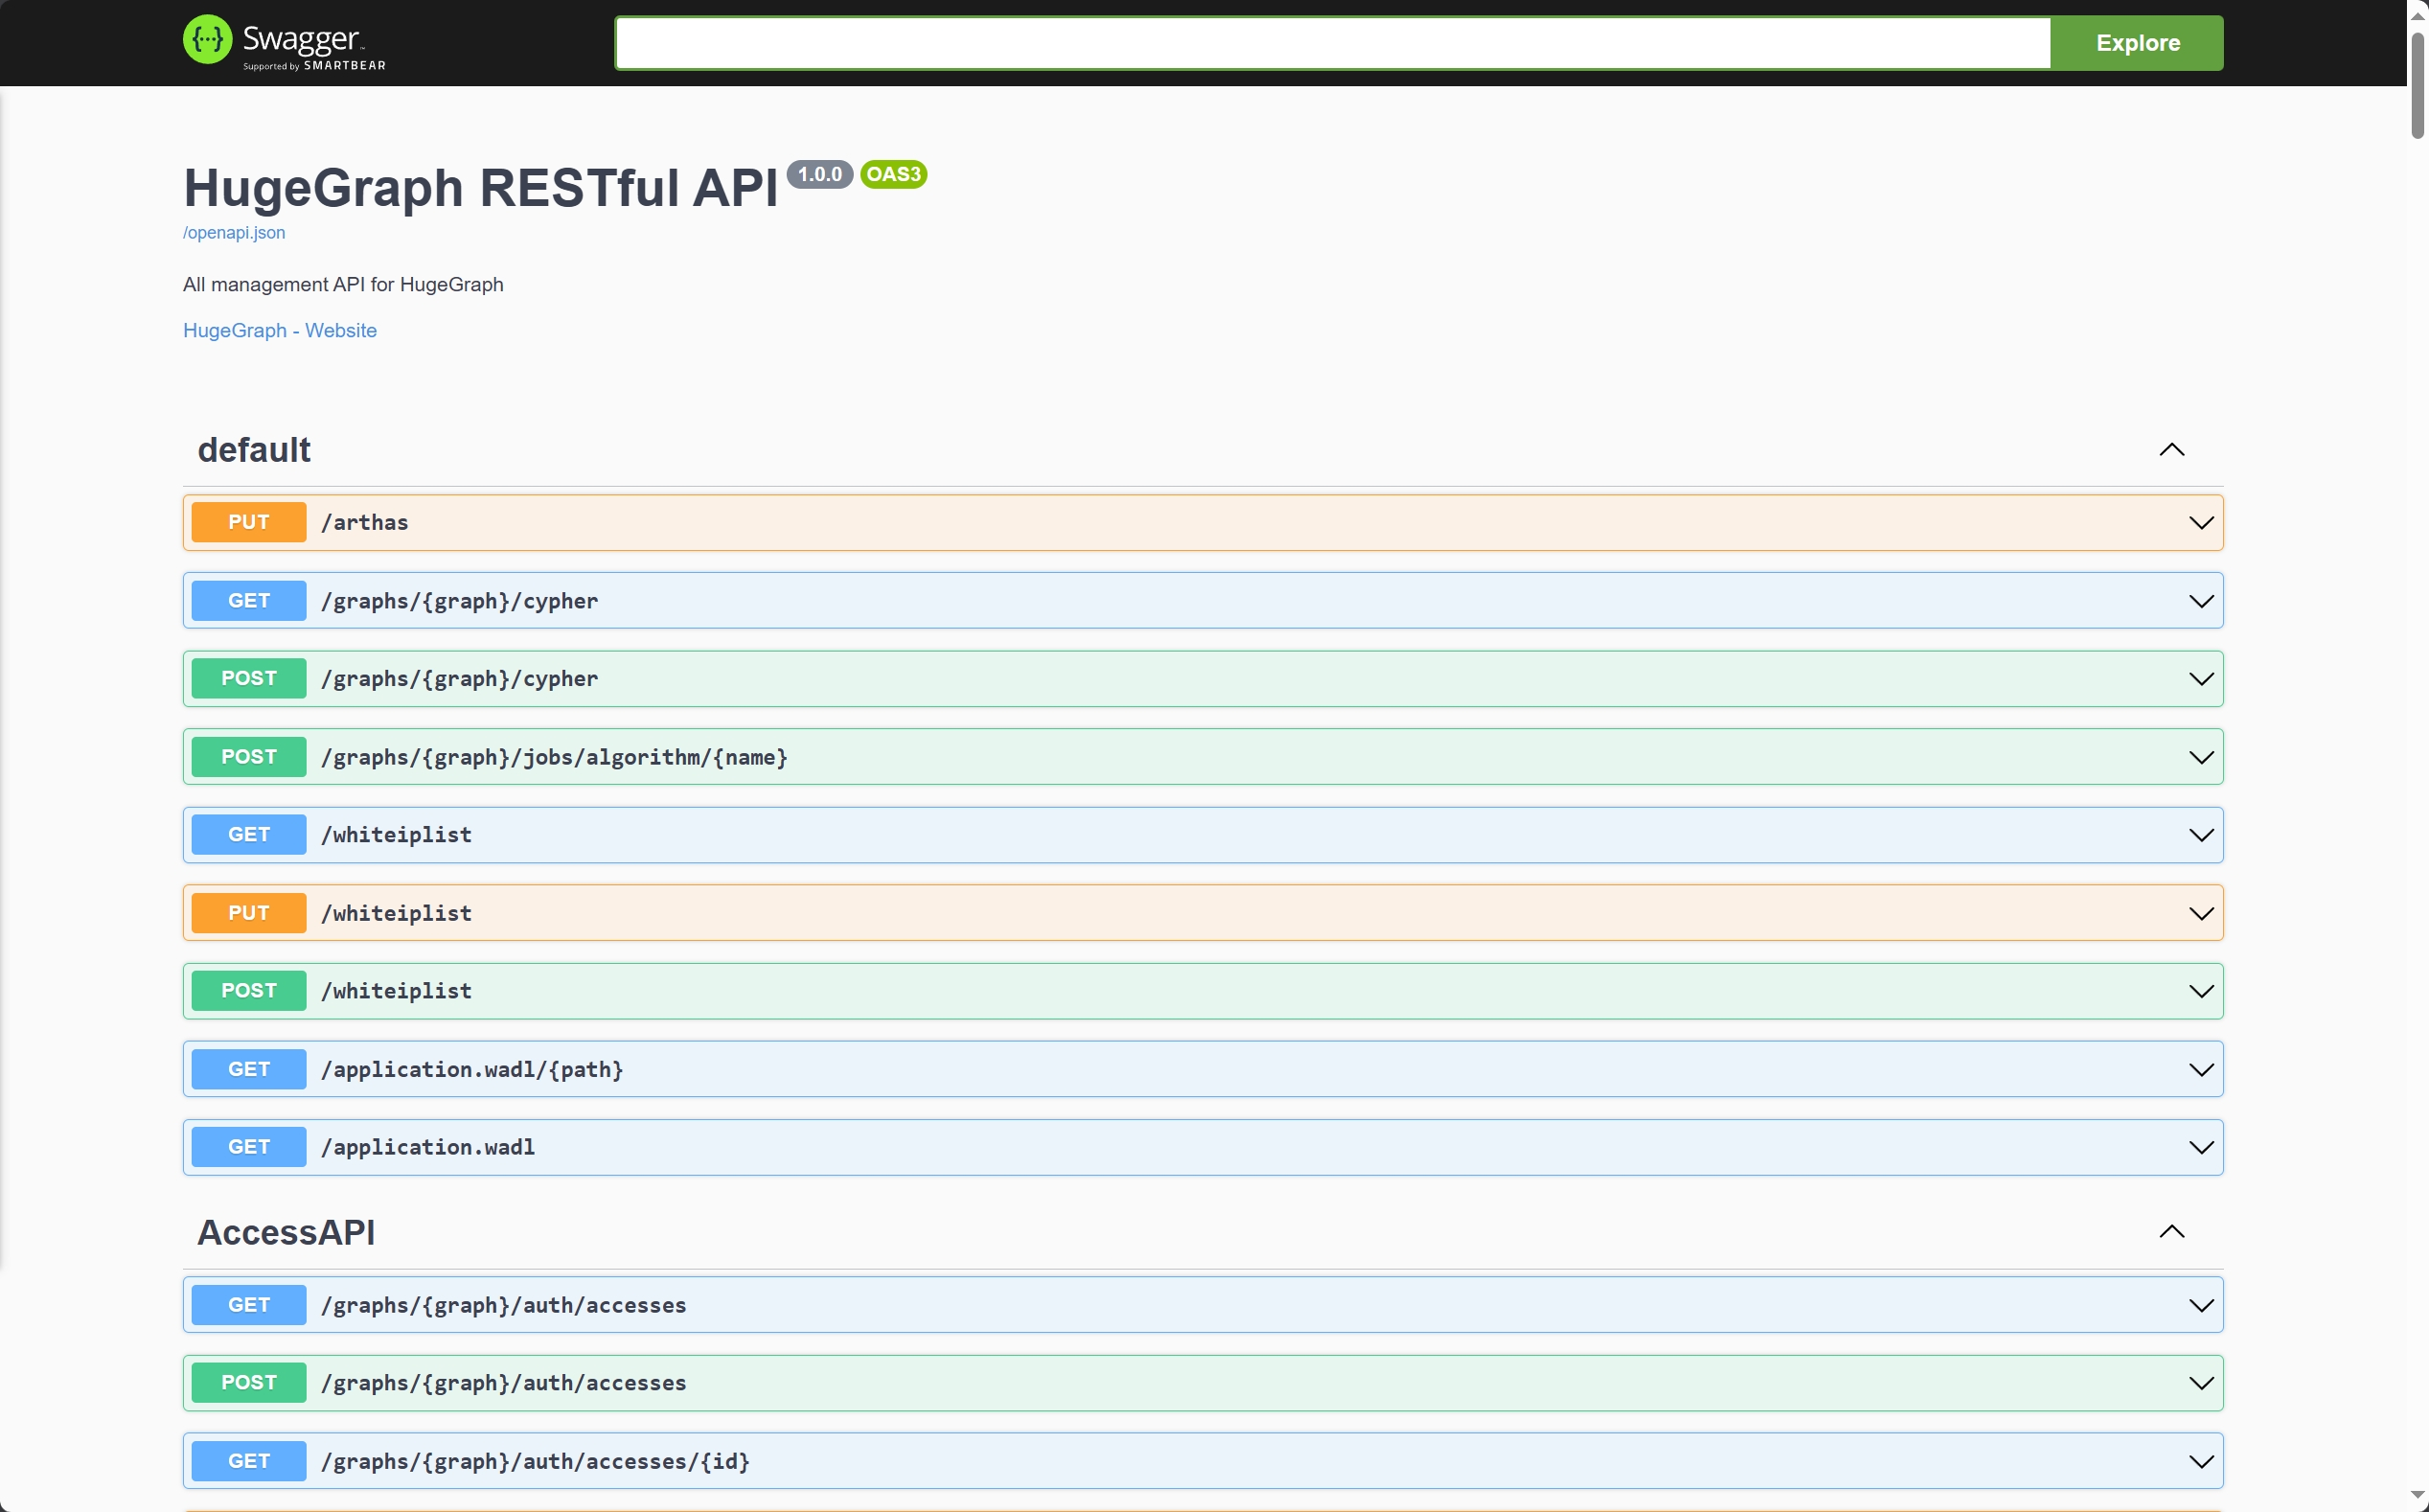
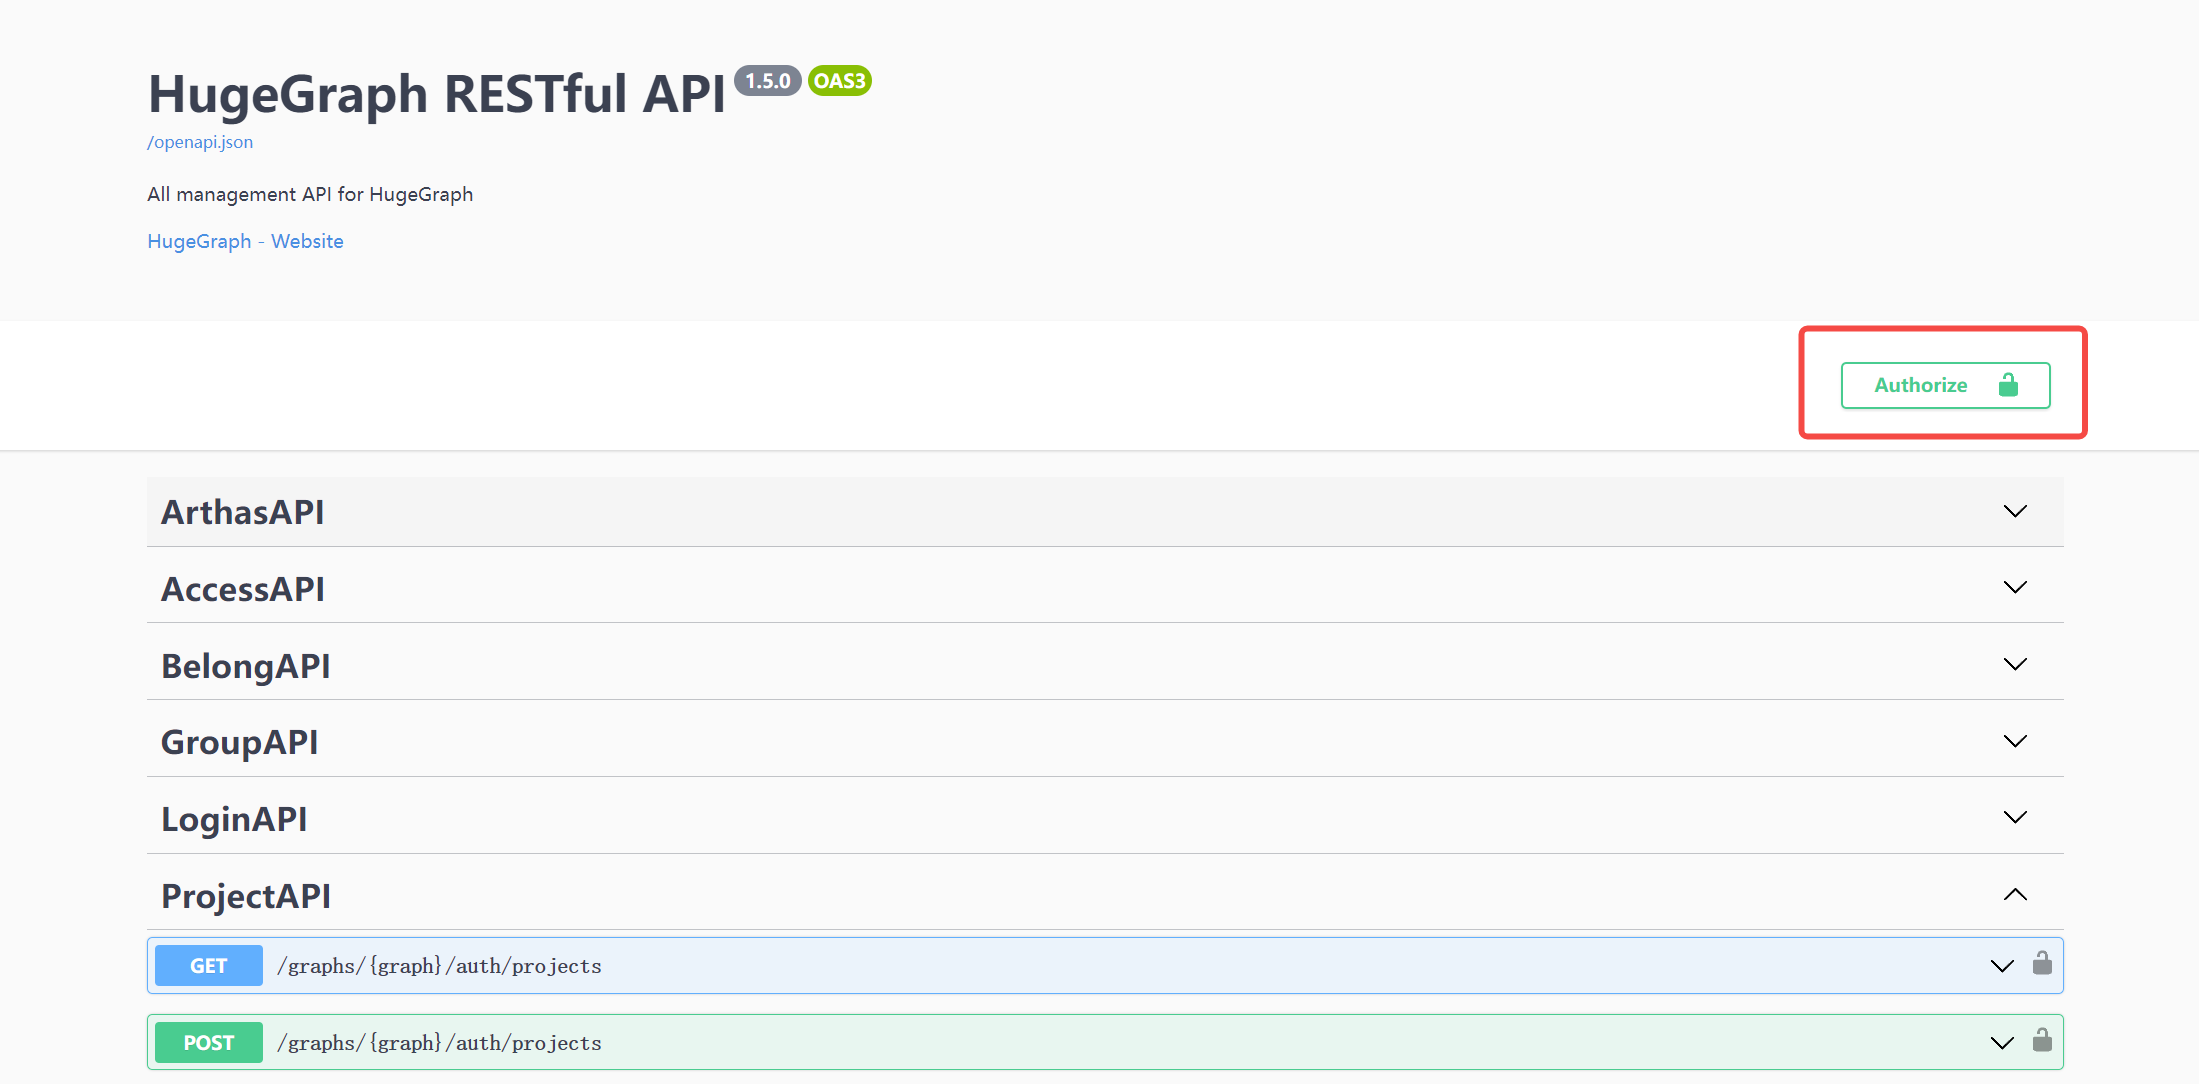
When using Swagger UI to debug the API provided by HugeGraph, if HugeGraph Server turns on authentication mode, you can enter authentication information on the Swagger page.
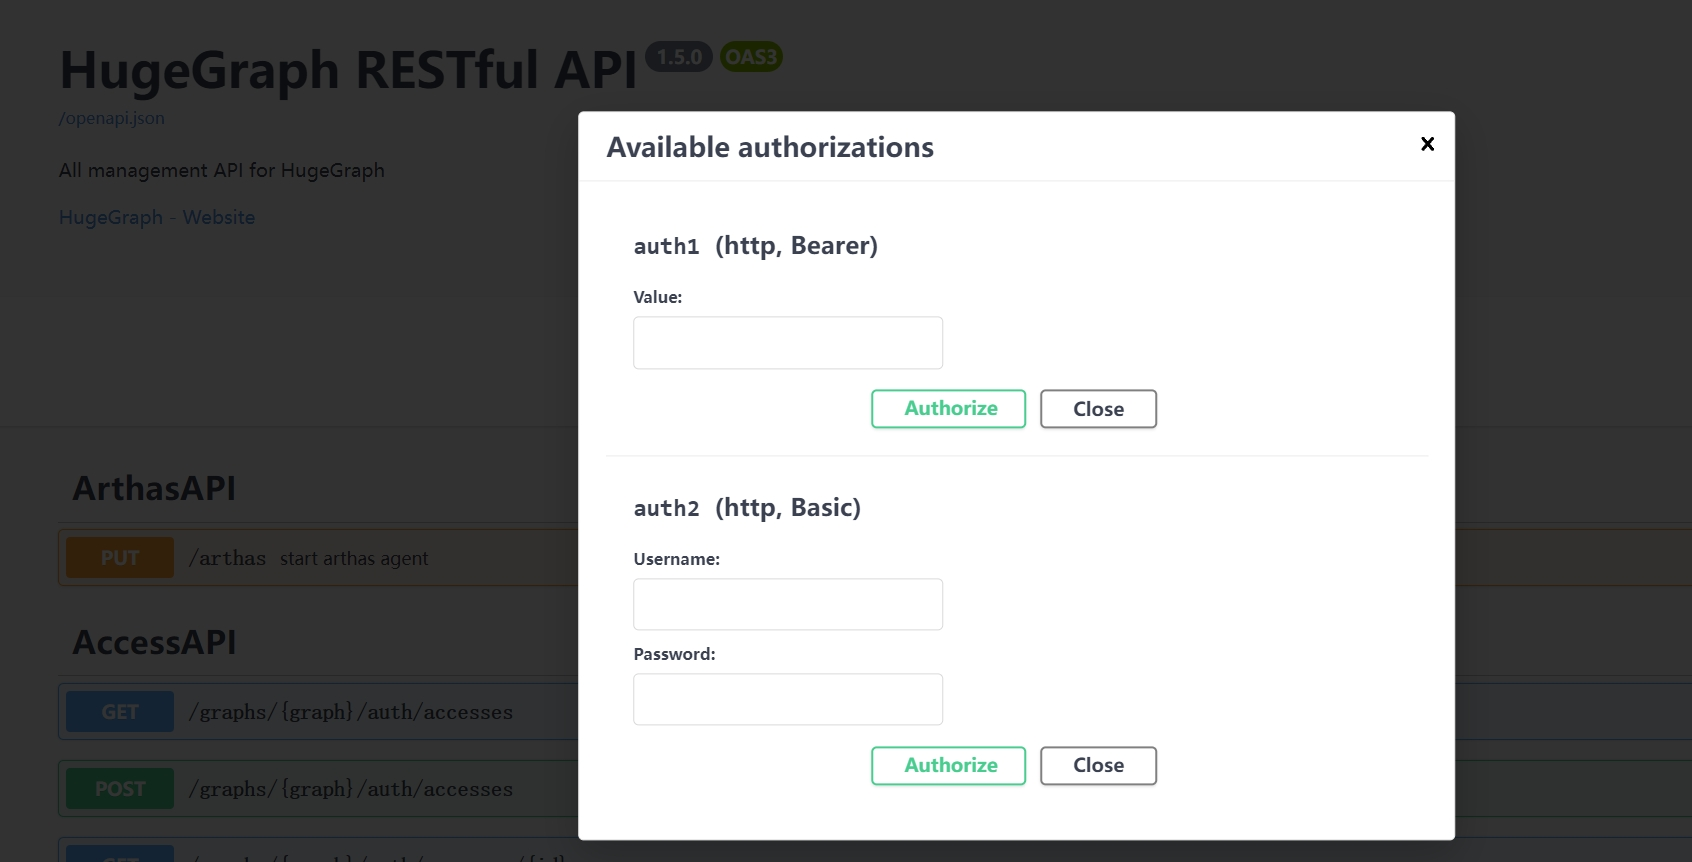
Currently, HugeGraph supports setting authentication information in two forms: Basic and Bearer.
7 Stop Server
8 Debug Server with IntelliJ IDEA
Please refer to Setup Server in IDEA
3.1.2 - HugeGraph-PD Quick Start
1 HugeGraph-PD Overview
HugeGraph-PD (Placement Driver) is the metadata management component of HugeGraph’s distributed version, responsible for managing the distribution of graph data and coordinating storage nodes. It plays a central role in distributed HugeGraph, maintaining cluster status and coordinating HugeGraph-Store storage nodes.
PD keeps cluster metadata in an embedded RocksDB store under pd.data-path and replicates it across PD nodes with Raft, so a 3-node or 5-node PD cluster keeps serving while a minority of nodes is down. On top of that it registers and activates Store nodes, allocates and rebalances partitions, tracks Store heartbeats, and answers service discovery queries from Store and Server.
PD listens on three ports:
| Port | Default | Configured by | Used by |
|---|---|---|---|
| gRPC | 8686 | grpc.port | Store and Server clients |
| REST | 8620 | server.port | Management, health checks, metrics |
| Raft | 8610 | raft.address | The other PD nodes only |
2 Prerequisites
2.1 Requirements
- Operating System: Linux or macOS (Windows has not been fully tested)
- Java version: Java 17 for HugeGraph 1.8.0+ (the Maven build accepts only JDK 17; the start script rejects older runtimes; 1.7.0 is the last release supporting Java 11)
- Maven version: ≥ 3.6.3 (for building from source)
3 Deployment
There are two ways to deploy the HugeGraph-PD component:
- Method 1: Download the tar package
- Method 2: Compile from source
3.1 Download the tar package
Apache downloads currently provide the complete 1.7.0 binary bundle containing PD, Store, and Server, without a separate PD binary. Verify version, signatures, and SHA512 on the official download page. This historical incubating release retains incubating in archive and extracted directory names:
3.2 Compile from source
To build only the PD distribution and the modules it depends on:
The unpacked distribution contains just three directories: bin (start and stop scripts), conf (application.yml, application.yml.template, log4j2.xml, verify-license.json) and lib (the hg-pd-service jar).
3.3 Docker Deployment
HG_PD_* mappings and /v1/ready are features of current master; the Server 1.7.0 source tag lacks these Docker mappings and readiness API. The following examples require images built from current master and tagged local. For release 1.7.0 assets, use bundled configuration and version-specific instructions:
To run master-built PD alone, first set a deployment-specific secret and replace example addresses with addresses reachable by the container:
| Variable | Required | Default | Configuration key | Description |
|---|---|---|---|---|
HG_PD_GRPC_HOST | Yes | None | grpc.host | Advertised gRPC hostname/IP; use container hostnames within a container network. |
HG_PD_RAFT_ADDRESS | Yes | None | raft.address | This PD node’s Raft address. |
HG_PD_RAFT_PEERS_LIST | Yes | None | raft.peers-list | Raft addresses of every PD node, including this node. |
HG_PD_INITIAL_STORE_LIST | Yes | None | pd.initial-store-list | Expected Store gRPC addresses. |
HG_PD_AUTH_SECRET_KEY | Yes | None | auth.secret-key | REST Basic password shared by all PD REST clients. |
HG_PD_GRPC_PORT | No | 8686 | grpc.port | gRPC service port. |
HG_PD_REST_PORT | No | 8620 | server.port | REST API port. |
HG_PD_DATA_PATH | No | /hugegraph-pd/pd_data | pd.data-path | Metadata path. |
HG_PD_INITIAL_STORE_COUNT | No | 1 | pd.initial-store-count | Minimum Store count needed for cluster availability. |
HG_PD_ACTUATOR_EXPOSURE | No | health,metrics,prometheus | management.endpoints.web.exposure.include | Public Actuator endpoint allowlist; * is forbidden. |
The master entrypoint requires all five mandatory variables, builds SPRING_APPLICATION_JSON overrides, then starts PD. Other settings come from image conf/application.yml; JAVA_OPTS is passed to the JVM. Deprecated GRPC_HOST, RAFT_ADDRESS, RAFT_PEERS, and PD_INITIAL_STORE_LIST remain supported with warnings.
Docker HEALTHCHECK polls /v1/health every 15 seconds, confirming only REST listener liveness, not a Raft quorum. Compose uses the same liveness check; verify /v1/ready separately before starting Store. Containers run Java in the foreground and exit when Java exits; automatic restart requires a Docker restart policy. Inspect logs with docker logs <container-name>.
See the Store Docker section and docker/README.md for master Compose and the minimal topology. When starting the full topology with Hubble, first generate the untracked Hubble configuration described in that README.
4 Configuration
PD startup reads installation conf/application.yml. Match this file to the installed version: 1.7.0 configuration or master configuration. Master leaves auth.secret-key empty, causing protected REST calls to be rejected until configured. Startup does not read application.yml.template.
4.1 Configuration Reference
These tables list master configuration values and code defaults. See the PDConfig implementation for Raft timeouts. Use the original tagged configuration with 1.7.0 binaries and master configuration with master builds. Differences from 1.7.0 are noted below.
gRPC and REST
| Key | Master distribution value | Built-in default | Description |
|---|---|---|---|
grpc.host | 127.0.0.1 | none, required | Address this PD advertises for gRPC. Store and Server connect here, so set it to a reachable IPv4 address or hostname, never 127.0.0.1 or 0.0.0.0, in a distributed deployment. |
grpc.port | 8686 | none, required | gRPC port. |
server.port | 8620 | none, required | REST API port. Also the port reported in Raft member information. |
application.yml.template also carries grpc.netty-server.max-inbound-message-size: 100MB, but PD sets the gRPC server’s inbound message limit to 1 GB in code, so that key has no effect.
Raft
| Key | Master distribution value | Built-in default | Description |
|---|---|---|---|
raft.address | 127.0.0.1:8610 | none, required | Raft address of this node as host:port. Must be unique per node and must appear in raft.peers-list. |
raft.peers-list | 127.0.0.1:8610 | none, required | Comma separated Raft addresses of every PD node, including this one. Must be identical on all nodes. |
raft.enable | not set | true | When true, metadata writes go through the Raft state machine. When false, PD writes straight to its local store with no replication. |
raft.ip-whitelist.enabled | not set | true | When true, the Raft RPC port accepts connections only from the addresses resolved from raft.peers-list; other clients are dropped and logged as Blocked connection from <ip>. The allowlist is re-resolved when the peer list changes, but a peer that keeps its hostname and changes IP (a restarted container, for example) needs a PD restart. |
raft.snapshotInterval | not set | 300 | Seconds between Raft snapshots. |
raft.rpc-timeout | not set | 10000 | Timeout of a Raft RPC between PD nodes, in milliseconds. Also the deadline of the ReadIndex wait that PD runs before it reads an id counter; id allocation fails when the wait takes longer. |
raft.rpc-connect-timeout | not set | 1000 | Timeout of the Ping that opens a Raft connection to a peer, in milliseconds. A candidate connects to its peers one at a time, so an election waits this long for each peer that accepts the TCP connection but does not answer. Requests on an open connection use raft.rpc-timeout. |
raft.rpc-install-snapshot-timeout | not set | 0 | Timeout for sending a snapshot to a follower that fell behind the log, in milliseconds. 0 uses raft.rpc-timeout. Raise it if large snapshots time out. |
raft.rpc-connect-timeout and raft.rpc-install-snapshot-timeout exist only in versions after 1.7.0. In 1.7.0, raft.rpc-timeout is also the connect and
install-snapshot timeout, and id allocation runs no ReadIndex wait.
PD core
| Key | Master distribution value | Built-in default | Description |
|---|---|---|---|
pd.data-path | ./pd_data | none, required | Metadata directory. Holds the RocksDB store in rocksdb/ and the Raft log, metadata and snapshots in pd_raft/. |
pd.patrol-interval | 1800 | 300 | Seconds between patrol runs, which check partition health across stores and rebalance partition counts. |
pd.initial-store-count | 1 | 3 | Minimum number of active Store nodes. Below this the cluster state becomes Cluster_Not_Ready and the cluster is treated as unavailable. Set it to the number of stores you deploy. |
pd.initial-store-list | 127.0.0.1:8500 | empty | Comma separated Store gRPC addresses (ip:port) that are activated automatically when they register. An entry may also carry a group id as store_address/group_id. |
pd.cluster_id | not set | 1 | Cluster id, used to keep separate PD clusters apart. |
Store management
| Key | Master distribution value | Built-in default | Description |
|---|---|---|---|
store.keepAlive-timeout | not set | 300 | Seconds without a heartbeat after which a Store is treated as temporarily unavailable and its partition leaders move to other replicas. |
store.max-down-time | 172800 | 1800 | Seconds after which a Store is treated as permanently unavailable and its replicas are reallocated to other machines. |
store.monitor_data_enabled | true | false | Whether to persist Store monitoring samples. |
store.monitor_data_interval | 1 minute | 1 minute | Sampling interval, written as <number> <unit> with unit one of second, minute, hour, day, month, year. The number defaults to 1 when omitted. |
store.monitor_data_retention | 1 day | 1 day | How long monitoring samples are kept, same format as above. |
Partitions
| Key | Master distribution value | Built-in default | Description |
|---|---|---|---|
partition.default-shard-count | 1 | 3 | Number of replicas per partition. Use 3 for a production cluster. |
partition.store-max-shard-count | 12 | 24 | Maximum number of partition replicas one Store holds. |
The initial partition count is derived from these two values and the size of pd.initial-store-list:
Discovery, license and metrics
| Key | Master distribution value | Built-in default | Description |
|---|---|---|---|
discovery.heartbeat-try-count | not set | 3 | Number of missed heartbeats after which a registered client’s discovery entry is deleted. |
license.verify-path | ./conf/verify-license.json | None; required configuration key | The PD distribution includes this JSON file; current master has no runtime read of this configuration option. |
license.license-path | ./conf/hugegraph.license | None; required configuration key | No license file is bundled at this path. Internal gRPC putLicense writes uploads here. Master REST GET /v1/license returns an empty object; a missing file does not block startup. |
auth.secret-key | Empty | Empty | Master PD REST Basic password for usernames hg, store, hubble, or vermeer. Docker requires it; bare-metal PD can start with an empty secret, but rejects protected REST calls. |
management.metrics.export.prometheus.enabled | true | Spring Boot default | Exposes /actuator/prometheus. |
management.endpoints.web.exposure.include | health,metrics,prometheus | Spring Boot exposes only health by default | Actuator allowlist; these endpoints bypass the PD REST Basic interceptor. |
logging.config | file:./conf/log4j2.xml | none | Log4j2 configuration. Writes logs/hugegraph-pd.log, logs/hugegraph-pd_raft.log and logs/audit-hugegraph-pd.log. |
Thread pools
| Key | Built-in default | Description |
|---|---|---|
thread.pool.grpc.core | 600 | Core size of the pool that serves gRPC calls. |
thread.pool.grpc.max | 1000 | Maximum size of that pool. |
thread.pool.grpc.queue | unbounded | Queue capacity of that pool. |
job.uninterruptibleThreadPool.core | 0 | Core size of the background metadata job pool. A value of 0 or less means half the available processors. |
job.uninterruptibleThreadPool.max | 256 | Maximum size of that pool. |
job.uninterruptibleThreadPool.queue | unbounded | Queue capacity of that pool. |
4.2 Single-node configuration
For master-built distributions, start with conf/application.yml, adjust per-node gRPC/Raft addresses and data paths, and set auth.secret-key. The following values are for development and testing. One PD node provides no majority fault tolerance; partition.default-shard-count: 1 means one replica per partition.
Generate a deployment secret with openssl rand -hex 24; Docker supplies it through HG_PD_AUTH_SECRET_KEY. See REST API authentication for the different 1.7.0 behavior.
4.3 Three-node cluster configuration
For a production cluster run 3 or 5 PD nodes, an odd number so Raft always has a quorum. A 3-node cluster tolerates one node failure. raft.peers-list must list every node and must be byte-for-byte identical on all of them, while grpc.host and raft.address differ per node.
Node 1 (192.168.1.10):
Node 2 (192.168.1.11) and node 3 (192.168.1.12) use the same file with grpc.host and raft.address changed to their own address:
To put all three PD nodes on one machine for testing, give each node its own pd.data-path and its own ports, for example raft 8610/8611/8612, gRPC 8686/8687/8688 and REST 8620/8621/8622.
In Docker bridge networking the same configuration comes from environment variables and uses container hostnames instead of IP addresses:
5 Start and Stop
5.1 Start PD
In the PD installation directory, execute:
The script requires Java 17 or later on PATH or in JAVA_HOME (Java ≥ 11 on 1.7.0).
It exits without doing anything if it finds a Java process already using this installation’s conf directory.
The lifecycle details below describe current master builds. The downloaded 1.7.0 launcher does not include those repairs. Supported flags, with GC version limits noted below:
| Flag | Values | Default | Description |
|---|---|---|---|
-d | true, false | true | Daemon mode. See the note below. |
-g | See version limits below | not set | Select the garbage collector. Unsupported values abort startup. |
-j | JVM options | empty | Extra JVM options, for example -j "-Xmx8g -Xms8g". |
-y | true, false | false | Attach the OpenTelemetry Java agent. The agent is downloaded into plugins/ on first use, its MD5 is verified, and traces are exported over gRPC to http://127.0.0.1:4317. |
Master builds accept g1, G1, zgc and ZGC.
The downloaded 1.7.0 launcher accepts only zgc or ZGC as explicit choices; -g g1, -g G1 and other values abort startup.
Omit -g for the default path. For rejected values, inspect logs/hugegraph-pd-stdout.log.
The -d flag controls daemon mode:
-d true(default): run as a background daemon; the script returns immediately.-d false: run in foreground. The scriptexecs Java, so the container or supervisor process IS Java. Use this when running under Docker or a process supervisor (systemd, supervisord) so crashes are detected and the service is restarted automatically.
Each flag also has an environment variable equivalent: DAEMON, GC_OPTION, USER_OPTION and OPEN_TELEMETRY. Setting JAVA_OPTIONS replaces the computed heap settings entirely; otherwise the script sizes the heap between 512 MB and 32 GB from available memory. Setting STDOUT_MODE=true leaves the JVM output on stdout instead of redirecting it to logs/hugegraph-pd-stdout.log, which is what the Docker image does.
After successful startup, you can see logs similar to the following in logs/hugegraph-pd-stdout.log:
The process id is written to bin/pid.
5.2 Stop PD
In the PD installation directory, execute:
The script reads bin/pid, sends the process a termination signal, waits up to 30 seconds for it to exit, and removes the pid file. If bin/pid is missing it reports that and exits successfully.
6 Startup Order in a Distributed Cluster
Start the components in this order:
- All PD nodes. Form the Raft group and elect a leader. Check
GET /v1/readyon each node; start Store only after HTTP200withready:true./v1/healthchecks REST listener liveness only. - All Store nodes. Register with PD; wait for
/v1/storesto show every target Store asUp. - All Server nodes. Start after PD and Store are ready.
sequenceDiagram
    participant Operator
    participant PD
    participant Store
    participant Server
    Operator->>PD: GET /v1/ready (check each PD)
    PD-->>Operator: HTTP 200 and ready=true
    Operator->>Store: Start Store
    Store->>PD: gRPC registration and heartbeat
    Operator->>PD: GET /v1/stores (Basic authentication)
    PD-->>Operator: Every target Store is Up
    Operator->>Server: Start Server
    Server->>PD: gRPC partitions and discovery
    Server->>Store: gRPC graph data access
Master Compose waits on PD /v1/health through Store depends_on: condition: service_healthy, and on Store REST liveness before Server. Server also polls PD /v1/stores for an Up Store before starting. Therefore, docker compose up --wait does not replace PD Raft readiness and Store registration checks.
PD is also the last component to stop: shut down Server, then Store, then PD.
7 Verification
7.1 REST API Authentication
Current master requires HTTP Basic Authorization for all PD REST paths except /actuator/*, /v1/health, /v1/ready, and /v1/prom/targets/*. Username must be hg, store, hubble, or vermeer, and password must equal auth.secret-key. A missing secret or wrong password returns HTTP 401. Query Stores using the same secret configured at PD startup:
bin/wait-storage.sh uses the same credentials through PD_AUTH_USER and PD_AUTH_PASSWORD. Release 1.7.0 checks only internal service usernames and does not compare passwords; do not apply this older behavior to master builds.
Protect Server and PD ports separately in production
Enable Server authentication and authorization, an IP allowlist, and minimum graph API permissions; retain and protect Server audit-*.log. These controls do not protect PD. Master PD REST uses auth.secret-key, whereas 1.7.0 checks usernames only. Keep raft.ip-whitelist.enabled enabled for configured peers and restrict PD REST/gRPC to trusted networks. Unauthenticated /v1/health, /v1/ready, and Actuator probes require network restrictions too. Protect master PD audit logs at logs/audit-hugegraph-pd.log.
7.2 Health Checks
Unauthenticated GET /v1/health returns 200 with an empty body, confirming only PD REST listener startup:
Spring Boot Actuator also provides a readable health response:
Actuator {"status":"UP"} does not confirm an available PD Raft leader. Master GET /v1/ready returns HTTP 200 with ready:true when the PD Raft node is active and sees a leader; otherwise it returns HTTP 503 with ready:false:
7.3 Cluster and member status
Check the PD members and which node is the Raft leader:
The response carries pdList, the elected pdLeader, numOfService, numOfNormalService and a stateCountMap. In a healthy 3-node PD cluster numOfService and numOfNormalService are both 3 and exactly one member has role: "Leader".
GET /v1/cluster returns the same member list together with the Store list, graph list and overall cluster state, and GET / returns a short summary (leader address, cluster state, member count, store count, graph count, partition count).
7.4 Store status
You can also verify Store node status through the PD API:
If the response shows state as Up, the corresponding Store node is running normally. The example below shows a single Store node. In a healthy 3-node deployment, the storeId list should contain three IDs, and stateCountMap.Up, numOfService, and numOfNormalService should all be 3.
7.5 Other REST endpoints
All paths below are relative to http://<pd-host>:8620 and need the Basic header from section 7.1 unless noted.
| Method and path | Description |
|---|---|
GET / | Brief cluster statistics: leader, state, member count, store count, graph count, partition count |
GET /v1/health | Liveness only; HTTP 200 does not imply Raft readiness; no authentication |
GET /v1/ready | Master readiness: HTTP 200 with ready:true means an active node that sees a leader; no authentication |
GET /v1/cluster | Full cluster statistics: PD members, stores, graphs, partitions |
GET /v1/members | PD member list with roles and the elected leader |
POST /v1/members/change | Change the Raft peer list, body {"peerList": "..."} |
GET /v1/stores | Registered Store nodes with state and per-store statistics |
GET /v1/store/{storeId} | One Store node |
POST /v1/store/{storeId} | Update a Store’s state, body {"storeState": "..."} |
DELETE /v1/store/{storeId} | Remove a Store from the cluster |
POST /v1/store/log | Store state change log, body {"startTime": "...", "endTime": "..."} |
GET /v1/storesAndStats | Raw Store metadata, for debugging |
GET /v1/store_monitor/{storeId} | Store monitoring samples as text |
GET /v1/store_monitor/json/{storeId} | Store monitoring samples as JSON |
GET /v1/shards | Every shard of every partition, with store id, role, state and progress |
GET /v1/shardGroups | Shard groups |
GET /v1/shardGroupsCache | Shard groups from PD’s in-memory cache |
GET /v1/shardLeaders | Partition leaders grouped by Store raft address |
GET /v1/balanceLeaders | Rebalance partition leaders across Stores |
GET /v1/partitions | Partition list with state and statistics |
GET /v1/highLevelPartitions | Partitions with per-graph key counts and data sizes |
GET /v1/partitionsAndStats | Raw partition metadata, for debugging |
POST /v1/partitions/log | Partition change log, body {"startTime": "...", "endTime": "..."} |
GET /v1/resetPartitionState | Reset the state of every partition |
GET /v1/graphs | Graph list |
GET /v1/graph/** | One graph by name |
POST /v1/graph/** | Update a graph’s partition count, body {"partitionCount": N} |
GET /v1/graph/partitionSizeRange | Minimum and maximum partition count the cluster accepts |
GET /v1/graph-spaces | Graph space list |
GET /v1/graph-spaces/** | One graph space |
POST /v1/graph-spaces/** | Update a graph space |
POST /v1/registry | Register a service instance for discovery |
POST /v1/registryInfo | Query registered instances |
GET /v1/allInfo | All registered instances |
GET /v1/license | Legacy endpoint; current master returns an empty object |
GET /v1/license/machineInfo | IP and MAC addresses seen by the license check |
GET /v1/task/patrolStores | Run the store patrol task now |
GET /v1/task/patrolPartitions | Run the partition patrol task now |
GET /v1/task/balancePartitions | Rebalance partitions across Stores |
GET /v1/task/splitPartitions | Run automatic partition splitting now |
GET /v1/task/balanceLeaders | Rebalance partition leaders |
GET /v1/task/compact | Instruct Store nodes to compact the RocksDB files of their partitions |
GET /v1/prom/targets/{appName} | Prometheus service discovery targets, no authentication required |
GET /v1/prom/targets-all | Prometheus targets for all app types |
GET /v1/prom/sd_config | Prometheus HTTP service discovery config |
GET /actuator/health | Spring Boot health, no authentication required |
GET /actuator/metrics | Spring Boot metrics, no authentication required |
GET /actuator/prometheus | Prometheus scrape endpoint, no authentication required |
The two log endpoints take a time range as {"startTime": "...", "endTime": "..."}; yyyy-MM-dd HH:mm:ss and yyyy-MM-dd are among the accepted formats.
PD registers its own meters under the hg prefix, so /actuator/prometheus exposes hg_up, hg_graphs, hg_stores and hg_terms alongside the standard JVM metrics, plus per-graph partition and size meters once graphs exist.
In versions after 1.7.0, PD also exports, for each registered store, hg_store_state{store="<id>",state="<state>"}, which is 1 for the store’s current state (Unknown, Pending, Up, Offline, Exiting or Tombstone) and 0 for the others, and hg_store_leader_count{store="<id>"}, the number of shard groups whose leader is on that store. A rebuilt Store reports 0 leaders until leadership moves back to it. Every PD member reads the same replicated metadata, so select one instance before aggregating these series.
3.1.3 - HugeGraph-Store Quick Start
1 HugeGraph-Store Overview
HugeGraph-Store is the storage node component of HugeGraph’s distributed version, responsible for actually storing and managing graph data. It works in conjunction with HugeGraph-PD to form HugeGraph’s distributed storage engine, providing high availability and horizontal scalability.
Each Store node keeps graph data in RocksDB and replicates it with Raft (JRaft): every partition is a separate Raft group, so a partition survives the loss of a minority of its replicas. Store nodes do not know about each other directly. They register with PD, receive their partition assignment from PD, and report state back over a heartbeat. HugeGraph-Server reaches Store over gRPC after looking up partition locations in PD.
2 Prerequisites
2.1 Requirements
- Operating System: Linux or macOS (Windows has not been fully tested)
- Java version: Java 17 for HugeGraph 1.8.0+ (the Maven build accepts only JDK 17; the start script rejects older runtimes; 1.7.0 is the last release supporting Java 11)
- Maven version: ≥ 3.6.3 (for building from source)
- Deploy HugeGraph-PD first for multi-node deployment
3 Deployment
There are two ways to deploy the HugeGraph-Store component:
- Method 1: Download the tar package
- Method 2: Compile from source
3.1 Download the tar package
Apache downloads currently provide the complete 1.7.0 binary bundle containing PD, Store, and Server, without a separate Store binary. Verify version, signatures, and SHA512 on the official download page. This historical incubating release retains incubating in archive and directory names:
3.2 Compile from source
To build Store alone instead of the whole repository, build hugegraph-struct first, because Store depends on it:
The assembled directory contains only bin/, conf/ and lib/hg-store-node-{version}.jar.
3.3 Docker Deployment
HG_STORE_* mappings are current master features, absent from Server tag 1.7.0. These Docker examples require PD, Store, and HStore Server images built from the same current master source with matching local tags:
Before first startup, create .env in docker/ following the authentication environment instructions.
The procedure uses umask 077 and refuses to overwrite existing files. Keep an existing .env and add missing entries. Never regenerate HG_PD_AUTH_SECRET_KEY for initialized data directories. Although .gitignore excludes this file, do not commit it.
In every new shell, load the same file from docker/ before Compose or PD REST commands:
Load the same secret before subsequent restarts or PD REST calls; do not regenerate it for initialized directories. Explicitly include HUGEGRAPH_VERSION=local and HUGEGRAPH_PULL_POLICY=never in every Compose lifecycle command.
To start Hubble, use the topology-specific untracked configuration: minimal docker-compose-hstore.yml mounts conf/hubble/hstore.local.properties;
HA docker-compose-3pd-3store-3server.yml mounts conf/hubble/hstore-ha.local.properties.
The README initialization creates both files with the shared PD secret. If missing or requiring updates, load existing .env from docker/ and run:
Multi-node service names are pd0–pd2, store0–store2, and server0–server2. This master Compose file also requires matching locally built images; do not mix HUGEGRAPH_VERSION=1.7.0 release images with master Compose.
To run master-built Store alone, replace example addresses with actual routable Store and PD addresses:
Current Master Docker Environment Variables:
| Variable | Required | Default | Configuration key | Description |
|---|---|---|---|---|
HG_STORE_PD_ADDRESS | Yes | None | pdserver.address | Comma-separated PD gRPC addresses. |
HG_STORE_GRPC_HOST | Yes | None | grpc.host | Advertised hostname/IP; use a container hostname within a container network. |
HG_STORE_RAFT_ADDRESS | Yes | None | raft.address | This node’s Raft address. |
HG_STORE_GRPC_PORT | No | 8500 | grpc.port | gRPC service port. |
HG_STORE_REST_PORT | No | 8520 | server.port | REST API port. |
HG_STORE_DATA_PATH | No | /hugegraph-store/storage | app.data-path | Data path. |
The master entrypoint writes these values into SPRING_APPLICATION_JSON, overriding image conf/application.yml. Other options still come from that file and application-pd.yml; Java runs in the foreground. Deprecated PD_ADDRESS, GRPC_HOST, and RAFT_ADDRESS remain supported with warnings.
PD and Store Docker HEALTHCHECK use /v1/health, confirming only local REST responses. Compose depends_on uses the same startup gate; separately verify PD /v1/ready and Up Store state in /v1/stores. Store defaults to STDOUT_MODE=true; its Dockerfile declares only EXPOSE 8520, so publish gRPC 8500 and Raft 8510 separately if needed outside the Docker network.
4 Configuration
Store reads two files under conf/. Release 1.7.0 sources: application.yml, application-pd.yml. Master sources: application.yml, application-pd.yml. Master places RocksDB settings in the second file, included through spring.profiles.include: pd; startup selects application.yml.
application.yml: Main PD address, ports, Raft, and data path settings.application-pd.yml: Included throughspring.profiles.include: pd; RocksDB memory and Actuator exposure.
4.1 application.yml
The following tables were checked against distribution values and Java defaults at Server master commit 2f827d6e8c9c62ae858f2fc122b3a192d015e2f4. Use tagged configuration for release 1.7.0 without replacing it with another version’s files.
4.2 application-pd.yml
This file contains only rocksdb and Actuator exposure settings.
Protect Server and Store ports separately in production
Enable Server authentication and authorization, an IP allowlist, and minimum graph API permissions; retain and protect Server audit-*.log. These settings do not protect Store: master exposes all Actuator endpoints without PD-style Basic authentication. Restrict Store REST, gRPC, and Raft to cluster nodes and trusted operations networks.
4.3 Configuration reference
“Master distribution value” comes from the two master files above. “Code default” is the fallback when a key is absent; rely on code defaults for options omitted from the distribution files.
Core
| Key | Master distribution value | Code default | Meaning |
|---|---|---|---|
pdserver.address | localhost:8686 | required | PD gRPC endpoints, comma separated. Store registers itself here and receives its partition assignment. Must be PD’s grpc.port, not its REST port. |
grpc.host | 127.0.0.1 | required | Address this node advertises for its own gRPC service. Set it to a routable IP or hostname, 127.0.0.1 is only usable for a single-machine setup. |
grpc.port | 8500 | required | gRPC port. Server and the Store client connect here. |
grpc.netty-server.max-inbound-message-size | 1000MB | gRPC default | Maximum size of a single inbound gRPC message. Bound by the grpc-spring-boot-starter Netty server. |
grpc.server.wait-time | not set | 3600 | Seconds a scan stream waits for the client to consume a page before the server aborts it. |
server.port | 8520 | required | REST and Actuator port. Also reported to PD as the rest.port label. |
Raft
| Key | Master distribution value | Code default | Meaning |
|---|---|---|---|
raft.address | 127.0.0.1:8510 | required | Raft service address of this node, host:port. Must be reachable from every other Store node. There is no peer list to configure: PD tells each node which peers belong to a partition’s Raft group. |
raft.disruptorBufferSize | 1024 | 0 | Raft task queue size. 0 derives it from rocksdb.total_memory_size, by rounding that size in GB to the nearest power of two and multiplying by 32. |
raft.max-log-file-size | 600000000000 | 50000000000 | Maximum byte size of Raft logs. |
raft.snapshotInterval | 1800 | 300 | Seconds between Raft snapshots. |
raft.snapshotLogIndexMargin | not set | 0 | Minimum applied-index distance since the last snapshot before a snapshot is actually written. 0 disables the distance check. |
raft.rpc-timeout | not set | 10000 | Raft RPC timeout in milliseconds. |
raft.metrics | not set | true | Collect JRaft node metrics, readable at /metrics/raft. |
raft.useRocksDBSegmentLogStorage | not set | true | Store Raft logs in the RocksDB segment log storage. |
raft.maxSegmentFileSize | not set | 67108864 | Segment log file size in bytes (64 MB). |
raft.maxReplicatorInflightMsgs | not set | 256 | Maximum in-flight replication requests per follower. |
raft.maxEntriesSize | not set | 256 | Maximum number of entries in one AppendEntries request. |
raft.maxBodySize | not set | 524288 | Maximum byte size of one AppendEntries request. |
ave-logEntry-size-ratio | not set | 0.95 | Smoothing ratio used to estimate the average log entry size. Note that this key sits at the top level, not under raft. |
Storage and labels
| Key | Master distribution value | Code default | Meaning |
|---|---|---|---|
app.data-path | ./storage | store | RocksDB data directory. Multiple paths separated by commas spread partitions over several disks. |
app.raft-path | commented out | empty | Directory for Raft logs and snapshots. Falls back to app.data-path when empty. |
app.fake-pd | not set | false | Built-in PD mode for standalone testing. Do not use it in production. |
app.placeholder-size | not set | 10 | Size in GB of a placeholder file created in each data path at startup, so space can be freed in an emergency. 0 disables it. |
app.label.<name> | not set | none | Arbitrary key/value labels sent to PD in the store heartbeat. The node adds rest.port on its own. |
RocksDB
| Key | Master distribution value | Code default | Meaning |
|---|---|---|---|
rocksdb.total_memory_size | 32000000000 | 51539607552 | Memory budget shared by all RocksDB instances on this node. When absent or 0, the node uses the JVM max heap instead. |
rocksdb.write_buffer_size | 32000000 | 33554432 | Memtable size in bytes. When absent or 0, the node uses total_memory_size / 1000. |
rocksdb.min_write_buffer_number_to_merge | 16 | 16 | Number of memtables merged together before a flush. |
rocksdb.write_buffer_ratio | not set | 0.66 | Share of total_memory_size given to the write cache. The rest becomes the block cache. |
Any other option defined in org/apache/hugegraph/rocksdb/access/RocksDBOptions.java can be added under the same rocksdb: block, for example rocksdb.max_background_jobs, rocksdb.level0_file_num_compaction_trigger or rocksdb.bloom_filter_bits_per_key.
Thread pools
| Key | Code default | Meaning |
|---|---|---|
thread.pool.grpc.core | 600 | Core threads serving gRPC requests. |
thread.pool.grpc.max | 1000 | Maximum gRPC threads. |
thread.pool.grpc.queue | 2147483647 | gRPC task queue capacity. |
thread.pool.scan.core | 128 | Core threads serving scans. 0 means 4 times the CPU count. |
thread.pool.scan.max | 1000 | Maximum scan threads. |
thread.pool.scan.queue | 0 | Scan task queue capacity. |
gRPC callback queue (1.8.0)
Store uses an unbounded queue for gRPC callbacks so that a full queue does not discard cancellation or completion notifications and leave requests unfinished.
You can keep thread.pool.grpc.queue in the configuration, but it no longer limits this queue.
thread.pool.grpc.core and thread.pool.grpc.max still configure the thread pool. Because callbacks can continue to queue, a backlog normally does not grow
the pool from core to max; increasing max alone does not increase callback processing capacity.
Sustained overload can still grow the queue and increase memory usage. Limit client concurrency and size the scan and query worker pools for the node’s
resources; do not rely on thread.pool.grpc.queue for load control. Version 1.7.0 still uses the configured gRPC queue capacity.
Query pushdown
| Key | Code default | Meaning |
|---|---|---|
query.push-down.threads | 1500 | Thread pool size for pushed-down queries. |
query.push-down.fetch_batch | 20000 | Rows fetched per request. |
query.push-down.fetch_timeout | 300000 | Fetch timeout in milliseconds. |
query.push-down.memory_limit_count | 50000 | Row limit for in-memory operations such as sorting. |
query.push-down.index_size_limit_count | 50000 | Index sst file size limit in kB. |
Background jobs
| Key | Code default | Meaning |
|---|---|---|
job.interruptableThreadPool.core | 128 | Core threads of the TTL cleaner pool. 0 means the CPU count. |
job.interruptableThreadPool.max | 256 | Maximum threads of the TTL cleaner pool. 0 means 4 times the CPU count. |
job.interruptableThreadPool.queue | 2147483647 | Queue capacity of the TTL cleaner pool. |
job.uninterruptibleThreadPool.core | 0 | Core threads of the engine’s uninterruptible job pool. 0 means the CPU count. |
job.uninterruptibleThreadPool.max | 256 | Maximum threads of the uninterruptible job pool. |
job.uninterruptibleThreadPool.queue | 2147483647 | Queue capacity of the uninterruptible job pool. |
job.cleaner.batch.size | 10000 | Keys deleted per batch by the TTL cleaner. |
job.start-time | 0 | Hour of day (0 to 23) at which the daily TTL cleanup runs. Values outside that range fall back to 19. |
Built-in PD mode
Only for single-node development and debugging, activated by app.fake-pd: true. The node then plays PD’s role itself and ignores pdserver.address.
| Key | Code default | Meaning |
|---|---|---|
fake-pd.store-list | '' | gRPC addresses of the Store nodes in the fake cluster. |
fake-pd.peers-list | '' | Raft addresses of the same nodes. |
fake-pd.partition-count | 3 | Number of partitions. |
fake-pd.shard-count | 3 | Replicas per partition. |
Diagnostics
Starting with HugeGraph 1.8.0, Store HTTP activation (GET /v1/arthasstart) is disabled and returns 403. Legacy configuration fields are kept only
for compatibility. Run the bundled script as the service OS user on the host to diagnose the running JVM (official container images include JDK 17):
For multiple processes on one host, specify --pid <PID> --telnet-port 3659. For command options, authentication, and security practices, see
Start the Arthas agent.
4.4 Per-node changes
For multi-node deployment, you need to modify the following configurations for each Store node:
grpc.hostandgrpc.port(the address other components dial)raft.address(Raft protocol address)server.port(REST port)app.data-path(data storage path)
pdserver.address is the same on every node, it lists the whole PD cluster.
5 Start and Stop
5.1 Start Store
Ensure that the PD service is already started, then in the Store installation directory, execute:
The lifecycle and timeout details below describe master builds that include launcher script repairs. The downloaded 1.7.0 launcher does not include those repairs. The script accepts four flags, with GC version limits noted below:
| Flag | Values | Default | Description |
|---|---|---|---|
-d | true, false | true | Daemon mode. See below. |
-g | See version limits below | not set | Select the garbage collector. Unsupported values abort startup. |
-j | JVM options string | empty | Extra JVM options, for example -j "-Xmx16g -Xms8g". |
-y | true, false | false | Attach the OpenTelemetry Java agent, downloading it into plugins/ on first use, and export traces to 127.0.0.1:4317. |
Master builds accept g1, G1, zgc and ZGC.
The downloaded 1.7.0 launcher accepts only zgc or ZGC as explicit choices; -g g1, -g G1 and other values abort startup.
Omit -g for the default path. For rejected values, inspect logs/hugegraph-store-server.log.
Daemon mode:
-d true(default): run as a background daemon. The script returns immediately and writes the Java pid tobin/pid.-d false: run in the foreground. The scriptexecs Java, so the container or supervisor process is Java itself. Use this under Docker or a process supervisor (systemd, supervisord) so crashes are detected and the service is restarted automatically.
JVM memory, unless you set JAVA_OPTIONS yourself: -Xms512m, and -Xmx set to half the free memory, clamped to the 512 MB to 2048 MB range. The script also adds -XX:MetaspaceSize=256M, a heap dump on out-of-memory into logs/, and a rolling GC log at logs/gc.log. Production nodes normally need a much larger heap, so pass one explicitly, for example -j "-Xmx32g -Xms32g".
The script refuses to start if ulimit -n or ulimit -u is below 1024, and it preloads jemalloc on x86_64 and arm64 when the shared object can be downloaded and verified.
In master builds, each optional jemalloc download allows 5 seconds to connect and 30 seconds in total. The 1.7.0 helper has no connection or total timeout. A timeout or failed verification follows the existing fallback: startup continues without preloading the downloaded library. Verified cached libraries can still be reused; partial downloads are removed.
After successful startup, you can see logs similar to the following in logs/hugegraph-store-server.log:
5.2 Stop Store
In the Store installation directory, execute:
The script reads bin/pid, signals that process, and waits up to 30 seconds for it to exit before removing the pid file. If bin/pid is missing it exits without doing anything.
5.3 Restart Store
It sources the stop script and then the start script, and forwards the flags from section 5.1.
5.4 Startup order
- All PD nodes first. Each Store’s
grpc.host:grpc.portmust appear in PDpd.initial-store-list, or the node remainsPendinginstead ofUp, blocking partition allocation. On master, verify HTTP200withready:truefrom every PD/v1/readyfirst;/v1/healthis liveness only. - Store next. Registration retries while PD is unreachable, logging
store heartbeat error: PD UNREACHABLE. - Server last. Every Store should report
Up; partitions must be ready before opening or initializing graphs.
Master Compose uses depends_on: condition: service_healthy for local liveness, but PD and Store Docker checks only call /v1/health; they do not confirm Raft quorum or Store registration. Server waits for PD to report at least one Up Store. Operators should still check PD /v1/ready and /v1/stores.
6 Multi-Node Deployment Example
Below is a configuration example for a three-node deployment:
6.1 Three-Node Configuration Reference
- 3 PD nodes
- raft ports: 8610, 8611, 8612
- rpc ports: 8686, 8687, 8688
- rest ports: 8620, 8621, 8622
- 3 Store nodes
- raft ports: 8510, 8511, 8512
- rpc ports: 8500, 8501, 8502
- rest ports: 8520, 8521, 8522
6.2 Store Node Configuration
For the three Store nodes, the main configuration differences are as follows:
Node A:
Node B:
Node C:
All nodes should point to the same PD cluster:
And every PD node should list all three Store gRPC addresses:
6.3 Docker Distributed Cluster Configuration
The distributed Store cluster definition is included in docker/docker-compose-3pd-3store-3server.yml. Each Store node gets its own hostname and environment variables:
The container ports stay 8500/8510/8520 on every node, only the published host ports differ. The PD nodes set HG_PD_INITIAL_STORE_LIST: store0:8500,store1:8500,store2:8500 to match.
Store nodes start only after all PD nodes pass healthchecks (/v1/health), enforced via depends_on: condition: service_healthy.
To view runtime logs for a running Store container use docker logs <container-name> (e.g. docker logs hg-store0).
See docker/README.md for the full setup guide.
7 Verify Store Service
Confirm that the Store service is running properly:
Actuator {"status":"UP"} confirms local Store application health, without proving registration as Up in PD.
GET /v1/health is the lighter check used by the Docker image and the compose files. It answers HTTP 200 with an empty body, so use curl -fsS and check the exit code rather than the output:
7.1 Store REST endpoints
The Store node exposes these read-only endpoints on server.port:
| Method | Path | Description |
|---|---|---|
| GET | /v1/health | Liveness probe, HTTP 200 with an empty body |
| GET | /actuator/health | Spring Boot Actuator health, {"status":"UP"} |
| GET | /actuator/prometheus | Prometheus scrape endpoint |
| GET | / | Node summary, leaderCount and partitionCount |
| GET | /-/state | Operator-set STARTING, ONLINE, or STOPPING flag; distinct from PD registration state |
| GET | /-/echo?name=<text> | Echo check |
| GET | /-/scan | State of the running scan streams |
| GET | /v1/partitions | All Raft groups on this node with per-partition metrics. Add ?flags=accurate for exact key counts, which is slower. |
| GET | /v1/partition/{id} | One Raft group by partition id, including role, leader, peers and committed index |
| GET | /metrics/system | Host CPU and memory metrics |
| GET | /metrics/drive | Disk metrics for the data paths |
| GET | /metrics/raft | JRaft node metrics, needs raft.metrics: true |
Master Store configuration exposes all Actuator endpoints with management.endpoints.web.exposure.include: "*" and enables Prometheus. These endpoints lack PD REST Basic protection; restrict Store REST network access.
The node also serves maintenance endpoints that change state or run heavy work: PUT /-/state, GET /-/cleaner,
GET /v1/partition/dump/{id}, GET /v1/partition/clean/{id}, POST /v1/compat?id=<partition>, POST /raft/options, and the /fix/* and /test/* groups.
Use them only for troubleshooting, and keep the REST port off untrusted networks.
7.2 Check registration from PD
You can also check Store node status through the PD API:
For master builds, PD REST usernames must be hg, store, hubble, or vermeer, and the password must equal PD auth.secret-key. HG_PD_AUTH_SECRET_KEY configures PD and Server in Compose. /v1/health, /v1/ready, /actuator/*, and /v1/prom/targets/* require no authentication. Release 1.7.0 checks only usernames, without comparing passwords; do not use that old behavior for master builds.
If Store is configured successfully, the response should include status information for the current node, and state: "Up" means the node is running normally. A node stuck at Pending is usually missing from PD’s pd.initial-store-list.
The example below shows a single Store node. If all three nodes are configured correctly and running, the storeId list should contain three IDs, and stateCountMap.Up, numOfService, and numOfNormalService should all be 3.
7.3 Minimal Graph Read/Write Verification
After Store appears as Up in PD, start an HStore-backed Server connected to the same PD cluster. See the Server Quick Start. Once GET /versions responds and the default hugegraph graph is loaded, create a property key, vertex label, and vertex, then read it:
The final response should contain vertex ID pd-store-demo-1 and property pd_store_demo_name. If Server authentication is enabled, add credentials to each request.
3.1.4 - Deploy HugeGraph with Helm
This guide covers HugeGraph 1.8.0 and later, using Helm 3.10+ with OCI support and Kubernetes (K8s) 1.23+.
Install hugegraph-helm from GHCR or Docker Hub. Chart and HugeGraph versions are maintained separately:
for example, a 0.2.x Chart can deploy a 1.8.x service.
The current development Chart uses latest images and is intended for testing.
For production, choose a stable Chart once the corresponding HugeGraph service has been released, and review its image versions.
Image tags can change; set each component’s image.digest to keep using the same image content.
Artifact Hub helps you find the Chart, browse versions and read installation instructions. The packages themselves are downloaded from GHCR or Docker Hub. See the chart README for settings and source-based development, and the operations reference for lifecycle procedures.
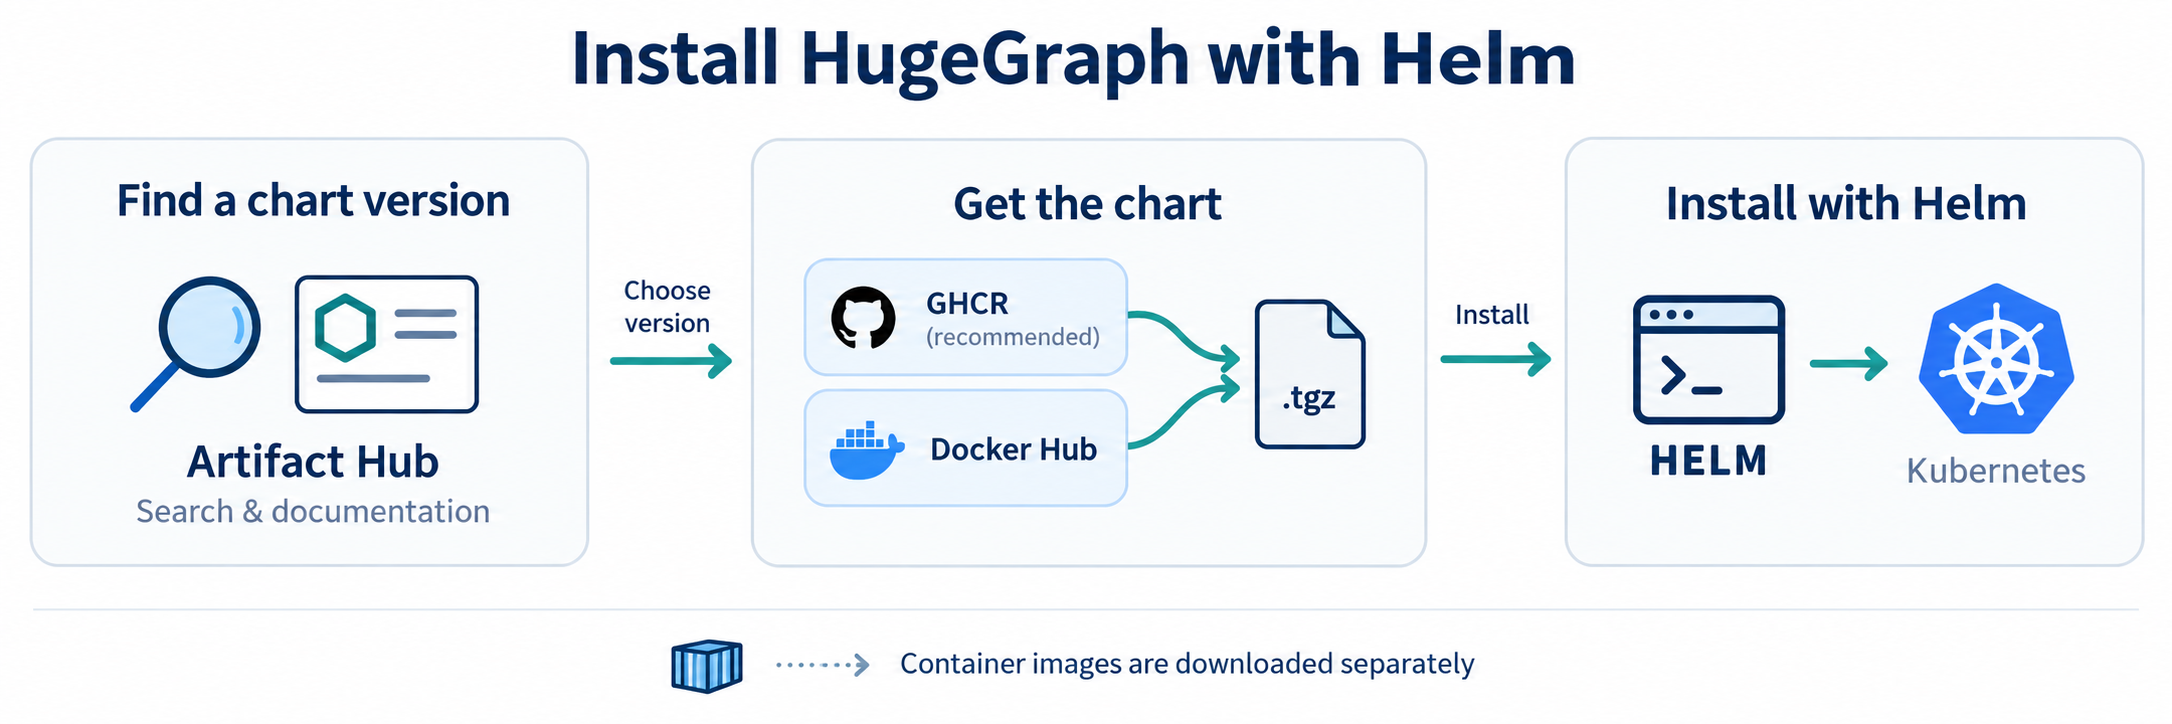
1 Install
Default Topology & Storage Prerequisites
- Components: Deploys 3 PD + 3 Store + 3 Server and Hubble by default, with authentication and persistent storage enabled.
- Volume Requirements: Requires a default dynamic StorageClass or matching pre-created static PVs, totaling 7 persistent volumes (3 × 10 GiB PD volumes, 3 × 50 GiB Store volumes, and 1 × 1 GiB Hubble volume).
- Memory Sizing: Retains container JVM memory auto-calculation; configure resource requests/limits to allocate sufficient physical memory for the 9 JVMs and Hubble.
Choose either registry; GHCR is recommended for public CI. For local lightweight testing, use the single-node preset.
--devel selects the highest Chart version, including development and stable versions, without limiting the version series.
For production or reproducible installations, replace --devel with --version <published-version> to pin your chosen version.
The single-node preset replaces the default installation with one replica per component and relaxed scheduling constraints.
2 Modes and entry points
The extracted package is rooted at hugegraph-helm/; the source directory remains helm/hugegraph/.
HugeGraph Helm Chart Layout
- hugegraph-helm/
- Chart.yamlChart metadata and version definitions
- values.yamlDefault values (easy mode: 3 PD + 3 Store + 3 Server + 1 Hubble, NodePort)
- values-single.yamlSingle-node preset (local Minikube/Kind testing with 1 replica and no anti-affinity)
- values-cluster.yamlMulti-node cluster preset (required anti-affinity, Store OnDelete rollout)
- values-strict.yamlHardened security preset (strict mode: ClusterIP only, strict NetworkPolicies)
- values.schema.jsonSchema validation for values configuration
- templates/Kubernetes workload templates
- pd-statefulset.yamlPD StatefulSet (metadata and scheduling)
- store-statefulset.yamlStore StatefulSet (storage engine)
- server-deployment.yamlServer Deployment (injects serviceId and graphSpace)
- hubble-deployment.yamlHubble UI Deployment
- tests/Smoke validation hook (helm test, supports custom testGraphAlias)
- examples/Seven complete production scenario examples (local PVs, GitOps secrets, Ingress)
- docs/operations.mdLifecycle operations and recovery guide
mode: easy is the default. Server and Hubble use automatic NodePorts; PD stays ClusterIP. HTTP works without a domain, certificate or acknowledgement.
mode: strict defaults Server/Hubble to ClusterIP and enables NetworkPolicy. Both modes keep authentication and persistence.
Explicit component parameters take priority over global parameters, which take priority over mode defaults; explicit false remains an override.
The global parameters are persistence.enabled and global.imageRegistry. Strict mode is also available through values-strict.yaml.
| Entry | Access | Requirements |
|---|---|---|
| NodePort | http://<reachable-node-ip>:<assigned-node-port> | Node connectivity and firewall access; no additional controller |
| ClusterIP | Internal Service IP/DNS, for example hugegraph-server.hugegraph.svc:8080 | External clients use port-forward or an existing gateway |
| LoadBalancer | Infrastructure-assigned address | Compatible load balancer controller |
| Ingress | HTTP routing through a controller | Installed controller; hostname and TLS optional |
Open Hubble on its assigned NodePort and log in as admin with this password. A node need not host the Pod with default externalTrafficPolicy: Cluster.
The internal ClusterIP is a virtual Service address, not a node IP; a laptop normally cannot reach it directly.
Use kubectl -n hugegraph port-forward svc/hugegraph-hubble 8088:8088 for a local browser at http://127.0.0.1:8088.
Each client Service supports externalTrafficPolicy, loadBalancerClass, loadBalancerIP, loadBalancerSourceRanges, externalIPs
and allocateLoadBalancerNodePorts, subject to the cluster/controller’s capabilities. Use LoadBalancer fields with that Service type.
NodePort omission or 0 means automatic allocation. Fixed ports are validated against the cluster’s configured range by Kubernetes;
the chart does not force 30000–32767. Legacy HTTP acknowledgement fields remain accepted but no longer gate rendering.
Server service identity and graph space
Both server.serviceId and server.graphSpace default to DEFAULT. To register the Server with a specific service name or graph space in PD:
For configuration-only changes, keep the installed Chart version and values.
Find the version with helm list and replace the placeholder below:
A non-default graph space must be created through the PD API before starting its assigned Server. server.testGraphAlias specifies the Gremlin binding checked
by helm test (case-sensitive) and does not auto-infer from graphSpace. Do not re-declare service ID or graph space in server.extraEnv.
3 Internal images and storage
Complete examples cover private registries, dynamic storage, seven local PVs, GitOps credentials, API-only deployment and a hostless HTTP Ingress.
Set global.imageRegistry to prefix unqualified image repositories; an explicit registry in a component repository takes precedence.
The default mirror inventory is only hugegraph/pd, hugegraph/store, hugegraph/server and hugegraph/hubble, at the configured tags/digests.
Store’s PD wait init container and the Helm test reuse Store and Server images respectively, which already contain curl.
No separate curl image or runtime package installation is required. Explicit store.waitImage / server.waitImage overrides remain supported.
Storage configuration
For storage, empty storageClassName inherits the cluster default, while "-" explicitly selects no StorageClass.
Local PVs require prepared host directories, matching capacities, nodeAffinity and a kubernetes.io/no-provisioner StorageClass;
WaitForFirstConsumer binds with the Pod’s scheduling constraints. See the complete seven-volume example before creating resources.
For a new temporary installation, set persistence.enabled=false to use emptyDir; component storage flags override it.
The chart never replaces a failed PVC with temporary storage and rejects PD/Store storage-mode changes on initialized releases.
Offline installation and internal repositories
Select the latest version, download that Chart and move the .tgz into your network.
Install it directly or upload it to an existing OCI or HTTP repository.
In air-gapped environments, override the image registry with --set global.imageRegistry=...,
see values-internal-registry.yaml.
Replace the example registry addresses with your own. The archive contains no container images: mirror all configured container images separately, then override their addresses.
4 Authentication and secrets
Normal Helm installations generate and reuse three credentials: <release>-admin (password), <release>-auth-token (token_secret)
and <release>-pd-auth (secret-key). PD REST requires the shared PD secret, supplied to the PD container as HG_PD_AUTH_SECRET_KEY;
Server’s storage wait and Hubble read the same credential. It is not a separate user password that must be invented for each Pod.
For GitOps, use fixed encrypted values or pre-created Secrets through pd.auth.existingSecret, server.auth.admin.existingSecret
and server.auth.token.existingSecret. existingSecret wins over inline values and is not managed by the chart.
The admin password must be printable ASCII without spaces, colons or backslashes; the PD secret must be printable ASCII without surrounding whitespace
or backslashes; the JWT signing key must be at least 32 bytes. Offline renderers cannot reuse live generated Secrets through lookup.
The admin Secret is an initial credential. Updating it does not rotate an existing account.
Change the password through PUT /graphspaces/DEFAULT/auth/users/admin with {"user_password":"<new-password>"} using the existing credential,
update the Secret/source to that same password, then restart the Server Deployment to clear every replica’s auth cache.
Hubble is enabled by default and its current login requires Server authentication. Set hubble.enabled=false for API-only access;
optionally also set server.auth.enabled=false for an unauthenticated API. Inactive credential settings may remain in your values file.
5 Upgrade and verification
Use native Helm value reuse to preserve an existing deployment’s UI, entry, storage and credentials:
Existing explicit helper images also remain under --reuse-values;
add --set-string store.waitImage= --set-string server.waitImage= to reuse component images.
Adopt new defaults deliberately with --reset-values and a reviewed file retaining your image, credential, storage and topology settings.
Do not treat PD membership, storage or credential changes as ordinary independent overrides; consult the lifecycle reference.
server.storageWaitTimeoutSeconds defaults to 300 and is passed as WAIT_STORAGE_TIMEOUT_S. An unspecified startup probe threshold is derived
from that wait plus 150 seconds; an explicit threshold is preserved and must cover the storage wait plus at least 120 seconds of Server startup.
A contradictory budget fails rendering with the relevant parameter names. Storage wait timeout is not a JVM memory setting.
The default helm test hook checks connectivity and reads. After installation or recovery, also test a new UI login and your application’s
read/write queries.
For scheduling, NetworkPolicy, rolling updates and recovery, see Kubernetes operations.
3.1.5 - Operate HugeGraph on Kubernetes
This guide accompanies Helm deployment. Detailed lifecycle checks and recovery notes are maintained in the
operations reference; all parameters are commented in values.yaml.
Commands assume release/namespace hugegraph; substitute the actual workload names if overridden.
1 Storage and private images
The default installation needs seven persistent volumes. Dynamic storage requires a working provisioner; static local storage requires prepared directories
and matching PVs on the named nodes. Use the complete examples
for all seven local PVs, WaitForFirstConsumer, registry mirrors and GitOps Secrets.
An initially Pending PVC with WaitForFirstConsumer can be normal; persistent Pending needs PVC/Pod events and PV matching checks.
A bound claim with a missing directory or permission mismatch can fail mounting. Do not replace failed PVCs with temporary data directories.
For ImagePullBackOff, inspect Pod events and registry access/credentials. The default image inventory contains four component images;
Store wait and Helm test reuse existing component images with curl already installed. Explicit helper-image overrides must also be mirrored.
2 Ports and health
PD listens on REST 8620, gRPC 8686 and Raft 8610; Store on REST 8520, gRPC 8500 and Raft 8510; Server HTTP on 8080; Hubble HTTP on 8088.
Client Services hide individual Pod addresses. NodePort is a separate allocated port on reachable nodes, not the application listener port.
PD /v1/ready requires a Raft leader; /v1/health only confirms the listener. Store startup waits for a majority of ready PD peers.
Server waits up to server.storageWaitTimeoutSeconds (default 300) before its application startup; adjust it for slow storage bootstrap.
No local Helm rendering verifies live cluster reachability, volumes or JVM capacity.
Helm test coverage
helm test validates graph binding on every Server Pod (DEFAULT-hugegraph by default, or configured via server.testGraphAlias), and requires
currently visible associated indexes to be in CREATED state.
Run it after index creation/rebuild jobs finish, with no schema changes during the test.
On HStore, reading an unfinished index can cache its temporary status on other Pods; retries do not refresh that state.
Indexed queries on those Pods may keep failing after the job succeeds; replace affected Server Pods only after the jobs finish.
The hook does not fix cross-Server schema cache consistency. Its 150-second internal retry window allows transient elections to settle;
Helm’s --timeout does not change that window.
It reads indexes by ID without refreshing the full index cache; it does not prove index query results or complete schema consistency.
For existing data, use --set-file server.testGremlin=assertions.groovy during Helm upgrade to add read-only business assertions on every Pod.
The script must use assert or throw on unexpected results; returning false alone does not fail the request.
See business query assertions
for an example and coverage limits. Without a script, business assertions are reported as skipped.
The default hook creates no schema or data. Custom scripts use the hook’s Server credential (admin with auth enabled);
read-only execution is not enforced, so supply trusted, read-only assertions.
Server API responses negotiate compression through Accept-Encoding. Gzip-capable clients can request gzip or use curl --compressed;
identity or no compression request keeps the response uncompressed. Build a new Server image from the updated source to include this behavior;
updating the chart alone does not update an existing image.
PD REST authentication
PD REST uses HTTP Basic auth: hg, store, hubble and vermeer share the PD REST Secret password.
Server’s admin account is not a PD REST account and receives 401. For the default release/Secret and a reachable PD REST address:
The HTTP example assumes a trusted internal network. For other access paths, use an HTTPS gateway or optionally forward the PD Service:
kubectl -n hugegraph port-forward service/hugegraph-pd-client 8620:8620, then query http://127.0.0.1:8620.
With pd.auth.existingSecret or a custom pd.auth.key, read the actual Secret and key. Do not use the Server admin password.
Variables avoid literal passwords in shell history, but expanded credentials can briefly appear in process arguments.
On shared terminals, use curl --user hg to prompt for the password or a private curl config with permissions 600;
the credentials guide
also covers password-update payloads. Keep credential files out of logs and version control.
3 Scheduling
The default preferred anti-affinity permits scheduling with fewer nodes than replicas. values-cluster.yaml sets required PD/Store anti-affinity,
so it needs at least three schedulable nodes. Explicit affinity takes priority over presets.
Local PV node affinity must match the workload’s placement constraints; PV capacity declarations do not enforce filesystem quotas.
Do not change a persisted PD/Store Raft hostname or port as an ordinary upgrade: those addresses are recorded identities.
4 Partition sharding
At first bootstrap, the chart seeds three shard replicas when there are at least three Stores, and one otherwise. PD persists the partition settings; changing chart values after initialization does not rewrite that metadata. Use the PD configuration API and a coordinated partition patrol for an existing cluster. An explicit shard count must be odd and no greater than Store replicas. See the topology constraints before changing a live cluster; the chart does not migrate existing shard metadata.
5 NetworkPolicy
Easy mode, including the ordinary cluster preset, defaults policies off. Strict mode enables them; explicit networkPolicy.enabled wins in either mode.
The cluster network plugin must enforce NetworkPolicy for these resources to have an effect.
The generated policies admit component traffic and DNS. External clients and Ingress controllers need suitable
networkPolicy.<component>.extraIngress rules; external discovery addresses may need matching extraEgress.
An empty list is valid and can block external traffic. Native Kubernetes rules are accepted, including {} to allow all;
there is no separate source-acknowledgement gate. Use your actual source addresses/selectors, considering NodePort SNAT and controller behavior.
6 Rolling Store images safely
Use store.updateStrategy.type=OnDelete for a controlled maintenance rollout, as the cluster preset does.
Delete one Store Pod at a time. Before replacing the next, verify the previous Pod is Ready, has a fresh Store heartbeat and each shard group has its
full membership and exactly one leader, read from the PD leader. PD’s Up status alone does not prove completed shard recovery.
PDBs limit voluntary eviction, not StatefulSet controller disruption. Stop on missing members or leaders.
The operations reference
summarizes these rollout conditions;
it does not provide a complete per-group diagnostic or disk-loss recovery procedure.
A single Store replacement can cause request errors or timeouts while Raft leadership and client routes converge, even with full replicas. There is no zero-error guarantee. Observe application errors as well as shard recovery before continuing; do not blindly retry writes.
PD patrol and leader balance
Partition patrol repairs shard membership; leader balance is a separate manual task and is not scheduled automatically.
Before either task, identify the PD leader through authenticated /v1/members (data.pdLeader.restUrl) and confirm its /v1/ready reports isLeader: true.
The GET tasks /v1/task/patrolPartitions and /v1/task/balanceLeaders change cluster state; target that confirmed leader with PD REST credentials.
Wait for membership recovery and split/move tasks to finish before balancing leaders; Stores must have fresh heartbeats and groups full, healthy membership.
A busy task returns body status: 1001. A follower may return empty success, and leader transfers are asynchronous:
HTTP 200 or a transfer plan does not prove completion. Recheck /v1/partitions, /v1/stores and application errors before further maintenance.
Follow the task procedure
for the separate patrol and balance steps; do not loop task requests while maintenance is busy.
7 Disaster recovery
Preserve existing volumes, claim identities and PD membership. Do not delete RocksDB lock files to recover a deployment, or replace persisted membership with freshly generated nodes. A new empty PVC does not restore the data from a lost Store disk. Local disks cannot migrate their files automatically when a node fails. Take backups outside these PVs and test recovery separately. The chart does not implement backup or automatic recovery. The recovery notes describe constraints, not a complete recovery sequence. Before destructive changes, establish and validate a recovery plan for the deployed version and remaining replicas or backups.
8 Scaling
Server replicas are routinely mutable; an HPA also needs CPU requests. Store growth is a coordinated storage/shard operation.
PD growth/shrink and Store shrink cannot be handled as ordinary replica changes, because persistent Raft/shard membership must be updated first.
Chart upgrade checks reject unsupported identity/membership changes on initialized StatefulSets; fresh installs do not query StatefulSets for upgrade checks.
Scale through the documented lifecycle procedure rather than kubectl scale, which can leave Hubble’s Store metrics configuration stale.
9 Running Hubble outside the cluster
Direct mode only needs an externally reachable Server URL. PD discovery also needs externally reachable PD gRPC, and Server addresses registered with PD
must be reachable from that external Hubble. Set server.advertiseUrl to a shared reachable Server URL when needed; it affects all discovery clients,
including in-cluster Hubble. In-chart Hubble already uses internal service discovery and needs no public PD entry point.
HTTP is supported directly; TLS termination remains optional. Hubble remains single-replica and its current login requires Server authentication.
10 When Gremlin fails with Could not rebind
A Server can become Ready and serve REST while Gremlin binding failed during a PD rollout. Run helm test hugegraph -n hugegraph --logs --timeout 5m;
the hook checks authenticated graph-bound Gremlin on every Server Pod. Once PD is stable, replace the failing Server Pod and verify again.
A test that only calls /versions does not prove graph binding; also check fresh Hubble login and a graph query.
For ERROR: missing required env 'HG_PD_AUTH_SECRET_KEY', inspect the PD Pod’s Secret reference and the corresponding key, not the Secret value in logs.
The chart normally injects this shared PD REST credential automatically. Custom containers/manifests must provide the same value to PD and its clients.
In GitOps, create the external Secret before workload reconciliation; with ordinary Helm, retain the chart-generated release Secret.
3.2 - HugeGraph ToolChain
HugeGraph Toolchain includes the Java and Go clients, Loader, Hubble, Tools, Spark Connector, and SeaTunnel Sink/Source. Choose an entry by the task you need to complete, then open the component guide for its configuration and commands.
| Task | Start here | Best for |
|---|---|---|
| Visualize graphs | Hubble | Viewing and managing graphs in a Web UI |
| Import graph data | Loader, SeaTunnel Sink, Spark Connector | Importing data directly or connecting an existing pipeline |
| Export or migrate graph data | Tools, SeaTunnel Source | Backup, export, cross-graph migration, and continuous reads |
Testing Guide: For running toolchain tests locally, please refer to HugeGraph Toolchain Local Testing Guide
DeepWiki provides real-time updated project documentation with more comprehensive and accurate content, suitable for quickly understanding the latest project information.
Source repository: apache/hugegraph-toolchain
3.2.1 - Graph visualization
Hubble provides a Web interface for HugeGraph data, schema, queries, and imports. Start with a standalone deployment without PD, then read the distributed differences when needed.
- Hubble basics with standalone RocksDB: startup, sample graphs, modeling, imports, and queries.
- Hubble with an HStore cluster: PD discovery, GraphSpaces, and cluster operations.
3.2.1.1 - Manage an HStore Cluster with Hubble
This guide highlights the key differences between HStore + PD distributed deployments and standalone RocksDB.
For general graph modeling, data import, and query workflows, see the Hubble standalone guide.
Content aligns with the Toolchain, Server, PD, and Store master branches (all currently 1.8.0).
The main repository’s docker/docker-compose-hstore.yml
provides complete orchestration for PD, Store, Server, and Hubble. Follow the adjacent
Docker README to prepare .env and generate the local Hubble configuration,
then launch services from docker/ without maintaining separate Compose files.
The guidance below focuses on connectivity and operations; ensure prerequisite credentials and service readiness from the README are met.
Docker latest is a moving tag. Screenshots assist in UI navigation; verify deployed versions via image digests and build details.
Metrics and permission APIs vary by version.
The screenshots show the HugeGraph Hubble interface in action; features and workflows are identical in both English and Chinese.
Connect to a distributed cluster
Hubble still manages graph data through the Server graph API. In distributed mode, it discovers Servers through PD and collects cluster information from PD and Store. Hubble does not read or write graph data directly in Store.
flowchart LR
    H[Hubble] -->|Graph API| S[Server]
    S -->|Graph reads and writes| T[Store]
    H -.->|Discovery and cluster information| P[PD]
    H -.->|Node metrics| T
Generate Hubble configuration. Prepare
.envin the main repository’sdocker/directory following the Docker README.The script reads
HG_PD_AUTH_SECRET_KEYfrom.envand writes its value asoperations.pd.passwordinto the generated filedocker/conf/hubble/hstore.local.properties. Edit this generated file to adjust connection or operations settings (do not overwrite the tracked.exampletemplate), ensuringoperations.pd.passwordmatches the PD secret. Compose mounts this file read-only into the container; do not edit inside the container. Both.envand the generated file contain secrets and should not be committed to Git. Re-running the script overwrites the generated file, requiring custom settings to be reapplied.Start the services. Use the same
docker/directory and confirm Server registration and Store readiness.
For separately deployed services, follow the PD deployment guide and
HStore deployment guide. A source or binary Hubble deployment instead uses the package’s
conf/hugegraph-hubble.properties. These settings match the official minimal topology; use backend-reachable addresses for other deployments:
| Setting | Purpose | Bundled value |
|---|---|---|
pd.enabled | Explicitly enable PD mode; server.direct_url is not used in this mode. | false |
cluster | Cluster name used for Server discovery; it must match the registration. | hg |
pd.peers | PD gRPC addresses, separated by commas. | 127.0.0.1:8686 |
pd.server | PD REST address for cluster operations, not a list of gRPC peers. | 127.0.0.1:8620 |
Distinguish between the two ports: 8686 is for gRPC and 8620 is for REST. Do not interchange them, and use container service names or reachable IPs
rather than 127.0.0.1 for cross-container traffic.
The bundled package sets pd.enabled=false. If omitted, the fallback default is true, so declare this setting explicitly in both standalone and distributed
setups.
After editing configuration: restart the Hubble process for source or binary deployments; for Docker Compose, recreate the Hubble container from docker/
to reload the mounted configuration (retaining the project name and all -f arguments):
In the Hubble UI, you do not need to configure a Server host and port for each graph.
Organize graphs and permissions with GraphSpaces
A GraphSpace groups graphs, Schema templates, and access permissions. For example, create sales and research spaces
so each team can work with its own graphs. Modeling, importing, and querying within a space follow the standalone guide.
Create and adjust a GraphSpace
With Server authentication enabled, creating, editing, and deleting GraphSpaces require super administrator access.
Start with a globally unique GraphSpace name, an optional display alias, and the maximum graph count.
For example, use research as the API identifier and “Research_graph” as the display alias.
The name cannot change after creation. The alias and description can change; aliases do not participate in URLs or permission matching.
Choose GraphSpace administrators from existing accounts.
“Advanced deployment and resource limits” includes CPU and memory limits for graph query/write services and asynchronous compute tasks, plus the storage capacity limit. These deployment quotas neither report current usage nor resize existing containers.
Defaults are 100 graphs, 64 CPU cores and 128 GB of memory for each of the graph and compute services, and 1000000 GB of storage. Keep the defaults for a container trial. Configure Kubernetes namespaces, Operator images, and algorithm images only for the corresponding deployment or compute use.
Select a space before opening a graph. Check the current graph after switching spaces, especially when spaces contain identically named graphs. The list reflects account access. If a space is missing, check membership permissions before creating more graphs.
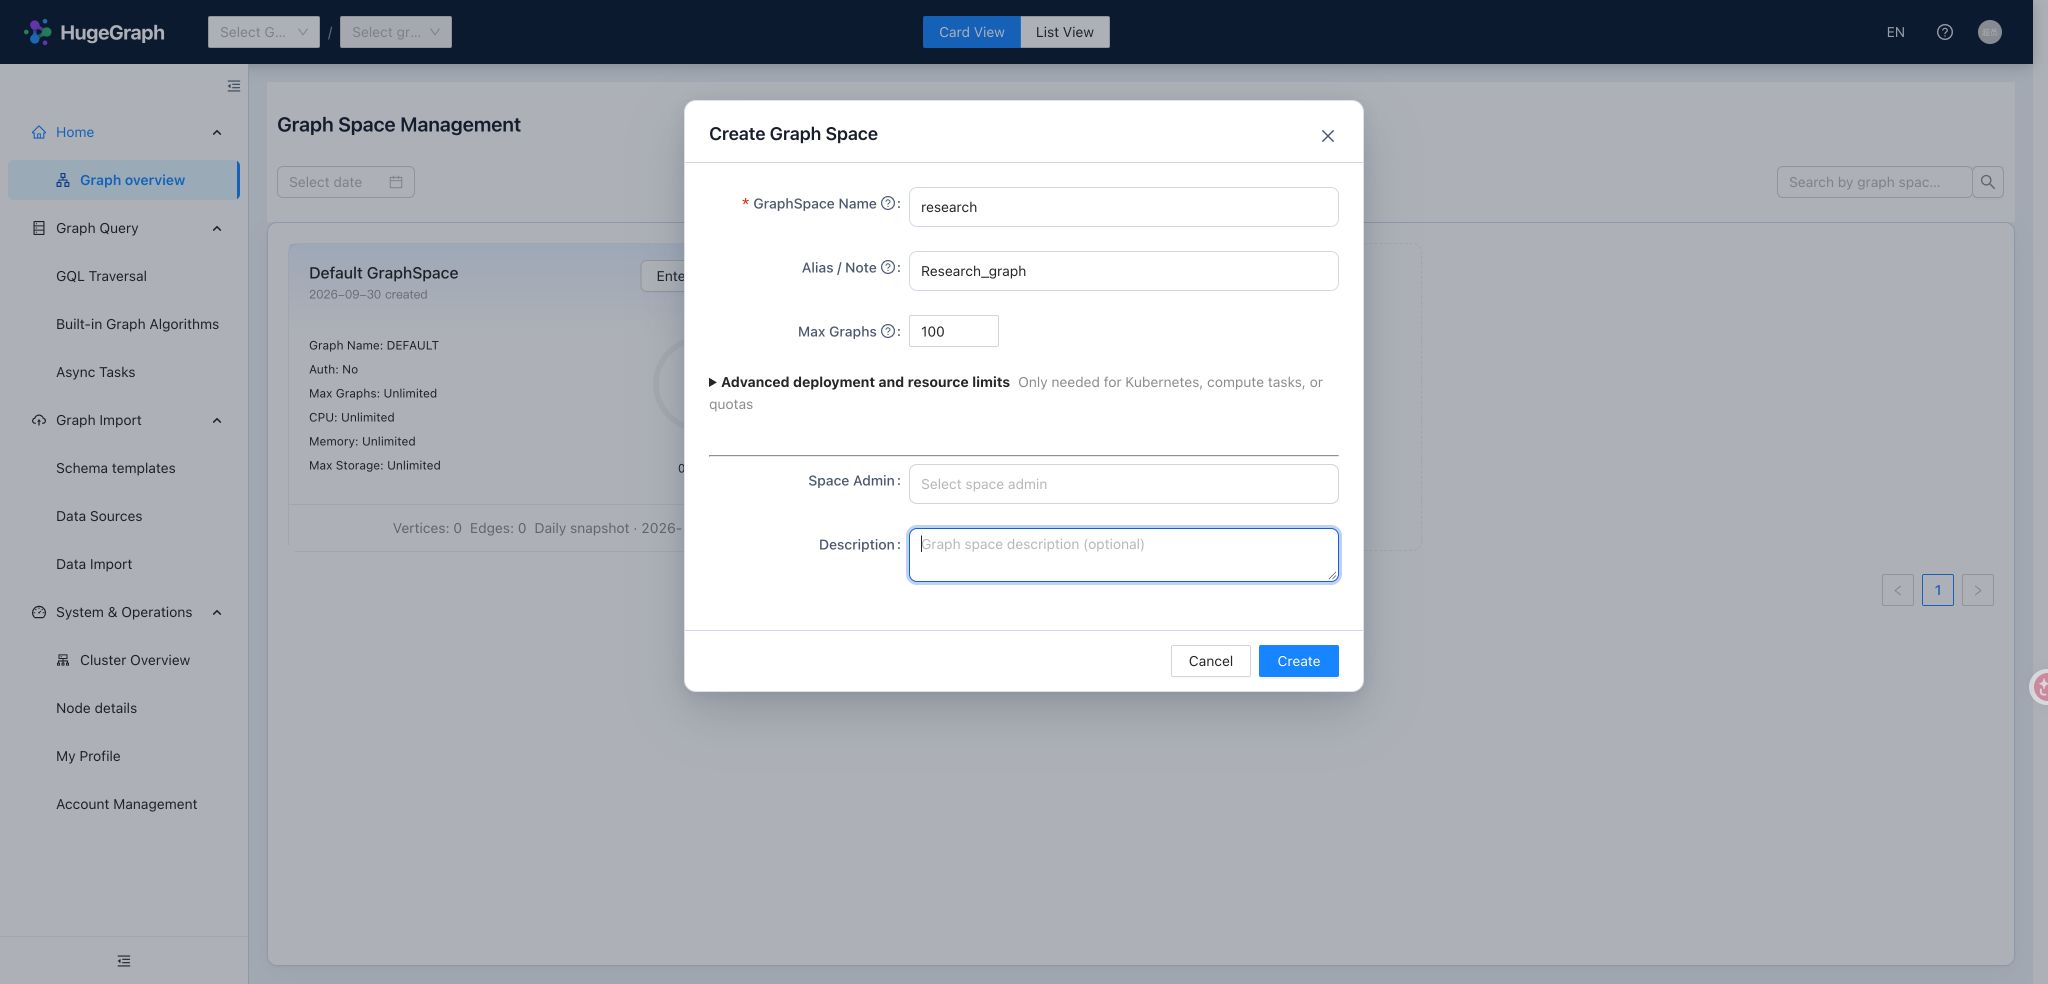
Reuse Schema templates
User-defined Schema templates require PD mode and persist reusable Groovy Schema within a GraphSpace.
When several business graphs share vertex labels, edge labels, and indexes, save the model as a template and select it when creating subsequent graphs.
For example, a user template in research can be reused for new graphs in that space. After switching spaces, select a template belonging to the new space.
User templates differ from the built-in sample templates in the main guide: built-in templates help explore preset models, while user templates preserve your own models for future use. A template is not an import of data; loading sample data is a separate graph creation choice. With Server authentication enabled, creating a user template requires write access to its space. Updating or deleting it also requires ownership or the corresponding administrative permission. Anonymous mode does not enforce per-user permissions or template ownership checks. Standalone mode does not provide user template management.
Assign access to a GraphSpace
For account creation, login, and personal details, see the standalone guide. Distributed mode adds “Manage GraphSpace members” to assign permissions between existing accounts and selected spaces. Servers supporting permission presets provide these common choices:
| Preset | Intended user | Scope |
|---|---|---|
| GraphSpace read-only | Users who inspect and query graph data | Selected spaces. |
| GraphSpace read-write | Users who model, import, and maintain graph data | Selected spaces. |
| GraphSpace administrator | Owners managing a space’s members and graph resources | Selected spaces; does not grant GraphSpace creation/editing or cluster operations access. |
| Super administrator | Operators managing accounts, GraphSpaces, and the cluster | Global; assign according to responsibilities. |
An account may have different access in different spaces, such as read-write in research and read-only in sales.
Accounts and space memberships are managed separately; removing a member does not delete the global account.
After creating an account, continue directly to assigning space access. When changing an existing membership, check the selected space and preset
and preserve permissions still needed in other spaces. Enabling pd.enabled grants no permissions;
legacy custom roles on older Servers are not interchangeable with these presets.
See Server authentication and authorization.
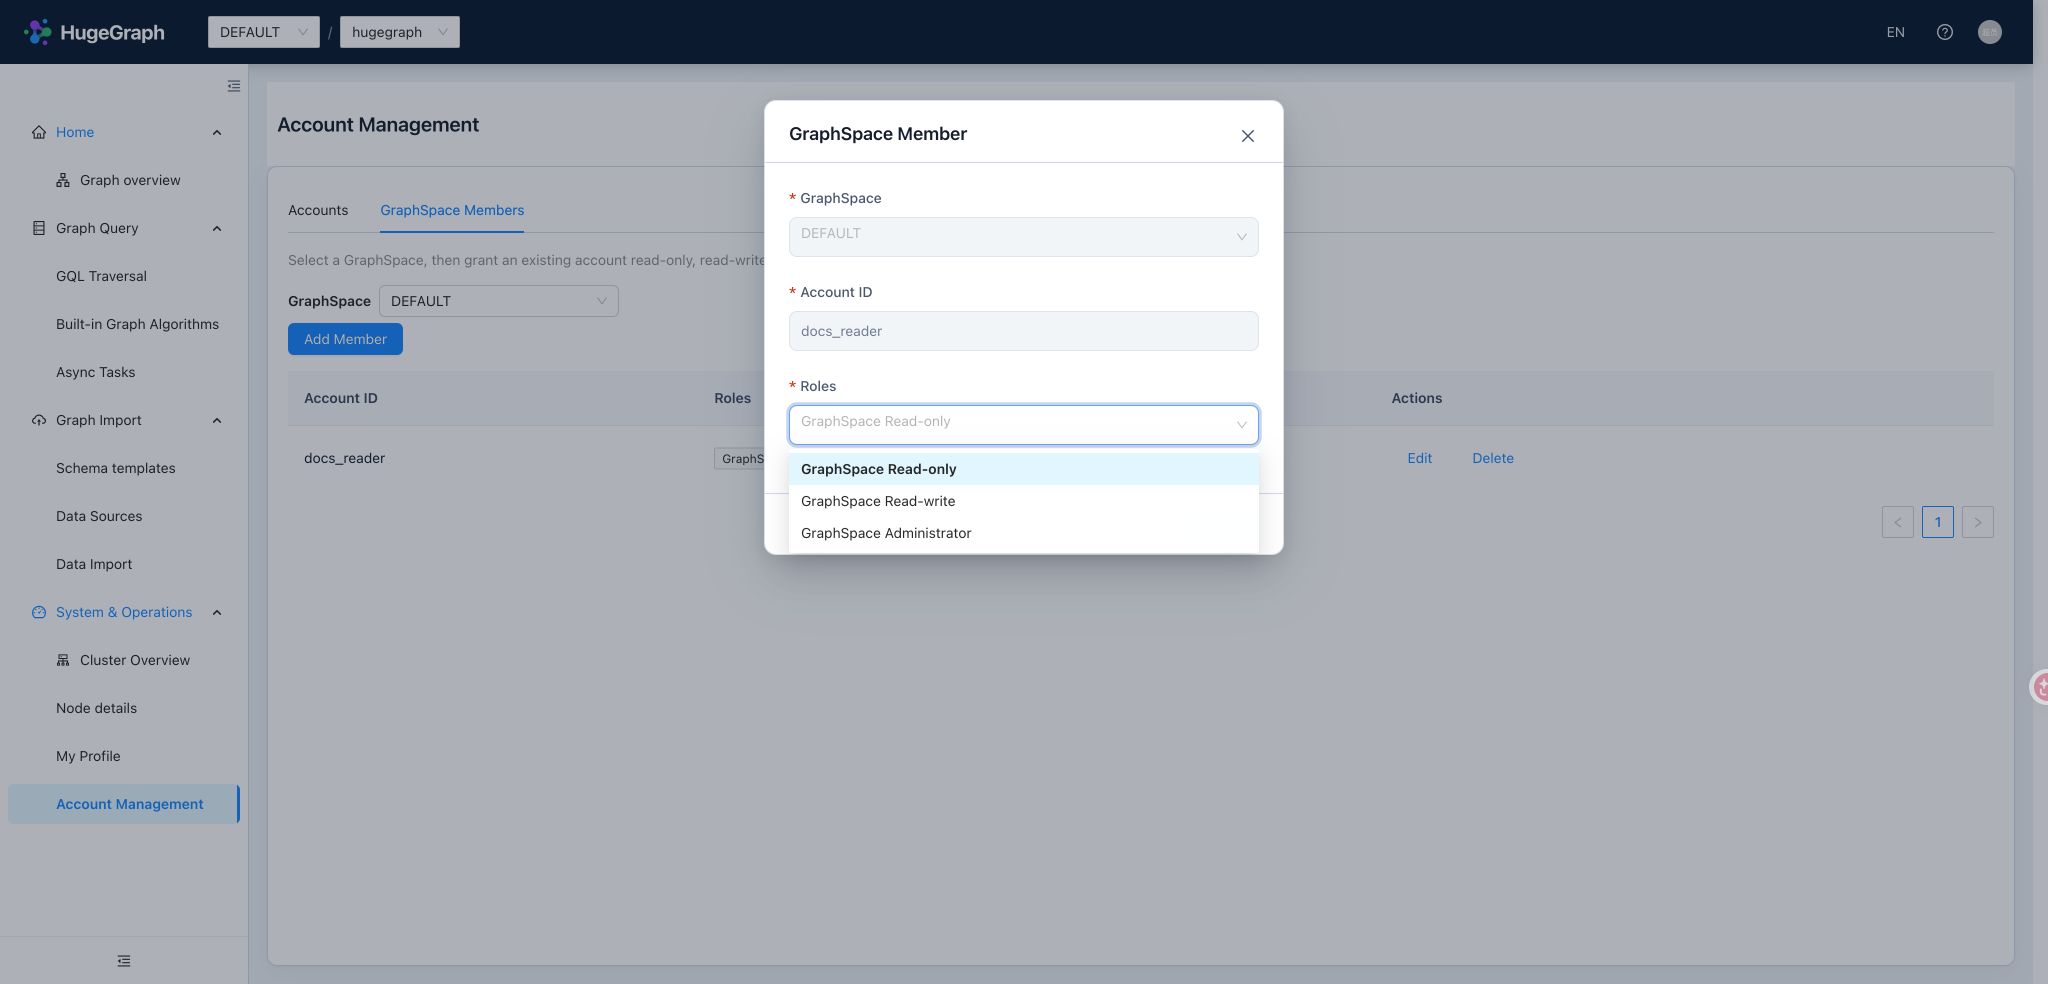
Locate problems through the cluster overview
The overview presents Server → PD → Store in one topology. Switch to the node list to filter by type, status, or name. PD Leader, online Store count, graphs, partitions, replicas, and data size help identify cluster scale and nodes requiring attention. Partitions and replicas describe data distribution. Data size is observed usage, distinct from a GraphSpace’s configured storage limit.
Start with cluster and source status, then inspect an affected node. UP indicates a successful collection from the source;
DEGRADED indicates a cluster or partial source issue, and DOWN indicates that the corresponding probe failed.
Graphs may remain queryable when topology is available but some metrics are missing.
The UI distinguishes unsupported, unavailable, stale, and failed collections and includes observation times.
An empty value is not zero, and an older value is not a current observation.
Read node details
| Node | Main observations | Use |
|---|---|---|
| Server | Availability, JVM/CPU/memory, and backend metrics | Check the query/write entrypoint and resource pressure. |
| PD | Leader/Follower role, status, and runtime metrics supplied upstream | Check the metadata/scheduling entrypoint; do not infer a role when Leader information is absent. |
| Store | Partition and Leader partition counts, system/disk metrics, Raft group and enabled group counts | Inspect storage nodes and replica service and compare distribution across nodes. |
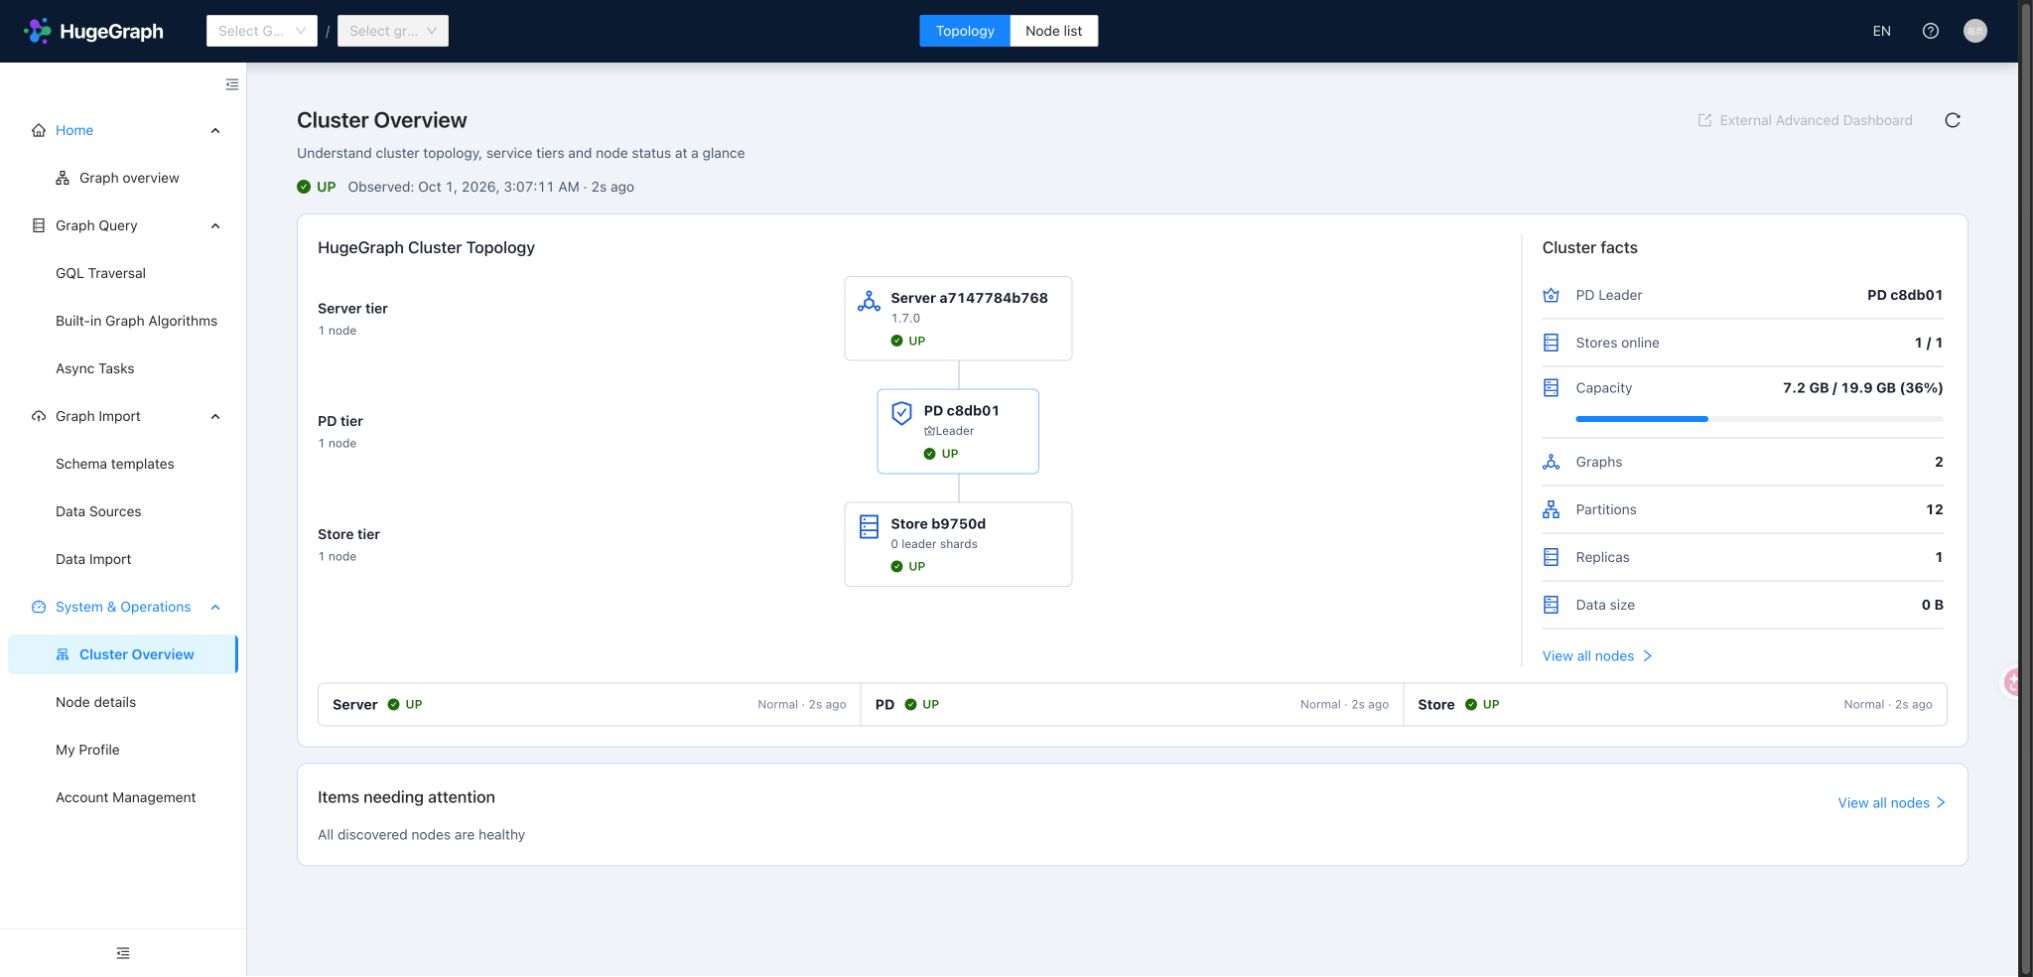
Start with cluster health and affected sources
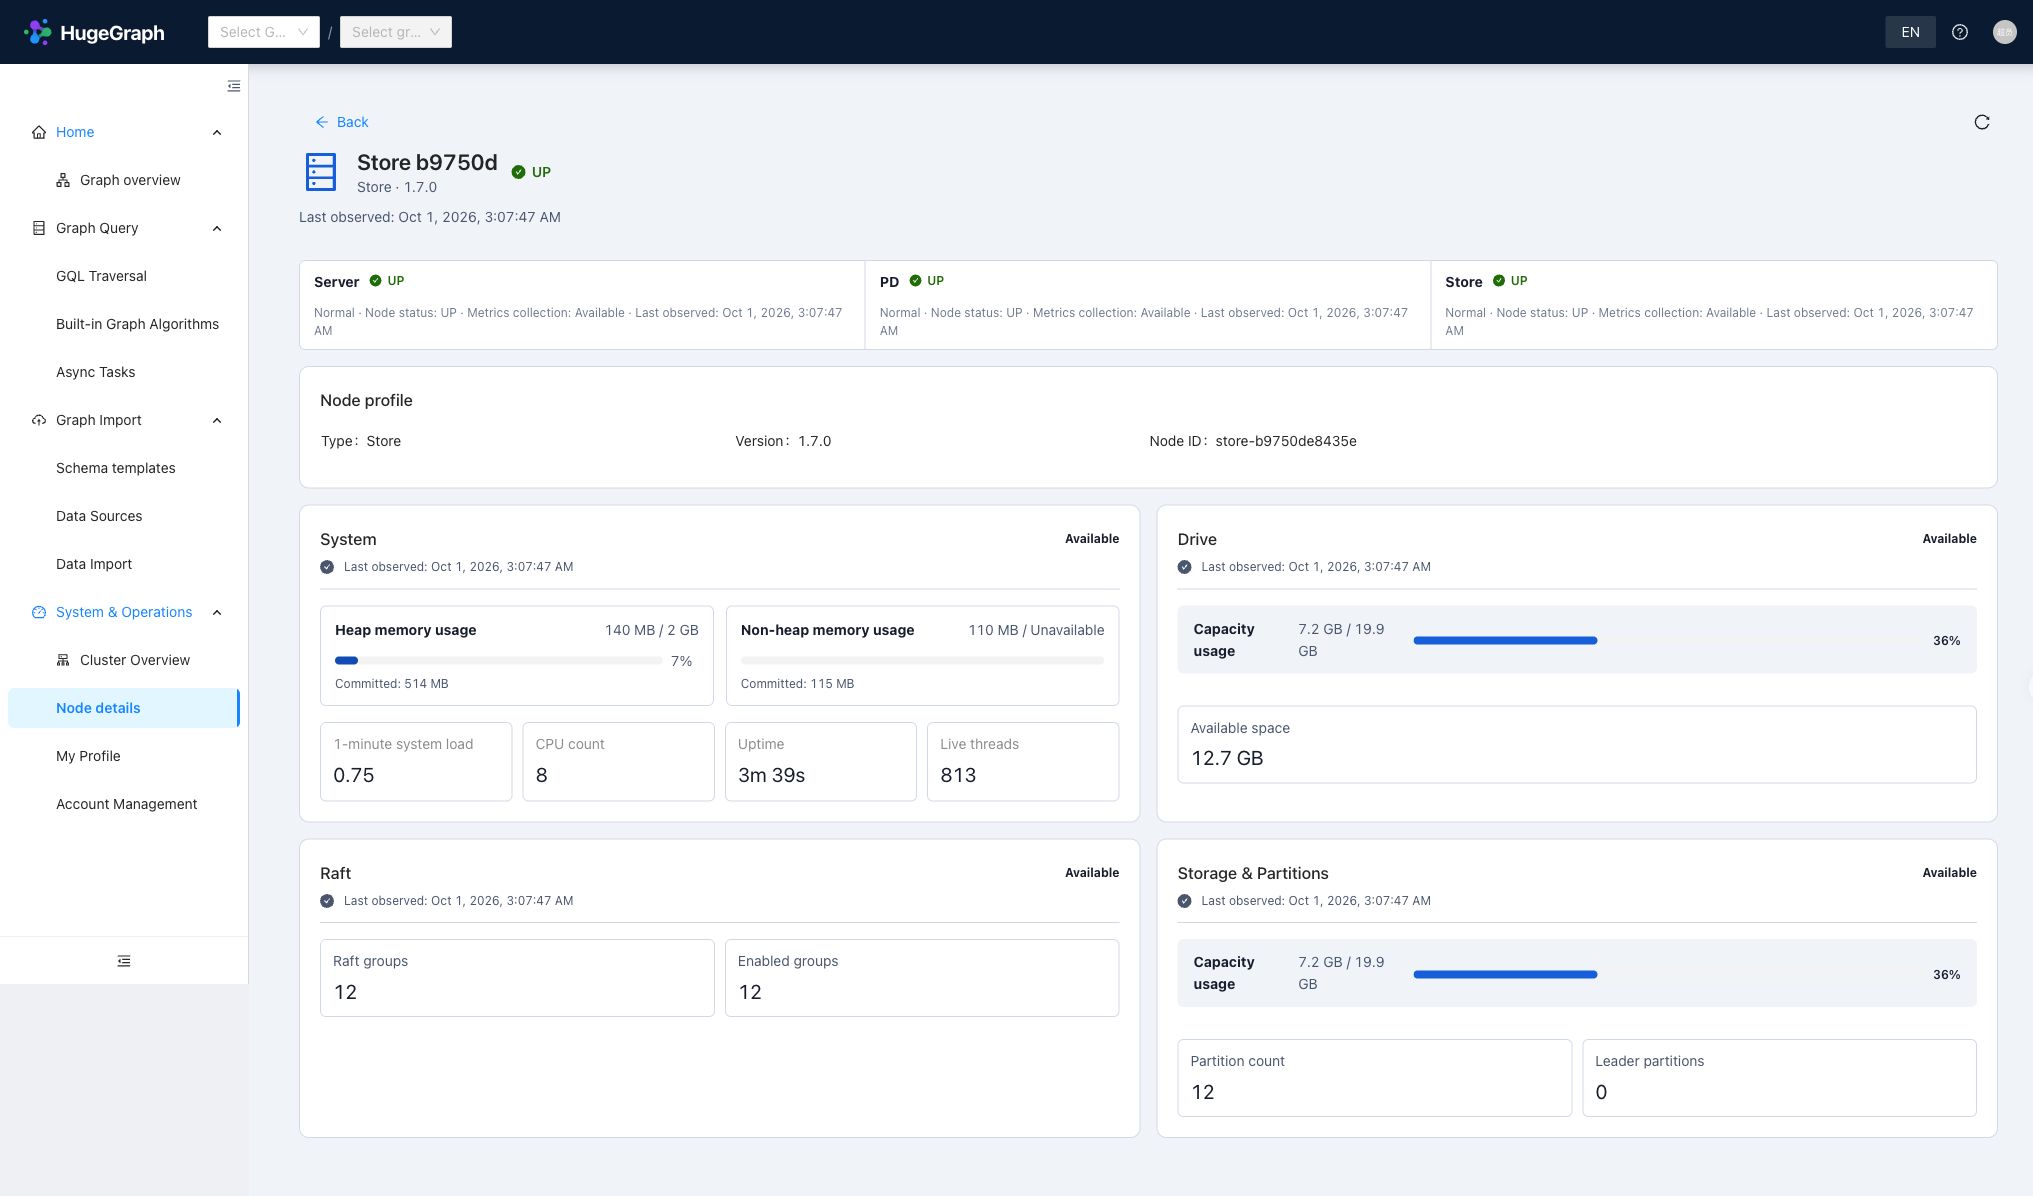
Inspect the affected Store node
The PD Leader and Store Leader partitions serve different purposes: PD coordinates cluster metadata, while a Store leads the respective data partition’s Raft group. Hubble displays upstream observations and does not replace a full Raft replica consistency check. Available metrics vary by component version.
With Server authentication enabled, cluster operations require a super administrator (ADMIN level).
GraphSpace administrators and ordinary members do not inherit cluster access.
Use container isolation, a trusted HTTPS entrypoint, Server authentication, and network allowlists; avoid publishing Hubble or component ports directly.
Configure operations access
Hubble’s backend uses the PD/Store operations credentials, separately from the Server account used to log in through the browser.
For Compose, edit the generated host file docker/conf/hubble/hstore.local.properties; other deployments use the Hubble package configuration.
The script-generated PD password must match the secret in .env. Configure the Store service account when Store authentication is enabled.
Do not include passwords in documentation, screenshots, or committed configuration:
| Setting | Bundled default | Configuration |
|---|---|---|
operations.pd.username / operations.pd.password | Username hubble, empty password | Match PD operations REST authentication. |
operations.store.username / operations.store.password | Username hubble, empty password | Set the service account when upstream Store REST authentication is enabled. |
operations.store.allowed_targets | [http://127.0.0.1:8520,http://[::1]:8520] | List trusted Store metric origins. |
For example, when a containerized Store advertises store:8520, set:
For multi-node clusters, list every trusted target origin. Each entry must use http or https with an explicit port and no path, credentials, or wildcard,
matching the Store metric target returned by PD. Adding an origin here only authorizes access—it does not register or discover nodes.
If topology renders but node metrics are missing, check Hubble backend connectivity and credentials to PD REST, verify the Store REST and metric addresses
returned by PD, and ensure targets are in operations.store.allowed_targets. A partially available overview indicates metrics collection was blocked for
specific sources, not that graph APIs are down.
3.2.2 - Graph Visualization with Hubble: Standalone Quick Start
Hubble is the HugeGraph Web management and graph visualization interface. Use a single workspace to manage schema, import data, run queries, and switch smoothly between graph, table, and JSON results. This guide uses standalone RocksDB Server + Hubble, without requiring PD or Store.
For use with an HStore distributed cluster, read the foundational operations here first, then consult the
distributed supplement.
This guide aligns with the Toolchain and Server master branches (currently based on 1.8, unreleased). Docker latest is a moving tag; use released versions for production deployments.
The screenshots show the HugeGraph Hubble interface in action; features and workflows are identical in both English and Chinese.
Do not expose unauthenticated Hubble or Server instances directly to the public internet. In production, use HTTPS, container isolation, authentication and authorization, and network allowlists.
Jump directly to a task below. If this is your first visit, start with the standalone deployment:
Start the two services and load the People & Software Demo Graph.
Run Gremlin and inspect graph, table, or JSON results.
Prepare CSV, map fields, and verify the imported records.
Start the standalone pair
Use the main repository’s docker/docker-compose.yml instead of writing custom Compose files. It already integrates RocksDB Server and Hubble with networking, health checks, and data volumes; see the adjacent README for deployment details.
Prepare the official Compose configuration.
If you already have the repository locally, navigate directly to its
docker/directory. Compose automatically mountsconf/hubble/standalone.properties, which pre-configurespd.enabled=falseandserver.direct_url=http://server:8080. Because both services communicate over a shared Docker network, you do not need to configure Server endpoints per graph. Start Compose directly fromdocker/so relative file paths resolve correctly.Hubble publishes on host loopback port
8088by default (controlled byHUBBLE_PUBLISH_HOST, defaulting to127.0.0.1), whereas Server publishes8080across all interfaces. For a local trial, set Server’sportsin Compose to127.0.0.1:8080:8080to prevent exposing unauthenticated ports beyond loopback (setHUBBLE_PUBLISH_HOST=0.0.0.0if remote access to Hubble is required).Start and check the services.
Choose an unused project name for this trial and keep these variables in the same terminal session:
Open Hubble.
Once services are healthy, open http://127.0.0.1:8088. When
HUGEGRAPH_ADMIN_PASSWORDis unset in.env, Server permits anonymous access and Hubble opens the homepage directly. If authentication is enabled, configure an admin password and JWT secret in.envas described in the Docker README, then sign in with a Server account (Hubble has no independent user database). Profile and account management options appear only when authentication is enabled and the account holds requisite permissions.
Use latest to explore recent features; pin a released image version or digest for production. Official release archives are on the
download page.
Screenshots help locate controls. Verify actual versions from the deployed image digests and build information.
Compose’s server-data and hubble-data retain graph data and Hubble metadata respectively. For further persistence and production settings,
see the Server deployment guide.
Home: find the right starting point
Home groups the workspace into graph overview, data preparation, and graph queries. Use it to understand the workflow,
then return to any section through the sidebar. The top graph selector determines the target of queries, schema operations, and async tasks;
check the current graph after changing pages. Standalone mode has only the DEFAULT GraphSpace and needs no PD configuration.
| Section | Purpose |
|---|---|
| Graph Overview and details | Select a graph, load samples, inspect its size, then model or query it |
| Schema configuration | Define properties, vertex/edge labels, and indexes |
| GQL Traversal | Write queries and explore graph, table, and JSON results |
| Built-in Algorithms | Explore neighbors, paths, and similarity with parameter forms |
| Async Tasks | Track background queries, schema changes, and index operations |
| Data Source Management | Upload files or configure external readers |
| Data Import | Map source fields to the graph model and run or schedule ingestion |
| Profile and Account Management | Update personal details/passwords and manage accounts or space members according to permissions |
| Operations | Inspect Server nodes; PD mode also includes cluster overview and PD/Store nodes |
Interface at a glance
Compare the graph overview, schema, and query workspaces below. Click a screenshot to view the original.
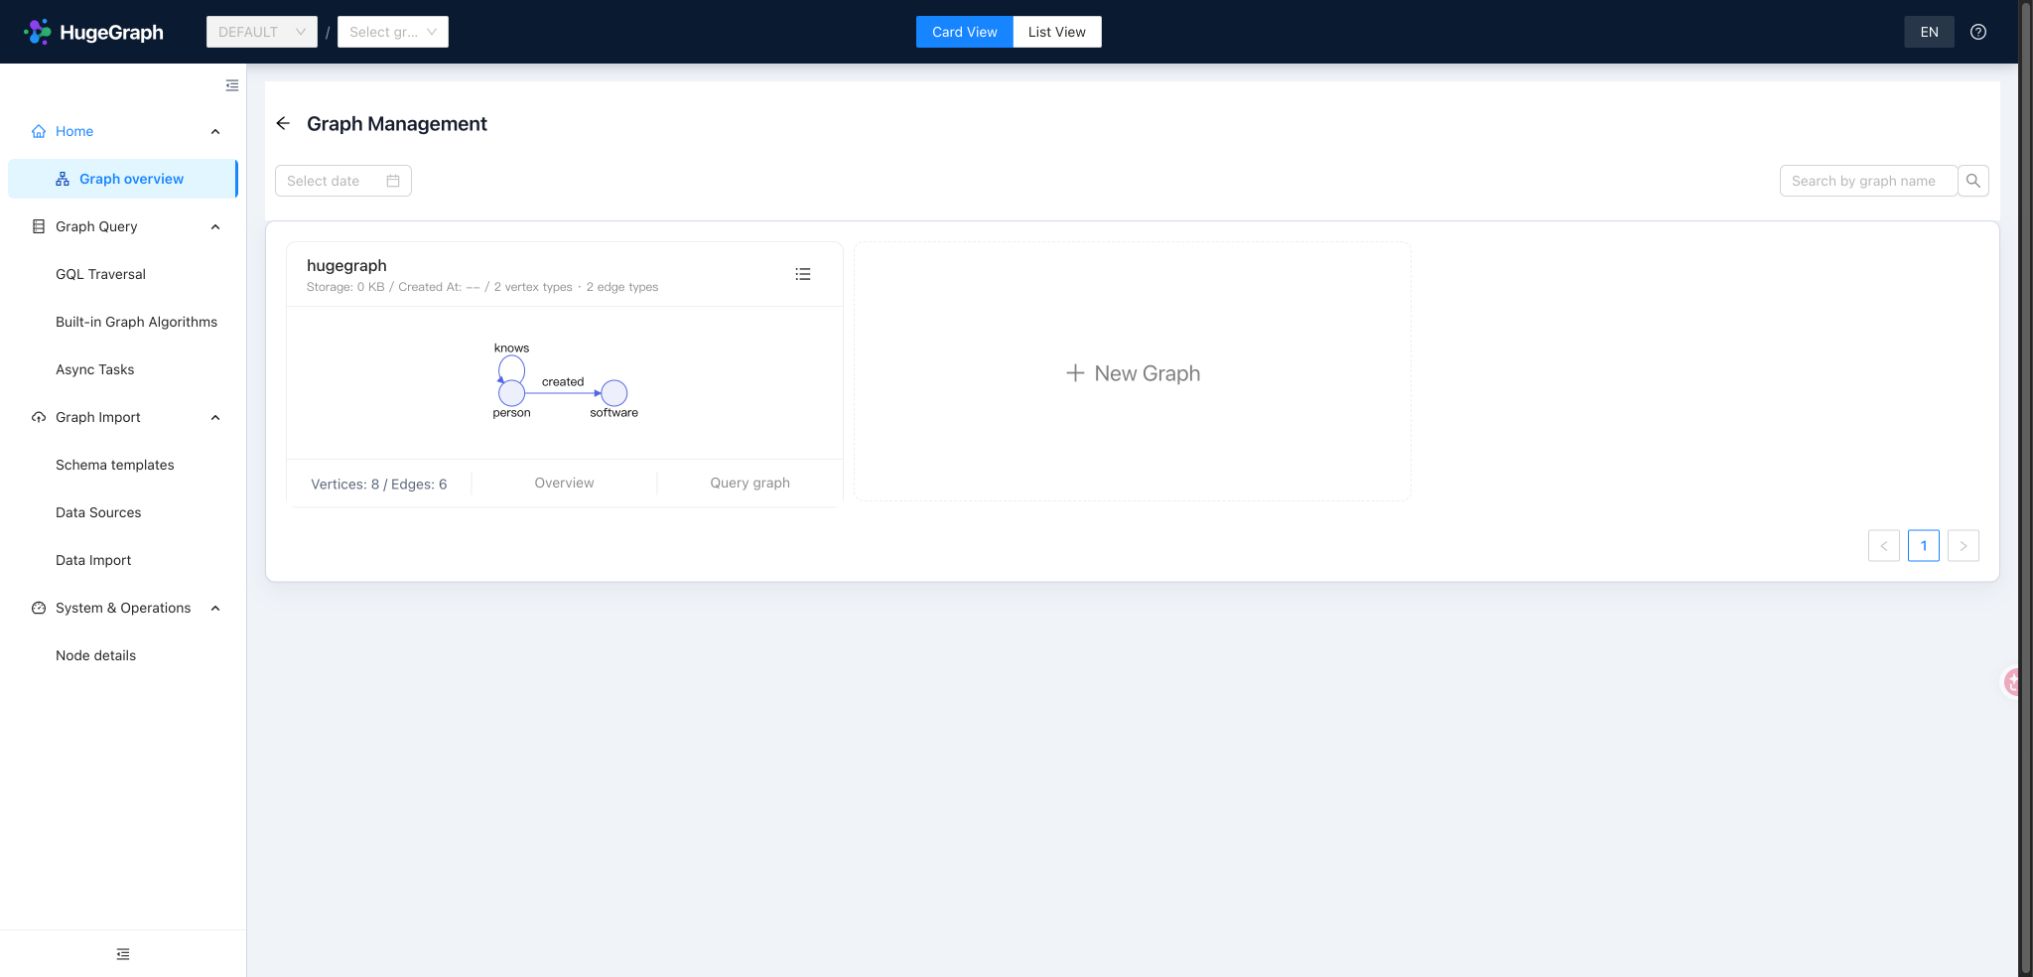
Graph overview: select a graph and inspect sample data
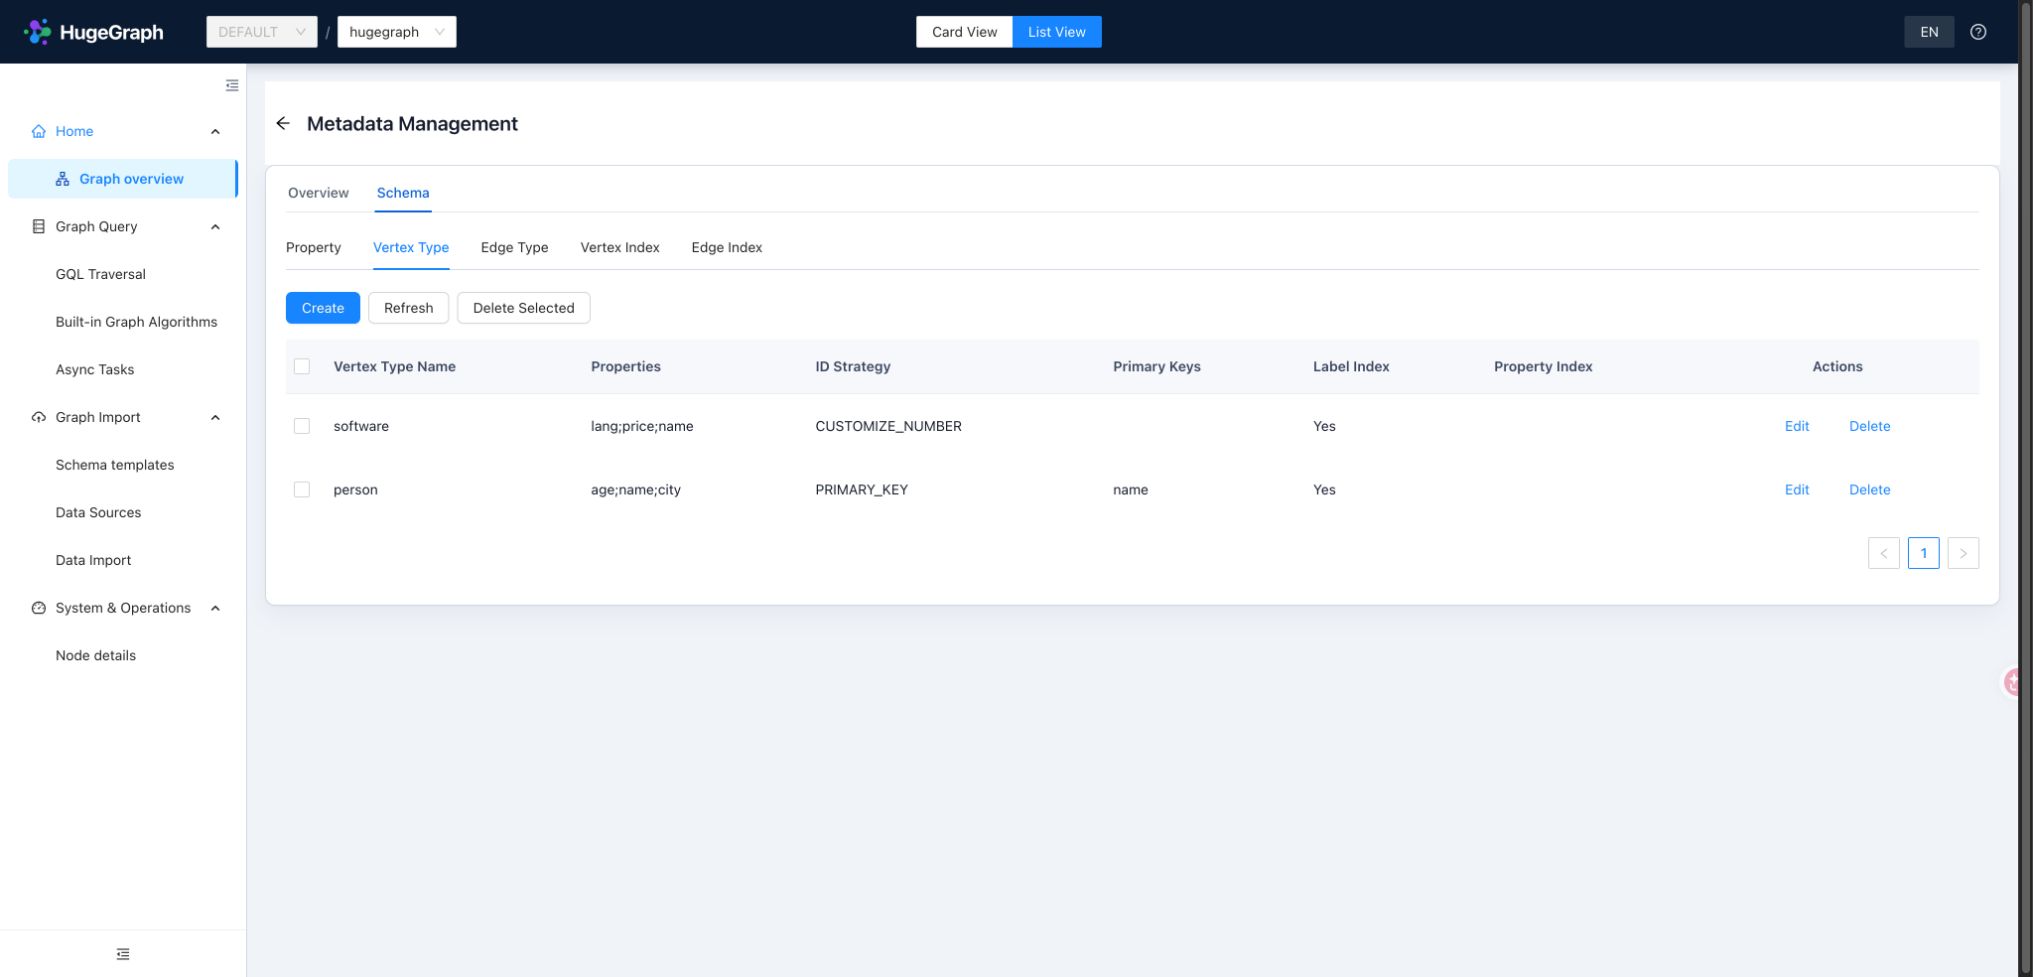
Schema: inspect vertex labels, primary keys, and ID strategies
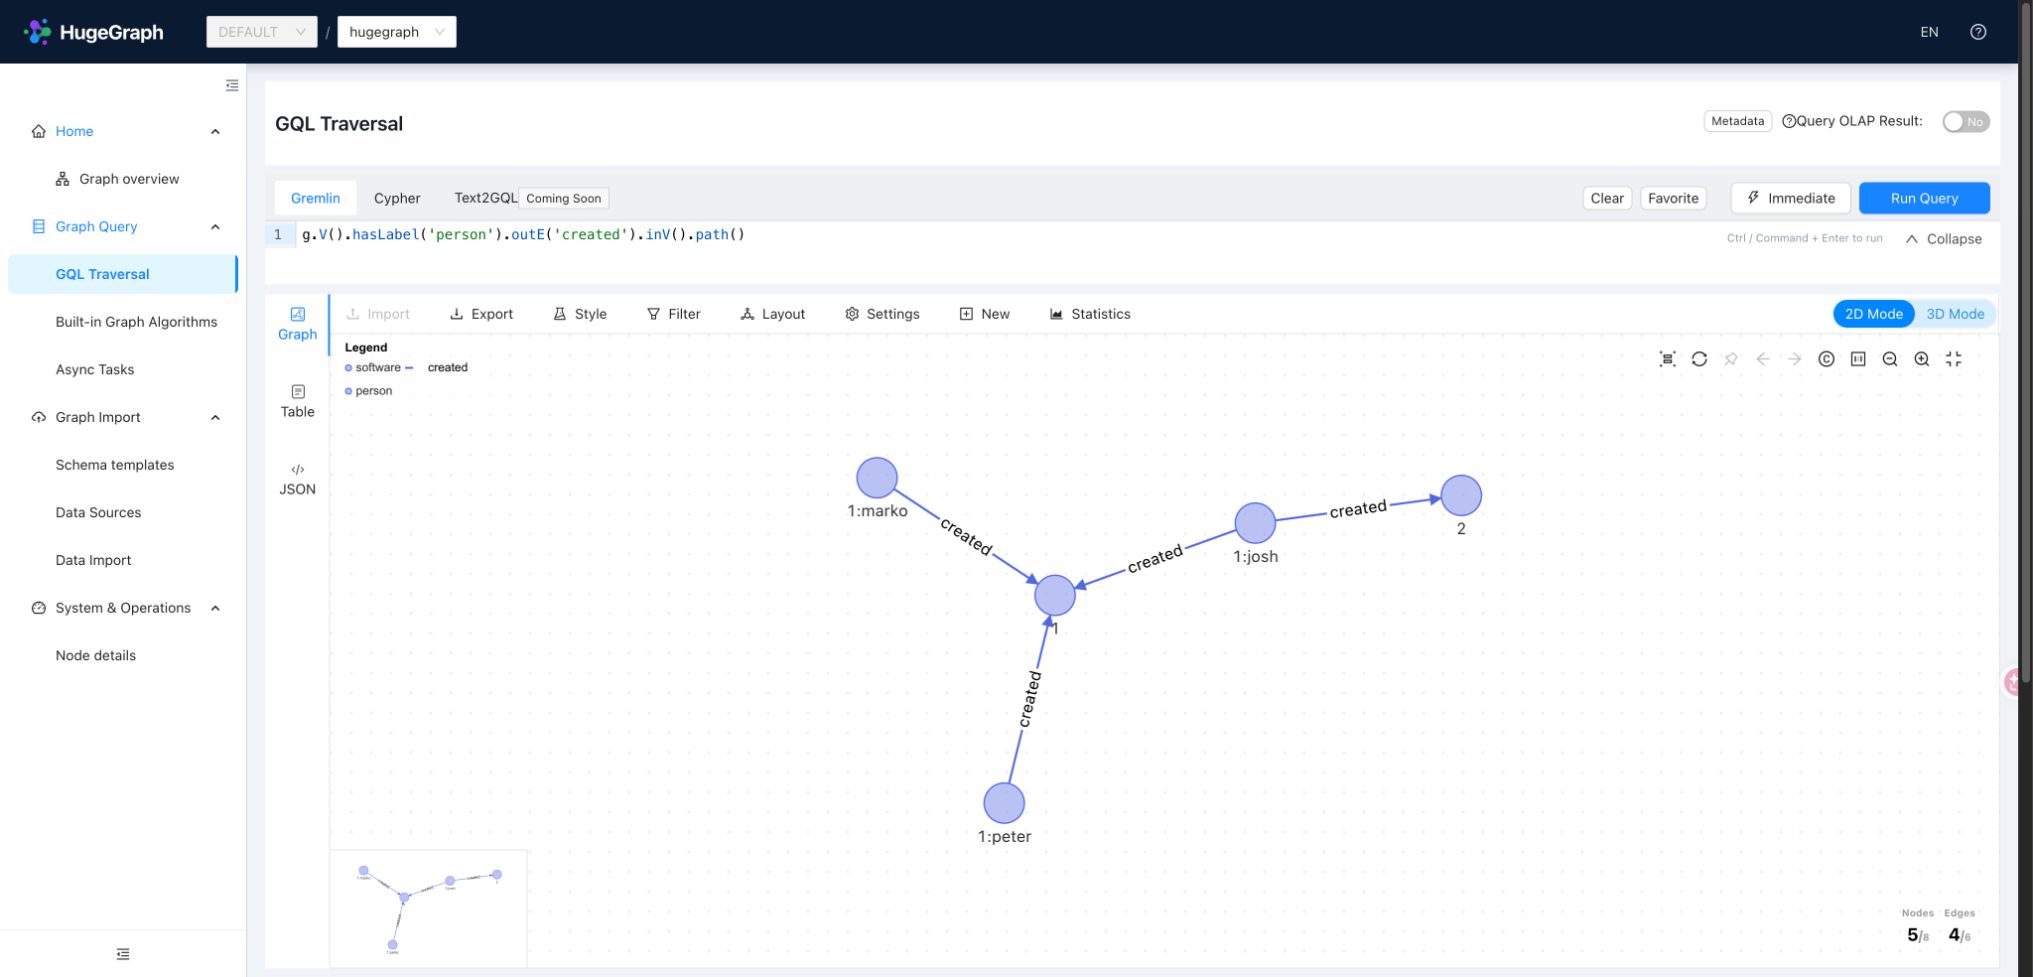
Graph query: run Gremlin and explore graph results
Graph Overview and details: get to know a graph
Select the default graph hugegraph in Graph Overview. Click the graph card or details to view its schema structure and data statistics,
or quickly jump to modeling, data import, or query pages.
Load the People & Software Demo Graph from the graph card’s More actions menu. The sample automatically provisions the required schema and imports sample records without clearing existing data. For your initial trial, load it into an empty graph to avoid name collisions. The remaining examples use this graph to explore connections between people and software.
To create a new graph, click the create button on the overview page and provide a graph name, optional alias, and schema template or sample data. Connection details are managed globally by the Hubble backend, so you do not re-enter Server host or credentials per graph. User-defined schema templates require PD mode; see the distributed supplement.
Schema modeling: define the shape of your data
Schema defines allowable properties, vertex labels, and edge labels, while determining vertex ID strategies and query index rules. Under Schema configuration, use the list view to manage definitions or the graph view to inspect vertex-edge topology visually.
| Definition | What to decide |
|---|---|
| Properties | Data type and cardinality; distinguish numbers from text |
| Vertex labels | Properties, nullable properties, ID strategy, and primary keys |
| Edge labels | Source/target labels, properties, frequency, and sort keys |
| Vertex / edge indexes | Index type and fields that match filtering and range queries |
In the person/software sample: person derives its ID from the primary key name, with nullable age and city;
software uses custom numeric IDs; the created edge label links people to software. This matches the
Loader example.
When modeling your own graph, create elements in order: Properties → Vertex labels → Edge labels → Indexes. Deleting labels or creating/rebuilding indexes typically submits background asynchronous tasks; verify their completion in Async Tasks.
GQL workspace: query and explore relationships
Open GQL Traversal and confirm hugegraph is selected. The workspace puts the query editor and graph display together,
with immediate or async execution, query favorites, and reusable execution history. Start with this Gremlin query:
Inspect person properties in table or JSON view. To visualize the people-to-software relationships, run:
Graph results support 2D / 3D. Click a vertex or edge to inspect its ID, label, and properties; double-click a vertex to expand its neighbors. Layout, styling, and filtering help highlight relevant relationships, while export helps share results. Use New to create elements, or edit existing data when authorized. Layout adjustments, styling, and display bounds only affect the local canvas; adding or editing elements via the UI or executing Gremlin write statements modifies underlying Server graph data.
Press Ctrl / Command + Enter to execute queries quickly. Immediate execution is ideal for interactive exploration; submit long or resource-intensive
queries as background async tasks. Cypher is available when supported by the backend Server.
The keyboard shortcut acts on whichever input currently has focus: generating a query from
the natural language prompt, or running statements in the code editor.
Text2GQL natural-language queries
Describe your query requirement in the Natural language input. Text2GQL combines the current graph schema to generate read-only Gremlin or Cypher and execute it automatically. Generated statements can be edited freely (read-only safety checks still apply before execution). In Async mode, both generated and handwritten queries can be submitted as background tasks. Inputs automatically restore the graph’s most recent query prompt without running it, and the execution history retains original natural-language questions.
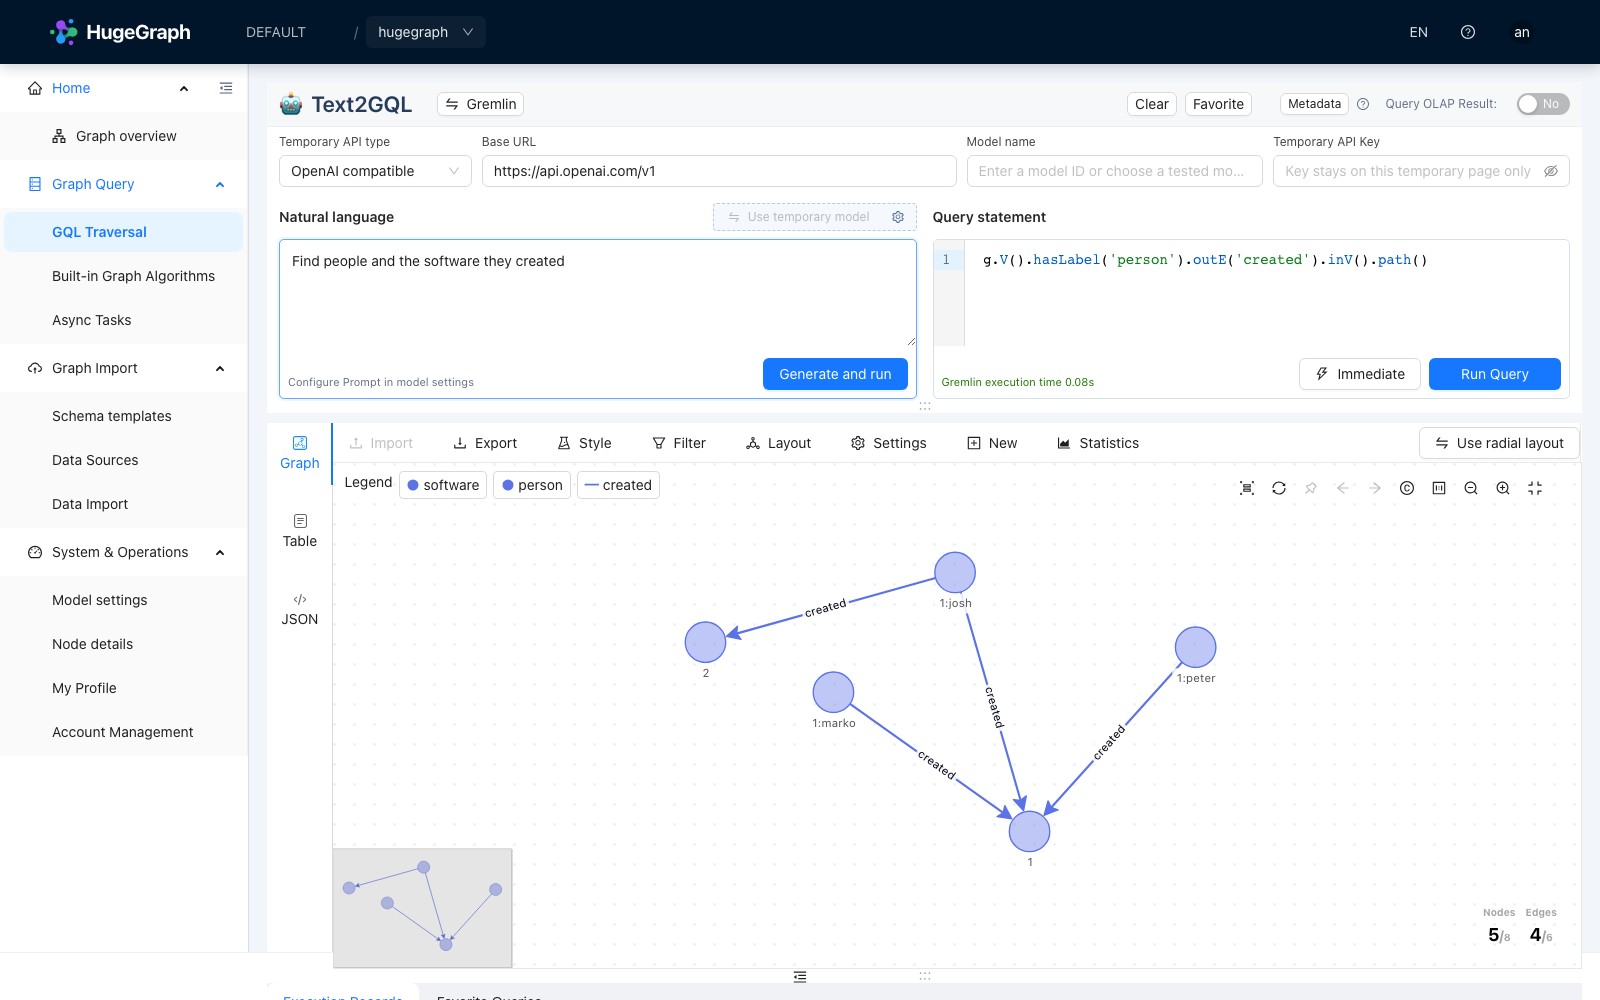
Unconfigured model; handwritten query
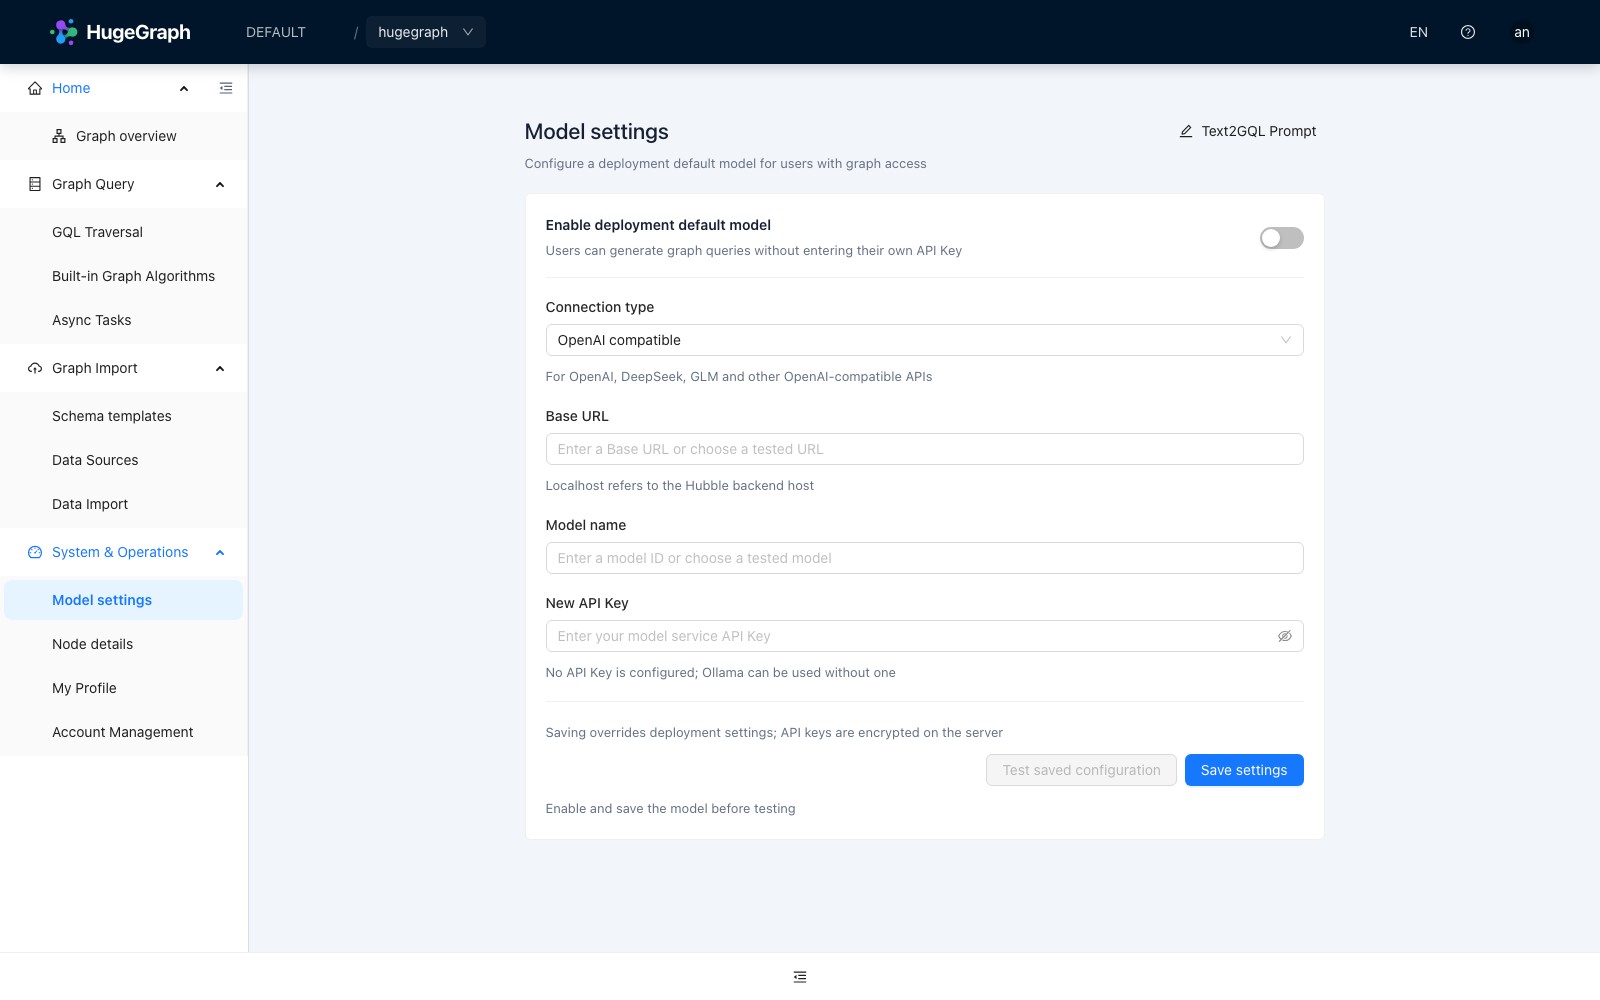
Model settings
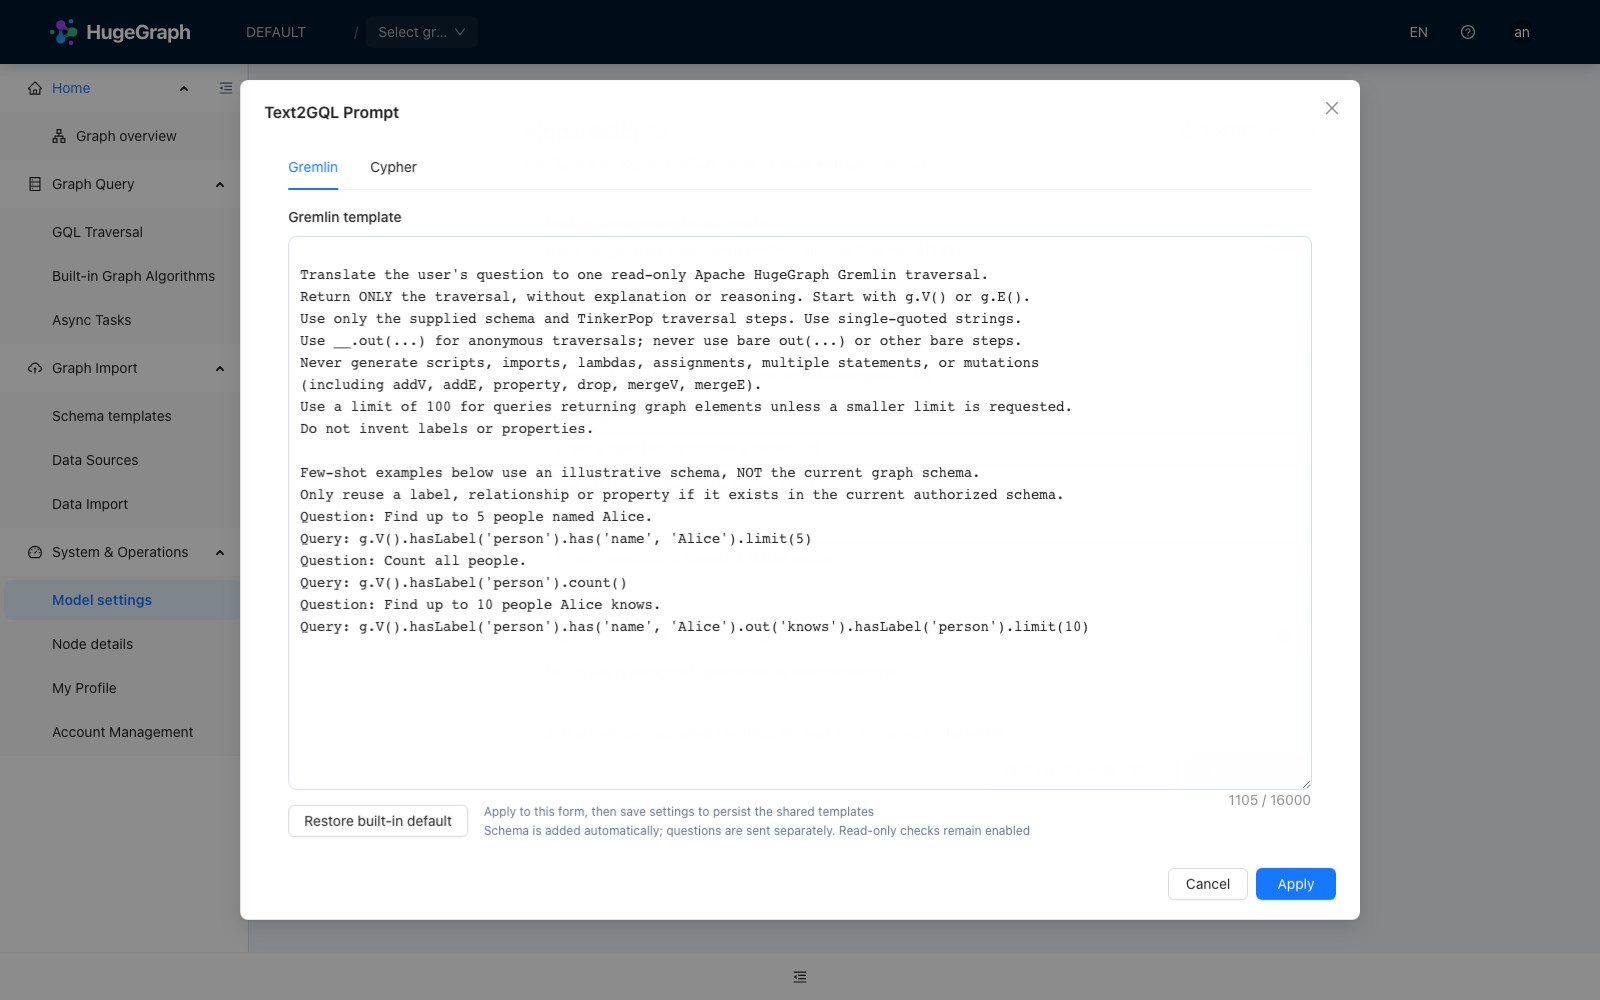
Text2GQL Prompt
The screenshots show an unconfigured model. The graph results come from handwritten Gremlin; connect a working model before generating natural-language queries.
| Model source | Configuration and storage |
|---|---|
| Use built-in model | Configure under System & Operations → Model settings; Keys are encrypted in H2 and never returned to the browser |
| Use temporary model | Enter the API type, Base URL, model name, and temporary API Key on the query page; the Key clears on refresh |
Choose OpenAI compatible for OpenAI, DeepSeek, GLM, and similar services, or Ollama (local) for local Ollama; unauthenticated Ollama needs no Key.
The Base URL must be reachable from Hubble’s backend; container localhost refers to that container. Public endpoints require HTTPS, while plain HTTP is
accepted only for loopback or private-network models; when changing the Base URL in Model settings, supply a new Key or explicitly clear the saved Key.
Administrators with model-settings management permission manage shared settings. When Server authentication is disabled, anyone who can access the
deployment can manage them.
Under model settings, click Text2GQL Prompt in the header to customize Gremlin and Cypher generation rules and few-shot examples. Click Apply and then save model settings to persist templates to the H2 database for both built-in and temporary models. The current graph schema is appended automatically during generation.
When backing up the Hubble H2 database, always back up the master-key file (data/text2gql-master.key by default); losing it prevents decrypting saved Keys.
Query generation sends only the prompt, graph schema, and necessary error-correction context to the model provider—it never transmits graph query results.
Browsers can remember frequently used Base URLs and model names, but temporary API Keys remain in memory only and clear on page refresh.
Input footers show model generation time and query request time separately. Async submission time excludes background execution.
Built-in algorithms: explore with parameter forms
Use Built-in Algorithms when you prefer a form to writing traversal code. Search for an algorithm and supply its parameters. Neighbor exploration answers what surrounds a vertex, path algorithms connect two vertices, and similarity/ranking algorithms compare or select vertices. Start with a known vertex ID and limit direction, edge labels, depth, and result size before attempting broader computation.
Forms provide parameter guidance and documentation links, and restore common parameters when navigating away and back.
Results use graph or algorithm-specific panels. Consult the help and documentation links beside the algorithm title for definitions and parameters.
While the parameter form is focused, Ctrl / Command + Enter runs the current algorithm.
OLAP batch algorithms require external compute services such as Computer or Vermeer. The two containers in this example provide online graph operations, not those compute services.
For example, select K-neighbor (GET) with source=1:marko, max_depth=1, and limit=20.
After parameter validation, use the run button on the card or the form shortcut to explore one-hop neighbors.
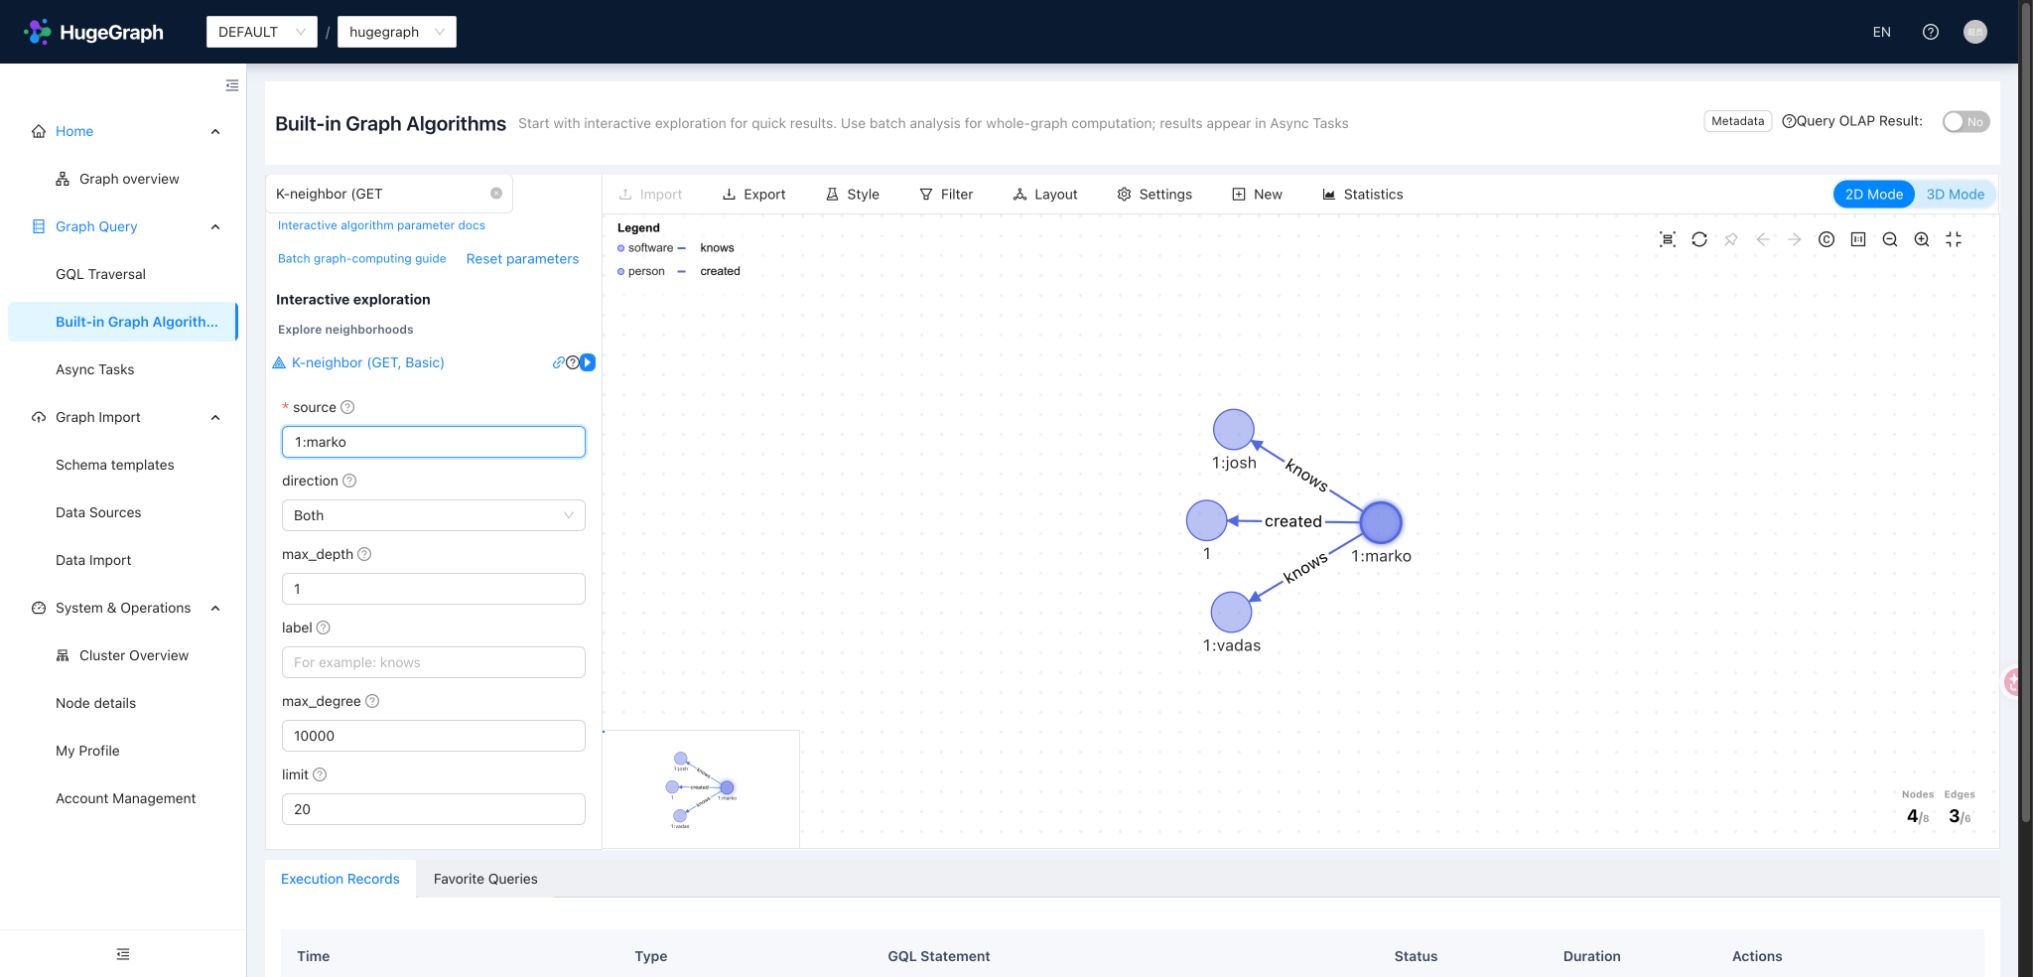
Async Tasks: confirm background results
Async Tasks lists background work for the current graph, including async queries and some schema/index operations. Filter by task type and status, inspect IDs, creation times, and execution states, open successful query results, or expand failure information. Completed task records can be deleted where the interface permits. These tasks are separate from import execution history.
For example, submit g.V().count() asynchronously, confirm success in the list, then inspect the returned count.
A successful submission means the request was accepted, not that computation or indexing has finished.
Use task errors and Server logs together when diagnosing failures.
Data Source Management: prepare the input
A data source defines where data comes from and how to parse it, and can be referenced by import tasks. Hubble supports FILE, HDFS, JDBC, and Kafka, each with its own path, connection, or subscription settings. FILE is an easy starting point: upload a file, configure its format, delimiter, encoding, and header, and check column names before mapping. Hubble configuration controls upload limits and permitted extensions.
Save this UTF-8 file as people.csv for the person example:
Create a FILE data source and upload it. Select CSV (comma separation and UTF-8 by default), with column names name,age,city.
Header, delimiter, and encoding belong to the data source, not mapping settings. The source fields must match the file.
Data Import: turn fields into a queryable graph
Data Import converts source rows into vertices and edges. Its four configuration sections identify the target, select fields,
map them to the graph, and choose execution timing. Use the preceding data source to create a person import into DEFAULT / hugegraph:
- Basic Information Select the target graph, new data source, and a task name.
- Source Fields Select
name,age, andcity, moving them to the selected field list. - Mapping Fields Add a
personvertex mapping; use Auto Match for same-name properties, then verify types. - Schedule Choose one-time execution and confirm to submit the task.
person uses PRIMARY_KEY, so do not select a separate ID column. Custom ID strategies require an ID column;
AUTOMATIC lets Server generate IDs, while PRIMARY_KEY derives them from mapped primary-key properties.
Edge mappings need source/target fields that follow the corresponding vertex ID rules.
The task list manages configuration and execution entry points; execution history in task details shows each instance’s state, count, and errors. Periodic schedules and real-time Kafka tasks are also available; choose an execution mode compatible with the source. After completion, verify the result in the GQL workspace:
The result should include both new people. Import counts are not necessarily counts of newly created vertices: reruns may update existing elements, and header processing can affect reader counts. If the import fails, check source fields, numeric types, nullable properties, and target schema. Use Hubble for small trials and HugeGraph Loader for production bulk ingestion.
Profile and account permissions
Hubble uses Server authentication and accounts, with no separate user database. Anonymous mode hides Profile and Account Management. After authentication is enabled, Profile shows the current account’s details and permissions and allows changing your password. Editing details such as a nickname requires Server support for the personal-profile API. Changing a password ends the current session; sign in again with the new password.
Standalone account management
In standalone mode, the administrator can create, inspect, edit, delete, and batch-create accounts. Ordinary standalone accounts created through Hubble receive read, write, delete, and execute permissions across all graphs; they are not read-only or isolated to one graph. Configure finer resource permissions through Server authentication and authorization rather than relying on GraphSpace presets.
GraphSpace permissions in PD mode
With a Server supporting default-role APIs, global accounts and space access can be managed separately. The administrator manages global accounts; a space administrator manages members only within authorized spaces. Ordinary members do not receive account-management or operations entry points. The following presets are for PD mode, and are not universally editable on older or standalone Servers:
| Preset | Scope and purpose |
|---|---|
SUPER_ADMIN | Global account, GraphSpace, and operations management; grant or revoke super-administrator access |
GS_ADMIN | Manage authorized spaces and their members, without granting other-space or global super-administrator access |
GS_READ_WRITE | Read and write graph data within authorized spaces, without managing global accounts |
GS_READ_ONLY | Read graph data within authorized spaces, without writes |
An account may have different permissions in different spaces. Select a space before adding an existing account or changing member permissions. Before replacing custom permissions with a preset, inspect the grants that need to be retained; complex permissions may not match a single preset. After changes, refresh permission context or sign in again and verify menus and space selection. Server still validates every request. Older Servers may hide or disable unsupported operations; a visible button alone does not establish resource authorization. See the distributed supplement for space management.
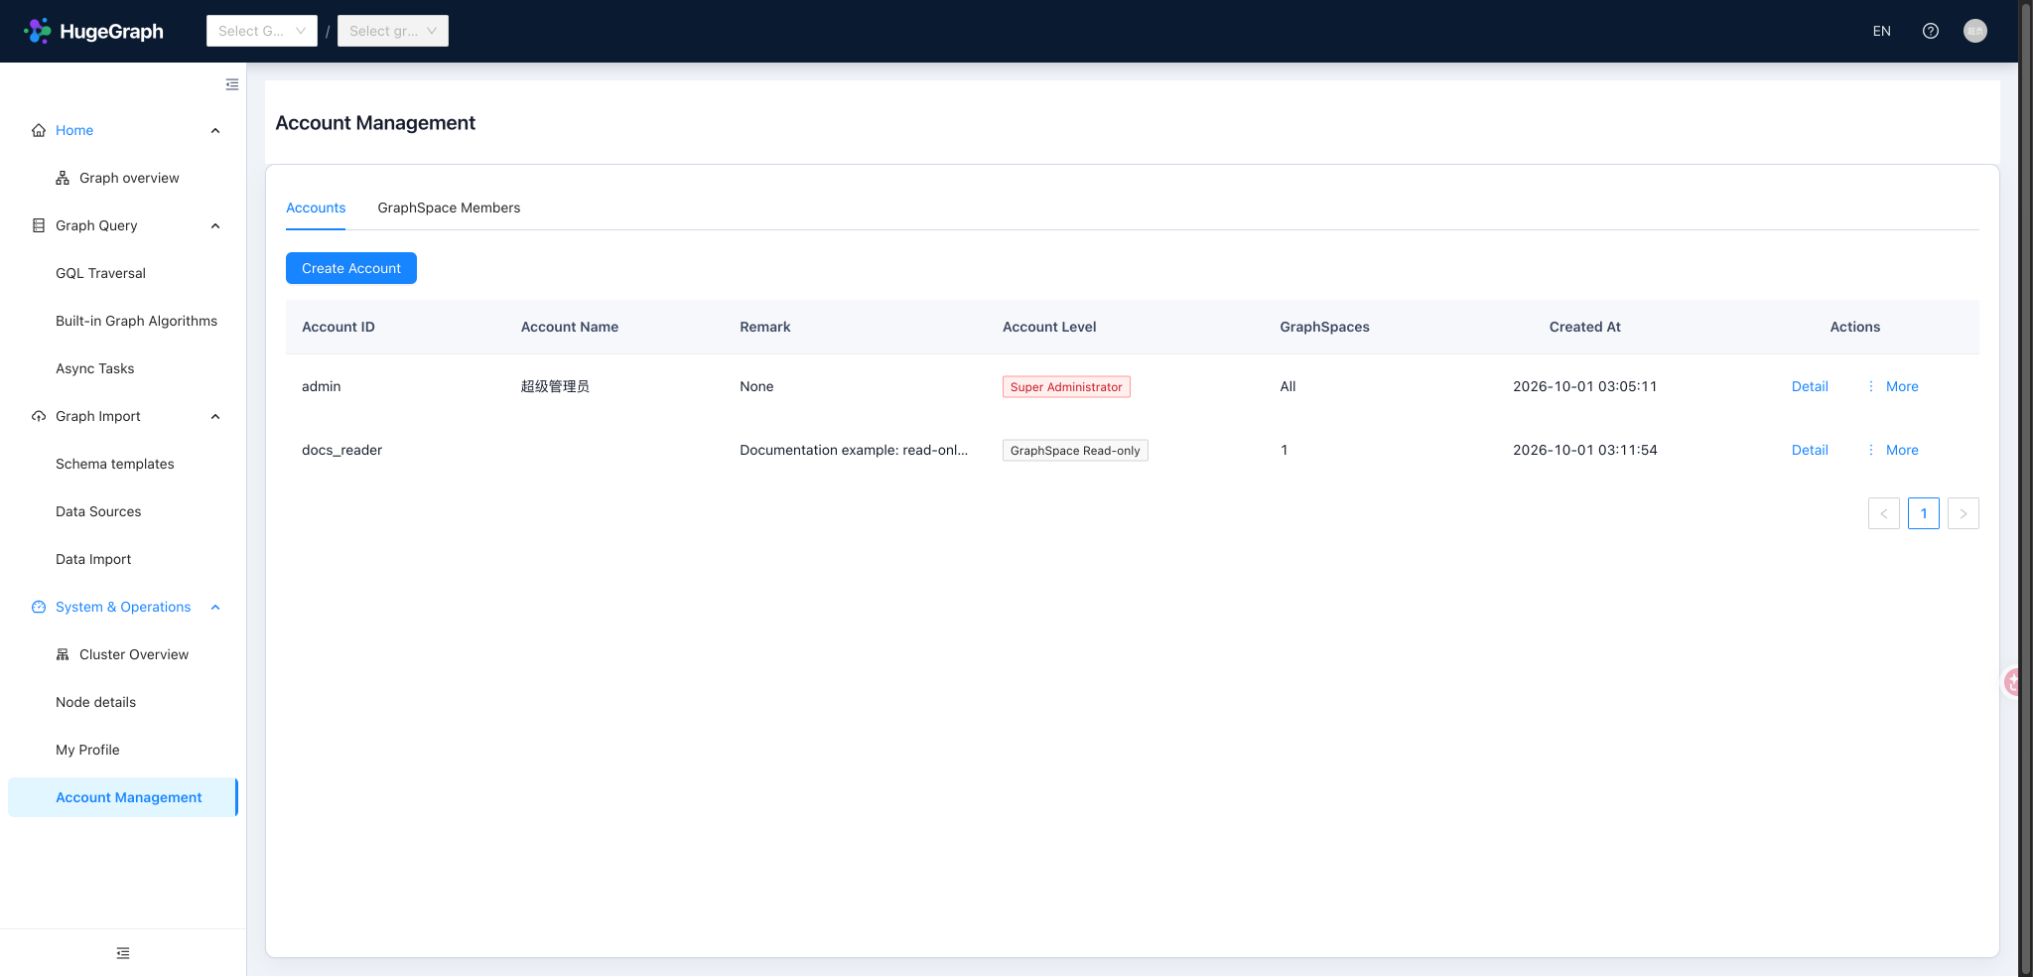
Operations: inspect the standalone Server
Standalone Operations provides Node Information for Server only, with no PD/Store nodes or cluster overview. Search nodes, filter health status, and open node details to inspect available version, system, JVM, and Server-backend metrics. When metrics are unavailable or stale, use collection state and the last successful observation time; a missing value is neither zero nor proof of health.
Anonymous mode can read operations information. With authentication enabled, operations are available only to administrators with the capability. This is an observation and diagnosis interface, not a start/stop or scaling console. The distributed supplement covers cluster overview and the PD/Store node hierarchy.
Keyboard shortcuts and graph interactions
Use the topbar shortcut-help button to see key bindings. Their scope differs: typing ? in an input does not trigger global help.
| Action | Key or gesture | Scope |
|---|---|---|
| Open / close shortcut help | ? | Outside inputs and editors |
| Execute query | Ctrl with Enter / Command with Enter | Query editor |
| Run current algorithm | Ctrl with Enter / Command with Enter | Algorithm parameter form |
| Toggle graph fullscreen | F | Click to focus the graph canvas first; not a global binding |
| Inspect element details | Click a vertex or edge | Graph result |
| Expand neighboring relationships | Double-click a vertex | Graph result |
Diagnose connection and result issues
| Symptom | Check first |
|---|---|
| The Hubble page does not open | Check container status and docker compose -p "$HUBBLE_DEMO_PROJECT" -f docker-compose.yml logs hubble |
| The page opens but graphs are unavailable | Server health, a server.direct_url reachable from Hubble, and a shared network |
| Login appears or write actions are missing | Server authentication and account permissions; Hubble has no independent authentication switch |
| Expected data is missing | Current graph, sample load result, matching labels/properties; distinguish canvas display from stored data |
| No cluster overview | This example has no PD; see the distributed supplement |
Configuration can affect displayed query size. gremlin.suffix_limit defaults to 250 and supplies .limit(N) appended to applicable Gremlin queries;
it is not a universal hard limit. gremlin.vertex_degree_limit (100) and gremlin.edges_total_limit (500) constrain expansion.
FILE uploads allow csv,txt by default, with 1 GB per file and 10 GB total. Override upload_file.* settings when needed.
Stop the trial or build from source
When finished, run this in the main repository’s docker/ directory:
This removes the project’s containers, network, named volumes, and anonymous volume, losing the sample data and Hubble import tasks.
To retain data, omit --volumes when taking the deployment down and reuse the same project name when starting it again.
Building current master requires JDK 17, Maven 3.9+, Python 3.9+, and stable Node.js 24 (at least 24.22.0), with pnpm 12.14.0 selected through Corepack. Maven no longer installs Node/Yarn automatically.
Follow the Java 17 migration instructions to install the Server SDK in an isolated Maven repository.
Follow the Hubble source-build procedure to install Python dependencies and build Client, Loader, and Hubble with that same repository (skipping tests).
Open the resulting
hugegraph-hubble/apache-hugegraph-hubble-*directory, configure Server connection settings inconf/hugegraph-hubble.properties, then start:
Current master uses a new H2 metadata database. Retain the old Hubble distribution and its data, and use a separate data directory for the new version. Old metadata has no automatic migration and cannot be reused directly.
The bundled configuration binds to localhost:8088. bin/stop-hubble.sh requests graceful shutdown before forcing termination on timeout.
For development and testing, see the Toolchain local test guide.
3.2.3 - Graph import
Choose an import tool when you need to write file, database, or message data into HugeGraph. Use Loader for a direct import, SeaTunnel Sink when an existing Source, Transform, and Sink pipeline should be reused, or Spark Connector from a Spark job.
3.2.3.1 - Import Graph Data with SeaTunnel Sink
SeaTunnel connects data sources such as databases and Kafka to HugeGraph. The connector has two parts: Source reads data and Sink writes data[1][2], with SeaTunnel transform components available between them. To export or migrate data from HugeGraph, see the SeaTunnel Source export and migration guide.
Version requirement: This guide targets SeaTunnel 3.0+. All examples use the
mappingsconfiguration available in SeaTunnel 3.0+.
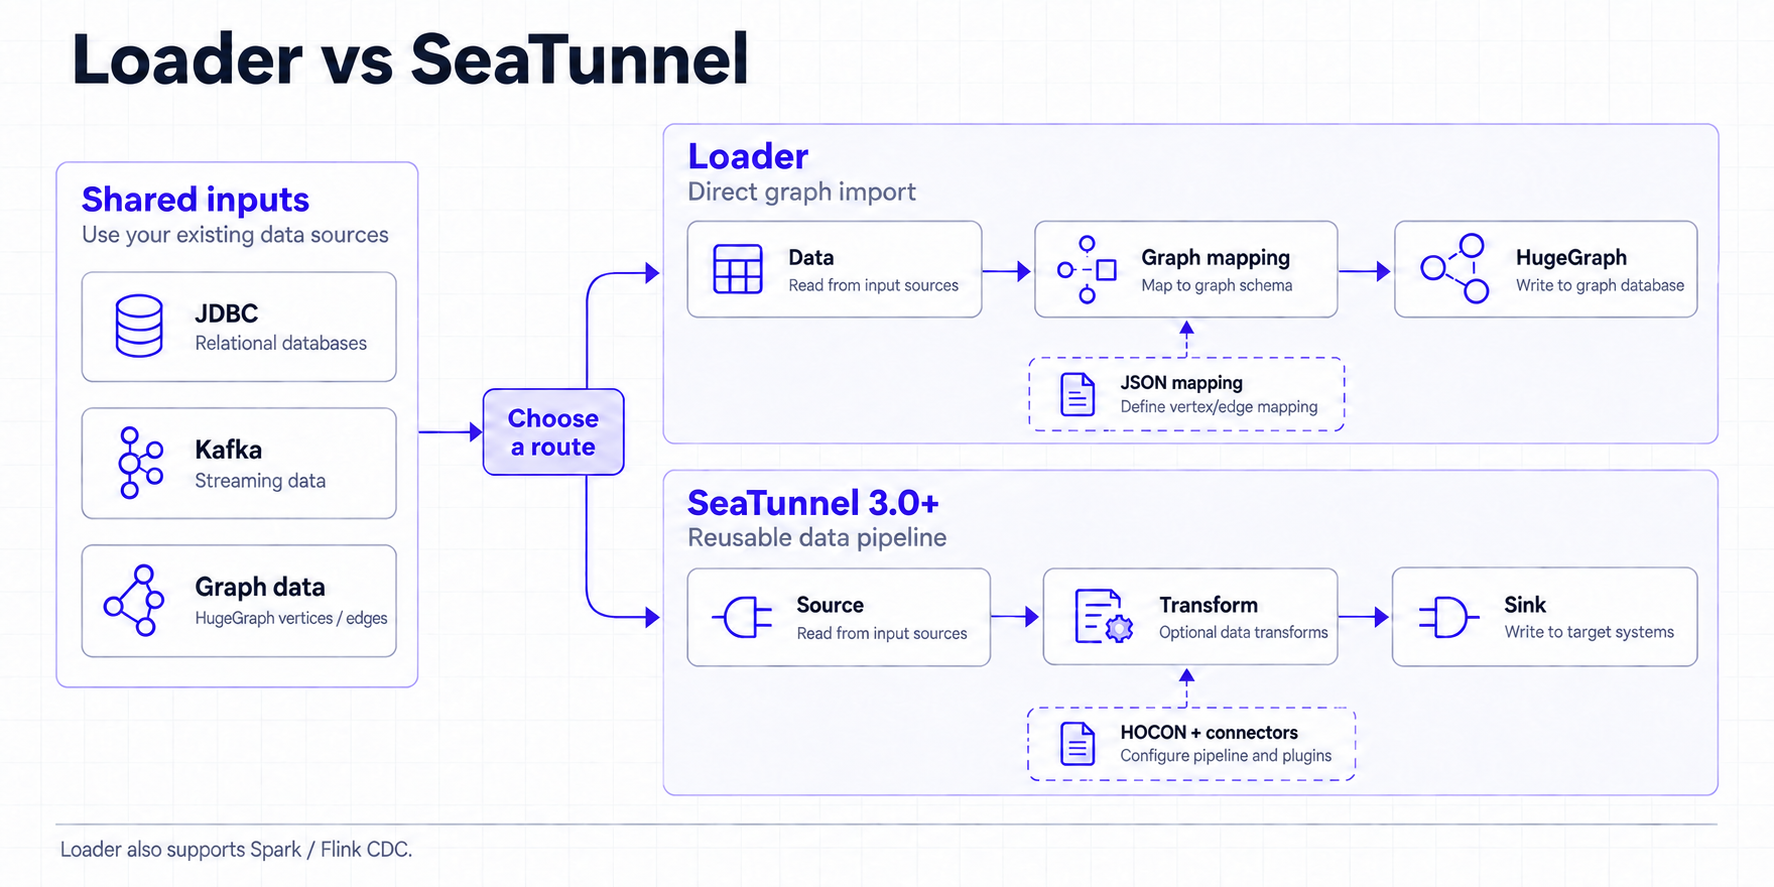
Click a diagram to view the original size.
1 Loader, Tools, and SeaTunnel
HugeGraph-Loader is suited to direct imports from common data sources. HugeGraph-Tools focuses on standalone graph management, backup, and export. SeaTunnel organizes a job as Source → Transform → Sink, so you can reuse existing connectors, transforms, and data pipelines.
Table legend
✅ Supported natively; ⚠️ conditional support or requires an extra component/external platform; ❌ not provided
| Comparison | Loader | Tools | SeaTunnel |
|---|---|---|---|
| Task coverage | ✅ Direct graph imports | ✅ Backup, restore, and export | ✅ Import, export, and migration with composable Source, Transform, and Sink stages |
| Job configuration | JSON mapping file describing the source, vertices, and edges | Command-line options and operations | HOCON job file[3] combining Source, Transform, and Sink |
| Default deployment | ✅ Standalone CLI; ⚠️ Spark Loader can extend it | ✅ Standalone CLI | ✅ Standalone; ✅ distributed |
| Execution engine | ⚠️ Mainly CLI; Spark Loader is a separate extension | ❌ Does not provide a Spark/Flink execution engine | ✅ HugeGraph Source and Sink support Zeta, Spark, and Flink[1][2][7][8][9][10] |
| Frontend and observability | ❌ No built-in frontend; inspect CLI logs | ❌ No built-in frontend; inspect CLI logs | ✅ Built-in Web UI job panel for task status and runtime information |
| Input and output | ⚠️ Focused on graph imports and common files, JDBC, Kafka, and similar sources | ⚠️ Focused on graph data and backup files in common storage | ✅ Dozens of connectors, including JDBC, Kafka, and SQL-CDC |
| Scheduling and resource management | ❌ No unified cross-task scheduling or resource allocation | ❌ No unified cross-task scheduling or resource allocation | ⚠️ Can integrate with DolphinScheduler for scheduling and task management |
| Simplicity | ✅ Focused and simple; a future binary CLI will make quick use easier | ✅ Direct commands for standalone operations | ⚠️ More runtime components, suited to long-lived data pipelines |
| High-throughput import | ✅ Supports bypass-server and other optimizations; measured peaks can reach 1-2 million records/s with specific backends and hardware, so benchmark the actual setup | ⚠️ Focuses on backup and export rather than bulk-import throughput | ✅ Scales throughput through parallelism, distributed engines, and connectors |
SeaTunnel covers Loader’s graph-import and Tools’ export and migration scenarios in one expandable pipeline, and it also supports SQL-CDC and dozens of input and output types. Loader and Tools normally run on one machine, while SeaTunnel supports both standalone and distributed deployments and scales with data and task volume. Tools’ schedule-backup can create a crontab entry, but it does not provide unified workflow orchestration and resource management.
Existing Spark/Flink daily jobs
Both HugeGraph Source and Sink list SeaTunnel Engine (Zeta), Spark, and Flink as supported engines in SeaTunnel 3.0+. If you express the daily job as a SeaTunnel job and submit it to that engine, records can move directly from Source to Transform to Sink without an intermediate file. If you keep the existing Spark/Flink DAG, SeaTunnel does not automatically take over its in-memory DataFrame or stream. Adapt it into a SeaTunnel job or expose the data through a Source connector
Loader and Tools are focused, direct, and quick to start. Use Loader for a direct graph import; use Tools for backup, restore, export, or daily operations. If a SeaTunnel job already exists, adding HugeGraph to that pipeline is usually simpler. For higher import throughput, Loader’s bypass-server path and other import optimizations are a better fit; measured peaks of 1-2 million records/s require a specific backend, data set, and hardware configuration and are not a general performance guarantee. For new SeaTunnel jobs, use 3.0+ and mappings. Recheck the connector configuration when using another version.
2 Prepare the environment
2.1 Get SeaTunnel 3.0+
Use JDK 11 and set JAVA_HOME; the official deployment guide
lists Java 8 and 11 as prerequisites. Choose a 3.0+ binary distribution from the
official release page[4] and verify its checksum or signature using the files linked there.
The commands below use 3.0.0 as an example; set SEATUNNEL_VERSION to the release you downloaded.
The binary distribution does not include connector plugins. In config/plugin_config, select the connectors needed by the examples:
Install the matching released plugins using the upstream plugin installation instructions[5]:
Run the remaining commands from this installation directory and keep the engine and connector plugins at the same version.
This guide uses the bundled Zeta engine in local mode[6][7]. Check that connectors/ contains HugeGraph, JDBC, and Kafka
as needed[11][12]. The JDBC examples also require the MySQL driver JAR in lib/, with driver class com.mysql.cj.jdbc.Driver.
2.2 Prepare HugeGraph and data sources
Start HugeGraph Server and create a graph for testing. The examples use the hugegraph graph in the DEFAULT graph space. Adjust these names to match the server configuration; graph space names are case-sensitive. If authentication is enabled, provide username and password in the HugeGraph Source and Sink configurations.
The following graph model is shared by the JDBC and Kafka examples. mappings creates missing PropertyKey, VertexLabel, and EdgeLabel definitions by default; existing schema definitions must be compatible.
| Graph element | Name and properties |
|---|---|
| Properties | name is Text; age and since are Int |
| Vertex | person, primary key name, properties name and age |
| Edge | knows, from person to person, property since |
The mysql, kafka, and hugegraph host names in the examples are placeholders. Replace them with addresses reachable from the SeaTunnel runtime. Inside a container, 127.0.0.1 points to that container; services on the same Docker network can use their service names. Set host to a host name or IP address, and set the port separately.
3 Import from a relational database (sql2graph)
Use two jobs for this import: write the person table as vertices first, then write the knows table as edges. Both edge endpoints will already exist when the edge job runs.
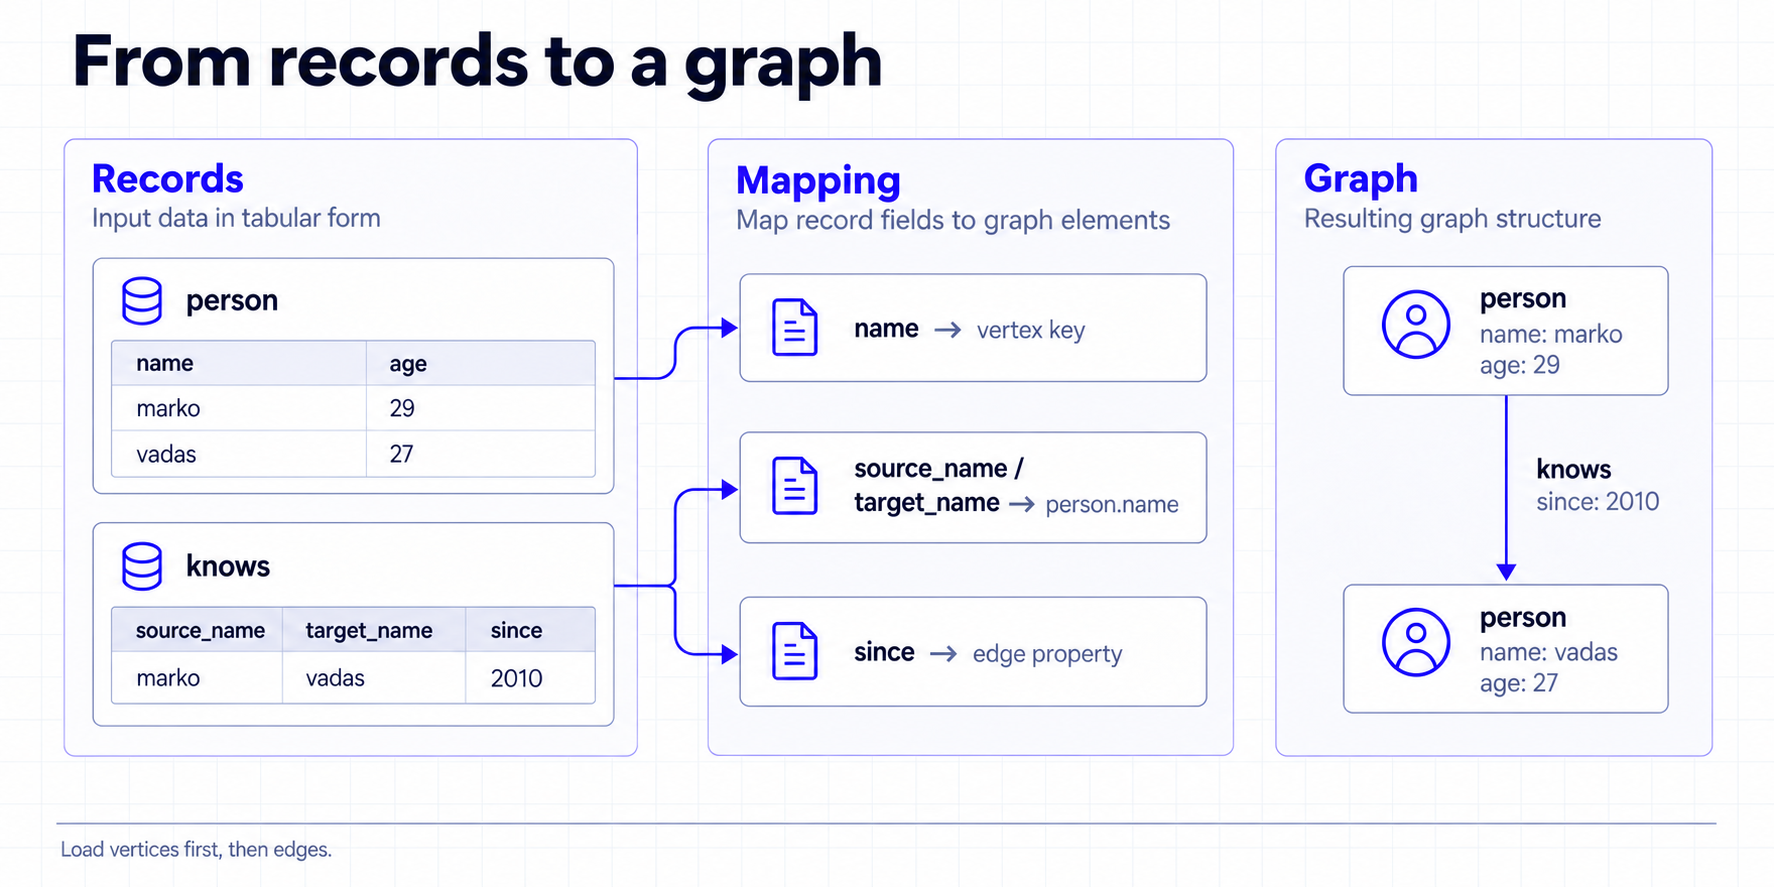
3.1 Import vertices
Prepare the sample data in the MySQL demo database and grant the configured account read access:
Save the following as config/sql2graph-person.conf and replace the database user name and password:
Check the result in Hubble or Gremlin. You should find marko and vadas with their ages:
idFields = ["name"] uses the name to generate the primary key. Importing the same name again writes to the same vertex. properties lists the source fields to write.
3.2 Import edges
Prepare the relation table. Its two endpoint fields correspond to person.name from the vertex job:
After the vertex job succeeds, run the edge job:
The following query should return a knows edge from marko to vadas with since set to 2010:
sourceConfig and targetConfig identify the endpoint fields. fieldMapping maps them to the vertex primary key name, and properties = ["since"] writes only the edge property. The example enables check_vertex = true and disables per-record fallback after a batch failure (batch_failure_fallback = false), so a missing endpoint or write failure causes the job to fail.
If the relation table has only numeric foreign keys while the graph uses names as primary keys, join the names in SQL before passing the records to the Sink. See MySQL CDC Source[13] for MySQL CDC integration.
4 Import from Kafka (kafka2graph)
Kafka is useful for a continuous stream of events. Create the user-events topic and publish the following JSON message. Each message becomes one person vertex:
Save the following as config/kafka2graph.conf:
Use the Gremlin query from section 3.1 to check the data. The streaming job keeps running. checkpoint.interval saves job state every 10 seconds, while sink.flush.interval asks Zeta to flush every 5 seconds so a small number of messages does not wait for a full batch.
HugeGraph Sink writes with at-least-once semantics, so recovery can replay records. PRIMARY_KEY sends the same name to the same vertex, but it does not make every update exactly-once. Scheduled flushing is provided by Zeta and does not apply to Spark or Flink engines.
5 Common configuration and troubleshooting
The following table applies to the SeaTunnel 3.0+ version used by this guide:
| Configuration | Purpose |
|---|---|
host, port | Set the HugeGraph host and port |
graph_name, graph_space | Select an existing graph and graph space |
mappings | Define how input fields become vertices or edges |
properties | List the source fields written by each mapping |
schema_save_mode | mappings creates missing schema by default; existing schema must still be compatible |
batch_size | Number of records per batch; default 500 |
env.sink.flush.interval | Zeta scheduled flush interval in milliseconds |
check_vertex | Check edge endpoints; the edge job in this guide sets it to true |
batch_failure_fallback[2] | Defaults to true, so a failed batch falls back to record-by-record retries, capped by max_insert_errors; the examples explicitly set false so a batch failure stops the job |
max_insert_errors | Number of failed records that record-by-record fallback may skip; default 500, -1 for unlimited, and only applies when batch_failure_fallback is enabled |
Use these checks when a job fails:
mappingsis unknown or HugeGraph Source is missing: Check that the engine and HugeGraph connector come from the same SeaTunnel 3.0+ build.- Connection failure: Check the host, port, graph space, authentication details, and whether the SeaTunnel runtime can reach the service.
- Schema incompatibility: Check the ID strategy, property types, and edge endpoints. Automatic creation does not change an existing
PRIMARY_KEYlabel intoCUSTOMIZE_STRING. - Small Kafka batches do not appear promptly: Confirm that the job uses Zeta and set
sink.flush.intervalinenv. In this version,batch_interval_msis retained only for compatibility and cannot replace it.
6 Choosing a tool
Choose a tool based on the work to complete. Use Tools for graph management, Gremlin, backup, or cloning. Use Loader for a direct graph import. Choose SeaTunnel when you need to reuse a Source, Transform, and Sink pipeline. For SeaTunnel graph reads and migrations, prepare the environment using the SeaTunnel 3.0+ version used by this guide.
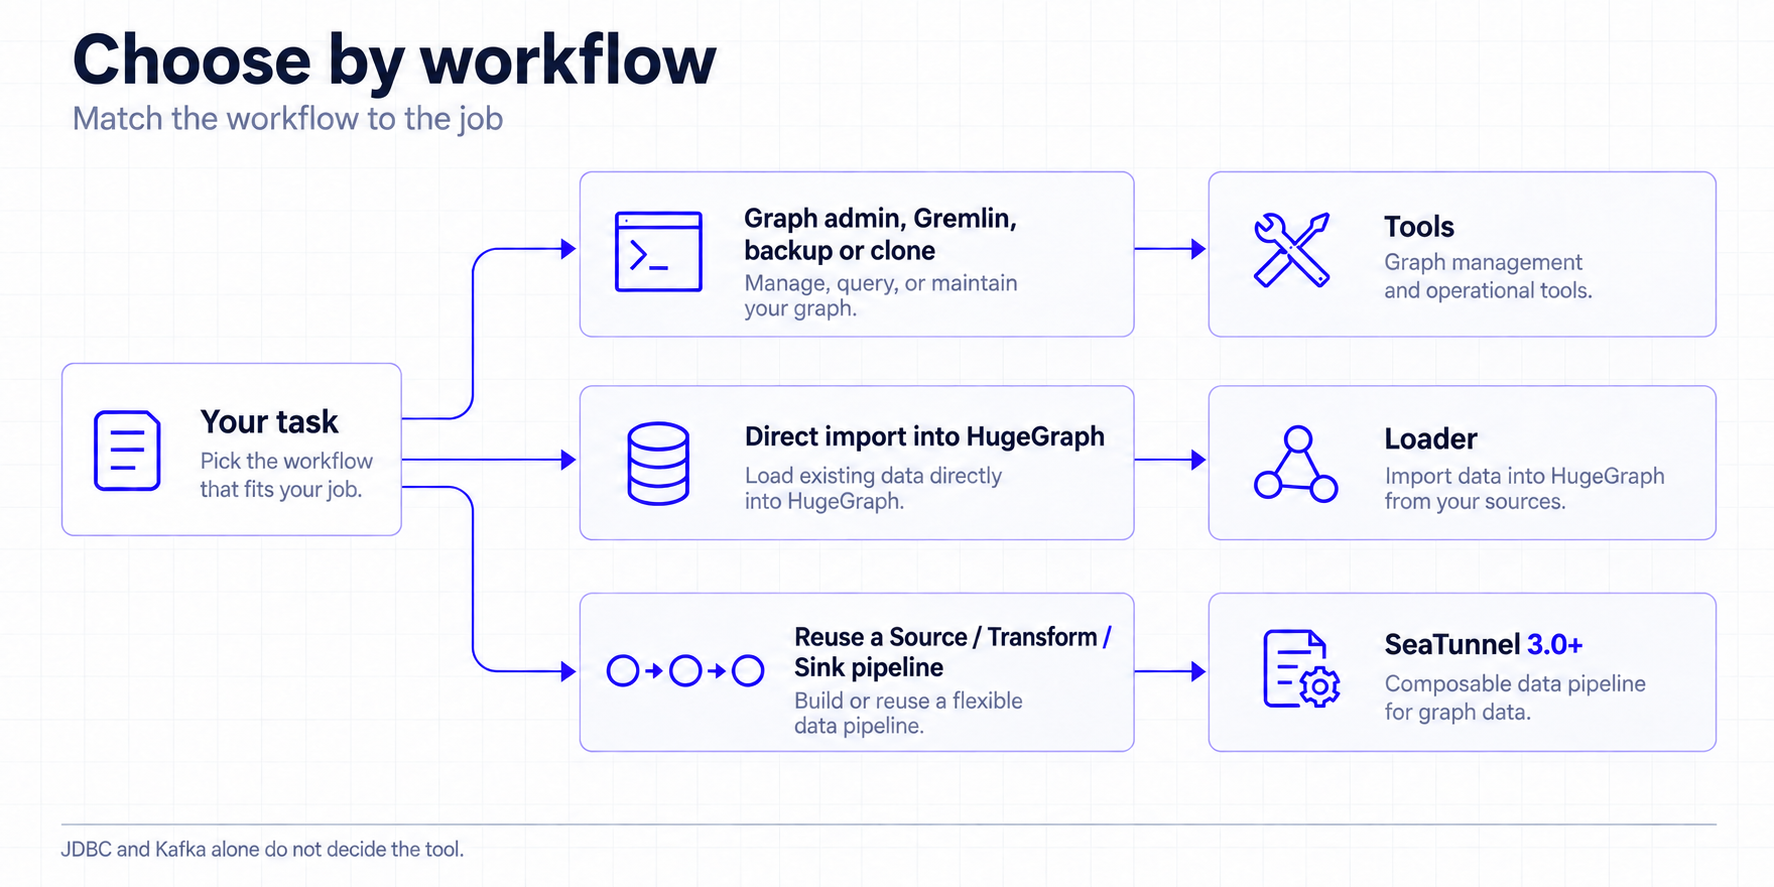
7 References
HugeGraph connectors
[1] HugeGraph Source
[2] HugeGraph Sink
Configuration and deployment
[3] HOCON job configuration
[4] SeaTunnel 3.0+ release download
[5] Connector plugin installation
[6] SeaTunnel local deployment
Execution engines
[7] SeaTunnel Engine Overview
[8] SeaTunnel Spark Engine
[9] SeaTunnel Flink Engine
[10] Connector V2 multi-engine support
Data source connectors
[11] JDBC Source
[12] Kafka Source
[13] MySQL CDC Source
3.2.4 - HugeGraph-Loader Quick Start
This guide aligns with the Toolchain master branch (currently based on 1.8, unreleased). Released packages and Docker latest may differ; check your version before using unreleased features.
Quick start: local file import
Walk through a minimal import workflow: import two people and one relationship, then verify the data in Hubble.
First install Loader and start HugeGraph Server.
The commands below run from the Loader directory, importing into the default graph hugegraph.
For an authenticated Server, append --username and --password (or --token).
Create the data files.
These CSV files have no header row. The mapping in the next step supplies the column names.
Create the schema and mapping.
Dedicated
docs_*names keep this example separate from the built-inpersondata. File paths are relative to the directory where you run Loader.Run the import.
Keep the same working directory. Change the host and port if Server runs elsewhere.
A first successful run imports two vertices and one edge. Check the success and failure counts in the summary.
Query the result in Hubble.
Connect Hubble to the same Server and graph, then run these queries separately in the Gremlin workspace.
The first query returns Alice with age
29and Bob with age31. The second returnsdocs-smoke-bob.
For other inputs, continue with the mapping reference. The bundled full example also includes software vertices and edge properties.
1 HugeGraph-Loader Overview
HugeGraph-Loader converts source data into graph vertices and edges and imports them into HugeGraph in batches.
Currently supported data sources include:
- Local disk file or directory, supports TEXT, CSV and JSON format files, supports compressed files
- HDFS file or directory supports compressed files
- Mainstream relational databases, such as MySQL, PostgreSQL, Oracle, SQL Server
- Kafka topic
- An existing HugeGraph graph, used to copy data from one graph into another
Local disk files and HDFS files support resumable uploads.
Note: HugeGraph-Loader requires HugeGraph Server service, please refer to HugeGraph-Server Quick Start to download and start Server
Concurrent imports: Loader on the master branch supports LOADING owner protection on the same Server instance when the Server’s
GET .../mode/ownersreturnsprotocol: 1. Servers without this endpoint retain legacy import behavior without this protection; see the compatibility notes below.
Testing Guide: For running HugeGraph-Loader tests locally, please refer to HugeGraph Toolchain Local Testing Guide
2 Get HugeGraph-Loader
HugeGraph-Loader is available in the following three ways:
- Use docker image (Convenient for Test/Dev)
- Download the compiled tarball
- Clone source code then compile and install
2.1 Use Docker image (Convenient for Test/Dev)
We can deploy the loader service using docker run -itd --name loader hugegraph/loader:latest. For the data that needs to be loaded, it can be copied into the loader container either by mounting -v /path/to/data/file:/loader/file or by using docker cp.
Alternatively, to start the loader using docker-compose, the command is docker-compose up -d. An example of the docker-compose.yml is as follows:
This combination is for local anonymous testing; the Server API is published only on the local host.
The specific data loading process can be referenced under 4.5 User Docker to load data
Note:
The docker image of hugegraph-loader is a convenience release to start hugegraph-loader quickly, but not official distribution artifacts. You can find more details from ASF Release Distribution Policy.
Pin a published version tag or image digest in production.
latestis mutable and does not guarantee alignment withmaster.
2.2 Download the compiled archive
Choose a published Toolchain archive from the download page and extract it.
A release may not include all master functionality; use the source build below for the implementation described here.
2.3 Clone source code to compile and install
Building Loader from the master branch requires Java 17, Maven 3.6.3+, and Python 3.9+. Clone the repository and build:
To build against candidate Server SDKs during development, refer to the Java 17 migration guide.
For Oracle input, obtain a JDBC driver JAR compatible with your Oracle/JDK versions and place it in the extracted Loader lib/ directory.
The startup script loads JARs there; installing a driver only in the local Maven repository does not put it on Loader’s runtime classpath.
3 How to use
To import a dataset, prepare the schema, data and mapping, then run Loader.
- Write graph schema
- Prepare data files
- Write input source map files
- Execute command import
3.1 Construct graph schema
Define the vertex labels, edge labels and properties needed to represent your data before writing the schema.
The example below uses person and software vertices, connected by knows and created edges.
People have names, ages and cities; software has a name and price. Each edge records a date.
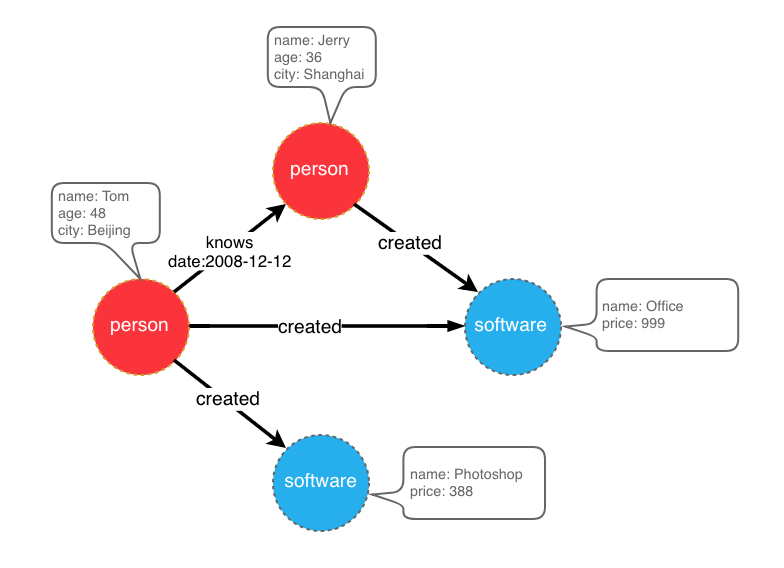
graph model example
Save the schema definitions in schema.groovy.
See HugeGraph Client for the schema API.
3.2 Prepare data
The data sources currently supported by HugeGraph-Loader include:
- local disk file or directory
- HDFS file or directory
- Partial relational database
- Kafka topic
- An existing HugeGraph graph
3.2.1 Data source structure
3.2.1.1 Local disk file or directory
Set the input path to a local file or a directory. A single input source accepts one directory, not a list of directories.
For data split across part-0, part-1 and other files, place those files in one directory and set the mapping’s path to that directory.
Supported file formats include:
- TEXT
- CSV
- JSON
TEXT uses a configurable delimiter. Each data row represents a record; its columns supply IDs, labels or properties.
Column names can come from a header row or from the mapping’s header setting.
An example is as follows:
CSV is a TEXT file with commas , as delimiters. When a column value itself contains a comma, the column value needs to be enclosed in double quotes, for example:
The JSON file requires that each line is a JSON string, and the format of each line needs to be consistent.
3.2.1.2 HDFS file or directory
Users can also specify HDFS files or directories as data sources, all of the above requirements for local disk files or directories apply here. In addition, since HDFS usually stores compressed files, loader also provides support for compressed files, and local disk file or directory also supports compressed files.
Currently supported compressed file types include: GZIP, BZ2, XZ, LZMA, SNAPPY_RAW, SNAPPY_FRAMED, Z, DEFLATE, LZ4_BLOCK, LZ4_FRAMED, ORC, and PARQUET.
3.2.1.3 Mainstream relational database
The loader also supports some relational databases as data sources, and currently supports MySQL, PostgreSQL, Oracle, and SQL Server.
Loader does not follow foreign keys to query other tables while parsing a row. Each input row must provide the values needed to construct its graph elements. Prepare any joins in the source query first.
Consider three tables named person, software and created.
If person and software use PRIMARY_KEY IDs with name as the primary key, each edge needs its endpoints’ names.
The created table contains only p_id and s_id; Loader will not query the names from those IDs. Use either of these ID designs.
- Keep
PRIMARY_KEYand use each vertex table’sidcolumn as its primary key property. Loader can then build endpoint IDs fromp_id,s_idand the vertex labels. - Use custom IDs, taking each vertex table’s
idcolumn as the vertex ID. The edge mapping can usep_idands_iddirectly.
Both designs let edge rows supply endpoint IDs without another lookup.
3.2.2 Prepare vertex and edge data
3.2.2.1 Vertex Data
The vertex data file consists of data line by line. Generally, each line is used as a vertex, and each column is used as a vertex attribute. The following description uses CSV format as an example.
- person vertex data (the data itself does not contain a header)
- software vertex data (the data itself contains the header)
3.2.2.2 Edge data
The edge data file consists of data line by line. Generally, each line is used as an edge. Some columns are used as the IDs of the source and target vertices, and other columns are used as edge attributes. The following uses JSON format as an example.
- knows edge data
- created edge data
3.3 Write data source mapping file
3.3.1 Mapping file overview
The mapping file uses JSON. Each item in structs contains one input and its vertices and edges mappings.
input describes the data location, format and delimiter. Vertex and edge mappings define labels, IDs, properties and field conversions.
Loader 0.11.0 introduced mapping format 2.0; earlier mappings use format 1.0. This page uses 2.0 unless stated otherwise.
Two versions of the mapping file are given directly here (the above graph model and data file are described)
The 1.0 version of the mapping file is centered on the vertex and edge, and sets the input source; while the 2.0 version is centered on the input source, and sets the vertex and edge mapping. Some input sources (such as a file) can generate both vertices and edges. If you write in the 1.0 format, you need to write an input block in each of the vertex and edge mapping blocks. The two input blocks are exactly the same; and the 2.0 version only needs to write input once. Therefore, compared with version 1.0, version 2.0 can save some repetitive writing of input.
In the bin directory of hugegraph-loader-{version}, there is a script tool mapping-convert.sh that can directly convert the mapping file of version 1.0 to version 2.0. The usage is as follows:
A struct-v2.json will be generated in the same directory as struct.json.
The bin directory also ships utf8-bom-to-utf8.sh, which strips the UTF-8 BOM from a single data file, or from every file under a directory. It is useful when a CSV or TEXT file exported by a Windows tool fails to parse because its first header column carries an invisible BOM:
3.3.2 Input Source
Input sources are currently divided into five categories: FILE, HDFS, JDBC, KAFKA and GRAPH, which are distinguished by the type node. We call them local file input sources, HDFS input sources, JDBC input sources, KAFKA input sources and GRAPH input source, which are described below.
3.3.2.1 Local file input source
- id: The id of the input source. This field is used to support some internal functions. It is not required (it will be automatically generated if it is not filled in). It is strongly recommended to write it, which is very helpful for debugging;
- skip: whether to skip the input source, because the JSON file cannot add comments, if you do not want to import an input source during a certain import, but do not want to delete the configuration of the input source, you can set it to true to skip it, the default is false, not required;
- input: input source map block, composite structure
- type: an input source type, file or FILE must be filled;
- path: the path of the local file or directory, an absolute path or a path relative to the Loader process working directory (not the mapping file). An absolute path is recommended; required;
- file_filter: filter files with compound conditions from
path, compound structure, currently only supports configuration extensions, represented by child nodeextensions, the default is “*”, which means to keep all files; - format: the format of the local file, the optional values are CSV, TEXT and JSON, which must be uppercase, the default is CSV, optional;
- header: column names; if omitted, the first data line supplies them. With an explicit header, an identical first line is still skipped by default (see has_header). JSON does not require a header; optional;
- has_header: for CSV and TEXT, the first line of every file is dropped when it is identical to the header, so a header repeated in each part file of a directory is not imported as data. Set this to
falseto turn that check off when the first line of a file is real data that happens to equal the header, optional; - delimiter: The column delimiter of the file line. The default depends on
format: a comma","for CSV and a tab"\t"for TEXT; a CSV file accepts no other delimiter. TheJSONfile does not need to be specified, optional; - charset: the encoded character set of the file, the default is
UTF-8, optional; - date_format: custom date format, the default value is yyyy-MM-dd HH:mm:ss, optional; if the date is presented in the form of a timestamp, this item must be written as
timestamp(fixed writing); - extra_date_formats: a list of fallback date formats, tried when a value does not match
date_format, empty by default, optional; - time_zone: Set which time zone the date data is in, the default value is
GMT+8, optional; - skipped_line: The line to be skipped, compound structure, currently only the regular expression of the line to be skipped can be configured, described by the child node
regex. The default regex is(^#|^//).*|, which skips lines starting with#or//and empty lines; to keep such lines, setregexto a pattern that matches nothing, optional; - compression: The compression format of the file, the optional values are NONE, GZIP, BZ2, XZ, LZMA, SNAPPY_RAW, SNAPPY_FRAMED, Z, DEFLATE, LZ4_BLOCK, LZ4_FRAMED, ORC and PARQUET, the default is NONE, which means a non-compressed file, optional; for ORC and PARQUET the header is matched case-insensitively;
- list_format: When a column of the file (non-JSON) is a collection structure (the Cardinality of the PropertyKey in the corresponding figure is Set or List), you can use this item to set the start character, separator, and end character of the column, compound structure :
- start_symbol: The start character of the collection structure column (the default value is the empty string
"", JSON format currently does not support specification) - elem_delimiter: the delimiter of the collection structure column (the default value is
|, and it must differ fromdelimiter; JSON format currently only supports native,delimiter) - end_symbol: the end character of the collection structure column (the default value is the empty string
"", the JSON format does not currently support specification) - ignored_elems: the elements dropped after the column is split, the default value is
[""], so empty elements are ignored
- start_symbol: The start character of the collection structure column (the default value is the empty string
3.3.2.2 HDFS input source
The nodes and meanings of the above local file input source are basically applicable here. Only the different and unique nodes of the HDFS input source are listed below.
- type: input source type, must fill in hdfs or HDFS, required;
- path: the path of the HDFS file or directory, it must be the absolute path of HDFS, required;
- core_site_path: the path of the core-site.xml file of the HDFS cluster, the key point is to specify the address of the NameNode (
fs.default.name) and the implementation of the file system (fs.hdfs.impl), required; - hdfs_site_path: the path of the hdfs-site.xml file of the HDFS cluster, optional;
- dir_filter: when
pathis a directory, decides which sub-directories are walked into, compound structure, optional:- include_regex: only directories whose name matches this regular expression are read, empty by default, which places no restriction;
- exclude_regex: directories whose name matches this regular expression are skipped, empty by default;
- kerberos_config: how to authenticate against a Kerberos-secured HDFS cluster, compound structure, optional:
- enable: whether to authenticate with Kerberos, the default is false;
- krb5_conf: the path of the krb5.conf file, required when
enableis true; - principal: the Kerberos principal, required when
enableis true; - keytab: the path of the keytab file, required when
enableis true;
3.3.2.3 JDBC input source
As mentioned above, it supports multiple relational databases, but because their mapping structures are very similar, they are collectively referred to as JDBC input sources, and then use the vendor node to distinguish different databases.
- type: input source type, must fill in jdbc or JDBC, required;
- vendor: database type, optional options are [MySQL, PostgreSQL, Oracle, SQLServer], case-insensitive, required;
- driver: the JDBC driver class, optional; when it is left out, the default driver of the
vendorlisted in the tables below is used; - url: the url of the database that jdbc wants to connect to, required;
- database: the name of the database to be connected, required;
- schema: The name of the schema to be connected, different databases have different requirements, and the details are explained below;
- table: the name of the table to be connected, at least one of
tableorcustom_sqlis required; - custom_sql: custom SQL statement, at least one of
tableorcustom_sqlis required; - username: username to connect to the database, required;
- password: password for connecting to the database, required;
- where: an extra condition appended to the generated
selectstatement, written without thewherekeyword, optional; - batch_size: The size of one page when obtaining table data by page, the default is 500, optional;
MYSQL
| Node | Fixed value or common value |
|---|---|
| vendor | MYSQL |
| driver | com.mysql.cj.jdbc.Driver |
| url | jdbc:mysql://127.0.0.1:3306 |
schema: nullable, if filled in, it must be the same as the value of database
POSTGRESQL
| Node | Fixed value or common value |
|---|---|
| vendor | POSTGRESQL |
| driver | org.postgresql.Driver |
| url | jdbc:postgresql://127.0.0.1:5432 |
schema: nullable, default is “public”
ORACLE
| Node | Fixed value or common value |
|---|---|
| vendor | ORACLE |
| driver | oracle.jdbc.driver.OracleDriver |
| url | jdbc:oracle:thin:@127.0.0.1:1521 |
schema: nullable, the default value is the username in upper case
SQLSERVER
| Node | Fixed value or common value |
|---|---|
| vendor | SQLSERVER |
| driver | com.microsoft.sqlserver.jdbc.SQLServerDriver |
| url | jdbc:sqlserver://127.0.0.1:1433 |
schema: required
3.3.2.4 Kafka input source
- type: input source type,
kafkaorKAFKA, required; - bootstrap_server: the list of kafka bootstrap servers, required;
- topic: the topic to subscribe to, required;
- group: group of Kafka consumers, required;
- from_beginning: sets
auto.offset.resettoearliestwhen true, orlatestwhen false (default). It applies only when no valid committed offset exists; otherwise consumption resumes from the committed offset. Optional; - format: format of each message, options are CSV, TEXT and JSON, must be uppercase, required;
- header: column name of each column of a message; no header line is read from the topic, so it has to be given for CSV and TEXT, while JSON messages do not need it;
- delimiter: delimiter of the message columns, used by TEXT only, since CSV always splits on
,, optional; - charset: encoding charset of the messages, default is UTF-8, optional;
- date_format: customized date format, default value is yyyy-MM-dd HH:mm:ss, optional; if the date is presented in the form of timestamp, this item must be written as timestamp (fixed);
- extra_date_formats: a customized list of another date formats, empty by default, optional; each item in the list is an alternate date format to the date_format specified date format;
- time_zone: set which time zone the date data is in, default is GMT+8, optional;
- skipped_line: current master
KafkaReaderdoes not implement this filter. Kafka messages go directly to the parser, so configuring this field does not skip blank or comment messages; preprocess them upstream or in the consumer to avoid parse failures; - batch_size: the maximum number of records fetched in one poll (
max.poll.records), default is 500, optional; - early_stop: the record pulled from Kafka broker at a certain time is empty, stop the task, default is false, only for debugging, optional;
3.3.2.5 GRAPH input Source
The GRAPH input source reads vertices and edges out of another HugeGraph graph, reached through HugeGraph-PD, and writes them into the target graph. When a mapping file contains a GRAPH input source, every input source in it that is not skipped has to be a GRAPH input source as well, and the loader puts the target graph into RESTORING mode for the duration of the import.
- type: Data source type; must be filled in as
graphorGRAPH(required); - graphspace: Source graphSpace name (required);
- graph: Source graph name (required);
- username: HugeGraph username; the
--usernamecommand-line option is used when this is empty; - password: HugeGraph password; the
--passwordcommand-line option is used when this is empty; - selected_vertices: the vertex labels to copy, each item written as
{"label": "...", "properties": [...], "query": {...}}, wherepropertiesnarrows the copied properties andqueryis an optional filter passed to the source graph; - ignored_vertices: the vertex labels to skip, each item written as
{"label": "...", "properties": [...]}; - selected_edges: the edge labels to copy, items have the same shape as in
selected_vertices; - ignored_edges: the edge labels to skip, items have the same shape as in
ignored_vertices; - pd-peers: HugeGraph-PD node addresses of the source cluster; the
--pd-peersoption is used when this is empty; - meta-endpoints: Meta service endpoints of the source cluster; the
--meta-endpointsoption is used when this is empty; - cluster: Source cluster name; the
--clusteroption is used when this is empty; - batch_size: Batch size for reading data from the source graph; default is 500;
3.3.3 Vertex and Edge Mapping
The nodes of vertex and edge mapping (a key in the JSON file) have a lot of the same parts. The same parts are introduced first, and then the unique nodes of vertex map and edge map are introduced respectively.
Nodes of the same section
- label:
labelto which the vertex/edge data to be imported belongs, required; - skip: whether to skip this vertex/edge mapping while the input source and the other mappings stay active, the default is false, optional;
- field_mapping: Map the column name of the input source column to the attribute name of the vertex/edge, optional;
- value_mapping: map the data value of the input source to the attribute value of the vertex/edge, optional;
- selected: select some columns to insert, other unselected ones are not inserted, cannot exist at the same time as
ignored, optional; - ignored: ignore some columns so that they do not participate in insertion, cannot exist at the same time as
selected, optional; - null_values: You can specify some strings to represent null values, such as “NULL”. If the vertex/edge attribute corresponding to this column is also a nullable attribute, the value of this attribute will not be set when constructing the vertex/edge, optional ;
- update_strategies: If the data needs to be updated in batches in a specific way, you can specify a specific update strategy for each attribute (see below for details), optional;
- unfold: Whether to unfold the column, each unfolded column will form a row with other columns, which is equivalent to unfolding into multiple rows; for example, the value of a certain column (id column) of the file is
[1,2,3], The values of other columns are18,Beijing. When unfold is set, this row will become 3 rows, namely:1,18,Beijing,2,18,Beijingand3,18, Beijing. Note that this will only expand the column selected as id. Default false, optional;
Update strategy supports 8 types: (requires all uppercase)
- Value accumulation:
SUM - Take the greater of the two numbers/dates:
BIGGER - Take the smaller of two numbers/dates:
SMALLER - Set property takes union:
UNION - Set attribute intersection:
INTERSECTION - List attribute append element:
APPEND - List/Set attribute delete element:
ELIMINATE - Override an existing property:
OVERRIDE
Note: If the newly imported attribute value is empty, the existing old data will be used instead of the empty value. For the effect, please refer to the following example
Note : After adopting the batch update strategy, the number of disk read requests will increase significantly, and the import speed will be several times slower than that of pure write coverage (at this time HDD disk [IOPS](https://en.wikipedia .org/wiki/IOPS) will be the bottleneck, SSD is recommended for speed)
Unique Nodes for Vertex Maps
- id: Specify a column as the id column of the vertex. When the vertex id policy is
CUSTOMIZE, it is required; when the id policy isPRIMARY_KEY, it must be empty;
Unique Nodes for Edge Maps
- source: Select certain columns of the input source as the id column of source vertex. When the id policy of the source vertex is
CUSTOMIZE, a certain column must be specified as the id column of the vertex; when the id policy of the source vertex isWhen PRIMARY_KEY, one or more columns must be specified for splicing the id of the generated vertex, that is, no matter which id strategy is used, this item is required; - target: Specify certain columns as the id columns of target vertex, similar to source, so I won’t repeat them;
- unfold_source: Whether to unfold the source column of the file, the effect is similar to that in the vertex map, and will not be repeated;
- unfold_target: Whether to unfold the target column of the file, the effect is similar to that in the vertex mapping, and will not be repeated;
3.4 Execute command import
With the schema, data and mapping ready, run Loader with the options below.
3.4.1 Parameter description
| Parameter | Default value | Required or not | Description |
|---|---|---|---|
-f or --file | Y | Path to configure script | |
-g or --graph | hugegraph | Graph name | |
--graphspace | DEFAULT | Graph space name | |
-s or --schema | Schema file path; optional when the Schema already exists | ||
-h or --host or -i | localhost | Address of HugeGraphServer | |
-p or --port | 8080 | Port number of HugeGraphServer | |
--username | null | When HugeGraphServer enables permission authentication, the username of the current graph | |
--password | null | When HugeGraphServer enables permission authentication, the password of the current graph | |
--create-graph | false | Whether to automatically create the graph if it does not exist | |
--token | null | When HugeGraphServer has enabled authorization authentication, the token of the current graph | |
--protocol | http | Protocol for sending requests to the server, optional http or https | |
--pd-peers | PD service node addresses | ||
--pd-token | Token for accessing PD service | ||
--meta-endpoints | Meta information storage service addresses | ||
--direct | false | Store direct mode is disabled in current master; imports still use Server API. Keep the default | |
--route-type | NODE_PORT | Route selection method (optional values: NODE_PORT / DDS / BOTH) | |
--cluster | hg | Cluster name | |
--trust-store-file | When the request protocol is https, the client’s certificate file path | ||
--trust-store-password | When the request protocol is https, the client certificate password | ||
--clear-all-data | false | Whether to clear the original data on the server before importing data | |
--clear-timeout | 240 | Timeout for clearing the original data on the server before importing data | |
--incremental-mode | false | Whether to use the breakpoint resume mode; only input sources FILE and HDFS support this mode. Enabling this mode allows starting the import from where the last import stopped | |
--failure-mode | false | When failure mode is true, previously failed data will be imported. Generally, the failed data file needs to be manually corrected and edited before re-importing | |
--batch-insert-threads | CPUs | Batch insert thread pool size (CPUs is the number of logical cores available to the current OS) | |
--single-insert-threads | 8 | Size of single insert thread pool | |
--max-conn | 4 * CPUs | The maximum number of HTTP connections between HugeClient and HugeGraphServer; while it is left at its default, it is raised automatically to 4 * --batch-insert-threads | |
--max-conn-per-route | 2 * CPUs | The maximum number of HTTP connections for each route between HugeClient and HugeGraphServer; while it is left at its default, it is raised automatically to 2 * --batch-insert-threads | |
--batch-size | 500 | The number of data items in each batch when importing data | |
--max-parse-errors | 1 | The maximum number of data parsing errors allowed (per line); the program exits when this value is reached | |
--max-insert-errors | 500 | The maximum number of data insertion errors allowed (per row); the program exits when this value is reached | |
--timeout | 60 | Timeout (seconds) for insert result return | |
--shutdown-timeout | 10 | Waiting time for multithreading to stop (seconds) | |
--retry-times | 3 | Maximum number of retries after a timeout | |
--retry-interval | 10 | Interval before retry (seconds) | |
--check-vertex | false | Whether to check if the vertices connected by the edge exist when inserting the edge | |
--print-progress | true | Whether to print the number of imported items in real time on the console | |
--dry-run | false | Enable this mode to only parse data without importing; usually used for testing | |
--help or -help | false | Print help information | |
--parser-threads or --parallel-count | max(2,CPUs/2) | Number of parallel read pipelines; --parallel-count is deprecated | |
--start-file | 0 | Start file index for partial loading | |
--end-file | -1 | End file index for partial loading | |
--scatter-sources | false | Scatter multiple sources for I/O optimization | |
--cdc-flush-interval | 30000 | The flush interval for Flink CDC | |
--cdc-sink-parallelism | 1 | The sink parallelism for Flink CDC | |
--max-read-errors | 1 | The maximum number of read error lines before exiting | |
--max-read-lines | -1L | The maximum number of read lines, task stops when reached | |
--test-mode | false | Whether the loader works in test mode | |
--use-prefilter | false | Whether to filter vertex in advance | |
--short-id | Map a customized vertex ID to a shorter generated ID, written as label:field:type, where type is one of boolean, byte, int, long, float, double, text, blob, date and uuid; repeat the option to cover several labels | ||
--vertex-edge-limit | -1L | The maximum number of vertex’s edges | |
--sink-type | true | spark-loader only: true writes through the HugeGraph server API, false generates HFiles and bulk-loads them into HBase | |
--vertex-partitions | 64 | The number of partitions of the HBase vertex table, used with --sink-type false | |
--edge-partitions | 64 | The number of partitions of the HBase edge table, used with --sink-type false | |
--vertex-table-name | HBase vertex table name, used with --sink-type false | ||
--edge-table-name | HBase edge table name, used with --sink-type false | ||
--hbase-zk-quorum | HBase ZooKeeper quorum, used with --sink-type false | ||
--hbase-zk-port | HBase ZooKeeper port, used with --sink-type false | ||
--hbase-zk-parent | HBase ZooKeeper parent, used with --sink-type false | ||
--restore | false | Set graph mode to RESTORING | |
--backend | hstore | The backend store type when creating graph if not exists | |
--serializer | binary | The serializer type when creating graph if not exists | |
--scheduler-type | distributed | The task scheduler type when creating graph if not exists | |
--batch-failure-fallback | true | Whether to fallback to single insert when batch insert fails |
The mapping file option --file (-f) is required; other options use their defaults. A valid minimal invocation is:
The launcher also accepts JCommander’s native @file syntax. Put each option and value on separate lines in loader.args:
This is equivalent to the minimal invocation above. Relative path values resolve from the Loader process working directory.
If the argument file contains credentials, restrict it to mode 0600 with chmod 0600 loader.args.
The @file form keeps credential values out of process arguments.
Loader must be able to create and write the mapping-prefix directory used for progress output.
Copy a mapping mounted from a read-only Kubernetes ConfigMap to a writable volume before running Loader.
3.4.2 Breakpoint Continuation Mode
For a long import, use a progress file to resume after an interruption.
Set --incremental-mode to true to resume from a progress file. Loader records progress when it closes normally after a successful import
or a normal stop; an unexpected failure may prevent this write.
The progress file is in ${struct} and named load-progress_${timestamp}, where ${struct} is the mapping-file prefix and ${timestamp} is the
import start time, formatted as yyyyMMdd-HHmmss. For example, an import started at 2019-10-10 12:30:30 with mapping file struct-example.json
writes struct-example/load-progress_20191010-123030. When the directory holds several progress files, the resumed import reads the last one in name
order, which is the most recent one.
Note: A progress file is written after a successful import or a normal stop (including an error limit), regardless of
--incremental-modeor--print-progress. An import aborted by an unexpected failure may not write one.
After stopping an import with Ctrl+C or kill, set --incremental-mode true to continue from the recorded position.
A forced stop with kill -9 cannot save progress.
Invalid data or connection failures can exhaust --max-read-errors, --max-parse-errors or --max-insert-errors.
Correct the rows in the failure files, then use --failure-mode true to retry them. This leaves the original data files unchanged.
Rows that still fail are recorded again and deduplicated when the failure file closes. Failure mode lifts these three limits and scans the entire file.
Each input source, that is each item of structs in the mapping file, gets its own failure file. The file is named after the id of that input source with the suffix .error and is stored in the ${struct}/failure-data directory.
Every failed line is written as a pair of lines: a tip line starting with #### READ ERROR:, #### PARSE ERROR: or #### INSERT ERROR:, followed by the original data line. When the input source has a header, that header is written as JSON to a sibling ${id}.header file, so the failure file can be read back with the right columns.
For example, if the mapping file has an input source with id 1 holding a vertex mapping person and an input source with id 3 holding an edge mapping knows, each of which has some error lines, you will see the following files in the ${struct}/failure-data directory when the Loader exits:
- 1.error: the failed lines of input source 1, each preceded by its tip line
- 1.header: the header of input source 1, written only when that input source has a header
- 3.error: the failed lines of input source 3
- 3.header: the header of input source 3
A
.errorfile that turns out to be empty is deleted when the Loader exits, so only the input sources that really had failed lines leave a file behind. In incremental mode new failures are appended to the existing file, otherwise the file is rewritten from scratch.
3.4.3 logs directory file description
The log and error data during program execution will be written into the hugegraph-loader.log file.
3.4.4 Execute command
Run bin/hugegraph-loader.sh and pass in parameters
The script runs the JVM under JAVA_HOME when that variable is set, and java from the PATH otherwise. It passes the contents of the JVM_OPTS environment variable, then -Xmx10g and the class path built from lib/, to that JVM, so JVM_OPTS is the place to add JVM flags. Logging is configured by conf/log4j2.xml.
3.4.5 Minimal Local-File Import
Follow the local-file import steps at the start of this page.
3.4.6 Concurrent imports and LOADING ownership
In the master branch, Loader implements a LOADING ownership protocol coordinated with Server’s /mode/owners endpoint.
When the deployed Server provides this endpoint and returns protocol: 1, Loader enables ownership protection automatically; released Server 1.7.0 and older versions continue using the legacy mode switching flow.
graph TD
    A["Graph Mode: NONE"] -->|First Loader acquires owner| B["LOADING Mode (Acquires Token)"]
    B -->|Concurrent Loaders join| B
    B -->|Loader finishes & releases| B
    B -->|Last Loader releases| C["Restores to NONE"]
    B -.->|Abnormal exit / kill -9| D["Manual Release / Recovery / Restart"]
    D -.->|"Last owner released, or recover/restart"| A
D -.->|"Other owners still active"| B- Probe and Acquire: Loader probes
/mode/owners. The first Loader obtains an ownership handle (instance/epoch/token), transitioning graph mode fromNONEtoLOADING; concurrent Loaders can join. - Data Import: Loaders holding valid handles execute concurrent imports while preserving
LOADINGmode. - Graceful Release: When an import completes, Loader drains its workers and releases its handle. When the last owner releases,
graph mode automatically returns to
NONE. - Failure Recovery: If abnormal exit (e.g.
kill -9) leaves an orphaned owner, stop and drain all related imports and graph writes, then perform administrator recovery via the RESTful API recovery endpoint or restart the Server. Manualreleaseapplies only when the caller still holds its token (e.g. a direct REST client).
Compatibility and Operational Notes
- Legacy Compatibility: During ordinary imports, only an unsupported-route
404status on/mode/ownersfalls back to the legacy enumLOADING/NONEflow (maintains compatibility with Server 1.7, without multi-loader protection). Network or permission errors, or a404for a missing graph, do not trigger fallback. - Restore and Graph Source Imports: Retain the
RESTORINGflow without ownership probes or automatic resets. After a restore import completes, manually reset graph mode toNONEbefore starting ordinary imports. Do not run restore, graph-source, Spark connector, or older Loader imports while owned imports are active. - Scope & Lifecycle: Ownership is bound to the target Server instance without cross-node synchronization or automatic lease expiry.
For embedded programmatic integrations, callers must invoke
HugeGraphLoader.shutdown()to attempt a single graceful release. If release fails, the handle is not retried; the owner may remain active on the Server, and the administrator recovery step above may be required.
4 Complete example
The Loader distribution includes this dataset in example/file/.
See the source files.
4.1 Prepare data
Vertex file: example/file/vertex_person.csv
Vertex file: example/file/vertex_software.txt
Edge file: example/file/edge_knows.json
Edge file: example/file/edge_created.json
4.2 Write schema
person uses name as its primary key. Tom’s age and city are removed by null_values, so both properties must be nullable.
software uses custom numeric IDs: mapping id supplies the vertex ID and created.target_id supplies the edge’s target ID.
Run this example in an empty graph without these schema labels; ifNotExist() does not replace incompatible existing definitions.
4.3 Write the input source mapping file example/file/struct.json
4.4 Command to import
After the import is complete, statistics similar to the following will appear:
4.5 Use Docker to load data
4.5.1 Use docker exec to load data directly
4.5.1.1 Prepare data
For a first import, use the built-in example dataset.
For custom data, first copy the files into the Loader container.
Prepare the data, schema and mapping as described in sections 4.1 to 4.3, then copy them with docker cp.
The following example stores the files in hugegraph-dataset.
Copy the files into the container.
4.5.1.2 Data loading
Run this command to import the built-in dataset.
For custom data, set -f to your mapping file and -s to your schema file.
You can refer to 3.4.1-Parameter description for the rest of the parameters.
If loading a custom dataset, following the previous example, you would use:
Also update every input.path in the custom struct.json to its actual container path, such as /loader/dataset/vertex_person.csv.
Changing only -f and -s does not change where Loader looks for data files.
If
loaderandserverare in the same Docker network, you can specify-h {server_container_name}; otherwise, you need to specify the IP of theserverhost (in our example,server_container_nameisserver).
Then we can see the result:
Query the imported data with Hubble or curl.
These requests use the GraphSpace-aware Server API. For an older Server, omit /graphspaces/DEFAULT from the path.
If you want to check the import result of edges, you can use curl --compressed "http://localhost:8080/graphspaces/DEFAULT/graphs/hugegraph/graph/edges".
4.5.2 Enter the docker container to load data
You can also open a shell in the container and run the same import commands.
Open the shell with docker exec -it loader bash, then run the import.
The results of the execution will be similar to those shown in 4.5.1.
4.6 Import data by spark-loader
The current master API sink uses Spark 3.5.8, Scala 2.12 and Java 17 on the driver and executors.
The POM’s Spark 3.2.2 dependency supplies compile-time APIs; it is not the runtime engine.
Set SPARK_HOME and JAVA_HOME, then use the distribution’s shaded Loader JAR with its launcher.
Create the schema first and make data files readable by the executors. CSV and TEXT inputs need headerless UTF-8 data and an explicit mapping header.
Other charsets and has_header: true are rejected. Load vertex data before edge data when the edges depend on those vertices.
Replace the mapping path below with your prepared vertex mapping.
Pass Spark options such as --master, --conf and --jars to the launcher alongside Loader options.
Additional JDBC drivers need explicit --jars; copying them into lib/ does not distribute them to executors.
Query the target graph to verify counts and properties; the API sink’s insertion counters do not report distributed writes.
This path rejects --incremental-mode true and --failure-mode true. Standalone Spark supports client deployment only.
HBase bulkload (--sink-type false) is unsupported on Spark 3.5.8 / Java 17; keep an existing bulkload deployment on its separately validated
released Loader/JVM/Spark/HBase environment.
For details, see the Spark migration guide.
4.7 Import data by flink-cdc-loader
The current master integration targets Flink 2.2.1, MySQL CDC 3.6.0-2.2 and Java 17.
Older examples using Flink 1.13.5 and CDC 2.2.1 belong to the previous implementation.
Set FLINK_HOME; the submission JVM, JobManager and TaskManager must all use Java 17.
Keep Flink’s module-access options and exactly one shaded Loader JAR in the distribution’s lib/.
Each mapping needs a MySQL JDBC input with url, database, table, username and password.
Set MySQL binlog_row_image=FULL. UPDATE events require explicit, nonempty update_strategies and unchanged graph IDs;
changes to vertex IDs, edge endpoints or sort keys are rejected. CDC also rejects --dry-run true and --use-prefilter true.
Without a separator, all arguments go to Loader. To set Flink options, put them before -- and Loader options after it.
For a prepared mapping at mysql-cdc.json, submit with one sink writer.
Each mapping uses a single source reader and sink writer. --cdc-sink-parallelism defaults to 1; other values are rejected.
After --, Loader’s -p means the Server port. Checkpoint flushing does not provide transactional graph writes or an exactly-once guarantee.
Validate edge CDC and broader mappings in your test environment before deploying to production.
For more details, see the Flink CDC documentation.
3.2.5 - Graph export and migration
Choose an export or migration tool when you need to back up, export, or move data between graphs. Tools is suited to standalone operations and backups; SeaTunnel Source connects graph reads to an expandable data pipeline.
3.2.5.1 - Export and Migrate Graph Data with SeaTunnel Source
If you need to copy data from one HugeGraph graph to another, use graph2graph: HugeGraph Source reads vertices and edges from the source graph (graph A), and HugeGraph Sink writes them to the target graph (graph B), with an optional Transform in between. The data path is graph A → HugeGraph Source → (optional Transform) → HugeGraph Sink → graph B. If you need to export graph data to a file, JDBC, Kafka, or another system, use graph2any, where a downstream Sink receives the records read by HugeGraph Source. This page covers both job types.
Version requirement: This guide targets SeaTunnel 3.0+
SeaTunnel 3.0+ provides HugeGraph Source, with schema auto-discovery and multi-label reads. See the official Source documentation for parallel-scan backend requirements and configuration limits.
Before starting, complete the shared environment and configuration steps on the import page. They cover JDK, HOCON, plugin installation, and the sample graph model.
1 Migrate a HugeGraph graph (graph2graph)
The following example migrates person vertices and knows edges from a source graph. Use a separate target graph. This section uses CUSTOMIZE_STRING to preserve vertex IDs. Do not reuse the person label created earlier with PRIMARY_KEY.
These two jobs migrate only the selected labels and properties. They do not copy every source schema setting, such as indexes and TTLs. Pause writes to the source graph during the migration so both jobs read a consistent point in time. Afterward, compare vertex and edge counts and sample properties.
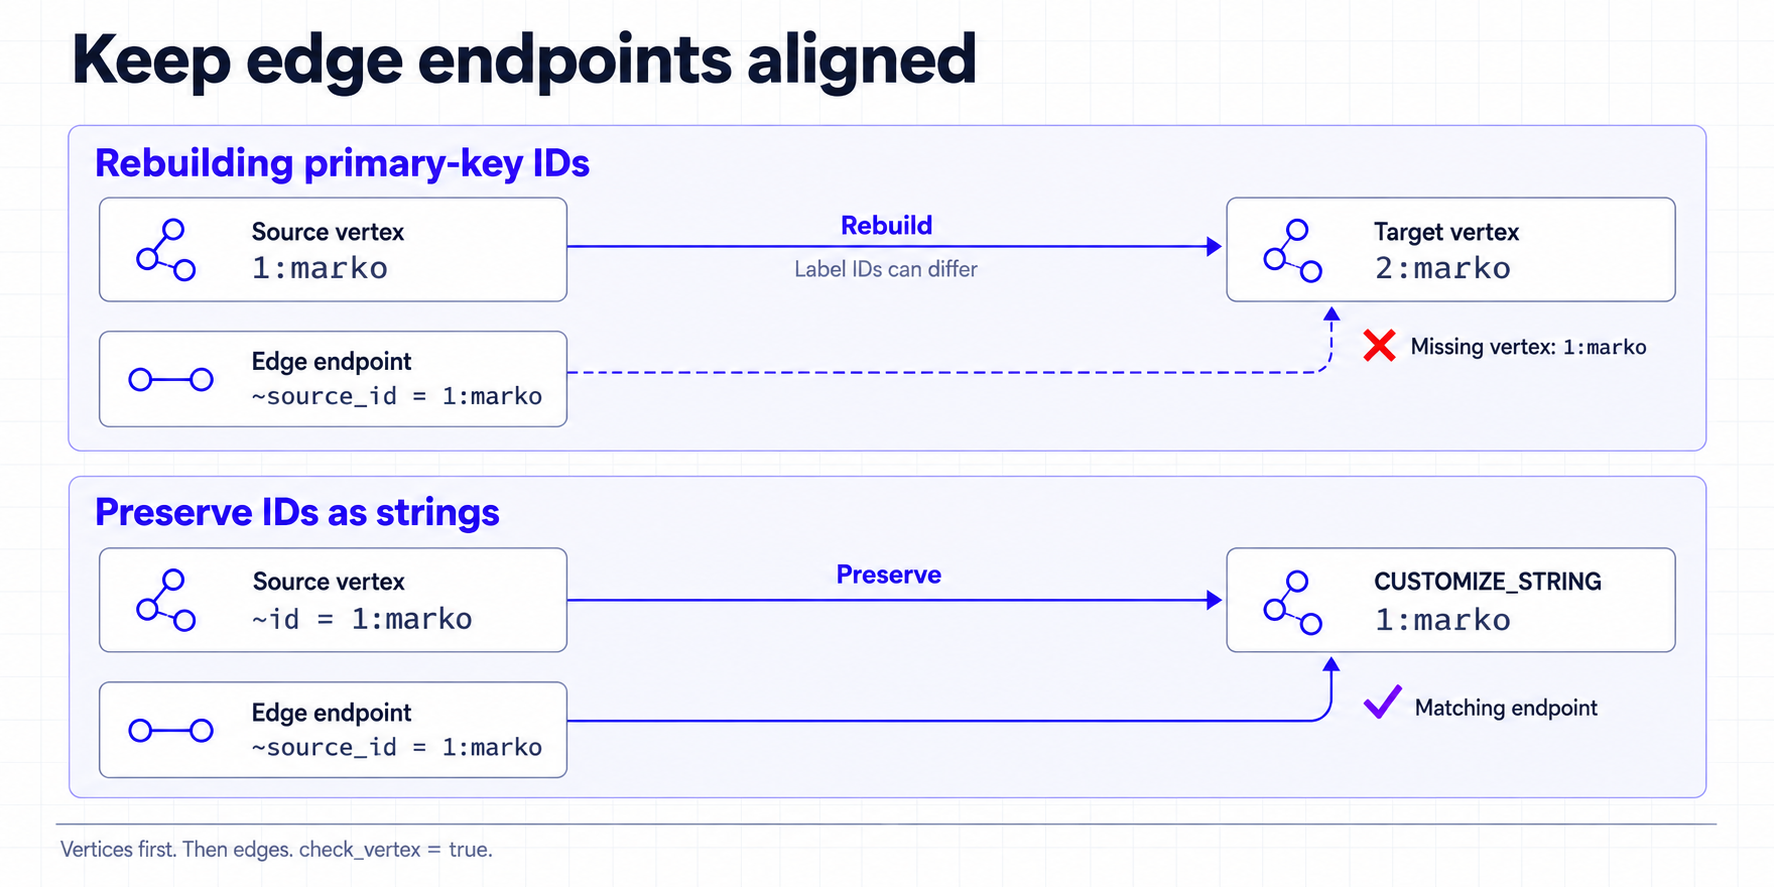
1.1 Migrate vertices first
Source adds a ~id column for the original ID, and Sink stores it as a string. Do not declare ~id in schema.fields; manually declaring this reserved column is rejected.
1.2 Migrate edges second
After the vertex job succeeds, use the ~source_id and ~target_id columns added by Source to locate endpoints. Because the previous job preserved the original IDs, these columns can refer directly to vertices in the target graph.
This example checks endpoints and makes write errors fail the job. The default check_vertex = false does not guarantee a consistent result: a missing endpoint can create a dangling edge, so a successful job is not a substitute for checking the migrated graph.
Why preserve IDs? A HugeGraph
PRIMARY_KEYID contains the internal ID of the vertex label, and that internal ID can differ between graphs. For example, a source vertex can be1:marko, while regenerating the primary key in the target graph can produce2:marko. Reusing the source edge endpoints after regenerating vertex IDs can connect edges to the wrong vertices. This example stores the original ID as a string, which changes the target graph’s ID strategy
When Source reads every label, omit label to read all labels of label_type (default VERTEX). It produces one output table per label. Bind each Sink mapping to its table with sourceTable, for example sourceTable = "default.person"; use the full table name shown in the Writer log for the exact value. Do not reuse the single-label configuration from this section. See the HugeGraph Source documentation for other limitations.
2 Export to another system (graph2any)
graph2any uses HugeGraph Source[1] to read vertices or edges and sends them to a downstream Sink. The example below exports person vertices to local JSON files; to export to JDBC, Kafka, or another system, replace LocalFile[2] and its options.
Save this as config/graph2file-person.conf and run it from the SeaTunnel installation directory:
To export edges, change the Source label to an edge label, set label_type = "EDGE", and declare the edge properties in schema.fields. Source also outputs the reserved columns ~source_id, ~source_label, ~target_id, and ~target_label; write them to the file or pass them to downstream transforms as needed.
This page covers row reads and writes. It does not copy source indexes, TTLs, or other schema settings. For the complete Source options and shared environment guidance, return to the SeaTunnel graph import guide[3].
3 References
Connectors
[1] HugeGraph Source
[2] LocalFile Sink
Related guide
3.2.6 - Tools Quick Start
1 HugeGraph-Tools Overview
HugeGraph-Tools manages graphs and tasks and provides backup and restore commands. It also retains deployment commands for legacy Server/Studio versions.
Testing Guide: For running HugeGraph-Tools tests locally, please refer to HugeGraph Toolchain Local Testing Guide
2 Get HugeGraph-Tools
HugeGraph-Tools is included in the Toolchain distribution. You can download the distribution or build it from source.
- Download the compiled tarball
- Clone source code then compile and install
2.1 Download the compiled archive
The following example uses the released HugeGraph-Toolchain 1.7.0 package. Check the download page for releases.
2.2 Clone source code to compile and install
Choose one source below. Both build the released 1.7.0 Tools; install Maven and JDK 11 first. The archive route also requires wget.
Each example ends in the generated Tools directory, where bin/hugegraph help lists the available commands.
The build also writes hugegraph-tools/target/apache-hugegraph-tools-incubating-1.7.0.tar.gz relative to the source root.
2.3 Build current source
To use unreleased features from the master branch, build Tools from source (master is currently based on 1.8; requires JDK 17, Maven 3.6.3+, and Python 3.9+):
Clone Toolchain source
Build matching Server SDK
Run the script below to download Server source and install the SDK into an isolated Maven repository:
See the Java 17 migration guide for details.
Package Tools
Keep the SDK repository while using this source build. The master build directory does not contain incubating.
3 How to use
3.1 Function overview
From the extracted or generated Tools directory, run bin/hugegraph help for the command list,
or bin/hugegraph help <sub-command> for one command. The commands cover these tasks.
- Graph management type, graph-mode-set, graph-mode-get, graph-list, graph-get, graph-clear, graph-create, graph-clone and graph-drop
- Asynchronous task management type, task-list, task-get, task-delete, task-cancel and task-clear
- Gremlin type, gremlin-execute and gremlin-schedule
- Backup/Restore type, backup, restore, migrate, schedule-backup and dump
- Authentication data backup/restore type, auth-backup and auth-restore
- Legacy Server/Studio deployment, deploy, clear, start-all and stop-all
3.2 [options]-Global Variable
Set these global connection options on the command line or through the environment variables below.
--graphselects the graph, defaulthugegraph.--urlsets the Server address, defaulthttp://127.0.0.1:8080.--usersupplies the username when Server authentication is enabled.--passwordsupplies that user’s password.--timeoutsets the connection timeout, default 30 seconds.--trust-store-fileselects the HTTPS truststore. An empty value uses the built-inconf/hugegraph.truststore.--trust-store-passwordsupplies its password. An empty value uses the built-in truststore password.--throw-modedefaults tofalse, which prints errors and exits. Set it totrueto throw exceptions, mainly for tests.
The scheme in
--urlselects the protocol. Usehttps://...for HTTPS and set truststore options only with that scheme. Supply both--userand--password, or omit both.
Use export to set an option for the current shell and the commands launched from it.
| Global Variable | Environment Variable | Example |
|---|---|---|
| –url | HUGEGRAPH_URL | export HUGEGRAPH_URL=http://127.0.0.1:8080 |
| –graph | HUGEGRAPH_GRAPH | export HUGEGRAPH_GRAPH=hugegraph |
| –user | HUGEGRAPH_USERNAME | export HUGEGRAPH_USERNAME=admin |
| –password | HUGEGRAPH_PASSWORD | export HUGEGRAPH_PASSWORD=test |
| –timeout | HUGEGRAPH_TIMEOUT | export HUGEGRAPH_TIMEOUT=30 |
| –trust-store-file | HUGEGRAPH_TRUST_STORE_FILE | export HUGEGRAPH_TRUST_STORE_FILE=/tmp/trust-store |
| –trust-store-password | HUGEGRAPH_TRUST_STORE_PASSWORD | export HUGEGRAPH_TRUST_STORE_PASSWORD=xxxx |
Both forms below count vertices in the same graph; choose either form. The example uses a local Server without authentication. For an authenticated Server, also provide the username and password described above.
You can also set these variables in bin/hugegraph.
bin/hugegraph also reads JAVA_HOME (a warning is printed when it is not set, and it is needed for https) and JAVA_OPTIONS (JVM options; when it is empty the script uses -Xms512m plus an -Xmx computed from the free memory of the machine).
3.3 Graph Management Type, graph-mode-set, graph-mode-get, graph-list, graph-get, graph-clear, graph-create, graph-clone and graph-drop
- graph-mode-set, set graph restore mode
- –graph-mode or -m, required, specifies the mode to be set, legal values include [NONE, RESTORING, MERGING, LOADING]
- graph-mode-get, get graph restore mode
- graph-list, list all graphs in a HugeGraph-Server
- graph-get, get a graph and its storage backend type
- graph-clear, clear all schema and data of a graph
- –confirm-message or -c, required, delete confirmation information, manual input is required, double confirmation to prevent accidental deletion, “I’m sure to delete all data”, including double quotes
- graph-create, create a new graph with configuration file
- –name or -n, optional, the name of the new graph, default is g
- –file or -f, the path to the graph configuration file, the content of the file is sent to HugeGraph-Server as the config of the new graph
- graph-clone, clone an existing graph
- –name or -n, optional, the name of the cloned graph, default is g
- –clone-graph-name, optional, the name of the source graph to clone from, default is hugegraph
- graph-drop, drop a graph (different from graph-clear, this completely removes the graph)
- –confirm-message or -c, required, confirmation message “I’m sure to drop the graph”, including double quotes
graph-create, graph-clone, graph-clear and graph-drop raise –timeout to at least 300 seconds.
Before restoring into a new graph, set its mode to
RESTORING. To merge into an existing graph, useMERGING.
3.4 Asynchronous task management Type,task-list、task-get、task-delete、task-cancel and task-clear
- task-list,List the asynchronous tasks in a graph, which can be filtered according to the status of the tasks
- –status,Optional, specify the status of the task to view, i.e. filter tasks by status, legal values include [UNKNOWN, NEW, QUEUED, RESTORING, RUNNING, SUCCESS, CANCELLED, FAILED] (case insensitive)
- –limit,Optional, specify the number of tasks to be obtained, the default is -1, which means to obtain all eligible tasks, a value passed explicitly must be positive
- task-get,Get detailed information about an asynchronous task
- –task-id,Required, specifies the ID of the asynchronous task
- task-delete,Delete information about an asynchronous task
- –task-id,Required, specifies the ID of the asynchronous task
- task-cancel,Cancel the execution of an asynchronous task
- –task-id,Required, the ID of the asynchronous task to cancel
- task-clear,Clean up completed asynchronous tasks
- –force,Optional. When set, it means to clean up all asynchronous tasks. Unfinished ones are canceled first, and then all asynchronous tasks are cleared. By default, only completed asynchronous tasks are cleaned up
3.5 Gremlin Type,gremlin-execute and gremlin-schedule
⚠️ SEC Reminder: The execution of Gremlin depends on the actual logic of the statements, which may involve scenarios such as large-scale data modification and high-risk system calls with potential implicit hazards. Please use this tool only in secure and trusted network environments. It is imperative to configure and secure HugeGraph-Server with the Authentication System (Auth) and an IP Whitelist to restrict execution requests on the server side. Never hand over the tool or expose the execution entry to unauthorized personnel.
- gremlin-execute, send Gremlin statements to HugeGraph-Server to execute query or modification operations, execute synchronously, and return results after completion
- –file or -f, specify the script file to execute, UTF-8 encoding, mutually exclusive with –script
- –script or -s, specifies the script string to execute, mutually exclusive with –file
- –aliases or -a, Gremlin alias settings, the format is: key1=value1,key2=value2,…
- –bindings or -b, Gremlin binding settings, the format is: key1=value1,key2=value2,…
- –language or -l, the language of the Gremlin script, the default is gremlin-groovy
–file and –script are mutually exclusive, one of them must be set
- gremlin-schedule, send Gremlin statements to HugeGraph-Server to perform query or modification operations, asynchronous execution, and return the asynchronous task id immediately after the task is submitted
- –file or -f, specify the script file to execute, UTF-8 encoding, mutually exclusive with –script
- –script or -s, specifies the script string to execute, mutually exclusive with –file
- –bindings or -b, Gremlin binding settings, the format is: key1=value1,key2=value2,…
- –language or -l, the language of the Gremlin script, the default is gremlin-groovy
–file and –script are mutually exclusive, one of them must be set
3.6 Backup/Restore Type
- backup, back up the schema or data in a certain graph out of the HugeGraph system, and store it on the local disk or HDFS in the form of JSON
- –format, the backup format, optional values include [json, text], the default is json
- –all-properties, whether to back up all properties of vertices/edges, only valid when –format is text, default false
- –label, the vertex label or edge label to be backed up, only applied when –format is text; when it is set, –huge-types must name exactly one type and that type must be vertex or edge, otherwise the command fails
- –properties, properties of vertices/edges to be backed up, separated by commas, only valid when –format is text, valid only when backing up vertices or edges
- –compress, whether to compress data during backup, the default is true
- –directory or -d, the directory to store schema or data, the default is ‘./{graphName}’ for local directory, and ‘{fs.default.name}/{graphName}’ for HDFS
- –huge-types or -t, the data types to be backed up, separated by commas, the optional value is ‘all’ or a combination of one or more [vertex, edge, vertex_label, edge_label, property_key, index_label], ‘all’ Represents all 6 types, namely vertices, edges and all schemas, ‘schema’ represents the 4 schema types [vertex_label, edge_label, property_key, index_label]
- –log or -l, specify the log directory, the default is ./logs
- –retry, specify the number of failed retries, the default is 3
- –thread-num or -T, the number of threads to use, default is Math.min(10, Math.max(4, CPUs / 2))
- –split-size or -s, specifies the size of splitting vertices or edges when backing up, the default is 1048576, and it must be at least 1048576 (1M)
- -D, use the mode of -Dkey=value to specify dynamic parameters, and specify HDFS configuration items when backing up data to HDFS, for example: -Dfs.default.name=hdfs://localhost:9000
If –timeout is less than 120 seconds, backup (and the backup step of migrate) uses 120 seconds
- restore, restore schema or data stored in JSON format to a new graph (RESTORING mode) or merge into an existing graph (MERGING mode)
- –directory or -d, the directory to store schema or data, the default is ‘./{graphName}’ for local directory, and ‘{fs.default.name}/{graphName}’ for HDFS
- –clean, whether to delete the directory specified by –directory after the recovery map is completed, the default is false
- –huge-types or -t, data types to restore, separated by commas, optional value is ‘all’ or a combination of one or more [vertex, edge, vertex_label, edge_label, property_key, index_label], ‘all’ Represents all 6 types, namely vertices, edges and all schemas, ‘schema’ represents the 4 schema types [vertex_label, edge_label, property_key, index_label]
- –log or -l, specify the log directory, the default is ./logs
- –retry, specify the number of failed retries, the default is 3
- –thread-num or -T, the number of threads to use, default is Math.min(10, Math.max(4, CPUs / 2))
- -D, use the mode of -Dkey=value to specify dynamic parameters, which are used to specify HDFS configuration items when restoring graphs from HDFS, for example: -Dfs.default.name=hdfs://localhost:9000
restoreaccepts backups made with--format json. restore requires the graph to be in RESTORING or MERGING mode (set it with graph-mode-set first), otherwise the command fails - migrate, migrate the currently connected graph to another HugeGraphServer
- –target-graph, the name of the target graph, the default is hugegraph
- –target-url, the HugeGraphServer where the target graph is located, the default is http://127.0.0.1:8081
- –target-user, the username used to access the target graph
- –target-password, the password to access the target map
- –target-timeout, the timeout for accessing the target map
- –target-trust-store-file, access the truststore file used by the target graph
- –target-trust-store-password, the password to access the truststore used by the target map
- –directory or -d, during the migration process, the directory where the schema or data of the source graph is stored. For a local directory, the default is ‘./{graphName}’; for HDFS, the default is ‘{fs.default.name}/ {graphName}’
- –huge-types or -t, the data types to be migrated, separated by commas, the optional value is ‘all’ or a combination of one or more [vertex, edge, vertex_label, edge_label, property_key, index_label], ‘all’ Represents all 6 types, namely vertices, edges and all schemas, ‘schema’ represents the 4 schema types [vertex_label, edge_label, property_key, index_label]
- –log or -l, specify the log directory, the default is ./logs
- –retry, specify the number of failed retries, the default is 3
- –thread-num or -T, the number of threads to use, default is Math.min(10, Math.max(4, CPUs / 2))
- –split-size or -s, specify the size of the vertex or edge block when backing up the source graph during the migration process, the default is 1048576, and it must be at least 1048576 (1M)
- -D, use the mode of -Dkey=value to specify dynamic parameters, which are used to specify HDFS configuration items when the data needs to be backed up to HDFS during the migration process, for example: -Dfs.default.name=hdfs://localhost: 9000
- –graph-mode or -m, the mode to set the target graph when restoring the source graph to the target graph, legal values include [RESTORING, MERGING], the default is RESTORING. The target graph is switched to this mode during the migration and switched back to its original mode afterwards
- –keep-local-data, whether to keep the backup of the source map generated in the process of migrating the map, the default is false, that is, the backup of the source map is not kept after the default migration map ends
- schedule-backup, periodically back up the graph and keep a certain number of the latest backups (currently only supports local file systems)
- –directory or -d, required, specifies the directory of the backup data
- –backup-num, optional, specifies the number of latest backups to save, defaults to 3
- –interval, an optional item, specifies the backup cycle, the format is the same as the Linux crontab format, the default is “0 0 * * *” (every day at 00:00)
schedule-backup adds a crontab entry that runs
backup -t allinto{directory}/{graph}/hugegraph-backup-{yyMMddHHmm}/and keeps only the latest –backup-num backups. A relative –directory is resolved against the hugegraph-tools home directory, and{directory}/{graph}must not exist yet - dump, export all vertices and edges in the graph, using the
vertex vertex-edge1 vertex-edge2...JSON format by default. To customize the format, implement aFormattersubclass such asCustomFormatterunderhugegraph-tools/src/main/java/org/apache/hugegraph/formatter, then select it when running the command:bin/hugegraph dump -f CustomFormatter- –formatter or -f, specify the formatter to use, the default is JsonFormatter
- –directory or -d, the directory where schema or data is stored, the default is ‘./{graphName}’ for local directory, and ‘{fs.default.name}/{graphName}’ for HDFS
- –log or -l, specify the log directory, the default is ./logs
- –retry, specify the number of failed retries, the default is 3
- –thread-num or -T, the number of threads to use, default is Math.min(10, Math.max(4, CPUs / 2))
- –split-size or -s, specifies the size of splitting vertices or edges when backing up, the default is 1048576, and it must be at least 1048576 (1M)
- -D, use the mode of -Dkey=value to specify dynamic parameters, and specify HDFS configuration items when backing up data to HDFS, for example: -Dfs.default.name=hdfs://localhost:9000
3.7 Authentication data backup/restore type
- auth-backup, backup authentication data to a specified directory
- –types or -t, types of authentication data to back up, separated by commas, optional value is ‘all’ or a combination of one or more [user, group, target, belong, access], ‘all’ represents all 5 types; ‘belong’ requires ‘user’ and ‘group’ to be included, ‘access’ requires ‘group’ and ’target’ to be included
- –directory, directory to store backup data, the default is ‘./auth-backup-restore’ for local directory, and ‘{fs.default.name}/auth-backup-restore’ for HDFS (this option has no -d short form)
- –retry, specify the number of failed retries, the default is 3
- -D, use the mode of -Dkey=value to specify dynamic parameters, and specify HDFS configuration items when backing up data to HDFS, for example: -Dfs.default.name=hdfs://localhost:9000
- auth-restore, restore authentication data from a specified directory
- –types or -t, types of authentication data to restore, separated by commas, optional value is ‘all’ or a combination of one or more [user, group, target, belong, access], ‘all’ represents all 5 types; ‘belong’ requires ‘user’ and ‘group’ to be included, ‘access’ requires ‘group’ and ’target’ to be included
- –directory, directory where backup data is stored, the default is ‘./auth-backup-restore’ for local directory, and ‘{fs.default.name}/auth-backup-restore’ for HDFS (this option has no -d short form)
- –retry, specify the number of failed retries, the default is 3
- –strategy, conflict handling strategy, optional values are [stop, ignore], default is stop. stop means stop restoring when encountering conflicts, ignore means ignore conflicts and continue restoring
- –init-password, initial password to set when restoring users, required when –types includes user
- -D, use the mode of -Dkey=value to specify dynamic parameters, which are used to specify HDFS configuration items when restoring data from HDFS, for example: -Dfs.default.name=hdfs://localhost:9000
3.8 Install the deployment type
Note: These deployment commands only apply to legacy versions (Server 0.6.10.10.4 and Studio 0.6.10.10.0),
and do not support current HugeGraph Server or Hubble.
For modern deployments, follow Server Quick Start
and Hubble Quick Start.
The options below are retained only for maintaining legacy environments.
- deploy, one-click download, install and start HugeGraph-Server and HugeGraph-Studio
- -v, required, specifies the HugeGraph-Server and HugeGraph-Studio version to install, must be one of the versions listed in bin/version-map.yaml (0.6, 0.7, 0.8, 0.9, 0.10), which maps it to the matching server and studio release versions
- -p, required, specifies the installed HugeGraph-Server and HugeGraph-Studio directories
- -u, optional, specifies the link to download the HugeGraph-Server and HugeGraph-Studio compressed packages
- clear, clean up HugeGraph-Server and HugeGraph-Studio directories and tarballs (refuses to run while a matching server or studio process is still alive, and prompts before each removal)
- -p, required, specifies the directory of HugeGraph-Server and HugeGraph-Studio to be cleaned
- start-all, start HugeGraph-Server and HugeGraph-Studio with one click
- -v, required, specifies the installed HugeGraph-Server and HugeGraph-Studio version to start, same values as deploy
- -p, required, specifies the directory where HugeGraph-Server and HugeGraph-Studio are installed
- stop-all, close HugeGraph-Server and HugeGraph-Studio with one click
deploy, start-all, clear and stop-all are handed by
bin/hugegraphstraight to the shell scriptsbin/deploy.sh,bin/start-all.sh,bin/clear.shandbin/stop-all.sh, so the global options and environment variables in 3.2 do not apply to them.
deploy -uoverrides the download URL and saves it in~/hugegraph-download-url-prefix. Later runs without-ureuse the saved URL. Without either setting, the script useshttps://github.com/hugegraph.
3.9 Specific command parameters
The help output below lists each subcommand and its options.
3.10 Specific command example
1. gremlin statement
2. Show task status
3. Set and show graph mode
4. Cleanup Graph
5. Backup Graph
6. Periodic Backup Graph
7. Recovery Graph
8. Graph Migration
3.2.7 - HugeGraph-Spark-Connector Quick Start
1 HugeGraph-Spark-Connector Overview
HugeGraph-Spark-Connector uses the Spark DataFrame API to write bulk data to HugeGraph. The current implementation provides vertex and edge writers.
Reading from HugeGraph is not implemented yet: the table only implements SupportsWrite, so spark.read.format(...) is not supported. The connector supports the CUSTOMIZE and PRIMARY_KEY vertex id strategies; the AUTOMATIC strategy is rejected.
2 Environment Requirements
- Java 8+
- Maven 3.6+
- Spark 3.2.x (the module is built against Spark 3.2.2 with
providedscope, so your Spark runtime must supply the Spark jars) - Scala 2.12 (built with Scala 2.12.11)
3 Building
3.1 Build without executing tests
3.2 Build with default tests
Both commands produce a fat jar at hugegraph-spark-connector/target/hugegraph-spark-connector-${revision}-jar-with-dependencies.jar (Spark itself is not bundled). Pass it to spark-submit --jars when you do not manage the dependency through Maven.
4 Usage
Add the dependency to pom.xml, replacing ${revision} with the release version you use:
The format string must be the full class name org.apache.hugegraph.spark.connector.DataSource; the connector does not register a short name with Spark’s DataSourceRegister service loader. When HugeGraphServer has authentication enabled, add .option("username", ...) and .option("token", ...) to the examples below.
4.1 Schema Definition Example
If we have a graph, the schema is defined as follows:
4.2 Vertex Sink (Scala)
4.3 Edge Sink (Scala)
4.4 Vertex Sink with PRIMARY_KEY id strategy (Scala)
For a vertex label that uses primaryKeys(...), do not set the id option: the id is spliced from the primary key columns. Columns that are not part of the schema can be dropped with ignored-fields.
4.5 Edge Sink with mixed id strategies (Scala)
source-name and target-name follow the id strategy of their own vertex label. Below, person uses a customized string id (one column) while software uses a primary key (its name column):
Note on save modes: SaveMode.Overwrite and SaveMode.Append both insert the rows. The overwrite path does not delete existing data from the graph first.
5 Configuration Parameters
Option keys are matched case-insensitively and trimmed. data-type and label are always required; source-name and target-name are required when data-type is edge; all other options have defaults.
5.1 Client Configs
Client Configs are used to configure hugegraph-client.
| Parameter | Default Value | Description |
|---|---|---|
host | localhost | Address of HugeGraphServer. A bare host name or IP, or a full http:// / https:// prefix |
port | 8080 | Port of HugeGraphServer |
graph | hugegraph | Graph name |
protocol | http | Protocol for sending requests to the server, optional http or https |
username | null | Username of the current graph when HugeGraphServer enables permission authentication. When unset, the graph name is used as the username |
token | null | Token of the current graph when HugeGraphServer has enabled authorization authentication |
timeout | 60 | Timeout (seconds) for inserting results to return |
max-conn | CPUS * 4 | The maximum number of HTTP connections between HugeClient and HugeGraphServer |
max-conn-per-route | CPUS * 2 | The maximum number of HTTP connections for each route between HugeClient and HugeGraphServer |
trust-store-file | null | The client’s certificate file path when the request protocol is https. When unset under https, the connector reads conf/hugegraph.truststore under the directory given by the JVM system property connector.home.path, which must then be set |
trust-store-token | null | The client’s certificate password when the request protocol is https. When unset under https, hugegraph is used |
5.2 Graph Data Configs
Graph Data Configs describe how DataFrame columns map to vertices or edges.
| Parameter | Default Value | Description |
|---|---|---|
data-type | Required. Graph data type, must be vertex or edge | |
label | Required. Label to which the vertex/edge data to be imported belongs | |
id | Specify a column as the id column of the vertex. When the vertex id policy is CUSTOMIZE, it is required; when the id policy is PRIMARY_KEY, it must be empty. The AUTOMATIC id policy is not supported | |
source-name | Required when data-type is edge. Select certain columns of the input source as the id column of source vertex. When the id policy of the source vertex is CUSTOMIZE, a certain column must be specified as the id column of the vertex; when the id policy of the source vertex is PRIMARY_KEY, one or more columns must be specified for splicing the id of the generated vertex, that is, no matter which id strategy is used, this item is required. Multiple columns are separated by , (the delimiter option does not apply here) | |
target-name | Required when data-type is edge. Specify certain columns as the id columns of target vertex, similar to source-name | |
selected-fields | Select some columns to insert, other unselected ones are not inserted, cannot exist at the same time as ignored-fields | |
ignored-fields | Ignore some columns so that they do not participate in insertion, cannot exist at the same time as selected-fields | |
batch-size | 500 | The number of data items in each batch when importing data. Applied per Spark task: each partition writer flushes its buffer to the server once it holds this many vertices/edges, and again at commit for the remainder |
5.3 Common Configs
Common Configs contains some common configurations.
| Parameter | Default Value | Description |
|---|---|---|
delimiter | , | Separator of selected-fields and ignored-fields. source-name and target-name are always split on , |
6 Notes and Limitations
- Each Spark write task opens its own HugeClient, switches the graph to
LOADINGmode before writing and sets it back toNONEat commit or abort. - Vertex ids are limited to 128 bytes (UTF-8). This applies to customized string ids and to ids spliced from primary keys.
- The
AUTOMATICvertex id strategy is not supported; the write fails with anIllegalArgumentExceptionwhen the writer is created. - Properties with
SETorLISTcardinality are not supported yet; onlySINGLEcardinality values are converted. - Date properties: string values must use the format
yyyy-MM-dd HH:mm:ssand are parsed in theGMT+8time zone; numeric values are treated as epoch milliseconds. - Boolean properties given as strings accept
true,1,yes,yandfalse,0,no,n(case-insensitive). - Rows whose customized string id, or any primary key value, is an empty string are skipped. A null id or primary key value raises an error instead.
7 License
The same as HugeGraph, hugegraph-spark-connector is also licensed under Apache 2.0 License.
3.3 - HugeGraph-AI
hugegraph-ai provides Python clients for HugeGraph, graph machine learning tools, and LLM tools for knowledge graph construction and GraphRAG applications.
Apache License 2.0 · Ask DeepWiki
Modules
- hugegraph-llm: knowledge graph construction, GraphRAG, and natural-language graph queries.
- hugegraph-ml: reads graph data from HugeGraph and runs graph learning models.
- hugegraph-python-client: a Python SDK for managing schemas and graph data and running Gremlin queries.
- vermeer-python-client: a Python SDK for the Vermeer graph computing service.
The repository uses a uv workspace whose members are hugegraph-llm and hugegraph-python-client. hugegraph-ml and vermeer-python-client are editable path dependencies rather than workspace members. The current repository version is 1.7.0. The client source directory is named hugegraph-python-client, but its distribution name is hugegraph-python.
Requirements
- HugeGraph-AI root workspace: Python 3.10 or later; HugeGraph-LLM additionally requires a version below 3.12
- HugeGraph-ML: Python 3.10 or later
- PyPI
hugegraph-python1.5.0: Python 3.9 or later; current repository source uses Python 3.10 or later with the workspace - Vermeer Python client: current source requires Python 3.10 or later, although package metadata still says
>=3.9; see the client guide uv0.7 or later- HugeGraph Server 1.5.0 or later; the current workspace client rejects detectable older versions
Optional Dependency Groups
The root project declares one extra per module plus a few combined ones:
| Extra | Installs |
|---|---|
llm | hugegraph-llm |
ml | hugegraph-ml |
python-client | hugegraph-python (source directory hugegraph-python-client) |
vermeer | vermeer-python-client |
dev | pytest, pytest-cov, coverage, pylint, ruff, mypy, ty, pre-commit |
nk-llm | hugegraph-llm, hugegraph-python-client, and Nuitka for the compiled image |
all | all four module packages |
hugegraph-llm itself declares a vectordb extra that adds pymilvus and qdrant-client.
Deploy with Docker Compose
The repository includes a Compose file that starts both HugeGraph Server and the RAG service:
Default addresses:
- HugeGraph Server:
http://localhost:8080 - RAG service and Web UI:
http://localhost:8001
Start the RAG Service from Source
uv sync creates .venv at the repository root. Installing from the root resolves workspace members and path dependencies together. The repository does not track uv.lock; uv sync resolves the declarations and version constraints in pyproject.toml.
Install ML Dependencies
Example scripts are under hugegraph-ml/src/hugegraph_ml/examples/.
Next Steps
3.3.1 - HugeGraph-LLM
HugeGraph-LLM supports knowledge graph construction, GraphRAG, and natural-language graph queries. Its demo service hosts Gradio and FastAPI in one process. Source launches listen locally at 127.0.0.1:8001, accessible at http://localhost:8001; explicitly use --host 127.0.0.1 for local-only access. Dockerfile.llm overrides this to 0.0.0.0:8001; do not use loopback inside the container, or published ports will not reach the service.
Production requires HugeGraph-LLM login (ENABLE_LOGIN=True, replacing USER_TOKEN and ADMIN_TOKEN) and a source IP allowlist at the firewall or network entry point. Separately enable Server authentication and authorization, retain Server audit logs (normally audit-*.log), and grant GRAPH_USER only the permissions this service needs. AI service tokens authenticate the LLM UI and API, not HugeGraph Server.
Requirements
AI-generated project documentation: Ask DeepWiki
- Python 3.10 or 3.11 (
>=3.10,<3.12) uv0.7 or later- HugeGraph Server 1.5.0 or later; the current workspace client rejects detectable older versions
Deploy with Docker Compose
Prepare the environment files from the HugeGraph-AI repository root:
After startup, HugeGraph Server is available at http://localhost:8080, and the RAG service and Web UI are available at http://localhost:8001.
The Compose file mounts ${PROJECT_PATH}/hugegraph-llm/.env into the container at /home/work/hugegraph-llm/.env, so the file has to exist before the container starts. The resource directory hugegraph-llm/src/hugegraph_llm/resources can be mounted the same way; the mount is commented out by default.
The application reads GRAPH_URL; Compose-provided HUGEGRAPH_HOST and HUGEGRAPH_PORT do not override it. Set GRAPH_URL=server:8080 and matching Server credentials in the container’s .env.
Container Images
| Build recipe | Description |
|---|---|
docker/Dockerfile.llm | Source runtime image recipe; starts python -m hugegraph_llm.demo.rag_demo.app --host 0.0.0.0 --port 8001 |
docker/Dockerfile.nk | Nuitka binary image recipe using the nk-llm extra; starts ./app.dist/app.bin |
Compose references untagged hugegraph/rag, which resolves to latest. scripts/build_llm_image.sh builds docker/Dockerfile.llm locally as hugegraph/graphrag:1.7.0. These are different images: building locally does not replace Compose’s image. To run the build, change Compose’s image to hugegraph/graphrag:1.7.0. The script builds but does not push. Both Dockerfiles expose 8001, run as non-root user work, declare a resource-directory volume, and use curl -f http://localhost:8001/ as their health check.
Deploy on Kubernetes
docker/charts/hg-llm is a Helm chart for the RAG service. It deploys the hugegraph/graphrag image and, by default, publishes a NodePort service that maps node port 8039 and service port 8080 onto container port 8001. The release name is fixed to hg-llm-service. Ingress and horizontal pod autoscaling are present but disabled by default.
The chart deploys only the RAG service, not HugeGraph Server. Set GRAPH_URL in the mounted .env to a Server address reachable from the Pod, with matching credentials.
image.tag still defaults to v0.0.1. The build script produces local hugegraph/graphrag:1.7.0; before deployment, push the image to a registry reachable by the cluster or load it onto cluster nodes, then set matching tag and pull policy values.
The .env and prompt YAML mounts are commented out in values.yaml. Prompt YAML can use a ConfigMap, but .env may contain secrets and passwords: use a Secret and change the env-config volume from configMap to secret. Create them separately:
Uncomment the volumeMounts entries and enable the prompt ConfigMap volume/mount if needed. Helm renders these volume definitions directly from values.yaml.
Start from Source
Install dependencies through the workspace at the repository root:
To use a custom address and port:
Set HG_DEV_RELOAD=1 to start uvicorn with auto-reload during development.
The service stores model, HugeGraph, and login settings in hugegraph-llm/.env. Prompts are stored separately in hugegraph-llm/src/hugegraph_llm/resources/demo/config_prompt.yaml. The configuration code creates missing files with default values.
The .env location is resolved in this order: HUGEGRAPH_LLM_ENV_PATH if it is set, then hugegraph-llm/.env when the package runs from a source checkout, then .env in the current working directory.
Main Capabilities
Build RAG Indexes
The first Web UI tab splits text into a chunk vector index, extracts vertices and edges according to a schema, writes the graph to HugeGraph, and updates the vertex vector index. Input can be typed into the text tab or uploaded through the file tab, which accepts .txt, .docx, and .pdf files and allows selecting several at once. Encrypted PDFs and scanned PDFs without an extractable text layer are rejected.
The schema can be inline JSON or the name of an existing graph. Through the REST API, a graph name requires a matching client_config.graph; inline JSON neither connects to HugeGraph nor accepts client_config.
The tab also carries two generators. Graph Schema Generator derives a schema from query examples plus a few-shot example. Graph Extraction Prompt Generator writes an extraction prompt from a described scenario and a selected reference example. A Graph Extraction Split Type dropdown chooses document, paragraph, or sentence granularity before extraction.
GraphRAG
The query pipeline can combine direct LLM answers, chunk-vector retrieval, and graph retrieval. Graph retrieval first extracts keywords and matches vertices, then attempts Text2Gremlin. If generation or execution fails, it can fall back to predefined graph traversals. Request parameters control result limits, vector distance thresholds, template counts, and reranking.
The same tab has a batch back-testing panel that reads questions from an .xlsx or .csv file, answers each one, and returns a downloadable file. A template file is offered for download next to the upload control.
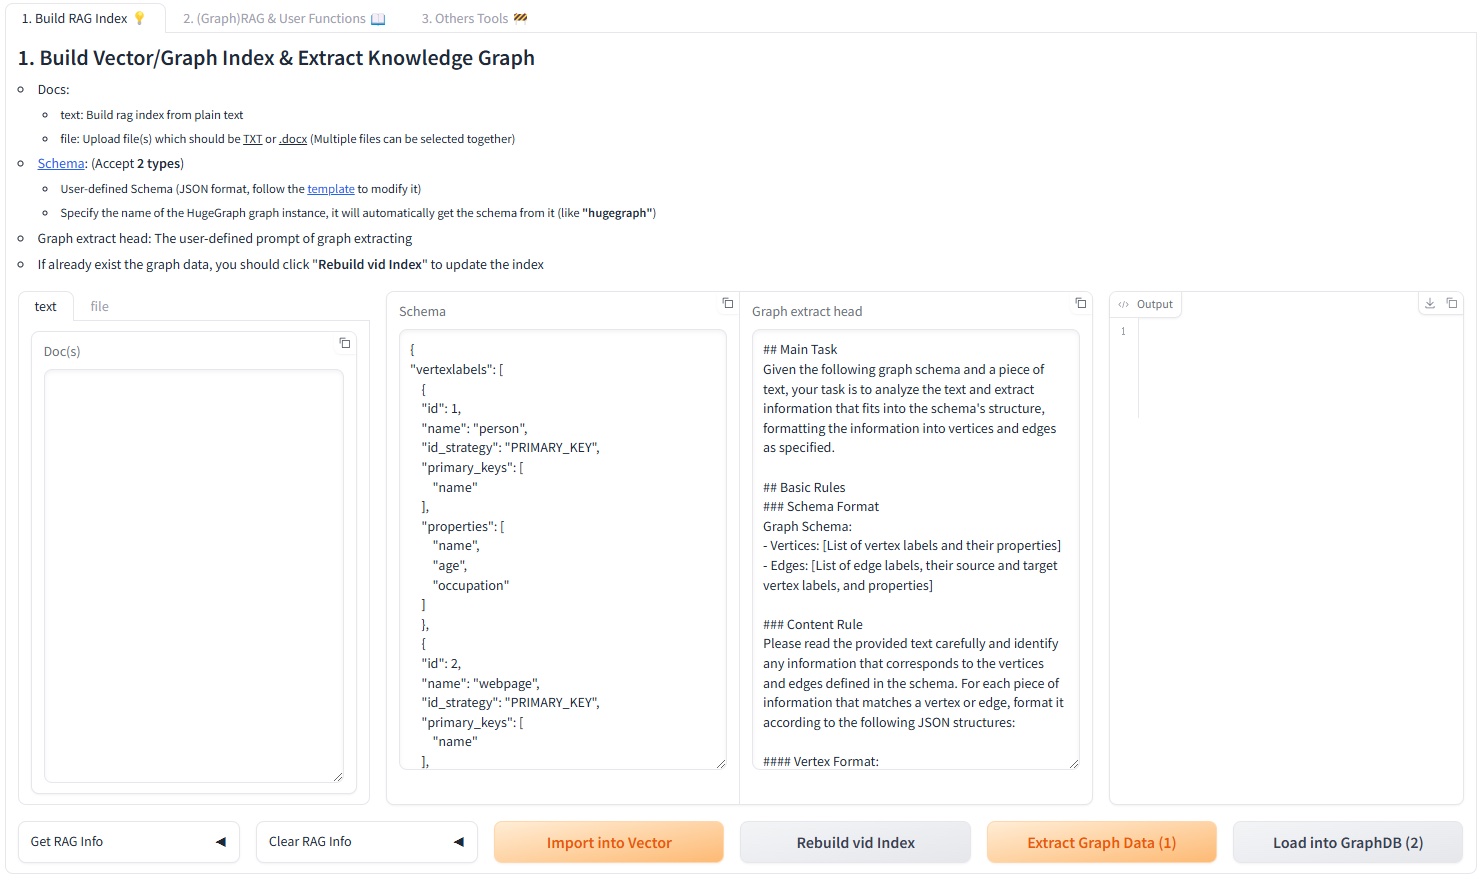
Text2Gremlin
POST /text2gremlin generates Gremlin from natural language, the graph schema, and optional examples. A custom prompt must retain {query}, {schema}, {example}, and {vertices}.
The matching UI tab can first build the example vector index from a .json or .csv file of question and Gremlin pairs. The bundled resources/demo/text2gremlin.csv is used when no file is supplied.
Graph and Admin Tools
The Graph Tools tab runs a Gremlin query directly, triggers a manual graph backup, and can initialize demo data in HugeGraph. The Admin Tools tab shows the last lines of logs/llm-server.log behind an ADMIN_TOKEN prompt, and can refresh or clear that file.
Two background tasks run for the lifetime of the process: a cron job that backs up the graph every day at 01:00, and a task that keeps vertex-id embeddings up to date.
Models and Vector Backends
Chat, information extraction, and Text2Gremlin can independently use an OpenAI-compatible endpoint, Ollama, or LiteLLM. The embedding model is configured separately and supports the same three providers. Reranking supports Cohere and SiliconFlow.
FAISS is the default vector index. CUR_VECTOR_INDEX selects Faiss, Milvus, or Qdrant, and the same choice is available in the 5. Set up the vector engine. panel of the Web UI. Milvus and Qdrant require the optional dependencies:
See the workflow guide, the configuration reference, and the REST API for details.
Programmatic Use
The former RAGPipeline and KgBuilder classes were replaced by a pipeline scheduler. Call a flow by name through SchedulerSingleton:
The registered flow names are rag_raw, rag_vector_only, rag_graph_only, rag_graph_vector, text2gremlin, build_examples_index, build_vector_index, graph_extract, import_graph_data, update_vid_embeddings, get_graph_index_info, build_schema, and prompt_generate. schedule_stream_flow is the async streaming variant.
Development Checks
Install the module and the development tools from the repository root, then run the checks that mirror CI:
Git hooks are available through pre-commit:
3.3.2 - HugeGraph-ML
HugeGraph-ML reads graph data from HugeGraph and converts it to DGL graphs for tasks such as node embedding, node classification, graph classification, link prediction and fraud detection. Model implementations are under hugegraph-ml/src/hugegraph_ml/models/.
Requirements
- Python 3.10 or later
- HugeGraph Server 1.5.0 or later; the current workspace client rejects detectable older versions
uv0.7 or later
All server access goes through hugegraph-python-client (the pyhugegraph package) from the same repository. HugeGraph2DGL pulls vertices and edges over the Gremlin endpoint with g.V().hasLabel(...) and g.E().hasLabel(...), and the dataset importers write through the schema and batch vertex/edge APIs in batches of 500.
The repository root declares ML version constraints under [tool.uv] constraint-dependencies:
| Package | Constraint |
|---|---|
torch | ==2.2.0 |
dgl | ~=2.1.0 |
ogb | ~=1.3.6 |
torchdata | ~=0.7.0 |
catboost | ~=1.2.3 |
category-encoders | ~=2.6.3 |
numpy | ~=1.24.4 |
pandas | ~=2.2.3 |
These constraints limit versions but do not select CPU or CUDA builds. Tasks that support gpu default to -1 for CPU. GPU use requires mutually compatible CUDA builds of torch and dgl.
Installation
HugeGraph-ML is a path dependency of the root project but is not a uv workspace member. Select the ml extra at the repository root so uv installs it and its local client dependency according to workspace configuration.
Implemented Models
Every module below lives in hugegraph-ml/src/hugegraph_ml/models/. models/__init__.py re-exports nothing, so import from the module file directly.
| Model | Module | Entry class | Used for | Paper |
|---|---|---|---|---|
| AGNN | agnn.py | AGNN | Node classification | 1803.03735 |
| APPNP | appnp.py | APPNP | Node classification | 1810.05997 |
| ARMA | arma.py | ARMA4NC | Node classification | 1901.01343 |
| BGNN | bgnn.py | BGNNPredictor | Gradient boosting over node features combined with a GNN; the bundled example runs regression | 2101.08543 |
| BGRL | bgrl.py | BGRL | Self-supervised node embedding | 2102.06514 |
| CARE-GNN | care_gnn.py | CAREGNN | Fraud detection | 2008.08692 |
| Cluster-GCN | cluster_gcn.py | SAGE | Node classification with subgraph sampling | 1905.07953 |
| C&S | correct_and_smooth.py | MLP, CorrectAndSmooth, LabelPropagation | Correcting and smoothing base predictions | 2010.13993 |
| DAGNN | dagnn.py | DAGNN | Node classification | 2007.09296 |
| DeeperGCN | deepergcn.py | DeeperGCN | Node classification with edge features | 2006.07739 |
| DGI | dgi.py | DGI | Self-supervised node embedding | 1809.10341 |
| DiffPool | diffpool.py | DiffPool | Graph classification | 1806.08804 |
| GATNE | gatne.py | DGLGATNE | Heterogeneous network embedding | 1905.01669 |
| GIN | gin_global_pool.py | GIN | Graph classification | |
| GRACE | grace.py | GRACE | Self-supervised node embedding | 2006.04131 |
| GRAND | grand.py | GRAND | Node classification | 2005.11079 |
| JKNet | jknet.py | JKNet | Node classification | 1806.03536 |
| MLP | mlp.py | MLPClassifier | Downstream classifier over learned embeddings | |
| P-GNN | pgnn.py | PGNN | Link prediction | you19b |
| SEAL | seal.py | DGCNN, SEALData | Link prediction | 1802.09691 |
GIN accepts pooling values sum (default), mean, max, global_attention and set2set.
Reading Graph Data
HugeGraph2DGL in hugegraph-ml/src/hugegraph_ml/data/hugegraph2dgl.py opens a PyHugeClient and converts query results into DGL objects:
| Method | Returns | Notes |
|---|---|---|
convert_graph(vertex_label, edge_label, feat_key="feat", label_key="label", mask_keys=None) | dgl.DGLGraph | mask_keys falls back to ["train_mask", "val_mask", "test_mask"] |
convert_hetero_graph(vertex_labels, edge_labels, feat_key="feat", label_key="label", mask_keys=None) | DGL heterograph | Takes lists of labels |
convert_graph_dataset(graph_vertex_label, vertex_label, edge_label, feat_key="feat", label_key="label") | HugeGraphDataset | Fills info with n_graphs, max_n_nodes, n_feat_dim, n_classes |
convert_graph_nx(vertex_label, edge_label) | networkx.Graph | Used by P-GNN |
convert_graph_with_edge_feat(vertex_label, edge_label, node_feat_key="feat", edge_feat_key="edge_feat", label_key="label", mask_keys=None) | dgl.DGLGraph | Also fills edata["feat"] |
convert_graph_ogb(vertex_label, edge_label, split_label) | (dgl.DGLGraph, split_edge) | Used by SEAL |
convert_hetero_graph_bgnn(vertex_labels, edge_labels, feat_key="feat", label_key="class", cat_key="cat_features", mask_keys=None) | DGL heterograph | Used by BGNN |
Node features land in ndata["feat"], labels in ndata["label"] and each mask in ndata[<mask key>]. NodeEmbed requires feat only; NodeClassify, NodeClassifyWithEdge and NodeClassifyWithSample require feat, label, train_mask, val_mask and test_mask and raise ValueError when one is missing.
Importing Sample Datasets
hugegraph_ml.utils.dgl2hugegraph_utils writes DGL, OGB and NetworkX datasets into HugeGraph so the conversion layer has something to read. Every function takes the same url, graph, user, pwd and graphspace arguments as HugeGraph2DGL, and most upper-case the dataset name before matching it.
| Function | Accepted datasets | Labels created |
|---|---|---|
import_graph_from_dgl | CORA, CITESEER, PUBMED | <NAME>_vertex, <NAME>_edge |
import_graphs_from_dgl | MUTAG, COLLAB, NCI1, PROTEINS, PTC, ENZYMES, DD | <NAME>_graph_vertex, <NAME>_vertex, <NAME>_edge |
import_hetero_graph_from_dgl | ACM | <NAME>_<ntype>_v, <NAME>_<etype>_e |
import_hetero_graph_from_dgl_no_feat | AMAZONGATNE | <NAME>_<ntype>_v, <NAME>_<etype>_e |
import_hetero_graph_from_dgl_bgnn | AVAZU | <NAME>_<ntype>_v, <NAME>_<etype>_e |
import_graph_from_nx | CAVEMAN | <NAME>_vertex, <NAME>_edge |
import_graph_from_dgl_with_edge_feat | CORA, CITESEER, PUBMED | <NAME>_edge_feat_vertex, <NAME>_edge_feat_edge |
import_graph_from_ogb | ogbl-collab, matched without upper-casing | <NAME>_vertex, <NAME>_edge |
import_split_edge_from_ogb | ogbl-collab, matched without upper-casing | <NAME>_split_edge |
Any other name raises ValueError("dataset not supported"). import_split_edge_from_ogb additionally requires the idx_to_vertex_id mapping and a max_nodes cap returned by the vertex import.
clear_all_data() drops every vertex and edge in the target graph. The test fixture calls it, loads CORA, MUTAG and ACM, and calls it again on teardown.
AMAZONGATNE and AVAZU are not fetched automatically. Their archive URLs are recorded in comments above import_hetero_graph_from_dgl_no_feat and import_hetero_graph_from_dgl_bgnn.
Tasks
Task classes live in hugegraph-ml/src/hugegraph_ml/tasks/. Each one takes the converted graph and a model instance.
| Class | Module | Entry points |
|---|---|---|
NodeEmbed | node_embed.py | train_and_embed(add_self_loop=True, lr=1e-3, weight_decay=0, n_epochs=200, patience=inf, gpu=-1) returns the graph with ndata["feat"] replaced by the embedding |
NodeClassify | node_classify.py | train(lr, weight_decay, n_epochs, patience, early_stopping_monitor, gpu) then evaluate(), which returns {"accuracy": ..., "loss": ...} |
NodeClassifyWithEdge | node_classify_with_edge.py | Same shape, for models that also read edata["feat"] |
NodeClassifyWithSample | node_classify_with_sample.py | Cluster-GCN style training on ClusterGCNSampler partitions; runs on CPU and takes no gpu argument |
GraphClassify | graph_classify.py | train(batch_size=20, lr, weight_decay, n_epochs, patience, early_stopping_monitor, clip=2.0, gpu) over a HugeGraphDataset, split 70/20/10 |
DetectorCaregnn | fraud_detector_caregnn.py | CARE-GNN training; evaluate() reports recall and ROC AUC and reads ndata["feature"] rather than ndata["feat"] |
HeteroSampleEmbedGATNE | hetero_sample_embed_gatne.py | train_and_embed(lr=1e-3, n_epochs=200, gpu=-1) |
LinkPredictionPGNN | link_prediction_pgnn.py | train(lr, weight_decay, n_epochs, gpu) |
LinkPredictionSeal | link_prediction_seal.py | The constructor calls data_prepare() itself, then train(lr=1e-3, n_epochs=200, gpu=-1) |
patience defaults to float("inf"). EarlyStopping in utils/early_stopping.py monitors either loss or accuracy, keeps a copy of the best weights and restores them when training stops.
Runnable Examples
Scripts sit in hugegraph-ml/src/hugegraph_ml/examples/. From hugegraph-ml/src, run one with:
Each script also exposes a function of the same name, so it can be imported and called with a smaller epoch count.
| Script | Model | Task | Reads |
|---|---|---|---|
agnn_example.py | AGNN | NodeClassify | CORA_vertex, CORA_edge |
appnp_example.py | APPNP | NodeClassify | CORA_vertex, CORA_edge |
arma_example.py | ARMA4NC | NodeClassify | CORA_vertex, CORA_edge |
bgnn_example.py | BGNNPredictor | Its own fit() | AVAZU__N_v, AVAZU__E_e |
bgrl_example.py | BGRL | NodeEmbed, NodeClassify | CORA_vertex, CORA_edge |
care_gnn_example.py | CAREGNN | DetectorCaregnn | AMAZON_user_v plus AMAZON_net_upu_e, AMAZON_net_usu_e, AMAZON_net_uvu_e |
cluster_gcn_example.py | SAGE | NodeClassifyWithSample | CORA_vertex, CORA_edge |
correct_and_smooth_example.py | MLP from correct_and_smooth | NodeClassify | CORA_vertex, CORA_edge |
dagnn_example.py | DAGNN | NodeClassify | CORA_vertex, CORA_edge |
deepergcn_example.py | DeeperGCN | NodeClassifyWithEdge | CORA_vertex, CORA_edge through convert_graph_with_edge_feat |
dgi_example.py | DGI | NodeEmbed, NodeClassify | CORA_vertex, CORA_edge |
diffpool_example.py | DiffPool | GraphClassify | MUTAG_graph_vertex, MUTAG_vertex, MUTAG_edge |
gatne_example.py | DGLGATNE | HeteroSampleEmbedGATNE | AMAZONGATNE__N_v, AMAZONGATNE_1_e, AMAZONGATNE_2_e |
gin_example.py | GIN | GraphClassify | MUTAG_graph_vertex, MUTAG_vertex, MUTAG_edge |
grace_example.py | GRACE | NodeEmbed, NodeClassify | CORA_vertex, CORA_edge |
grand_example.py | GRAND | NodeClassify | CORA_vertex, CORA_edge |
jknet_example.py | JKNet | NodeClassify | CORA_vertex, CORA_edge |
pgnn_example.py | PGNN | LinkPredictionPGNN | CAVEMAN_vertex, CAVEMAN_edge |
seal_example.py | DGCNN | LinkPredictionSeal | ogbl-collab_vertex, ogbl-collab_edge, ogbl-collab_split_edge |
DGI Node Embedding Example
First import DGL’s Cora dataset into HugeGraph. The name is upper-cased before use, so cora and CORA both produce the CORA_vertex and CORA_edge labels:
Read the graph and train DGI:
evaluate() returns a dictionary such as {'accuracy': 0.82, 'loss': 0.5714246034622192}. The complete script is hugegraph-ml/src/hugegraph_ml/examples/dgi_example.py.
GRAND Node Classification Example
GRAND returns a list of logits per augmentation sample, and NodeClassify masks each element of that list before computing the loss. The complete script is hugegraph-ml/src/hugegraph_ml/examples/grand_example.py.
Troubleshooting
- Connection failures: check the HugeGraph Server address, port, and credentials.
- Schema mismatches: the examples use
CORA_vertexandCORA_edge; pass the actual labels for your own data. ValueError: Graph is missing required node attribute ...: the node classification tasks needfeat,label,train_mask,val_maskandtest_maskinndata. Import a dataset that carries masks, or pass your ownmask_keystoconvert_graph.ValueError: dataset not supported: the importer only accepts the names in the table above, andimport_graph_from_ogbmatchesogbl-collabwithout upper-casing.- DGL or PyTorch import failures: rerun
uv sync --extra mlfrom the repository root and confirm that Python comes from the root.venv. bgrl_example.pycurrently fails on import: it asks forMLP_Predictorfromhugegraph_ml.models.bgrl, but that module defines the class asMLPPredictor.care_gnn_example.pyreadsAMAZON_user_vand the threeAMAZON_net_*_eedge labels. No bundled importer creates them, so load that dataset yourself before running the script.
3.3.3 - HugeGraph-LLM Workflow
Follow the Web UI to build indexes, query documents, and generate Gremlin. See HugeGraph-LLM for startup instructions.
Prepare a reachable HugeGraph Server, a generation model, and an embedding model. Viewing settings or running handwritten Gremlin in
Graph Tools needs no model. Document vectors require embeddings; graph extraction and answers also require an LLM.
The reranker is optional. Start with the local bleu method.
| Task | UI tab | Prerequisites |
|---|---|---|
| Build indexes from documents | 1. Build RAG Index | Documents and embeddings; graph extraction also needs a schema and LLM |
| Answer from documents or a graph | 2. (Graph)RAG & User Functions | The corresponding indexes and an LLM |
| Convert a question to Gremlin | 3. Text2gremlin | Graph schema and LLM; examples also need embeddings and an example index |
| Check graph data directly | 4. Graph Tools | A HugeGraph connection and handwritten Gremlin |
The screenshots show the HugeGraph-LLM Web UI. The built-in prompt language can be toggled via LANGUAGE in .env, while UI controls remain in English.
If startup raises FileNotFoundError for questions_template.xlsx, create the input template from the repository root after installing dependencies,
then restart. This preserves an existing file. The template has all 6 columns, with a test question and expected answer; the 4 model-answer columns stay empty.
0. Configuration Panel
Above the tabs sits a collapsible configuration panel with five sections: 1. Set up the HugeGraph server., 2. Set up the LLM., 3. Set up the Embedding., 4. Set up the Reranker., and 5. Set up the vector engine.. Each section has its own apply button, and applying a change writes the supported fields back to .env. The header also shows the current prompt language.
Set the answer, extraction, and query-generation models in the chat, mini_tasks, and text2gql sub-tabs of the LLM settings.
The screenshots use local Ollama models qwen2.5:3b and mxbai-embed-large, with Faiss as the vector engine.
Rebuild indexes after changing embedding models, since vector dimensions or meaning can differ.
1. Build RAG Indexes
The first tab splits documents into a chunk vector index. It also extracts vertices and edges according to a schema, writes them to HugeGraph, and maintains a vertex vector index.
flowchart TD
    A[Input document] --> B[Split text]
    B --> C[Generate chunk vectors]
    C --> D[Write vector index]
    B --> E[LLM extracts vertices and edges from schema]
    E --> F[Write to HugeGraph]
    F --> G[Update vertex vector index]
Input comes from either the text sub-tab or the file sub-tab. Uploads accept .txt, .docx, and .pdf, and several files can be selected at once.
For a first run, paste this short document into Input Doc(s). Select a dedicated test graph before importing it.
Paste this JSON into Graph Schema and keep the default extraction prompt.
It allows people and roommate relationships, with optional age and occupation.
Follow these steps to build the indexes. For vector-only retrieval, stop after step 1.
- Click
Import into Vectorto split the document and build the chunk vector index. - Enter schema JSON or an existing graph name in
Graph Schema, then clickExtract Graph Data (1). Check the vertices, edges, and properties inOutput Info. - Click
Load into GraphDB (2)after checking the extraction. This writes to HugeGraph and refreshes vertex embeddings. - Open
Graph Tools. Rung.V().count()andg.E().count(), then query the properties to confirm that the data was written.
This example should produce 2 vertices and 1 edge, with Sarah’s age set to 30 and occupation to attorney.
If the graph already contains data, use Update Vid Embedding to refresh its vertex index separately.
The Graph Extraction Split Type dropdown selects document, paragraph, or sentence.
document uses the whole input; the other options split it before extraction.
The page can also inspect or clear chunk indexes, vertex indexes, and graph data. Clearing removes existing data, so first confirm that the current graph and indexes are not still used by other queries.
Two collapsed helpers sit below the main controls:
Graph Schema Generatortakes query examples and a few-shot example and produces a schema for the Graph Schema field.Graph Extraction Prompt Generatortakes an expected scenario, such as social relationships or a financial knowledge graph, and a selected reference example, and produces a Graph Extract Prompt Header.
2. GraphRAG Queries
The second tab offers four answer modes. Choose the indexes needed for your question.
| Control | Answer source |
|---|---|
Basic LLM Answer | The LLM alone, without document or graph retrieval |
Vector-only Answer | Retrieved document chunks |
Graph-only Answer | Retrieved graph data |
Graph-Vector Answer | Retrieved graph data and document chunks |
Using Graph-Vector Answer is recommended, as it combines graph traversal and
vector search for more comprehensive fact retrieval. Other scopes are summarized in the table above.
The screenshots use these short prompts. Paste them into Query Prompt and Keywords Extraction Prompt, respectively.
The service fills the placeholders. Keep the KEYWORDS: prefix and ASCII colons in keyword output, and preserve name capitalization.
- Enter
Who is Sarah?, setGraph-only AnswertoFalse, and setGraph-Vector AnswertoTrue. - Keep
Template Num=-1andRerank method=bleufor the first check, then clickAnswer Question. - Read
Graph-Vector Answerand compare facts such as age and occupation with the source document and graph.
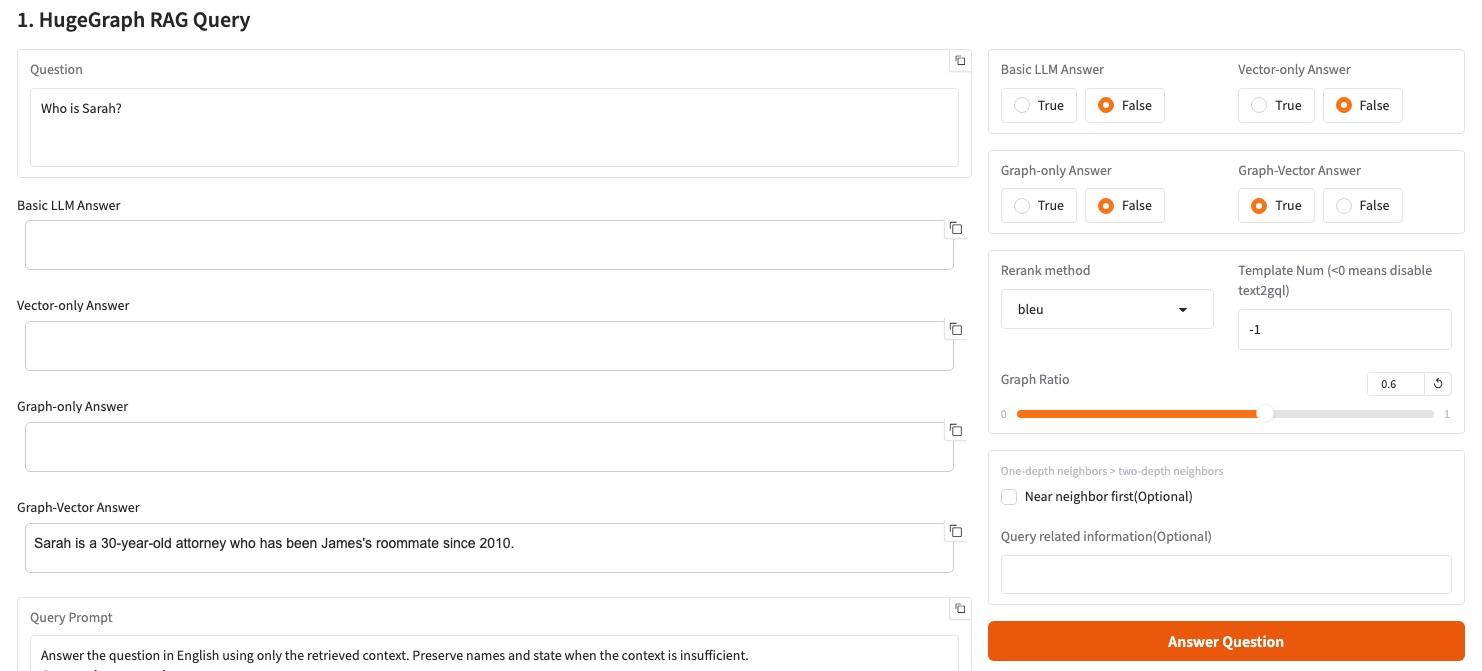
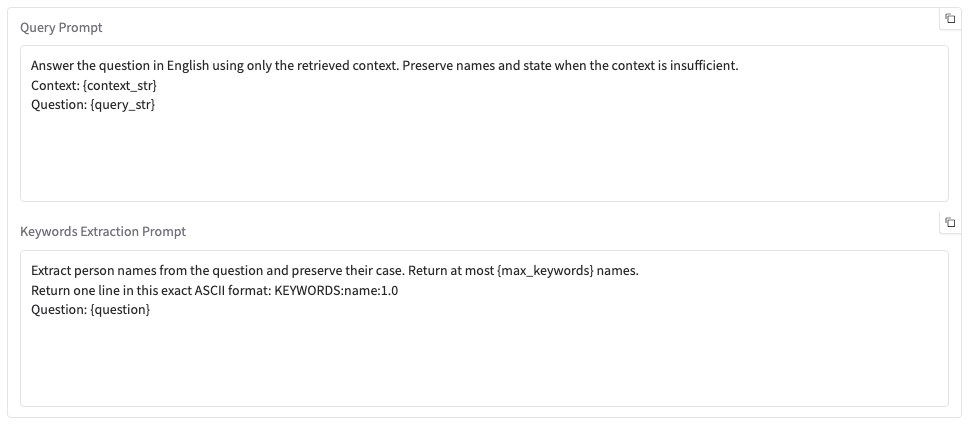
flowchart TD
    Q[Question] --> V[Query chunk vector index]
    Q --> K[Extract keywords]
    K --> M[Match graph vertices]
    M --> D{Text2Gremlin enabled}
    D -->|Yes| T[Generate and execute Gremlin]
    D -->|No| B[BFS graph traversal]
    T -->|Failure| B
    T --> R[Prepare graph results]
    B --> R
    V --> S[Merge and rerank]
    R --> S
    S --> A[Generate answer]
Graph retrieval first matches HugeGraph vertices exactly by keyword and then uses vector similarity if no exact match exists. The matched vertices are passed to Text2Gremlin. If generation or execution fails, the pipeline can fall back to a predefined traversal.
Template Num controls how Text2Gremlin participates in graph retrieval:
- A negative value skips Text2Gremlin entirely, so graph retrieval goes straight to the predefined traversal.
0uses baseline generation without retrieving examples.- A positive value retrieves that many similar examples from the example index and uses the template-guided result. The example count is clamped to the range 0 to 10.
Other controls on this tab are Rerank method (bleu or reranker), Graph Ratio, Near neighbor first, and Query related information, plus editable Query Prompt and Keywords Extraction Prompt fields.
Below the single-question panel is a batch back-testing panel. Upload an .xlsx or .csv file of questions, set Max Lines To Show, and click Generate Answer (Batch). The answers appear in a preview table and can be downloaded as a file. A template file is offered next to the upload control.
3. Text2Gremlin
The third tab converts natural language into Gremlin and executes the generated queries.
The upper panel builds an example vector index from question and Gremlin pairs in .json or .csv files.
When no file is uploaded, it uses resources/demo/text2gremlin.csv. Match example labels and properties to the current graph.
If building the example index does not automatically retrieve similar templates, you can provide few-shot examples directly in the Prompt template below.
Use these inputs to reproduce the Sarah query.
- Save the CSV below as
sarah-gremlin.csv, upload it, and clickBuild Example Vector Index. SetNumber of refer examplesto1. - Paste the simplified schema below into
Schema. It contains only the labels and properties needed for this query. - Paste the prompt below into
Prompt, enterWho is Sarah?, then clickText2Gremlin. - Check both generated queries and their
Query ... Outputfields. This example returns Sarah withage=30andoccupation=attorney.
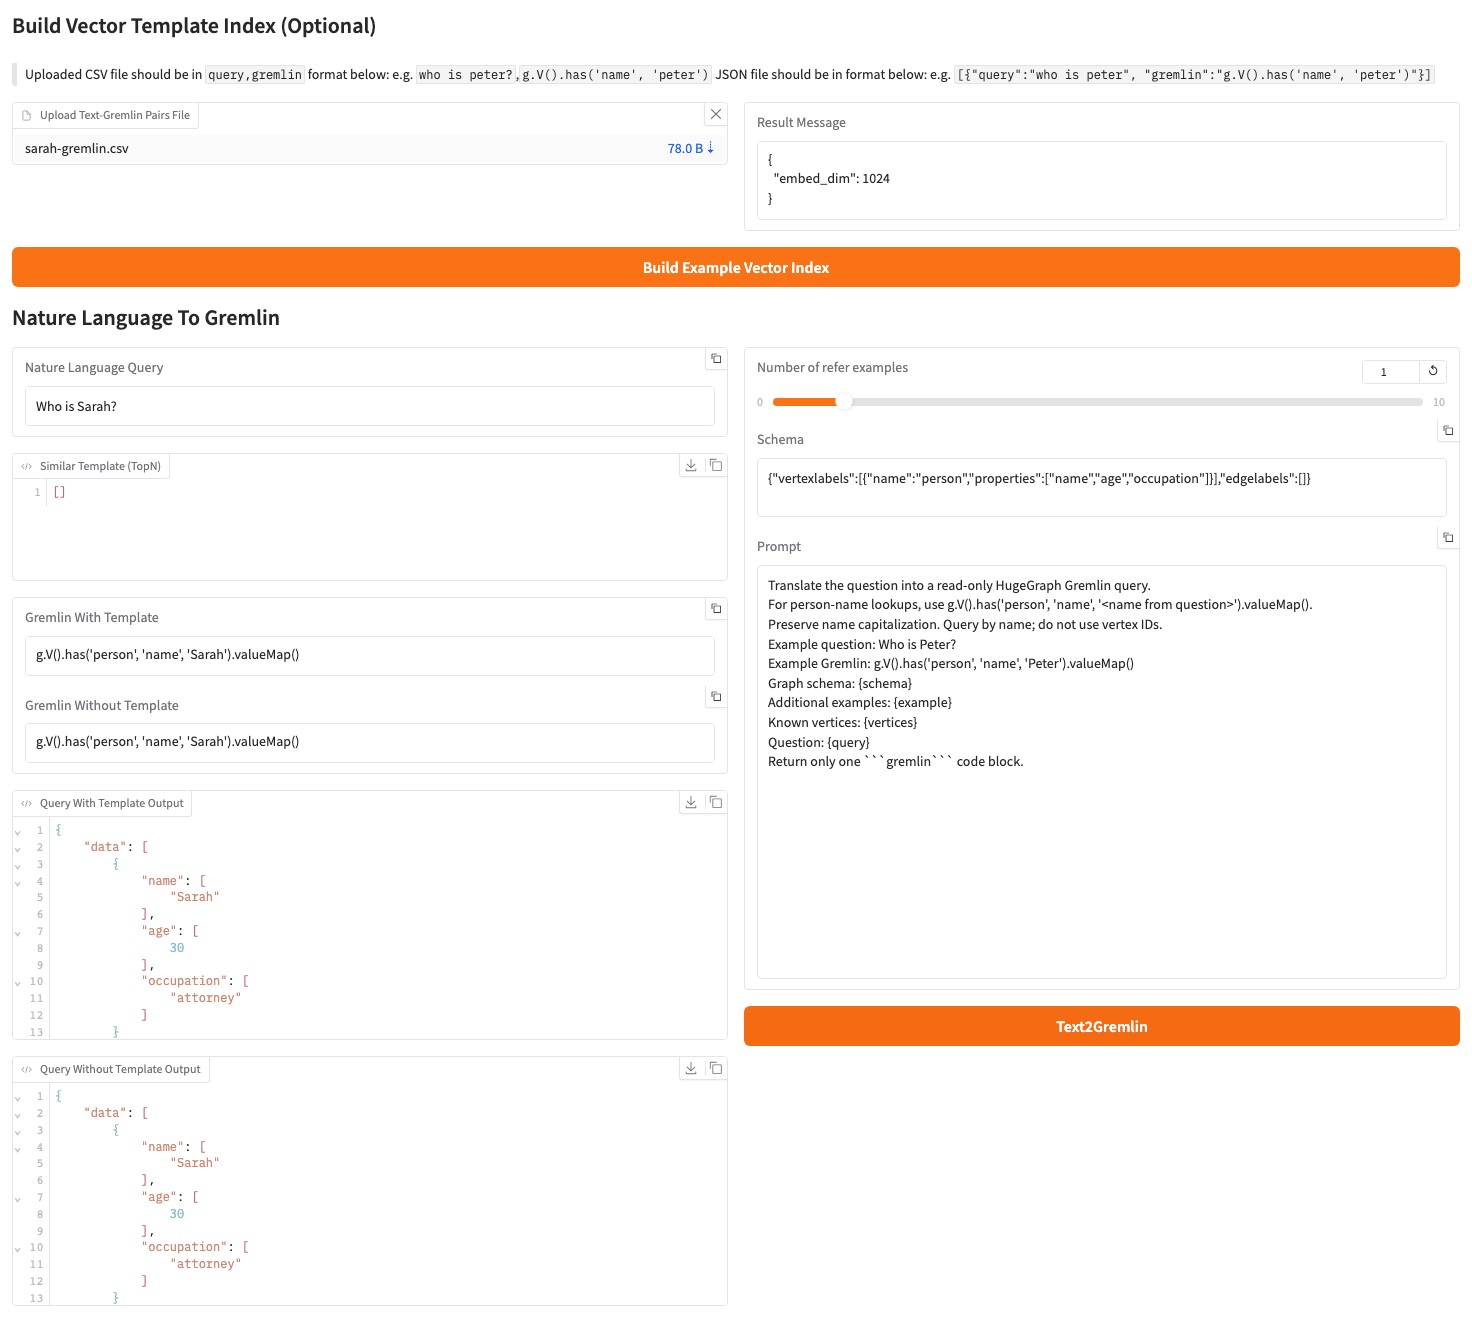
A small model can generate incorrect IDs, change name capitalization, or use filters that do not meet the graph’s index requirements. Check the returned data before treating a query as successful. The Web UI executes generated queries directly, so use a dedicated test graph. To generate a query without executing it, select the corresponding output types in the REST API.
A custom prompt must retain {query}, {schema}, {example}, and {vertices}. The REST API rejects it if any placeholder is missing.
4. Graph and Administration Tools
Graph Tools runs a Gremlin query directly against the configured graph, triggers a manual graph backup, and can initialize demo data in HugeGraph through a beta action. A background job also backs up the graph every day at 01:00, and a second background task keeps vertex-id embeddings up to date while the process runs.
Initializing demo data first clears the current graph. Use this action only on a dedicated test graph.
Admin Tools is password protected. Entering the configured ADMIN_TOKEN reveals the tail of logs/llm-server.log, which refreshes every 60 seconds, along with buttons to refresh or clear it. Access is refused while ADMIN_TOKEN is empty or still set to the placeholder xxxx.
When ENABLE_LOGIN=True, the Web UI asks for basic credentials with the fixed user name rag and USER_TOKEN as the password, and the REST API requires USER_TOKEN as a Bearer token. The log endpoint additionally requires a separately configured, secure ADMIN_TOKEN.
In production, enable HugeGraph-LLM login, replace USER_TOKEN and ADMIN_TOKEN, and enforce a source IP allowlist at the firewall or network entry point. Separately enable Server authentication and authorization, retain Server audit logs (normally audit-*.log), and grant GRAPH_USER minimum required permissions. AI service tokens do not replace Server authentication.
5. Prompt Language
Set LANGUAGE=EN or LANGUAGE=CN in hugegraph-llm/.env, then restart the service. This selects the language of built-in prompts; it does not translate input documents and is not a field in the /rag request body.
6. REST Calls
The Web UI and REST API use the same pipeline. For application integration, use /rag, /rag/graph, /graph/extract, and /text2gremlin; see the REST API for request formats.
3.3.4 - Configuration Reference
HugeGraph-LLM reads runtime configuration from .env and prompts from config_prompt.yaml. These files have different path-resolution rules; the prompt file is not part of .env.
The .env path is resolved in this order:
HUGEGRAPH_LLM_ENV_PATH, if that environment variable is set. A leading~is expanded.hugegraph-llm/.env, when the package runs from a source checkout..envin the current working directory, for an installed package.
The path is selected when the configuration module is imported. Set HUGEGRAPH_LLM_ENV_PATH before starting Python, not inside the .env file that will be loaded. Relative overrides are resolved against the process working directory.
The prompt YAML path is resolved in this order:
HUGEGRAPH_LLM_PROMPT_CONFIG_PATHfrom the process environment, expanding a leading~.hugegraph-llm/src/hugegraph_llm/resources/demo/config_prompt.yamlwhen running from source.${XDG_CONFIG_HOME:-~/.config}/hugegraph-llm/config_prompt.yamlfor an installed package.
Set path overrides before starting the process. Relative paths use its working directory. The source Docker image points PYTHONPATH at the source tree, so its default prompt path remains under hugegraph-llm/src/hugegraph_llm/resources/demo/.
Create or update files from configuration-class defaults with:
--update is enabled by default, so running without arguments has the same effect. On first configuration-module import, missing .env and prompt YAML files are created from defaults. The generator asks interactively before overwriting existing files. It handles HugeGraph, administrator, LLM, index, and prompt settings without overwriting existing files silently.
.env contains keys and passwords. Do not commit it to version control.
Basic Options
| Setting | Default | Description |
|---|---|---|
LANGUAGE | EN | Prompt language: EN or CN |
CHAT_LLM_TYPE | openai | Answer model: openai, litellm, or ollama/local |
EXTRACT_LLM_TYPE | openai | Information extraction model; same choices as above |
TEXT2GQL_LLM_TYPE | openai | Text2Gremlin model; same choices as above |
EMBEDDING_TYPE | openai | Embedding model; same choices as above, or empty |
RERANKER_TYPE | empty | cohere or siliconflow |
KEYWORD_EXTRACT_TYPE | llm | llm, textrank, or hybrid |
WINDOW_SIZE | 3 | TextRank window size, from 1 to 10 |
HYBRID_LLM_WEIGHTS | 0.5 | Weight of LLM results in hybrid mode, from 0 to 1 |
OpenAI-Compatible APIs
Chat, extraction, and Text2Gremlin can use different endpoints, keys, and models.
| Purpose | API base | Key | Model | Default maximum tokens |
|---|---|---|---|---|
| Answer | OPENAI_CHAT_API_BASE | OPENAI_CHAT_API_KEY | OPENAI_CHAT_LANGUAGE_MODEL | OPENAI_CHAT_TOKENS=8192 |
| Extraction | OPENAI_EXTRACT_API_BASE | OPENAI_EXTRACT_API_KEY | OPENAI_EXTRACT_LANGUAGE_MODEL | OPENAI_EXTRACT_TOKENS=256 |
| Text2Gremlin | OPENAI_TEXT2GQL_API_BASE | OPENAI_TEXT2GQL_API_KEY | OPENAI_TEXT2GQL_LANGUAGE_MODEL | OPENAI_TEXT2GQL_TOKENS=4096 |
| Embedding | OPENAI_EMBEDDING_API_BASE | OPENAI_EMBEDDING_API_KEY | OPENAI_EMBEDDING_MODEL | Not applicable |
The default API base is https://api.openai.com/v1. The default language model for all three tasks is gpt-4.1-mini, and the default embedding model is text-embedding-3-small.
OPENAI_BASE_URL and OPENAI_API_KEY provide general fallback values. Embeddings also support OPENAI_EMBEDDING_BASE_URL and OPENAI_EMBEDDING_API_KEY as fallback values.
LiteLLM
| Purpose | API base | Key | Model | Default maximum tokens |
|---|---|---|---|---|
| Answer | LITELLM_CHAT_API_BASE | LITELLM_CHAT_API_KEY | LITELLM_CHAT_LANGUAGE_MODEL | LITELLM_CHAT_TOKENS=8192 |
| Extraction | LITELLM_EXTRACT_API_BASE | LITELLM_EXTRACT_API_KEY | LITELLM_EXTRACT_LANGUAGE_MODEL | LITELLM_EXTRACT_TOKENS=256 |
| Text2Gremlin | LITELLM_TEXT2GQL_API_BASE | LITELLM_TEXT2GQL_API_KEY | LITELLM_TEXT2GQL_LANGUAGE_MODEL | LITELLM_TEXT2GQL_TOKENS=4096 |
| Embedding | LITELLM_EMBEDDING_API_BASE | LITELLM_EMBEDDING_API_KEY | LITELLM_EMBEDDING_MODEL | Not applicable |
The default language model is openai/gpt-4.1-mini, and the default embedding model is openai/text-embedding-3-small. Model names generally use the provider/model form; supported values depend on the LiteLLM service.
Ollama
| Purpose | Host | Port | Model |
|---|---|---|---|
| Answer | OLLAMA_CHAT_HOST | OLLAMA_CHAT_PORT | OLLAMA_CHAT_LANGUAGE_MODEL |
| Extraction | OLLAMA_EXTRACT_HOST | OLLAMA_EXTRACT_PORT | OLLAMA_EXTRACT_LANGUAGE_MODEL |
| Text2Gremlin | OLLAMA_TEXT2GQL_HOST | OLLAMA_TEXT2GQL_PORT | OLLAMA_TEXT2GQL_LANGUAGE_MODEL |
| Embedding | OLLAMA_EMBEDDING_HOST | OLLAMA_EMBEDDING_PORT | OLLAMA_EMBEDDING_MODEL |
The default host is 127.0.0.1 and the default port is 11434. Model names have no defaults; pull the required models in Ollama before use.
Reranking
| Setting | Default | Description |
|---|---|---|
COHERE_BASE_URL | https://api.cohere.com/v1/rerank | Cohere rerank endpoint; CO_API_URL is a fallback |
RERANKER_API_KEY | empty | Cohere or SiliconFlow key |
RERANKER_MODEL | empty | Model name supported by the service |
HugeGraph Connection and Retrieval Limits
| Setting | Default | Description |
|---|---|---|
GRAPH_URL | 127.0.0.1:8080 | HugeGraph address; it is not split into IP and port |
GRAPH_NAME | hugegraph | Graph name |
GRAPH_USER | admin | User name |
GRAPH_PWD | xxx | Password |
GRAPH_SPACE | empty | GraphSpace name |
LIMIT_PROPERTY | False | Whether to limit returned properties; read as a string by the configuration class |
MAX_GRAPH_PATH | 10 | Maximum graph path length |
MAX_GRAPH_ITEMS | 30 | Maximum number of graph retrieval items |
EDGE_LIMIT_PRE_LABEL | 8 | Result limit for each edge label |
VECTOR_DIS_THRESHOLD | 0.9 | Results beyond this vector-distance threshold are ignored |
TOPK_PER_KEYWORD | 1 | Candidates per keyword |
TOPK_RETURN_RESULTS | 20 | Results returned after reranking |
Vector Index Backend
| Setting | Default | Description |
|---|---|---|
CUR_VECTOR_INDEX | Faiss | Active vector store: Faiss, Milvus, or Qdrant |
QDRANT_HOST | empty | |
QDRANT_PORT | 6333 | |
QDRANT_API_KEY | empty | |
MILVUS_HOST | empty | |
MILVUS_PORT | 19530 | |
MILVUS_USER | empty | |
MILVUS_PASSWORD | empty |
FAISS is local and needs no extra dependency. Selecting Milvus or Qdrant without the optional dependencies raises an error that names the missing package, so install them first:
The same choice is available in the 5. Set up the vector engine. panel of the Web UI, which also persists the connection settings for the selected engine.
Login and Log API
| Setting | Default | Description |
|---|---|---|
ENABLE_LOGIN | False | Whether to require a Bearer token; read as a string by the configuration class |
USER_TOKEN | 4321 | Token for the Web UI and regular APIs |
ADMIN_TOKEN | xxxx | Administrator token used by /logs |
/logs returns 403 when ADMIN_TOKEN is empty or still set to xxxx.
In production, set ENABLE_LOGIN=True, replace USER_TOKEN and ADMIN_TOKEN, and enforce a source IP allowlist at the firewall or network entry point. This protects only HugeGraph-LLM. Separately enable Server authentication and authorization, retain Server audit logs (normally audit-*.log), and grant GRAPH_USER minimum required permissions. The two services use different credentials.
Minimal OpenAI Configuration
Configuration Loading
Configuration classes supply code defaults. During initialization, values from the selected .env are written into the process environment before the configuration objects are created, overriding same-named shell variables. Missing keys use defaults; empty values and unknown keys are ignored. The Web UI and configuration APIs can update settings and write supported fields back to .env. Restart after manual .env edits; prompt YAML is read at service startup or page load.
Keys are matched case-insensitively.
Configuration definitions are in:
hugegraph-llm/src/hugegraph_llm/config/llm_config.pyhugegraph-llm/src/hugegraph_llm/config/hugegraph_config.pyhugegraph-llm/src/hugegraph_llm/config/index_config.pyhugegraph-llm/src/hugegraph_llm/config/admin_config.pyhugegraph-llm/src/hugegraph_llm/config/prompt_config.pyhugegraph-llm/src/hugegraph_llm/config/models/base_config.pyfor the loading and file-sync behaviour
3.3.5 - HugeGraph-LLM REST API
The HugeGraph-LLM demo process serves both the Web UI and REST API. The default address is http://localhost:8001:
All endpoints are POST:
| Path | Success status | Purpose |
|---|---|---|
/rag | 200 | Answer a question with the selected retrieval modes |
/rag/graph | 200 | Graph retrieval only, without a final answer |
/graph/extract | 200 | Extract vertices and edges from text |
/text2gremlin | 200 | Generate Gremlin from natural language |
/config/graph | 201 | Update the HugeGraph connection |
/config/llm | 201 | Update the language model |
/config/embedding | 201 | Update the embedding model |
/config/rerank | 201 | Update the reranker |
/logs | 200 | Stream the server log |
Authentication
Enable login in .env:
Requests then require a Bearer token:
The same setting puts the Gradio UI behind basic authentication, with the fixed user name rag and USER_TOKEN as the password. A wrong token returns 401 with a WWW-Authenticate: Bearer header. When ENABLE_LOGIN is left at False, every endpoint is open.
Production requires HugeGraph-LLM login and a source IP allowlist at the firewall or network entry point. This protects only the LLM UI and REST API. Separately enable Server authentication and authorization, retain Server audit logs (normally audit-*.log), and grant GRAPH_USER minimum permissions. USER_TOKEN does not replace Server authentication.
RAG
POST /rag
Returns one or more answer types according to the switches. When none is explicitly selected, only graph_only is enabled.
The response contains only enabled answer fields:
Other optional parameters include graph_ratio (default 0.5), rerank_method (bleu or reranker, default bleu), near_neighbor_first (default false), custom_priority_info, and the three custom prompt fields answer_prompt, keywords_extract_prompt, and gremlin_prompt. Omitting a prompt field uses the value from config_prompt.yaml.
gremlin_tmpl_num selects how Text2Gremlin runs during graph retrieval. A negative value skips Text2Gremlin and goes straight to the predefined traversal, 0 generates Gremlin without examples, and a positive value retrieves that many examples from the example index.
An empty or whitespace-only query returns 400.
POST /rag/graph
Runs graph retrieval without generating a final natural-language answer:
graph_recall in the response can contain query, keywords, match_vids, graph_result_flag, gremlin, graph_result, and vertex_degree_list. Set get_vertex_only=true to return immediately after vertex matching; the endpoint then replaces match_vids with the full vertex details.
An empty query returns 400, a type error in the request returns 400, and any other failure returns 500.
Graph Extraction
POST /graph/extract
An inline schema does not connect to HugeGraph:
Request fields:
| Field | Default | Notes |
|---|---|---|
texts | required | A string or an array of strings; empty or blank entries are dropped and an empty result is rejected |
schema | required | Inline JSON object or string, or the name of an existing graph |
example_prompt | prompt YAML value | Extraction prompt header |
extract_type | property_graph | Only value currently accepted |
language | zh | zh or en, used for chunk splitting |
split_type | document | document, paragraph, or sentence |
include_meta | false | Adds vertex_count, edge_count, and text_count to meta |
client_config | none | Only allowed with a graph-name schema |
An inline schema must be an object with vertexlabels and edgelabels lists. Every vertex label needs a non-empty name and a non-empty properties list; every edge label needs a non-empty name, source_label, and target_label. propertykeys is optional and must be a list when present.
When schema is an existing graph name, also pass client_config, and make client_config.graph match that name. client_config here accepts only graph, user, pwd, and gs; unknown fields are rejected, and there is no url field:
A successful response always contains status (always succeeded), result.vertices, result.edges, warnings, and meta. meta stays empty unless include_meta is true.
Text2Gremlin
POST /text2gremlin
output_types can contain:
match_resulttemplate_gremlinraw_gremlintemplate_execution_resultraw_execution_result
If omitted, only template_gremlin is returned by default. An empty array lets the implementation return all outputs. A custom gremlin_prompt must contain {query}, {schema}, {example}, and {vertices}; a missing placeholder fails request validation and names the placeholders that are absent.
example_num defaults to 0, which means no templates, and is clamped to the range 0 to 10. client_config overrides the HugeGraph connection for the request; the schema used for generation is the active graph name. An empty query returns 400, and a generation failure returns 500.
Runtime Configuration
POST /config/graph
user and pwd default to empty strings, and gs is optional.
POST /config/llm and POST /config/embedding
Both endpoints use the same request model. /config/llm sets chat_llm_type, extract_llm_type, and text2gql_llm_type to the same value; per-task types can only be set separately through .env or the Web UI. OpenAI or LiteLLM example:
Ollama requests still require the common fields; api_key and api_base can be empty strings:
POST /config/rerank
reranker_type accepts cohere or siliconflow. Cohere also accepts cohere_base_url.
All four configuration endpoints return 201 on success. They change the process’s active configuration and may write values back to .env. /config/llm, /config/embedding, and /config/rerank restore the previous values if applying a change raises; /config/graph does not.
client_config in /rag, /rag/graph, and /text2gremlin overrides the HugeGraph connection for one request, and only the fields actually present in the request are applied. The current implementation still changes process-global settings temporarily, so do not issue long-running requests with different connections concurrently.
Logs
POST /logs
This endpoint requires ADMIN_TOKEN in .env to be changed to a secure value. Example request body:
log_file defaults to llm-server.log, must be a file name under logs/, and cannot be absolute, contain path separators, or resolve to . or ... Invalid names return 400.
An unset or placeholder ADMIN_TOKEN returns 403 before the token is even compared, and a wrong token returns a 403 body with the message Invalid admin_token.
The successful response is a text/plain stream that first replays the last 125 lines of the file and then follows it, in the manner of tail -f.
3.3.6 - Vermeer Python Client
vermeer-python-client is the Python SDK for Vermeer, the memory-first graph computing engine written in Go. The SDK wraps the REST API of the Vermeer master so you can list graphs, submit load and compute tasks, and read task state from Python. The import package is pyvermeer.
The module does not pin a Vermeer server version. It talks to the Vermeer master over HTTP using the endpoints listed in API Surface.
Requirements
- Current source requires Python 3.10 or later because its type annotations use Python 3.10 features, although packaging metadata still declares
>=3.9. - A running Vermeer master reachable over HTTP on its default port
6688. Docker deployments must publish6688:6688; see the Vermeer quick start. uv(recommended) orpip
Runtime dependencies: requests, urllib3, python-dateutil, decorator, rich, and setuptools.
Installation
The distribution name in the packaging metadata is vermeer-python-client and the version is managed independently of the repository version. The package is not published on PyPI yet, so install it from source.
From the root of the HugeGraph-AI repository, the vermeer extra installs it into the shared virtual environment:
vermeer-python-client is wired in as an editable path dependency rather than a uv workspace member, so a plain uv sync at the repository root does not install it. You have to ask for the extra (or for --all-extras).
To install the module standalone:
Connect to a Vermeer Master
Constructor parameters:
| Parameter | Type | Default | Description |
|---|---|---|---|
ip | str | required | Host name or IP address of the Vermeer master |
port | int | required | REST port of the Vermeer master |
token | str | required | Sent verbatim as the Authorization request header |
timeout | (float, float) or None | None | Connect and read timeouts in seconds |
log_level | str | "INFO" | Level applied to the shared VermeerClient logger |
For a client running on the host, use a master address reachable from that host. For a container client, use its container-network address. The client connects only to the master HTTP API; PD and Store addresses must be reachable from the Vermeer nodes that perform loading.
Behavior worth knowing before you connect:
tokenmay be an empty string when the master does not check authorization, but it cannot beNone. The session raisesValueError("Vermeer Token must be provided.")in that case.timeoutis a(connect, read)pair.VermeerConfighas its own default of(0.5, 15.0), but the client always forwards its own argument, so omittingtimeoutstoresNoneand the request waits without a deadline. Pass the pair explicitly if you want one.- The base URL is always built as
http://{ip}:{port}/, so the client speaks plain HTTP. - Every request sets
Content-Type: application/jsonand serializesparamsinto the request body, including forGETrequests. - The session configures up to 3 retries on HTTP 500, 502, and 504 with backoff factor
0.1. Status retries follow urllib3’s default allowed methods, which excludePOST; do not rely on automatic retries for task submission. log_levelsets the level of the shared logger namedVermeerClient. Its console handler is fixed atINFO, soDEBUGrecords are not printed to the console today.
End-to-End Example
The module ships vermeer-python-client/src/pyvermeer/demo/task_demo.py. This extended example polls with a deadline, waits for loading, reads the graph, and submits PageRank. It reads PD peers and the HugeGraph password from environment variables. The worker group must match the task-space allocation; a single-worker quick start can use worker_group=$. Bind a named group to the task space first, as shown in the Vermeer quick start.
Loading succeeds with loaded; computation succeeds with complete. error or canceled stops the example. Set VERMEER_PD_PEERS to a JSON array string, for example export VERMEER_PD_PEERS='["hugegraph-pd:8686"]'. The master must reach these PD addresses, and workers must reach the Store addresses returned by PD. Set VERMEER_TOKEN only if the master uses token authentication; an empty string works without it.
output.type=local writes results to the executing worker’s local filesystem with file-name prefix result/pagerank. Mount its result directory to read container output from the host. poll_timeout is the client polling deadline; requests between checks remain subject to HTTP timeouts and SDK retries, so completion can exceed that deadline. A timeout stops client waiting, not the Server task.
Never hardcode a real HugeGraph password into a script or configuration file. Use an environment variable or credential store.
Save and Run the Documentation Example
Save the complete extended example above as vermeer_client_example.py at the hugegraph-ai/ repository root. Run it with the workspace’s vermeer extra:
Enter the password and press Enter. Replace hugegraph-pd:8686 with a PD address reachable from the Vermeer master. If token authentication is enabled, supply VERMEER_TOKEN through your local credential-management method. These commands run the extended documentation example, not the bundled demo.
Original Bundled Demo
vermeer-python-client/src/pyvermeer/demo/task_demo.py is a separate minimal example. It hardcodes client port 8688, PD address 127.0.0.1:8686, and placeholder credentials xxx. It does not read the extended example’s environment variables, poll task state, or compute PageRank. Adjust its addresses and credentials separately if running it; it does not replace the documentation commands above.
API Surface
PyVermeerClient exposes its API groups as attributes. Two groups are registered today, graph and tasks.
client.graph
| Method | Vermeer endpoint | Returns |
|---|---|---|
get_graphs() | GET /graphs | GraphsResponse |
get_graph(graph_name) | GET /graphs/{graph_name} | GraphResponse |
client.tasks
| Method | Vermeer endpoint | Returns |
|---|---|---|
get_tasks() | GET /tasks | TasksResponse |
get_task(task_id) | GET /task/{task_id} | TaskResponse |
create_task(create_task) | POST /tasks/create | TaskCreateResponse |
pyvermeer/api/master.py and pyvermeer/api/worker.py contain only the license header, and neither group is registered on the client. Master and worker information is therefore not reachable from the client yet, even though MasterResponse and WorkersResponse already exist under pyvermeer/structure/.
client.send_request(method, endpoint, params) is the shared entry point behind both groups. You can call it directly to reach a Vermeer endpoint that has no wrapper yet; it returns the decoded JSON body as a plain dict.
Requests and Responses
TaskCreateRequest(task_type, graph_name, params) is serialized as {"task_type": ..., "graph": ..., "params": ...}. Note that graph_name becomes graph on the wire, which matches the payload documented for the Vermeer REST API.
Every response type extends BaseResponse and exposes errcode and message, plus a to_dict() helper. errcode is 0 on success and 1 on error; -1 means the field was missing from the response body.
GraphsResponse.graphsandGraphResponse.graphyieldVermeerGraphobjects withname,space_name,status,create_time,update_time,vertex_count,edge_count,workers,worker_group,use_out_edges,use_property,use_out_degree,use_undirected,on_disk, andbackend_option.TasksResponse.tasks,TaskResponse.task, andTaskCreateResponse.taskyieldTaskInfoobjects withid,state,create_user,create_type,create_time,start_time,update_time,graph_name,space_name,params,workers, anderror_message.- Timestamps are parsed with
python-dateutilintodatetimeobjects. An empty timestamp string becomesNone.
Server returns the task type as task_type, but SDK TaskInfo.type reads type, so that property is currently empty. The SDK also drops Server statistics_result. Use TaskInfo.state for polling. This is a field-contract mismatch in current source.
Task Parameters
The client does not validate params. Keys and values are passed straight through to Vermeer, so the accepted names come from the engine, not from the SDK. For the load parameters and the parameters of the supported algorithms, see the Vermeer quick start.
The usual sequence is the same as with the REST API directly: create a load task to read the graph into Vermeer, wait for it to finish, then create computation tasks against the loaded graph.
Errors
pyvermeer.utils.exception defines four exceptions, all raised from the underlying requests or JSON failure:
| Exception | Raised when |
|---|---|
ConnectError | requests.ConnectionError, the master is unreachable |
TimeOutError | requests.Timeout, the connect or read deadline expired |
JsonDecodeError | The response body is not valid JSON |
UnknownError | Any other failure during the request |
The client does not check the HTTP status code of the response, so inspect errcode and message on the returned object to tell success from a Vermeer-side error.
Development Checks
Run the formatting and static checks from the root of the HugeGraph-AI repository:
The source lives under vermeer-python-client/src/pyvermeer/. A few structure tests are available under src/tests/structure/test_task_data.py; they do not cover HTTP API integration.
References
3.4 - HugeGraph Computing (OLAP)
The HugeGraph-Computer repository contains two graph computing systems with different deployment and runtime models. Start with Go Vermeer for general graph algorithms; use Computer when you need distributed Java BSP/Pregel computation. Both can connect to HugeGraph, but their configuration and job entry points are not interchangeable.
Default entry: Go Vermeer
flowchart TB
    Master["Master"] --> Workers["Workers"]
    Master -->|PD| PD["PD"]
    Workers -->|Scan| Store["Store"]
    Workers -.->|REST| Server["Server"]
With load.type=hugegraph, the Vermeer master queries PD for partition metadata and workers scan HStore Store partitions directly. Workers write results through the Server REST API only when output.type=hugegraph; other input sources or output settings do not require those connections.
Java Computer
flowchart TB
    Config["Job configuration"] --> Master["Master"] --> Workers["Workers"]
    Master -. BSP .-> Etcd["etcd"]
    Workers <-->|REST| Server["Server"]
    Workers <-->|HDFS| HDFS["HDFS (optional)"]
Job configuration can be submitted through the Kubernetes Operator or YARN. Workers read graph data through the HugeGraph Server REST API and can write results back according to the output configuration. With HDFS input or output, workers access HDFS directly. The master uses etcd to coordinate BSP jobs.
3.4.1 - HugeGraph-Vermeer Quick Start
1. Overview of Vermeer
1.1 Architecture
Vermeer is a high-performance, memory-first graph computing framework written in Go: start once and execute repeatedly. It supports fast execution of 15+ OLAP algorithms, often in seconds to minutes; actual time depends on graph size, algorithm parameters, and resources. A single master currently schedules multiple workers.
The master handles communication, forwarding, and aggregation, with modest computation and resource usage. Workers store graph data and execute tasks, consuming most memory and CPU. gRPC handles internal communication; REST provides external APIs.
At startup, built-in defaults are loaded first, followed by the [default] section of config/<env>.ini under the working directory, then explicit command-line overrides. For example, --env=master reads config/master.ini. The Docker image copies repository configuration to /go/bin/config/ and works from /go/bin/. A host bind mount hides the bundled files, so it must contain every ini file used. The configuration reader does not read environment variables.
Default ports:
| Role | Configuration key | Default address | Purpose |
|---|---|---|---|
| master | http_peer | 0.0.0.0:6688 | REST API for host-side clients |
| master | grpc_peer | 0.0.0.0:6689 | Workers connect to master |
| worker | http_peer | 0.0.0.0:6788 | Worker HTTP service |
| worker | grpc_peer | 0.0.0.0:6789 | Worker gRPC listener, also advertised to master for node communication |
The Docker examples publish only master HTTP on host loopback 127.0.0.1:6688:6688; master and worker gRPC ports stay within the container network.
flowchart LR
  Client["curl / Python client"] -->|"HTTP :6688"| Master["master"]
  Worker["worker"] <-->|"Bidirectional gRPC: master :6689, worker :6789"| Master
  Master -->|"gRPC partition lookup"| PD["HugeGraph PD"]
  Worker -->|"gRPC partition scan"| Store["HugeGraph Store"]
1.2 Running Vermeer
In production, enable Server authentication and authorization, an IP allowlist, and minimum permissions; retain audit-*.log. Server Auth does not protect independent Vermeer, PD, or Store APIs. Restrict these HTTP/gRPC ports to trusted networks and callers, and configure access controls at the Vermeer external entry point.
master.ini defaults to auth=none, disabling authentication for ordinary and administrative APIs. Local examples publish loopback only. Before remote access, enable auth=token or restrict callers through a protected network or gateway.
Both Docker options need a host configuration directory. From the Vermeer repository root, copy the supplied master.ini and worker.ini templates. The mount hides image configuration under /go/bin/config, so never mount an empty directory or your entire home directory there:
Keep master HTTP/gRPC listeners at 0.0.0.0:6688 and 0.0.0.0:6689. The Compose example assigns 172.20.0.10 to master and 172.20.0.11 to worker; set these options in the copied worker.ini:
This single-worker example uses literal worker_group=$, the general group used when no named group is bound. The repository template defaults to worker_group=default; if retaining that named group, bind it to the task space or graph before submitting tasks. For default space $DEFAULT, use:
An errcode=0 response confirms binding; with token authentication, also supply the authorization header. master_peer must reach master gRPC from the worker network. grpc_peer is both the listener and advertised worker address, so do not advertise 0.0.0.0, which other containers cannot reach. Update these IPs when changing the subnet or addresses; each additional worker needs a unique, mutually reachable grpc_peer.
- Option 1: Docker Compose (Recommended)
Run from the Vermeer repository root. Modify existing docker-compose.yaml or use the following example. The repository file currently mounts all of ~/ as configuration and does not publish master HTTP; replace the mount and add the port mapping before starting:
Replace /home/user/vermeer-config with your actual absolute configuration directory. Changing the subnet or static IPs of vermeer_network also requires updating grpc_peer and master_peer in worker.ini. Do not use the default grpc_peer=0.0.0.0:6789 as an advertised container address.
Build and start from the project directory:
View logs / stop / remove:
- Option 2: Separate docker run Commands (Manual Network and Static IPs)
Set CONFIG_DIR to the prepared configuration directory, with grpc_peer and master_peer matching the static container addresses. Replace the example CONFIG_DIR with your actual absolute path.
Build the image:
Create a custom bridge network (once):
Run master (use your absolute CONFIG_DIR and adjust IPs as needed):
Run worker:
View logs / stop / remove:
- Option 3: Build from Source
Build following the Vermeer README.
Start from the Vermeer root directory with ./vermeer --env=master and ./vermeer --env=worker01. In worker01.ini, set grpc_peer to an address bindable locally and reachable by master and other workers; point master_peer to master gRPC.
After starting master, check its HTTP port from the host:
Expect HTTP 200 and JSON errcode=0.
2. Task Creation REST API
2.1 Introduction
Submit a load task, wait for loading to finish, then submit a compute task. A loaded graph can support repeated computations and is not deleted after completion. Asynchronous APIs return creation results and task information, including ID, before completion; synchronous APIs wait for success or failure, so client and proxy HTTP timeouts must be sufficiently long. Query task states: loaded for successful loading, complete for successful computation, error for failure, and canceled for cancellation; other states remain waiting or running. Graphs loading or in an error state cannot be computed. Deletion requires a deletable graph state and no current usage.
Available URLs:
- Asynchronous:
POST http://master_ip:port/tasks/create; read the ID from responsetask.id. - Synchronous:
POST http://master_ip:port/tasks/create/sync; returns after the task ends. - Query task:
GET http://master_ip:port/task/{task_id}.errcode=0indicates a successful query; inspecttask.statefor task status. Set a client polling deadline for asynchronous jobs; reaching it stops client waiting without canceling the server task.
2.2 Loading Graph Data
The examples list common load parameters. Each loader reads its own keys; unused keys do not change behavior.
Vermeer provides three loading methods:
- Local files
load.vertex_files and load.edge_files map worker address host portions to file paths read by those workers. With containers, mount data into the worker and use container paths. In the Compose example, mount a host data directory at worker /data (such as - /host/data:/data:ro) and use 172.20.0.11 from grpc_peer as the mapping key. Other deployments use the host portion of their advertised worker addresses.
Obtain a dataset such as Twitter-2010; the first twitter-2010.txt.gz file is sufficient.
Request example:
- HugeGraph
Request example:
Replace request addresses, graph name, and credentials with your actual connection settings.
Vermeer master connects to PD through load.hg_pd_peers to look up partitions; workers read data from the returned Store addresses. These services must be reachable from the corresponding Vermeer hosts or containers. Inside Docker, 127.0.0.1 identifies the container itself, not the host or another container.
- HDFS
Request example:
2.3 Outputting Computation Results
Current result writers support local, hdfs, and hugegraph through output.type; none disables output. Source retains an afs constant, but current master registers no AFS loader or writer. Set output.need_statistics=1 to put statistics into task information; supported statistics operators depend on each algorithm implementation.
The examples list common computation and output parameters; supported algorithm parameters depend on current Vermeer implementations.
Request example:
output.type=local writes to the executing worker’s local filesystem. For containers, mount the output directory if the host needs to read results.
3. Supported Algorithms
3.1 PageRank
The PageRank algorithm, also known as the web ranking algorithm, is a technique used by search engines to calculate the relevance and importance of web pages (nodes) based on their mutual hyperlinks.
- If a web page is linked to by many other web pages, it indicates that the web page is relatively important, and its PageRank value will be relatively high.
- If a web page with a high PageRank value links to other web pages, the PageRank value of the linked web pages will also increase accordingly.
The PageRank algorithm is suitable for scenarios such as web page ranking and identifying key figures in social networks.
Request example:
3.2 WCC (Weakly Connected Components)
The weakly connected components algorithm calculates all connected subgraphs in an undirected graph and outputs the weakly connected subgraph ID to which each vertex belongs, indicating the connectivity between points and distinguishing different connected communities.
Request example:
3.3 LPA (Label Propagation Algorithm)
The label propagation algorithm is a graph clustering algorithm commonly used in social networks to discover potential communities.
Request example:
3.4 Degree Centrality
The degree centrality algorithm calculates the degree centrality value of each node in the graph, supporting both undirected and directed graphs. Degree centrality is an important indicator of node importance; the more edges a node has with other nodes, the higher its degree centrality value, and the more important the node is in the graph. In an undirected graph, degree centrality is calculated based on edge information to count the number of times a node appears, resulting in the degree centrality value of the node. In a directed graph, it is based on the direction of the edges, filtering based on input or output-edge information to count the number of times a node appears, resulting in the in-degree or out-degree value of the node. It indicates the importance of each point, with more important points having higher degrees.
Request example:
3.5 Closeness Centrality
Closeness centrality is used to calculate the inverse of the shortest distance from a node to all other reachable nodes, accumulating and normalizing the value. Closeness centrality can be used to measure the time it takes for information to be transmitted from the node to other nodes. The larger the closeness centrality of a node, the closer its position in the graph is to the center, suitable for scenarios such as identifying key nodes in social networks.
Request example:
3.6 Betweenness Centrality
The betweenness centrality algorithm determines the value of a node as a “bridge” node; the larger the value, the more likely it is to be a necessary path between two points in the graph. Typical examples include mutual followers in social networks. It is suitable for measuring the degree of aggregation around a node in a community.
Request example:
3.7 Triangle Count
The triangle count algorithm calculates the number of triangles passing through each vertex, suitable for calculating the relationships between users and whether the associations form triangles. The more triangles, the higher the degree of association between nodes in the graph, and the tighter the organizational relationship. In social networks, triangles indicate cohesive communities, and identifying triangles helps understand clustering and interconnections among individuals or groups in the network. In financial or transaction networks, the presence of triangles may indicate suspicious or fraudulent activities, and triangle counting can help identify transaction patterns that may require further investigation.
The output result is the Triangle Count corresponding to each vertex, i.e., the number of triangles the vertex is part of.
Note: This algorithm is for undirected graphs and ignores edge directions.
Request example:
3.8 K-Core
The K-Core algorithm marks all vertices with a degree of K, suitable for graph pruning and finding the core part of the graph.
Request example:
3.9 SSSP (Single Source Shortest Path)
The single source the shortest path algorithm calculates the shortest distance from one point to all other points.
Request example:
3.10 KOUT
Starting from a point, get the k-layer nodes of this point.
Request example:
3.11 Louvain
The Louvain algorithm is a community detection algorithm based on modularity. The basic idea is that nodes in the network try to traverse all neighbor community labels and choose the community label that maximizes the modularity increment. After maximizing modularity, each community is regarded as a new node, and the process is repeated until the modularity no longer increases.
The distributed Louvain algorithm implemented on Vermeer is affected by factors such as node order and parallel computation. Due to the random traversal order of the Louvain algorithm, community compression also has a certain randomness, leading to different results in multiple executions. However, the overall trend will not change significantly.
Request example:
3.12 Jaccard Similarity Coefficient
The Jaccard index, also known as the Jaccard similarity coefficient, is used to compare the similarity and diversity between finite sample sets. The larger the Jaccard coefficient value, the higher the similarity of the samples. It is used to calculate the Jaccard similarity coefficient between a given source point and all other points in the graph.
Request example:
3.13 Personalized PageRank
The goal of personalized PageRank is to calculate the relevance of all nodes relative to user u. Starting from the node corresponding to user u, at each node, there is a probability of 1-d to stop walking and start again from u, or a probability of d to continue walking, randomly selecting a node from the nodes pointed to by the current node to walk down. It is used to calculate the personalized PageRank score starting from a given starting point, suitable for scenarios such as social recommendations.
Since the calculation requires using out-degree, load.use_out_degree needs to be set to 1 when reading the graph.
Request example:
3.14 Global Kout
Calculate the k-degree neighbors of all nodes in the graph (excluding themselves and 1~k-1 degree neighbors). Due to the severe memory expansion of the global kout algorithm, k is currently limited to 1 and 2. Additionally, the global kout algorithm supports filtering functions (parameters such as “compute.filter”:“risk_level==1”), and the filtering condition is judged when calculating the k-degree. The final result set includes those that meet the filtering condition. The algorithm’s final output is the number of neighbors that meet the condition.
Request example:
3.15 Clustering Coefficient
The clustering coefficient represents the coefficient of the clustering degree of nodes in a graph. In real networks, especially in specific networks, nodes tend to establish a tightly organized relationship due to relatively high-density connection points. The clustering coefficient algorithm (Cluster Coefficient) is used to calculate the clustering degree of nodes in the graph. This algorithm is for local clustering coefficients. The local clustering coefficient can measure the clustering degree around each node in the graph.
Request example:
3.16 SCC (Strongly Connected Components)
In the mathematical theory of directed graphs, if every vertex of a graph can be reached from any other point in the graph, the graph is said to be strongly connected. The parts of any directed graph that can achieve strong connectivity are called strongly connected components. It indicates the connectivity between points and distinguishes different connected communities.
Request example:
🚧, further updates and improvements will be made at any time. Suggestions and feedback are welcome.
3.4.2 - HugeGraph-Computer Quick Start
1. Component Overview
HugeGraph-Computer is a Java distributed graph computing framework based on BSP (Bulk Synchronous Parallel), with algorithms running in iterative supersteps. Kubernetes Operator or YARN can schedule jobs; master and worker processes can also run on one machine for small trial jobs.
Computer and Vermeer, in the same repository, are separate implementations: Computer uses a Java/BSP runtime for distributed computing, while Vermeer is a Go in-memory graph computing platform with a master-worker architecture. They share HugeGraph data sources, but their deployment and job configurations are not interchangeable.
Computer reads graph data from HugeGraph or HDFS and writes results to either system. The runtime can spill some data to disk; whether a job completes still depends on input size, resources, and configuration. Disk spilling does not remove resource limits.
2. Prerequisites and Connections
Building and running require JDK 11 or later; source builds also require Maven 3.5 or later. The PageRank example needs a running HugeGraph-Server with graph data, plus etcd reachable by the master and workers.
| Service | Example address or port | Purpose |
|---|---|---|
| HugeGraph-Server | http://127.0.0.1:8080 | Read graph data and write algorithm results; configured by hugegraph.url. |
| etcd | http://127.0.0.1:2379 | BSP job coordination; configured by bsp.etcd_endpoints. |
| Computer master RPC | TCP 8190 | Workers connect to master; port in the distribution configuration. |
| Computer worker data transfer | OS-assigned locally; K8s Operator defaults to 8099 | Transfer vertices and messages between workers. Advertised addresses and ports must be reachable across hosts. |
| MinIO (K8s manifests) | HTTP 9000 | Input partition snapshots. Computer 1.7.0 manifests incorrectly map Service port 9000 to MinIO Console port 9090; change targetPort to 9000 before enabling snapshots. Defaults are snapshot.write=false and snapshot.load=false, so MinIO access is unnecessary when snapshots are disabled. |
| cert-manager (K8s) | In-cluster service | Operator manifests use cert-manager.io/v1 Certificate, Issuer, and CA injection. Install a compatible version before deploying the Operator. |
| HDFS | Cluster-specific | Required only when input or output uses HDFS. |
For Kubernetes jobs, hugegraph.url must be reachable from all computing Pods; do not use a localhost address available only on your computer. If HugeGraph authentication is enabled, configure the username and password and supply matching credentials for REST queries.
In production, enable Server authentication and authorization, retain Server audit logs (normally audit-*.log), give Computer a dedicated account with only the read/write permissions required by its jobs, and configure a source IP allowlist for Server. hugegraph.username and hugegraph.password are credentials for connecting to Server, not a replacement for Server authentication.
See the Computer configuration reference for more options.
3. Obtain Source and Build a Distribution
The Apache HugeGraph download directory provides versioned Computer source archives, without separate precompiled Computer binaries. This example uses VERSION=1.7.0, whose source archive and build output names include -incubating-. For other versions, use the actual filenames in the download directory.
To build current master, clone and package the source:
The computer/computer-dist module assembles the distribution, including bin/start-computer.sh, runtime dependencies in lib/, built-in algorithms in algorithm/builtin-algorithm.jar, and default conf/computer.properties and conf/log4j2.xml. The source configuration is computer/computer-dist/src/assembly/static/conf/computer.properties. Release 1.7.0 build output includes -incubating-; current master omits it and takes its version from the POM. Use archive names matching the source you built.
4. Run PageRank Locally
Edit conf/computer.properties in the distribution directory with your HugeGraph URL, graph name, and credentials; point bsp.etcd_endpoints to reachable etcd. The default configuration selects built-in PageRankParams. Master and workers must use the same configuration and job.id; concurrent jobs need distinct job IDs.
Start processes from the distribution directory in two terminals. The script reads conf/computer.properties by default; use -c to select another file.
Master waits for the configured workers to register before running the job. Check both terminal outputs; the default logging configuration also writes master and worker logs under the distribution directory’s logs/. Process startup alone does not confirm completion: verify that input, superstep computation, and output all finish normally in the master log.
PageRank writes results to HugeGraph under page_rank. First ensure every target vertex label allows this property. Computer creates a DOUBLE, OLAP_COMMON property key but does not add it to vertex labels. If absent, create it:
If the property key already exists, verify its type is DOUBLE and write_type is OLAP_COMMON. List vertex labels, then add nullable page_rank to every label being computed; replace person with the actual label:
If the current read mode hides OLAP writes, an administrator can set it to ALL:
Query vertices to verify the result property:
When authentication is required, add --user "$HG_USER:$HG_PASSWORD" to curl. See the graph read-mode REST API for the endpoint and permissions.
5. Run PageRank on Kubernetes
Ensure computing Pods can reach HugeGraph-Server, then install a cluster-compatible cert-manager using its official installation guide. The Computer Operator manifests deploy the Operator, etcd, and MinIO. Use the same Computer release for the CRD and Operator manifests; this example uses 1.7.0:
The 1.7.0 MinIO Service maps S3 API port 9000 to Console port 9090. Fix this mapping before enabling snapshots and set snapshot.minio_endpoint to http://hugegraph-computer-operator-minio.hugegraph-computer-operator-system.svc:9000. Skip this when snapshots remain disabled.
Replace the HugeGraph URL with a service address reachable by computing Pods, then submit a HugeGraphComputerJob. This example uses the official Docker Hub image hugegraph/hugegraph-computer:latest and its built-in PageRank JAR. Custom algorithm JARs can be bundled in the image and selected with jarFile, or downloaded from HTTP(S) with remoteJarUri. The partition count must be at least the worker count.
Save the following YAML as pagerank-job.yaml, then apply it:
SUCCEEDED means the job completed. By default, the Operator deletes the CR and computing resources after completion. Expand the following instructions when you need to retain state or investigate a failed job.
The Operator defaults to AUTO_DESTROY_POD=true, so short jobs may lose their CR and Pods before inspection. Disable this before submitting the job, wait for the replacement Controller Pod to become ready, then submit. Change this setting in the Java Operator’s controller container:
Inspect runtime information or failure logs:
After checking results, delete the CR to clean up associated resources and restore the default policy:
After PageRank writes to HugeGraph, set the read mode and query as in the previous section. For HDFS output, results are under output.hdfs_path_prefix/<job.id>/; filenames and partition layout depend on job configuration.
See the CRD configuration reference for all fields.
6. Built-in Algorithms and Development
Current built-in algorithms include:
- Centrality: PageRank, Betweenness Centrality, Closeness Centrality, Degree Centrality.
- Communities and structure: Clustering Coefficient, K-core, LPA, Triangle Count, WCC.
- Paths and sampling: ring detection, filtered ring detection, single-source shortest path, Random Walk.
Implementations are in computer/computer-algorithm. Custom algorithms must follow the Computer API and be packaged as loadable JARs; see the Computer README for modules and development entry points.
3.4.3 - HugeGraph-Computer Configuration Reference
Computer Config Options
The defaults in the tables come from ComputerOptions.java in computer-api; explicit conf/computer.properties overrides are shown as “code default (distribution: actual value)”. Common options such as rpc.* come from HugeGraph Commons; distribution values are listed separately below.
Configuration Sources
- Source template:
computer/computer-dist/src/assembly/static/conf/computer.properties, withlog4j2.xmlin the same directory. Mavenpackagecopies these into distributionconf/, runtime dependencies intolib/, and built-in algorithm JARs intoalgorithm/. Templates are maintained in source; there is no separate configuration generator. - Standalone and YARN: startup scripts read distribution
conf/computer.propertiesby default. Override it withbin/start-computer.sh -c <configuration-path>; master and workers need the same job parameters. - Kubernetes Operator: users supply
spec.computerConfin the CRD; the Operator writes a ConfigMap mounted ascomputer.properties. It supplies job ID, worker count, Pod addresses, and etcd when unspecified. Unspecified or zero transfer/RPC ports become8099/8190;transport.server_hostandrpc.server_hostbecome Pod IPs. Job startup scripts substitute only${POD_IP},${HOSTNAME},${POD_NAME}, and${POD_NAMESPACE}. - Kubernetes job images must contain the Computer runtime. Bundle algorithm JARs and select them with
jarFile, or use an HTTP(S)remoteJarUrifor startup download. See the Computer Quick Start and CRD table below.
Apache downloads provide versioned Computer source archives without separate precompiled binaries. Release 1.7.0 source and distribution names include -incubating-; run mvn clean package -DskipTests in the tagged computer/ project to build them. Current master omits that marker and takes its version from the POM. Source archives cannot be started as built distributions.
Empty HugeGraph credentials and example MinIO keys below are for local demonstrations. In production, enable Server authentication and authorization, retain Server audit-*.log, use a Computer account with minimum required Server permissions, and configure a Server source IP allowlist. Do not use example MinIO keys in production.
1. Basic Configuration
Core job settings for HugeGraph-Computer.
| config option | default value | description |
|---|---|---|
| hugegraph.url | http://127.0.0.1:8080 | The HugeGraph server URL to load data and write results back. |
| hugegraph.name | hugegraph | The graph name to load data and write results back. |
| hugegraph.username | "" (empty) | The username for HugeGraph authentication (leave empty if authentication is disabled). |
| hugegraph.password | "" (empty) | The password for HugeGraph authentication (leave empty if authentication is disabled). |
| job.id | local_0001 (packaged: local_001) | The job identifier on YARN cluster or K8s cluster. |
| job.namespace | "" (empty) | Optional etcd job-key prefix for namespace isolation; distinct from Kubernetes metadata.namespace and not populated automatically by the Operator. |
| job.workers_count | 1 | The number of workers for one graph algorithm job. In K8s, this option is set by the Operator. |
| job.partitions_count | 1 | The number of partitions for computing one graph algorithm job. |
| job.partitions_thread_nums | 4 | The number of threads for partition parallel compute. |
2. Algorithm Configuration
Algorithm-specific configuration for computation logic.
| config option | default value | description |
|---|---|---|
| algorithm.params_class | ComputerOptions.Null placeholder class | Required. The class used to pass algorithm parameters before the algorithm runs. |
| algorithm.result_class | ComputerOptions.Null placeholder class | The vertex value class used to store computation results. |
| algorithm.message_class | ComputerOptions.Null placeholder class | The message class passed while computing a vertex. |
3. Input Configuration
Configuration for loading input data from HugeGraph or other sources.
3.1 Input Source
| config option | default value | description |
|---|---|---|
| input.source_type | hugegraph-server | The source type to load input data, allowed values: [‘hugegraph-server’, ‘hugegraph-loader’]. The ‘hugegraph-loader’ means use hugegraph-loader to load data from HDFS or file. If using ‘hugegraph-loader’, please configure ‘input.loader_struct_path’ and ‘input.loader_schema_path’. |
| input.loader_struct_path | "" (empty) | The structure path for Loader input. It takes effect only when input.source_type=hugegraph-loader. |
| input.loader_schema_path | "" (empty) | The schema path for Loader input. It takes effect only when input.source_type=hugegraph-loader. |
3.2 Input Splits
| config option | default value | description |
|---|---|---|
| input.split_size | 1048576 (1 MB) | The input split size in bytes. |
| input.split_max_splits | 10000000 | The maximum number of input splits. |
| input.split_page_size | 500 | The page size for streamed load input split data. |
| input.split_fetch_timeout | 300 | The timeout in seconds to fetch input splits. |
3.3 Input Processing
| config option | default value | description |
|---|---|---|
| input.filter_class | org.apache.hugegraph.computer.core.input.filter.DefaultInputFilter | The class to create input-filter object. Input-filter is used to filter vertex edges according to user needs. |
| input.edge_direction | OUT | The direction of edges to load, allowed values: [OUT, IN, BOTH]. When the value is BOTH, edges in both OUT and IN directions will be loaded. |
| input.edge_freq | MULTIPLE | The frequency of edges that can exist between a pair of vertices, allowed values: [SINGLE, SINGLE_PER_LABEL, MULTIPLE]. SINGLE means only one edge can exist between a pair of vertices (identified by sourceId + targetId); SINGLE_PER_LABEL means each edge label can have one edge between a pair of vertices (identified by sourceId + edgeLabel + targetId); MULTIPLE means many edges can exist between a pair of vertices (identified by sourceId + edgeLabel + sortValues + targetId). |
| input.max_edges_in_one_vertex | 200 | The maximum number of adjacent edges allowed to be attached to a vertex. The adjacent edges will be stored and transferred together as a batch unit. |
3.4 Input Performance
| config option | default value | description |
|---|---|---|
| input.send_thread_nums | 4 | The number of threads for parallel sending of vertices or edges. |
4. Snapshot & Storage Configuration
HugeGraph-Computer supports snapshot functionality to save vertex/edge partitions to local storage or MinIO object storage, enabling checkpoint recovery or accelerating repeated computations.
4.1 Basic Snapshot Configuration
| config option | default value | description |
|---|---|---|
| snapshot.write | false | Whether to write snapshots of input vertex/edge partitions. |
| snapshot.load | false | Whether to load from snapshots of vertex/edge partitions. |
| snapshot.name | "" (empty) | User-defined snapshot name to distinguish different snapshots. |
4.2 MinIO Integration (Optional)
MinIO can be used as a distributed object storage backend for snapshots in K8s deployments.
| config option | default value | description |
|---|---|---|
| snapshot.minio_endpoint | "" (empty) | MinIO service endpoint (e.g., http://minio:9000). Required when using MinIO. |
| snapshot.minio_access_key | minioadmin | MinIO access key for authentication. |
| snapshot.minio_secret_key | minioadmin | MinIO secret key for authentication. |
| snapshot.minio_bucket_name | "" (empty) | MinIO bucket name for storing snapshot data. |
Usage Scenarios:
- Checkpoint Recovery: Resume from snapshots after job failures, avoiding data reloading
- Repeated Computations: Load data from snapshots when running the same algorithm multiple times
- A/B Testing: Save multiple snapshot versions of the same dataset to test different algorithm parameters
Example: Local Snapshot (in computer.properties):
Example: MinIO Snapshot (in K8s CRD computerConf):
5. Worker & Master Configuration
Configuration for worker and master computation logic.
5.1 Master Configuration
| config option | default value | description |
|---|---|---|
| master.computation_class | org.apache.hugegraph.computer.core.master.DefaultMasterComputation | Master-computation is computation that can determine whether to continue to the next superstep. It runs at the end of each superstep on the master. |
5.2 Worker Computation
| config option | default value | description |
|---|---|---|
| worker.computation_class | org.apache.hugegraph.computer.core.config.Null | The class to create worker-computation object. Worker-computation is used to compute each vertex in each superstep. |
| worker.combiner_class | org.apache.hugegraph.computer.core.config.Null | Combiner can combine messages into one value for a vertex. For example, PageRank algorithm can combine messages of a vertex to a sum value. |
| worker.partitioner | org.apache.hugegraph.computer.core.graph.partition.HashPartitioner | The partitioner that decides which partition a vertex should be in, and which worker a partition should be in. |
5.3 Worker Combiners
| config option | default value | description |
|---|---|---|
| worker.vertex_properties_combiner_class | org.apache.hugegraph.computer.core.combiner.OverwritePropertiesCombiner | The combiner can combine several properties of the same vertex into one properties at input step. |
| worker.edge_properties_combiner_class | org.apache.hugegraph.computer.core.combiner.OverwritePropertiesCombiner | The combiner can combine several properties of the same edge into one properties at input step. |
5.4 Worker Buffers
| config option | default value | description |
|---|---|---|
| worker.received_buffers_bytes_limit | 104857600 (100 MB) | The limit bytes of buffers of received data. The total size of all buffers can’t exceed this limit. If received buffers reach this limit, they will be merged into a file (spill to disk). |
| worker.write_buffer_capacity | 52428800 (50 MB) | The initial size of write buffer that used to store vertex or message. |
| worker.write_buffer_threshold | 52428800 (50 MB) | The threshold of write buffer. Exceeding it will trigger sorting. The write buffer is used to store vertex or message. |
5.5 Worker Data & Timeouts
| config option | default value | description |
|---|---|---|
| worker.data_dirs | [jobs] | The directories separated by ‘,’ that received vertices and messages can persist into. |
| worker.wait_sort_timeout | 600000 (10 minutes) | The max timeout (in ms) for message-handler to wait for sort-thread to sort one batch of buffers. |
| worker.wait_finish_messages_timeout | 86400000 (24 hours) | The max timeout (in ms) for message-handler to wait for finish-message of all workers. |
6. I/O & Output Configuration
Configuration for output computation results.
6.1 Output Class & Result
| config option | default value | description |
|---|---|---|
| output.output_class | org.apache.hugegraph.computer.core.output.LogOutput | The class to output the computation result of each vertex. Called after iteration computation. |
| output.result_name | value | The value is assigned dynamically by #name() of instance created by WORKER_COMPUTATION_CLASS. |
| output.result_write_type | OLAP_COMMON | The result write-type to output to HugeGraph, allowed values: [OLAP_COMMON, OLAP_SECONDARY, OLAP_RANGE]. |
6.2 Output Behavior
| config option | default value | description |
|---|---|---|
| output.with_adjacent_edges | false | Whether to output the adjacent edges of the vertex. |
| output.with_vertex_properties | false | Whether to output the properties of the vertex. |
| output.with_edge_properties | false | Whether to output the properties of the edge. |
6.3 Batch Output
| config option | default value | description |
|---|---|---|
| output.batch_size | 500 | The batch size of output. |
| output.batch_threads | 1 | The number of threads used for batch output. |
| output.single_threads | 1 | The number of threads used for single output. |
6.4 HDFS Output
| config option | default value | description |
|---|---|---|
| output.hdfs_url | hdfs://127.0.0.1:9000 | The HDFS URL for output. |
| output.hdfs_user | hadoop | The HDFS user for output. |
| output.hdfs_path_prefix | /hugegraph-computer/results | The directory of HDFS output results. |
| output.hdfs_delimiter | , (comma) | The delimiter of HDFS output. |
| output.hdfs_merge_partitions | true | Whether to merge output files of multiple partitions. |
| output.hdfs_replication | 3 | The replication number of HDFS. |
| output.hdfs_core_site_path | "" (empty) | The HDFS core site path. |
| output.hdfs_site_path | "" (empty) | The HDFS site path. |
| output.hdfs_kerberos_enable | false | Whether Kerberos authentication is enabled for HDFS. |
| output.hdfs_kerberos_principal | "" (empty) | The HDFS principal for Kerberos authentication. |
| output.hdfs_kerberos_keytab | "" (empty) | The HDFS keytab file for Kerberos authentication. |
| output.hdfs_krb5_conf | /etc/krb5.conf | Kerberos configuration file path. |
6.5 Retry & Timeout
| config option | default value | description |
|---|---|---|
| output.retry_times | 3 | The retry times when output fails. |
| output.retry_interval | 10 | The retry interval (in seconds) when output fails. |
| output.thread_pool_shutdown_timeout | 60 | The timeout (in seconds) of output thread pool shutdown. |
7. Network & Transport Configuration
Configuration for network communication between workers and master.
7.1 Server Configuration
| config option | default value | description |
|---|---|---|
| transport.server_host | 127.0.0.1 | Worker data listener and advertised address. It must be reachable by other workers across hosts; the Operator sets it to the Pod IP. |
| transport.server_port | 0 (distribution: 0; K8s Operator: 8099) | Worker data port. Locally, 0 lets the OS assign a port; the Operator uses fixed port 8099 by default for Pod communication. |
| transport.server_threads | 4 | The number of transport threads for server. |
7.2 Client Configuration
| config option | default value | description |
|---|---|---|
| transport.client_threads | 4 | The number of transport threads for client. |
| transport.client_connect_timeout | 3000 | The timeout (in ms) of client connect to server. |
7.3 Protocol Configuration
| config option | default value | description |
|---|---|---|
| transport.provider_class | org.apache.hugegraph.computer.core.network.netty.NettyTransportProvider | The transport provider, currently only supports Netty. |
| transport.io_mode | AUTO | The network IO mode, allowed values: [NIO, EPOLL, AUTO]. AUTO means selecting the appropriate mode automatically. |
| transport.tcp_keep_alive | true | Whether to enable TCP keep-alive. |
| transport.transport_epoll_lt | false | Whether to enable EPOLL level-trigger (only effective when io_mode=EPOLL). |
7.4 Buffer Configuration
| config option | default value | description |
|---|---|---|
| transport.send_buffer_size | 0 | The size of socket send-buffer in bytes. 0 means using system default value. |
| transport.receive_buffer_size | 0 | The size of socket receive-buffer in bytes. 0 means using system default value. |
| transport.write_buffer_high_mark | 67108864 (64 MB) | The high water mark for write buffer in bytes. It will trigger sending unavailable if the number of queued bytes > write_buffer_high_mark. |
| transport.write_buffer_low_mark | 33554432 (32 MB) | The low water mark for write buffer in bytes. It will trigger sending available if the number of queued bytes < write_buffer_low_mark. |
7.5 Flow Control
| config option | default value | description |
|---|---|---|
| transport.max_pending_requests | 8 | The max number of client unreceived ACKs. It will trigger sending unavailable if the number of unreceived ACKs >= max_pending_requests. |
| transport.min_pending_requests | 6 | The minimum number of client unreceived ACKs. It will trigger sending available if the number of unreceived ACKs < min_pending_requests. |
| transport.min_ack_interval | 200 | The minimum interval (in ms) of server reply ACK. |
7.6 Timeouts
| config option | default value | description |
|---|---|---|
| transport.close_timeout | 10000 | The timeout (in ms) of close server or close client. |
| transport.sync_request_timeout | 10000 | The timeout (in ms) to wait for response after sending sync-request. |
| transport.finish_session_timeout | 0 | The timeout (in ms) to finish session. 0 means using (transport.sync_request_timeout × transport.max_pending_requests). |
| transport.write_socket_timeout | 3000 | The timeout (in ms) to write data to socket buffer. |
| transport.server_idle_timeout | 360000 (6 minutes) | The max timeout (in ms) of server idle. |
7.7 Heartbeat
| config option | default value | description |
|---|---|---|
| transport.heartbeat_interval | 20000 (20 seconds) | The minimum interval (in ms) between heartbeats on client side. |
| transport.max_timeout_heartbeat_count | 120 | The maximum times of timeout heartbeat on client side. If the number of timeouts waiting for heartbeat response continuously > max_timeout_heartbeat_count, the channel will be closed from client side. |
7.8 Advanced Network Settings
| config option | default value | description |
|---|---|---|
| transport.max_syn_backlog | 511 | The capacity of SYN queue on server side. 0 means using system default value. |
| transport.recv_file_mode | true | Whether to enable receive buffer-file mode. It will receive buffer and write to file from socket using zero-copy if enabled. Note: Requires OS support for zero-copy (e.g., Linux sendfile/splice). |
| transport.network_retries | 3 | The number of retry attempts for network communication if network is unstable. |
7.9 Master RPC Configuration
These options come from HugeGraph Commons RPC configuration; the distribution template explicitly sets host and port. Kubernetes Operator advertises the Pod IP and defaults an unspecified or zero port to 8190.
| Option | Distribution value | Description |
|---|---|---|
| rpc.server_host | 127.0.0.1 (K8s: Pod IP) | Master RPC address, reachable by workers. |
| rpc.server_port | 8190 (K8s default: 8190) | Master RPC listener port; allow worker connections in security groups and network policies. |
8. Storage & Persistence Configuration
Configuration for HGKV (HugeGraph Key-Value) storage engine and value files.
8.1 HGKV Configuration
| config option | default value | description |
|---|---|---|
| hgkv.max_file_size | 2147483648 (2 GB) | The max number of bytes in each HGKV file. |
| hgkv.max_data_block_size | 65536 (64 KB) | The max byte size of HGKV file data block. |
| hgkv.max_merge_files | 10 | The max number of files to merge at one time. |
| hgkv.temp_file_dir | /tmp/hgkv | This folder is used to store temporary files during the file merging process. |
8.2 Value File Configuration
| config option | default value | description |
|---|---|---|
| valuefile.max_segment_size | 1073741824 (1 GB) | The max number of bytes in each segment of value-file. |
9. BSP & Coordination Configuration
Configuration for Bulk Synchronous Parallel (BSP) protocol and etcd coordination.
| config option | default value | description |
|---|---|---|
| bsp.etcd_endpoints | http://localhost:2379 (distribution: http://127.0.0.1:2379) | Comma-separated etcd client endpoints. The Operator uses INTERNAL_ETCD_URL only when computerConf does not specify this key. |
| bsp.max_super_step | 10 (packaged: 2) | The max super step of the algorithm. |
| bsp.register_timeout | 300000 (packaged: 100000) | The max timeout (in ms) to wait for master and workers to register. |
| bsp.wait_workers_timeout | 86400000 (24 hours) | The max timeout (in ms) to wait for workers BSP event. |
| bsp.wait_master_timeout | 86400000 (24 hours) | The max timeout (in ms) to wait for master BSP event. |
| bsp.log_interval | 30000 (30 seconds) | The log interval (in ms) to print the log while waiting for BSP event. |
10. Performance Tuning Configuration
Configuration for performance optimization.
| config option | default value | description |
|---|---|---|
| allocator.max_vertices_per_thread | 10000 | Maximum number of vertices per thread processed in each memory allocator. |
| sort.thread_nums | 4 | The number of threads performing internal sorting. |
11. System Administration Configuration
Kubernetes Operator fills or overrides these options. Avoid overriding them unless customizing the Operator or network. job.namespace is optional user configuration; see the basic configuration table.
| Option | Managed by | Description |
|---|---|---|
| bsp.etcd_endpoints | K8s Operator | Uses INTERNAL_ETCD_URL only when absent from computerConf. |
| transport.server_host | K8s Operator | Overrides with Pod IP; workers must reach each other. |
| transport.server_port | K8s Operator | Defaults unspecified or zero values to 8099, not a random port. |
| job.id | K8s Operator | Set from CRD job ID. |
| job.workers_count | K8s Operator | Set from CRD workerInstances. |
| rpc.server_host | K8s Operator | Overrides with master Pod IP. |
| rpc.server_port | K8s Operator | Defaults unspecified or zero values to 8190. |
| rpc.remote_url | Computer startup | Removed when configuration is read; do not set as job configuration. |
Why these values must match:
- BSP/RPC: Must match deployed etcd/RPC services for coordination.
- Job settings: Must match the CRD to provide the correct worker count.
- Transport: Workers need mutually reachable Pod IPs and ports; the K8s default is
8099.
K8s Operator Config Options
NOTE: Option needs to be converted through environment variable settings, e.g. k8s.internal_etcd_url => INTERNAL_ETCD_URL
| config option | default value | description |
|---|---|---|
| k8s.auto_destroy_pod | true | Delete the job CR after completion or failure; CR deletion triggers cleanup of associated computing resources. |
| k8s.close_reconciler_timeout | 120 | The max timeout (in ms) to close reconciler. |
| k8s.internal_etcd_url | Code: http://127.0.0.1:2379; manifest: http://hugegraph-computer-operator-etcd.hugegraph-computer-operator-system:2379 | etcd URL used by Operator jobs; the supplied manifest uses the etcd Service address. |
| k8s.internal_minio_url | Code: http://127.0.0.1:9000; manifest: http://hugegraph-computer-operator-minio.hugegraph-computer-operator-system:9000 | MinIO address supplied to jobs by the Operator; needed only for MinIO snapshots. |
| k8s.max_reconcile_retry | 3 | The max retry times of reconcile. |
| k8s.probe_backlog | 50 | The maximum backlog for serving health probes. |
| k8s.probe_port | 9892 | The port that the controller binds to for serving health probes. |
| k8s.ready_check_internal | 1000 | The time interval (ms) of check ready. |
| k8s.ready_timeout | 30000 | The max timeout (in ms) of check ready. |
| k8s.reconciler_count | Code: Runtime.getRuntime().availableProcessors(); manifest: 6 | Maximum reconciler thread count. |
| k8s.resync_period | 600000 | The minimum frequency at which watched resources are reconciled. |
| k8s.timezone | Asia/Shanghai | The timezone of computer job and operator. |
| k8s.watch_namespace | hugegraph-computer-operator-system | Namespace watched for custom resources; also used by the supplied manifest. Use * to watch all namespaces. |
HugeGraph-Computer CRD
| spec | default value | description | required |
|---|---|---|---|
| algorithmName | The name of algorithm. | true | |
| jobId | The job id. | true | |
| image | Job container image, which must include the Computer runtime. Bundle algorithm JARs or download them with remoteJarUri. | true | |
| computerConf | The map of computer config options. | true | |
| workerInstances | The number of worker instances, it will override the ‘job.workers_count’ option. | true | |
| pullPolicy | Kubernetes selects Always for latest, otherwise IfNotPresent, when unset | Explicit values: Always, Never, or IfNotPresent. The CRD has no default; see image pull policy. | false |
| pullSecrets | The pull-secrets of Image, detail please refer to: https://kubernetes.io/docs/concepts/containers/images/#specifying-imagepullsecrets-on-a-pod | false | |
| masterCpu | The cpu limit of master, the unit can be ’m’ or without unit detail please refer to: https://kubernetes.io/docs/concepts/configuration/manage-resources-containers/#meaning-of-cpu | false | |
| workerCpu | The cpu limit of worker, the unit can be ’m’ or without unit detail please refer to: https://kubernetes.io/docs/concepts/configuration/manage-resources-containers/#meaning-of-cpu | false | |
| masterMemory | The memory limit of master, the unit can be one of Ei、Pi、Ti、Gi、Mi、Ki detail please refer to: https://kubernetes.io/docs/concepts/configuration/manage-resources-containers/#meaning-of-memory | false | |
| workerMemory | The memory limit of worker, the unit can be one of Ei、Pi、Ti、Gi、Mi、Ki detail please refer to: https://kubernetes.io/docs/concepts/configuration/manage-resources-containers/#meaning-of-memory | false | |
| log4jXml | The content of log4j.xml for computer job. | false | |
| jarFile | Path to the algorithm JAR inside the image. | false | |
| remoteJarUri | HTTP(S) algorithm JAR URL, downloaded and loaded by the startup script. | false | |
| jvmOptions | The java startup parameters of computer job. | false | |
| envVars | please refer to: https://kubernetes.io/docs/tasks/inject-data-application/define-interdependent-environment-variables/ | false | |
| envFrom | please refer to: https://kubernetes.io/docs/tasks/inject-data-application/define-environment-variable-container/ | false | |
| masterCommand | bin/start-computer.sh | The run command of master, equivalent to ‘Entrypoint’ field of Docker. | false |
| masterArgs | ["-r master", “-d k8s”] | The run args of master, equivalent to ‘Cmd’ field of Docker. | false |
| workerCommand | bin/start-computer.sh | The run command of worker, equivalent to ‘Entrypoint’ field of Docker. | false |
| workerArgs | ["-r worker", “-d k8s”] | The run args of worker, equivalent to ‘Cmd’ field of Docker. | false |
| volumes | Please refer to: https://kubernetes.io/docs/concepts/storage/volumes/ | false | |
| volumeMounts | Please refer to: https://kubernetes.io/docs/concepts/storage/volumes/ | false | |
| secretPaths | The map of k8s-secret name and mount path. | false | |
| configMapPaths | The map of k8s-configmap name and mount path. | false | |
| podTemplateSpec | Please refer to: https://kubernetes.io/docs/reference/kubernetes-api/workload-resources/pod-template-v1/#PodTemplateSpec | false | |
| securityContext | Please refer to: https://kubernetes.io/docs/tasks/configure-pod-container/security-context/ | false |
KubeDriver Config Options
| config option | default value | description |
|---|---|---|
| k8s.build_image_bash_path | The path of command used to build image. | |
| k8s.enable_internal_algorithm | true | Whether enable internal algorithm. |
| k8s.framework_image_url | hugegraph/hugegraph-computer:latest | The image url of computer framework. |
| k8s.image_repository_password | The password for login image repository. | |
| k8s.image_repository_registry | The address for login image repository. | |
| k8s.image_repository_url | hugegraph/hugegraph-computer | The url of image repository. |
| k8s.image_repository_username | The username for login image repository. | |
| k8s.internal_algorithm | [pageRank] | The name list of all internal algorithm. Note: Algorithm names use camelCase here (e.g., pageRank), but algorithm implementations return underscore_case (e.g., page_rank). |
| k8s.internal_algorithm_image_url | hugegraph/hugegraph-computer:latest | The image url of internal algorithm. |
| k8s.jar_file_dir | /cache/jars/ | The directory where the algorithm jar will be uploaded. |
| k8s.kube_config | ~/.kube/config | The path of k8s config file. |
| k8s.log4j_xml_path | The log4j.xml path for computer job. | |
| k8s.namespace | hugegraph-computer-operator-system | Namespace of the HugeGraph-Computer system. |
| k8s.pull_secret_names | [] | The names of pull-secret for pulling image. |
3.5 - HugeGraph Client
The Java and Go clients are maintained in the HugeGraph Toolchain repository, while the Python client is maintained in the HugeGraph-AI repository. Their installation methods and APIs differ; see the corresponding pages for details.
3.5.1 - HugeGraph-Java-Client
1 Overview
HugeGraph Java Client translates Java APIs into REST requests to HugeGraph Server. It supports managing schemas and graph data, executing Gremlin queries, and calling Traverser APIs. See the Client API for detailed interfaces; this page shows how to use the client in a Java project.
For other languages, use the Go Client or the Python Client maintained in the HugeGraph-AI repository.
2 What You Need
- JDK 17 for this walkthrough and for building Client
1.8.0from Toolchainmaster - Maven 3.6.3+
3 How To Use
The basic steps to use HugeGraph-Client are as follows:
- Create a Maven project in IntelliJ IDEA or Eclipse.
- Add the HugeGraph-Client dependency to
pom.xml. - Create a client, call its APIs, and close it after use.
See the complete example in the following section for the detail.
4 Complete Example
4.1 Build New Maven Project
Using IDEA or Eclipse to create the project:
4.2 Add Hugegraph-Client Dependency In POM
Choose the client version before building:
| Use case | Client version | Java build target |
|---|---|---|
| Run the complete examples below | Published 1.7.0; use the dependency above | Java 8 in the release POM; this walkthrough uses JDK 17 |
| Use new master APIs, such as capability detection | Toolchain master (based on 1.8) | Java 17 |
The examples use Schema, Graph, Gremlin and resource-cleanup APIs available in Client 1.7.0 and compatible with Toolchain master.
The release’s Java build target does not describe the runtime requirements of every transitive dependency.
To use unreleased features from the master branch, build Client from source (see Tools source build instructions):
Both version checks must report JDK 17. Also pass -Dmaven.repo.local="$candidate_dir/m2" to Maven commands in projects using Client from master.
Client and Server versions need not be identical; check the required APIs and compatibility before upgrading.
4.3 Example
Choose a single-record or batch example. Save the complete code as src/main/java/SingleExample.java or
src/main/java/BatchExample.java in your Maven project. The copy button includes the folded lines.
4.3.1 SingleExample
4.3.2 BatchExample
4.4 Run The Example
- Start HugeGraph Server and prepare a test graph named
hugegraphin graphspaceDEFAULT. - Set the Maven project’s JDK to 17. In the selected example, replace the Server URL, graphspace, graph and credentials in
HugeClient.builder(...)andconfigUser(...)with your settings. OmitconfigUser(...)if Server does not require authentication. - Run
SingleExample.main()orBatchExample.main()in your IDE. Both examples create schema and graph data, print the results, and close the client. Use a test graph: existing schema or data can affect repeated runs.
4.5 More Information About Client-API
3.5.2 - HugeGraph Python Client Quick Start
hugegraph-python-client is the Python SDK for HugeGraph. It manages schemas, reads and writes graph data, and executes Gremlin queries. HugeGraph-LLM and HugeGraph-ML also use this client.
The module lives in the hugegraph-ai repository under hugegraph-python-client/. The import name is pyhugegraph.
Requirements
- The client and HugeGraph-AI workspace require Python 3.10 or later; CI runs client tests on 3.10 and 3.11.
- HugeGraph Server 1.5.0 or later. The client refuses to connect to older servers; use client v1.3.x for those.
uv(recommended) orpip
Runtime dependencies are decorator, requests, setuptools, urllib3 and rich.
Installation
The released package is published on PyPI as hugegraph-python:
These commands do not pin a version and install the latest release; see PyPI. The source directory is hugegraph-python-client, while the distribution is hugegraph-python. Install from the HugeGraph-AI workspace for master code.
To use the latest repository code, sync the workspace from the root of the HugeGraph-AI repository. hugegraph-python-client is a workspace member exposed through the python-client extra, so plain uv sync does not pull it in:
Connect and Write Data
Client Parameters
PyHugeClient(url, graph, user, pwd, graphspace=None, timeout=None)
| Parameter | Type | Default | Description |
|---|---|---|---|
url | str | required | Base URL of HugeGraph Server. If the value has no scheme, http:// is prepended, so 127.0.0.1:8080 also works. |
graph | str | required | Graph name. This is the second positional parameter. |
user | str | required | Username, sent as HTTP basic auth. |
pwd | str | required | Password, sent as HTTP basic auth. |
graphspace | str or None | None | GraphSpace name. See below for how None is resolved. |
timeout | tuple[float, float] or None | None | (connect, read) timeouts in seconds. None becomes (0.5, 15.0). |
Every HTTP session retries three times with a 0.1 backoff factor on 500, 502 and 504 responses.
Server Version and GraphSpace
The client resolves GraphSpace at construction time:
- A non-empty
graphspacestring turns GraphSpace mode on directly. - Otherwise the client sends
GET {url}/versionsand readsversions.core. - A server older than 1.5.0 raises
RuntimeErrorasking you to upgrade the server or use client v1.3.x. - A server newer than 1.5.0 gets
graphspaceset toDEFAULTand GraphSpace mode turned on, with a warning in the log. A server at exactly 1.5.0 keeps GraphSpace mode off. - If the probe fails for network reasons, GraphSpace mode stays off.
The mode decides the request prefix: /graphspaces/<graphspace>/graphs/<graph>/... when GraphSpace is on, /graphs/<graph>/... when it is off.
Managers on the Client
Each accessor builds its manager lazily and gives it a dedicated HTTP session.
| Accessor | Manager | Covers |
|---|---|---|
client.schema() | SchemaManager | Property keys, vertex labels, edge labels, index labels |
client.graph() | GraphManager | Vertex and edge CRUD, batch writes, paging |
client.gremlin() | GremlinManager | Gremlin execution |
client.graphs() | GraphsManager | Graph list, graph info, config, clear data |
client.traverser() | TraverserManager | Traversal and path algorithms |
client.variable() | VariableManager | Graph variables |
client.task() | TaskManager | Async task list, query, cancel, delete |
client.auth() | AuthManager | Users, groups, targets, belongs, accesses |
client.metrics() | MetricsManager | Server metrics |
client.version() | VersionManager | Server version |
RankManager, RebuildManager and ServicesManager also ship in pyhugegraph.api, but PyHugeClient does not expose accessors for them yet; construct them directly with a session if you need them.
Common Operations
Build the Schema
The schema builders are fluent. Call create() last, or append(), eliminate() and remove() to change an existing definition.
Query the Schema
Read, Update and Delete Graph Data
The graph API takes property dictionaries, not chained property builders:
addVertex returns a VertexData with id, label, type and properties. addEdge returns an EdgeData with id, label, type, outV, outVLabel, inV, inVLabel and properties.
Vertex ids passed to the client may be strings, integers or uuid.UUID values. Booleans are rejected, and integers must fit the Java signed long range.
Batch Writes
addVertices takes (label, properties) pairs, and addEdges takes (label, out_id, in_id, out_label, in_label, properties) tuples. Both return objects that carry only the generated ids.
Paging and Conditional Queries
Execute Gremlin
exec binds the graph and g aliases for you, based on the graph name and the resolved GraphSpace, and returns the result field of the server response. A response missing requestId, status or result raises ResponseParseError.
Traverse the Graph
TraverserManager wraps the server traverser endpoints. Its methods use snake_case.
The POST-based variants take request bodies: advanced_paths, customized_paths, template_paths, customized_crosspoints and fusiform_similarity.
Graph Variables
Async Tasks
Server Metrics and Graph Info
Authentication and Authorization
AuthManager follows the server routing: users, targets, belongs and accesses are mounted under /graphspaces/{graphspace}/auth/..., while groups stay at the server-level /auth/groups. On HugeGraph 1.7.0 and later a graphspace must be resolved, otherwise these calls raise ValueError before any request is sent.
Method Naming
Manager methods written in camelCase, such as addVertex and getVertexById, also get a snake_case alias generated at construction time. graph.add_vertex(...) and graph.addVertex(...) reach the same method. The camelCase spellings are marked deprecated in the debug log, so prefer snake_case in new code.
Error Handling
Exceptions live in pyhugegraph.utils.exceptions:
| Exception | Raised when |
|---|---|
NotAuthorizedError | The server answers 401 |
NotFoundError | The server answers 404, or a required argument is missing |
ServerError | Any other non-2xx response, with the server message attached |
ResponseParseError | A successful response cannot be parsed into the expected shape |
ServiceUnavailableError | The server reports ServiceUnavailableException |
InvalidParameterError, CreateError, RemoveError, UpdateError, DataFormatError | Raised by individual builders and structures |
Request and response bodies are logged with password, token and secret values redacted.
API parameters may change with the HugeGraph REST API version. If an interface is incompatible, first check the REST API documentation for the current server version and the client test cases.
Development Checks
Run formatting and static checks from the root of the HugeGraph-AI repository:
Run the tests the same way CI does:
CI runs the integration job against the hugegraph/hugegraph:1.7.0 image. HUGEGRAPH_GRAPHSPACE is also read when you need a non-default space.
The source code and tests are under hugegraph-python-client/src/pyhugegraph/ and hugegraph-python-client/src/tests/. A runnable example is at hugegraph-python-client/src/pyhugegraph/example/hugegraph_example.py.
3.5.3 - HugeGraph Go Client Quick Start
HugeGraph Go Client is the Go SDK in the Toolchain repository. It currently provides APIs for version queries, schemas (property keys, vertex labels, and edge labels), vertices, and Gremlin. An edge data API is not implemented yet.
This module is still under development. Refer to the source code under
hugegraph-client-go/api/v1for the currently available interfaces.
Requirements
- Go 1.19 or later
- An accessible HugeGraph Server; examples use
http://127.0.0.1:8080
Installation
Run the following command in a Go module project:
Initialize the Client
NewCommonClient requires Host to be an IP address and Port to be between 1 and 65535. The client always connects over plain HTTP. Leave the username and password empty when authentication is disabled; Basic Auth is sent only when both are set.
When GraphSpace is nonempty, the Vertex and schema APIs (Schema(), Propertykey, VertexLabel, and EdgeLabel) use
/graphspaces/{space}/graphs/{graph}/...; an empty value selects the legacy /graphs/{graph}/... paths. Use DEFAULT for the default space.
Gremlin default aliases also use GraphSpace, treating an empty value as DEFAULT. Version() calls /versions independently of graph space.
The Versions value returned by Version() includes the HugeGraph Server, Core, Gremlin, and REST API versions. The NewDefaultCommonClient() helper in the source connects to the hugegraph graph at 127.0.0.1:8080 with admin/pa authentication and a ColorLogger that prints every request and response body. Production code should normally pass an explicit configuration instead.
Configuration Options
hugegraph.Config has the following fields:
| Field | Type | Description |
|---|---|---|
Host | string | HugeGraph Server IP address. Host names are rejected. |
Port | int | HugeGraph Server REST port, 1 to 65535 |
GraphSpace | string | Graph space for the Vertex and schema APIs and default Gremlin aliases; use DEFAULT for the default space. |
Graph | string | Graph name configured on the server |
Username | string | Server username; empty string when authentication is disabled |
Password | string | Server password; empty string when authentication is disabled |
Transport | http.RoundTripper | Custom HTTP transport; http.DefaultTransport when nil |
Logger | hgtransport.Logger | Request/response logger; no logging when nil |
The hgtransport package ships four loggers: TextLogger (plain text), ColorLogger (terminal colors), CurlLogger (runnable curl commands), and JSONLogger (JSON lines). Each has the same fields: Output (an io.Writer), EnableRequestBody, and EnableResponseBody.
Available Entry Points
CommonClient currently exposes the following entry points:
| Entry point | Purpose |
|---|---|
Version() | Query the server version |
Schema() | Query the complete schema |
Propertykey | Create, GetAll, GetByName, UpdateUserdata, DeleteByName |
VertexLabel | Create, GetAll, GetByName, UpdateUserdata, DeleteByName |
EdgeLabel | Create, GetAll, DeleteByName |
Vertex | Create, BatchCreate, UpdateProperties (with WithAction: append or eliminate) |
Gremlin | Get and Post. Post defaults language to gremlin-groovy, fills the graph/g aliases from GraphSpace and Graph, and returns the parsed result in Data. Get only returns the status code and prints the raw response to stdout. |
Each operation takes functional options named With... on the operation itself, for example client.Gremlin.Post.WithGremlin(...) or client.Propertykey.GetByName.WithName(...).
EdgeLabel.Create accepts Properties: nil or an empty []string{} in its request data to create an edge label without properties.
Typed APIs return err for request validation, transport, response reading, or JSON decoding failures.
An HTTP 4xx/5xx response can still return err == nil; for example, creating a vertex with a nonexistent label returns HTTP 400.
Check that response.StatusCode is in the 2xx range before reading result data. For Gremlin.Post, also check response.Data.Status.Code
for a successful Gremlin protocol status (2xx).
The
Vertexoperations takemodel.Vertex[any]values from theinternal/modelpackage. Go does not allow importing aninternalpackage from another module, so at the moment theVertexAPI can only be called from code inside the client module itself; its test file is also fully commented out.
For complete usage, see the tests in each API directory, such as version_test.go, gemlin_test.go, and vertexlabel_test.go.
4 - HugeGraph-Server Configuration
This section covers HugeGraph-Server configuration files, available options, authentication, and HTTPS settings.
- Server Configuration Guide
- Server Configuration Options
- Authentication and Authorization
- HTTPS Configuration
Backend Configuration
4.1 - Server Startup Guide
1 Overview
Default configuration lives under conf/ in the extracted distribution. External HBase, Kerberos, and HTTPS files can use other paths; see the corresponding backend, authentication, and HTTPS guides.
The main files are gremlin-server.yaml, rest-server.properties, and hugegraph.properties.
HugeGraphServer integrates GremlinServer and RestServer, configured by gremlin-server.yaml and rest-server.properties respectively.
- GremlinServer: Accepts Gremlin requests and invokes the graph engine.
- RestServer: Provides REST APIs that invoke Core APIs. A Gremlin request body is forwarded to GremlinServer to operate on graph data.
The following sections describe these files.
Production requires Server authentication and network access controls
The authentication settings on this page apply to HugeGraph Server. In production, enable authentication and authorization, maintain an IP allowlist, grant minimum permissions, and retain and protect Server audit-*.log files. Commented authentication settings in the examples indicate that authentication is disabled by default.
The distribution copies default files from the Server repository into the installation directory’s conf/ folder. Options absent from these files use source-code defaults; explicit file settings override those defaults.
The file-loading behavior on this page was checked against Server master commit 2f827d6. Use the configuration files and entry scripts that correspond to your installed release.
| File | Source and purpose | Loading behavior |
|---|---|---|
conf/gremlin-server.yaml | Shipped with the distribution; configures Gremlin Server. | Passed to Server by start-hugegraph.sh. |
conf/rest-server.properties | Shipped when building the checked Server master; configures REST Server, PD, authentication, and related settings. | Read by startup scripts and Server; the corresponding container entrypoint also updates supported settings before startup. |
conf/graphs/hugegraph.properties | Shipped default graph configuration, using RocksDB. | Scanned by both init-store.sh and application initialization, which attempts to load local graphs. graph.load_from_local_config defaults to false and controls constructor preloading. Restart Server to apply graph configuration changes. |
conf/graphs/hstore.properties.template | Shipped HStore template; users create other graph configurations as needed. | The HStore image renames it to hugegraph.properties during its build; distribution users can copy and customize it. |
Complete defaults are in Server master: gremlin-server.yaml, rest-server.properties, hugegraph.properties, and hstore.properties.template.
The following Docker environment-variable behavior applies only to images built from master; arbitrary variable names are not converted into configuration options. Before initialization and startup, this entrypoint processes HG_SERVER_BACKEND, HG_SERVER_PD_PEERS, HG_SERVER_USE_PD, HG_SERVER_CLUSTER, HG_SERVER_REST_URL, HG_SERVER_URLS_TO_PD, HG_SERVER_DEPLOY_IN_K8S, HG_SERVER_MIN_FREE_MEMORY, HG_SERVER_AUTH_TOKEN_SECRET, HG_SERVER_INIT_STORE_ENABLED, and PASSWORD. Check the tagged entrypoint for historical release images. See Docker entrypoint.
2 gremlin-server.yaml
This example shows commonly adjusted startup options. Use the source links above for the complete serializer and plugin configuration.
The shipped host and port lines are commented out. Without explicit values, the address is 127.0.0.1:8182. Uncomment and set these options to change the listener:
Usually, focus on channelizer, host, and port. Graphs are not loaded from the Gremlin Server graphs section. During application initialization, the REST-side manager scans the graphs directory and attempts to load local graph configurations. graph.load_from_local_config controls constructor preloading; its default false does not disable local loading during application initialization.
channelizer: The defaultWsAndHttpChannelizersupports WebSocket and HTTP. Gremlin Console uses WebSocket; HugeGraph Client, Loader, and Hubble use HTTP.
GremlinServer listens at 127.0.0.1:8182 by default. Set host and port to change this address.
host: The hostname or IP of the GremlinServer host. RestServer forwards Gremlin requests; GremlinServer is not directly exposed to users.port: The GremlinServer listener port.
Set the matching gremlinserver.url=http://host:port in rest-server.properties.
3 rest-server.properties
The following example lists rest-server.properties options. The master template omits graph.load_from_local_config, whose source-code default is false. Setting it to true is optional: it enables constructor preloading. Application initialization still scans and attempts to load local graph configurations.
restserver.url: The REST listener URL. Use a specific address for remote access, orhttp://0.0.0.0to listen on every interface while restricting the accessible network.graphs: The graph configuration directory, defaulting to./conf/graphs. Bothinit-store.shand application initialization scan it; initialization attempts to load its properties files.graph.load_from_local_config: Controls constructor preloading, with source-code defaultfalse. It does not block local loading during application initialization and is not a security isolation switch. Restart Server to apply graph configuration changes.
Starting with HugeGraph 1.8.0, use canonical snake_case options:
arthas.telnet_port,arthas.http_port,arthas.ip, andarthas.disabled_commands. Legacy camelCase names remain supported as fallbacks; an explicitly configured snake_case value takes precedence. Upgrade notice: The shippedrest-server.propertiestemplate includes default snake_case entries. If you configured custom camelCase properties earlier, migrate those values to snake_case keys to avoid being overridden by template defaults. For diagnostic workflows, access controls, and authentication configuration, see Start the Arthas agent.
gremlinserver.urlis the GremlinServer address used by RestServer, defaulting tohttp://127.0.0.1:8182. It must matchhostandportingremlin-server.yaml. Like the template, it can omit the scheme; missing schemes receive anhttp://prefix.
4 hugegraph.properties
hugegraph.properties is the default shipped graph configuration. Each additional graph needs its own properties file under conf/graphs. This example shows the key settings for the default RocksDB backend; see the source links above for the complete file.
The main uncommented options are:
gremlin.graph: The graph entry point used by GremlinServer. Leave it unchanged unless enabling authentication, which usesorg.apache.hugegraph.auth.HugeFactoryAuthProxy.vertex.cache_type/edge.cache_type: Cache implementation, eitherl1orl2, defaulting tol2.backend: The storage backend. Version 1.7.0 supports memory, rocksdb, hstore, and hbase.serializer: Serialization of schemas, vertices, and edges. RocksDB uses binary.store: The graph’s backend store name.task.schedule_period,task.retry,task.wait_timeout: Task scheduling period in seconds, retry count, and wait timeout in seconds. HStore uses a distributed scheduler; other backends use a local scheduler. The oldtask.scheduler_typekey is ignored.search.text_analyzer/search.text_analyzer_mode: Full-text analyzer and mode. Supported analyzers includeansj,hanlp,smartcn,jieba,jcseg,mmseg4j, andikanalyzer, each with its own mode values.rocksdb.data_path: RocksDB data directory, defaulting torocksdb-data/data; applies only whenbackend=rocksdb.rocksdb.wal_path: RocksDB WAL directory, defaulting torocksdb-data/wal; applies only whenbackend=rocksdb.
5 Multi-Graph Configuration
A Server can load multiple graphs, each with its own properties file. This example creates a RocksDB graph hugegraph_rocksdb and an in-memory graph hugegraph_memory.
[Optional]: Modify rest-server.properties
Set the graph configuration directory with graphs in rest-server.properties, defaulting to graphs=./conf/graphs. Adjust it for another directory. The example optionally enables constructor preloading with graph.load_from_local_config=true; application initialization still reads local graph configurations from this directory:
Under conf/graphs, create hugegraph_memory.properties and hugegraph_rocksdb.properties based on hugegraph.properties.
Modify hugegraph_memory.properties as follows:
Modify hugegraph_rocksdb.properties as follows:
Stop Server, run init-store.sh to initialize the new graphs, then restart Server.
List the created graphs:
Inspect a graph:
4.2 - Server Complete Configuration Manual
Defaults in these tables are source-code defaults used when an option is not explicitly set. Distribution files can specify different values and override them; use the configuration shipped with your installed release to determine effective settings.
Gremlin Server Config Options
Corresponding configuration file gremlin-server.yaml
| config option | default value | description |
|---|---|---|
| host | 127.0.0.1 | The host or ip of Gremlin Server. |
| port | 8182 | The listening port of Gremlin Server. |
| graphs | {} | Graphs are loaded dynamically by the Server; do not configure them here. |
| evaluationTimeout | 30000 | Gremlin script evaluation timeout in milliseconds. |
| channelizer | org.apache.tinkerpop.gremlin.server.channel.WsAndHttpChannelizer | Handles both WebSocket and HTTP requests. |
| maxContentLength | 65536 | Maximum size in bytes of a request that the server accepts. |
| maxChunkSize | 8192 | Maximum chunk size in bytes of an HTTP request. |
| maxHeaderSize | 8192 | Maximum size in bytes of the HTTP request headers. |
| resultIterationBatchSize | 64 | Number of results returned per batch when streaming a result set. |
| ssl.enabled | false | Whether Gremlin Server serves over TLS. |
| authentication | Not configured | When enabling authentication, configure the authenticator, handler, and path to rest-server.properties. |
Rest Server & API Config Options
Corresponding configuration file rest-server.properties
| config option | default value | description |
|---|---|---|
| graphs | ./conf/graphs | Directory containing graph configuration properties files. |
| graph.load_from_local_config | false | Controls constructor preloading. Application initialization still scans and attempts to load local configurations, so false does not block local loading. Restart Server to apply graph configuration changes. |
| graphs.enable_dynamic_create_drop | true | Whether to enable create or drop graph dynamically. |
| init_store.enabled | true | Whether init-store initializes the local backend stores and the built-in admin account. Set false in distributed deployments (PD/HStore) where the storage side already owns the metadata. |
| server.id | Empty string | The optional legacy id of hugegraph-server. |
| server.role | master | The role of nodes in the cluster, available types are [master, worker, computer] |
| server.node_id | node-id1 | The node id of the server. |
| server.node_role | worker | The node role of the server. |
| server.graphspace | DEFAULT | The graph space of the server. |
| server.service_id | DEFAULT | The service id of the server. |
| server.path_graphspace | DEFAULT | The default path graph space of the server. |
| server.start_ignore_single_graph_error | true | Whether to start ignore single graph error. |
| server.event_hub_threads | 1 | The event hub threads of server. |
| restserver.url | http://127.0.0.1:8080 | The url for listening of graph server. |
| ssl.keystore_file | conf/hugegraph-server.keystore | The path of server keystore file used when https protocol is enabled. |
| ssl.keystore_password | hugegraph | The password of the server keystore file when the https protocol is enabled. |
| white_ip.status | disable | The status of whether enable white ip. |
| restserver.max_worker_threads | 2 * CPUs | The maximum worker threads of rest server. |
| restserver.task_threads | max(4, CPUs / 2) | The task threads of rest server. |
| restserver.min_free_memory | 64 | The minimum free memory(MB) of rest server, requests will be rejected when the available memory of system is lower than this value. |
| restserver.request_timeout | 30 | The time in seconds within which a request must complete, -1 means no timeout. |
| restserver.connection_idle_timeout | 30 | The time in seconds to keep an inactive connection alive, -1 means no timeout. |
| restserver.connection_max_requests | 256 | The max number of HTTP requests allowed to be processed on one keep-alive connection, -1 means unlimited. |
| gremlinserver.url | http://127.0.0.1:8182 | The url of gremlin server. |
| gremlinserver.max_route | 2 * CPUs | The max route number for gremlin server. |
| gremlinserver.timeout | 30 | The timeout in seconds of waiting for gremlin server. |
| batch.max_edges_per_batch | 2500 | The maximum number of edges submitted per batch. |
| batch.max_vertices_per_batch | 2500 | The maximum number of vertices submitted per batch. |
| batch.max_write_ratio | 70 | The maximum thread ratio for batch writing, only take effect if the batch.max_write_threads is 0. |
| batch.max_write_threads | 0 | The maximum threads for batch writing, if the value is 0, the actual value will be set to batch.max_write_ratio * restserver.max_worker_threads. |
| raft.group_peers | 127.0.0.1:8090 | The rpc address of raft group initial peers. |
| auth.authenticator | The class path of authenticator implementation. e.g., org.apache.hugegraph.auth.StandardAuthenticator, or a custom implementation. | |
| auth.graph_store | hugegraph | The name of graph used to store authentication information, like users, only for org.apache.hugegraph.auth.StandardAuthenticator. |
| auth.admin_pa | pa | Used when the Server startup path initializes admin. Explicitly set a strong password before production deployment; the public default is pa. On local persistent backends, init-store.sh prompts for the initial password. |
| auth.remote_url | If the address is empty, it provide auth service, otherwise it is auth client and also provide auth service through rpc forwarding. The remote url can be set to multiple addresses, which are concat by ‘,’. | |
| exception.allow_trace | true | Whether to allow exception trace stack. |
| memory_monitor.threshold | 0.85 | Threshold for JVM memory usage monitoring, 1 means disabling the memory monitoring task. |
| memory_monitor.period | 2000 | The period in ms of JVM memory usage monitoring, in each period we will detect the jvm memory usage and take corresponding actions. |
| log.slow_query_threshold | 1000 | The threshold time(ms) of logging slow query, 0 means logging slow query is disabled. |
| log.slow_query_body_limit | 512 | The max bytes of request body recorded in the slow query log, 0 means the body is not recorded. The recorded prefix is written as-is and may contain sensitive Gremlin or Cypher literals. |
The role election options server.role_election and server.role.* apply to version 1.7.0 and earlier only. Later versions no longer read them: a server that still sets them starts normally and logs a warning for each key.
PD/Meta Config Options (Distributed Mode)
Corresponding configuration file rest-server.properties
| config option | default value | description |
|---|---|---|
| usePD | false | Whether use pd. |
| pd.peers | 127.0.0.1:8686 | The pd server peers, separated with commas. |
| cluster | hg-test | The cluster name. |
| pd.stores_wait_timeout | 300 | Seconds to wait for at least pd.initial-store-count active Stores before opening an HStore graph. Range: 0..2147483647; 0 disables waiting. |
| metrics.data_to_pd | true | Whether to report metrics data to pd. |
| meta.endpoints | http://127.0.0.1:2379 | The URL of meta endpoints. No code reads this option, so setting it has no effect; the meta connection is built from pd.peers. |
| meta.use_ca | false | Whether to use ca to meta server. |
| meta.ca | The ca file of meta server. | |
| meta.client_ca | The client ca file of meta server. | |
| meta.client_key | The client key file of meta server. |
The HStore backend also reads two options from the graph configuration file {graph-name}.properties. Both default to
0, which means the value is decided by PD:
| config option | default value | description |
|---|---|---|
| hstore.partition_count | 0 | Number of partitions, which PD controls partitions based on. |
| hstore.shard_count | 0 | Number of copies, which PD controls partition copies based on. |
Authentication Graph Config Options
Write these options in the properties file for the graph specified by auth.graph_store, normally conf/graphs/hugegraph.properties. Configure auth.authenticator, auth.graph_store, auth.admin_pa, and auth.remote_url in the rest-server.properties table above.
| config option | default value | description |
|---|---|---|
| auth.audit_log_rate | 1000.0 | Maximum audit records per user per second. Non-negative values are truncated to integers: 1.9 becomes 1; 0 or values below 1 suppress audit logging. Use a positive integer to retain audit records. |
| auth.cache_capacity | 10240 | Maximum entries per authentication cache; a non-negative integer. |
| auth.cache_expire | 600 | Authentication client and Server cache expiration in seconds; a non-negative integer. |
| auth.token_expire | 86400 | JWT lifetime in seconds; a non-negative integer. |
| auth.token_secret | 32 random bytes encoded as Base64 | Authentication graph setting; the default is not written back to the file. Explicitly set the same strong random value on every node to validate tokens across restarts or nodes. HS256 requires at least 32 UTF-8 bytes. |
Basic Config Options
Basic Config Options and Backend Config Options correspond to configuration files:{graph-name}.properties, such as hugegraph.properties
| config option | default value | description |
|---|---|---|
| gremlin.graph | org.apache.hugegraph.HugeFactory | Gremlin entrance to create graph. |
| backend | memory | The data store type. For version 1.7.0+ the allowed values are [memory, rocksdb, hstore, hbase]; the shipped conf/graphs/hugegraph.properties sets rocksdb and conf/graphs/hstore.properties.template sets hstore. Note: cassandra, scylladb, mysql, postgresql were removed in 1.7.0 (use <= 1.5.x for legacy backends). |
| serializer | text | The serializer for backend store, built-in values are [text, binary, binaryscatter]; a backend may register its own, like hbase. The shipped graph templates set binary. |
| serializer.buffer_max_capacity | 134217728 | The process-wide max capacity of one serialization buffer in bytes. |
| store | hugegraph | The backend database namespace. |
| store.connection_detect_interval | 600 | The interval in seconds for detecting connections, if the idle time of a connection exceeds this value, detect it and reconnect if needed before using, value 0 means detecting every time. |
| store.graph | g | The graph table name, which store vertex, edge and property. |
| graphspace | DEFAULT | The graph space name. |
| alias.graph.id | The graph alias id. | |
| graph.read_mode | OLTP_ONLY | The graph read mode, which could be ALL | OLTP_ONLY | OLAP_ONLY. |
| pd.peers | 127.0.0.1:8686 | The addresses of pd nodes, separated with commas. Only used by the hstore backend. |
| pd.cluster | hg | Cluster prefix used for graph-level PD metadata connections when usePD=false. With usePD=true, the REST cluster setting takes precedence. This value is bound once per process. |
| schema.illegal_name_regex | .\s+$|~. | The regex specified the illegal format for schema name. |
| schema.cache_capacity | 10000 | The max cache size(items) of schema cache. |
| schema.init_template | The template schema used to init graph. | |
| schema.index_rebuild_using_pushdown | true | Whether to use pushdown when to create/rebuild index. |
| vertex.cache_type | l2 | The type of vertex cache, allowed values are [l1, l2]. |
| vertex.cache_capacity | 10000000 | The max cache size(items) of vertex cache. |
| vertex.cache_expire | 600 | The expiration time in seconds of vertex cache. |
| vertex.check_customized_id_exist | false | Whether to check the vertices exist for those using customized id strategy. |
| vertex.default_label | vertex | The default vertex label. |
| vertex.tx_capacity | 10000 | The max size(items) of vertices(uncommitted) in transaction. |
| vertex.check_adjacent_vertex_exist | false | Whether to check the adjacent vertices of edges exist. |
| vertex.lazy_load_adjacent_vertex | true | Whether to lazy load adjacent vertices of edges. |
| vertex.part_edge_commit_size | 5000 | Whether to enable the mode to commit part of edges of vertex, enabled if commit size > 0, 0 means disabled. |
| vertex.encode_primary_key_number | true | Whether to encode number value of primary key in vertex id. |
| vertex.remove_left_index_at_overwrite | false | Whether remove left index at overwrite. |
| edge.cache_type | l2 | The type of edge cache, allowed values are [l1, l2]. |
| edge.cache_capacity | 1000000 | The max cache size(items) of edge cache. |
| edge.cache_expire | 600 | The expiration time in seconds of edge cache. |
| edge.tx_capacity | 10000 | The max size(items) of edges(uncommitted) in transaction. |
| query.page_size | 500 | The size of each page when querying by paging. |
| query.batch_size | 1000 | The size of each batch when querying by batch. |
| query.ignore_invalid_data | true | Whether to ignore invalid data of vertex or edge. |
| query.index_intersect_threshold | 1000 | The maximum number of intermediate results to intersect indexes when querying by multiple single index properties. |
| query.max_indexes_available | 1 | The upper limit of the number of indexes that can be used to query. |
| query.dedup_option | limit | The way to dedup data, allowed values are [limit, global]. |
| query.trust_index | false | Whether to trust index. |
| query.ramtable_edges_capacity | 20000000 | The maximum number of edges in ramtable, include OUT and IN edges. |
| query.ramtable_enable | false | Whether to enable ramtable for query of adjacent edges. |
| query.ramtable_vertices_capacity | 10000000 | The maximum number of vertices in ramtable, generally the largest vertex id is used as capacity. |
| query.optimize_aggregate_by_index | false | Whether to optimize aggregate query(like count) by index. |
| oltp.concurrent_depth | 10 | The min depth to enable concurrent oltp algorithm. |
| oltp.concurrent_threads | max(10, CPUs / 2) | Thread number to concurrently execute oltp algorithm. |
| oltp.collection_type | EC | The implementation type of collections used in oltp algorithm, allowed values are [JCF, EC, FU]. |
| oltp.query_batch_size | 10000 | The size of each batch when executing oltp algorithm. |
| oltp.query_batch_avg_degree_ratio | 0.95 | The ratio of exponential approximation for average degree of iterator when executing oltp algorithm. |
| oltp.query_batch_expect_degree | 100000000 | The expect sum of degree in each batch when executing oltp algorithm. |
| rate_limit.read | 0 | The max rate(times/s) to execute query of vertices/edges. |
| rate_limit.write | 0 | The max rate(items/s) to add/update/delete vertices/edges. |
| task.schedule_period | 10 | Period time in seconds when scheduler to schedule task. |
| task.wait_timeout | 10 | Timeout in seconds for waiting for the task to complete, such as when truncating or clearing the backend. |
| task.retry | 0 | Task retry times, allowed range is [0, 3]. |
| task.input_size_limit | 16777216 | The job input size limit in bytes. |
| task.result_size_limit | 16777216 | The job result size limit in bytes. |
| task.sync_deletion | false | Whether to delete schema or expired data synchronously. |
| task.ttl_delete_batch | 1 | The batch size used to delete expired data. |
| computer.config | ./conf/computer.yaml | The config file path of computer job. |
| k8s.operator_template | ./conf/operator-template.yaml | The path of operator container template. |
| k8s.quota_template | ./conf/resource-quota-template.yaml | The path of resource quota template. |
| search.text_analyzer | ikanalyzer | Choose a text analyzer for searching the vertex/edge properties, available type are [ansj, hanlp, smartcn, jieba, jcseg, mmseg4j, ikanalyzer]. The shipped graph templates set jieba. If use ‘ikanalyzer’, need download jar from ‘https://github.com/apache/hugegraph-doc/raw/ik_binary/dist/server/ikanalyzer-2012_u6.jar' to lib directory |
| search.text_analyzer_mode | smart | Specify the mode for the text analyzer, the available mode of analyzer are {ansj: [BaseAnalysis, IndexAnalysis, ToAnalysis, NlpAnalysis], hanlp: [standard, nlp, index, nShort, shortest, speed], smartcn: [], jieba: [SEARCH, INDEX], jcseg: [Simple, Complex], mmseg4j: [Simple, Complex, MaxWord], ikanalyzer: [smart, max_word]}. |
| snowflake.datacenter_id | 0 | The datacenter id of snowflake id generator. |
| snowflake.force_string | false | Whether to force the snowflake long id to be a string. |
| snowflake.worker_id | 0 | The worker id of snowflake id generator. |
| memory.mode | off-heap | The memory mode used for query in HugeGraph. |
| memory.max_capacity | 1073741824 | The maximum memory capacity in bytes that can be managed for all queries in HugeGraph. |
| memory.one_query_max_capacity | 104857600 | The maximum memory capacity in bytes that can be managed for a query in HugeGraph. |
| memory.alignment | 8 | The alignment used for round memory size. |
The shipped graph configuration templates mark these options as deprecated. They only take effect when
raft.mode=true, and raft.group_peers is read from rest-server.properties instead of the graph file.
| config option | default value | description |
|---|---|---|
| raft.mode | false | Whether the backend storage works in raft mode. |
| raft.safe_read | false | Whether to use linearly consistent read. |
| raft.path | ./raftlog | The log path of current raft node. |
| raft.use_replicator_pipeline | true | Whether to use replicator line, when turned on it multiple logs can be sent in parallel, and the next log doesn’t have to wait for the ack message of the current log to be sent. |
| raft.election_timeout | 10000 | Timeout in milliseconds to launch a round of election. |
| raft.snapshot_interval | 3600 | The interval in seconds to trigger snapshot save. |
| raft.snapshot_threads | 4 | The thread number used to do snapshot. |
| raft.snapshot_parallel_compress | false | Whether to enable parallel compress. |
| raft.snapshot_compress_threads | 4 | The thread number used to do snapshot compress. |
| raft.snapshot_decompress_threads | 4 | The thread number used to do snapshot decompress. |
| raft.backend_threads | CPUs | The thread number used to apply task to backend. |
| raft.read_index_threads | 8 | The thread number used to execute reading index. |
| raft.read_strategy | ReadOnlyLeaseBased | The linearizability of read strategy, allowed values are [ReadOnlyLeaseBased, ReadOnlySafe]. |
| raft.apply_batch | 1 | The apply batch size to trigger disruptor event handler. |
| raft.queue_size | 16384 | The disruptor buffers size for jraft RaftNode, StateMachine and LogManager. |
| raft.queue_publish_timeout | 60 | The timeout in second when publish event into disruptor. |
| raft.rpc_threads | max(CPUs * 2, 80) | The rpc threads for jraft RPC layer. |
| raft.rpc_connect_timeout | 5000 | The rpc connect timeout in milliseconds for jraft rpc. |
| raft.rpc_timeout | 60 | The general rpc timeout in seconds for jraft rpc. |
| raft.install_snapshot_rpc_timeout | 36000 | The install snapshot rpc timeout in seconds for jraft rpc. |
| raft.rpc_buf_low_water_mark | 10485760 | The ChannelOutboundBuffer’s low water mark of netty, when buffer size less than this size, the method ChannelOutboundBuffer.isWritable() will return true, it means that low downstream pressure or good network. |
| raft.rpc_buf_high_water_mark | 20971520 | The ChannelOutboundBuffer’s high water mark of netty, only when buffer size exceed this size, the method ChannelOutboundBuffer.isWritable() will return false, it means that the downstream pressure is too great to process the request or network is very congestion, upstream needs to limit rate at this time. |
RocksDB Backend Config Options
| config option | default value | description |
|---|---|---|
| backend | Must be set to rocksdb. | |
| serializer | Must be set to binary. | |
| rocksdb.data_path | rocksdb-data/data | The path for storing data of RocksDB. |
| rocksdb.wal_path | rocksdb-data/wal | The path for storing WAL of RocksDB. |
| rocksdb.sst_path | The path for ingesting SST file into RocksDB. | |
| rocksdb.data_disks | [] | The optimized disks for storing data of RocksDB. The format of each element: STORE/TABLE: /path/disk.Allowed keys are [g/vertex, g/edge_out, g/edge_in, g/vertex_label_index, g/edge_label_index, g/range_int_index, g/range_float_index, g/range_long_index, g/range_double_index, g/secondary_index, g/search_index, g/shard_index, g/unique_index, g/olap] |
| rocksdb.log_level | INFO | The info log level of RocksDB. |
| rocksdb.num_levels | 7 | Set the number of levels for this database. |
| rocksdb.compaction_style | LEVEL | Set compaction style for RocksDB: LEVEL/UNIVERSAL/FIFO. |
| rocksdb.optimize_mode | true | Optimize for heavy workloads and big datasets. |
| rocksdb.bulkload_mode | false | Switch to the mode to bulk load data into RocksDB. |
| rocksdb.compression_per_level | [none, none, snappy, snappy, snappy, snappy, snappy] | The compression algorithms for different levels of RocksDB, allowed values are none/snappy/z/bzip2/lz4/lz4hc/xpress/zstd. |
| rocksdb.bottommost_compression | none | The compression algorithm for the bottommost level of RocksDB, allowed values are none/snappy/z/bzip2/lz4/lz4hc/xpress/zstd. |
| rocksdb.compression | snappy | The compression algorithm for compressing blocks of RocksDB, allowed values are none/snappy/z/bzip2/lz4/lz4hc/xpress/zstd. |
| rocksdb.max_background_jobs | 8 | Maximum number of concurrent background jobs, including flushes and compactions. |
| rocksdb.max_subcompactions | 4 | The value represents the maximum number of threads per compaction job. |
| rocksdb.delayed_write_rate | 16777216 | The rate limit in bytes/s of user write requests when need to slow down if the compaction gets behind. |
| rocksdb.max_open_files | -1 | The maximum number of open files that can be cached by RocksDB, -1 means no limit. |
| rocksdb.max_manifest_file_size | 104857600 | The max size of manifest file in bytes. |
| rocksdb.skip_stats_update_on_db_open | false | Whether to skip statistics update when opening the database, setting this flag true allows us to not update statistics. |
| rocksdb.skip_check_sst_size_on_db_open | false | Whether to skip checking sizes of all sst files when opening the database. |
| rocksdb.max_file_opening_threads | 16 | The max number of threads used to open files. |
| rocksdb.max_total_wal_size | 0 | Total size of WAL files in bytes. Once WALs exceed this size, we will start forcing the flush of column families related, 0 means no limit. |
| rocksdb.bytes_per_sync | 0 | Allows OS to incrementally sync SST files to disk while they are being written, asynchronously in the background. Issue one request for every bytes_per_sync written. 0 turns it off. |
| rocksdb.wal_bytes_per_sync | 0 | Allows OS to incrementally sync WAL files to disk while they are being written, asynchronously in the background. Issue one request for every bytes_per_sync written. 0 turns it off. |
| rocksdb.strict_bytes_per_sync | false | When true, guarantees SST/WAL files have at most bytes_per_sync/wal_bytes_per_sync bytes submitted for writeback at any given time. This can be used to handle cases where processing speed exceeds I/O speed. |
| rocksdb.db_write_buffer_size | 0 | Total size of write buffers in bytes across all column families, 0 means no limit. |
| rocksdb.log_readahead_size | 0 | The number of bytes to prefetch when reading the log. 0 means the prefetching is disabled. |
| rocksdb.compaction_readahead_size | 0 | The number of bytes to perform bigger reads when doing compaction. If running RocksDB on spinning disks, you should set this to at least 2MB. 0 means the prefetching is disabled. |
| rocksdb.row_cache_capacity | 0 | The capacity in bytes of global cache for table-level rows. 0 means the row_cache is disabled. |
| rocksdb.delete_obsolete_files_period | 21600 | The periodicity in seconds when obsolete files get deleted, 0 means always do full purge. |
| rocksdb.write_buffer_size | 134217728 | Amount of data in bytes to build up in memory. |
| rocksdb.max_write_buffer_number | 6 | The maximum number of write buffers that are built up in memory. |
| rocksdb.min_write_buffer_number_to_merge | 2 | The minimum number of write buffers that will be merged together. |
| rocksdb.max_write_buffer_number_to_maintain | 0 | The total maximum number of write buffers to maintain in memory for conflict checking when transactions are used. |
| rocksdb.memtable_bloom_size_ratio | 0.0 | If prefix-extractor is set and memtable_bloom_size_ratio is not 0, or if memtable_whole_key_filtering is set true, create bloom filter for memtable with the size of write_buffer_size * memtable_bloom_size_ratio. If it is larger than 0.25, it is santinized to 0.25. |
| rocksdb.memtable_whole_key_filtering | false | Enable whole key bloom filter in memtable, it can potentially reduce CPU usage for point-look-ups. Note this will only take effect if memtable_bloom_size_ratio > 0. |
| rocksdb.memtable_huge_page_size | 0 | The page size for huge page TLB for bloom in memtable. If <= 0, not allocate from huge page TLB but from malloc. |
| rocksdb.inplace_update_support | false | Allows thread-safe inplace updates if a put key exists in current memtable and sizeof new value is smaller. |
| rocksdb.level_compaction_dynamic_level_bytes | false | Whether to enable level_compaction_dynamic_level_bytes, if it’s enabled we give max_bytes_for_level_multiplier a priority against max_bytes_for_level_base, the bytes of base level is dynamic for a more predictable LSM tree, it is useful to limit worse case space amplification. Turning this feature on/off for an existing DB can cause unexpected LSM tree structure so it’s not recommended. |
| rocksdb.max_bytes_for_level_base | 536870912 | The upper-bound of the total size of level-1 files in bytes. |
| rocksdb.max_bytes_for_level_multiplier | 10.0 | The ratio between the total size of level (L+1) files and the total size of level L files for all L. |
| rocksdb.target_file_size_base | 67108864 | The target file size for compaction in bytes. |
| rocksdb.target_file_size_multiplier | 1 | The size ratio between a level L file and a level (L+1) file. |
| rocksdb.level0_file_num_compaction_trigger | 2 | Number of files to trigger level-0 compaction. |
| rocksdb.level0_slowdown_writes_trigger | 20 | Soft limit on number of level-0 files for slowing down writes. |
| rocksdb.level0_stop_writes_trigger | 36 | Hard limit on number of level-0 files for stopping writes. |
| rocksdb.soft_pending_compaction_bytes_limit | 68719476736 | The soft limit to impose on pending compaction in bytes. |
| rocksdb.hard_pending_compaction_bytes_limit | 274877906944 | The hard limit to impose on pending compaction in bytes. |
| rocksdb.allow_mmap_writes | false | Allow the OS to mmap file for writing. |
| rocksdb.allow_mmap_reads | false | Allow the OS to mmap file for reading sst tables. |
| rocksdb.use_direct_reads | false | Enable the OS to use direct I/O for reading sst tables. |
| rocksdb.use_direct_io_for_flush_and_compaction | false | Enable the OS to use direct read/writes in flush and compaction. |
| rocksdb.use_fsync | false | If true, then every store to stable storage will issue a fsync. |
| rocksdb.atomic_flush | false | If true, flushing multiple column families and committing their results atomically to MANIFEST. Note that it’s not necessary to set atomic_flush=true if WAL is always enabled. |
| rocksdb.format_version | 5 | The format version of BlockBasedTable, allowed values are 0~5. |
| rocksdb.index_type | kBinarySearch | The index type used to lookup between data blocks with the sst table, allowed values are [kBinarySearch,kHashSearch,kTwoLevelIndexSearch,kBinarySearchWithFirstKey]. |
| rocksdb.data_block_index_type | kDataBlockBinarySearch | The search type used to point lookup in data block with the sst table, allowed values are [kDataBlockBinarySearch,kDataBlockBinaryAndHash]. |
| rocksdb.data_block_hash_table_util_ratio | 0.75 | The hash table utilization ratio value of entries/buckets. It is valid only when data_block_index_type=kDataBlockBinaryAndHash. |
| rocksdb.block_size | 4096 | Approximate size of user data packed per block, Note that it corresponds to uncompressed data. |
| rocksdb.block_size_deviation | 10 | The percentage of free space used to close a block. |
| rocksdb.block_restart_interval | 16 | The block restart interval for delta encoding in blocks. |
| rocksdb.block_cache_capacity | 8388608 | The amount of block cache in bytes that will be used by RocksDB, 0 means no block cache. |
| rocksdb.cache_index_and_filter_blocks | true | Set this option true if we’d put index/filter blocks to the block cache. |
| rocksdb.pin_l0_filter_and_index_blocks_in_cache | true | Set this option true if we’d pin L0 index/filter blocks to the block cache. |
| rocksdb.bloom_filter_bits_per_key | -1 | The bits per key in bloom filter, a good value is 10, which yields a filter with ~ 1% false positive rate. Set bloom_filter_bits_per_key > 0 to enable bloom filter, -1 means no bloom filter (0~0.5 round down to no filter). |
| rocksdb.bloom_filter_block_based_mode | false | If bloom filter is enabled, set this option true to use block based filter rather than full filter. |
| rocksdb.bloom_filter_whole_key_filtering | true | If bloom filter is enabled, set this option true to place whole keys in the bloom filter, else place the prefix of keys when prefix-extractor is set. |
| rocksdb.optimize_filters_for_hits | true | If bloom filter is enabled, this flag allows us to not store filters for the last level. set this option true to optimize the filters mainly for cases where keys are found rather than also optimize for keys missed. |
| rocksdb.partition_filters_and_indexes | false | If bloom filter is enabled, set this option true to use partitioned full filters and indexes for each sst file. This option is incompatible with block-based filters. |
| rocksdb.pin_top_level_index_and_filter | true | If partition_filters_and_indexes is set true, set this option true if we’d pin top-level index of partitioned filter and index blocks to the block cache. |
| rocksdb.prefix_extractor_n_bytes | 0 | The prefix-extractor uses the first N bytes of a key as its prefix, it will use the full key when a key is shorter than the N. 0 means unset prefix-extractor. |
Corresponding configuration file rest-server.properties
| config option | default value | description |
|---|---|---|
| server.use_k8s | false | Whether to use k8s to support multiple tenancy. |
| server.deploy_in_k8s | false | Whether to deploy server in k8s. |
| server.urls_to_pd | http://0.0.0.0:8080 | Used as the server address reserved for PD and provided to clients, only used when starting the server in k8s. |
| server.k8s_url | https://127.0.0.1:8888 | The url of k8s. |
| server.k8s_use_ca | false | Whether to use ca to k8s api server. |
| server.k8s_ca | The ca file of k8s api server. | |
| server.k8s_client_ca | The client ca file of k8s api server. | |
| server.k8s_client_key | The client key file of k8s api server. | |
| k8s.api | false | The k8s api start status when the computer service is enabled. |
| k8s.namespace | hugegraph-computer-system | The namespace used for k8s work when the computer service is enabled. |
| k8s.kubeconfig | The k8s kube config file when the computer service is enabled. | |
| k8s.hugegraph_url | The hugegraph url for k8s work when the computer service is enabled. | |
| k8s.enable_internal_algorithm | true | Whether to open k8s internal algorithm. |
| service.access_pd_name | hg | Service name for server to access pd service. |
| service.access_pd_token | Service token for server to access pd service. | |
| server.k8s_oltp_image | 127.0.0.1/kgs_bd/hugegraphserver:3.0.0 | The oltp server image of k8s. |
| server.k8s_olap_image | hugegraph/hugegraph-server:v1 | The olap server image of k8s. |
| server.k8s_storage_image | hugegraph/hugegraph-server:v1 | The storage server image of k8s. |
| server.default_oltp_k8s_namespace | hugegraph-server | The default oltp namespace for HugeGraph default graph space. |
| server.default_olap_k8s_namespace | hugegraph-computer-system | The default olap namespace for HugeGraph default graph space. |
| k8s.internal_algorithm | [page-rank, degree-centrality, wcc, triangle-count, rings, rings-with-filter, betweenness-centrality, closeness-centrality, lpa, links, kcore, louvain, clustering-coefficient, ppr, subgraph-match] | The names of the built-in k8s algorithms. |
| k8s.algorithms | See ServerOptions.K8S_ALGORITHMS | The name:paramsClass mapping of the built-in k8s algorithms. |
| k8s.internal_algorithm_image_url | Empty | Image URL for built-in Kubernetes algorithms. |
Corresponding configuration file: rest-server.properties.
Starting with HugeGraph 1.8.0.
| Config option | Default value | Description |
|---|---|---|
| arthas.telnet_port | 8562 | Arthas telnet port for administrator activation through PUT /arthas. |
| arthas.http_port | 8561 | Arthas HTTP port for administrator activation. |
| arthas.ip | 127.0.0.1 | Bind address; administrators may explicitly select another valid address, including 0.0.0.0. |
| arthas.disabled_commands | Empty | Optional comma-separated disabled commands, e.g. jad,mc, for API activation; not applied by the local helper. |
Legacy arthas.telnetPort, arthas.httpPort, and arthas.disabledCommands remain supported as fallbacks; explicit snake_case settings take precedence.
The bundled bin/arthas.sh provides local diagnostics without changing configuration. For activation workflows, permissions, and authentication options,
see Start the Arthas agent.
Corresponding configuration file rest-server.properties
| config option | default value | description |
|---|---|---|
| rpc.server_host | The hosts/ips bound by rpc server to provide services, empty value means not enabled. | |
| rpc.server_port | 8090 | The port bound by rpc server to provide services. |
| rpc.server_adaptive_port | false | Whether the bound port is adaptive, if it’s enabled, when the port is in use, automatically +1 to detect the next available port. Note that this process is not atomic, so there may still be port conflicts. |
| rpc.server_timeout | 30 | The timeout(in seconds) of rpc server execution. |
| rpc.remote_url | The remote urls of rpc peers, it can be set to multiple addresses, which are concat by ‘,’, empty value means not enabled. | |
| rpc.client_connect_timeout | 20 | The timeout(in seconds) of rpc client connect to rpc server. |
| rpc.client_reconnect_period | 10 | The period(in seconds) of rpc client reconnect to rpc server. |
| rpc.client_read_timeout | 40 | The timeout(in seconds) of rpc client read from rpc server. |
| rpc.client_retries | 3 | Failed retry number of rpc client calls to rpc server. |
| rpc.client_load_balancer | consistentHash | The rpc client uses a load-balancing algorithm to access multiple rpc servers in one cluster. Default value is ‘consistentHash’, means forwarding by request parameters. |
| rpc.protocol | bolt | Rpc communication protocol, client and server need to be specified the same value. |
| rpc.serialization | hessian2 | Rpc serialization type, client and server must set the same value. Note: If you choose ‘protobuf’, you need to add the relative IDL file. (Could refer PD/Store *.proto) |
| rpc.config_order | 999 | Sofa-RPC configuration file loading order, the larger the more later loading. |
| rpc.logger_impl | com.alipay.sofa.rpc.log.SLF4JLoggerImpl | Sofa-RPC log implementation class. |
| config option | default value | description |
|---|---|---|
| backend | Must be set to hbase. | |
| serializer | Must be set to hbase. | |
| hbase.hosts | localhost | The hostnames or ip addresses of HBase zookeeper, separated with commas. |
| hbase.port | 2181 | The port address of HBase zookeeper. |
| hbase.threads_max | 64 | The max threads num of hbase connections. |
| hbase.znode_parent | /hbase | The znode parent path of HBase zookeeper. |
| hbase.zk_retry | 3 | The recovery retry times of HBase zookeeper. |
| hbase.truncate_timeout | 30 | The timeout in seconds of waiting for store truncate. |
| hbase.aggregation_timeout | 43200 | The timeout in seconds of waiting for aggregation. |
| hbase.kerberos_enable | false | Is Kerberos authentication enabled for HBase. |
| hbase.kerberos_keytab | The HBase’s key tab file for kerberos authentication. | |
| hbase.kerberos_principal | The HBase’s principal for kerberos authentication. | |
| hbase.krb5_conf | /etc/krb5.conf | Kerberos configuration file, including KDC IP, default realm, etc. |
| hbase.hbase_site | /etc/hbase/conf/hbase-site.xml | The HBase’s configuration file |
| hbase.enable_partition | true | Is pre-split partitions enabled for HBase. |
| hbase.vertex_partitions | 10 | The number of partitions of the HBase vertex table. |
| hbase.edge_partitions | 30 | The number of partitions of the HBase edge table. |
≤ 1.5 Version Config (Legacy)
The following backend stores are no longer supported in version 1.7.0+ and are only available in version 1.5.x and earlier:
| config option | default value | description |
|---|---|---|
| backend | Must be set to cassandra. | |
| serializer | Must be set to cassandra. | |
| cassandra.host | localhost | The seeds hostname or ip address of cassandra cluster. |
| cassandra.port | 9042 | The seeds port address of cassandra cluster. |
| cassandra.connect_timeout | 5 | The cassandra driver connect server timeout(seconds). |
| cassandra.read_timeout | 20 | The cassandra driver read from server timeout(seconds). |
| cassandra.keyspace.strategy | SimpleStrategy | The replication strategy of keyspace, valid value is SimpleStrategy or NetworkTopologyStrategy. |
| cassandra.keyspace.replication | [3] | The keyspace replication factor of SimpleStrategy, like ‘[3]’.Or replicas in each datacenter of NetworkTopologyStrategy, like ‘[dc1:2,dc2:1]’. |
| cassandra.username | The username to use to login to cassandra cluster. | |
| cassandra.password | The password corresponding to cassandra.username. | |
| cassandra.compression_type | none | The compression algorithm of cassandra transport: none/snappy/lz4. |
| cassandra.jmx_port=7199 | 7199 | The port of JMX API service for cassandra. |
| cassandra.aggregation_timeout | 43200 | The timeout in seconds of waiting for aggregation. |
| config option | default value | description |
|---|---|---|
| backend | Must be set to scylladb. | |
| serializer | Must be set to scylladb. |
Other options are consistent with the Cassandra backend.
| config option | default value | description |
|---|---|---|
| backend | Must be set to mysql. | |
| serializer | Must be set to mysql. | |
| jdbc.driver | com.mysql.jdbc.Driver | The JDBC driver class to connect database. |
| jdbc.url | jdbc:mysql://127.0.0.1:3306 | The url of database in JDBC format. |
| jdbc.username | root | The username to login database. |
| jdbc.password | ****** | The password corresponding to jdbc.username. |
| jdbc.ssl_mode | false | The SSL mode of connections with database. |
| jdbc.reconnect_interval | 3 | The interval(seconds) between reconnections when the database connection fails. |
| jdbc.reconnect_max_times | 3 | The reconnect times when the database connection fails. |
| jdbc.storage_engine | InnoDB | The storage engine of backend store database, like InnoDB/MyISAM/RocksDB for MySQL. |
| jdbc.postgresql.connect_database | template1 | The database used to connect when init store, drop store or check store exist. |
| config option | default value | description |
|---|---|---|
| backend | Must be set to postgresql. | |
| serializer | Must be set to postgresql. |
Other options are consistent with the MySQL backend.
The driver and url of the PostgreSQL backend should be set to:
jdbc.driver=org.postgresql.Driverjdbc.url=jdbc:postgresql://localhost:5432/
4.3 - Built-in User Authentication and Authorization Configuration and Usage in HugeGraph
Overview
HugeGraph provides StandardAuthenticator for multi-user authentication and access control based on users, groups, operations, and resources.
Initialization creates the admin superuser. Administrators create users, groups, and resources, then grant or revoke permissions.
Users receive read, write, delete, and execute permissions through their groups.
A resource describes accessible data using type, label, and properties. Conditions within one resource are combined with AND; multiple resources are
combined with OR.
This relationship grants a user read access to data for Beijing.
Configure User Authentication
By default, HugeGraph does not enable user authentication, and it needs to be enabled by modifying the configuration file.
Production requires authentication
HugeGraph disables user authentication by default. In production, enable authentication and authorization, set a strong non-default administrator password,
maintain the Server IP allowlist, and grant minimum permissions. Do not expose Gremlin, Cypher, or other query endpoints directly to the public network.
Standard Server configuration writes authentication-proxy audit records to audit-*.log; retain these files and restrict read access. auth.audit_log_rate
limits per-user output rather than serving as a dedicated audit-log on/off switch.
Use StandardAuthenticator for built-in access control, or implement HugeAuthenticator to connect an existing identity system.
HugeGraph uses HTTP Basic Authentication. The value after
Basic is the Base64 encoding of username:password. With curl, pass the credentials directly through -u:
Protect Basic Authentication credentials
Basic Authentication only Base64-encodes username:password; it does not encrypt credentials. Use HTTPS for network transmission. See HTTPS
configuration.
JWT risks in older versions
HugeGraph-Server versions before 1.5.0 have JWT-related security risks in Auth mode. Upgrade affected versions or change the JWT secretKey according to that
version’s requirements.
auth.token_secret is read from the authentication graph’s configuration. The default graph is hugegraph, so its file is normally
conf/graphs/hugegraph.properties; if auth.graph_store changes, use that graph’s properties file.
The core configuration defaults to 32 random bytes encoded as Base64 and does not write that default back to the file. Independently generated defaults cannot
remain consistent across restarts or Server nodes. To preserve existing tokens across restarts or validate the same token on multiple nodes, explicitly
configure the same strong random secret in each authentication graph configuration.
Server encodes this string as UTF-8 for JJWT’s HS256 signer, which requires at least 32 bytes. This is a byte-length requirement; an arbitrary 32-character string need not have sufficient randomness. The command below generates 32 random bytes and Base64-encodes them locally.
Generate the secret locally and transfer it securely into the authentication graph configuration. Do not commit the actual secret or expose it in public logs:
Token lifetime is controlled by auth.token_expire, defaulting to 86400 seconds.
Both auth.token_expire and auth.token_secret belong to the authentication graph specified by auth.graph_store. Entries with the same names in
rest-server.properties do not override that graph configuration.
StandardAuthenticator Mode
StandardAuthenticator stores users and password hashes in the backend and checks access by role.
After updating these three configurations, initialize authentication and restart Server.
Set the authenticator and REST configuration path in conf/gremlin-server.yaml.
Set the authenticator and authentication graph in conf/rest-server.properties.
auth.graph_store names the graph that stores authentication data. It must match a graph configuration in conf/graphs/.
Set gremlin.graph in conf/graphs/<graph>.properties for each protected graph.
For authorization API usage, see the Authentication API documentation.
Custom User Authentication System
Implement org.apache.hugegraph.auth.HugeAuthenticator and point both authenticator configurations to that implementation to connect an existing identity
system.
Switching authentication mode
Use this sequence for a local persistent backend such as RocksDB, after applying the configuration above.
HStore/PD deployments create the administrator through the PD startup path. Set auth.admin_pa for that deployment instead of using local interactive
initialization.
Stop Server.
Initialize authentication data.
Enter a strong password when prompted to create
admin. Existing graph data is retained. Ifadminalready exists, this command does not reset its password. Keep the existing storage directory.Start Server and check authentication.
curl prompts for the password. Correct credentials should return HTTP 200; missing or incorrect credentials should return HTTP 401. If startup fails, check the logs and authentication graph configuration before retrying.
Enable authentication with Docker
For a new container, choose either Docker run or Docker Compose. For an existing container, see enabling authentication in existing containers.
When deploying with Docker, the official image supports enabling authentication
directly via environment variables (applicable to the official /hugegraph-server layout).
Replace the placeholder below with your image tag or digest:
Execute the command and enter a strong administrator password when prompted. Avoid committing plaintext passwords into shared Compose files. Persist the JWT secret in the authentication graph configuration as described above. Use the same value across all nodes.
Docker run
Create a new container and publish its REST port only on the local host.
The entrypoint configures authentication, initializes the backend on first startup, and starts Server. Continue with checking authentication.
Docker Compose
Save the following as compose.yaml. Compose rejects missing required variables to avoid starting an unauthenticated service by accident.
Start the service in the same terminal.
Set these variables again before recreating the container. Retain its data volumes and persist the configuration required by your deployment. Continue with checking authentication.
Existing containers
Use this path for an official Server container that ran without authentication and uses a local persistent backend.
Back up its data first. Confirm that the configuration, backend data, and conf-bak are all in mounted persistent volumes.
The official image declares /hugegraph-server as a volume; inspect the mounts of custom images first.
HStore/PD and external authentication services use their own administrator initialization paths.
Stop the original container and open a maintenance container with the same image and volumes.
Keep the original container stopped so two JVMs do not open the local database at once.
--entrypoint bashopens a shell without starting Server.Configure authentication and initialize it inside the maintenance container.
On its first run,
enable-auth.shsaves the original configuration inconf-bakand updates authentication and the defaulthugegraphgraph. Ifconf-bakalready exists, the script skips its changes. Check all three configurations under StandardAuthenticator mode. Configure other authentication graphs manually. Write a strong random JWT secret to the authentication graph configuration as described above, then initialize it.Enter the administrator password when prompted, then exit after initialization succeeds.
Start the original container from the host.
Retain the
docker/init_completemarker. Later changes to thePASSWORDenvironment variable do not change the stored administrator password.
Check authentication
Once Server is running, execute the following requests from the host to verify. -u admin prompts interactively for the password:
Requests without credentials should return 401 Unauthorized, while requests with the correct password return 200 OK (incorrect passwords also return 401).
Note: Current master URLs include /graphspaces/DEFAULT; for 1.7.0 and older versions, omit the graphspace prefix (use /graphs/hugegraph/... directly).
If unauthenticated requests still return 200, authentication is not active; inspect configuration and restart Server.
4.4 - Configuring HugeGraphServer to Use HTTPS Protocol
Overview
HugeGraphServer uses HTTP by default and can be configured to use HTTPS.
HTTPS does not replace Server authentication or access control
HTTPS protects transport but does not restrict caller permissions. In production, use HTTPS and enable Server authentication and authorization, an IP allowlist, and minimum permissions. Retain and protect Server audit-*.log files. If a reverse proxy terminates TLS, also restrict network access to the Server backend port.
Use a dedicated Server certificate in production
If conf/hugegraph-server.keystore is missing at startup, the script downloads a shared demonstration keystore with the public password hugegraph. Use a dedicated certificate and keystore password in production, and restrict read access to private-key files.
Server Configuration
Modify the conf/rest-server.properties configuration file and change the schema part of restserver.url to https.
The keystore file is not shipped inside the distribution, because it carries no license declaration. When restserver.url
starts with https and conf/hugegraph-server.keystore is missing, bin/start-hugegraph.sh downloads it from the
binary-1.5 branch of the hugegraph-doc repository before starting the server. The password of that file is hugegraph.
Both values are the defaults of ssl.keystore_file and ssl.keystore_password; users can generate their own keystore
file and password and then change the two options.
Client Configuration
Using HTTPS in HugeGraph-Client
When constructing a HugeClient, pass the HTTPS-related configurations. Here’s an example in Java:
Note: Before version 1.9.0, HugeGraph-Client was created directly using the
newkeyword and did not support the HTTPS protocol. Starting from version 1.9.0, it changed to use the builder pattern and supports configuring the HTTPS protocol.
Using HTTPS in HugeGraph-Loader
When starting an import task, add the following options in the command line:
Under the conf directory of hugegraph-loader, there is already a default client certificate file named hugegraph.truststore, and its password is hugegraph.
Using HTTPS in HugeGraph-Tools
When executing commands, add the following options in the command line:
Under the conf directory of hugegraph-tools, there is already a default client certificate file named hugegraph.truststore, and its password is hugegraph.
How to Generate Certificate Files
This section provides an example of generating certificates. If the default certificate is sufficient or if you already know how to generate certificates, you can skip this section.
Server
- Generate the server’s private key and import it into the server’s keystore file. The
server.keystoreis for the server’s use and contains its private key.
During the process, fill in the description information according to your requirements. The description information for the default certificate is as follows:
- Export the server certificate based on the server’s private key.
server.crt is the server’s certificate.
Client
client.truststore is for the client’s use and contains the trusted certificate.
4.5 - Configuring the RocksDB Backend
Overview
RocksDB is an embedded LSM-tree key-value store. With the rocksdb backend, HugeGraph-Server keeps all
graph data in RocksDB instances that live inside the server process, so there is no separate storage
service to deploy. This is the backend used by the shipped conf/graphs/hugegraph.properties.
Since version 1.7.0 the server accepts only memory, rocksdb, hbase and hstore as the backend.
The rocksdb backend stores data on the local disks of one server: it does not support shared storage,
so a graph cannot be served by several servers over the same data directory. For a distributed
deployment use the hstore backend with PD and Store.
The RocksDB JNI library is pinned to version 8.10.2 by hugegraph-rocksdb/pom.xml, so the on-disk
format and the option semantics are those of RocksDB 8.10.
The backend driver version reported by this store is 1.11, and it is written into the meta table of
the system store when the graph is initialized.
Selecting the backend
Set the backend and the serializer in the graph properties file (conf/graphs/<graph>.properties):
backend=rocksdbselects the RocksDB store provider.serializer=binaryis the serializer the shipped template uses for this backend. The built-in serializers arebinary,binaryscatterandtext.storeis the database namespace of the graph, and it is also part of the graph name that the provider passes down to the store.
Run bin/init-store.sh once before the first start to create the stores, then start the server. Both
bin/init-store.sh and bin/hugegraph-server.sh load the RocksDB library, so the data directories are
created on the machine that runs them.
The distribution registers the option space and the store provider for each backend listed in the
packaged backend.properties, whose value comes from the hugegraph.backends build property. A default
build registers rocksdb, hbase, hstore; building with -Drocksdb-only activates the rocksdb-only
profile and produces a distribution that registers only rocksdb. A backend that is not registered
fails at startup with Not exists BackendStoreProvider.
The provider registration also adds a second name, rocksdbsst, for the store that writes SST files
instead of a live database. That name is not in the list of allowed backends, so backend=rocksdbsst
is rejected with backend is illegal: rocksdbsst. To load SST files into a normal rocksdb graph, use
rocksdb.sst_path as described below.
Data directory layout
Two directories matter: rocksdb.data_path (default rocksdb-data/data) and rocksdb.wal_path
(default rocksdb-data/wal). Relative paths resolve against the working directory of the server, which
is the installation directory.
Each graph opens three stores: m for schema, g for graph data, and s for the system store. The
store name is appended to both configured paths, so a default single-graph installation looks like this:
RocksDB data directories
- rocksdb-data/
- data/
- m/schema store: property keys, vertex/edge/index labels, counters
- g/graph store: vertices, edges, index tables, olap tables
- s/system store: tasks, server info, backend meta (driver version)
- wal/
- m/
- g/
- s/
- data/
Every backend table becomes a RocksDB column family inside the store it belongs to, named
<database>+<table>, where the database is derived from the graph name. Column families of existing
data directories are always reopened, so tables created by an older version stay readable.
Other points to keep in mind:
- Two graphs must not share a data path. When a graph is created by cloning an existing configuration
through the API, the provider appends
_<newGraph>to bothrocksdb.data_pathandrocksdb.wal_path. Deleting such a graph deletes both directories. - Snapshots are created beside the data directory: the last two segments of the data path are rewritten
with a prefix, so with the default paths the snapshot of the graph store goes to
rocksdb-data/<prefix>_data/g. Resuming a snapshot closes the instance, deletes the data directory and moves the snapshot into its place. - With
rocksdb.data_disksset, the tables named there are opened as separate RocksDB instances under the given paths instead of underrocksdb.data_path. The server opens up to 8 instances in parallel, waits at most 600 seconds for the open to finish and 30 seconds for sessions to close.
Path and log options
| config option | default value | description |
|---|---|---|
| rocksdb.data_path | rocksdb-data/data | The path for storing data of RocksDB. Must not be empty. |
| rocksdb.data_disks | [] | The optimized disks for storing data of RocksDB. The format of each element: STORE/TABLE: /path/disk. Allowed keys are [g/vertex, g/edge_out, g/edge_in, g/vertex_label_index, g/edge_label_index, g/range_int_index, g/range_float_index, g/range_long_index, g/range_double_index, g/secondary_index, g/search_index, g/shard_index, g/unique_index, g/olap]. A disk path must differ from rocksdb.data_path. |
| rocksdb.wal_path | rocksdb-data/wal | The path for storing WAL of RocksDB. Must not be empty. |
| rocksdb.sst_path | (empty) | The path for ingesting SST file into RocksDB. Empty disables ingestion. |
| rocksdb.log_level | INFO | The info log level of RocksDB. Allowed values: DEBUG, INFO, WARN, ERROR, FATAL, HEADER. |
Compaction and compression options
| config option | default value | description |
|---|---|---|
| rocksdb.num_levels | 7 | Set the number of levels for this database. Range: 1 to 2^31-1. |
| rocksdb.compaction_style | LEVEL | Set compaction style for RocksDB: LEVEL/UNIVERSAL/FIFO. |
| rocksdb.optimize_mode | true | Optimize for heavy workloads and big datasets. See “How the options are applied” below. |
| rocksdb.bulkload_mode | false | Switch to the mode to bulk load data into RocksDB. |
| rocksdb.compression_per_level | [none, none, snappy, snappy, snappy, snappy, snappy] | The compression algorithms for different levels of RocksDB, allowed values are none/snappy/z/bzip2/lz4/lz4hc/xpress/zstd. The list must be empty or hold exactly rocksdb.num_levels elements. |
| rocksdb.bottommost_compression | none | The compression algorithm for the bottommost level of RocksDB, allowed values are none/snappy/z/bzip2/lz4/lz4hc/xpress/zstd. |
| rocksdb.compression | snappy | The compression algorithm for compressing blocks of RocksDB, allowed values are none/snappy/z/bzip2/lz4/lz4hc/xpress/zstd. |
Database level options
| config option | default value | description |
|---|---|---|
| rocksdb.max_background_jobs | 8 | Maximum number of concurrent background jobs, including flushes and compactions. Range: 1 to 2^31-1. |
| rocksdb.max_subcompactions | 4 | The value represents the maximum number of threads per compaction job. Range: 1 to 2^31-1. |
| rocksdb.delayed_write_rate | 16777216 (16 MB/s) | The rate limit in bytes/s of user write requests when need to slow down if the compaction gets behind. |
| rocksdb.max_open_files | -1 | The maximum number of open files that can be cached by RocksDB, -1 means no limit. |
| rocksdb.max_manifest_file_size | 104857600 (100 MB) | The max size of manifest file in bytes. |
| rocksdb.skip_stats_update_on_db_open | false | Whether to skip statistics update when opening the database, setting this flag true allows us to not update statistics. |
| rocksdb.skip_check_sst_size_on_db_open | false | Whether to skip checking sizes of all sst files when opening the database. |
| rocksdb.max_file_opening_threads | 16 | The max number of threads used to open files. Range: 1 to 2^31-1. |
| rocksdb.max_total_wal_size | 0 | Total size of WAL files in bytes. Once WALs exceed this size, we will start forcing the flush of column families related, 0 means no limit. |
| rocksdb.bytes_per_sync | 0 | Allows OS to incrementally sync SST files to disk while they are being written, asynchronously in the background. Issue one request for every bytes_per_sync written. 0 turns it off. |
| rocksdb.wal_bytes_per_sync | 0 | Same as above for WAL files. 0 turns it off. |
| rocksdb.strict_bytes_per_sync | false | When true, guarantees SST/WAL files have at most bytes_per_sync/wal_bytes_per_sync bytes submitted for writeback at any given time. This can be used to handle cases where processing speed exceeds I/O speed. |
| rocksdb.db_write_buffer_size | 0 | Total size of write buffers in bytes across all column families, 0 means no limit. |
| rocksdb.log_readahead_size | 0 | The number of bytes to prefetch when reading the log. 0 means the prefetching is disabled. |
| rocksdb.compaction_readahead_size | 0 | The number of bytes to perform bigger reads when doing compaction. If running RocksDB on spinning disks, you should set this to at least 2MB. 0 means the prefetching is disabled. |
| rocksdb.row_cache_capacity | 0 | The capacity in bytes of global cache for table-level rows. 0 means the row_cache is disabled. |
| rocksdb.delete_obsolete_files_period | 21600 (6 hours) | The periodicity in seconds when obsolete files get deleted, 0 means always do full purge. The value is converted to microseconds before it reaches RocksDB. |
Memtable options
| config option | default value | description |
|---|---|---|
| rocksdb.write_buffer_size | 134217728 (128 MB) | Amount of data in bytes to build up in memory. Minimum 1 MB. This is per column family. |
| rocksdb.max_write_buffer_number | 6 | The maximum number of write buffers that are built up in memory. Range: 1 to 2^31-1. |
| rocksdb.min_write_buffer_number_to_merge | 2 | The minimum number of write buffers that will be merged together. Range: 1 to 2^31-1. |
| rocksdb.max_write_buffer_number_to_maintain | 0 | The total maximum number of write buffers to maintain in memory for conflict checking when transactions are used. |
| rocksdb.memtable_bloom_size_ratio | 0.0 | If prefix-extractor is set and memtable_bloom_size_ratio is not 0, or if memtable_whole_key_filtering is set true, create bloom filter for memtable with the size of write_buffer_size * memtable_bloom_size_ratio. A value larger than 0.25 is reduced to 0.25. Range: 0.0 to 1.0. |
| rocksdb.memtable_whole_key_filtering | false | Enable whole key bloom filter in memtable, it can potentially reduce CPU usage for point-look-ups. Note this will only take effect if memtable_bloom_size_ratio > 0. |
| rocksdb.memtable_huge_page_size | 0 | The page size for huge page TLB for bloom in memtable. If <= 0, not allocate from huge page TLB but from malloc. |
| rocksdb.inplace_update_support | false | Allows thread-safe inplace updates if a put key exists in current memtable and sizeof new value is smaller. |
Level sizing and write stall options
| config option | default value | description |
|---|---|---|
| rocksdb.level_compaction_dynamic_level_bytes | false | Whether to enable level_compaction_dynamic_level_bytes, if it’s enabled we give max_bytes_for_level_multiplier a priority against max_bytes_for_level_base, the bytes of base level is dynamic for a more predictable LSM tree, it is useful to limit worse case space amplification. Turning this feature on/off for an existing DB can cause unexpected LSM tree structure so it’s not recommended. |
| rocksdb.max_bytes_for_level_base | 536870912 (512 MB) | The upper-bound of the total size of level-1 files in bytes. Minimum 1 MB. |
| rocksdb.max_bytes_for_level_multiplier | 10.0 | The ratio between the total size of level (L+1) files and the total size of level L files for all L. Minimum 1.0. |
| rocksdb.target_file_size_base | 67108864 (64 MB) | The target file size for compaction in bytes. Minimum 1 MB. |
| rocksdb.target_file_size_multiplier | 1 | The size ratio between a level L file and a level (L+1) file. |
| rocksdb.level0_file_num_compaction_trigger | 2 | Number of files to trigger level-0 compaction. |
| rocksdb.level0_slowdown_writes_trigger | 20 | Soft limit on number of level-0 files for slowing down writes. |
| rocksdb.level0_stop_writes_trigger | 36 | Hard limit on number of level-0 files for stopping writes. |
| rocksdb.soft_pending_compaction_bytes_limit | 68719476736 (64 GB) | The soft limit to impose on pending compaction in bytes. Minimum 1 GB. |
| rocksdb.hard_pending_compaction_bytes_limit | 274877906944 (256 GB) | The hard limit to impose on pending compaction in bytes. Minimum 1 GB. |
File I/O options
| config option | default value | description |
|---|---|---|
| rocksdb.allow_mmap_writes | false | Allow the OS to mmap file for writing. |
| rocksdb.allow_mmap_reads | false | Allow the OS to mmap file for reading sst tables. |
| rocksdb.use_direct_reads | false | Enable the OS to use direct I/O for reading sst tables. |
| rocksdb.use_direct_io_for_flush_and_compaction | false | Enable the OS to use direct read/writes in flush and compaction. |
| rocksdb.use_fsync | false | If true, then every store to stable storage will issue a fsync. |
| rocksdb.atomic_flush | false | If true, flushing multiple column families and committing their results atomically to MANIFEST. Note that it’s not necessary to set atomic_flush=true if WAL is always enabled. |
SST table format and block cache options
| config option | default value | description |
|---|---|---|
| rocksdb.format_version | 5 | The format version of BlockBasedTable, allowed values are 0~5. |
| rocksdb.index_type | kBinarySearch | The index type used to lookup between data blocks with the sst table, allowed values are [kBinarySearch, kHashSearch, kTwoLevelIndexSearch, kBinarySearchWithFirstKey]. |
| rocksdb.data_block_index_type | kDataBlockBinarySearch | The search type used to point lookup in data block with the sst table, allowed values are [kDataBlockBinarySearch, kDataBlockBinaryAndHash]. |
| rocksdb.data_block_hash_table_util_ratio | 0.75 | The hash table utilization ratio value of entries/buckets. It is valid only when data_block_index_type=kDataBlockBinaryAndHash. Range: 0.0 to 1.0. |
| rocksdb.block_size | 4096 (4 KB) | Approximate size of user data packed per block, Note that it corresponds to uncompressed data. |
| rocksdb.block_size_deviation | 10 | The percentage of free space used to close a block. Range: 0 to 100. |
| rocksdb.block_restart_interval | 16 | The block restart interval for delta encoding in blocks. |
| rocksdb.block_cache_capacity | 8388608 (8 MB) | The amount of block cache in bytes that will be used by RocksDB, 0 means no block cache. A separate cache of this size is created for each column family. |
Bloom filter options
The options in this group are read only when rocksdb.bloom_filter_bits_per_key is 0 or greater. With
the default value of -1 there is no bloom filter and none of the other options in this table take
effect, including the index and filter block caching ones.
| config option | default value | description |
|---|---|---|
| rocksdb.bloom_filter_bits_per_key | -1 | The bits per key in bloom filter, a good value is 10, which yields a filter with ~ 1% false positive rate. Set bloom_filter_bits_per_key > 0 to enable bloom filter, -1 means no bloom filter (0~0.5 round down to no filter). |
| rocksdb.bloom_filter_block_based_mode | false | If bloom filter is enabled, set this option true to use block based filter rather than full filter. |
| rocksdb.bloom_filter_whole_key_filtering | true | If bloom filter is enabled, set this option true to place whole keys in the bloom filter, else place the prefix of keys when prefix-extractor is set. |
| rocksdb.cache_index_and_filter_blocks | true | Set this option true if we’d put index/filter blocks to the block cache. |
| rocksdb.pin_l0_filter_and_index_blocks_in_cache | true | Set this option true if we’d pin L0 index/filter blocks to the block cache. |
| rocksdb.optimize_filters_for_hits | true | If bloom filter is enabled, this flag allows us to not store filters for the last level. set this option true to optimize the filters mainly for cases where keys are found rather than also optimize for keys missed. This one is applied even when the filter is disabled. |
| rocksdb.partition_filters_and_indexes | false | If bloom filter is enabled, set this option true to use partitioned full filters and indexes for each sst file. This option is incompatible with block-based filters. Enabling it also forces the index type to kTwoLevelIndexSearch and sets the metadata block size to rocksdb.block_size. |
| rocksdb.pin_top_level_index_and_filter | true | If partition_filters_and_indexes is set true, set this option true if we’d pin top-level index of partitioned filter and index blocks to the block cache. |
| rocksdb.prefix_extractor_n_bytes | 0 | The prefix-extractor uses the first N bytes of a key as its prefix, it will use the full key when a key is shorter than the N. 0 means unset prefix-extractor. |
How the options are applied
The server builds the RocksDB option objects once per store and per column family, so a change to any of the options above takes effect on the next server start.
rocksdb.optimize_mode=trueapplies presets before the values in the tables above: at the database level it raises parallelism to half of the available processors (at least one), allows concurrent memtable writes and enables the write thread adaptive yield; at the column family level it calls the RocksDB level-style and universal-style compaction presets. The explicit options are applied afterwards, so any value you set in the properties file wins over the preset.rocksdb.bulkload_mode=truedisables automatic compaction, raises the three level-0 triggers to the maximum integer and the two pending compaction limits to the maximum long value. Turn it off and restart after the load, otherwise compaction never runs.rocksdb.block_cache_capacity=0turns the block cache off completely rather than making it unbounded.rocksdb.prefix_extractor_n_bytesgreater than 0 installs a capped prefix extractor of that length.- Every column family uses the
uint64addmerge operator, which is what the counter table relies on. - The database is created if it is missing, and
avoid_unnecessary_blocking_ioandwrite_dbid_to_manifestare always on.
Memory notes
The caches and write buffers of RocksDB are native allocations, so they are not part of the JVM heap
sizing in bin/hugegraph-server.sh. The GET /metrics/backend endpoint reports what the store uses:
the memory number is the sum of the block cache usage, the pinned block cache usage, the estimated
table reader memory (index and filter blocks) and the size of all memtables, taken from the RocksDB
properties of every open column family.
Two option values multiply with the number of column families:
rocksdb.block_cache_capacitycreates one cache instance per column family, so the total block cache of a server is roughly this value times the number of open tables across them,gandsstores of every graph, plus the instances opened forrocksdb.data_disks.rocksdb.write_buffer_sizetimesrocksdb.max_write_buffer_numberbounds the memtable memory of one column family.rocksdb.db_write_buffer_sizecaps the total across all column families of one store, and its default of 0 means there is no such cap.
rocksdb.row_cache_capacity is different: it is one cache per store, and 0 disables it.
Ingesting SST files
Setting rocksdb.sst_path turns on ingestion. When a store is opened, and again whenever tables are
created, the server walks <sst_path>/<column family>/, collects every non-empty *.sst file below it
and ingests those files into the matching column family. The files are moved rather than copied, so the
source directory is consumed by the ingestion.
Raft mode
The RocksDB backend can still run behind the raft state machine: with raft.mode=true the store
provider of any local backend is wrapped by the raft provider. The wrapper rejects backends with shared
storage, so rocksdb is accepted while hbase is not. Under raft mode a RocksDB session writes with
the WAL disabled and without sync, because the state machine can restore from a snapshot plus the raft
log, and snapshots are supported by this backend.
Notes for anyone using it:
bin/init-store.shforcesraft.mode=falsewhile it initializes the backend, so initialization never goes through raft.- The shipped
conf/graphs/hugegraph.propertiesmarks the raft options as deprecated. Distributed deployments of 1.7.0 and later use thehstorebackend with PD and Store instead. - The raft peer endpoints are served under
graphspaces/{graphspace}/graphs/{graph}/raft/, withlist_peers,get_leader,set_leader,transfer_leader,add_peerandremove_peer.bin/raft-tools.shwraps the same operations, but it still builds URLs without the graphspace segment, so the path has to be adjusted for a 1.7.0 server. - The remaining
raft.*options are listed in the Server Complete Configuration Manual.
Backend capabilities
The feature flags of this backend affect what the server can push down to the store:
- Scans by key prefix and by key range, paged queries, range conditions and order-by are supported.
- There is no index inside RocksDB, so querying schema by name, querying by label and deleting edges by label are done by the server instead of the store.
- Transactions are supported through RocksDB write batches.
- Snapshots are supported, which is what raft mode and backup rely on.
- Shared storage is not supported, so one data directory belongs to one server.
- Olap properties are supported, and their tables are created as extra column families.
- The store does not expire data by itself, so the server filters out elements whose TTL has passed when it reads them.
in,containsandcontains_keyconditions, aggregate properties and vertex or edge property updates in place are not supported at the store level.
Platform note for riscv64
On Linux riscv64 the RocksDB JNI library needs libatomic.so.1. bin/util.sh looks for it and adds it
to LD_PRELOAD before bin/hugegraph-server.sh, bin/init-store.sh and bin/dump-store.sh start the
JVM. If it is missing, those scripts stop with
RISC-V RocksDB requires libatomic.so.1; install libatomic1, and installing the libatomic1 package
fixes it.
4.6 - Configuring the HStore Distributed Backend
1 Overview
hstore is the distributed storage backend of HugeGraph. When a graph uses it, HugeGraph-Server keeps no
graph data on its own disk. Two other processes do that work:
- HugeGraph-PD (Placement Driver) owns the cluster metadata: the registered store list, the partition layout of every graph, the partition to store mapping, the graph schema and the schema id counters.
- HugeGraph-Store owns the key value data itself, replicated across store nodes with Raft.
Server links a PD client and a Store client into its own process. For every read and write it asks PD which partition owns the key and which store node currently leads that partition, then sends the request directly to that store node.
The server side adapter is the hugegraph-hstore module. It registers under the backend name hstore and
reports driver version 1.13.
Selecting hstore changes more than where the bytes are written. Server switches these behaviors on the
backend type:
| Area | With hstore | With a local backend |
|---|---|---|
| Schema storage | Schema is read and written through the PD meta driver | Schema lives in the m store |
| Schema ids | Allocated by PD through the PD client | Allocated by the schema store |
| System store | None, system data goes to the graph store | Separate s store |
| Task scheduler | distributed | local |
| Auth manager | StandardAuthManagerV2 | StandardAuthManager |
| Backend version check | Reads the graph store | Reads the system store |
init-store.sh | Skips the graph, PD and Store already own the metadata | Creates the local store |
2 Prerequisites
hstore is not self contained. A PD cluster and at least one Store node must be running before Server opens
an hstore graph, and they have to be started in this order:
- PD, so that it can form its Raft group.
- Store, which registers itself with PD over gRPC. A store whose gRPC address is listed in PD’s own
pd.initial-store-listgoes to stateUpright away. A store that is not in that list, and that PD has never seenUporOfflinebefore, registers asPendingand has to be activated before it serves data. - Server, which then reads the store list back out of PD.
Default ports the Server side needs to know about:
| Process | gRPC port | REST port |
|---|---|---|
| PD | 8686 | 8620 |
| Store | 8500 | 8520 |
pd.peers on the Server side points at the PD gRPC port, not the REST port.
For installing and configuring the other two processes, see Install/Build HugeGraph-PD and Install/Build HugeGraph-Store.
3 Selecting the hstore backend
3.1 Graph configuration file
Set the backend in the graph properties file, for example conf/graphs/hugegraph.properties:
Notes on those four keys:
backend=hstoreselects the adapter. Since 1.7.0 the allowed values arememory,rocksdb,hbaseandhstore. The value is compared case insensitively where the distribution checks it.serializer=binaryis required. Registering thehstorebackend adds a config space and a store provider but no serializer of its own, and the adapter is written against the binary serializer. The built-in default ofserializeristext, so this value has to be written out.store=hugegraphis the namespace part of the name PD sees. Server opens the provider with<graphspace>/<store>and each backing store appends its own suffix, so PD ends up with one graph entry per store:DEFAULT/hugegraph/gfor graph data andDEFAULT/hugegraph/mfor the schema store slot.graphspacedefaults toDEFAULT, whilegandmare fixed.pd.peersis the comma separated list of PD gRPC addresses. The adapter reads it from the graph config, not fromrest-server.properties, and the graph level metadata connection uses the same value.
If the graph file does not contain pd.peers, Server copies the value from rest-server.properties into the
graph config while loading the graph, provided that usePD is true or the backend is hstore. Writing the
key explicitly in the graph file is still the clearer option.
3.2 rest-server.properties
usePD=true makes the Server load its metadata from PD at startup. On that path it connects the meta manager
to PD, creates the built-in admin account and the default graph space, loads the graph spaces and services,
creates the internal system graph (always with backend=hstore), and loads the graph configs that PD holds.
It is a separate switch from the graph level backend=hstore: a graph can use hstore with usePD left at
its default of false, and Server then never opens the PD backed metadata path. The distribution’s own test
startup script sets it whenever the backend is hstore.
3.3 The shipped template
The distribution ships a ready made graph file for this backend at
conf/graphs/hstore.properties.template. It matches hugegraph.properties except that it sets
backend=hstore, leaves pd.peers=127.0.0.1:8686 uncommented, and carries no memory management block.
The hstore Docker image applies that template for you: it deletes conf/graphs/hugegraph.properties and
renames the template over it, so a container starts with the hstore backend already selected.
A locally built distribution has the hstore provider compiled in by default. The rocksdb-only Maven
profile narrows the compiled backend list to rocksdb, and a distribution built that way rejects
backend=hstore with Not exists BackendStoreProvider: hstore after the provider factory check.
4 hstore config options
These are the only keys in the hstore config space. They belong in the graph properties file.
| config option | default value | description |
|---|---|---|
| hstore.partition_count | 0 | Number of partitions, which PD controls partitions based on. |
| hstore.shard_count | 0 | Number of copies, which PD controls partition copies based on. |
4.1 hstore.partition_count
Server sends this number to PD once per graph store, the first time the store is opened, together with the
graph name. A negative value is rejected at that point with
The value of hstore.partition_count cannot be less than 0.
How PD reads the number:
0, the default, means let PD decide. For a graph data store PD uses its own cluster wide partition total, which it derives from the number of entries inpd.initial-store-list,partition.store-max-shard-countandpartition.default-shard-count. For the/mand/sstores it uses a fixed count of1.- A value between
1and that total is used as is. - A value above that total is clamped down to it.
The number is applied when the store is first registered with PD, so changing it later in the properties file does not repartition an existing graph.
4.2 hstore.shard_count
hstore.shard_count is declared in the hstore config space and is accepted in the properties file, but no
code on the Server side reads it in this release: hstore.partition_count is the only one of the two the
adapter reads. The replica count in effect is the one PD is configured with,
partition.default-shard-count in PD’s application.yml.
5 Other options that only apply in hstore mode
These keys live in the shared rest-server.properties and graph properties files, but only take effect, or
only change behavior, when PD and the hstore backend are in use. The source column gives the file and line
in the checked Server master commit 2f827d6 where the option is declared.
| config option | file | default | why it matters with hstore | source |
|---|---|---|---|---|
| pd.peers | rest-server.properties | 127.0.0.1:8686 | PD addresses used for metadata, service discovery and the system graph | ServerOptions.java:195-201 |
| pd.peers | {graph}.properties | 127.0.0.1:8686 | PD addresses used by the backend adapter itself | CoreOptions.java:649-654 |
| usePD | rest-server.properties | false | Whether Server loads its metadata from PD at startup | ServerOptions.java:401-407 |
| cluster | rest-server.properties | hg-test | Cluster name used as the prefix of every PD metadata key | ServerOptions.java:187-193 |
| init_store.enabled | rest-server.properties | true | Set it to false in a PD/Store deployment, where the storage side already owns the metadata | ServerOptions.java:382-390 |
| graph.load_from_local_config | rest-server.properties | false | Controls constructor preloading. Application initialization still scans and attempts to load local configurations, so false does not block local loading. Restart Server to apply graph configuration changes. | ServerOptions.java:366-372 |
| auth.graph_store | rest-server.properties | hugegraph | The graph that holds auth data, checked against the hstore backend when init-store is off | ServerOptions.java:602-609 |
| graphspace | {graph}.properties | DEFAULT | First segment of the graph name PD sees | CoreOptions.java:679-685 |
init-store.sh never initializes an hstore graph. On the enabled path it scans conf/graphs and skips
every graph whose backend is hstore. If you turn the whole step off with init_store.enabled=false, it
validates instead that the admin account can still be created on the PD startup path: usePD has to be true,
the auth graph has to exist locally with backend hstore, and auth.admin_pa has to be set to an explicit
non-empty value. Otherwise startup fails rather than handing out the public default password.
6 How the Server finds the stores
The adapter builds its clients once per process, on the first hstore graph it opens:
- A PD client config from
pd.peers, with the PD authority credentials and the client side partition cache enabled. - The process wide PD client.
- The process wide store client, created from that PD client.
Creating the store client installs a PD backed partitioner as the node provider, partitioner and notifier of the store client’s node manager. That partitioner is the whole of the routing logic:
- Point and prefix requests ask PD for the partition that owns the key, take the leader shard of that partition and send the request to that store id.
- Code range scans walk the partitions by code until the range is covered, producing one target store per partition.
- Whole graph scans ask PD for the active stores of the graph and fan out to every one of them.
- Store address lookup resolves a store id to a host and port through PD.
- Cache invalidation: when a store answers that a partition leader moved, the notifier updates the partition leader in PD’s client cache and invalidates the stale partition entry, so later requests follow the new leader.
Because the store list comes from PD rather than from configuration, a store node is added or removed by starting or stopping it against the same PD cluster. No Server side config change is needed.
7 Backend capabilities
hstore does not support every query form the local backends do. The differences visible to a user:
| Feature | Supported |
|---|---|
| Scan by key prefix | yes |
| Scan by key range | yes |
| Query with range condition | yes |
| Query with order by | yes |
| Query by page | yes |
| OLAP properties | yes |
| Task and server vertex | yes |
| Scan token | no |
| Query schema by name | no |
| Query by label | no |
Query with in condition | no |
Query with contains | no |
Query with contains key | no |
| Sort results by input ids | no |
| Delete edge by label | no |
| Update vertex property | no |
| Update edge property | no |
| Transaction | no |
| Number type | no |
| Aggregate property | no |
| TTL | no |
Sorting by input ids is off because multi node batch scans group the input keys by store and lose the global order. Vertex and edge property updates are off because the properties are stored in a single cell.
8 Verification
Once the Server is up, the backend metrics endpoint reports the number of stores that PD currently considers active:
The nodes value in the response is the count of active stores PD returns. A nodes value of 0 means the
Server reached PD but PD has no store in state Up, which usually means the Store nodes have not registered
yet, or registered as Pending because they are not in PD’s pd.initial-store-list.
4.7 - Configuring the HBase Backend
Overview
The HBase backend stores graph data in Apache HBase tables. HugeGraph acts as an HBase client only: it connects through the HBase ZooKeeper quorum, creates one HBase namespace per graph, and creates that graph’s schema, data and index tables inside it. Counting queries are answered by the HBase AggregateImplementation coprocessor, which HugeGraph attaches to every table it creates.
Note: the HBase backend is deprecated and is planned for removal in HugeGraph 2.0. New deployments should use
hstore(distributed) orrocksdb(embedded, the default), and existing HBase deployments should plan a migration.
Since 1.7.0 the only backends shipped in the distribution are hstore, rocksdb, hbase and memory. The backend driver version reported by the HBase provider is 1.12.
Supported HBase Versions
The client jars are pinned to HBase 2.6.5 (hbase-endpoint plus hbase-shaded-client). HBase 2.x is required on the server side: when the detected HBase version is older than 2.0 the scan path rewrites an inclusive stop row into an exclusive one plus a trailing 0 byte, because inclusive stop rows do not work before that release. The CI job and the local Docker image both use HBase 2.6.5, so that is the version the backend is tested against.
Selecting the Backend
Edit conf/graphs/hugegraph.properties of the graph that should use HBase:
Note:
serializermust be set tohbase, not tobinary. The HBase serializer is aBinarySerializersubclass that drops the id prefix from row keys and writes the pre-split partition prefix that the pre-split vertex and edge tables expect. Withserializer=binaryneither of these applies.
Then initialize the store and start the server:
The default distribution is built with the backends rocksdb, hbase, hstore, so no extra jar is needed. A distribution built with the rocksdb-only Maven profile does not contain the HBase backend, and backend=hbase then fails to open with Not exists BackendStoreProvider: hbase.
All options below live in the graph properties file (conf/graphs/hugegraph.properties), not in rest-server.properties. They are registered only when the hbase backend is part of the distribution.
Connection Options
| Option | Default | Description |
|---|---|---|
| hbase.hosts | localhost | The hostnames or ip addresses of HBase zookeeper, separated with commas. Must not be empty. Maps to hbase.zookeeper.quorum. |
| hbase.port | 2181 | The port address of HBase zookeeper, in the range 1 to 65535. Maps to hbase.zookeeper.property.clientPort. |
| hbase.znode_parent | /hbase | The znode parent path of HBase zookeeper. Must not be empty. Maps to zookeeper.znode.parent. |
| hbase.zk_retry | 3 | The recovery retry times of HBase zookeeper, in the range 0 to 1000. Maps to zookeeper.recovery.retry. |
| hbase.threads_max | 64 | The max threads num of hbase connections, in the range 1 to 1000. Maps to hbase.hconnection.threads.max, which HBase itself defaults to 256; the lower value is used to avoid running out of memory. |
Timeout Options
| Option | Default | Description |
|---|---|---|
| hbase.truncate_timeout | 30 | The timeout in seconds of waiting for store truncate. Must be positive. It applies per store, and a graph has three stores, so a truncate can take up to three times this value. |
| hbase.aggregation_timeout | 43200 (12 hours) | The timeout in seconds of waiting for aggregation. Must be positive. Sets hbase.rpc.timeout on the aggregation client used by count queries. |
Kerberos and HBase Site Options
| Option | Default | Description |
|---|---|---|
| hbase.kerberos_enable | false | Is Kerberos authentication enabled for HBase. |
| hbase.krb5_conf | /etc/krb5.conf | Kerberos configuration file, including KDC IP, default realm, etc. Applied as the java.security.krb5.conf system property. |
| hbase.hbase_site | /etc/hbase/conf/hbase-site.xml | The HBase’s configuration file. It is added as a configuration resource on every connection, whether or not Kerberos is enabled. |
| hbase.kerberos_principal | (empty) | The HBase’s principal for kerberos authentication. |
| hbase.kerberos_keytab | (empty) | The HBase’s key tab file for kerberos authentication. |
When hbase.kerberos_enable=true, HugeGraph sets hadoop.security.authentication and hbase.security.authentication to kerberos on the connection, then logs in from the keytab with the configured principal before opening the connection. A Kerberos setup therefore needs all four of hbase.krb5_conf, hbase.hbase_site, hbase.kerberos_principal and hbase.kerberos_keytab to be valid:
hbase.hbase_site is read even with Kerberos disabled, so a path that does not exist is simply an empty resource. Point it at the cluster’s own hbase-site.xml when HBase settings beyond the options above are needed.
Pre-split Partition Options
| Option | Default | Description |
|---|---|---|
| hbase.enable_partition | true | Is pre-split partitions enabled for HBase. Also decides whether the backend reports support for key-prefix and key-range scans. |
| hbase.vertex_partitions | 10 | The number of partitions of the HBase vertex table. Must not be negative. |
| hbase.edge_partitions | 30 | The number of partitions of the HBase edge table. Must not be negative. |
With pre-split enabled, the vertex table is created with hbase.vertex_partitions regions and each of the two edge tables with hbase.edge_partitions regions, and the serializer prefixes row keys with the partition the id hashes to.
Note: set the partition counts to match the actual data volume and the number of region servers before the store is initialized. They change the load speed considerably, and they are only applied at table creation time.
Turning hbase.enable_partition off restores plain, unprefixed row keys. In exchange the backend then reports support for key-prefix scans and key-range scans, which pre-split row keys cannot serve.
Namespace and Table Layout
Each graph maps to one HBase namespace named <graphspace>/<store>, lowercased, with / replaced by _ because an HBase namespace name may only contain alphanumeric characters and the _ character. With the defaults graphspace=DEFAULT and store=hugegraph, the namespace is default_hugegraph.
Inside that namespace a graph keeps three stores, the schema store m, the graph store g and the system store s:
| Store | Tables |
|---|---|
schema (m) | VL, EL, PK, IL, C, m_si |
graph (g) | g_v, g_oe, g_ie, g_si, g_vi, g_ei, g_ii, g_fi, g_li, g_di, g_ai, g_hi, g_ui |
system (s) | s_v, s_oe, s_ie, s_si, s_vi, s_ei, s_ii, s_fi, s_li, s_di, s_ai, s_hi, s_ui, M |
g_v is the vertex table, g_oe and g_ie are the out-edge and in-edge tables, and the remaining g_* tables are the secondary, vertex-label, edge-label, range (int, float, long, double), search, shard and unique index tables. Every table has a single column family named f, and every table is created with the org.apache.hadoop.hbase.coprocessor.AggregateImplementation coprocessor attached. Only g_v, g_oe and g_ie are pre-split; the system store’s copies of those tables are created with a single region.
The M table in the system store holds the backend version written by init-store.sh. It is excluded when a graph is truncated, because losing it makes the version check fail on the next startup. Clearing a graph drops the tables; clearing it with the storage space included drops the whole namespace.
GET /metrics/backend reports the HBase cluster state: cluster_id, master_name, average_load, hbase_version, region_count, leaving_servers, nodes, region_servers, and a servers map with heap, disk, request and per region details for each region server. PUT /graphspaces/{graphspace}/graphs/{name}/compact asks HBase to compact every table of the graph.
Local Testing with Docker
docker/hbase in the server repository builds a standalone HBase 2.6.5 image (hugegraph/hbase:2.6.5, container name hg-hbase-test) for local development and tests. Run these from the repository root.
Start HBase for a HugeGraph server running on the host:
Start HBase for a HugeGraph server running in a container on the same Docker network:
The advertised hostnames matter: the container writes HBASE_MASTER_HOSTNAME and HBASE_REGIONSERVER_HOSTNAME into its hbase-site.xml on startup, falling back to HBASE_HOSTNAME (default hbase). A client that cannot resolve the advertised name fails with UnknownHostException: hbase:16000 even though ZooKeeper answers.
Ports published to the host:
| Port | Service |
|---|---|
| 2181 | ZooKeeper, matches the hbase.port default |
| 16000 | HBase Master RPC |
| 16010 | HBase Master web UI, http://localhost:16010 |
| 16020 | HBase RegionServer RPC |
| 16030 | HBase RegionServer web UI, http://localhost:16030 |
Run the backend test suite against it:
Stop it and remove its volumes:
The image starts ZooKeeper, the master and the region server as separate daemons and waits for the master to report a live server before it starts tailing the logs, so the first startup can take a while. Give Docker at least 4 GB of memory. The compose health check has a 90 second start period for the same reason.
Limitations
The HBase backend does not support these features:
- Transactions. A rollback only discards the batch that has not been committed yet, and a commit writes one table at a time, so it is not atomic across tables.
- Updating a single vertex or edge property in place, and merging vertex properties. Properties are stored in one cell, so the whole property column is rewritten.
- Querying schema by name, and querying vertices or edges by label alone. Both would need an HBase secondary index.
- Deleting edges by label.
- Queries with an
incondition, acontainscondition or acontains_keycondition. - Aggregate properties and OLAP properties.
- Native number types (the
supportsNumberTypebackend feature is off). - Scan tokens.
- Key-prefix scans and key-range scans while
hbase.enable_partitionistrue. - Aggregation other than
count. Any other aggregate function is rejected. - Snapshots. Creating or resuming a backend snapshot throws
UnsupportedOperationException.
Supported features include TTL on vertices and edges, paged queries, order-by queries, range conditions, and sorting by input ids.
5 - Clients and APIs
This section covers the REST API, Gremlin Console, and client libraries. The current Server REST API identifies graph resources with both a graph space and a graph name. Refer to each API page and the Server OpenAPI page for the exact paths.
5.1 - HugeGraph RESTful API
This section documents the REST API on current master. For historical APIs, switch to the versioned HugeGraph 1.7 RESTful API documentation or HugeGraph 1.5 RESTful API documentation.
The default graph space is
DEFAULT.
After starting Server, open http://localhost:8080/swagger-ui/index.html to view the OpenAPI page for the current version. See the usage example.
5.1.1 - Graphspace API
2.0 Graphspace
HugeGraph implements multi-tenancy through graph spaces, which isolate compute/storage resources per tenant.
Prerequisites
- Graphspace currently only works in HStore mode.
- In non-HStore mode you can only use the default graphspace
DEFAULT; creating/deleting/updating other graphspaces is not supported. - Set
usePD=trueinrest-server.propertiesandbackend=hstoreinhugegraph.properties. - Production requires Server authentication and authorization, and
auth=truefor new graph spaces. Replace the public default administrator passwordpaconfigured byauth.admin_pa. - Every endpoint on this page requires PD mode. In standalone mode they answer
400with the messageGraphSpace management is not supported in standalone mode.
Restrict graph-space listing and detail endpoints
GET /graphspaces and GET /graphspaces/{graphspace} have no @RolesAllowed annotation. They are anonymous when Server authentication is disabled and lack method-level administrator checks when it is enabled. Detail responses contain dp_username and dp_password. In production, set white_ip.status=enable and maintain the IP allowlist. A gateway must restrict both paths by caller identity or role to administrators and trusted operators; restricting only source IPs still lets ordinary authenticated accounts on that network read DP credentials. Server network policy must allow only trusted gateway egress addresses to the API port, blocking direct client bypass. Record caller identity, source, and outcome at the gateway. Server audit-*.log files record authentication and authorization but do not replace gateway access auditing for these paths. Grant business accounts minimum permissions.
2.0.1 Create a graphspace
Method & Url
Request Body
Note: CPU/memory and Kubernetes-related capabilities are not publicly available yet.
| Name | Required | Type | Default | Range/Note | Description |
|---|---|---|---|---|---|
| name | Yes | String | Lowercase letters, digits, underscore; must start with a letter; max length 48 | Graphspace name | |
| nickname | No | String | name | Must be unique among graphspaces | Display name of the graphspace |
| description | No | String | Description | ||
| cpu_limit | Yes | Int | > 0 | CPU cores for the graphspace | |
| memory_limit | Yes | Int | > 0 (GB) | Memory quota in GB | |
| storage_limit | Yes | Int | > 0 | Maximum disk usage, in GB | |
| compute_cpu_limit | No | Int | 0 | >= 0 | Extra HugeGraph-Computer CPU cores; falls back to cpu_limit if unset or 0 |
| compute_memory_limit | No | Int | 0 | >= 0 | Extra HugeGraph-Computer memory in GB; falls back to memory_limit if unset or 0 |
| oltp_namespace | No | String | "" | Kubernetes namespace for OLTP HugeGraph-Server | |
| olap_namespace | No | String | "" | Resources are merged when identical to oltp_namespace | Kubernetes namespace for OLAP / HugeGraph-Computer |
| storage_namespace | No | String | "" | Kubernetes namespace for HugeGraph-Store | |
| operator_image_path | No | String | "" | HugeGraph-Computer operator image registry | |
| internal_algorithm_image_url | No | String | "" | HugeGraph-Computer algorithm image registry | |
| max_graph_number | Yes | Int | > 0 | Maximum number of graphs that can be created inside the graphspace | |
| max_role_number | No | Int | 0 | Maximum number of roles that can be created inside the graphspace | |
| auth | No | Boolean | false | true / false | Whether to enable authentication for the graphspace |
| configs | No | Map | Additional configuration |
Response Status
Response Body
2.0.2 List all graphspaces
Method & Url
Response Status
Response Body
2.0.3 Get graphspace details
Params
Path parameters
- graphspace: Graphspace name
Method & Url
Response Status
Response Body
The
dp_usernameanddp_passwordvalues above are documentation examples. Real detail responses contain the graph space’s DP credentials and must be protected as sensitive credentials.
2.0.4 Update a graphspace
authcannot be changed once a graphspace is created.
Params
Path parameter
- graphspace: Graphspace name
Request parameters
- action: Must be
"update" - update: Container for the actual fields to update (see table below)
| Name | Required | Type | Range/Note | Description |
|---|---|---|---|---|
| name | Yes | String | Must match the graphspace name in the path | Graphspace name |
| nickname | No | String | Must be unique among graphspaces | Display name of the graphspace |
| description | No | String | Description | |
| cpu_limit | Yes | Int | > 0 | CPU cores for OLTP HugeGraph-Server |
| memory_limit | Yes | Int | > 0 (GB) | Memory quota (GB) for OLTP HugeGraph-Server |
| storage_limit | Yes | Int | > 0 | Maximum disk usage, in GB |
| compute_cpu_limit | No | Int | >= 0 | Extra HugeGraph-Computer CPU cores; falls back to cpu_limit if unset or 0 |
| compute_memory_limit | No | Int | >= 0 | Extra HugeGraph-Computer memory in GB; falls back to memory_limit if unset or 0 |
| oltp_namespace | Yes | String | Kubernetes namespace for OLTP HugeGraph-Server | |
| olap_namespace | Yes | String | Resources are merged when identical to oltp_namespace | Kubernetes namespace for OLAP |
| storage_namespace | Yes | String | Kubernetes namespace for HugeGraph-Store | |
| operator_image_path | No | String | HugeGraph-Computer operator image registry | |
| internal_algorithm_image_url | No | String | HugeGraph-Computer algorithm image registry | |
| max_graph_number | Yes | Int | > 0 | Maximum number of graphs |
| max_role_number | Yes | Int | > 0 | Maximum number of roles |
Method & Url
Request Body
Response Status
Response Body
2.0.5 Delete a graphspace
Params
Path parameter
- graphspace: Graphspace name
Method & Url
Response Status
Warning: deleting a graphspace releases all resources that belong to it.
2.0.6 List all graphspaces with their details
Params
Query parameters
- prefix: Return only the graphspaces whose name or nickname starts with this prefix
Method & Url
Response Status
Response Body
Each entry carries the same fields as GET /graphspaces/{graphspace} plus authed, default, create_time and update_time. authed says whether the current user may enter the graphspace: it is false when the graphspace has authentication on and the user is neither an administrator, nor a manager, nor a member of it. default is always false for now, the default-graphspace feature is not implemented yet.
Default roles
Every graphspace carries four built-in roles, so that a user or a group can be given a whole set of permissions at once:
space: manager of the graphspace, only an administrator may grant itspace_member: member of the graphspaceanalyst: analyst of the graphspaceobserver: read-only role, it can be narrowed to a single graph by passinggraph
user accepts either a user name or a group name. Whether the current user holds a default role can also be checked with GET /graphspaces/{graphspace}/auth/managers/default, see Authentication API.
2.0.7 Grant a default role
Params
Path parameter
- graphspace: Graphspace name
Request parameters
- user: User or group name, required
- role: One of
space,space_member,analyst,observer, required - graph: Graph name, optional, only taken into account with
role=observer
Method & Url
Request Body
Response Status
Response Body
graph is echoed back only when the role was granted on a single graph.
2.0.8 Check a default role
Params
Path parameter
- graphspace: Graphspace name
Query parameters
- user: User or group name, required
- role: Default role name, required
- graph: Graph name, optional, only taken into account with
role=observer
Method & Url
Response Status
Response Body
2.0.9 Revoke a default role
Params
Path parameter
- graphspace: Graphspace name
Query parameters
- user: User or group name, required
- role: Default role name, required
- graph: Graph name, optional, only taken into account with
role=observer
Method & Url
Response Status
Schema templates
A schema template stores a Gremlin schema script under a name, so that a new graph can be initialized with it by passing schema when the graph is created, see Graphs API. A template can be updated or deleted by its creator, by a manager of the graphspace, or by an administrator.
2.0.10 Create a schema template
Params
Path parameter
- graphspace: Graphspace name
Request parameters
- name: Template name, required
- schema: Gremlin schema script, required
Method & Url
Request Body
Response Status
Response Body
2.0.11 List the schema templates of a graphspace
Method & Url
Response Status
Response Body
2.0.12 Get a schema template
Method & Url
Response Status
2.0.13 Update a schema template
Only schema can be updated, the name of a template is fixed.
Method & Url
Request Body
Response Status
2.0.14 Delete a schema template
Method & Url
Response Status
5.1.2 - Schema API
1.1 Schema
HugeGraph provides a single interface to get all Schema information of a graph, including: PropertyKey, VertexLabel, EdgeLabel and IndexLabel.
Method & Url
Response Status
Response Body
5.1.3 - PropertyKey API
1.2 PropertyKey
Params Description:
- name: The name of the property type, required.
- data_type: The data type of the property type, including: bool, byte, int, long, float, double, text, blob, date, uuid. The default data type is
text(Represent astringtype) - cardinality: The cardinality of the property type, including: single, list, set. The default cardinality is
single.
Request Body Field Description:
- id: The ID value of the property type.
- properties: The properties of the property type. For properties, this field is empty.
- user_data: Setting the common information of the property type, such as setting the value range of the age property from 0 to 100. Currently, no validation is performed on this field, and it is only a reserved entry for future expansion.
1.2.1 Create a PropertyKey
Method & Url
Request Body
Response Status
Response Body
1.2.2 Add or Remove userdata for an existing PropertyKey
Params
- action: Indicates whether the current action is to add or remove userdata. Possible values are
append(add) andeliminate(remove).
Method & Url
Request Body
Response Status
Response Body
1.2.3 Get all PropertyKeys
Method & Url
Response Status
Response Body
1.2.4 Get PropertyKey according to name
Method & Url
Where age is the name of the PropertyKey to be retrieved.
Response Status
Response Body
1.2.5 Delete PropertyKey according to name
Method & Url
Where age is the name of the PropertyKey to be deleted.
Response Status
Response Body
5.1.4 - VertexLabel API
1.3 VertexLabel
Assuming that the PropertyKeys listed in 1.1.3 have already been created.
Params Description:
- id: The ID value of the vertex type.
- name: The name of the vertex type, required.
- id_strategy: The ID strategy for the vertex type, including primary key ID, auto-generated, custom string, custom number, custom UUID. The default strategy is primary key ID.
- properties: The property types associated with the vertex type.
- primary_keys: The primary key properties. This field must have a value when the ID strategy is PRIMARY_KEY, and must be empty for other ID strategies.
- enable_label_index: Whether to enable label indexing. It is disabled by default.
- index_names: The indexes created for the vertex type. See details in section 3.4.
- nullable_keys: Nullable properties.
- user_data: Setting the common information of the vertex type, similar to the property type.
1.3.1 Create a VertexLabel
Method & Url
Request Body
Response Status
Response Body
Starting from version v0.11.2, hugegraph-server supports Time-to-Live (TTL) functionality for vertices. The TTL for vertices is set through VertexLabel. For example, if you want the vertices of type “person” to have a lifespan of one day, you need to set the TTL field to 86400000 (in milliseconds) when creating the “person” VertexLabel.
Additionally, if the vertex has a property called “createdTime” and you want to use it as the starting point for calculating the vertex’s lifespan, you can set the ttl_start_time field in the VertexLabel. For example, if the “person” VertexLabel has a property called “createdTime” of type Date, and you want the vertices of type “person” to live for one day starting from the creation time, the Request Body for creating the “person” VertexLabel would be as follows:
1.3.2 Add properties or userdata to an existing VertexLabel, or remove userdata (removing properties is currently not supported)
Params
- action: Indicates whether the current action is to add or remove. Possible values are
append(add) andeliminate(remove).
Method & Url
Request Body
Response Status
Response Body
1.3.3 Get all VertexLabels
Method & Url
Response Status
Response Body
1.3.4 Get VertexLabel by name
Method & Url
Response Status
Response Body
1.3.5 Delete VertexLabel by name
Deleting a VertexLabel will result in the removal of corresponding vertices and related index data. This operation will generate an asynchronous task.
Method & Url
Response Status
Response Body
Note:
You can use
GET http://localhost:8080/graphspaces/DEFAULT/graphs/hugegraph/tasks/1(where “1” is the task_id) to query the execution status of the asynchronous task. For more information, refer to the Asynchronous Task RESTful API.
5.1.5 - EdgeLabel API
1.4 EdgeLabel
Assuming PropertyKeys from version 1.2.3 and VertexLabels from version 1.3.3 have already been created.
Params Explanation
- name: Name of the vertex type, required.
- source_label: Name of the source vertex type, required.
- target_label: Name of the target vertex type, required.
- frequency: Whether there can be multiple edges between two points, can have values SINGLE or MULTIPLE, optional (default value: SINGLE).
- properties: Property types associated with the edge type, optional.
- sort_keys: Specifies a list of differentiating key properties when multiple associations are allowed.
- nullable_keys: Nullable properties, optional (default: nullable).
- enable_label_index: Whether to enable type indexing, disabled by default.
1.4.1 Create an EdgeLabel
Method & Url
Request Body
Response Status
Response Body
Starting from version 0.11.2 of hugegraph-server, the TTL (Time to Live) feature for edges is supported. The TTL for edges is set through EdgeLabel. For example, if you want the “knows” type of edge to have a lifespan of one day, you need to set the TTL field to 86400000 when creating the “knows” EdgeLabel, where the unit is milliseconds.
Additionally, when the edge has a property called “createdTime” and you want to use the “createdTime” property as the starting point for calculating the edge’s lifespan, you can set the ttl_start_time field in the EdgeLabel. For example, if the knows EdgeLabel has a property called “createdTime” which is of type Date, and you want the “knows” type of edge to live for one day from the time of creation, the Request Body for creating the knows EdgeLabel would be as follows:
1.4.2 Add properties or userdata to an existing EdgeLabel, or remove userdata (removing properties is currently not supported)
Params
- action: Indicates whether the current action is to add or remove, with values
append(add) andeliminate(remove).
Method & Url
Request Body
Response Status
Response Body
1.4.3 Get all EdgeLabels
Method & Url
Response Status
Response Body
1.4.4 Get EdgeLabel by name
Method & Url
Response Status
Response Body
1.4.5 Delete EdgeLabel by name
Deleting an EdgeLabel will result in the deletion of corresponding edges and related index data. This operation will generate an asynchronous task.
Method & Url
Response Status
Response Body
Note:
You can query the execution status of an asynchronous task by using
GET http://localhost:8080/graphspaces/DEFAULT/graphs/hugegraph/tasks/1(where “1” is the task_id). For more information, refer to the Asynchronous Task RESTful API.
5.1.6 - IndexLabel API
1.5 IndexLabel
Assuming PropertyKeys from version 1.1.3, VertexLabels from version 1.2.3, and EdgeLabels from version 1.3.3 have already been created.
1.5.1 Create an IndexLabel
Method & Url
Request Body
Response Status
Response Body
1.5.2 Get all IndexLabels
Method & Url
Response Status
Response Body
1.5.3 Get IndexLabel by name
Method & Url
Response Status
Response Body
1.5.4 Delete IndexLabel by name
Deleting an IndexLabel will result in the deletion of related index data. This operation will generate an asynchronous task.
Method & Url
Response Status
Response Body
Note:
You can query the execution status of an asynchronous task by using
GET http://localhost:8080/graphspaces/DEFAULT/graphs/hugegraph/tasks/1(where “1” is the task_id). For more information, refer to the Asynchronous Task RESTful API.
1.5.5 Add or remove userdata for an existing IndexLabel
Only user_data can be changed this way, base_type, base_value and index_type must be left out of the request body.
Params
- action: Indicates whether the current action is to add or remove userdata. Possible values are
append(add) andeliminate(remove).
Method & Url
Request Body
Response Status
Response Body
5.1.7 - Rebuild API
1.6 Rebuild
1.6.1 Rebuild IndexLabel
Method & Url
Response Status
Response Body
Note:
You can get the asynchronous job status by
GET http://localhost:8080/graphspaces/DEFAULT/graphs/hugegraph/tasks/${task_id}(the task_id here should be 1). See More AsyncJob RESTfull API
1.6.2 Rebulid all Indexs of VertexLabel
Method & Url
Response Status
Response Body
Note:
You can get the asynchronous job status by
GET http://localhost:8080/graphspaces/DEFAULT/graphs/hugegraph/tasks/${task_id}(the task_id here should be 2). See More AsyncJob RESTfull API
1.6.3 Rebulid all Indexs of EdgeLabel
Method & Url
Response Status
Response Body
Note:
You can get the asynchronous job status by
GET http://localhost:8080/graphspaces/DEFAULT/graphs/hugegraph/tasks/${task_id}(the task_id here should be 3). See More AsyncJob RESTfull API
5.1.8 - Vertex API
2.1 Vertex
In vertex types, the Id strategy determines the type of the vertex Id, with the corresponding relationships as follows:
| Id_Strategy | id type |
|---|---|
| AUTOMATIC | number |
| PRIMARY_KEY | string |
| CUSTOMIZE_STRING | string |
| CUSTOMIZE_NUMBER | number |
| CUSTOMIZE_UUID | uuid |
For the GET/PUT/DELETE API of a vertex, the id part in the URL should be passed as the id value with type information. This type information is indicated by whether the JSON string is enclosed in quotes, meaning:
- When the id type is
number, the id in the URL is without quotes, for example:xxx/vertices/123456. - When the id type is
string, the id in the URL is enclosed in quotes, for example:xxx/vertices/"123456".
The next example requires first creating the graph schema from the following groovy script
2.1.1 Create a vertex
Method & Url
Request Body
Response Status
Response Body
2.1.2 Create multiple vertices
Method & Url
Request Body
Response Status
Response Body
2.1.3 Update vertex properties
Method & Url
Request Body
Note: There are three categories for property values: single, set, and list. If it is single, it means adding or updating the property value. If it is set or list, it means appending the property value.
Response Status
Response Body
2.1.4 Batch Update Vertex Properties
Function Description
Batch update properties of vertices and support various update strategies, including:
- SUM: Numeric accumulation
- BIGGER: Take the larger value between two numbers/dates
- SMALLER: Take the smaller value between two numbers/dates
- UNION: Take the union of set properties
- INTERSECTION: Take the intersection of set properties
- APPEND: Append elements to list properties
- ELIMINATE: Remove elements from list/set properties
- OVERRIDE: Override existing properties, if the new property is null, the old property is still used
Assuming the original vertex and properties are:
Add vertices with the following command:
Method & Url
Request Body
Response Status
Response Body
Result Analysis:
- The lang property does not specify an update strategy and is directly overwritten by the new value, regardless of whether the new value is null.
- The price property specifies the BIGGER update strategy. The old property value is 328, and the new property value is 299, so the old property value of 328 is retained.
- The age property specifies the OVERRIDE update strategy, but the new property value does not include age, which is equivalent to age being null. Therefore, the original property value of 32 is still retained.
- The city property also specifies the OVERRIDE update strategy, and the new property value is not null, so it overrides the old value.
- The weight property specifies the SUM update strategy. The old property value is 0.1, and the new property value is 0.2. The final value is 0.3.
- The hobby property (cardinality is Set) specifies the UNION update strategy, so the new value is taken as the union with the old value.
The usage of other update strategies can be inferred in a similar manner and will not be further elaborated.
2.1.5 Delete Vertex Properties
Method & Url
Request Body
Note: Here, the properties (keys and all values) will be directly deleted, regardless of whether the property values are single, set, or list.
Response Status
Response Body
2.1.6 Get Vertices that Meet the Criteria
Params
- label: Vertex type
- properties: Property key-value pairs (precondition: indexes are created for property queries)
- keep_start_p: Default is false. When set to true, the range matching input expression will not be automatically escaped. For example,
properties={"age":"P.gt(18)"}will be interpreted as an exact match, i.e., the age property is equal to the string “P.gt(18)” - offset: Offset, default is 0
- limit: Maximum number of results, default is 100
- page: Page number
All of the above parameters are optional. page can not be combined with a non-zero offset, everything else can be combined in any way.
Property key-value pairs consist of the property name and value in JSON format. Multiple property key-value pairs are allowed as query conditions. The property value supports exact matching, range matching, and fuzzy matching. For exact matching, use the format properties={"age":29}, for range matching, use the format properties={"age":"P.gt(29)"}, and for fuzzy matching, use the format properties={"city": "P.textcontains("ChengDu China")}. The following expressions are supported for range matching:
| Expression | Explanation |
|---|---|
| P.eq(number) | Vertices with property value equal to number |
| P.neq(number) | Vertices with property value not equal to number |
| P.lt(number) | Vertices with property value less than number |
| P.lte(number) | Vertices with property value less than or equal to number |
| P.gt(number) | Vertices with property value greater than number |
| P.gte(number) | Vertices with property value greater than or equal to number |
| P.between(number1,number2) | Vertices with property value greater than or equal to number1 and less than number2 |
| P.inside(number1,number2) | Vertices with property value greater than number1 and less than number2 |
| P.outside(number1,number2) | Vertices with property value less than number1 and greater than number2 |
| P.within(value1,value2,value3,…) | Vertices with property value equal to any of the given values |
Query all vertices with age 29 and label person
Method & Url
Response Status
Response Body
Paginate through all vertices, retrieve the first page (page without parameter value), limited to 3 records
Add vertices with the following command:
Method & Url
Response Status
Response Body
The returned body contains information about the page number of the next page, "page": "CIYxOnBldGVyAAAAAAAAAAM". When querying the next page, assign this value to the page parameter.
Paginate and retrieve all vertices, including the next page (passing the page value returned from the previous page), limited to 3 items.
Method & Url
Response Status
Response Body
At this point, "page": null indicates that there are no more pages available. (Note: When using Cassandra as the backend for performance reasons, if the returned page happens to be the last page, the page value may not be empty. When requesting the next page using that page value, it will return empty data and page = null. The same applies to other similar situations.)
2.1.7 Retrieve Vertex by ID
Method & Url
Response Status
Response Body
2.1.8 Delete Vertex by ID
Params
- label: Vertex type, optional parameter
Delete the vertex based on ID only.
Method & Url
Response Status
Delete Vertex by Label+ID
When deleting a vertex by specifying both the Label parameter and the ID, it generally offers better performance compared to deleting by ID alone.
Method & Url
Response Status
5.1.9 - Edge API
2.2 Edge
The modification of the vertex ID format also affects the ID of the edge, as well as the formats of the source vertex and target vertex IDs.
The EdgeId is formed by concatenating src-vertex-id + direction + label + sort-values + tgt-vertex-id, but the vertex ID types are not distinguished by quotation marks here. Instead, they are distinguished by prefixes:
- When the ID type is number, the vertex ID in the EdgeId has a prefix
L, like “L123456>1»L987654”. - When the ID type is string, the vertex ID in the EdgeId has a prefix
S, like “S1:peter>1»S2:lop”.
The following example requires creating a graph schema based on the following groovy script:
2.2.1 Creating an Edge
Params
Path Parameter Description:
- graph: The graph to operate on
Request Body Description:
- label: The edge type name (required)
- outV: The source vertex id (required)
- inV: The target vertex id (required)
- outVLabel: The source vertex type (required)
- inVLabel: The target vertex type (required)
- properties: The properties associated with the edge. The internal structure of the object is as follows:
- name: The property name
- value: The property value
Method & Url
Request Body
Response Status
Response Body
2.2.2 Creating Multiple Edges
Params
Path Parameter Description:
- graph: The graph to operate on
Request Parameter Description:
- check_vertex: Whether to check the existence of vertices (true | false). When set to true, an error will be thrown if the source or target vertices of the edge to be inserted do not exist. Default is true.
Request Body Description:
- List of edge information
Method & Url
Request Body
Response Status
Response Body
2.2.3 Updating Edge Properties
Params
Path Parameter Description:
- graph: The graph to operate on
- id: The ID of the edge to be operated on
Request Parameter Description:
- action: The append action
Request Body Description:
- Edge information
Method & Url
Request Body
NOTE: There are three categories of property values: single, set, and list. If it is single, it means adding or updating the property value. If it is set or list, it means appending the property value.
Response Status
Response Body
2.2.4 Batch Updating Edge Properties
Params
Path Parameter Description:
- graph: The graph to operate on
Request Body Description:
- edges: List of edge information
- update_strategies: For each property, you can set its update strategy individually, including:
- SUM: Only supports number type
- BIGGER/SMALLER: Only supports date/number type
- UNION/INTERSECTION: Only supports set type
- APPEND/ELIMINATE: Only supports collection type
- OVERRIDE
- check_vertex: Whether to check the existence of vertices (true | false). When set to true, an error will be thrown if the source or target vertices of the edge to be inserted do not exist. Default is true.
- create_if_not_exist: Currently only supports setting to true
Method & Url
Request Body
Response Status
Response Body
2.2.5 Deleting Edge Properties
Params
Path Parameter Description:
- graph: The graph to operate on
- id: The ID of the edge to be operated on
Request Parameter Description:
- action: The eliminate action
Request Body Description:
- Edge information
Method & Url
Request Body
NOTE: This will directly delete the properties (removing the key and all values), regardless of whether the property values are single, set, or list.
Response Status
Response Body
It is not possible to delete an attribute that is not set as nullable.
2.2.6 Fetching Edges that Match the Criteria
Params
Path Parameter:
- graph: The graph to operate on
Request Parameters:
- vertex_id: Vertex ID
- direction: Edge direction (OUT | IN | BOTH), default is BOTH
- label: Edge label
- properties: Key-value pairs of properties (requires pre-built indexes for property queries)
- keep_start_p: Default is false. When set to true, the range matching input expression will not be automatically escaped. For example,
properties={"age":"P.gt(0.8)"}will be interpreted as an exact match, i.e., the age property is equal to “P.gt(0.8)” - offset: Offset, default is 0
- limit: Number of queries, default is 100
- page: Page number
Key-value pairs of properties consist of the property name and value in JSON format. Multiple key-value pairs are allowed as query conditions. Property values support exact matching and range matching. For exact matching, it is in the form properties={"weight":0.8}. For range matching, it is in the form properties={"age":"P.gt(0.8)"}. The expressions supported by range matching are as follows:
| Expression | Description |
|---|---|
| P.eq(number) | Edges with property value equal to number |
| P.neq(number) | Edges with property value not equal to number |
| P.lt(number) | Edges with property value less than number |
| P.lte(number) | Edges with property value less than or equal to number |
| P.gt(number) | Edges with property value greater than number |
| P.gte(number) | Edges with property value greater than or equal to number |
| P.between(number1,number2) | Edges with property value greater than or equal to number1 and less than number2 |
| P.inside(number1,number2) | Edges with property value greater than number1 and less than number2 |
| P.outside(number1,number2) | Edges with property value less than number1 and greater than number2 |
| P.within(value1,value2,value3,…) | Edges with property value equal to any of the given values |
| P.textcontains(value) | Edges with property value containing the given value (string type) |
| P.contains(value) | Edges with property value containing the given value (collection type) |
Edges connected to the vertex person:marko(vertex_id=“1:marko”) with label knows and date property equal to “20160111”
Method & Url
Response Status
Response Body
Paginate and retrieve all edges, get the first page (page without parameter value), limit to 2 entries
Method & Url
Response Status
Response Body
The returned body contains the page number information for the next page, "page": "EoYxOm1hcmtvgggCAIQyOmxvcAAAAAAAAAAC". When querying the next page, assign this value to the page parameter.
Paginate and retrieve all edges, get the next page (include the page value returned from the previous page), limit to 2 entries
Method & Url
Response Status
Response Body
When "page": null is returned, it indicates that there are no more pages available.
NOTE: When the backend is Cassandra, for performance considerations, if the returned page happens to be the last page, the
pagevalue may not be empty. When requesting the next page data using thatpagevalue, it will returnempty dataandpage = null. Similar situations apply for other cases.
2.2.7 Fetching Edge by ID
Params
Path parameter description:
- graph: The graph to be operated on.
- id: The ID of the edge to be operated on.
Method & Url
Response Status
Response Body
2.2.8 Deleting Edge by ID
Params
Path parameter description:
- graph: The graph to be operated on.
- id: The ID of the edge to be operated on.
Request parameter description:
- label: The label of the edge.
Deleting Edge by ID only
Method & Url
Response Status
Deleting Edge by Label + ID
In general, specifying the Label parameter along with the ID to delete an edge will provide better performance compared to deleting by ID only.
Method & Url
Response Status
5.1.10 - Traverser API
3.1 Overview of Traverser API
HugeGraphServer provides a RESTful API interface for the HugeGraph graph database. In addition to the basic CRUD operations for vertices and edges, it also offers several traversal methods, which we refer to as the traverser API. These traversal methods implement various complex graph algorithms, making it convenient for users to analyze and explore the graph.
The Traverser API supported by HugeGraph includes:
- K-out API: It finds neighbors that are exactly N steps away from a given starting vertex. There are two versions:
- The basic version uses the GET method to find neighbors that are exactly N steps away from a given starting vertex.
- The advanced version uses the POST method to find neighbors that are exactly N steps away from a given starting vertex. The advanced version differs from the basic version in the following ways:
- Supports counting the number of neighbors only
- Supports filtering by edge and vertex properties
- Supports returning the shortest path to reach the neighbor
- K-neighbor API: It finds all neighbors that are within N steps of a given starting vertex. There are two versions:
- The basic version uses the GET method to find all neighbors that are within N steps of a given starting vertex.
- The advanced version uses the POST method to find all neighbors that are within N steps of a given starting vertex. The advanced version differs from the basic version in the following ways:
- Supports counting the number of neighbors only
- Supports filtering by edge and vertex properties
- Supports returning the shortest path to reach the neighbor
- Same Neighbors: It queries the common neighbors of two vertices.
- Jaccard Similarity API: It calculates the Jaccard similarity, which includes two types:
- One type uses the GET method to calculate the similarity (intersection over union) of neighbors between two vertices.
- The other type uses the POST method to find the top N vertices with the highest Jaccard similarity to a given starting vertex in the entire graph.
- Shortest Path API: It finds the shortest path between two vertices.
- All Shortest Paths: It finds all shortest paths between two vertices.
- Weighted Shortest Path: It finds the shortest weighted path from a starting vertex to a target vertex.
- Single Source Shortest Path: It finds the weighted shortest path from a single source vertex to all other vertices.
- Multi Node Shortest Path: It finds the shortest path between every pair of specified vertices.
- Paths API: It finds all paths between two vertices. There are two versions:
- The basic version uses the GET method to find all paths between a given starting vertex and an ending vertex.
- The advanced version uses the POST method to find all paths that meet certain conditions between a set of starting vertices and a set of ending vertices.
- Customized Paths API: It traverses all paths that pass through a batch of vertices according to a specific pattern.
- Template Path API: It specifies a starting point, an ending point, and the path information between them to find matching paths.
- Crosspoints API: It finds the intersection (common ancestors or common descendants) between two vertices.
- Customized Crosspoints API: It traverses multiple patterns starting from a batch of vertices and finds the intersections with the vertices reached in the final step.
- Rings API: It finds the cyclic paths that can be reached from a starting vertex.
- Rays API: It finds the paths from a starting vertex that reach the boundaries (i.e., paths without cycles).
- Fusiform Similarity API: It finds the fusiform similar vertices to a given vertex.
- Adamic-Adar API: It computes the Adamic-Adar index of two vertices.
- Resource Allocation API: It computes the resource allocation index of two vertices.
- Edge Existence API: It returns the edges that exist between two given vertices.
- Count API: It counts the vertices reached after a series of traversal steps, without returning them.
- Vertices API:
- Batch querying vertices by ID.
- Getting the partitions of vertices.
- Querying vertices by partition.
- Edges API:
- Batch querying edges by ID.
- Getting the partitions of edges.
- Querying edges by partition.
3.2 Detailed Explanation of Traverser API
The usage examples provided in this section are based on the graph presented on the TinkerPop official website:
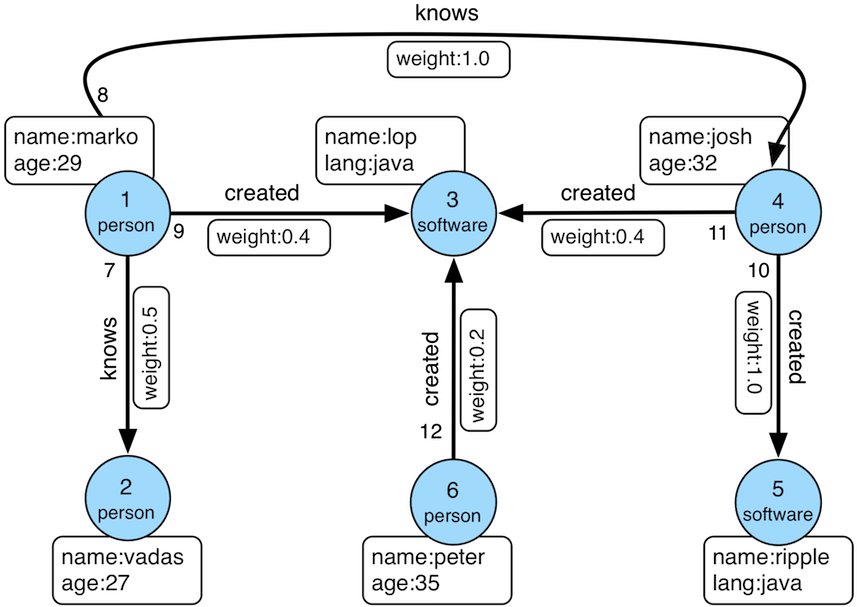
The data import program is as follows:
The vertex IDs are:
The edge IDs are:
3.2.1 K-out API (GET, Basic Version)
3.2.1.1 Functionality Overview
The K-out API allows you to find vertices that are exactly “depth” steps away from a given starting vertex, considering the specified direction, edge type (optional), and depth.
Params
- source: ID of the starting vertex (required)
- direction: Direction of traversal from the starting vertex (OUT, IN, BOTH). Optional, default is BOTH.
- max_depth: Number of steps (required)
- label: Edge type (optional), represents all edge labels by default
- nearest: When nearest is set to true, it means the shortest path length from the starting vertex to the result vertices is equal to the depth, and there is no shorter path. When nearest is set to false, it means there is at least one path of length depth from the starting vertex to the result vertices (not necessarily the shortest and may contain cycles). Optional, default is true.
- max_degree: Maximum number of adjacent edges to traverse per vertex during the query. Optional, default is 10000.
- capacity: Maximum number of vertices to be visited during the traversal. Optional, default is 10000000.
- limit: Maximum number of vertices to be returned. Optional, default is 10000000.
3.2.1.2 Usage Example
Method & Url
Response Status
Response Body
3.2.1.3 Use Cases
Finding vertices that are exactly N steps away in a relationship. Two examples:
- In a family relationship, finding all grandchildren of a person. The set of vertices that can be reached by person A through two consecutive “son” edges.
- Discovering potential friends in a social network. For example, finding users who are two degrees of friendship away from the target user, reachable through two consecutive “friend” edges.
3.2.2 K-out API (POST, Advanced Version)
3.2.2.1 Functionality Overview
The K-out API allows you to find vertices that are exactly “depth” steps away from a given starting vertex, considering the specified steps (including direction, edge type, and attribute filtering).
The advanced version differs from the basic version of K-out API in the following aspects:
- Supports counting the number of neighbors only
- Supports edge attribute filtering
- Supports returning the shortest path to the neighbor
Params
- source: The ID of the starting vertex, required.
- steps: Steps from the starting point, required, with the following structure:
- direction: Represents the direction of the edges (OUT, IN, BOTH), default is BOTH.
- edge_steps: The step set of edges, supporting label and properties filtering for the edge. If edge_steps is empty, the edge is not filtered.
- label: Edge types.
- properties: Filter edges based on property values.
- vertex_steps: The step set of vertices, supporting label and properties filtering for the vertex. If vertex_steps is empty, the vertex is not filtered.
- label: Vertex types.
- properties: Filter vertices based on property values.
- max_degree: Maximum adjacent edges traversed per vertex, defaulting to 10000; the parameter name
degreeis also accepted. - skip_degree: Sets the minimum number of edges to skip super vertices during the query process. If the number of adjacent edges for a vertex is greater than skip_degree, the vertex is completely skipped. Optional. If enabled, it should satisfy the constraint
skip_degree >= max_degree. Default is 0 (not enabled), indicating no skipping of any vertices (Note: Enabling this configuration means that during traversal, an attempt will be made to access skip_degree edges of a vertex, not just max_degree edges. This incurs additional traversal overhead and may have a significant impact on query performance. Please enable it only after understanding the implications).
- max_depth: Number of steps, required.
- nearest: When nearest is true, it means the shortest path length from the starting vertex to the result vertex is equal to depth, and there is no shorter path. When nearest is false, it means there is a path of length depth from the starting vertex to the result vertex (not necessarily the shortest and can contain cycles). Optional, default is true.
- count_only: Boolean value, true indicates only counting the number of results without returning specific results, false indicates returning specific results. Default is false.
- with_path: When true, it returns the shortest path from the starting vertex to each neighbor. When false, it does not return the shortest path. Optional, default is false.
- with_edge: Optional parameter, default is false:
- When true, the result will include complete edge information (all edges in the path):
- When with_path is true, it returns complete information of all edges in all paths.
- When with_path is false, no information is returned.
- When false, it only returns edge IDs.
- When true, the result will include complete edge information (all edges in the path):
- with_vertex: Optional parameter, default is false:
- When true, the result will include complete vertex information (all vertices in the path):
- When with_path is true, it returns complete information of all vertices in all paths.
- When with_path is false, it returns complete information of all neighbors.
- When false, it only returns vertex IDs.
- When true, the result will include complete vertex information (all vertices in the path):
- capacity: Maximum number of vertices to visit during traversal. Optional, default is 10000000.
- limit: Maximum number of vertices to return. Optional, default is 10000000.
- traverse_mode: Traversal mode. There are two options: “breadth_first_search” and “depth_first_search”, default is “breadth_first_search”.
3.2.2.2 Usage
Method & Url
Request Body
Response Status
Response Body
3.2.2.3 Use Cases
Refer to 3.2.1.3.
3.2.3 K-neighbor (GET, Basic Version)
3.2.3.1 Function Introduction
Find all vertices that are reachable within depth steps, including the starting vertex, based on the starting vertex, direction, edge type (optional), and depth.
Equivalent to the union of: starting vertex, K-out(1), K-out(2), …, K-out(max_depth).
Params
- source: ID of the starting vertex, required.
- direction: Direction in which the starting vertex’s edges extend (OUT, IN, BOTH). Optional, default is BOTH.
- max_depth: Number of steps, required.
- label: Edge type, optional, default represents all edge labels.
- max_degree: Maximum number of adjacent edges to traverse for a single vertex during the query process. Optional, default is 10000.
- limit: Maximum number of vertices to return, also represents the maximum number of vertices to visit during traversal. Optional, default is 10000000.
3.2.3.2 Usage
Method & Url
Response Status
Response Body
3.2.3.3 Use Cases
Find all vertices reachable within N steps, for example:
- In a family relationship, find all descendants within five generations of a person. This can be achieved by traversing five consecutive “parent-child” edges from person A.
- In a social network, discover friend circles. For example, users who can be reached by 1, 2, or 3 “friend” edges from the target user can form the target user’s friend circle.
3.2.4 K-neighbor API (POST, Advanced Version)
3.2.4.1 Function Introduction
Find all vertices that are reachable within depth steps from the starting vertex, based on the starting vertex, steps (including direction, edge type, and filter properties), and depth.
The difference from the Basic Version of K-neighbor API is that:
- It supports counting the number of neighbors only.
- It supports filtering edges based on their properties.
- It supports returning the shortest path to reach the neighbors.
Params
- source: Starting vertex ID, required.
- steps: Steps from the starting point, required, with the following structure:
- direction: Represents the direction of the edges (OUT, IN, BOTH), default is BOTH.
- edge_steps: The step set of edges, supporting label and properties filtering for the edge. If edge_steps is empty, the edge is not filtered.
- label: Edge types.
- properties: Filter edges based on property values.
- vertex_steps: The step set of vertices, supporting label and properties filtering for the vertex. If vertex_steps is empty, the vertex is not filtered.
- label: Vertex types.
- properties: Filter vertices based on property values.
- max_degree: Maximum adjacent edges traversed per vertex, defaulting to 10000; the parameter name
degreeis also accepted. - skip_degree: Used to set the minimum number of edges to discard super vertices during the query process. When the number of adjacent edges for a vertex exceeds skip_degree, the vertex is completely discarded. This is an optional parameter. If enabled, it should satisfy the constraint
skip_degree >= max_degree. Default is 0 (not enabled), which means no vertices are skipped. (Note: When this configuration is enabled, the traversal will attempt to access skip_degree edges for each vertex, not just max_degree edges. This incurs additional traversal overhead and may significantly impact query performance. Please make sure to understand this before enabling.)
- max_depth: Number of steps, required.
- count_only: Boolean value. If true, only the count of results is returned without the actual results. If false, the specific results are returned. Default is false.
- with_path: If true, the shortest path from the starting point to each neighbor is returned. If false, the shortest path from the starting point to each neighbor is not returned. This is an optional parameter. Default is false.
- with_edge: Optional parameter, default is false:
- When true, the result will include complete edge information (all edges in the path):
- When with_path is true, it returns complete information of all edges in all paths.
- When with_path is false, no information is returned.
- When false, it only returns edge IDs.
- When true, the result will include complete edge information (all edges in the path):
- with_vertex: Optional parameter, default is false:
- When true, the result will include complete vertex information (all vertices in the path):
- When with_path is true, it returns complete information of all vertices in all paths.
- When with_path is false, it returns complete information of all neighbors.
- When false, it only returns vertex IDs.
- When true, the result will include complete vertex information (all vertices in the path):
- limit: Maximum number of vertices to be returned. Also, the maximum number of vertices visited during the traversal process. This is an optional parameter. Default is 10000000.
3.2.4.2 Usage Method
Method & Url
Request Body
Response Status
Response Body
3.2.4.3 Use Cases
See 3.2.3.3
3.2.5 Same Neighbors
3.2.5.1 Function Introduction
Retrieve the common neighbors of two vertices.
Params
- vertex: ID of one vertex, required.
- other: ID of another vertex, required.
- direction: Direction in which the vertex expands outward (OUT, IN, BOTH). Optional, default is BOTH.
- label: Edge type. Optional, default represents all edge labels.
- max_degree: Maximum number of adjacent edges to traverse for each vertex during the query process. Optional, default is 10000.
- limit: Maximum number of common neighbors to be returned. Optional, default is 10000000.
3.2.5.2 Usage Method
Method & Url
Response Status
Response Body
3.2.5.3 Use Cases
Find the common neighbors of two vertices:
- In a social network, find the common followers or users both users are following.
3.2.6 Jaccard Similarity (GET)
3.2.6.1 Function Introduction
Compute the Jaccard similarity between two vertices (the intersection of the neighbors of the two vertices divided by the union of the neighbors of the two vertices).
For neighbor sets N(u) and N(v) with a nonempty union, the definition above is:
Params
- vertex: ID of one vertex, required.
- other: ID of another vertex, required.
- direction: Direction in which the vertex expands outward (OUT, IN, BOTH). Optional, default is BOTH.
- label: Edge type. Optional, default represents all edge labels.
- max_degree: Maximum number of adjacent edges to traverse for each vertex during the query process. Optional, default is 10000.
3.2.6.2 Usage Method
Method & Url
Response Status
Response Body
3.2.6.3 Use Cases
Used to evaluate the similarity or closeness between two vertices.
3.2.7 Jaccard Similarity (POST)
3.2.7.1 Function Introduction
Compute the N vertices with the highest Jaccard similarity to a specified vertex.
The Jaccard similarity is calculated as the intersection of the neighbors of the two vertices divided by the union of the neighbors of the two vertices.
Params
- vertex: ID of a vertex, required.
- Steps from the starting point, required. The structure is as follows:
- direction: Direction of the edges (OUT, IN, BOTH). Optional, default is BOTH.
- labels: List of edge types.
- properties: Filter edges based on property values.
- max_degree: Maximum adjacent edges traversed per vertex, defaulting to 10000; the parameter name
degreeis also accepted. - skip_degree: Used to set the minimum number of edges to skip super vertices during the query process. If the number of adjacent edges for a vertex is greater than skip_degree, the vertex is completely skipped. Optional, default is 0 (not enabled), which means no skipping. (Note: When this configuration is enabled, the traversal will attempt to access skip_degree edges of a vertex, not just max_degree edges. This incurs additional traversal overhead and may have a significant impact on query performance. Please enable it after understanding and confirming.)
- top: Return the top N vertices with the highest Jaccard similarity for a starting vertex. Optional, default is 100.
- capacity: Maximum number of vertices to be visited during the traversal process. Optional, default is 10000000.
3.2.7.2 Usage Method
Method & Url
Request Body
Response Status
Response Body
3.2.7.3 Use Cases
Used to find the vertices in the graph that have the highest similarity to a specified vertex.
3.2.8 Shortest Path
3.2.8.1 Function Introduction
Find the shortest path between a starting vertex and a target vertex based on the direction, edge type (optional), and maximum depth.
Params
- source: ID of the starting vertex, required.
- target: ID of the target vertex, required.
- direction: Direction in which the starting vertex expands (OUT, IN, BOTH). Optional, default is BOTH.
- max_depth: Maximum number of steps, required.
- label: Edge type, optional. Default represents all edge labels.
- max_degree: Maximum number of adjacent edges to traverse for each vertex during the query process. Optional, default is 10000.
- skip_degree: Used to set the minimum number of edges to skip super vertices during the query process. If the number of adjacent edges for a vertex is greater than skip_degree, the vertex is completely skipped. Optional, default is 0 (not enabled), which means no skipping. (Note: When this configuration is enabled, the traversal will attempt to access skip_degree edges of a vertex, not just max_degree edges. This incurs additional traversal overhead and may have a significant impact on query performance. Please enable it after understanding and confirming.)
- capacity: Maximum number of vertices to be visited during the traversal process. Optional, default is 10000000.
3.2.8.2 Usage Method
Method & Url
Response Status
Response Body
3.2.8.3 Use Cases
Used to find the shortest path between two vertices, for example:
- In a social network, finding the shortest path between two users, representing the closest friend relationship chain.
- In a device association network, finding the shortest association relationship between two devices.
3.2.9 All Shortest Paths
3.2.9.1 Function Introduction
Find all shortest paths between a starting vertex and a target vertex based on the direction, edge type (optional), and maximum depth.
Params
- source: ID of the starting vertex, required.
- target: ID of the target vertex, required.
- direction: Direction in which the starting vertex expands (OUT, IN, BOTH). Optional, default is BOTH.
- max_depth: Maximum number of steps, required.
- label: Edge type, optional. Default represents all edge labels.
- max_degree: Maximum number of adjacent edges to traverse for each vertex during the query process. Optional, default is 10000.
- skip_degree: Used to set the minimum number of edges to skip super vertices during the query process. If the number of adjacent edges for a vertex is greater than skip_degree, the vertex is completely skipped. Optional, default is 0 (not enabled), which means no skipping. (Note: When this configuration is enabled, the traversal will attempt to access skip_degree edges of a vertex, not just max_degree edges. This incurs additional traversal overhead and may have a significant impact on query performance. Please enable it after understanding and confirming.)
- capacity: Maximum number of vertices to be visited during the traversal process. Optional, default is 10000000.
3.2.9.2 Usage Method
Method & Url
Response Status
Response Body
3.2.9.3 Use Cases
Used to find all shortest paths between two vertices, for example:
- In a social network, finding all shortest paths between two users, representing all the closest friend relationship chains.
- In a device association network, finding all shortest association relationships between two devices.
3.2.10 Weighted Shortest Path
3.2.10.1 Function Introduction
Find a weighted shortest path between a starting vertex and a target vertex based on the direction, edge type (optional), maximum depth, and edge weight property.
Params
- source: ID of the starting vertex, required.
- target: ID of the target vertex, required.
- direction: Direction in which the starting vertex expands (OUT, IN, BOTH). Optional, default is BOTH.
- label: Edge type, optional. Default represents all edge labels.
- weight: Edge weight property, required. It must be a numeric property.
- max_degree: Maximum number of adjacent edges to traverse for each vertex during the query process. Optional, default is 10000.
- skip_degree: Used to set the minimum number of edges to skip super vertices during the query process. If the number of adjacent edges for a vertex is greater than skip_degree, the vertex is completely skipped. Optional, default is 0 (not enabled), which means no skipping. (Note: When this configuration is enabled, the traversal will attempt to access skip_degree edges of a vertex, not just max_degree edges. This incurs additional traversal overhead and may have a significant impact on query performance. Please enable it after understanding and confirming.)
- capacity: Maximum number of vertices to be visited during the traversal process. Optional, default is 10000000.
- with_vertex: true to include complete vertex information (all vertices in the path) in the result, false to only return vertex IDs. Optional, default is false.
3.2.10.2 Usage Method
Method & Url
Response Status
Response Body
3.2.10.3 Use Cases
Used to find the weighted shortest path between two vertices, for example:
- In a transportation network, finding the transportation method that requires the least cost from city A to city B.
3.2.11 Single Source Shortest Path
3.2.11.1 Function Introduction
Starting from a vertex, find the shortest paths from that vertex to other vertices in the graph (optional with weight).
Params
- source: ID of the starting vertex, required.
- direction: Direction in which the starting vertex expands (OUT, IN, BOTH). Optional, default is BOTH.
- label: Edge type, optional. Default represents all edge labels.
- weight: Edge weight property, optional. It must be a numeric property. If not provided or the edges don’t have this property, the weight is considered as 1.0.
- max_degree: Maximum number of adjacent edges to traverse for each vertex during the query process. Optional, default is 10000.
- skip_degree: Used to set the minimum number of edges to skip super vertices during the query process. If the number of adjacent edges for a vertex is greater than skip_degree, the vertex is completely skipped. Optional, default is 0 (not enabled), which means no skipping. (Note: When this configuration is enabled, the traversal will attempt to access skip_degree edges of a vertex, not just max_degree edges. This incurs additional traversal overhead and may have a significant impact on query performance. Please enable it after understanding and confirming.)
- capacity: Maximum number of vertices to be visited during the traversal process. Optional, default is 10000000.
- limit: Number of target vertices to be queried and the number of shortest paths to be returned. Optional, default is 10.
- with_vertex: true to include complete vertex information (all vertices in the path) in the result, false to only return vertex IDs. Optional, default is false.
3.2.11.2 Usage Method
Method & Url
Response Status
Response Body
3.2.11.3 Use Cases
Used to find the weighted shortest path from one vertex to other vertices, for example:
- Finding the shortest travel time by bus from Beijing to all other cities in the country.
3.2.12 Multi Node Shortest Path
3.2.12.1 Function Introduction
Finds the shortest paths between pairs of specified vertices.
Params
- vertices: Defines the starting vertices, required. It can be specified in the following ways:
- ids: Provide a list of vertex IDs as starting vertices.
- label and properties: If no IDs are specified, use the combined conditions of label and properties to query the starting vertices.
- label: Vertex type.
- properties: Query the starting vertices based on property values.
Note: Property values in properties can be a list, indicating that the value of the key can be any value in the list.
- step: Represents the path from the starting vertices to the destination vertices, required. The structure of the step is as follows:
- direction: Represents the direction of the edges (OUT, IN, BOTH). Default is BOTH.
- labels: List of edge types.
- properties: Filters the edges based on property values.
- max_degree: Maximum adjacent edges traversed per vertex, defaulting to 10000; the parameter name
degreeis also accepted. - skip_degree: Used to set the minimum number of edges to skip super vertices during the query process. If the number of adjacent edges for a vertex is greater than skip_degree, the vertex is completely skipped. Optional, default is 0 (not enabled), which means no skipping. (Note: When this configuration is enabled, the traversal will attempt to access skip_degree edges of a vertex, not just max_degree edges. This incurs additional traversal overhead and may have a significant impact on query performance. Please enable it after understanding and confirming.)
- max_depth: Number of steps, required.
- capacity: Maximum number of vertices to be visited during the traversal process. Optional, default is 10000000.
- with_vertex: true to include complete vertex information (all vertices in the path) in the result, false to only return vertex IDs. Optional, default is false.
3.2.12.2 Usage Method
Method & Url
Request Body
Response Status
Response Body
3.2.12.3 Use Cases
Used to find the shortest paths between multiple vertices, for example:
- Finding the shortest paths between multiple companies and their legal representatives.
3.2.13 Paths (GET, Basic Version)
3.2.13.1 Function Introduction
Finds all paths based on conditions such as the starting vertex, destination vertex, direction, edge types (optional), and maximum depth.
Params
- source: ID of the starting vertex, required.
- target: ID of the destination vertex, required.
- direction: Direction in which the starting vertex expands (OUT, IN, BOTH). Optional, default is BOTH.
- label: Edge type. Optional, default represents all edge labels.
- max_depth: Number of steps, required.
- max_degree: Maximum number of adjacent edges to traverse for each vertex during the query process. Optional, default is 10000.
- capacity: Maximum number of vertices to be visited during the traversal process. Optional, default is 10000000.
- limit: Maximum number of paths to be returned. Optional, default is 10.
3.2.13.2 Usage Method
Method & Url
Response Status
Response Body
3.2.13.3 Use Cases
Used to find all paths between two vertices, for example:
- In a social network, finding all possible relationship paths between two users.
- In a device association network, finding all associated paths between two devices.
3.2.14 Paths (POST, Advanced Version)
3.2.14.1 Function Introduction
Finds all paths based on conditions such as the starting vertex, destination vertex, steps (step), and maximum depth.
Params
- sources: Defines the starting vertices, required. The specification methods include:
- ids: Provide the starting vertices through a list of vertex IDs.
- label and properties: If no IDs are specified, use the label and properties as combined conditions to query the starting vertices.
- label: Vertex type.
- properties: Query the starting vertices based on the values of their properties.
Note: The property values in properties can be a list, indicating that any value corresponding to the key is acceptable.
- targets: Defines the destination vertices, required. The specification methods include:
- ids: Provide the destination vertices through a list of vertex IDs.
- label and properties: If no IDs are specified, use the label and properties as combined conditions to query the destination vertices.
- label: Vertex type.
- properties: Query the destination vertices based on the values of their properties.
Note: The property values in properties can be a list, indicating that any value corresponding to the key is acceptable.
- step: Represents the path from the starting vertex to the destination vertex, required. The structure of Step is as follows:
- direction: Represents the direction of edges (OUT, IN, BOTH). The default is BOTH.
- labels: List of edge types.
- properties: Filters edges based on property values.
- max_degree: Maximum adjacent edges traversed per vertex, defaulting to 10000; the parameter name
degreeis also accepted. - skip_degree: Used to set the minimum number of edges to be discarded for super vertices during the query process. When the number of adjacent edges for a vertex is greater than skip_degree, the vertex is completely discarded. Optional, if enabled, it must satisfy the constraint
skip_degree >= max_degree. Default is 0 (not enabled), which means no points are skipped. (Note: When this configuration is enabled, the traversal will attempt to visit skip_degree edges of a vertex, not just max_degree edges. This incurs additional traversal overhead and may have a significant impact on query performance. Please make sure to understand before enabling it.)
- max_depth: Number of steps, required.
- nearest: When nearest is true, it means the shortest path length from the starting vertex to the result vertex is depth, and there is no shorter path. When nearest is false, it means there is a path of length depth from the starting vertex to the result vertex (not necessarily the shortest path and can have cycles). Optional, default is true.
- capacity: Maximum number of vertices to be visited during the traversal process. Optional, default is 10000000.
- limit: Maximum number of paths to be returned. Optional, default is 10.
- with_vertex: When true, the results include complete vertex information (all vertices in the path). When false, only the vertex IDs are returned. Optional, default is false.
3.2.14.2 Usage Method
Method & Url
Request Body
Response Status
Response Body
3.2.14.3 Use Cases
Used to find all paths between two vertices, for example:
- In a social network, finding all possible relationship paths between two users.
- In a device association network, finding all associated paths between two devices.
3.2.15 Customized Paths
3.2.15.1 Function Introduction
Finds all paths that meet the specified conditions based on a batch of starting vertices, edge rules (including direction, edge types, and property filters), and maximum depth.
Params
- sources: Defines the starting vertices, required. The specification methods include:
- ids: Provide the starting vertices through a list of vertex IDs.
- label and properties: If no IDs are specified, use the label and properties as combined conditions to query the starting vertices.
- label: Vertex type.
- properties: Query the starting vertices based on the values of their properties.
Note: The property values in properties can be a list, indicating that any value corresponding to the key is acceptable.
- steps: Represents the path rules traversed from the starting vertices and is a list of Steps. Required. The structure of each Step is as follows:
- direction: Represents the direction of edges (OUT, IN, BOTH). The default is BOTH.
- labels: List of edge types.
- properties: Filters edges based on property values.
- weight_by: Calculates the weight of edges based on the specified property. It is effective when sort_by is not NONE and is mutually exclusive with default_weight.
- default_weight: The default weight to be used when there is no property to calculate the weight of edges. It is effective when sort_by is not NONE and is mutually exclusive with weight_by.
- max_degree: Maximum adjacent edges traversed per vertex, defaulting to 10000; the parameter name
degreeis also accepted. - sample: Used when sampling is needed for the edges that meet the conditions of a specific step. -1 means no sampling, and the default is to sample 100 edges.
- sort_by: Sorts the paths based on their weights. Optional, default is NONE:
- NONE: No sorting, default value.
- INCR: Sorts in ascending order based on path weights.
- DECR: Sorts in descending order based on path weights.
- capacity: Maximum number of vertices to be visited during the traversal process. Optional, default is 10000000.
- limit: Maximum number of paths to be returned. Optional, default is 10.
- with_vertex: When true, the results include complete vertex information (all vertices in the path). When false, only the vertex IDs are returned. Optional, default is false.
3.2.15.2 Usage Method
Method & Url
Request Body
Response Status
Response Body
3.2.15.3 Use Cases
Suitable for finding various complex sets of paths, for example:
- In a social network, finding the paths from users who have watched movies directed by Zhang Yimou to the influencers they follow (Zhang Yimou —> Movie —> User —> Influencer).
- In a risk control network, finding the paths from multiple high-risk users to the friends of their direct relatives (High-risk user —> Direct relative —> Friend).
3.2.16 Template Paths
3.2.16.1 Function Introduction
Finds all paths that meet the specified conditions based on a batch of starting vertices, edge rules (including direction, edge types, and property filters), and maximum depth.
Params
- sources: Defines the starting vertices, required. The specification methods include:
- ids: Provide the starting vertices through a list of vertex IDs.
- label and properties: If no IDs are specified, use the label and properties as combined conditions to query the starting vertices.
- label: Vertex type.
- properties: Query the starting vertices based on the values of their properties.
Note: The property values in properties can be a list, indicating that any value corresponding to the key is acceptable.
- targets: Defines the ending vertices, required. The specification methods include:
- ids: Provide the ending vertices through a list of vertex IDs.
- label and properties: If no IDs are specified, use the label and properties as combined conditions to query the ending vertices.
- label: Vertex type.
- properties: Query the ending vertices based on the values of their properties.
Note: The property values in properties can be a list, indicating that any value corresponding to the key is acceptable.
- steps: Represents the path rules traversed from the starting vertices and is a list of Steps. Required. The structure of each Step is as follows:
- direction: Represents the direction of edges (OUT, IN, BOTH). The default is BOTH.
- labels: List of edge types.
- properties: Filters edges based on property values.
- max_times: The number of times the current step can be repeated. When set to N, it means the starting vertices can pass through the current step 1-N times.
- max_degree: Maximum adjacent edges traversed per vertex, defaulting to 10000; the parameter name
degreeis also accepted. - skip_degree: Used to set the minimum number of edges to discard super vertices during the query process. When the number of adjacent edges of a vertex is greater than skip_degree, the vertex is completely discarded. Optional. If enabled, it must satisfy the
skip_degree >= max_degreeconstraint. Default is 0 (not enabled), which means no points are skipped. (Note: After enabling this configuration, traversing will attempt to access a vertex’s skip_degree edges, not just max_degree edges. This incurs additional traversal overhead and may have a significant impact on query performance. Please ensure understanding before enabling.)
- with_ring: Boolean value, true to include cycles; false to exclude cycles. Default is false.
- capacity: Maximum number of vertices to be visited during the traversal process. Optional, default is 10000000.
- limit: Maximum number of paths to be returned. Optional, default is 10.
- with_vertex: When true, the results include complete vertex information (all vertices in the path). When false, only the vertex IDs are returned. Optional, default is
false.
3.2.16.2 Usage Method
Method & Url
Request Body
Response Status
Response Body
3.2.16.3 Use Cases
Suitable for finding various complex template paths, such as personA -(Friend)-> personB -(Classmate)-> personC, where the “Friend” and “Classmate” edges can have a maximum depth of 3 and 4 layers, respectively.
3.2.17 Crosspoints
3.2.17.1 Function Introduction
Finds the intersection points based on the specified conditions, including starting vertices, destination vertices, direction, edge types (optional), and maximum depth.
Params
- source: ID of the starting vertex, required.
- target: ID of the destination vertex, required.
- direction: The direction from the starting vertex to the destination vertex. The reverse direction is used from the destination vertex to the starting vertex. When set to BOTH, the direction is not considered (OUT, IN, BOTH). Optional, default is BOTH.
- label: Edge type, optional. Default represents all edge labels.
- max_depth: Number of steps, required.
- max_degree: Maximum number of adjacent edges to traverse for each vertex during the query process. Optional, default is 10000.
- capacity: Maximum number of vertices to be visited during the traversal process. Optional, default is 10000000.
- limit: Maximum number of intersection points to be returned. Optional, default is 10.
3.2.17.2 Usage Method
Method & Url
Response Status
Response Body
3.2.17.3 Use Cases
Used to find the intersection points and their paths between two vertices, such as:
- In a social network, finding the topics or influencers that two users have in common.
- In a family relationship, finding common ancestors.
3.2.18 Customized Crosspoints
3.2.18.1 Function Introduction
Finds the intersection of destination vertices that satisfy the specified conditions, including starting vertices, multiple edge rules (including direction, edge type, and property filters), and maximum depth.
Params
sources: Defines the starting vertices, required. The specified options include:
- ids: Provides a list of vertex IDs as starting vertices.
- label and properties: If no IDs are specified, uses the combined conditions of label and properties to query the starting vertices.
- label: Type of the vertex.
- properties: Queries the starting vertices based on property values.
Note: Property values in properties can be a list, indicating that the value of the key can be any item in the list.
path_patterns: Represents the path rules to be followed from the starting vertices. It is a list of rules. Required. Each rule is a PathPattern.
- Each PathPattern consists of a list of steps, where each step has the following structure:
- direction: Indicates the direction of the edge (OUT, IN, BOTH). Default is BOTH.
- labels: List of edge types.
- properties: Filters the edges based on property values.
- max_degree: Maximum number of adjacent edges to traverse for each vertex during the query process. Default is 10000.
- skip_degree: Sets the minimum number of edges to discard super vertices during the query process. If the number of adjacent edges for a vertex is greater than skip_degree, the vertex is completely discarded. Optional. If enabled, it must satisfy the constraint
skip_degree >= max_degree. Default is 0 (not enabled), which means no vertices are skipped. Note: When this configuration is enabled, the traversal process will attempt to visit skip_degree edges of a vertex, not just max_degree edges. This incurs additional traversal overhead and may significantly impact query performance. Please make sure you understand it before enabling.
- Each PathPattern consists of a list of steps, where each step has the following structure:
capacity: Maximum number of vertices to be visited during the traversal process. Optional. Default is 10000000.
limit: Maximum number of paths to be returned. Optional. Default is 10.
with_path: When set to true, returns the paths where the intersection points are located. When set to false, does not return the paths. Optional. Default is false.
with_vertex: Optional. Default is false.
- When set to true, the result includes complete vertex information (all vertices in the paths):
- When with_path is true, it returns complete information of all vertices in the paths.
- When with_path is false, it returns complete information of all intersection points.
- When set to false, only the vertex IDs are returned.
- When set to true, the result includes complete vertex information (all vertices in the paths):
3.2.18.2 Usage Method
Method & Url
Request Body
Response Status
Response Body
3.2.18.3 Use Cases
Used to query a group of vertices that have intersections at the destination through multiple paths. For example:
- In a product knowledge graph, multiple models of smartphones, learning devices, and gaming devices belong to the top-level category of electronic devices through different lower-level category paths.
3.2.19 Rings
3.2.19.1 Function Introduction
Finds reachable cycles based on the specified conditions, including starting vertices, direction, edge types (optional), and maximum depth.
For example: 1 -> 25 -> 775 -> 14690 -> 25, where the cycle is 25 -> 775 -> 14690 -> 25.
Params
- source: Starting vertex ID, required.
- direction: Direction of edges emitted from the starting vertex (OUT, IN, BOTH). Optional. Default is BOTH.
- label: Edge type. Optional. Default represents all edge labels.
- max_depth: Number of steps. Required.
- source_in_ring: Whether the starting point is included in the cycle. Optional. Default is true.
- max_degree: Maximum number of adjacent edges to traverse for each vertex during the query process. Optional. Default is 10000.
- capacity: Maximum number of vertices to be visited during the traversal process. Optional. Default is 10000000.
- limit: Maximum number of reachable cycles to be returned. Optional. Default is 10.
3.2.19.2 Usage Method
Method & Url
Response Status
Response Body
3.2.19.3 Use Cases
Used to query cycles reachable from the starting vertex, for example:
- In a risk control project, querying individuals or devices involved in a circular guarantee that a user is connected to.
- In a device network, discovering devices that have circular references around a specific device.
3.2.20 Rays
3.2.20.1 Function Introduction
Finds paths that diverge from the starting vertex and reach boundary vertices based on the specified conditions, including starting vertices, direction, edge types (optional), and maximum depth.
For example: 1 -> 25 -> 775 -> 14690 -> 2289 -> 18379, where 18379 is the boundary vertex, meaning there are no edges emitted from 18379.
Params
- source: Starting vertex ID, required.
- direction: Direction of edges emitted from the starting vertex (OUT, IN, BOTH). Optional. Default is BOTH.
- label: Edge type. Optional. Default represents all edge labels.
- max_depth: Number of steps. Required.
- max_degree: Maximum number of adjacent edges to traverse for each vertex during the query process. Optional. Default is 10000.
- capacity: Maximum number of vertices to be visited during the traversal process. Optional. Default is 10000000.
- limit: Maximum number of non-cycle paths to be returned. Optional. Default is 10.
3.2.20.2 Usage Method
Method & Url
Response Status
Response Body
3.2.20.3 Use Cases
Used to find paths from the starting vertex to boundary vertices based on a specific relationship, for example:
- In a family relationship, finding paths from a person to all descendants who do not have children.
- In a device network, discovering paths from a specific device to terminal devices.
3.2.21 Fusiform Similarity
3.2.21.1 Function Introduction
Queries a batch of “fusiform similar vertices” based on specified conditions. When two vertices share a certain relationship with many common vertices, they are considered “fusiform similar vertices.” For example, if “Reader A” has read 100 books, readers who have read 80 or more of these 100 books can be defined as “fusiform similar vertices” of “Reader A.”
Params
sources: Starting vertices, required. Specify using:
- ids: Provide a list of vertex IDs as starting vertices.
- label and properties: If ids are not specified, use the combined conditions of label and properties to query the starting vertices.
- label: Vertex type.
- properties: Query the starting vertices based on the values of their properties.
Note: Property values in properties can be a list, indicating that the value of the key can be any value in the list.
label: Edge type. Optional. Default represents all edge labels.
direction: Direction in which the starting vertex diverges (OUT, IN, BOTH). Optional. Default is BOTH.
min_neighbors: Minimum number of neighbors. If the number of neighbors is less than this threshold, the starting vertex is not considered a “fusiform similar vertex.” For example, if you want to find “fusiform similar vertices” of books read by “Reader A,” and min_neighbors is set to 100, it means that “Reader A” must have read at least 100 books to have “fusiform similar vertices.” Required.
alpha: Similarity, representing the proportion of common neighbors between the starting vertex and “fusiform similar vertices” to all neighbors of the starting vertex. Required.
min_similars: Minimum number of “fusiform similar vertices.” Only when the number of “fusiform similar vertices” of the starting vertex is greater than or equal to this value, the starting vertex and its “fusiform similar vertices” will be returned. Optional. Default is 1.
top: Returns the top highest similarity “fusiform similar vertices” of a starting vertex. Required. 0 means all.
group_property: Used together with min_groups. Returns the starting vertex and its “fusiform similar vertices” only if there are at least min_groups different values for a certain attribute of the starting vertex and its “fusiform similar vertices.” For example, when recommending “out-of-town” book buddies for “Reader A,” set group_property to the “city” attribute of readers and min_group to at least 2. Optional. If not specified, no filtering based on attributes is needed.
min_groups: Used together with group_property. Only meaningful when group_property is set.
max_degree: Maximum number of adjacent edges to traverse for each vertex during the query process. Optional. Default is 10000.
capacity: Maximum number of vertices to be visited during the traversal process. Optional. Default is 10000000.
limit: Maximum number of results to be returned (one starting vertex and its “fusiform similar vertices” count as one result). Optional. Default is 10.
with_intermediary: Whether to return the starting vertex and the intermediate vertices that are commonly related to the “fusiform
similar vertices.” Default is false.
- with_vertex: Optional. Default is false.
- true: Returns complete vertex information in the results.
- false: Only returns vertex IDs.
3.2.21.2 Usage Method
Method & Url
Request Body
Response Status
Response Body
3.2.21.3 Use Cases
Used to query vertices that have high similarity with a group of vertices. For example:
- Readers with similar book lists to a specific reader.
- Players who play similar games to a specific player.
3.2.22 Vertices
3.2.22.1 Batch Query Vertices by Vertex IDs
Params
- ids: List of vertex IDs to be queried.
Method & Url
Response Status
Response Body
3.2.22.2 Get Vertex Shard Information
Obtain vertex shard information by specifying the shard size split_size (can be used in conjunction with Scan in 3.2.21.3 to retrieve vertices).
Params
- split_size: Shard size, required.
Method & Url
Response Status
Response Body
3.2.22.3 Batch Retrieve Vertices Based on Shard Information
Retrieve vertices in batches based on the specified shard information (refer to 3.2.21.2 Shard for obtaining shard information).
Params
- start: Shard start position, required.
- end: Shard end position, required.
- page: Page position for pagination, optional. Default is null, no pagination. When page is “”, it represents the first page of pagination starting from the position indicated by start.
- page_limit: The upper limit of the number of vertices per page when retrieving vertices with pagination, optional. Default is 100000.
Method & Url
Response Status
Response Body
3.2.22.4 Use Cases
- Querying vertices by ID list, which can be used for batch vertex queries. For example, after querying multiple paths in a path search, you can further query all vertex properties of a specific path.
- Retrieving shards and querying vertices by shard, which can be used to traverse all vertices.
3.2.23 Edges
3.2.23.1 Batch Retrieve Edges Based on Edge IDs
Params
- ids: List of edge IDs to be queried.
Method & Url
Response Status
Response Body
3.2.23.2 Retrieve Edge Shard Information
Retrieve shard information for edges by specifying the shard size (split_size). This can be used in conjunction with the Scan operation described in section 3.2.22.3 to retrieve edges.
Params
- split_size: Shard size, required field.
Method & Url
Response Status
Response Body
3.2.23.3 Batch Retrieve Edges Based on Shard Information
Batch retrieve edges by specifying shard information (refer to section 3.2.22.2 for shard retrieval).
Params
- start: Shard starting position, required field.
- end: Shard ending position, required field.
- page: Page position for pagination, optional field. Default is null, which means no pagination. When
pageis empty, it indicates the first page of pagination starting from the position indicated bystart. - page_limit: Upper limit of the number of edges per page for paginated retrieval, optional field. Default is 100000.
Method & Url
Response Status
Response Body
3.2.23.4 Use Cases
- Querying edges based on ID list, suitable for batch retrieval of edges.
- Retrieving shard information and querying edges based on shards, useful for traversing all edges.
3.2.24 Adamic-Adar
3.2.24.1 Function Introduction
Compute the Adamic-Adar index of two vertices: the sum of the reciprocal of the logarithm of the degree of each common neighbor.
Params
- vertex: ID of one vertex, required.
- other: ID of another vertex, required. It must differ from
vertex. - direction: Direction in which the vertex expands outward (OUT, IN, BOTH). Optional, default is BOTH.
- label: Edge type. Optional, default represents all edge labels.
- max_degree: Maximum number of adjacent edges to traverse for each vertex during the query process. Optional, default is 10000.
- limit: Maximum number of common neighbors taken into account. Optional, default is 10000000.
3.2.24.2 Usage Method
Method & Url
Response Status
Response Body
Common neighbors with a degree of 0 are skipped, so the result is 0.0 when the two vertices share no neighbor.
3.2.24.3 Use Cases
Predict whether a link is likely to appear between two vertices, where rare common neighbors weigh more than popular ones.
3.2.25 Resource Allocation
3.2.25.1 Function Introduction
Compute the resource allocation index of two vertices: the sum of the reciprocal of the degree of each common neighbor.
Params
- vertex: ID of one vertex, required.
- other: ID of another vertex, required. It must differ from
vertex. - direction: Direction in which the vertex expands outward (OUT, IN, BOTH). Optional, default is BOTH.
- label: Edge type. Optional, default represents all edge labels.
- max_degree: Maximum number of adjacent edges to traverse for each vertex during the query process. Optional, default is 10000.
- limit: Maximum number of common neighbors taken into account. Optional, default is 10000000.
3.2.25.2 Usage Method
Method & Url
Response Status
Response Body
3.2.25.3 Use Cases
Link prediction, as an alternative to Adamic-Adar with a stronger penalty on high-degree common neighbors.
3.2.26 Edge Existence
3.2.26.1 Function Introduction
Return the edges that exist between a source vertex and a target vertex.
Params
- source: ID of the source vertex, required.
- target: ID of the target vertex, required.
- label: Edge type. Optional, default represents all edge labels.
- sort_values: Value of the sort keys, required for edge labels of the
MULTIPLEfrequency to pick one of several parallel edges. Optional, default is an empty string. - limit: Maximum number of edges to be returned. Optional, default is 100.
3.2.26.2 Usage Method
Method & Url
Response Status
Response Body
3.2.26.3 Use Cases
Check whether two vertices are directly connected, and get the properties of the connecting edges in one request.
3.2.27 Count
3.2.27.1 Function Introduction
Count the vertices reached from a starting vertex after a series of traversal steps, without returning the vertices themselves.
Params
- source: ID of the starting vertex, required.
- steps: Steps of the traversal, required. Each step accepts the following fields:
- direction: Direction in which the vertex expands outward (OUT, IN, BOTH). Optional, default is BOTH.
- labels: List of edge labels of the step. Optional, default represents all edge labels.
- properties: Property filter of the edges of the step. Optional.
- max_degree: Maximum number of adjacent edges to traverse for each vertex in this step. Optional, default is 10000.
- skip_degree: Threshold above which a super vertex is skipped in this step. Optional, default is 100000.
- contains_traversed: Whether to also count the vertices reached by the intermediate steps. Optional, default is false.
- dedup_size: Maximum number of vertices kept for deduplication,
-1means no limit. Optional, default is 1000000.
3.2.27.2 Usage Method
Method & Url
Request Body
Response Status
Response Body
3.2.27.3 Use Cases
Get the size of a multi-step neighborhood when only the number matters, so the vertices do not have to be serialized and transferred.
5.1.11 - Rank API
4.1 Rank API overview
Not only the Graph iteration (traverser) method, HugeGraph-Server also provide Rank API for recommendation purpose.
You can use it to recommend some vertexes much closer to a vertex.
4.2 Details of Rank API
4.2.1 Personal Rank API
A typical scenario for Personal Rank algorithm is in recommendation application. According to the out edges of a vertex,
recommend some other vertices that having the same or similar edges.
Here is a use case: According to someone’s reading habit or reading history, we can recommend some books he may be interested or some book pal.
For Example:
- Suppose we have a vertex, Person type, and named tom.He like 5 books
a,b,c,d,e. If we want to recommend some book pal and books for tom, an easier idea is let’s check whoever also liked these books (common hobby based). - Now, we need someone else, like neo, he like three books
b,d,f. And Jay, he like 4 booksc,d,e,g, and Lee, he also like 4 booksa,d,e,f. - For we don’t need to recommend books tom already read, the recommend-list should only contain the books Tom’s book pal already read but tom haven’t read yet. Such as book “f” and “g”, and with priority f > g.
- Now, we recompute Tom’s personal rank value, we will get a sorted TopN book pal or book recommend-list. (Choose OTHER_LABEL,for Only Book purpose)
4.2.1.0 Data Preparation
The case above is simple. Here we also provide a public test dataset MovieLens for use case. You should download the dataset. The load it into HugeGraph with HugeGraph-Loader. To make it simple, we ignore all properties data of user and move. only field id is enough. we also ignore the value of edge rating.
The metadata for input file and mapping file as follows:
Note: modify the
input.pathto your local path.
4.2.1.1 Function Introduction
suitable for bipartite graph, will return all vertex or a list of its correlation which related to all source vertex.
Bipartite Graph is a special model in Graph Theory, as well as a special flow in network. The strongest feature is, it split all vertex in graph into two sets. The vertex in the set is not connected. However,the vertex in two sets may connect with each other.
Suppose we have one bipartite graph based on user and things. A random walk based PersonalRank algorithm should be likes this:
- Choose a user u as start vertex, let’s set the initial weight to be 1.0 . Go from Vu with probability alpha to a neighbor vertex, and (1-alpha) to stay.
- If we decide to go outside, we would like to choose an edge, such as
rating, to find a common judge.- Then choose the neighbors of current vertex randomly with uniform distribution, and reset the weights with uniform distribution.
- Compensate the source vertex’s weight with (1 - alpha)
- Repeat step 2;
- Convergence after reaching a certain number of steps or precision, then we got a recommend-list.
Params
Required:
- source: the id of source vertex
- label: edge label go from the source vertex, should connect two different type of vertex
Optional:
- alpha: the probability of going out for one vertex in each iteration,similar to the alpha of PageRank,required, value range is (0, 1], default 0.85.
- max_degree: in query process, the max iteration number of adjacency edge for a vertex, default
10000 - max_depth: iteration number,range [2, 5000], default
5 - with_label:result filter,default
BOTH_LABEL,optional list as follows:- SAME_LABEL:Only keep vertex which has the same type as source vertex
- OTHER_LABEL:Only keep vertex which has different type as source vertex (the another part in bipartite graph)
- BOTH_LABEL:Keep both type vertex
- limit: max return vertex number,default
100 - max_diff: accuracy for convergence, default
0.0001(will implement soon) - sorted: whether sort the result by rank or not, true for descending sort, false for none, default
true
4.2.1.2 Usage
Method & Url
Request Body
Response Status
Response Body
4.2.1.3 Suitable Scenario
In a bipartite graph build by two different type of vertex, recommend other most related vertex to one vertex. for example:
- Reading recommendation: find out the books should be recommended to someone first, It is also possible to recommend book pal with the highest common preferences at the same time (just like: WeChat “your friend also read xx " function)
- Social recommendation: find out other Poster who interested in same topics, or other News/Messages you may be interested with (Such as : “Hot News” function in Weibo)
- Commodity recommendation: according to someone’s shopping habit,find out a commodity list should recommend first, some online salesman may also be good (Such as : “You May Like” function in TaoBao)
4.2.2 Neighbor Rank API
4.2.2.0 Data Preparation
4.2.2.1 Function Introduction
In a general graph structure,find the first N vertices of each layer with the highest correlation with a given starting point and their relevance.
In graph words: to go out from the starting point, get the probability of going to each vertex of each layer.
Params
- source: id of source vertex,required
- alpha:the probability of going out for one vertex in each iteration,similar to the alpha of PageRank,required, value range is (0, 1]
- steps: a path rule for source vertex visited,it’s a list of Step,each Step map to a layout in result,required.The structure of each Step as follows:
- direction:the direction of edge(OUT, IN, BOTH), BOTH for default.
- labels:a list of edge types, will union all edge types
- max_degree:in query process, the max iteration number of adjacency edge for a vertex, default
10000- max_degree: Maximum adjacent edges traversed per vertex, defaulting to 10000; the parameter name
degreeis also accepted.
- max_degree: Maximum adjacent edges traversed per vertex, defaulting to 10000; the parameter name
- skip_degree: the threshold above which a super vertex is skipped in this layer, default
0(no skipping) - top: retains only the top N results with the highest weight in each layer of the results, default 10, max 1000
- capacity: the maximum number of vertexes visited during the traversal, optional, default 10000000
4.2.2.2 Usage
Method & Url
Request Body
Response Status
Response Body
4.2.2.3 Suitable Scenario
Find the vertices in different layers for a given start point that should be most recommended
- For example, in the four-layered structure of the audience, friends, movies, and directors, according to the movies that a certain audience’s friends like, recommend movies for that audience, or recommend directors for those movies based on who made them.
5.1.12 - Variable API
5.1 Variables
Variables can be used to store data about the entire graph. The data is accessed and stored in the form of key-value pairs.
5.1.1 Creating or Updating a Key-Value Pair
Method & Url
Request Body
Response Status
Response Body
5.1.2 Listing all key-value pairs
Method & Url
Response Status
Response Body
5.1.3 Listing a specific key-value pair
Method & Url
Response Status
Response Body
5.1.4 Deleting a specific key-value pair
Method & Url
Response Status
5.1.13 - Graphs API
6.1 Graphs
In production, enable Server authentication and authorization, restrict graph management with an IP allowlist and minimum permissions, and retain audit-*.log audit records. Unauthenticated settings below are only for isolated local tests.
This page documents the Graphs API on current master. For historical paths and request bodies, use the 1.7 Graphs API or 1.5 Graphs API.
With authentication enabled, creation, cloning, deletion, clearing, display-name changes, graph-configuration reads, read-mode changes, and manual compaction require graph-space management permission (space); administrators can satisfy it through permission inheritance. Snapshot creation/restoration and data-mode changes allow graph-space managers or the graph owner. Listing, details, and data/read-mode queries use graph read permissions. Raft APIs additionally require graph-space membership.
6.1.1 List all graphs in the graphspace
Params
Path parameters
- graphspace: Graphspace name
Method & Url
Response Status
Response Body
6.1.2 Get details of the graph
Params
Path parameters
- graphspace: Graphspace name
- graph: Graph name
Method & Url
Response Status
Response Body
6.1.3 Clear all data of a graph, include: schema, vertex, edge and index
Params
Path parameters
- graphspace: Graphspace name
- graph: Graph name
Query parameters
Since emptying the graph is a dangerous operation, we have added parameters for confirmation to the API to avoid false calls by users:
- confirm_message: default by
I'm sure to delete all data
Method & Url
Response Status
6.1.4 Clone graph
Params
Path parameters
- graphspace: Graphspace name
- graph: Name of the new graph to create
Query parameters
- clone_graph_name: name of an existed graph. To clone from an existing graph, the user can choose to transfer the configuration file, which will replace the configuration in the existing graph
Method & Url
Request Body [Optional]
Clone a non-auth mode graph (set Content-Type: application/json)
Note:
- The data/wal_path can’t be the same as the existing graph (use separate directories)
- Replace “gremlin.graph=org.apache.hugegraph.auth.HugeFactoryAuthProxy” to enable auth mode
Response Status
Response Body
6.1.5 Create graph
Params
Path parameters
- graphspace: Graphspace name
- graph: Graph name
Method & Url
Request Body
Create a graph (set Content-Type: application/json)
gremlin.graph Configuration:
- Auth mode:
"gremlin.graph": "org.apache.hugegraph.auth.HugeFactoryAuthProxy"(required in production) - Non-auth mode:
"gremlin.graph": "org.apache.hugegraph.HugeFactory"
Note: For HStore, configure PD correctly in HugeGraph Server; see HStore configuration. The backend selects the scheduler: HStore uses the distributed scheduler; other backends use the local scheduler.
Response Status
Response Body
6.1.6 Delete graph and its data
Graph-space management permission (space) is required when authentication is enabled.
Stop writes and tasks on every Server that uses the graph before deletion, and keep them stopped during failures and retries. Do not recreate the same graph name until deletion has completed and been confirmed on every Server. Notifications are not a cluster-wide barrier.
On the deleting Server, scheduler shutdown fences new task admission and waits for actual executions, cancellation callbacks and transaction cleanup.
If the configured task-drain wait times out (task.wait_timeout, seconds), deletion is refused before data, configuration or metadata removal; retry after
the owners exit. Task admission stays closed after this refusal.
To resume ordinary graph use before destructive cleanup, keep writes and task producers stopped;
wait for all admitted tasks and cancellation cleanup to finish, then restart Server. A restart does not restore data or metadata already removed.
Closing the scheduler alone retains persistent work that has not started.
Deletion is not transactional. A failure after destructive cleanup does not restore removed data or metadata. An uncertain owner or native-resource cleanup
needs manual inspection; do not force-remove the scheduler or resume writes just because a task Future is done.
In PD deployments with graph.load_from_local_config=true, if deletion is refused because the graph uses local configuration,
removing its configuration file and restarting Server stops Server from loading the graph, but leaves its backend data in place.
Params
Path parameters
- graphspace: Graphspace name
- graph: Graph name
Query parameters
Since deleting a graph is a dangerous operation, we have added parameters for confirmation to the API to avoid false calls by users:
- confirm_message: default by
I'm sure to drop the graph
Method & Url
Response Status
6.1.7 List the graphs of the graphspace with their configuration
Returns one entry per graph the current user can read, each carrying the graph configuration (keys that look like passwords, secrets, tokens, credentials or private keys are left out) plus the fields below. Graphs marked as default for the current user come first.
Params
Path parameters
- graphspace: Graphspace name
Query parameters
- prefix: Return only the graphs whose name or nickname starts with this prefix
Method & Url
Response Status
Response Body
default_update_time is only present when the graph is a default graph of the current user, and create_time only when the graph records one.
6.1.8 Update the nickname of a graph
Params
Path parameters
- graphspace: Graphspace name
- graph: Graph name
Request parameters
- action: Must be
update - update: Container for the fields to update.
nameis required and must match the graph name in the path,nicknameis the new display name and must be unique inside the graphspace.
Method & Url
Request Body
Response Status
Response Body
6.1.9 Manage the default graphs of the current user
A default graph is recorded per user, so the endpoints below act on behalf of the calling user. They need the authentication system, a server started in standalone mode without it answers 400 with GraphSpace management is not supported in standalone mode.
Set a graph as default
Method & Url
Response Status
Response Body
Unset a default graph
Method & Url
Response Status
Response Body
Get the default graphs
Method & Url
Response Status
Response Body
6.1.10 Reload the graphs of the graphspace
Apply graph configuration changes by restarting Server. Hot-reload recovery is deferred; do not use this endpoint for configuration maintenance. In the current non-PD path, reload invokes graph deletion and can clear backend data. Keep writes and tasks stopped until Server has restarted and the intended graphs have been verified. The request and response below document the API shape, not a maintenance or recovery guarantee.
Params
Path parameters
- graphspace: Graphspace name
Request parameters
- action: Must be
reload
Method & Url
Request Body
Response Status
Response Body
6.2 Conf
6.2.1 Get configuration for a graph
Params
Path parameters
- graphspace: Graphspace name
- graph: Graph name
Method & Url
Response Status
Response Body
6.3 Mode
Allowed graph mode values are: NONE, RESTORING, MERGING, LOADING
- None mode is regular mode
- Not allowed to create schema with specified id
- Not support creating vertex with id for AUTOMATIC id strategy
- LOADING mode used to load data via hugegraph-loader.
- When adding vertices / edges, it is not checked whether the required attributes are passed in
Restore has two different modes: Restoring and Merging
- Restoring mode is used to restore schema and graph data to a new graph.
- Support create schema with specified id
- Support create vertex with id for AUTOMATIC id strategy
- Merging mode is used to merge schema and graph data to an existing graph.
- Not allowed to create schema with specified id
- Support create vertex with id for AUTOMATIC id strategy
Under normal circumstances, the graph mode is None. When you need to restore the graph, you need to temporarily modify the graph mode to Restoring or Merging as needed. When you complete the restore, change the graph mode to None.
6.3.1 Get graph mode
Graph read permission (space_member or the graph owner) is required when authentication is enabled.
Params
Path parameters
- graphspace: Graphspace name
- graph: Graph name
Method & Url
Response Status
Response Body
Allowed graph mode values are: NONE, RESTORING, MERGING, LOADING
6.3.2 Modify graph mode.
Graph-space management permission (space) or graph ownership is required when authentication is enabled; administrators can satisfy it through permission inheritance.
Params
Path parameters
- graphspace: Graphspace name
- graph: Graph name
Method & Url
Request Body
Allowed graph mode values are: NONE, RESTORING, MERGING, LOADING
While loading owners are active, this enum PUT rejects all mode changes, including "LOADING". Release the owners after their import workers stop.
Response Status
Response Body
6.3.3 Get graph’s read mode
Graph read permission (space_member or the graph owner) is required when authentication is enabled.
Params
Path parameters
- graphspace: Graphspace name
- graph: Graph name
Method & Url
Response Status
Response Body
6.3.4 Modify graph’s read mode.
Graph-space management permission (space) is required when authentication is enabled; administrators can satisfy it through permission inheritance.
Params
Path parameters
- graphspace: Graphspace name
- graph: Graph name
Method & Url
Request Body
Allowed read mode values are: ALL, OLTP_ONLY. The API rejects OLAP_ONLY with
Graph-read-mode could be ALL or OLTP_ONLY.
Response Status
Response Body
6.3.5 LOADING ownership
Starting with HugeGraph 1.8.0, the Server provides the protocol 1 endpoints for LOADING ownership
(requires a Server whose GET .../mode/owners returns protocol: 1 and a matching Loader; current master does not include it yet);
Loader integration requires a matching 1.8.0 or newer client.
Released packages, earlier 1.8 builds, and current master builds lack this protocol. Support for the LOADING enum alone does not imply support for it.
With authentication enabled, both endpoints use the mode setter’s permissions: graph-space management (space) or graph ownership, with STATUS write
authorization. Server binds the handle to the authenticated principal; a token grants no permission. Keep the same identity for acquire, release and retries.
The 200 capability response contains the graph-instance UUID, current nonnegative epoch, and state revision:
Generate a new lowercase hyphenated UUID token for each import, retain the returned instance and epoch,
and acquire with Content-Type: application/json:
An acquire succeeded only when the response returns 200 with state: "active", echoing protocol, instance, epoch, token, and mode: "LOADING".
A 200 response with state: "released" means the handle is finished or was preemptively released; it does not grant ownership. In that case, stop and drain
that import attempt, then start a new attempt with a fresh GET for instance and epoch and generate a new token.
Release with action: "release" and the same handle; its response has state: "released" and the effective graph mode. Calling release before acquire is
recorded and causes a subsequent acquire with that handle to return released.
Keep one handle for retries; Server checks its principal, instance and epoch. A released handle cannot acquire again.
To clear orphaned handles after an abnormal exit (e.g. kill -9), an administrator can execute an explicit recovery request:
Administrator recovery requires the global administrator role (admin). Callers must supply the current revision, instance, and epoch
obtained from GET /mode/owners, plus the confirmation string confirm: "I'm sure all imports have stopped".
If the provided revision does not match the Server’s current state, the request is rejected with HTTP 409 Conflict.
On success, the Server clears all active owners, resets graph mode to NONE, and increments the epoch, returning HTTP 200 with
state: "recovered" and mode: "NONE".
The first owner requires NONE. Other owners share owner-managed LOADING; the last release restores NONE.
Manually set LOADING, RESTORING and MERGING are not adopted. While owners are active, the legacy enum PUT rejects mode changes.
This protects ordinary imports on one live Server graph instance, with the handle bound to its authenticated principal, instance and epoch.
It provides no cross-Server coordination, data-write isolation or automatic expiry. Use a fixed direct Server endpoint and release after the import stops.
The upgraded Loader falls back to old behavior only for an unsupported-route 404 from its ownership probe; other errors remain failures.
Graph-source and restore imports retain their original enum-mode behavior. See
Loader compatibility and recovery.
6.4 Snapshot
6.4.1 Create a snapshot
Graph-space management permission (space) or graph ownership is required when authentication is enabled; administrators can satisfy it through permission inheritance.
Params
Path parameters
- graphspace: Graphspace name
- graph: Graph name
Method & Url
Response Status
Response Body
6.4.2 Resume a snapshot
Graph-space management permission (space) or graph ownership is required when authentication is enabled; administrators can satisfy it through permission inheritance.
Params
Path parameters
- graphspace: Graphspace name
- graph: Graph name
Method & Url
Response Status
Response Body
6.5 Compact
6.5.1 Manually compact graph
Graph-space management permission (space) is required when authentication is enabled; administrators can satisfy it through permission inheritance.
Params
Path parameters
- graphspace: Graphspace name
- graph: Graph name
Method & Url
Response Status
Response Body
6.6 Raft
These endpoints only work when the graph runs in raft mode, see the raft.mode option in Config Options. On a graph that does not, they answer 400 with Allowed <operation> operation only when working on raft mode.
Params
Path parameters
- graphspace: Graphspace name
- graph: Graph name
Query parameters
- group: Raft group name, default is
default - endpoint: Address of the peer, in the
host:portform. Required bytransfer_leader,set_leader,add_peerandremove_peer.
6.6.1 List the peers of a raft group
Graph-space membership (space_member) is required when authentication is enabled; administrators can satisfy it through permission inheritance.
Method & Url
Response Status
Response Body
The key of the returned object is the raft group name.
6.6.2 Get the leader of a raft group
Method & Url
Response Status
Response Body
6.6.3 Transfer the leadership of a raft group
Method & Url
Response Status
Response Body
6.6.4 Set the leader of a raft group
Method & Url
Response Status
Response Body
6.6.5 Add a peer to a raft group
This schedules an asynchronous task, see Task API.
Method & Url
Response Status
Response Body
6.6.6 Remove a peer from a raft group
This schedules an asynchronous task, see Task API.
Method & Url
Response Status
Response Body
5.1.14 - Task API
7.1 Task
7.1.1 List all async tasks in graph
Params
- status: the status of asyncTasks, one of NEW, SCHEDULING, SCHEDULED, QUEUED, RESTORING, RUNNING, SUCCESS, CANCELLING, CANCELLED, FAILED, HANGING, DELETING, case-insensitive
- ids: task ids to query, can be repeated. It can not be combined with
statusorpage, and it ignoreslimit. - limit: the max number of tasks to return, default is 100
- page: page token for pagination. When it is passed, the response carries a
pagefield with the token of the next page.
Method & Url
Response Status
Response Body
7.1.2 View the details of an async task
Params
- with_result: whether to load the result of the task, default is true
Method & Url
Response Status
Response Body
7.1.3 Delete task information of an async task,won’t delete the task itself
Params
- force: whether to delete the task even when it is still running, default is false
Task-record deletion is separate from graph deletion. For graph maintenance, follow the stop-write and task-drain requirements in the graph API.
Method & Url
Response Status
7.1.4 Cancel an async task, the task should be able to be canceled
If you already created an async task via Gremlin API as follows:
Method & Url
cancel it in 10s. if more than 10s, the task may already be finished, then can’t be cancelled.
Response Status
Cancelling a task that is already completed or already cancelling returns 400.
Response Body
The whole task object is returned, with task_status set to cancelling or cancelled:
At this point, the number of vertices whose label is man must be less than 10.
7.2 Algorithm Job
Schedules an OLAP algorithm as an asynchronous task inside the server. The task id in the response can be followed with the Task API above.
Params
Path parameters
- graphspace: Graphspace name
- graph: Graph name
- name: Algorithm name. The registered algorithms are
count_vertex,count_edge,degree_centrality,stress_centrality,betweenness_centrality,closeness_centrality,eigenvector_centrality,triangle_count,cluster_coefficient,lpa,louvain,weak_connected_component,fusiform_similarity,rings,k_core,page_rankandsubgraph_stat. An unknown name returns404.
Method & Url
Request Body
The body is the parameter map of the algorithm, and each algorithm validates its own parameters. Pass {} to run with the defaults.
Response Status
Response Body
7.3 Computer Job
Schedules a HugeGraph-Computer job as an asynchronous task. The computer job runs outside the server, see HugeGraph-Computer.
Params
Path parameters
- graphspace: Graphspace name
- graph: Graph name
- name: Computer name. The registered computers are
page_rank,weak_connected_component,lpa,triangle_countandlouvain. An unknown name returns404.
Method & Url
Request Body
The body is the parameter map of the computer job. Pass {} to run with the defaults.
Response Status
Response Body
5.1.15 - Gremlin API
8.1 Gremlin
Use native query APIs safely in production
The flexibility of graph query languages such as Gremlin and Cypher can introduce security risks. Do not expose native query endpoints directly to the public network.
In production, enable authentication and authorization, maintain an IP allowlist, and grant minimum permissions. Standard Server configuration writes authentication-proxy authorization records to audit-*.log; retain these files and restrict read access. auth.audit_log_rate limits per-user output rather than serving as a dedicated audit-log on/off switch.
8.1.1 Send a Gremlin statement to HugeGraphServer (GET), synchronously
Params
- gremlin: The Gremlin statement to execute on HugeGraphServer.
- bindings: Parameter bindings with string keys and string or numeric values, similar to MySQL prepared statements, to speed up execution.
- language: Statement language, defaulting to
gremlin-groovy. - aliases: Adds aliases for existing variables in a graph space.
This REST proxy cannot reliably carry a JSON-braced aliases parameter in GET queries. Current graph binding names contain hyphens and cannot be used directly as Groovy variables. This GET example uses a simple expression; use the POST example with aliases below to select a graph for traversal.
Method & Url
Response Status
Response Body
8.1.2 Send a Gremlin statement to HugeGraphServer (POST), synchronously
Count vertices
Runnable request
/gremlin is a top-level endpoint. The traversal source for graph hugegraph in graph space DEFAULT is __g_DEFAULT-hugegraph; aliases maps it to script variable g. Adjust the alias to the Server binding name for another graph or graph space. Batch responses can use gzip; curl --compressed decompresses them automatically.
Response Status
Response Body
Vertex count depends on current graph data; 6 above is an example result.
The response structure differs from the Vertex and Edge REST APIs; clients may need to parse it explicitly.
Query edges
Request Body
Response Status
Response Body
Edge IDs, endpoints, and properties depend on current graph data.
8.1.3 Send a Gremlin statement to HugeGraphServer (POST), asynchronously
Method & Url
Query vertices
Request Body
Note:
Asynchronous requests cannot supply
aliases. Server automatically bindsgraphto the current graph andgto its traversal source, and adds the URL graph name as an alias forgraph. Scripts can usegraph,g, or that graph name.
Response Status
Response Body
Note:
Query task status with
GET http://localhost:8080/graphspaces/DEFAULT/graphs/hugegraph/tasks/1, where1is the task ID. See the asynchronous task REST API.
Query edges
Request Body
Response Status
Response Body
Note:
Query task status with
GET http://localhost:8080/graphspaces/DEFAULT/graphs/hugegraph/tasks/2, where2is the task ID. See the asynchronous task REST API.
5.1.16 - Cypher API
9.1 Cypher
The Cypher API always needs an
Authorizationheader, eitherBasicorBearer. A request without one is rejected with401, even when the server runs without authentication. The credentials are forwarded to the Gremlin Server throughconf/remote-objects.yaml.
9.1.1 Sending a cypher statement (GET) to HugeGraphServer for synchronous execution
Method & Url
Params
Path parameters
- graphspace: Graphspace name
- graph: Graph name
Query parameters
- cypher: Cypher statement
Example
Response Status
Response Body
9.1.2 Sending a cypher statement (POST) to HugeGraphServer for synchronous execution
Method & Url
Params
Path parameters
- graphspace: Graphspace name
- graph: Graph name
Body
{cypher}
- cypher: Cypher statement
Note:
It is not in JSON format, but a plain text Cypher statement.
Example
Request Body
Response Status
Response Body
5.1.17 - Authentication API
Version notes: This page documents current
master. For historical behavior, use the 1.7 Authentication API or 1.5 Authentication API.Users, graph-space groups, resources, memberships, and permission grants use
/graphspaces/{graphspace}/auth/.... Login, logout, and token verification remain at/auth/login,/auth/logout, and/auth/verify; default graph-space roles are under/graphspaces/{graphspace}/role. Source retains top-level/auth/groups; this page’s group examples use the graph-space API.
{group_id}, {target_id}, {another_target_id}, {belong_id}, and {access_id} are placeholders. Replace them with the corresponding response id, then encode IDs as URL path components before placing them in a path.
10.1 User Authentication and Access Control
To enable authentication and related configurations, please refer to the Authentication Configuration documentation.
Overview of User Authentication and Access Control:
HugeGraph supports multi-user authentication and fine-grained access control. It adopts a 4-tier design based on “User-User Group-Operation-Resource” to flexibly control user roles and permissions. Resources describe data in the graph database, such as vertices that meet certain conditions. Each resource consists of three elements: type, label, and properties. There are a total of 18 types and combinations of any label and properties to form resources. The internal condition of a resource is an “AND” relationship, while the condition between multiple resources is an “OR” relationship. Users can belong to one or more user groups, and each user group can have permissions for any number of resources. The types of operations include read, write, delete, execute, etc. HugeGraph supports dynamically creating users, user groups, and resources, and supports dynamically assigning or revoking permissions. During the initialization of the database, a super administrator user is created, and subsequently, various role users can be created by the super administrator. If a newly created user is assigned sufficient permissions, they can create or manage more users.
Example:
user(name=boss) -belong-> group(name=all) -access(read)-> target(graph=graph1, resource={label: person, city: Beijing})
Description: User ‘boss’ has read permission for people in the ‘graph1’ graph from Beijing.
Interface Description:
The core of user authentication and access control is 5 categories: UserAPI, GroupAPI, TargetAPI, BelongAPI, AccessAPI. Alongside them, ManagerAPI grants graphspace-level manager roles, LoginAPI issues and verifies tokens, and ProjectAPI groups several graphs so that permissions can be granted for the whole set at once.
10.2 User (User) API
The user interface includes APIs for creating users, deleting users, modifying users, and querying user-related information.
10.2.1 Create User
Params
- user_name: User name
- user_password: User password
- user_nickname: User nickname
- user_phone: User phone number
- user_email: User email
- user_avatar: URL of the user avatar
- user_description: User description
Both user_name and user_password are required, the rest are optional.
Request Body
Method & Url
Response Status
Response Body
In the response message, the password is encrypted as ciphertext.
10.2.2 Delete User
Params
- id: User ID to be deleted
Method & Url
Response Status
10.2.3 Modify User
Params
- id: User ID to be modified
Method & Url
Request Body
Modify user_password and user_phone. user_name can not be changed, and when it is passed it must match the existing name.
Response Status
Response Body
The returned result is the entire user object including the modified content.
10.2.4 Query User List
Params
- name: Return only the user with this name. When it is given, the response is a single user object instead of a list, and
404is returned if no such user exists. - limit: Upper limit of the number of results returned, default is 100
Method & Url
Response Status
Response Body
10.2.5 Query a User
Params
- id: User ID to be queried
Method & Url
Response Status
Response Body
10.2.6 Query Roles of a User
Method & Url
Response Status
Response Body
10.3 Group (Group) API
Groups grant corresponding resource permissions, and users are assigned to different groups, thereby having different resource permissions. The group interface includes APIs for creating groups, deleting groups, modifying groups, and querying group-related information.
GroupAPIremains at/auth/groupson 1.7.0; currentmasteralso serves/graphspaces/DEFAULT/auth/groups.The GraphSpace API generates each persisted group name as
~hubble_role:v1:+ base64url(graphspace) +:+ 32 hex digits. ForDEFAULT, the name and ID look like~hubble_role:v1:REVGQVVMVA:<32 hex>; requestgroup_nameis only a client label. Use the ID returned by the create response below.
10.3.1 Create Group
Params
- group_name: Required client label; the Server generates the persisted name
- group_description: Group description
Request Body
group_name is required, but cannot customize the persisted graph-space group name generated by Server. Copy the response id for later membership, authorization, lookup, update, or deletion operations.
Method & Url
Response Status
Response Body
10.3.2 Delete Group
Params
- id: Group ID to be deleted
Method & Url
Response Status
10.3.3 Modify Group
Params
- id: Group ID to be modified
Method & Url
Request Body
Modify group_description. On the GraphSpace form group_name is omitted here, or equal
to the generated name: any other value is rejected with “The name of group can’t be
updated”.
Response Status
Response Body
The returned result is the entire group object including the modified content.
10.3.4 Query Group List
Params
- limit: Upper limit of the number of results returned
Method & Url
Response Status
Response Body
10.3.5 Query a Specific Group
Params
- id: Group ID to be queried
Method & Url
Response Status
Response Body
10.4 Resource (Target) API
Resources describe data in the graph database, such as vertices that meet certain criteria. Each resource includes three elements: type, label, and properties. There are 18 types in total, and the combination of any label and any properties forms a resource. The internal conditions of a resource are based on the AND relationship, while the conditions between multiple resources are based on the OR relationship.
The resource API includes creating, deleting, modifying, and querying resources.
10.4.1 Create Resource
Params
- target_name: Name of the resource
- target_graph: Graph of the resource
- target_url: URL of the resource
- target_resources: Resource definitions (list)
target_resources can include multiple target_resource, stored in the form of a list.
Each target_resource contains:
- type: Optional value: VERTEX, EDGE, etc. Can be filled with ALL, indicating it can be a vertex or edge.
- label: Optional value: name of a vertex or edge type. Can be filled with *, indicating any type.
- properties: Map type, can contain multiple key-value pairs of properties. Must match all property values. Property values can support conditional ranges (e.g., age: P.gte(18)). If properties are null, it means any property is allowed. If both the property name and value are ‘*’, it also means any property is allowed.
For example, a specific resource: “target_resources”: [{“type”:“VERTEX”,“label”:“person”,“properties”:{“city”:“Beijing”,“age”:“P.gte(20)”}}]
The resource definition means: a vertex of type ‘person’ with the city property set to ‘Beijing’ and the age property greater than or equal to 20.
Request Body
Method & Url
Response Status
Response Body
10.4.2 Delete Resource
Params
- id: Resource Id to be deleted
Method & Url
Response Status
10.4.3 Modify Resource
Params
- id: Resource Id to be modified
Method & Url
Request Body
Modify the ’type’ in the resource definition.
Response Status
Response Body
The response contains the entire target group object, including the modified content.
10.4.4 Query Resource List
Params
- limit: Upper limit of the number of returned results.
Method & Url
Response Status
Response Body
10.4.5 Query a Specific Resource
Params
- id: Id of the resource to query
Method & Url
Response Status
Response Body
10.5 Association of Roles (Belong) API
The association between users and user groups allows a user to be associated with one or more user groups. User groups have permissions for related resources, and the permissions for different user groups can be understood as different roles. In other words, users are associated with roles.
The API for associating roles includes creating, deleting, modifying, and querying the association of roles for users.
Use your actual group ID from 10.3. For later requests, use the Belong response
idand URL-encode>as%3Ein URLs.
10.5.1 Create an Association of Roles for a User
Params
- user: User ID
- group: User group ID
- belong_description: Description
Request Body
Method & Url
Response Status
Response Body
10.5.2 Delete an Association of Roles
Params
- id: ID of the association of roles to delete
Method & Url
Response Status
10.5.3 Modify an Association of Roles
An association of roles can only be modified for its description. The user and group properties cannot be modified. If you need to modify an association of roles, you need to delete the existing association and create a new one.
Params
- id: ID of the association of roles to modify
Method & Url
Request Body
Modify the belong_description field
Response Status
Response Body
The response includes the modified content as well as the entire association of roles object
10.5.4 Query List of Associations of Roles
Params
- user: Return only the associations of this user
- group: Return only the associations of this group
- limit: Upper limit on the number of results to return, default is 100
user and group can not be used together.
Method & Url
Response Status
Response Body
10.5.5 View a Specific Association of Roles
Params
- id: The id of the association of roles to be queried
Method & Url
Response Status
Response Body
10.6 Authorization (Access) API
Grant permissions to user groups for resources, including operations such as READ, WRITE, DELETE, EXECUTE, etc. The authorization API includes: creating, deleting, modifying, and querying permissions.
Use your actual group ID from 10.3 and target ID from 10.4. For later requests, use the Access response
idand URL-encode>as%3Ein URLs.
10.6.1 Create Authorization (Granting permissions to user groups for resources)
Params
- group: Group ID
- target: Resource ID
- access_permission: Permission grant
- access_description: Authorization description
Access permissions:
- READ: Read operations, including all queries such as querying the schema, retrieving vertices/edges, aggregating vertex and edge counts (VERTEX_AGGR/EDGE_AGGR), and reading the graph’s status (STATUS), variables (VAR), tasks (TASK), etc.
- WRITE: Write operations, including creating and updating operations, such as adding property keys to the schema or adding/updating properties of vertices.
- DELETE: Delete operations, including deleting metadata, vertices, or edges.
- EXECUTE: Execute operations, including executing Gremlin queries, executing tasks, and executing metadata functions.
Request Body
Method & Url
Response Status
Response Body
10.6.2 Delete Authorization
Params
- id: The ID of the authorization to be deleted
Method & Url
Response Status
10.6.3 Modify Authorization
Authorization can only be modified for its description. User group, resource, and permission cannot be modified. If you need to modify the authorization relationship, delete the original authorization and create a new one.
Params
- id: The ID of the authorization to be modified
Method & Url
Request Body
Modify access_description
Response Status
Response Body
The response includes the modified content as well as the entire authorization object.
10.6.4 Query Authorization List
Params
- group: Return only the authorizations of this group
- target: Return only the authorizations on this resource
- limit: The maximum number of results to return, default is 100
group and target can not be used together.
Method & Url
Response Status
Response Body
10.6.5 Query a Specific Authorization
Params
- id: The ID of the authorization to be queried
Method & Url
Response Status
Response Body
10.7 Graphspace Manager (Manager) API
Note: Before using the following APIs, you need to create a graphspace first. For example, create a graphspace named
gs1via the Graphspace API. The examples below assume thatgs1already exists.
Note: The manager APIs only work when the server runs in PD mode. In standalone mode they return
400with the messageGraphSpace management is not supported in standalone mode.
- The graphspace manager API is used to grant/revoke manager roles for users at the graphspace level, and to query the roles of the current user or other users in a graphspace. Supported role types include
SPACE,SPACE_MEMBER, andADMIN.
10.7.1 Check whether the current login user has a specific role
Params
- type: Role type to check, required, one of
SPACE,SPACE_MEMBER,ADMIN
Method & Url
Response Status
Response Body
10.7.2 List graphspace managers
Params
- type: Role type, required, one of
SPACE,SPACE_MEMBER,ADMIN.SPACElists the managers of the graphspace,SPACE_MEMBERlists its members, andADMINlists the administrators of the whole cluster.
Method & Url
Response Status
Response Body
10.7.3 Grant/create a graphspace manager
- The following example grants user
bosstheSPACE_MEMBERrole in graphspacegs1.
Params
- user: User or group name, required
- type: Role type, required, one of
SPACE,SPACE_MEMBER,ADMIN
Granting
SPACEto a user that is already a space member revokes the member role first, and the other way round. Only an administrator can grantADMIN.
Request Body
Method & Url
Response Status
Response Body
10.7.4 Revoke graphspace manager privileges
- The following example revokes the
SPACE_MEMBERrole of userbossin graphspacegs1.
Params
- user: User name to revoke. The built-in
adminuser can not be removed fromADMIN. - type: Role type to revoke, one of
SPACE,SPACE_MEMBER,ADMIN
Method & Url
Response Status
10.7.5 Query roles of a specific user in a graphspace
Params
- user: User name
Method & Url
Response Status
Response Body
The returned roles are a subset of ADMIN, SPACE and SPACE_MEMBER; NONE is returned when the user holds none of them in this graphspace.
10.7.6 Check whether the current login user holds a default role
Default roles are the built-in roles of a graphspace, see Graphspace API. Valid role values are space, space_member, analyst and observer; graph is only taken into account for the observer role.
Params
- role: Default role name, required
- graph: Graph name, optional, only used with
role=observer
Method & Url
Response Status
Response Body
10.8 Login (Login) API
Besides HTTP Basic authentication, the server can hand out a JWT token that is then passed as Authorization: Bearer <token>. The login endpoints are not scoped to a graphspace.
The token is signed with the auth.token_secret option and expires after auth.token_expire seconds (default 86400). The default secret is generated randomly at startup, so set it explicitly when tokens must stay valid across a restart or must be accepted by more than one server.
10.8.1 Log in and get a token
Params
- user_name: User name, required
- user_password: User password, required
- token_expire: Token lifetime in seconds, optional
Request Body
Method & Url
Response Status
Wrong credentials return 401.
Response Body
10.8.2 Log out and invalidate the token
The token to invalidate is taken from the request header, no request body is needed.
Params
Request header
- Authorization:
Bearer <token>, required. Only the Bearer scheme is accepted, other schemes return400.
Method & Url
Response Status
An invalid or expired token returns 401.
10.8.3 Verify a token
Params
Request header
- Authorization:
Bearer <token>, required
Method & Url
Response Status
An invalid or expired token returns 401.
Response Body
10.9 Project (Project) API
A project groups a set of graphs together with an admin group and an op group, so that permissions can be granted for the whole set at once. Creating a project also creates its project_target, project_admin_group and project_op_group, which are returned in the response but can not be set by the client.
10.9.1 Create Project
Params
- project_name: Project name, required
- project_description: Project description, optional
project_graphs can not be passed on creation, use the add_graph action below.
Request Body
Method & Url
Response Status
Response Body
10.9.2 Add graphs to or remove graphs from a project
Params
- id: Project ID
- action:
add_graphto add graphs,remove_graphto remove them
Request Body
Method & Url
Response Status
Response Body
The whole project object is returned, including the updated graph list.
10.9.3 Modify the description of a project
Params
- id: Project ID
Leave action out to update the description. project_graphs must not be present in this case.
Request Body
Method & Url
Response Status
10.9.4 Query Project List
Params
- limit: The maximum number of results to return, default is 100
Method & Url
Response Status
Response Body
10.9.5 Query a Specific Project
Params
- id: Project ID
Method & Url
Response Status
10.9.6 Delete Project
Params
- id: Project ID
Remove all graphs from the project before deleting it.
Method & Url
Response Status
5.1.18 - Metrics API
HugeGraph provides a metrics interface for obtaining monitoring information, such as statistics on each Gremlin execution time, cache size, etc. The metrics interface includes the following categories: basic metrics, statistical metrics, system metrics, and backend storage metrics.
1. Basic Metrics
1.1 Get All Basic Metrics
Params
- type: If the passed value is
json, it is returned in json format, otherwise it is returned in Promethaus format.
1.1.1 Method & Url
Response Status
Response Body
1.1.2 Method & Url
Response Status
Response Body
1.2 Get Gauges Metrics
Method & Url
Response Status
Response Body
1.3 Get Counters Metrics
Method & Url
Response Status
Response Body
1.4 Get Histograms Metrics
Method & Url
Response Status
Response Body
1.5 Get Meters Metrics
Method & Url
Response Status
Response Body
1.6 Get Timers Metrics
Method & Url
Response Status
Response Body
2.Statistical Metrics
Params
- type: If the passed value is JSON, it is returned in JSON format, otherwise it is returned in Promethaus format.
2.1 Method & Url
Response Status
Response Body
2.2 Method & Url
Response Status
Response Body
3.System Metrics
System metrics mainly return the machine metrics, such as memory, threads, and other information.
Method & Url
Response Status
Response Body
4.Backend Metrics
HugeGraph supports multiple backend storage, with backend metrics including memory, disk, and other information.
Method & Url
Response Status
Response Body
5.1.19 - Other API
11.1 Other
11.1.1 View Version Information of HugeGraph
Method & Url
Response Status
Response Body
11.1.2 View the profile of the server
Returns the service name, the core version, the documentation links and the API groups served by this node.
Method & Url
Response Status
Response Body
The swagger_ui value is derived from restserver.url, and apis lists the API groups registered on this node, sorted by name.
11.1.3 List all APIs of the server
Lists every registered resource method, grouped by API group and resource class. Each entry carries the url, the HTTP method and the query parameters with their types and default values.
Method & Url
Response Status
Response Body
The response is long, the following fragment shows the shape:
11.1.4 View and switch the exception trace stack
Whether the error responses of the server carry the exception stack in the exception and cause fields is decided by the exception.allow_trace option (default true). The switch below is a node-wide runtime override: while it is on, the stack is always included, no matter what the option says. GET reports the state of that override, which starts as false.
Method & Url
Response Status
Response Body
Method & Url
Request Body
Response Status
Response Body
11.1.5 Manage the IP allowlist, this operation requires administrator privileges
The allowlist is only enforced when it is switched on, see the white_ip.status option (default disable).
List the allowlist
Method & Url
Response Status
Response Body
Add IPs to or remove IPs from the allowlist
Params
- ips: list of IPv4 addresses
- action:
loadto add,removeto delete
Method & Url
Request Body
Response Status
Response Body
existed_ips are the addresses already in the list, added_ips are the newly added ones, and illegal_ips is only returned when some addresses are not valid IPv4 addresses. For action=remove the response carries removed_ips and non_existed_ips instead.
Enable or disable the allowlist
Params
- status:
trueto enable,falseto disable
Method & Url
Response Status
Response Body
11.1.6 Start the Arthas agent
Starting with HugeGraph 1.8.0, Server and Store bundle Arthas 4.1.5 (PD does not embed an Arthas agent). You can attach it to a running JVM for live troubleshooting via the local script or the administrator HTTP endpoint.
Security & Access Control
- Local by Default: Arthas binds to
127.0.0.1by default. If binding a wildcard address (such as0.0.0.0), ensure firewall protection and enable authentication. - Administrator Privilege: HTTP API activation (
PUT /arthas) requires Server authentication enabled with administrator privileges; requests without authentication enabled return403. - Store Endpoint Disabled: Store’s
GET /v1/arthasstartis disabled and returns403. Usebin/arthas.shinstead. - No Restart & Auto Cleanup: We recommend running
bin/arthas.shon the host as the service OS user without restarting the JVM; exiting the interactive session automatically unloads the agent.
| Deployment | Recommended Activation | Access & Permissions |
|---|---|---|
| Server (auth) | Admin PUT /arthas or bin/arthas.sh | Admin HTTP credentials; script requires service OS user |
| Server (auth disabled) | Local script bin/arthas.sh | HTTP activation returns 403 (including loopback and proxy requests) |
| Store | Local script bin/arthas.sh | GET /v1/arthasstart is disabled and returns 403 |
Activation & Diagnostics
Operational Notes & Security Configuration
- Session Exit & Cleanup: The local script automatically stops Arthas and releases ports when exiting (via
quit,stop, or--commandcompletion), leaving the service JVM running. If activated via HTTP API only, executestopin the console to unload the agent. - Authentication & Security: Enable native authentication before exposing diagnostic ports beyond loopback. Supply credentials via
--username/--passwordin the script or set JVM properties-Darthas.usernameand-Darthas.password. For full authentication behavior and options, see Arthas Authentication Documentation. - Disabling Dangerous Commands: In
rest-server.properties, configurearthas.disabled_commandswith a comma-separated list (e.g.,jad,mc). Keepsessionandstopenabled so tooling can manage the agent lifecycle. See Arthas Commands for command usage.
HTTP Response Body
A successful activation returns HTTP 200 and the applied configuration:
Configuration options use canonical snake_case names: arthas.telnet_port, arthas.http_port, arthas.ip,
and arthas.disabled_commands. Legacy camelCase aliases remain supported for backward compatibility; explicit snake_case settings take precedence (see
upgrade note). The response preserves Arthas agent key names for client compatibility.
5.2 - HugeGraph Java Client
The code in this document is written in java, but its style is very similar to gremlin(groovy). The user only needs to replace the variable declaration in the code with def or remove it directly,
You can convert java code into groovy; in addition, each line of statement can be without a semicolon at the end, groovy considers a line to be a statement.
The gremlin(groovy) written by the user in HugeGraph-Studio can refer to the java code in this document, and some examples will be given below.
This reference follows Toolchain master (Client 1.8.0). Prepare the matching dependency using the
quickstart; newly added APIs such as capability detection are unavailable in older clients.
1 HugeGraph-Client
HugeGraph-Client is the general entry for operating graph. Users must first create a HugeGraph-Client object and establish a connection (pseudo connection) with HugeGraph-Server before they can obtain the operation entry objects of schema, graph and gremlin.
HugeGraph-Client connects to an existing graph on the server. Its builder accepts a GraphSpace; the two-argument builder, or an empty GraphSpace value, uses DEFAULT.
If the above process of creating HugeClient fails, an exception will be thrown, and the user needs to use try-catch. If successful, continue to get schema, graph and gremlin manager.
When operating through gremlin in HugeGraph-Hubble(or HugeGraph-Studio), HugeClient is not required and can be ignored.
1.1 Builder options
The builder accepts the following options. Every timeout is expressed in seconds and converted to milliseconds internally.
| interface | description | default |
|---|---|---|
configUrl(String url) | Server address, normally passed to builder(...) already | required |
configGraph(String graph) | Graph name, normally passed to builder(...) already | required |
configGraphSpace(String graphSpace) | GraphSpace name, a null or empty value falls back to DEFAULT | DEFAULT |
configUser(String username, String password) | Credentials for the server, a null value is stored as an empty string | empty, no auth |
configToken(String token) | Token used instead of username and password | empty |
configTimeout(int seconds) | Request timeout; use a positive number of seconds | 20 |
configConnectTimeout(Integer seconds) | Connect timeout, left unset so that configTimeout applies | unset |
configReadTimeout(Integer seconds) | Read timeout, left unset so that configTimeout applies | unset |
configPool(int maxConns, int maxConnsPerRoute) | Connection pool sizes, passing 0 for either one restores its default | 4 x CPUs, 2 x CPUs |
configIdleTime(int seconds) | Idle connection keep-alive, must be greater than 0 | 30 |
configSSL(String trustStoreFile, String trustStorePassword) | Truststore used for HTTPS connections | empty |
configHttpBuilder(Consumer<OkHttpClient.Builder> consumer) | Callback that receives the underlying OkHttp builder for further customization | none |
graphRequired(boolean graphRequired) | Whether build() rejects an empty url or graph name | true |
Current master has a unit-conversion defect in configTimeout(0): it sets 20,000 seconds instead of the default 20 seconds.
Omit the call to keep the default, or use configTimeout(20) explicitly; do not use 0 to reset it.
On build(), the client reads the server API version and rejects anything outside the range [0.38, 0.81).
1.2 Operation entries
Besides schema, graph and gremlin, HugeClient exposes the following entries. The graph-scoped ones are only available when a graph name was supplied; when the client is built with an empty graph name they return null until assignGraph(graphSpace, graph) is called.
| interface | returns | scope | description |
|---|---|---|---|
schema() | SchemaManager | graph | Manage PropertyKey, VertexLabel, EdgeLabel and IndexLabel |
graph() | GraphManager | graph | Add, query, update and delete vertices and edges, single or batch |
gremlin() | GremlinManager | graph | Run Gremlin statements, synchronously or as an async task |
cypher() | CypherManager | graph | Run Cypher statements, synchronously or as an async task |
traverser() | TraverserManager | graph | RESTful traversals such as shortest path, k-out, k-neighbor and crosspoints |
variables() | VariablesManager | graph | Get, set, list and remove graph variables |
job() | JobManager | graph | Rebuild the index of a VertexLabel, EdgeLabel or IndexLabel |
task() | TaskManager | graph | List, get, cancel, delete and wait on async tasks |
computer() | ComputerManager | graph | Create, cancel, list and get computer jobs |
graphs() | GraphsManager | graphspace | Create, clone, list, reload, clear and drop graphs, read and set the graph mode |
graphSpace() | GraphSpaceManager | server | Manage GraphSpaces, see section 4 |
auth() | AuthManager | server | Manage users, groups, targets, belongs and accesses |
metrics() | MetricsManager | server | Read backend, system and statistics metrics |
versionManager() | VersionManager | server | Read the core, gremlin and API versions of the server |
The client also reports what the connected server supports, so callers can branch on a capability instead of on a version string: supportsGraphSpace(), supportsCypher(), supportsGraphCreate(), supportsDefaultRole() and isServerAuthEnabled().
2 Schema
2.1 SchemaManager
SchemaManager is used to manage four kinds of schema in HugeGraph, namely PropertyKey (property type), VertexLabel (vertex type), EdgeLabel (edge type) and IndexLabel (index label). A SchemaManager object can be created for schema information definition.
The user can obtain the SchemaManager object using the following methods:
Create a schema object via gremlin in HugeGraph-Hubble:
The definition process of the 4 kinds of schema is described below.
2.2 PropertyKey
2.2.1 Interface and parameter introduction
PropertyKey is used to standardize the property constraints of vertices and edges, and properties of properties are not currently supported.
The constraint information that PropertyKey allows to define includes: name, datatype, cardinality, aggregateType, writeType and userdata, which are introduced one by one below.
- name: The name of the property, used to distinguish different PropertyKeys, PropertyKeys with the same name are not allowed.
| interface | param | must set |
|---|---|---|
| propertyKey(String name) | name | y |
- datatype: property value type, you must select an explicit setting from the following table that conforms to the specific business scenario:
| interface | Java Class |
|---|---|
| asText() | String |
| asInt() | Integer |
| asDate() | Date |
| asUUID() | UUID |
| asBoolean() | Boolean |
| asByte() | Byte |
| asBlob() | Byte[] |
| asDouble() | Double |
| asFloat() | Float |
| asLong() | Long |
- cardinality: Whether the property value is single-valued or multivalued, in the case of multivalued, it is divided into allowing-duplicate values and not-allowing-duplicate values. This item is single by default. If necessary, you can select a setting from the following table:
| interface | cardinality | description |
|---|---|---|
| valueSingle() | single | single value |
| valueList() | list | multi-values that allow duplicate value |
| valueSet() | set | multi-values that not allow duplicate value |
- aggregateType: How repeated writes of the same property are combined. The default is none, which keeps the last written value. The numeric options require a number datatype:
| interface | aggregateType | description |
|---|---|---|
| calcSum() | sum | accumulate the written values |
| calcMax() | max | keep the greatest value |
| calcMin() | min | keep the smallest value |
| calcOld() | old | keep the first written value and ignore updates |
aggregateType(AggregateType type) sets the same thing directly, and AggregateType.NONE restores the default.
- writeType: Whether the property belongs to the OLTP graph or to an OLAP computing result, and for OLAP whether it carries an index. The default is oltp:
| writeType | description |
|---|---|
| OLTP | ordinary graph property |
| OLAP_COMMON | OLAP property without index |
| OLAP_SECONDARY | OLAP property with a secondary index |
| OLAP_RANGE | OLAP property with a range index |
| interface | description |
|---|---|
| writeType(WriteType writeType) | set the write type with the enum value |
| writeType(String name) | set the write type by enum name |
- userdata: Users can add some constraints or additional information by themselves, and then check whether the incoming properties satisfy the constraints, or extract additional information when necessary:
| interface | description |
|---|---|
| userdata(String key, Object value) | The same key, the latter will cover the former |
2.2.2 Create PropertyKey
The syntax of creating the above PropertyKey object through gremlin in HugeGraph-Hubble is exactly the same. If the user does not define the schema variable, it should be written like this:
In the following examples, the syntax of gremlin and java is exactly the same, so we won’t repeat them.
- ifNotExist(): Add a judgment mechanism for create, if the current PropertyKey already exists, it will not be created, otherwise the property will be created. If no ifNotExist() is added, an exception will be thrown if a property-key with the same name already exists. The same as below, and will not be repeated there.
2.2.3 Delete PropertyKey
2.2.4 Query PropertyKey
2.3 VertexLabel
2.3.1 Interface and parameter introduction
VertexLabel is used to define the vertex type and describe the constraint information of the vertex.
The constraint information that VertexLabel allows to define include: name, idStrategy, properties, primaryKeys, nullableKeys and ttl, which are introduced one by one below.
- name: The name of the VertexLabel, used to distinguish different VertexLabels, VertexLabels with the same name are not allowed.
| interface | param | must set |
|---|---|---|
| vertexLabel(String name) | name | y |
- idStrategy: Each VertexLabel can choose its own ID strategy. There are currently three strategies to choose from, namely Automatic (automatically generated), Customize (user input) and PrimaryKey (primary attribute key). Among them, Automatic uses the Snowflake algorithm to generate ID, Customize requires the user to pass in the ID of string or number type, and PrimaryKey allows the user to select several properties of VertexLabel as the basis for differentiation. HugeGraph will be spliced and generated ID according to the value of the primary properties. idStrategy uses Automatic by default, but if the user does not explicitly set idStrategy and calls the primaryKeys(…) method to set the primary property, then idStrategy will automatically use PrimaryKey.
| interface | idStrategy | description |
|---|---|---|
| useAutomaticId | AUTOMATIC | generate id automatically by Snowflake algorithm |
| useCustomizeStringId | CUSTOMIZE_STRING | passed id by user, must be string type |
| useCustomizeNumberId | CUSTOMIZE_NUMBER | passed id by user, must be number type |
| useCustomizeUuidId | CUSTOMIZE_UUID | passed id by user, must be UUID type |
| usePrimaryKeyId | PRIMARY_KEY | choose some important prop as primary key to splice id |
- properties: define the properties of the vertex, the incoming parameter is the name of the PropertyKey.
| interface | description |
|---|---|
| properties(String… properties) | allow to pass multi properties |
- primaryKeys: When the user selects the ID strategy of PrimaryKey, several primary properties need to be selected from the properties of VertexLabel as the basis for differentiation;
| interface | description |
|---|---|
| primaryKeys(String… keys) | allow to choose multi prop as primaryKeys |
Note that the selection of the ID strategy and the setting of primaryKeys have some mutual constraints, which cannot be called at will. The constraints are shown in the following table:
| useAutomaticId | useCustomizeStringId | useCustomizeNumberId | usePrimaryKeyId | |
|---|---|---|---|---|
| unset primaryKeys | AUTOMATIC | CUSTOMIZE_STRING | CUSTOMIZE_NUMBER | ERROR |
| set primaryKeys | ERROR | ERROR | ERROR | PRIMARY_KEY |
The client itself only checks that the ID strategy is set once, so calling two of these methods on the same builder fails locally. The combinations above are validated by the server.
- nullableKeys: For properties set by the properties(…) method, all of them are non-nullable by default, that is, the property must be assigned a value when creating a vertex, which may impose too strict integrity requirements on user data. In order to avoid such strong constraints, the user can set some properties to be nullable through this method, so that the properties can be unassigned when adding vertices.
| interface | description |
|---|---|
| nullableKeys(String… properties) | allow to pass multi props |
Note: primaryKeys and nullableKeys cannot intersect, because a property cannot be both primary and nullable.
- ttl: Time to live of the vertices of this label. The default is 0, which means they never expire. The client rejects a negative value. By default the countdown is relative to the moment the vertex is written; ttlStartTime instead names a date property of the label that the countdown is measured from.
| interface | description |
|---|---|
| ttl(long ttl) | set the time to live, 0 disables expiry |
| ttlStartTime(String property) | name the date property the countdown starts from |
- enableLabelIndex: The user can specify whether to create an index for the label. If you don’t create it, you can’t globally search for the vertices and edges of the specified label. If you create it, you can search globally, like
g.V().hasLabel('person'), g.E().has('label', 'person')query, but the performance will be slower when inserting data, and it will take up more storage space. This defaults to true.
| interface | description |
|---|---|
| enableLabelIndex(boolean enable) | Whether to create a label index |
- userdata: Users can add some constraints or additional information by themselves, and then check whether the incoming properties meet the constraints, or extract additional information when necessary.
| interface | description |
|---|---|
| userdata(String key, Object value) | The same key, the latter will cover the former |
2.3.2 Create VertexLabel
2.3.3 Update VertexLabel
VertexLabel can append constraints, but only properties and nullableKeys, and the appended properties must also be added to the nullableKeys collection.
2.3.4 Delete VertexLabel
2.3.5 Query VertexLabel
2.4 EdgeLabel
2.4.1 Interface and parameter introduction
EdgeLabel is used to define the edge type and describe the constraint information of the edge.
The constraint information that EdgeLabel allows to define include: name, sourceLabel, targetLabel, frequency, properties, sortKeys, nullableKeys and ttl, which are introduced one by one below.
- name: The name of the EdgeLabel, used to distinguish different EdgeLabels, EdgeLabels with the same name are not allowed.
| interface | param | must set |
|---|---|---|
| edgeLabel(String name) | name | y |
sourceLabel and targetLabel: The names of the source and the target vertex type of the edge link. Setting both is the same as declaring one link pair.
link: An EdgeLabel holds a set of source and target pairs, so
link(...)can be called more than once to let the same edge type connect several pairs of vertex types. Once a pair has been added this way,sourceLabel(...)andtargetLabel(...)are rejected, and thesourceLabel()andtargetLabel()getters only work on a label that has exactly one pair. Uselinks()to read them all.
| interface | param | must set |
|---|---|---|
| link(String sourceLabel, String targetLabel) | sourceLabel, targetLabel | y, or set the two below |
| sourceLabel(String label) | label | y, unless link() was used |
| targetLabel(String label) | label | y, unless link() was used |
- frequency: Indicating the number of times a relationship occurs between two specific vertices, which can be single (single) or multiple (frequency), the default is single.
| interface | frequency | description |
|---|---|---|
| singleTime() | single | a relationship can only occur once |
| multiTimes() | multiple | a relationship can occur many times |
- properties: Define the properties of the edge.
| interface | description |
|---|---|
| properties(String… properties) | allow to pass multi props |
- sortKeys: When the frequency of EdgeLabel is multiple, some properties are needed to distinguish the multiple relationships, so sortKeys (sorted keys) is introduced;
| interface | description |
|---|---|
| sortKeys(String… keys) | allow to choose multi prop as sortKeys |
- nullableKeys: Consistent with the concept of nullableKeys in vertices.
Note: sortKeys and nullableKeys also cannot intersect.
ttl: Consistent with the concept of ttl in vertices, with the same
ttl(long ttl)andttlStartTime(String property)methods and the same default of 0.edge label type: An EdgeLabel is normal by default. It can instead be declared as the parent of a family of edge labels, as a child of such a parent, or as a general label:
| interface | edgeLabelType | description |
|---|---|---|
| asBase() | PARENT | declare the label as a parent label |
| withBase(String parentLabel) | SUB | declare the label as a child of ‘parentLabel’ |
| asGeneral() | GENERAL | declare the label as a general label |
enableLabelIndex: It is consistent with the concept of enableLabelIndex in the vertex.
userdata: Users can add some constraints or additional information by themselves, and then check whether the incoming properties meet the constraints, or extract additional information when necessary.
| interface | description |
|---|---|
| userdata(String key, Object value) | The same key, the latter will cover the former |
2.4.2 Create EdgeLabel
2.4.3 Update EdgeLabel
2.4.4 Delete EdgeLabel
2.4.5 Query EdgeLabel
2.5 IndexLabel
2.5.1 Interface and parameter introduction
IndexLabel is used to define the index type and describe the constraint information of the index, mainly for the convenience of query.
The constraint information that IndexLabel allows to define include: name, baseType, baseValue, indexFields, indexType, which are introduced one by one below.
- name: The name of the IndexLabel, used to distinguish different IndexLabels, IndexLabels with the same name are not allowed.
| interface | param | must set |
|---|---|---|
| indexLabel(String name) | name | y |
baseType: Indicates whether to index VertexLabel or EdgeLabel, used in conjunction with the baseValue below.
baseValue: Specifies the name of the VertexLabel or EdgeLabel to be indexed.
| interface | param | description |
|---|---|---|
| onV(String baseValue) | baseValue | build index for VertexLabel: ‘baseValue’ |
| onE(String baseValue) | baseValue | build index for EdgeLabel: ‘baseValue’ |
- indexFields: on which fields to index, it can be a joint index for multiple columns.
| interface | param | description |
|---|---|---|
| by(String… fields) | files | allow to build index for multi fields for secondary index |
- indexType: There are currently five types of indexes established, namely Secondary, Range, Search, Shard and Unique.
- Secondary Index supports exact matching secondary index, allow to build joint index, joint index supports index prefix search
- Single Property Secondary Index, support equality query, for example: the secondary index of the city property of the person vertex, you can use
g.V().has("city", "Beijing")to query all the vertices with “city attribute value is Beijing” - Joint Secondary Index, supports prefix query and equality query, such as: joint index of city and street properties of person vertex, you can use
g.V().has("city", "Beijing").has('street', 'Zhongguancun street ')to query all vertices of “city property value is Beijing and street property value is ZhongGuanCun”, org.V().has("city", "Beijing")to query all vertices of “city property value is Beijing”.
The query of Secondary Index is based on the query condition of “yes” or “equal”, and does not support “partial matching”.
- Single Property Secondary Index, support equality query, for example: the secondary index of the city property of the person vertex, you can use
- Range Index supports for range queries of numeric types
- Must be a single number or date attribute, for example: the range index of the age property of the person vertex, you can use
g.V().has("age", P.gt(18))to query the vertices with “age property value greater than 18” . In addition toP.gt(), also supportsP.gte(),P.lte(),P.lt(),P.eq(),P.between(),P.inside()andP.outside()etc.
- Must be a single number or date attribute, for example: the range index of the age property of the person vertex, you can use
- Search Index supports full-text search
- It must be a single text property, such as: full-text index of the address property of the person vertex, you can use
g.V().has("address", Text.contains('building')to query all vertices whose “address property contains a ‘building’”
The query of the Search Index is based on the query condition of “is” or “contains”.
- It must be a single text property, such as: full-text index of the address property of the person vertex, you can use
- Shard Index supports prefix matching + numeric range query
- The shard index of N properties supports range queries with equal prefixes. For example, the shard index of the city and age properties of the person vertex can use
g.V().has("city", "Beijing").has ("age", P.between(18, 30))Query “city property is Beijing and all vertices whose age is greater than or equal to 18 and less than 30”. - When all N properties are text properties in a Shard Index, it is equivalent to Secondary Index.
- When there is only one single number or date property in a Shard Index, it is equivalent to the Range Index.
Shard Index can have any number or date property, but at most one range search condition can be provided when querying, and the prefix properties of the Shard Search conditions must be “equals”.
- The shard index of N properties supports range queries with equal prefixes. For example, the shard index of the city and age properties of the person vertex can use
- Unique Index supports properties uniqueness constraints, that is, the value of properties can be limited to not repeat, and joint indexing is allowed, but querying is not supported now
- The unique index of single or multiple properties cannot be used for query, only the value of the property can be limited, and an error will be reported when there is a duplicate value.
- Secondary Index supports exact matching secondary index, allow to build joint index, joint index supports index prefix search
| interface | indexType | description |
|---|---|---|
| secondary() | Secondary | support prefix search |
| range() | Range | support range(numeric or date type) search |
| search() | Search | support full text search |
| shard() | Shard | support prefix + range(numeric or date type) search |
| unique() | Unique | support unique props value, not support search |
2.5.2 Create IndexLabel
These examples assume a person vertex label with name and age, and a created edge label with date.
First add the indexed properties below; id is a business property, separate from the internal vertex ID.
2.5.3 Delete IndexLabel
2.5.4 Query IndexLabel
3 Graph
3.1 Vertex
Vertices are the most basic elements of a graph, and there can be many vertices in a graph. Here is an example of adding vertices:
- The key to adding vertices is the vertex properties. The number of parameters of the vertex adding function must be an even number and satisfy the order of
key1 -> val1, key2 -> val2 ..., and the order between key-value pairs is free . - The parameter must contain a special key-value pair, namely
T.LABEL -> "val", which is used to define the category of the vertex, so that the program can obtain the schema definition of the VertexLabel from the cache or backend, and then do subsequent constraint checks. The label in the example is defined as person.T.LABELis the constant"label", so the plain string works just as well. - If the vertex type’s ID policy is
AUTOMATIC, users are not allowed to pass in id key-value pairs. - If the ID policy of the vertex type is
CUSTOMIZE_STRING, the user needs to pass in the value of the id of the String type. The key-value pair is like:T.ID, "123456". - If the ID policy of the vertex type is
CUSTOMIZE_NUMBER, the user needs to pass in the value of the id of the Number type. The key-value pair is like:T.ID, 123456. - If the ID policy of the vertex type is
PRIMARY_KEY, the parameters must also contain the name and value of the properties corresponding to theprimaryKeys, if not set an exception will be thrown. For example, theprimaryKeysofpersonisname, in the example, the value ofnameis set tomarko. - For properties that are not nullableKeys, a value must be assigned.
- The remaining parameters are the settings of other properties of the vertex, but they are not required.
- After calling the
addVertexmethod, the vertices are inserted into the backend storage system immediately.
3.2 Edge
After added vertices, edges are also needed to form a complete graph. Here is an example of adding edges:
- The function
addEdge()of the (source) vertex is to add an edge(relationship) between itself and another vertex. The first parameter of the function is the label of the edge, and the second parameter is the target vertex. The position and order of these two parameters are fixed. The subsequent parameters are the order ofkey1 -> val1, key2 -> val2 ..., set the properties of the edge, and the key-value pair order is free. - The source and target vertices must conform to the definitions of source-label and target label in EdgeLabel, and cannot be added arbitrarily.
- For properties that are not nullableKeys, a value must be assigned.
Note: When frequency is multiple, the value of the property type corresponding to sortKeys must be set.
4 GraphSpace
The client can manage multiple GraphSpaces in one physical deployment, and each GraphSpace can contain multiple graphs. When no GraphSpace is specified, it uses DEFAULT.
GraphSpaces need a server of core version 1.7.0 or later. Against an older server the client falls back to a legacy profile, and hugeClient.supportsGraphSpace() returns false.
4.1 Create GraphSpace
4.2 GraphSpace Interface Summary
| Category | Interface | Description |
|---|---|---|
| Manager - Query | listGraphSpace() | Get all GraphSpace names |
| listProfile() / listProfile(String prefix) | Get GraphSpace profiles | |
| getGraphSpace(String name) | Get the specified GraphSpace | |
| getDefault() | Get the default GraphSpace | |
| Manager - Create/Update | createGraphSpace(GraphSpace) | Create a GraphSpace |
| updateGraphSpace(GraphSpace) | Update configuration | |
| setDefault(String name) | Set the default GraphSpace | |
| Manager - Delete | deleteGraphSpace(String name) | Delete the specified GraphSpace |
| Manager - Default role | setDefaultRole(String name, String user, String role) | Grant a default role, optionally scoped to a graph with a fourth argument |
| checkDefaultRole(String name, String user, String role) | Check a default role, optionally scoped to a graph with a fourth argument | |
| deleteDefaultRole(String name, String user, String role) | Revoke a default role, optionally scoped to a graph with a fourth argument | |
| GraphSpace - Properties | getName() / getNickname() / getDescription() | Get name / nickname / description |
| getGraphNumberUsed() / getRoleNumberUsed() | Get the number of graphs / roles in use | |
| getCpuUsed() / getMemoryUsed() / getStorageUsed() | Get the resources in use | |
| getCreateTime() / getUpdateTime() | Get the creation / update time | |
| GraphSpace - Configuration | setDescription(String) / setNickname(String) | Set description / nickname |
| setMaxGraphNumber(int) / setMaxRoleNumber(int) | Set the maximum number of graphs / roles | |
| setCpuLimit(int) / setMemoryLimit(int) / setStorageLimit(int) | Set the resource quotas | |
| setConfigs(Map<String, Object>) | Set extra configuration entries |
5 Simple Example
Simple examples can reference HugeGraph-Client
5.3 - Gremlin-Console
Gremlin-Console is an interactive client developed by TinkerPop. Users can use this client to perform various operations on Graph. There are two main usage modes:
- Stand-alone offline mode
- Client/Server mode
Note: Gremlin-Console is only for users to quickly get started and experience, it is not recommended for use in production environments.
1 Stand-alone offline mode
Since the lib directory already contains the HugeCore jar package, and HugeGraph-Server has been registered in the Console as a plug-in, the users can write a groovy script directly to call the code of HugeGraph-Core, and then hand it over to the parsing engine in Gremlin-Console for execution. As a result, the users can operate the graph without starting the Server.
Here is an example, first modify the hugegraph.properties configuration to use the Memory backend (using other backends may encounter some initialization issues):
Then enter the following command:
The
--here will be parsed by getopts as the last option, allowing the subsequent options to be passed to Gremlin-Console for processing.-irepresentsExecute the specified script and leave the console open on completion. For more options, you can refer to the source code of Gremlin-Console.
example.groovy is an example script under the scripts directory. This script inserts some data and queries the number of vertices and edges in the graph at the end.
You can continue to enter Gremlin statements to operate on the graph:
For more Gremlin statements, please refer to Tinkerpop Official Website
2 Client/Server mode
Gremlin Console connects to HugeGraph Server through WebSocket. Use the Console and conf/remote.yaml bundled with the same Server version.
Keep the serializer settings from that file; change only the address and, if authentication is enabled, credentials.
Older configuration files may reference serializer classes that no longer exist.
Prepare the connection configuration and start Server.
Check the
hostandportinconf/gremlin-server.yaml. The defaultWsAndHttpChannelizerhandles both WebSocket and HTTP requests; it does not need to be changed. Inconf/remote.yaml,hostsmust contain the Server address reachable from the Console, andportmust match the Gremlin port (default8182, not the REST port8080). Start Server following the quick start.The current master configuration uses GraphBinary V1 with HugeGraph’s type registry:
If Server requires authentication, add your actual credentials to the same file:
The bundled
remote-objects.yamlandgremlin-driver-settings.yamluse the same serializer settings. Keep them aligned if you use them.Start Console from the Server distribution directory and create a client with a traversal alias.
Server binds the graph
hugegraphin graphspaceDEFAULTasDEFAULT-hugegraph, and its traversal source as__g_DEFAULT-hugegraph. Because hyphens are invalid in Groovy variable names, use.alias(['g': '__g_DEFAULT-hugegraph'])to map it togwhen creating the driver client:Submit queries through the client.
Both return
6if the sample graph was preloaded at Server startup (other graphs return their actual vertex count). When submitting scripts viaclient.submit(), no:>prefix is needed.Close the client and cluster when finished.
Alternatively, you can connect using Gremlin Console’s built-in :remote command:
When connected with :remote, expressions prefixed with :> are sent to the remote Server, while normal expressions execute locally in Console.
For more information, see the TinkerPop Gremlin Console reference.
6 - GUIDES
This section covers HugeGraph architecture, design, backup and restore, plugin development, security settings, and frequently asked questions.
6.1 - HugeGraph Architecture Overview
Full-Stack Components
The HugeGraph ecosystem combines a graph database, graph computing engines, graph AI, and a toolchain with distinct responsibilities. HugeGraph Server provides OLTP graph database services; HugeGraph-Computer and Vermeer are independent OLAP engines; HugeGraph-AI provides graph AI capabilities. Toolchain clients, import tools, visualization, and operations tools provide entry points for applications and operators.
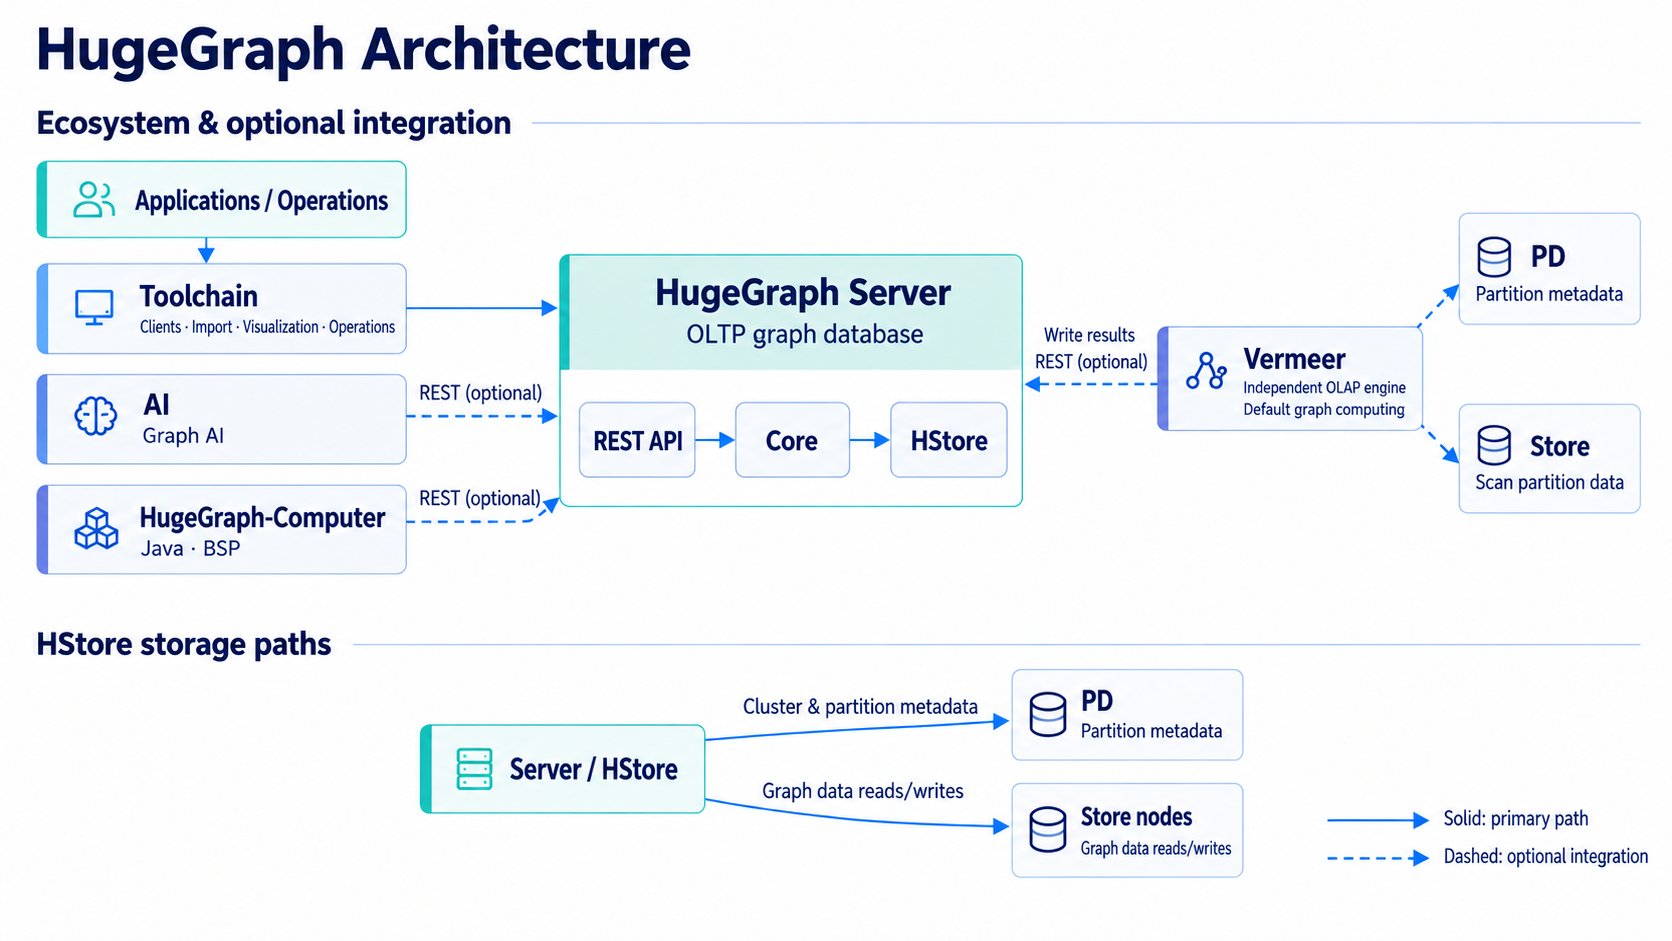
Figure: Server uses HStore as an example backend; see the Mermaid diagram below for independent backends such as RocksDB and HBase. Vermeer and HugeGraph-Computer are independent OLAP engines. Dashed arrows indicate optional integration.
Ecosystem Integration
flowchart TB
Apps["Applications / Operations"] --> Toolchain["Toolchain"] --> Server["Server REST API"]
AI["AI"] -. REST .-> Server
Computer["Computer"] -. REST .-> Server
Vermeer["Vermeer"] -. PD .-> PD["PD"]
Vermeer -. Scan .-> Store["Store"]
Vermeer -. Write .-> ServerOptional connections do not mean every AI, Computer, or Vermeer task must connect to Server, PD, or Store. Computer and AI read and write through the Server REST API. Vermeer’s HugeGraph input queries PD for partition metadata and scans HStore partitions directly through Store. With HugeGraph result output, it writes results back through the Server REST API.
Server Internals
flowchart TB
API["REST API / Gremlin"] --> Core["Core"] --> Adapter["Backend adapter"]
Adapter --> RocksDB["RocksDB"]
Adapter --> HBase["HBase"]
Adapter --> HStore["HStore"]
HStore --> PD["PD"]
HStore --> Store["Store"]Server REST APIs and Gremlin send requests to Core, which reads and writes through a backend adapter. RocksDB and HBase are independent backends. The HStore adapter obtains cluster metadata and partition information from PD and sends graph operations to Store nodes. PD manages metadata and partitions; it does not carry graph data reads and writes.
Current Server implementations include RocksDB, HBase, HStore, and memory backends. Memory is for testing or temporary use, not a persistent production deployment. See the Server quick start for production deployment options.
Main Toolchain components:
- Hubble: Connects to the graph database through a web interface to manage schemas, import data, and run queries.
- Loader: Converts multiple data sources and imports them into graph data in batches.
- Tools: Provides command-line deployment, management, backup, and restore operations.
- Client: Wraps Server connections, schema management, graph reads and writes, and queries. Clients are available for Java, Python, and Go; a Rust client is under development.
Independent Graph Computing Engines
- Vermeer: Provides independent graph computing services and algorithm APIs.
- HugeGraph-Computer: A Java distributed graph computing engine based on BSP/Pregel.
Historical Architecture
The following diagram is retained for historical reference. Its depiction of Server providing both OLTP and OLAP, and of various old backends, does not describe current master.
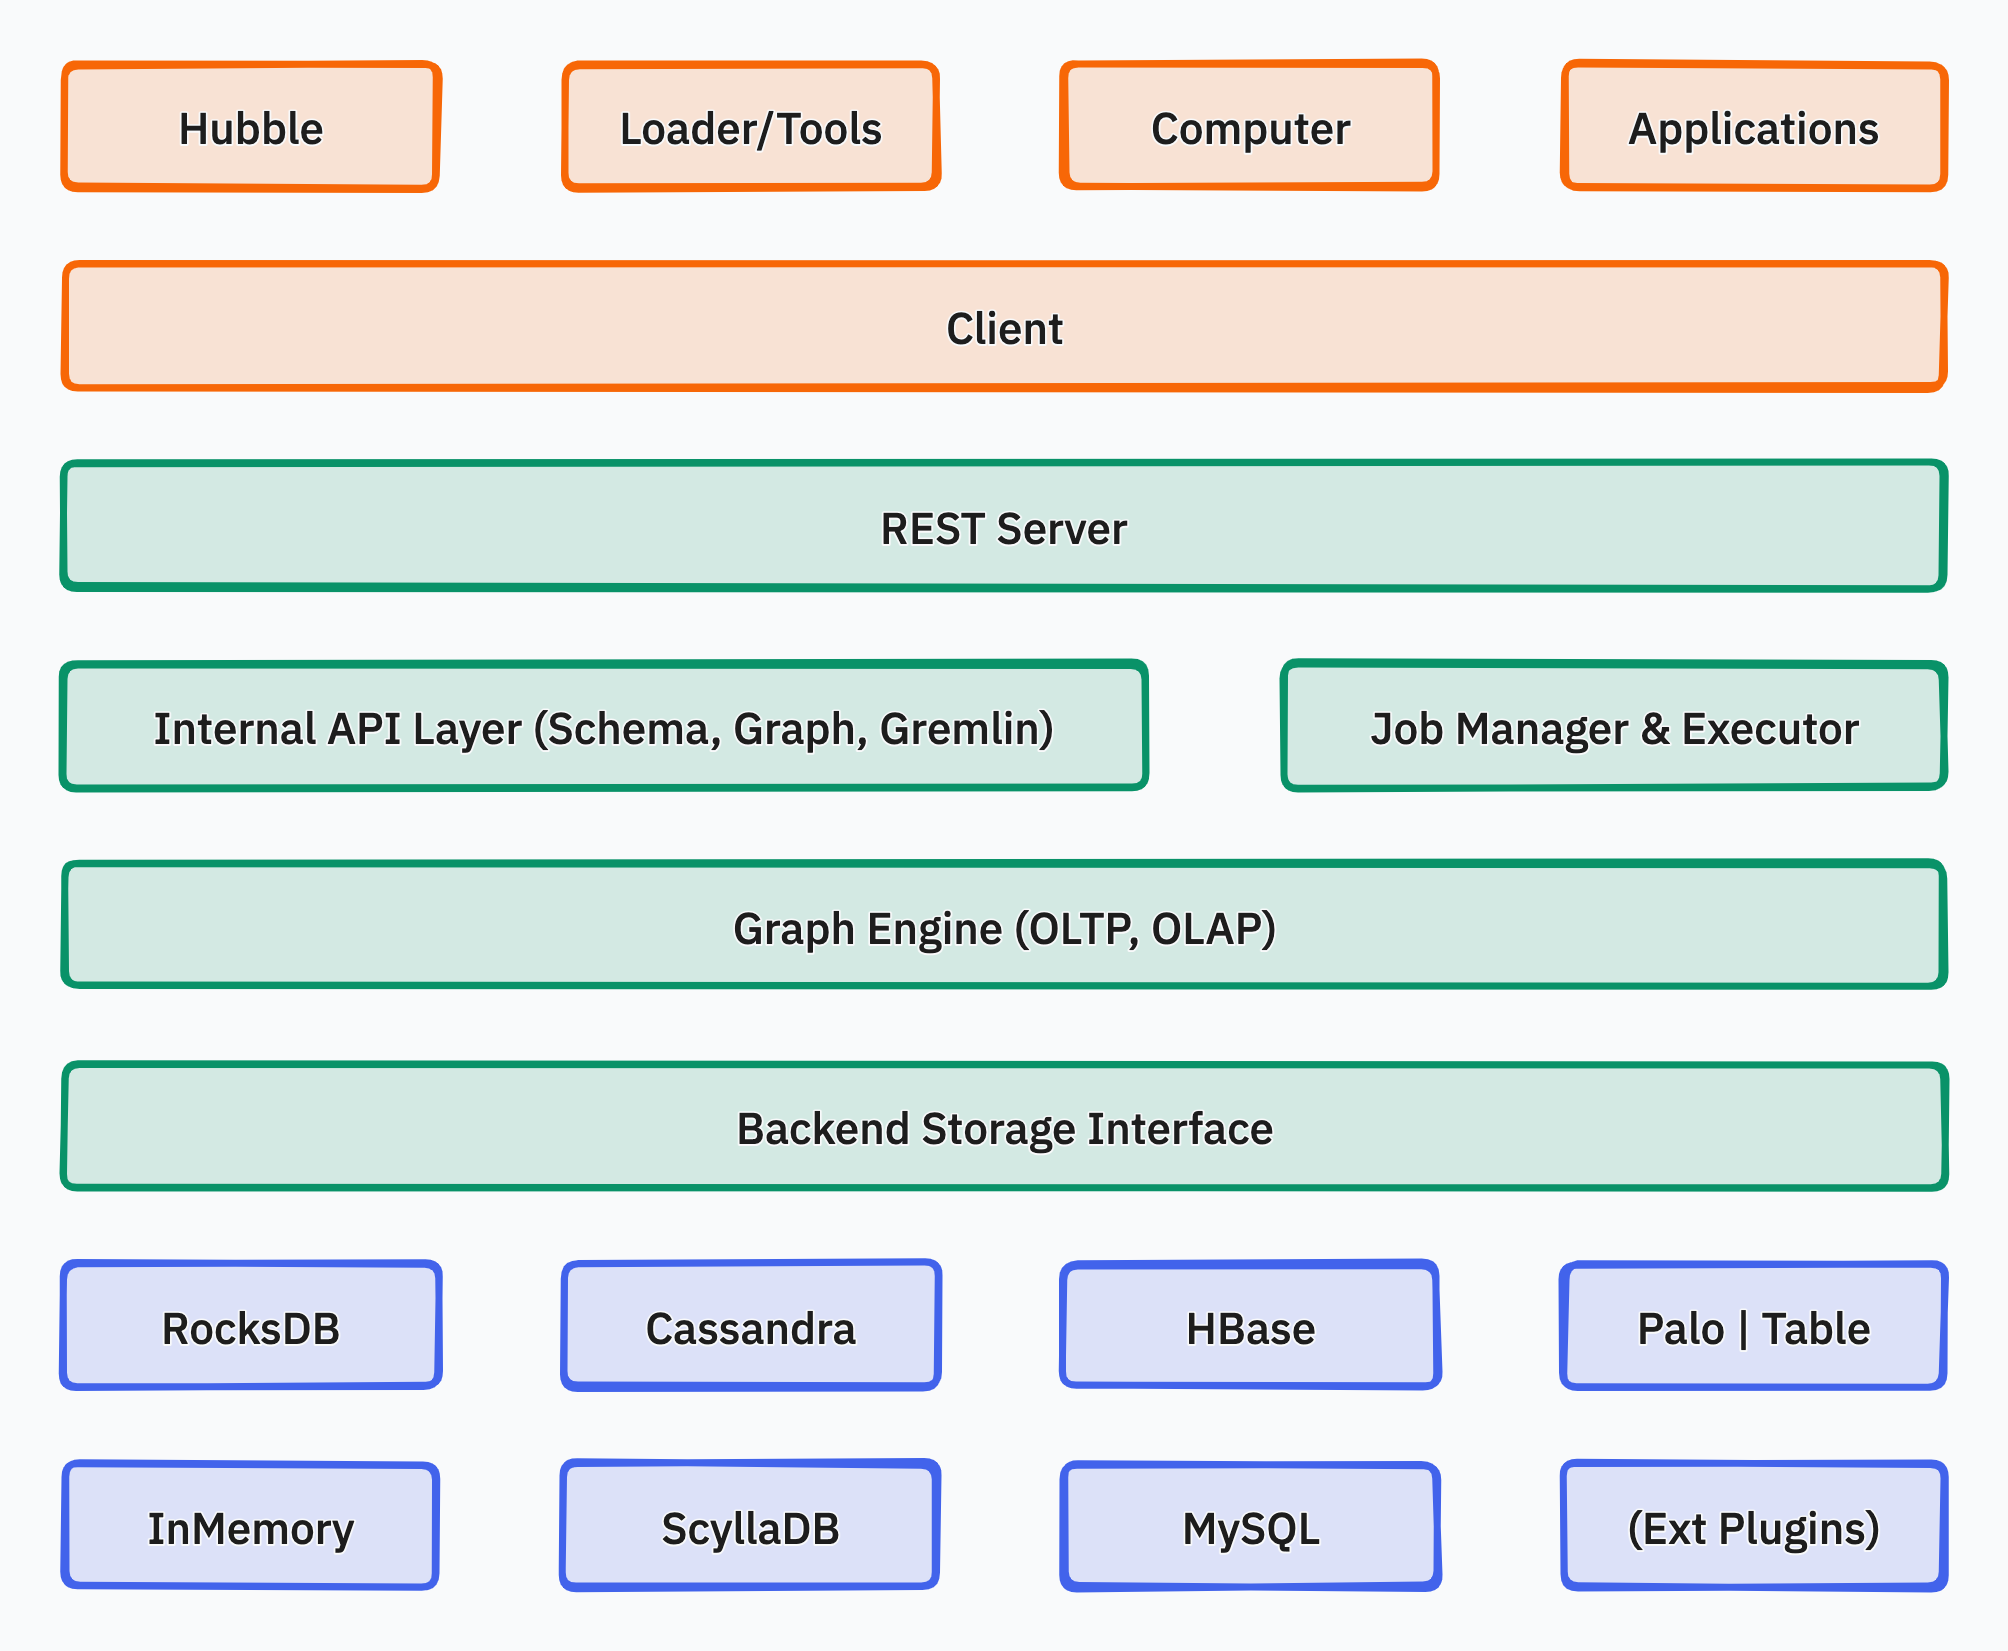
6.2 - HugeGraph Design Concepts
1. Property Graph
Version note: This page retains early design material. The property graph model and vertex ID strategies remain consistent with current master, but figures, partitioning conclusions, and transaction descriptions have the scope stated in each section. They are not current deployment or storage implementation guarantees.
There are two common graph data representation models, namely the RDF (Resource Description Framework) model and the Property Graph (Property Graph) model. Both RDF and Property Graph are the most basic and well-known graph representation modes, and both can represent entity-relationship modeling of various graphs. RDF is a W3C standard, while Property Graph is an industry standard and is widely supported by graph database vendors. HugeGraph currently uses Property Graph.
HugeGraph uses the property graph model. This person-and-book example shows labels and properties on vertices and directed edges. It is a logical model, not an illustration of the current internal data layout.
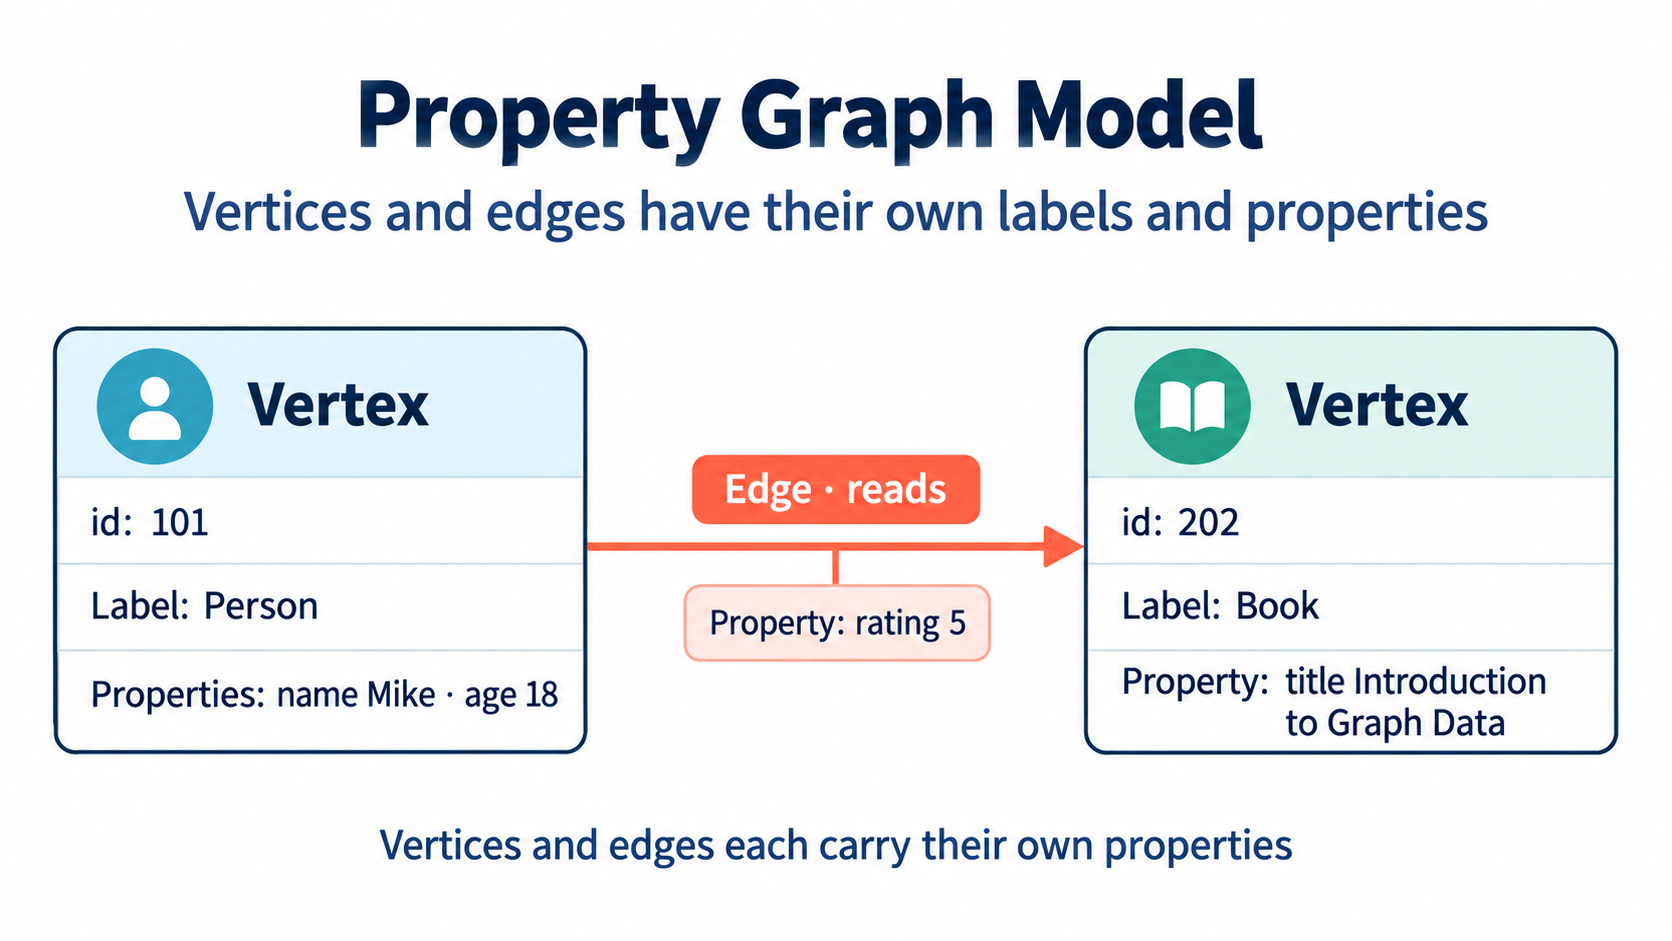
Figure: Vertices and edges each carry their own labels and properties.
Inside HugeGraph, each vertex/edge is identified by a unique VertexId/EdgeId, and the attributes are stored inside the corresponding vertex/edge. The relationship/mapping between vertices is stored through edges.
When the vertex attribute value is stored by edge pointer, if you want to update a vertex-specific attribute value, you can directly write it by overwriting. The disadvantage is that the VertexId is redundantly stored; if you want to update the attribute of the relationship, you need to use the read-and-modify method , read all attributes first, modify some attributes, and then write to the storage system, the update efficiency is low. According to experience, there are more requirements for modifying vertex attributes, but less for edge attributes. For example, calculations such as PageRank and Graph Cluster require frequent modification of vertex attribute values.
2. Graph Partition Scheme
Version note: The Edge Cut and Vertex Cut comparison is historical design background. Current PD and Store code does not define “HugeGraph uses Edge Cut” as an implementation contract. Do not use that conclusion to describe current partitioning or replication; see the HStore quick start for current distributed deployments.
For distributed graph databases, there are two partition storage methods for graphs: Edge Cut and Vertex Cut, as shown in the following figure. When using the Edge Cut method to store graphs, any vertex will only appear on one machine, while edges may be distributed on different machines. This storage method may lead to multiple storage of edges. When using the Vertex Cut method to store graphs, any edge will only appear on one machine, and each same point may be distributed to different machines. This storage method may result in multiple storage of vertices.
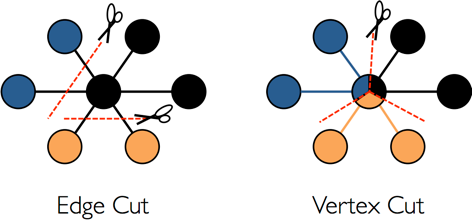
The EdgeCut partition scheme can support high-performance insert and update operations, while the VertexCut partition scheme is more suitable for static graph query analysis, so EdgeCut is suitable for OLTP graph query, and VertexCut is more suitable for OLAP graph query. Early design material described HugeGraph as using Edge Cut. That historical conclusion is retained here and does not describe the current partitioning implementation.
3. VertexId Strategy
Vertex of HugeGraph supports four ID strategies. Different VertexLabels in the same graph database can use different Id strategies. Currently, the Id strategies supported by HugeGraph are:
- Automatic generation (AUTOMATIC): Use the Snowflake algorithm to automatically generate a globally unique Id, Long type;
- Primary Key (PRIMARY_KEY): Generate Id through VertexLabel+PrimaryKeyValues, String type;
- Custom (CUSTOMIZE_STRING|CUSTOMIZE_NUMBER): User-defined Id, which is divided into two types: String and Long, and you need to ensure the uniqueness of the Id yourself;
- Custom UUID (CUSTOMIZE_UUID): User-defined Id in UUID form, you need to ensure the uniqueness of the Id yourself;
The default Id policy is AUTOMATIC, if the user calls the primaryKeys() method and sets the correct PrimaryKeys, the PRIMARY_KEY policy is automatically enabled. After enabling the PRIMARY_KEY strategy, HugeGraph can implement data deduplication based on PrimaryKeys.
- AUTOMATIC ID Policy
- PRIMARY_KEY ID policy
- CUSTOMIZE_STRING ID Policy
- CUSTOMIZE_NUMBER ID Policy
- CUSTOMIZE_UUID ID Policy
If users need Vertex deduplication, there are three options:
- Adopt PRIMARY_KEY strategy, automatic overwriting, suitable for batch insertion of large amount of data, users cannot know whether overwriting has occurred
- Adopt AUTOMATIC strategy, read-and-modify, suitable for small data insertion, users can clearly know whether overwriting occurs
- Using the CUSTOMIZE_STRING or CUSTOMIZE_NUMBER strategy, the user guarantees the uniqueness
4. EdgeId policy
Current implementation: The four-part composition below is a historical simplification. Current
EdgeIdalso distinguishes edge direction and parent/child edge labels. SeeEdgeIdin the Server source; use the source for your version when relying on ID formats or persistent keys.
The EdgeId of HugeGraph is composed of srcVertexId + edgeLabel + sortKey + tgtVertexId. Among them sortKey is an important concept of HugeGraph.
There are two reasons for adding sortKey to Edge as the unique ID of Edge:
- If there are multiple edges of the same Label between two vertices, they can be distinguished by
sortKey - For SuperNode nodes, edges can be sorted and truncated by
sortKey.
Since EdgeId is composed of srcVertexId + edgeLabel + sortKey + tgtVertexId, HugeGraph will automatically overwrite when the same Edge is inserted
multiple times to achieve deduplication. It should be noted that the properties of Edge will also be overwritten in the batch insert mode.
In addition, because HugeGraph’s EdgeId adopts an automatic deduplication strategy, HugeGraph considers that there is only one edge in the case of self-loop (a vertex has an edge pointing to itself), while a graph database that uses the AUTOMATIC strategy (TitanDB for example) considers that the graph has two edges.
The edges of HugeGraph only support directed edges, and undirected edges can be realized by creating two edges, Out and In.
5. HugeGraph transaction overview
Version scope: The isolation-level, thread-binding, and backend atomicity descriptions below are historical implementation notes. Transaction isolation and rollback boundaries depend on the backend implementation; do not treat these historical descriptions as cross-backend guarantees.
TinkerPop transaction overview
A TinkerPop transaction refers to a unit of work that performs operations on the database. A set of operations within a transaction either succeeds or all fail. For a detailed introduction, please refer to the official documentation of TinkerPop: http://tinkerpop.apache.org/docs/current/reference/#transactions
TinkerPop transaction interfaces
- open open transaction
- commit commit transaction
- rollback rollback transaction
- close closes the transaction
TinkerPop transaction specification
- The transaction must be explicitly committed before it can take effect (the modification operation can only be seen by the query in this transaction if it is not committed)
- A transaction must be opened before it can be committed or rolled back
- If the transaction setting is automatically turned on, there is no need to explicitly turn it on (the default method), if it is set to be turned on manually, it must be turned on explicitly
- When the transaction is closed, you can set three modes: automatic commit, automatic rollback (default mode), manual (explicit shutdown is prohibited), etc.
- The transaction must be closed after committing or rolling back
- The transaction must be open after the query
- Transactions (non-threaded tx) must be thread-isolated, and multi-threaded operations on the same transaction do not affect each other
For more transaction specification use cases, see: Transaction Test
HugeGraph transaction implementation
- All operations in a transaction either succeed or fail
- A transaction can only read what has been committed by another transaction (Read committed)
- All uncommitted operations can be queried in this transaction, including:
- Adding a vertex can query the vertex
- Delete a vertex to filter out the vertex
- Deleting a vertex can filter out the related edges of the vertex
- Adding an edge can query the edge
- Delete edge can filter out the edge
- Adding/modifying (vertex, edge) attributes can take effect when querying
- Delete (vertex, edge) attributes can take effect at query time
- All uncommitted operations become invalid after the transaction is rolled back, including:
- Adding and deleting vertices and edges
- Addition/modification, deletion of attributes
Example: One transaction cannot read another transaction’s uncommitted content
Principle of transaction realization
- The server internally realizes isolation by binding transactions to threads (ThreadLocal)
- The uncommitted content of this transaction overwrites the old data in chronological order for this transaction to query the latest version of data
- The bottom layer relies on the back-end database to ensure transaction atomicity (for example, the batch interface of RocksDB guarantees atomicity)
Notice
REST APIs do not expose a separate transaction lifecycle interface; write APIs invoke the relevant Server-side transaction commit logic.
TinkerPop API allows open transactions, which are automatically closed when the request is completed (Gremlin Server forces close)
6.3 - HugeGraph Plugin mechanism and plug-in extension process
For plugins targeting the planned 1.8.0 shared-foundation API, follow the Java/SPI migration guide and recompile against matching artifacts. The examples below describe the 1.7.0 API.
Background
- HugeGraph is not only open source and open, but also simple and easy to use. General users can easily add plug-in extension functions without changing the source code.
- HugeGraph supports a variety of built-in storage backends, and also allows users to extend custom backends without changing the existing source code.
- HugeGraph supports full-text search. The full-text search function involves word segmentation in various languages. Currently, there are 7 built-in word breakers (ansj, hanlp, smartcn, jieba, jcseg, mmseg4j, ikanalyzer), and it also allows users to expand custom word breakers without changing the existing source code.
Scalable dimension
Currently, the plug-in method provides extensions in the following dimensions:
- backend storage
- serializer
- Custom configuration items
- tokenizer
Plug-in implementation mechanism
- HugeGraph provides a plug-in interface HugeGraphPlugin, which supports plug-in through the Java SPI mechanism
- HugeGraph provides four extension registration functions as static methods on HugeGraphPlugin: registerOptions(), registerBackend(), registerSerializer(), registerAnalyzer()
- The plug-in implementer implements the corresponding Options, Backend, Serializer or Analyzer interface
- The plug-in implementer implements register()the method of the HugeGraphPlugin interface, registers the specific implementation class listed in the above point 3 in this method, and packs it into a jar package
- The plug-in user puts the jar package in the HugeGraph Server installation directory plugins, modifies the relevant configuration items to the plug-in custom value, and restarts to take effect
Plug-in implementation process example
1 Create a new maven project
1.1 Name the project name: hugegraph-plugin-demo
1.2 Add hugegraph-core Jar package dependencies
The Maven pom.xml is shown below. Match hugegraph.version to the target Server version; this example uses the current master version 1.7.0:
2 Realize extended functions
2.1 Extending a custom backend
2.1.1 Implement the interface BackendStoreProvider
- Realizable interfaces:
org.apache.hugegraph.backend.store.BackendStoreProvider - Or inherit an abstract class:
org.apache.hugegraph.backend.store.AbstractBackendStoreProvider
Take the RocksDB backend RocksDBStoreProvider as an example:
2.1.2 Implement interface BackendStore
The main abstract methods of BackendStore are shown below; default helper methods are omitted:
2.1.3 Extending custom serializers
The serializer must inherit the abstract class: org.apache.hugegraph.backend.serializer.AbstractSerializer
( implements GraphSerializer, SchemaSerializer) The main interface is defined as follows:
2.1.4 Extend custom configuration items
When adding a custom backend, it may be necessary to add new configuration items. The implementation process mainly includes:
- Add a configuration item container class and implement the interface
org.apache.hugegraph.config.OptionHolder - Provide a singleton method
public static OptionHolder instance(), and call the method when the object is initializedOptionHolder.registerOptions() - Add configuration item declaration, single-value configuration item type is
ConfigOption, multi-value configuration item type isConfigListOption
Take the RocksDB configuration item definition as an example:
2.2 Extend custom tokenizer
The tokenizer needs to implement the interface org.apache.hugegraph.analyzer.Analyzer, take implementing a SpaceAnalyzer space tokenizer as an example.
3. Implement the plug-in interface and register it
The plug-in registration entry is HugeGraphPlugin.register(), the custom plug-in must implement this interface method, and register the extension
items defined above inside it. The interface org.apache.hugegraph.plugin.HugeGraphPlugin is defined as follows:
And HugeGraphPlugin provides 4 static methods for registering extensions:
- registerOptions(String name, String classPath): register configuration items
- registerBackend(String name, String classPath): register backend (BackendStoreProvider)
- registerSerializer(String name, String classPath): register serializer
- registerAnalyzer(String name, String classPath): register tokenizer
The following is an example of registering the SpaceAnalyzer tokenizer:
4. Configure SPI entry
- Make sure the services directory exists: hugegraph-plugin-demo/resources/META-INF/services
- Create a text file in the services directory: org.apache.hugegraph.plugin.HugeGraphPlugin
- The content of the file is as follows: org.apache.hugegraph.plugin.DemoPlugin
5. Make Jar package
Through maven packaging, execute the command in the project directory mvn package, and a Jar package file will be generated in the
target directory. Copy the Jar package to the plugins directory when using it, and restart the service to take effect.
6.4 - HugeGraph Toolchain Local Testing Guide
This guide helps developers run HugeGraph toolchain tests locally.
1. Core Concepts
1.1 Core Dependency: HugeGraph Server
Integration and functional tests of the toolchain depend on HugeGraph Server, including Client, Loader, Hubble, Spark Connector, Tools, and other components.
1.2 Test Types
- Unit Tests: Test individual functions/methods, no external dependencies required
- API Tests (ApiTestSuite): Test API interfaces, requires running HugeGraph Server
- Functional Tests (FuncTestSuite): End-to-end tests, require complete system environment
2. Environment Setup
2.1 System Requirements
- Operating System: Linux / macOS (Windows use WSL2)
- JDK: >= 11, configure
JAVA_HOME - Maven: >= 3.6
- Python: >= 3.11 (only required for Hubble tests)
2.2 Clone Code
3. Deploy Test Environment
Deployment Options
- Script Deployment: Specify a Server commit to reproduce the server version used by CI
- Docker Deployment: Suitable for quick checks; if tests fail, first verify compatibility between the image and Toolchain
For detailed installation instructions, refer to Community Documentation
3.1 Script Deployment
Parameter Description
$COMMIT_ID: Specify Server source code Git Commit ID$DB_DATABASE/$DB_PASS: MySQL database name and password for Loader JDBC tests
Deployment Steps
1. Install HugeGraph Server
- The script starts HTTP and HTTPS instances on ports 8080 and 8443 and configures
admin/paauthentication. - Ensure both ports are available before running it.
2. Install Optional Dependencies
3. Health Check
3.2 Docker Deployment
Note: Docker images may have version lag, use script deployment if encountering compatibility issues
Quick Start
docker-compose Configuration (Optional)
Complete configuration example including Server, MySQL, Hadoop services (requires Docker Compose V2):
Hadoop Configuration Mounts
Create a ./config folder in the same directory as docker-compose.yml to mount Hadoop configuration files. You can skip this step if HDFS testing is not required.
📁 ./config/core-site.xml content:
📁 ./config/hdfs-site.xml content:
Docker Operations
4. Run Tests
Test process for each tool:
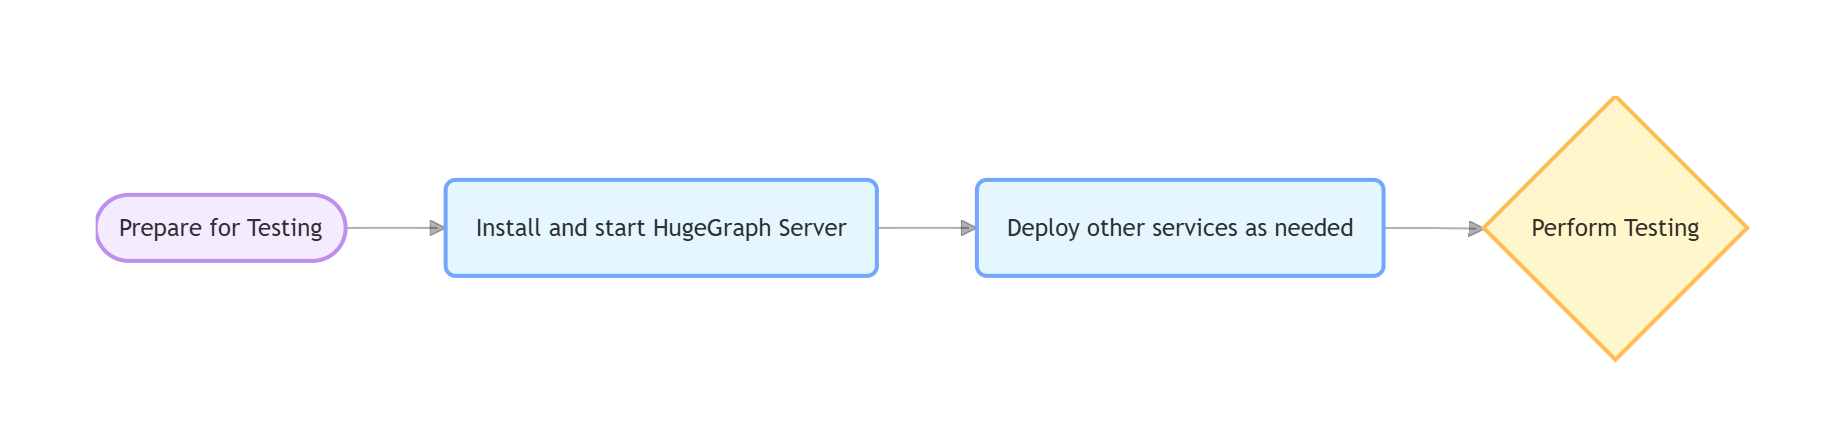
4.1 hugegraph-client
Compile
Dependent Services
Start HugeGraph Server (refer to Section 3)
Server Authentication Configuration
ApiTest requires authentication. No additional configuration is needed when using the script in Section 3.1. For a manually deployed Server, the authentication settings and test credentials must match the test code.
Run Tests
Check Server log if tests fail:
logs/hugegraph-server.log
4.2 hugegraph-loader
Compile
Dependent Services
- Required: HugeGraph Server
- Optional: Hadoop (HDFS tests), MySQL (JDBC tests); Kafka tests use Testcontainers to start Kafka and also require an available Docker daemon.
Run Tests
4.3 hugegraph-hubble
Compile
Dependent Services
1. Start Server (refer to Section 3)
2. Python Environment
3. Build and Verify
Run Tests
4.4 hugegraph-spark-connector
Compile
Run Tests
4.5 hugegraph-tools
Compile
Run Tests
5. Common Issues
Service Connection Issues
If Server, MySQL, or Hadoop cannot be reached:
- Confirm services are running (Server must be on port 8080)
- Check port usage:
lsof -i:8080 - Docker check:
docker compose psanddocker compose logs
Configuration Issues
If files cannot be found or parameters are invalid:
- Check environment variables:
echo $COMMIT_ID - Script permissions:
chmod +x hugegraph-*/assembly/travis/*.sh
HDFS Test Failures
- Confirm NameNode/DataNode running normally
- Check Hadoop logs
- Verify HDFS connection:
hdfs dfsadmin -report
JDBC Test Failures
- Confirm MySQL running normally
- Verify database connection:
mysql -u root -p$DB_PASS - Check MySQL logs
6. References
- HugeGraph GitHub Repository: https://github.com/apache/hugegraph
- HugeGraph Toolchain GitHub Repository: https://github.com/apache/hugegraph-toolchain
- HugeGraph Server Documentation: https://hugegraph.apache.org/docs/quickstart/hugegraph/hugegraph-server/
- CI Configuration:
.github/workflows/*-ci.yml - Dependency Installation Scripts:
hugegraph-*/assembly/travis/
6.5 - Backup and Restore
Description
Backup exports a graph’s schema, vertices, and edges as JSON data. Restore imports that data into a target graph. These HugeGraph-Tools commands support migration, recovery after an upgrade, and graph merging.
Backup
Backup runs in any graph mode. Pausing source writes before exporting is recommended to keep schema, vertices, and edges consistent
(paginated read APIs do not provide a global transactional snapshot).
Note: backup -t all only exports schema and graph data, excluding deployment configurations and user permissions.
Restore
Before restoring data, switch the target graph to the appropriate mode.
Normal read/write operations use NONE mode; note that LOADING mode cannot be used for restore.
| Target | Mode | Schema IDs | Vertex and edge IDs |
|---|---|---|---|
| New graph without schema or data | RESTORING | Use IDs from the backup | Use IDs from the backup |
| Existing graph to merge into | MERGING | Use target schema IDs, creating schema if needed | Some IDs change with target schema; see below |
In MERGING, Tools recomputes PRIMARY_KEY vertex IDs using the target label IDs and updates connected edge endpoints and IDs.
It retains AUTOMATIC and custom vertex IDs. The merge reuses schema with matching names.
Check that their definitions are compatible and that retained vertex IDs do not conflict.
It does not resolve arbitrary schema or data conflicts. Test on a separate target before merging production data.
Instructions
Prepare HugeGraph-Tools compatible with your Server version, then run the commands from the Tools root directory.
This example restores a source graph on port 8080 to an empty target on port 8081.
Both Servers and the target graph must already exist and be running. Adjust the addresses and graph names for your deployment.
With authentication enabled, add --user <user> --password <password> before the subcommand in each Tools command.
The account needs the relevant graph access and graph-mode management permissions.
See the Tools reference for connection and credential options.
Backup
Pause source writes, then export all schema, vertices, and edges.
An explicit -d is the backup directory itself; the graph name is not appended. Use a separate directory for each backup to avoid mixing old files.
Retain the complete directory, including compressed files. Restore reads the JSON backup formats supported by Tools.
Restore
This sequence uses RESTORING. To merge, use MERGING after the compatibility checks above.
Pause application writes to the target during maintenance.
Record the original mode, then switch it.
A graph in normal use should be in
NONEmode. SetORIGINAL_MODEto the value returned by the query, such asNONEbelow. If another task is usingRESTORING,MERGING, orLOADING, coordinate with that task before changing its mode.Restore the data.
Check command output and the restore results for each type. On failure, retain the backup directory and logs to inspect target state. Restore does not automatically roll back committed writes; do not re-run on a partially restored graph without inspection.
Restore the original mode.
Reset the mode using
ORIGINAL_MODE, recorded in the first step.Regardless of whether restore succeeds or fails, always restore the graph mode back to its original state (usually
NONE). On failure, preserve the logs and state, and re-prepare the target graph before resuming business writes.
After resetting the mode, compare vertex and edge counts on both graphs.
Each pair of counts should match exactly. We also recommend using the Schema API to verify metadata definitions, and sampling vertex and edge properties and endpoints to ensure complete data integrity.
Help
For additional options on compression, concurrency, and selective type backup, see the Tools reference. Before performing cross-major-version restores, verify backup file compatibility in a test environment first.
API description for Backup/Restore usage and implementation
Backup
Backup exports data through the schema, vertex, and edge list GET APIs.
Restore
Restore imports data through the schema, vertex, and edge creation APIs. See the mode table for ID behavior.
RESTORING accepts schema IDs; MERGING does not. Both accept retained AUTOMATIC vertex IDs.
Normal NONE mode does not accept these ID settings required for restore.
View the mode of a graph
When authentication is enabled, graph read permission is required (space_member or the graph owner).
Method & Url
Response Status
Response Body
Valid graph modes are NONE, RESTORING, MERGING, and LOADING.
Set the mode of a graph
When authentication is enabled, graph-space management permission (space) is required; administrators can satisfy it through permission inheritance.
Method & Url
Request Body
Valid graph modes are NONE, RESTORING, MERGING, and LOADING.
Response Status
Response Body
6.6 - HugeGraph Docker Cluster Guide
Overview
Docker Compose provides a quick way to run a complete HugeGraph distributed cluster (PD + Store + Server) on Linux or macOS.
Prerequisites
- Docker Engine 20.10+ or Docker Desktop 4.x+
- Docker Compose v2
- For a three-node cluster on macOS, allocate at least 12 GB of memory (Settings → Resources → Memory). Adjust resources to suit other platforms.
Tested environments: Linux (native Docker) and macOS (Docker Desktop on ARM M4).
Compose Files
The HugeGraph repository provides four Compose files in docker/:
| File | Services | Use case |
|---|---|---|
docker-compose.yml | 1 RocksDB Server + 1 Hubble | Default standalone Quick Start; recommended starting point |
docker-compose-hstore.yml | 1 PD + 1 Store + 1 Server + 1 Hubble | Local distributed development |
docker-compose-3pd-3store-3server.yml | 3 PD + 3 Store + 3 Server + 1 Hubble | HA reference and evaluation |
docker-compose.dev.yml | Override only | Source-build override for the minimal HStore topology; always combine with docker-compose-hstore.yml |
Standalone uses hugegraph/hugegraph:${HUGEGRAPH_VERSION:-latest}; HStore uses matching hugegraph/pd, hugegraph/store, and hugegraph/server tags. Hubble is selected separately by ${HUBBLE_IMAGE:-hugegraph/hubble:latest}.
The following steps assume you have cloned the
hugegraphrepository, or at least itsdocker/directory.
HStore and HA instructions use current master Compose files and require PD, Store, and Server images built from the same master source. Do not combine these files with HStore component images tagged 1.7.0. The standalone example separately pins hugegraph/hugegraph:1.7.0.
Authentication Environment
This .env template applies to current master Compose. Angle-bracket values and replace-with-your-password are placeholders: replace them before loading the file or starting services. Follow the master authentication environment instructions to generate .env, then replace the administrator password placeholder:
For master HStore and HA topologies, HG_PD_AUTH_SECRET_KEY is the PD REST Basic password, shared by all PD nodes, Server, and Hubble. Current master PD Docker images require it. Hubble does not read .env directly: generate the local configuration for its topology using this value before startup, as described below. Do not commit .env or generated .local.properties files.
A nonempty HUGEGRAPH_ADMIN_PASSWORD enables Server authentication through PASSWORD; Hubble detects this mode through the Server API. It initializes the built-in admin password only on first initialization. An unset or empty value disables authentication and is suitable only for trusted local environments.
Current master Compose passes HUGEGRAPH_AUTH_TOKEN_SECRET as HG_SERVER_AUTH_TOKEN_SECRET. A shared secret lets master Server replicas verify the same tokens and retain token validity after container recreation; HA Compose requires an explicit secret. The standalone hugegraph/hugegraph:1.7.0 entrypoint enables authentication through PASSWORD but ignores HG_SERVER_AUTH_TOKEN_SECRET, so this .env variable does not fix its JWT secret. For a stable JWT secret in 1.7.0, explicitly set auth.token_secret in its authentication graph configuration, conf/graphs/hugegraph.properties, and persist that file across container replacement. See the authentication guide for graph paths and secret generation.
Changing HUGEGRAPH_ADMIN_PASSWORD later does not rotate an existing password; use the user API.
Production component access controls
In production, enable Server authentication and authorization for graph APIs, maintain the Server IP allowlist, grant minimum permissions, and retain Server audit-*.log with restricted read access. Configure PD REST credentials and PD/Store gRPC, Raft, and REST network boundaries separately; Server Auth does not protect those ports. Expose PD/Store only to cluster nodes and trusted operations networks.
Standalone Quick Start
This section pins the standalone image hugegraph/hugegraph:1.7.0. HStore/HA examples use master-built images; do not reuse this version for them.
Verify:
Hubble binds only to host loopback (127.0.0.1:8088) by default. Set HUBBLE_PUBLISH_HOST only behind an HTTPS reverse proxy and trusted network controls.
Minimal HStore Quick Start (Current Master Images)
Build PD, Store, and HStore Server images from the HugeGraph Server master repository root:
From the repository root, enter docker/, load .env, and generate Hubble configuration for the minimal topology. A read-only bind mount cannot create a valid missing hstore.local.properties; generate it before startup:
Verify:
To build this topology from local source instead of pulling images, add the development override and keep both files in all subsequent lifecycle commands:
The override builds images tagged dev. If you already built local images above, start with the base Compose file and HUGEGRAPH_VERSION=local; keep the tag choices consistent.
Three-Node Cluster Quick Start (Current Master Images)
HA Compose has no source-build override. First build hugegraph/pd:local, hugegraph/store:local, and hugegraph/server:local from the same master source as in the minimal HStore section, then load .env in docker/, generate HA Hubble configuration, and start:
HA Hubble bind-mounts conf/hubble/hstore-ha.local.properties; generate this before startup. It is separate from the minimal topology’s hstore.local.properties, but both use the same HG_PD_AUTH_SECRET_KEY from .env.
The default startup order is:
- PD nodes start first and must pass
/v1/healthchecks. - Store nodes start after all PD nodes are healthy.
- Server nodes start after all Store and PD nodes are healthy.
Verify the cluster: PD /v1/health and /v1/ready probes require no authentication. Store registration and partition queries are protected PD REST management APIs: use Basic username hg and HG_PD_AUTH_SECRET_KEY from .env.
With authentication enabled, graph listing should reject anonymous access and accept the administrator:
The other Server nodes listen on 8081 and 8082; the remaining PD and Store nodes use 8621/8622 and 8521/8522.
Environment Variable Reference
The following tables describe current master entrypoints and Compose files, not the standalone hugegraph/hugegraph:1.7.0 environment-variable contract. PD and Store build SPRING_APPLICATION_JSON from their variables and log selected nonsensitive settings at startup. PD secrets are excluded from that summary. Use docker logs to check listed settings; an absent secret in the logs does not establish whether it was applied. Server instead rewrites keys in conf/graphs/hugegraph.properties and conf/rest-server.properties.
PD Variables
| Variable | Required | Default | Configuration mapping |
|---|---|---|---|
HG_PD_GRPC_HOST | Yes | None | grpc.host |
HG_PD_RAFT_ADDRESS | Yes | None | raft.address |
HG_PD_RAFT_PEERS_LIST | Yes | None | raft.peers-list |
HG_PD_INITIAL_STORE_LIST | Yes | None | pd.initial-store-list |
HG_PD_GRPC_PORT | No | 8686 | grpc.port |
HG_PD_REST_PORT | No | 8620 | server.port |
HG_PD_DATA_PATH | No | /hugegraph-pd/pd_data | pd.data-path |
HG_PD_INITIAL_STORE_COUNT | No | 1 | pd.initial-store-count |
HG_PD_AUTH_SECRET_KEY | Yes (current master Docker) | None | auth.secret-key; PD REST Basic password, also used by Server and Hubble |
Deprecated aliases:
GRPC_HOST→HG_PD_GRPC_HOST,RAFT_ADDRESS→HG_PD_RAFT_ADDRESS,RAFT_PEERS→HG_PD_RAFT_PEERS_LIST,PD_INITIAL_STORE_LIST→HG_PD_INITIAL_STORE_LIST. Old names are mapped only when new names are unset, with a warning. Missing required variables cause the entrypoint to exit with code 2.
Store Variables
| Variable | Required | Default | Configuration mapping |
|---|---|---|---|
HG_STORE_PD_ADDRESS | Yes | None | pdserver.address |
HG_STORE_GRPC_HOST | Yes | None | grpc.host |
HG_STORE_RAFT_ADDRESS | Yes | None | raft.address |
HG_STORE_GRPC_PORT | No | 8500 | grpc.port |
HG_STORE_REST_PORT | No | 8520 | server.port |
HG_STORE_DATA_PATH | No | /hugegraph-store/storage | app.data-path |
Deprecated aliases:
PD_ADDRESS→HG_STORE_PD_ADDRESS,GRPC_HOST→HG_STORE_GRPC_HOST,RAFT_ADDRESS→HG_STORE_RAFT_ADDRESS.
Server Variables
Unlike PD and Store, Server has no mandatory entrypoint variables: only set values are written to configuration. Distributed deployment nevertheless requires at least HG_SERVER_BACKEND and HG_SERVER_PD_PEERS.
| Variable | Default | Configuration mapping |
|---|---|---|
HG_SERVER_BACKEND | Template value (rocksdb, or hstore in hugegraph/server) | backend in conf/graphs/hugegraph.properties |
HG_SERVER_PD_PEERS | None | pd.peers in hugegraph.properties and rest-server.properties |
HG_SERVER_USE_PD | false | usePD in rest-server.properties |
HG_SERVER_CLUSTER | hg-test | cluster in rest-server.properties |
HG_SERVER_REST_URL | http://0.0.0.0:8080 (set in the image) | restserver.url |
HG_SERVER_URLS_TO_PD | http://0.0.0.0:8080 | server.urls_to_pd: comma-separated URLs this Server registers in PD instead of restserver.url; read only when server.deploy_in_k8s is true; give each URL its own http:// prefix, since only the first entry gets one added; whitespace is removed |
HG_SERVER_DEPLOY_IN_K8S | false | server.deploy_in_k8s in rest-server.properties |
HG_SERVER_MIN_FREE_MEMORY | 64(MB) | restserver.min_free_memory |
HG_SERVER_INIT_STORE_ENABLED | true | init_store.enabled; set false for PD/HStore deployments whose metadata is managed by storage |
HG_SERVER_AUTH_TOKEN_SECRET | Generated when PASSWORD is set | auth.token_secret in both configuration files; at least 32 bytes |
HG_SERVER_REQUIRE_AUTH_TOKEN_SECRET | false | When true, refuse startup if PASSWORD is set without HG_SERVER_AUTH_TOKEN_SECRET |
PASSWORD | None | auth.admin_pa; runs bin/enable-auth.sh to enable authentication |
PRELOAD | None | When true, preload the example graph from scripts/example.groovy |
JAVA_OPTS | Set in the image | Passed to bin/start-hugegraph.sh -j |
HG_SERVER_STARTUP_TIMEOUT_S | 120 seconds | Passed to bin/start-hugegraph.sh -t, range 1–86400; see Server startup timeout below |
STORE_REST | store:8520 | Store REST address polled by wait-partition.sh, for HStore only |
HG_SERVER_PD_REST_ENDPOINT | Derived from pd.peers by replacing :8686 with :8620 | PD REST address polled by wait-storage.sh |
PD_AUTH_USER | store | Basic username for PD REST calls from wait-storage.sh |
PD_AUTH_PASSWORD | Empty | PD REST Basic password; must match HG_PD_AUTH_SECRET_KEY when PD REST authentication is enabled |
WAIT_PARTITION_TIMEOUT_S | 120 | Partition polling timeout; also bounds the final diagnostic in builds with the fix described below |
Master builds that include authentication property fixes preserve spaces, backslashes and Unicode in explicit
signing keys. Use the same key on every Server replica. When upgrading from an image that misread such a key, explicitly supply the intended
HG_SERVER_AUTH_TOKEN_SECRET again; retaining the old configuration also retains its misread key. If the active key changes, sign in again to
obtain new tokens. The 1.7.0 image limitation above still applies.
Older images could initialize a Unicode administrator password incorrectly when the initializer inherited the C locale. Upgrading or setting
PASSWORD again does not repair an existing account’s stored password. A working administrator must change it through the
user API. This fix provides no automatic recovery when no administrator identity is usable; preserve the
existing data and arrange account recovery before upgrading.
Deprecated aliases:
BACKEND→HG_SERVER_BACKEND,PD_PEERS→HG_SERVER_PD_PEERS.
wait-storage.sh waits up to 300 seconds for an Up Store. This duration is hardcoded and cannot be changed through environment variables.
In master builds, HStore startup gives partition polling
and the final /v1/partitions diagnostic separate WAIT_PARTITION_TIMEOUT_S budgets. Earlier builds bound polling only; the final diagnostic
request has no timeout. With the default value, a stalled final response times out after 120 seconds; setting the value to 0 disables
GNU timeout’s limit.
The entrypoint waits for wait-partition.sh before waiting for the Java launcher. If Java exits while partition polling is still waiting,
that poll can consume its full timeout before the entrypoint observes the exit. If polling succeeds, the diagnostic step can then consume
a second full timeout before observation finishes; signal-triggered shutdown remains interruptible.
HG_SERVER_INIT_STORE_ENABLED and HG_SERVER_DEPLOY_IN_K8S accept only the case-insensitive boolean values recognized by HugeConfig: y, t, yes, on, true, n, f, no, off, false. Other values, including 0 and 1, terminate the entrypoint.
After successful initialization, the entrypoint writes docker/init_complete; later starts skip reinitialization but still invoke bin/init-store.sh to revalidate configuration each time initialization is disabled.
Compose Variables
Compose files, rather than entrypoints, read these variables:
| Variable | Default | Purpose |
|---|---|---|
HUGEGRAPH_VERSION | latest | Server, PD, and Store image tag |
HUGEGRAPH_PULL_POLICY | missing | Image pull_policy; use never to retain locally built images |
HUBBLE_IMAGE | hugegraph/hubble:latest | Hubble image, selected independently of HUGEGRAPH_VERSION |
HUBBLE_PULL_POLICY | missing | Hubble image pull_policy |
HUBBLE_PUBLISH_HOST | 127.0.0.1 | Host interface for publishing Hubble port 8088 |
HUGEGRAPH_ADMIN_PASSWORD | None | Passed to Server as PASSWORD |
HUGEGRAPH_AUTH_TOKEN_SECRET | None | Master Compose passes this to Server as HG_SERVER_AUTH_TOKEN_SECRET; the 1.7.0 image ignores it |
HG_PD_AUTH_SECRET_KEY | None | HStore PD REST Basic password; Compose supplies it to PD and Server and uses it to generate local Hubble configuration |
Port Reference
Published ports in the three-node cluster:
| Service | Host port | Container port | Purpose |
|---|---|---|---|
| pd0 | 8620 | 8620 | REST API |
| pd0 | 8686 | 8686 | gRPC |
| pd1 | 8621 | 8620 | REST API |
| pd1 | 8687 | 8686 | gRPC |
| pd2 | 8622 | 8620 | REST API |
| pd2 | 8688 | 8686 | gRPC |
| store0 | 8500 | 8500 | gRPC |
| store0 | 8510 | 8510 | Raft |
| store0 | 8520 | 8520 | REST API |
| store1 | 8501 | 8500 | gRPC |
| store1 | 8511 | 8510 | Raft |
| store1 | 8521 | 8520 | REST API |
| store2 | 8502 | 8500 | gRPC |
| store2 | 8512 | 8510 | Raft |
| store2 | 8522 | 8520 | REST API |
| server0 | 8080 | 8080 | Graph API |
| server1 | 8081 | 8080 | Graph API |
| server2 | 8082 | 8080 | Graph API |
| hubble | 8088 | 8088 | Hubble UI, bound to 127.0.0.1 by default |
Standalone publishes only 8080 and 8088; minimal HStore publishes 8620 (PD REST), 8520 (Store REST), 8080, and 8088. PD Raft uses internal port 8610, unpublished in all topologies.
Troubleshooting
Container OOM exit (code 137): Increase Docker Desktop memory beyond 12 GB or adjust JVM memory for the killed process.
Raft election timeout: Verify every PD node has the same
HG_PD_RAFT_PEERS_LIST. Check connectivity withdocker exec hg-pd0 ping pd1.Partition allocation incomplete: Load
.envindocker/, then check Store registration with PD REST Basic authentication:PD can complete partition allocation once all three Stores report
"state":"Up".Connection refused: Use container hostnames (
pd0,store0) inHG_*variables rather than127.0.0.1.Unexpected retained data:
docker compose downkeeps named volumes. To delete topology data too, usedocker compose down -v.
Runtime logs: docker logs <container-name> (for example, docker logs hg-pd0) shows logs without entering containers. In images built from current
master, the PD, Store and both Server images (hugegraph/hugegraph and the HStore hugegraph/server) set STDOUT_MODE=true and send service logs to stdout.
For the Server, WARN and above from Hadoop, ZooKeeper, SOFA, Netty and Commons also reaches stdout; INFO from Hadoop, Netty and Commons and the audit and
slow-query logs stay in files, and ZooKeeper and SOFA log nothing below WARN. /hugegraph-server/logs holds hugegraph-server.log, JVM crash logs
(hs_err_pid*.log) and out-of-memory heap dumps (heapdump_*/java_pid*.hprof, one directory per start, so the Server and the JVMs it starts get separate files
unless a JVM reuses an earlier PID from that start; if the directory cannot be created, dumps go to /hugegraph-server/logs itself). Both images declare
VOLUME /hugegraph-server, so docker restart and a Compose recreate keep them; docker compose down leaves that anonymous volume behind unattached, and a
later down -v does not remove it (note the volume name from docker inspect before down and delete it with docker volume rm <name>; docker volume prune
would also delete every other unused anonymous volume on the Docker host), so use a named volume or bind mount to keep them reachable. Kubernetes starts a new
container on every restart, so mount an emptyDir or a PersistentVolumeClaim at /hugegraph-server/logs. Give each pod its own volume, or a per-pod directory
on a shared PVC (subPathExpr: $(POD_NAME), with POD_NAME passed in from metadata.name through the Downward API; the Helm chart sets neither): crash files
get distinct names, but the log files themselves have fixed names. Pods on different nodes can share one PVC only if its storage supports read-write mounts from
several nodes (typically ReadWriteMany); a ReadWriteOnce claim is writable from one node only, so otherwise give each pod its own PVC. The Helm chart does
not mount a logs volume yet. A heap dump can be as large as the JVM heap, and every start uses a new directory, so a Server that keeps running out of memory
fills the volume; size it for the dumps you want to keep, keep it within any ephemeral-storage limit or emptyDir sizeLimit (eviction deletes the
emptyDir with the dump), and do not use medium: Memory. A failing liveness probe can restart the container as soon as about
(failureThreshold - 1) × periodSeconds + timeoutSeconds after a dump starts, and the kubelet kills it at most terminationGracePeriodSeconds after that; make
that time longer than writing a heap dump takes, or a restart in the middle of a dump leaves a truncated file. The launcher never deletes dumps or heapdump_*
directories, because a computer-job JVM can go on using one after its Server exits; each start that reaches Java leaves one, empty unless something ran out of
memory. Delete old ones once no HugeGraph JVM from that launch is running, never the newest one of a running Server. To turn dumps off for every JVM, set
JAVA_TOOL_OPTIONS=-XX:-HeapDumpOnOutOfMemoryError in the container’s environment (docker run -e, an environment: entry on the Server service in Compose,
which the shipped Compose files do not set, or env in Kubernetes; exporting it in the host shell has no effect), which keeps the image’s default JAVA_OPTS;
putting the flag in JAVA_OPTS affects the Server JVM only and replaces that default (-XX:+UseContainerSupport -XX:MaxRAMPercentage=50 ...), so repeat those
flags.
Version scope: the paragraph above describes current master images. No 1.7.0 or older image sets
STDOUT_MODE, including the standalonehugegraph/hugegraph:1.7.0used above:docker logsshows only entrypoint output, and service logs stay inlogs/inside the container (logs/hugegraph-server.logfor the Server).
Container Monitoring and Health Checks
Version scope: This section describes current master Docker images; these behaviors are not included in 1.7.0 images. Use the master-built
localimages above or alatestimage containing these changes.
Process Monitoring
Previously, all three entrypoints ended with tail -f /dev/null, keeping containers alive even after Java crashed. Because containers never exited, Docker’s restart: unless-stopped policy did not trigger.
Entrypoints now monitor Java directly:
- PD and Store: The entrypoint passes
-d falseto the startup script, which replaces itself with Java usingexec. When Java exits, the container exits immediately and Docker’s restart policy applies. - Server: The entrypoint owns the foreground launcher and waits for Java. After readiness, it preserves Java’s exit status,
including
0,42, and137forSIGKILL.SIGTERMandSIGINTrequest cooperative shutdown, reap owned readiness/partition checks, and return143and130respectively after shutdown. - PID 1 in every image is
dumb-init, which forwards Docker signals to the entrypoint.
Server Startup Timeout
HG_SERVER_STARTUP_TIMEOUT_S sets the Docker entrypoint’s REST readiness deadline; the default is 120 seconds.
Values must be decimal integers without leading zeros, from 1 to 86400 seconds.
Empty strings, 0, negative numbers, fractions, and out-of-range values log an error and exit with code 1.
The entrypoint also passes this value to bin/start-hugegraph.sh -t; the foreground launcher itself waits for Java, without polling REST.
A startup deadline failure or Java exiting with 0 before readiness returns 1;
an early nonzero Java exit keeps its status. The deadline excludes earlier storage initialization and backend readiness waits.
Readiness and partition checks remain interruptible during shutdown. A deadline failure requests termination and returns without an indefinite wait;
an unresponsive Java process relies on container termination for final cleanup.
For example, from the HugeGraph repository’s docker/ directory, extend the standalone Server wait to 300 seconds (Compose passes this variable to the container):
This setting is independent of Docker health-check start_period, interval, timeout, and retries. Those determine when a container becomes unhealthy; extending health-check grace periods does not extend the startup script deadline. Adjusting this variable does not update health-check settings, so check both for slow startup.
Health-Check Endpoints
All four master Docker images include HEALTHCHECK. docker ps displays health status. Failures during the 90-second startup grace period do not count; three consecutive failures afterward mark a container unhealthy.
| Image | Health-check endpoint | Port | Parameters |
|---|---|---|---|
hugegraph/hugegraph (standalone RocksDB Server) | GET /versions | 8080 | --interval=15s --timeout=10s --start-period=90s --retries=3 |
hugegraph/server (HStore Server) | GET /versions | 8080 | Same as above |
hugegraph/pd | GET /v1/health | 8620 | Same as above |
hugegraph/store | GET /v1/health | 8520 | Same as above |
Compose defines additional health checks, so --wait and depends_on: condition: service_healthy do not depend on image-level checks. Compose uses shorter startup periods (30–120 seconds depending on service and topology) and more retries.
Note: The cron-based
-m truemonitoring option instart-hugegraph.shis for VM/bare-metal deployments. Docker images neither install nor use it; use built-inHEALTHCHECKand Docker restart policies.
6.7 - FAQ
Deployment and startup
Choose RocksDB or HStore
For development, testing, or small-to-medium standalone deployments, Server + RocksDB is recommended for its simplicity and high performance. When data volume is large (TB to PB scale) or requires horizontal scalability and multi-replica high availability, deploy an HStore distributed cluster (PD + Store + Server).
Version 1.7.0 supports RocksDB, HStore, HBase, and Memory. Legacy backends such as Cassandra, ScyllaDB, MySQL, and PostgreSQL require a version earlier than 1.7.0. See the Server quick start for deployment steps.
Investigate a core dump at startup
First, run java -version to confirm your JDK version: HugeGraph master (1.8 baseline) requires Java 17, and 1.7.0 requires Java 11 (Java 8 is no longer supported). If the JDK version is correct, inspect the Server logs and the JVM crash log (hs_err_pid*.log) to check for
architecture mismatches, missing native libraries (such as RocksDB JNI), or insufficient system memory.
Which backends need init-store
When using local persistent backends like RocksDB or HBase, you must run bin/init-store.sh before the first startup. Memory (in-memory
backend) and HStore (distributed backend) do not use this script; HStore storage is managed directly by PD and Store.
Note: The backend and serializer settings must match (for example, RocksDB requires binary). If the service starts but reports that
the backend is disconnected, verify initialization and backend connection settings first.
Resolve a missing GLIBCXX version during init-store
The following error indicates that the host system’s libstdc++ version is too old and lacks symbols required by the RocksDB JNI native library:
To resolve: Upgrade the system’s libstdc++ (or install a newer GCC runtime), or run HugeGraph using the official Docker image.
Which Server startup script should I use
Current releases uniformly use bin/start-hugegraph.sh. Both GremlinServer and the REST Server start in the same process. The
start-restserver.sh and start-gremlinserver.sh scripts from older documentation are deprecated.
Which graphs does the startup script load
The script name has no relation to the graph name. Server scans and loads all graph configurations in conf/graphs by default (this
directory can be customized via graphs in conf/rest-server.properties). Each local graph uses an independent configuration file; restart
Server after editing configurations.
Note: graph.load_from_local_config defaults to false (controlling constructor preloading) and cannot prevent local graph loading at
startup. See the Server configuration guide.
Connections and queries
Read compressed responses with curl
Batch vertex and edge endpoints return gzip-compressed data by default. Add the --compressed flag to curl to decompress automatically:
If authentication is enabled, supply credentials. If output remains unexpected, check HTTP status codes, Content-Type, and
Content-Encoding. Do not pipe JSON error responses directly into gunzip.
A vertex exists, but lookup by ID cannot find it
Check the exact format and type of id in existing query results: string IDs require JSON double quotes, while numeric IDs do not. For
example, the string ID 1:marko is written in JSON as "1:marko".
When embedding this JSON ID into a URL path, URL-encode the entire string including double quotes. If the ID contains special characters, encoding the whole quoted string is required:
| Character | URL encoding |
|---|---|
+ | %2B |
| Space | %20 |
/ | %2F |
? | %3F |
% | %25 |
# | %23 |
& | %26 |
= | %3D |
" | %22 |
Queries by label time out
When a label contains a large volume of data, scanning all records will exhaust resources and time out. Recommended solutions:
- Append
.limit(n)to restrict the number of returned records; - Use pagination to fetch results incrementally;
- Filter by specific properties and ensure the relevant properties are indexed to prevent full scans.
REST works, but Gremlin returns HTTP 500
A working REST endpoint only confirms HTTP reachability. HTTP 500 from Gremlin typically stems from:
- Gremlin Server connection failure: Verify that
gremlinserver.urlinconf/rest-server.propertiespoints to a reachable Gremlin port (default8182, configured inconf/gremlin-server.yaml); - Query syntax or logic error: Such as unindexed property filtering triggering scan limits;
- Missing or expired credentials.
Check logs/hugegraph-server.log for the detailed exception stack trace.
REST returns HTTP 415
When sending POST/PUT requests with a JSON body, set the header Content-Type: application/json and ensure the payload is valid JSON.
Import and data maintenance
Loader reports Socket Timeout
Import timeouts usually occur when batch sizes are too large or write concurrency is too high for the Server. Recommended actions:
- Decrease
--batch-size(e.g., from 500 down to 200); - Reduce the number of concurrent insert threads;
- Increase
--timeoutand configure retry settings. See the Loader guide for parameter details.
Clear all data from a graph
Administrators can call the following endpoint to wipe schema, vertices, edges, and indexes from a graph (verify target graph and backups beforehand):
The request requires the confirm_message query parameter, strictly matching I'm sure to delete all data (URL-encoded). See the Graph
API for complete reference.
Schema still exists after clearing the backend
Server caches metadata in memory. Bypassing Server to clear underlying storage directly (such as wiping RocksDB directories or HBase tables) causes cache inconsistency. If storage was manually deleted, restart Server to clear the cache. For normal cleanup, use the official Clear Graph API.
Modeling and IDs
A vertex or edge ID exceeds the length limit
To maintain storage and indexing performance, HugeGraph enforces maximum ID length limits (calculated by encoded byte count):
- Vertex ID: Maximum 16384 bytes (16 KB);
- Edge ID: Maximum 65536 bytes (64 KB).
Use concise business identifiers as primary keys rather than concatenating large text blocks. Note: Property index values exceeding 32 bytes are automatically hashed for storage and will not trigger length errors.
Are nested properties supported
Nested properties (complex nested maps or objects) are not currently supported. To represent multi-level relations, model the nested object as an independent vertex and link it to the parent vertex with an edge.
Can one edge label connect several vertex-label pairs
Yes. When creating an EdgeLabel, invoke link(sourceLabel, targetLabel) once for each source-target pair.
For example, an investment edge label can link both individual → enterprise and enterprise → enterprise. The deprecated
sourceLabel() and targetLabel() methods only supported a single pair and should no longer be used.
For other questions, search the Server issues or Toolchain issues.
6.8 - Security Report
Reporting New Security Problems with Apache HugeGraph
Production security requirements
HugeGraph disables user authentication by default. In production, enable authentication and authorization, set white_ip.status=enable, maintain the IP allowlist, and grant minimum permissions. Do not expose Gremlin, Cypher, or other query endpoints directly to the public network. See the IP allowlist API. Isolate the Server process, for example with Docker or Kubernetes.
Standard Server configuration writes authentication-proxy audit records to audit-*.log. Retain these files and restrict read access. auth.audit_log_rate controls the maximum per-user log output rate rather than serving as a dedicated audit-log on/off switch.
Vulnerability reporting scope
The community has received many reports about the flexibility of graph query languages. Until the security architecture is refactored, known risks from DSL queries executed with Auth disabled or deliberately skipped, outside an authorized session, will not be treated individually as new vulnerabilities.
Exploitation through anonymous or unauthorized access despite Auth being enabled, or bypassing an IP allowlist or escaping a container to cause serious privilege violations or system compromise, remains a high-risk security vulnerability. Please report these cases to the community.
Following ASF procedures, the HugeGraph community actively works to resolve security issues.
Report security issues privately to the dedicated security list first. See the ASF security procedures for details.
The security list handles undisclosed vulnerabilities and their resolution. Report ordinary software bugs through GitHub Issues/Discussions or the developer mailing list. Messages unrelated to security sent to the security list will be ignored.
Security mailing list: security@hugegraph.apache.org
The general vulnerability-handling process is:
- The reporter privately sends the HugeGraph security list the affected versions, description, reproduction steps, and impact.
- The project security team works privately with the reporter on a fix. A
CVEidentifier can be requested after initial confirmation. - The project releases an updated version of the affected software containing the fix.
- At an appropriate time, the project discloses the general issue and how to apply the fix, following ASF rules and omitting sensitive reproduction details.
- CVE publication and related steps follow the ASF security procedures.
Known Security Vulnerabilities (CVEs)
HugeGraph main repository (Server/PD/Store)
- CVE-2024-27348: HugeGraph-Server - Command execution in gremlin
- CVE-2024-27349: HugeGraph-Server - Bypass whitelist in Auth mode
- CVE-2024-43441: HugeGraph-Server - Fixed JWT Token (Secret)
- CVE-2025-26866: HugeGraph-Server - RAFT and deserialization vulnerability
HugeGraph-Toolchain repository (Hubble/Loader/Client/Tools/..)
- CVE-2024-27347: HugeGraph-Hubble - SSRF in Hubble connection page
6.9 - 1.8.0 shared-foundation migration
The 1.8.0 shared-foundation migration changes Java imports and extension signatures, and requires Server, PD and Store to upgrade together. Use this guide to identify affected code, rebuild your integrations and check existing data before deployment.
Find the work that applies to you
| Your integration | What to prepare |
|---|---|
| Java code using Server IDs, schema metadata, queries or indexes | Update imports and affected signatures, then recompile against matching 1.8.0 artifacts. |
Custom serializers, HugeGraph implementations or element subclasses | Adapt the SPI contracts and shared element state below. |
| Custom Gremlin imports or scripts | Replace the old IdGenerator class name and test packaged Gremlin startup. |
| Hubble, Java client or Computer integration | Apply the downstream exception changes when matching artifacts are available. |
| HStore deployment | Align the PD namespace, inspect legacy rebuilt indexes and upgrade all writers together. |
| Loader or another REST-only caller | Keep the independent client DTOs; migrate any actual affected Java calls. |
This shared-foundation consolidation targets HugeGraph 1.8.0. Use matching Server, PD, Store and downstream artifacts when upgrading. See the source migration guide for Java mappings and compatibility fixtures.
Where shared code now lives
Server core and struct previously carried separate implementations of several IDs, schema types, queries, elements and codecs.
The migration gives these shared types one owner so Server and Store can use the same implementation.
hugegraph-core continues to run the graph engine, hugegraph-struct supplies shared models and codecs, and hugegraph-common supplies utilities.
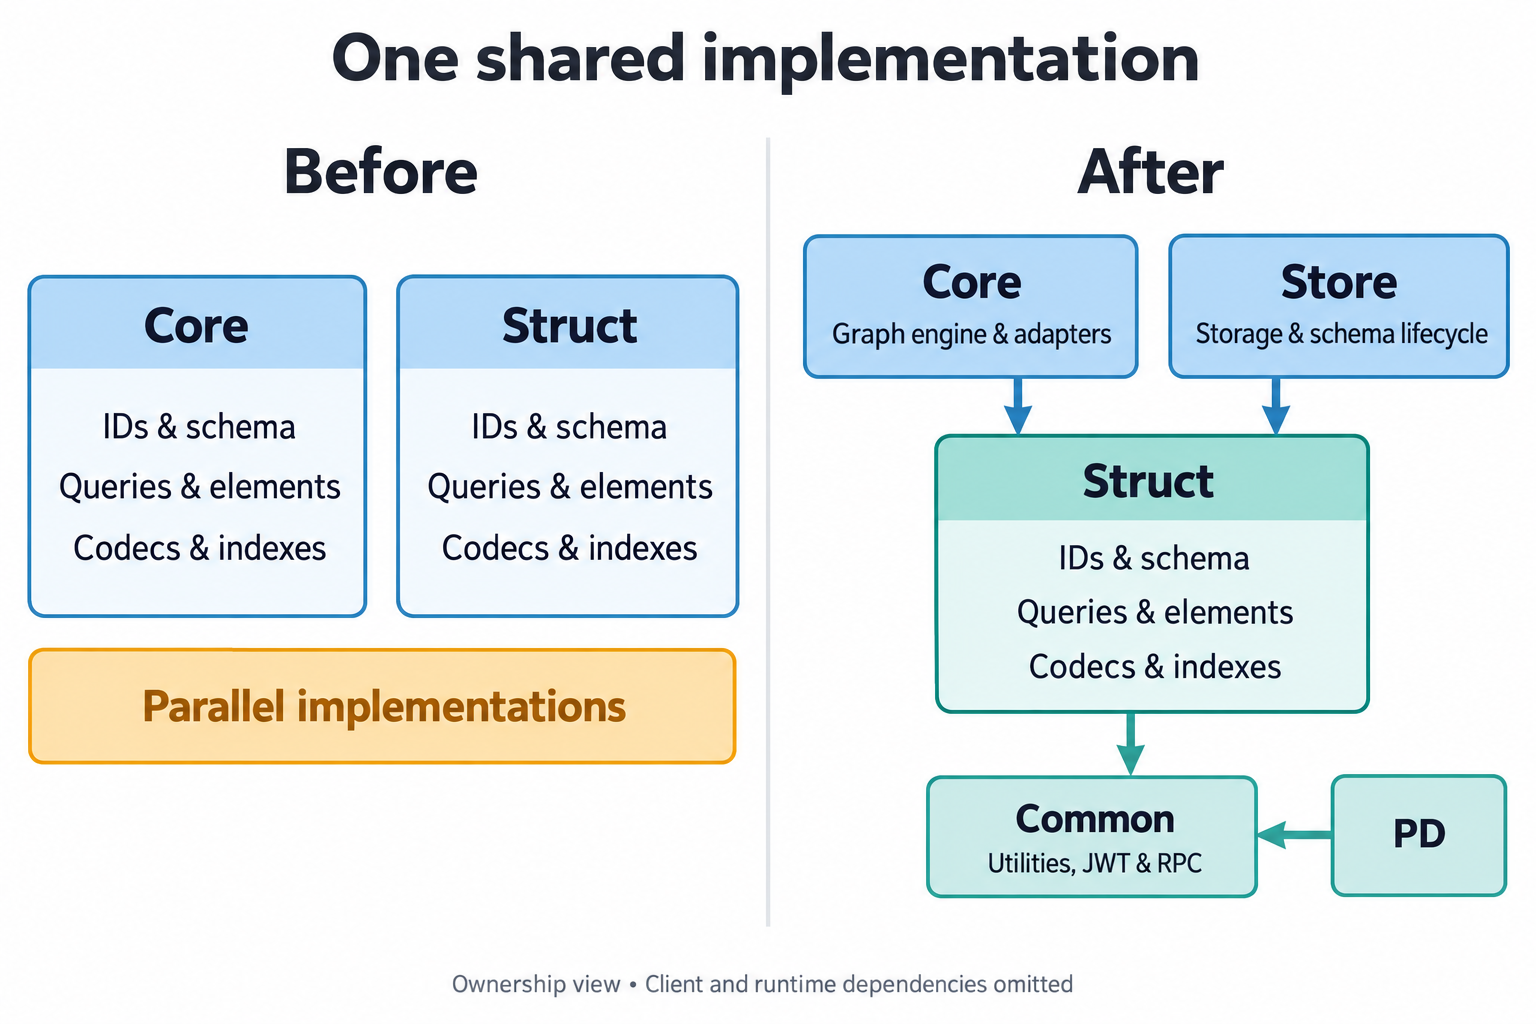
Core retains graph execution and adapters, Store retains storage and schema lifecycle, and struct/common own the shared implementations. The arrows show shared ownership, not the full dependency tree.
| Owner | Responsibilities |
|---|---|
| struct | IDs, schema metadata, type codes, queries, base elements, property/byte codecs, index construction and analyzers |
| core | Transactions, traversal, tasks, schema mutation, backend adapters and index update orchestration |
| Store | PD-backed schema access, listeners and cache lifecycle through SchemaGraph/SchemaDriver |
| common | JWT signing/verification, shared auth constants and RPC configuration interfaces |
The Server HStore adapter still needs PD and Store clients. Store retains its network, PD client and storage libraries. PD and Store must not depend on core, and struct must not depend on core or PD clients.
Core and Store implement HugeGraphSupplier to provide schema, configuration and clock access.
Shared base elements hold state and adjacency. HugeVertex and HugeEdge retain engine behavior and wrapper identity over that same state;
property mutation, cloning, removal, expiration and loading state must propagate through it.
Core serializers retain backend adapters and delegate shared encoding.
Shared index and OLAP selection receive schema candidates and result sinks from their callers; core keeps transaction writes and backend capability checks.
Update Java source and SPI implementations
Start with the types your code imports. This ID construction call keeps the same string value while its imports move.
Before, using the 1.7.0 core API
After, using the shared API
Recompile the application and its plugins after adapting source. Relocated types also change method descriptors, so editing imports cannot make an old compiled jar binary-compatible. Removed core classes have no general compatibility package. The plugin examples still describe 1.7.0; apply the following mappings when targeting the migrated API.
| Previous Java entry | Use in the migrated API |
|---|---|
Shared types listed below in org.apache.hugegraph.backend.id | org.apache.hugegraph.id.* |
org.apache.hugegraph.schema.* metadata | org.apache.hugegraph.struct.schema.* |
Shared types listed below in org.apache.hugegraph.backend.query | org.apache.hugegraph.query.* |
org.apache.hugegraph.backend.query.serializer.* | org.apache.hugegraph.query.serializer.* |
org.apache.hugegraph.backend.store.Shard | org.apache.hugegraph.backend.Shard |
org.apache.hugegraph.backend.store.BackendEntry.BackendColumn | org.apache.hugegraph.backend.BackendColumn |
org.apache.hugegraph.structure.HugeIndex | org.apache.hugegraph.structure.Index |
| Shared byte/encoding code in backend serializers | org.apache.hugegraph.serializer.* |
Core HugeException | org.apache.hugegraph.exception.HugeException |
org.apache.hugegraph.SchemaGraph/SchemaDriver | org.apache.hugegraph.store.schema.* |
Only Id, IdGenerator, EdgeId, IdUtil and SplicingIdGenerator move from the ID package.
SnowflakeIdGenerator remains in core under org.apache.hugegraph.backend.id; retain its existing import.
The moved query types are Query, ConditionQuery, Condition, IdQuery, IdPrefixQuery, IdRangeQuery, BatchConditionQuery and Aggregate.
QueryResults, ConditionQueryFlatten, EdgesQueryIterator, QueryBatch and QueryResultContext remain in core under
org.apache.hugegraph.backend.query; retain their existing imports.
SchemaManager, schema mutation builders and backend-specific serializers remain in core, so apply these mappings only to affected types.
Client REST DTOs remain independent, including Toolchain’s org.apache.hugegraph.structure.graph.Shard.
| Extension point | Change in your implementation |
|---|---|
HugeGraph.sameAs(HugeGraph) | Override sameAs(org.apache.hugegraph.HugeGraphSupplier). There is no old-signature overload. |
GraphSerializer.writeIndex/readIndex | Accept/return shared org.apache.hugegraph.structure.Index; update callers too. |
Custom HugeElement subclass | Expose shared BaseElement through element() and adapt properties through wrapProperty. |
Keep element adapters on the shared state; do not restore removed engine state fields or add a second adjacency collection.
For Gremlin classImports and scripts, replace org.apache.hugegraph.backend.id.IdGenerator with org.apache.hugegraph.id.IdGenerator.
Configuration-only class names need a packaged Gremlin startup check; Java compilation does not exercise them.
The RPC interfaces org.apache.hugegraph.rpc.RpcServiceConfig4Client and RpcServiceConfig4Server now have one owner in common.
Their names and signatures stay the same, so this move requires no RPC import or configuration change.
org.apache.hugegraph.auth.TokenGenerator also belongs to common. Callers supply the signing secret and map JWT failures to their service responses.
Common’s JWT dependencies are optional; direct JWT consumers must declare their required libraries.
Adapt downstream exceptions when matching artifacts are available
| Previous downstream entry | Replacement |
|---|---|
Hubble org.apache.hugegraph.exception.HugeException | org.apache.hugegraph.exception.HubbleException |
Java client org.apache.hugegraph.exception.NotSupportException | org.apache.hugegraph.exception.ClientNotSupportException |
Hubble’s copy of org.apache.hugegraph.license.MachineInfo | Keep the import and use the common implementation. |
Update constructors and catch clauses along with imports. HubbleException keeps its RuntimeException parent and string constructor.
ClientNotSupportException keeps its ClientException parent and message/cause and message/arguments constructors.
Computer’s HgkvDirImpl is one affected client-exception caller. Struct’s similarly named exceptions have different contracts.
Loader’s REST boundary and independent client DTOs do not need an overall conversion to struct.
The Toolchain and Computer changes are still unpublished downstream handoffs. They need matching publication, builds and packaged-classpath checks. Inspect the built jars as well as the source tree for stale or transitive copies of the same class.
Prepare a coordinated service upgrade
Upgrade Server, PD and Store together to matching release artifacts. This migration does not support mixed-version rolling upgrades. The sequence below applies once those matching artifacts are available.
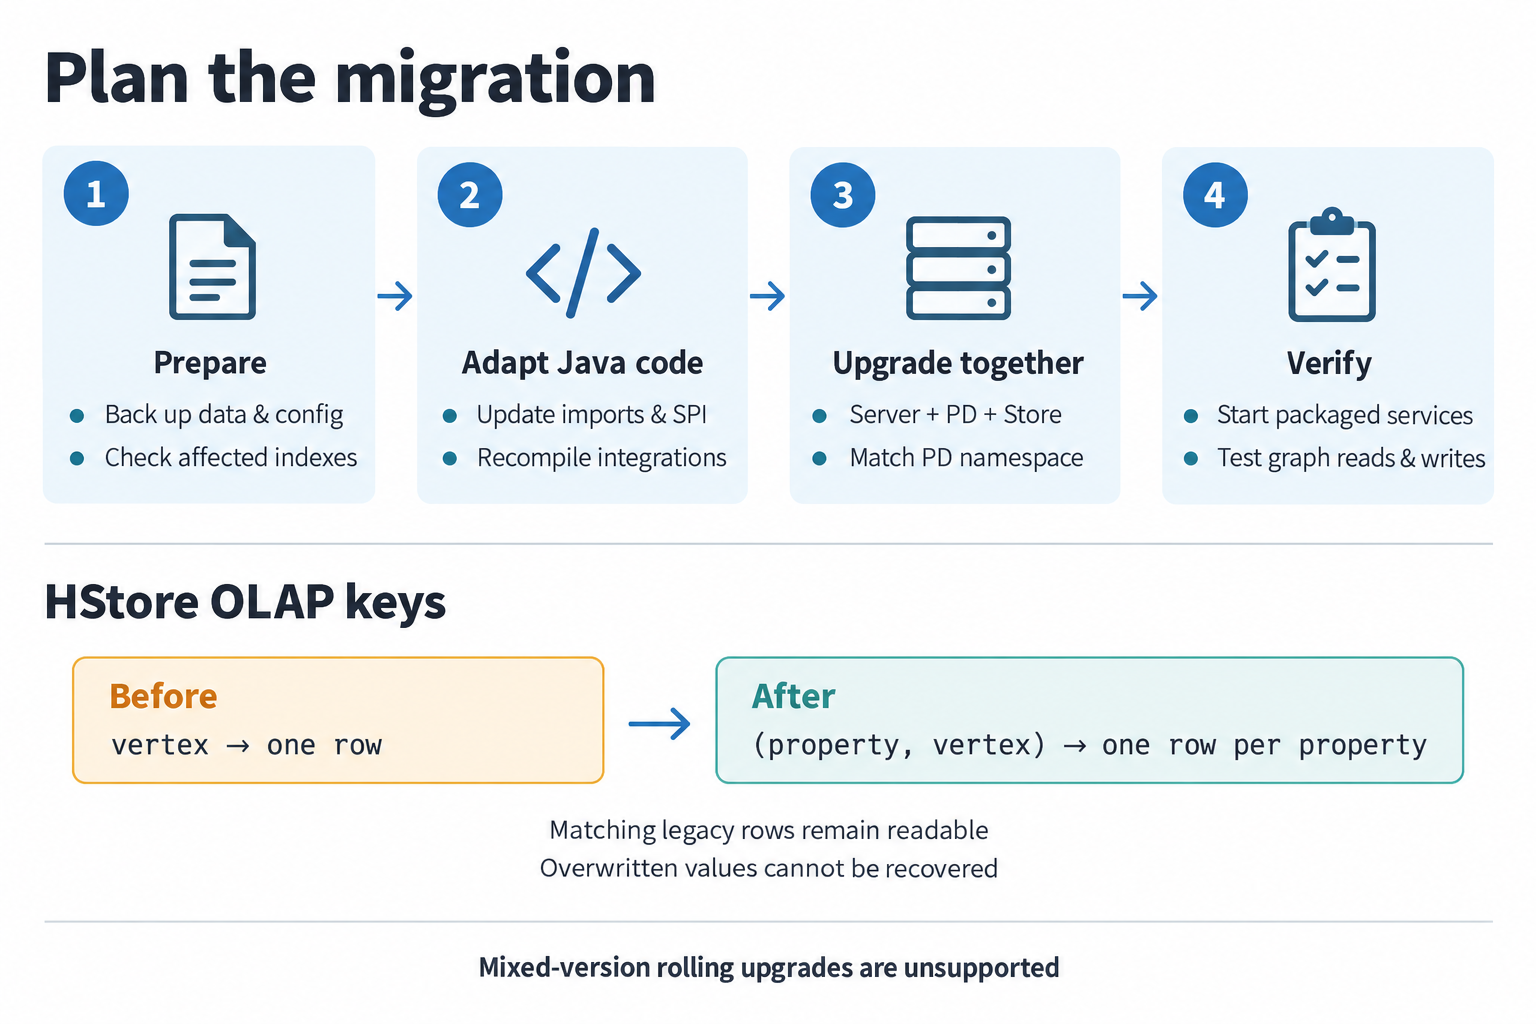
Back up data/configuration and check affected indexes, update imports/SPI and recompile, then upgrade matching services and align the PD namespace. Verify packaged services and graph reads/writes. OLAP keys change from one row per vertex to one row per property and vertex; matching legacy rows remain readable, overwritten values cannot be recovered, and mixed-version rolling upgrades are unsupported.
- Back up graph data with the existing backup and restore procedure and preserve deployment configuration.
- Prepare matching Server, PD and Store artifacts, plus rebuilt plugins and any required downstream integrations.
- Align the metadata namespace using the settings below; preserve existing backend graph names.
- Rehearse in a validation environment. Start the packaged services, read historical data and exercise affected queries and writes.
- Pause writes for the coordinated deployment upgrade. Resume only after all Server and Store writers use matching artifacts and checks pass.
The consolidation does not automatically rewrite graph data, rebuild indexes or recover historical entries. Review the compatibility cases below during the rehearsal.
Match the PD metadata namespace
Store’s pd.cluster defaults to hg. Set it in Store application.yml as follows.
The equivalent environment variable is PD_CLUSTER.
| Server mode | Value that must match Store’s pd.cluster |
|---|---|
usePD=true | Server’s cluster |
usePD=false | The graph’s pd.cluster |
This namespace covers schema, graph configuration, cache watches and TTL-cleaner metadata.
All HStore graphs in one Server process must use the same metadata namespace.
With usePD=false, the first HStore graph opened binds the process-wide MetaManager to its pd.cluster.
A later graph’s explicit conflicting pd.cluster is logged and ignored; it does not create an independent namespace.
One Store process cannot share a schema driver across conflicting namespaces.
Preserve backend graphspace/store/table names such as DEFAULT/hugegraph/g; the REST identity DEFAULT-hugegraph is not a metadata key.
Check data compatibility
| Data or behavior | What the migration preserves or changes |
|---|---|
| Stored IDs and properties | Existing type codes and ID/property bytes are preserved, along with configuration defaults. |
| String ID comparison | Java UTF-16 order is used consistently, including IDs loaded from UTF-8 bytes. Stored ID bytes stay the same. |
| Query JSON and supported Kryo values | Historical Java names still need legacy decoding after relocation. |
| Schema maps | Wire fields and ID identity stay the same. Primary-key and edge sort-key lists keep order and duplicates. |
| Schema endpoints | Matching redundant metadata and legacy endpoint-only maps remain readable; conflicting or malformed endpoints are rejected. |
| Ordinary schema indexes | Server-created keys keep their key/name-TTL layout. |
| Store SYSTEM-label indexes with positive expiry | Stable keys and the old 13-byte value envelope remain; the label reader recognizes that bounded envelope. |
The core SYSTEM-label writer keeps its existing bytes. This migration adds no TTL suffix to those keys and does not change prefix deletion. Previously unsupported index-only element reconstruction remains unsupported.
Element classification also keeps the producer context through BaseVertex.TypeContext.
| Context | Existing system-vertex classification |
|---|---|
STORAGE | ~variables is task data. |
ENGINE | ~server and ~role_data are server data; ~variables is ordinary vertex data. |
| Both | ~task and ~taskresult are task data. |
Engine wrappers select ENGINE; standalone storage elements retain STORAGE so table routing follows the existing behavior.
Rebuild affected legacy long-text indexes
The previous Store-side IndexBuilder shortened long text values to 20 characters. Server queries used the full value and its hash.
The shared builder now follows the Server contract. An old shortened row can still be decoded, but it does not automatically match a full-value query.
If your deployment used Store-side index rebuilding, identify affected indexes and rebuild them from graph data where necessary. The migration performs no automatic rebuild and cannot recover missing historical entries. Ordinary Server-created index keys retain their existing contract.
Verify HStore OLAP reads and deletes
New OLAP rows use [property ID][vertex ID] keys, allowing several OLAP properties on one vertex to coexist.
Legacy rows used only the vertex ID; their values remain readable without a rewrite.
| Operation | Behavior with compound and legacy keys |
|---|---|
| Read a property | Prefer its compound key. Fall back to a vertex-only row only when its value contains the requested property ID. |
| Delete a property | Remove its compound row and a matching legacy row; preserve other properties. |
| Read a property already overwritten by the old writer | The lost value cannot be recovered by this repair. |
Upgrade all Server and Store writers before resuming writes. An old writer can update a legacy row while a new reader prefers an existing compound row. Mixed-version OLAP writes are outside the supported upgrade contract.
Verify packaged services and integrations
Run affected Java/SPI tests, then exercise RocksDB and HStore queries, authentication, Store schema/filter behavior and shared element state propagation. Include historical ID, schema, property and index samples, pagination, TTL and OLAP cases. Inspect resolved dependencies and shipped jars for forbidden module dependencies or duplicate HugeGraph classes, and start the actual packaged services without classpath-ordering workarounds. The contribution guide describes build and dependency-inventory prerequisites.
The implementation, website documentation and downstream artifacts need coordinated publication. Use matching artifacts and their runtime results to decide when to adopt the migration; compiling source or skipping tests is insufficient.
6.10 - ToplingDB development integration
Development interface: This guide applies to development builds with the optional ToplingDB runtime enabled. Existing releases and image tags do not establish support, and runtime acceptance remains a deployment prerequisite.
Choose the database owner
HugeGraph defaults to standard RocksDB. Enable Topling separately for each process that owns local storage:
| Component | Business provider setting | Start command |
|---|---|---|
| Standalone RocksDB Server | rocksdb.provider=topling in each selected graph properties file | bin/start-hugegraph.sh |
| PD | provider: topling under rocksdb in conf/application.yml | bin/start-hugegraph-pd.sh |
| Store | provider: topling under rocksdb in conf/application-pd.yml | bin/start-hugegraph-store.sh |
A standalone Server keeps backend=rocksdb; an HStore-backed Server uses backend=hstore and needs no local Topling runtime.
All local RocksDB graphs in one Server process must use the same provider. The business setting must match the runtime selected by its launcher.
Build and prepare a standard distribution
Build the normal distributions from the source repository root using Java 17 and Maven 3.6.3 or later:
Obtain a trusted Topling Easy Migrate JNI JAR and its SHA-256 through your artifact channel. Preparation requires a Java 17 JDK, Linux x86_64,
sha256sum, unzip, od, ldd, and GNU mv. The selected JAR’s native dependencies, including its glibc and libaio requirements, must be installed.
Stop the component, unpack a fresh standard distribution, and run from that component directory:
The script verifies the copied JAR’s hash, Topling Java marker, one Linux x86_64 JNI entry, ELF architecture and native dependencies.
Before installation, a disposable database verifies that the selected JNI actually applies EasyMigrate configuration to its persisted write-buffer size.
Unsupported builds are rejected even when their marker and hash match. The probe does not certify existing-data compatibility or every production setting.
A checksum receipt binds this verification to the installed JAR and native library; launchers reject missing or changed receipts. Use a fresh distribution
when upgrading from an older preparation script. Launch rejects inherited RocksDB JNI preloads in default/standard mode
and competing JNI in Topling mode, while preserving unrelated preloads.
It installs topling/rocksdbjni.jar, its native library and optional web resources outside lib. Preparation refuses an existing topling directory;
replace a runtime by preparing another stopped, fresh distribution. Repeat preparation separately for Server, PD and Store as applicable.
Keep data outside the distribution
Changing providers does not convert an existing database. Use separate, initially empty Topling directories and retain the standard-provider data. Create persistent directories writable by the service account, outside source checkouts, build outputs and unpacked distribution directories. Note that each graph requires distinct, dedicated data and WAL directories to prevent path conflicts:
| Component | Configuration file and key | Example persistent path |
|---|---|---|
| Server data | Graph properties: rocksdb.data_path | /srv/hugegraph/topling/server/<graph>/data |
| Server WAL | Graph properties: rocksdb.wal_path | /srv/hugegraph/topling/server/<graph>/wal |
| PD | conf/application.yml: pd.data-path | /srv/hugegraph/topling/pd |
| Store data | conf/application.yml: app.data-path | /srv/hugegraph/topling/store/data |
| Store Raft | conf/application.yml: app.raft-path | /srv/hugegraph/topling/store/raft |
For a standalone Server, edit every selected graph configuration, for example conf/graphs/hugegraph.properties
(replace hugegraph with the corresponding graph name for each graph):
Set both Server data and WAL paths, ensuring each graph uses distinct directories. Leaving WAL at its package-local default risks losing it when a build or package replacement removes that directory. Keep the external data, WAL and Raft roots across runtime/package changes.
For PD and Store, edit the existing rocksdb mapping in the provider configuration file listed above, retaining its other options:
Set their persistent paths separately in conf/application.yml; keep the normal network addresses and cluster configuration.
The published runtime directories use 0755 and regular files use 0644, so a service account different from the preparer can read the JNI. The service account also needs traversal permission on the component’s parent directories; preparation does not change those parents.
Select, start and verify
In the startup shell of each component that owns a Topling database, explicitly select the runtime:
The launcher uses that component’s conf/toplingdb.yaml. Set TOPLINGDB_EASY_MIGRATE_CONF=/absolute/path/config.yaml for an explicit override.
The shipped native profile disables its HTTP server and keeps memtable_as_log_index=false, which the Java write path requires.
Tune that profile for the host; it is separate from the business provider and data-path configuration.
For a fresh standalone Server graph, initialize its store once before the first startup:
bin/init-store.sh and bin/dump-store.sh use the same explicit runtime selection as bin/start-hugegraph.sh.
For HStore, start PD, then Store. Before starting the HStore-backed Server from the same shell, run unset TOPLINGDB_ROCKSDB_PROVIDER
(or export TOPLINGDB_ROCKSDB_PROVIDER=rocksdb); do not enable local Topling on that Server.
A configured provider/runtime mismatch fails before the component opens its database.
Before adoption, verify the actual RocksDB Java classes and mapped JNI library belong to the prepared runtime. Use dedicated data directories to test real writes, reads, normal stop and restart; for HStore, include a Server graph operation through PD and Store. A successful build, startup or standard-JNI unit test alone does not establish Topling runtime acceptance.
Stop or switch back
Stop incoming work, then use the normal stop scripts. For HStore, stop Server with bin/stop-hugegraph.sh, Store with bin/stop-hugegraph-store.sh,
and PD with bin/stop-hugegraph-pd.sh, waiting for each process to exit before stopping its dependency. A forced kill is not proof of normal native cleanup.
To use standard RocksDB again, stop the component, unset TOPLINGDB_ROCKSDB_PROVIDER, and restore its business provider to rocksdb.
Select the corresponding standard-provider data and WAL paths; do not point it at a database modified by Topling.
Dedicated Topling distributions, Docker/Compose packaging, general lifecycle changes and retryable snapshot recovery are separate follow-ups. This guide covers the normal distribution launch scripts; custom IDE and embedded launchers require their own runtime setup and validation.
7 - Query Languages
HugeGraph supports Gremlin and Cypher. This section mainly covers Gremlin; see the Cypher API for the Cypher HTTP interface.
7.1 - HugeGraph Gremlin
Overview
HugeGraph supports Gremlin, a graph traversal query language of Apache TinkerPop3. While SQL is a query language for relational databases, Gremlin is a general-purpose query language for graph databases. Gremlin can be used to create entities (Vertex and Edge) of a graph, modify the properties of entities, delete entities, as well as perform graph queries.
Gremlin can be used to create entities (Vertex and Edge) of a graph, modify the properties of entities, and delete entities. More importantly, it can be used to perform graph querying and analysis operations.
TinkerPop Features
HugeGraph implements the TinkerPop framework, but not all TinkerPop features are implemented.
The table below lists the support status of various TinkerPop features in HugeGraph:
Graph Features
| Name | Description | Support |
|---|---|---|
| Computer | Determines if the {@code Graph} implementation supports {@link GraphComputer} based processing | false |
| Transactions | Determines if the {@code Graph} implementations supports transactions. | true |
| Persistence | Determines if the {@code Graph} implementation supports persisting it’s contents natively to disk.This feature does not refer to every graph’s ability to write to disk via the Gremlin IO packages(.e.g. GraphML), unless the graph natively persists to disk via those options somehow. For example,TinkerGraph does not support this feature as it is a pure in-sideEffects graph. | Backend-dependent |
| ThreadedTransactions | Determines if the {@code Graph} implementation supports threaded transactions which allow a transaction be executed across multiple threads via {@link Transaction#createThreadedTx()}. | false |
| ConcurrentAccess | Determines if the {@code Graph} implementation supports more than one connection to the same instance at the same time. For example, Neo4j embedded does not support this feature because concurrent access to the same database files by multiple instances is not possible. However, Neo4j HA could support this feature as each new {@code Graph} instance coordinates with the Neo4j cluster allowing multiple instances to operate on the same database. | false |
Vertex Features
| Name | Description | Support |
|---|---|---|
| UserSuppliedIds | Determines if an {@link Element} can have a user defined identifier. Implementation that do not support this feature will be expected to auto-generate unique identifiers. In other words, if the {@link Graph} allows {@code graph.addVertex(id,x)} to work and thus set the identifier of the newly added {@link Vertex} to the value of {@code x} then this feature should return true. In this case, {@code x} is assumed to be an identifier data type that the {@link Graph} will accept. | true |
| NumericIds | Determines if an {@link Element} has numeric identifiers as their internal representation. In other words,if the value returned from {@link Element#id()} is a numeric value then this method should be return {@code true}. Note that this feature is most generally used for determining the appropriate tests to execute in the Gremlin Test Suite. | false |
| StringIds | Determines if an {@link Element} has string identifiers as their internal representation. In other words, if the value returned from {@link Element#id()} is a string value then this method should be return {@code true}. Note that this feature is most generally used for determining the appropriate tests to execute in the Gremlin Test Suite. | true |
| UuidIds | Determines if an {@link Element} has UUID identifiers as their internal representation. In other words,if the value returned from {@link Element#id()} is a {@link UUID} value then this method should be return {@code true}.Note that this feature is most generally used for determining the appropriate tests to execute in the Gremlin Test Suite. | false |
| CustomIds | Determines if an {@link Element} has a specific custom object as their internal representation.In other words, if the value returned from {@link Element#id()} is a type defined by the graph implementations, such as OrientDB’s {@code Rid}, then this method should be return {@code true}.Note that this feature is most generally used for determining the appropriate tests to execute in the Gremlin Test Suite. | true |
| AnyIds | Determines if an {@link Element} any Java object is a suitable identifier. TinkerGraph is a good example of a {@link Graph} that can support this feature, as it can use any {@link Object} as a value for the identifier. Note that this feature is most generally used for determining the appropriate tests to execute in the Gremlin Test Suite. This setting should only return {@code true} if {@link #supportsUserSuppliedIds()} is {@code true}. | false |
| AddProperty | Determines if an {@link Element} allows properties to be added. This feature is set independently from supporting “data types” and refers to support of calls to {@link Element#property(String, Object)}. | true |
| RemoveProperty | Determines if an {@link Element} allows properties to be removed. | true |
| AddVertices | Determines if a {@link Vertex} can be added to the {@code Graph}. | true |
| MultiProperties | Determines if a {@link Vertex} can support multiple properties with the same key. | true |
| DuplicateMultiProperties | Determines if a {@link Vertex} can support non-unique values on the same key. For this value to be {@code true}, then {@link #supportsMetaProperties()} must also return true. By default this method, just returns what {@link #supportsMultiProperties()} returns. | true |
| MetaProperties | Determines if a {@link Vertex} can support properties on vertex properties. It is assumed that a graph will support all the same data types for meta-properties that are supported for regular properties. | false |
| RemoveVertices | Determines if a {@link Vertex} can be removed from the {@code Graph}. | true |
Edge Features
| Name | Description | Support |
|---|---|---|
| UserSuppliedIds | Determines if an {@link Element} can have a user defined identifier. Implementation that do not support this feature will be expected to auto-generate unique identifiers. In other words, if the {@link Graph} allows {@code graph.addVertex(id,x)} to work and thus set the identifier of the newly added {@link Vertex} to the value of {@code x} then this feature should return true. In this case, {@code x} is assumed to be an identifier data type that the {@link Graph} will accept. | false |
| NumericIds | Determines if an {@link Element} has numeric identifiers as their internal representation. In other words,if the value returned from {@link Element#id()} is a numeric value then this method should be return {@code true}. Note that this feature is most generally used for determining the appropriate tests to execute in the Gremlin Test Suite. | false |
| StringIds | Determines if an {@link Element} has string identifiers as their internal representation. In other words, if the value returned from {@link Element#id()} is a string value then this method should be return {@code true}. Note that this feature is most generally used for determining the appropriate tests to execute in the Gremlin Test Suite. | true |
| UuidIds | Determines if an {@link Element} has UUID identifiers as their internal representation. In other words,if the value returned from {@link Element#id()} is a {@link UUID} value then this method should be return {@code true}.Note that this feature is most generally used for determining the appropriate tests to execute in the Gremlin Test Suite. | false |
| CustomIds | Determines if an {@link Element} has a specific custom object as their internal representation.In other words, if the value returned from {@link Element#id()} is a type defined by the graph implementations, such as OrientDB’s {@code Rid}, then this method should be return {@code true}.Note that this feature is most generally used for determining the appropriate tests to execute in the Gremlin Test Suite. | true |
| AnyIds | Determines if an {@link Element} any Java object is a suitable identifier. TinkerGraph is a good example of a {@link Graph} that can support this feature, as it can use any {@link Object} as a value for the identifier. Note that this feature is most generally used for determining the appropriate tests to execute in the Gremlin Test Suite. This setting should only return {@code true} if {@link #supportsUserSuppliedIds()} is {@code true}. | false |
| AddProperty | Determines if an {@link Element} allows properties to be added. This feature is set independently from supporting “data types” and refers to support of calls to {@link Element#property(String, Object)}. | true |
| RemoveProperty | Determines if an {@link Element} allows properties to be removed. | true |
| AddEdges | Determines if an {@link Edge} can be added to a {@code Vertex}. | true |
| RemoveEdges | Determines if an {@link Edge} can be removed from a {@code Vertex}. | true |
Data Type Features
| Name | Description | Support |
|---|---|---|
| BooleanValues | true | |
| ByteValues | true | |
| DoubleValues | true | |
| FloatValues | true | |
| IntegerValues | true | |
| LongValues | true | |
| MapValues | Supports setting of a {@code Map} value. The assumption is that the {@code Map} can contain arbitrary serializable values that may or may not be defined as a feature itself | false |
| MixedListValues | Supports setting of a {@code List} value. The assumption is that the {@code List} can contain arbitrary serializable values that may or may not be defined as a feature itself. As this{@code List} is “mixed” it does not need to contain objects of the same type. | false |
| BooleanArrayValues | false | |
| ByteArrayValues | true | |
| DoubleArrayValues | false | |
| FloatArrayValues | false | |
| IntegerArrayValues | false | |
| LongArrayValues | false | |
| SerializableValues | false | |
| StringArrayValues | false | |
| StringValues | true | |
| UniformListValues | Supports setting of a {@code List} value. The assumption is that the {@code List} can contain arbitrary serializable values that may or may not be defined as a feature itself. As this{@code List} is “uniform” it must contain objects of the same type. | true |
Gremlin Steps
HugeGraph supports all steps of Gremlin. For complete reference information about Gremlin, please refer to the Gremlin official website.
| Step | Description | Documentation |
|---|---|---|
| addE | Add an edge between two vertices. | addE step |
| addV | add vertices to graph. | addV step |
| and | Make sure all traversals return values. | and step |
| as | Step modulator for assigning variables to the step’s output. | as step |
| by | Step Modulators used in conjunction with group and order. | by step |
| coalesce | Returns the first traversal that returns a result. | coalesce step |
| constant | Returns a constant value. Used in conjunction with coalesce. | constant step |
| count | Returns a count from the traversal. | count step |
| dedup | Returns values with duplicates removed. | dedup step |
| drop | Discards a value (vertex/edge). | drop step |
| fold | Acts as a barrier for computing aggregated values from results. | fold step |
| group | Groups values based on specified labels. | group step |
| has | Used to filter properties, vertices, and edges. Supports hasLabel, hasId, hasNot, and has variants. | has step |
| inject | Injects values into the stream. | inject step |
| is | Used to filter by a Boolean expression. | is step |
| limit | Used to limit the number of items in a traversal. | limit step |
| local | Locally wraps a part of a traversal, similar to a subquery. | local step |
| not | Used to generate the negation result of a filter. | not step |
| optional | Returns the result of a specified traversal if it generates any results, otherwise returns the calling element. | optional step |
| or | Ensures that at least one traversal returns a value. | or step |
| order | Returns results in the specified order. | order step |
| path | Returns the full path of the traversal. | path step |
| project | Projects properties as a map. | project step |
| properties | Returns properties with specified labels. | properties step |
| range | Filters based on a specified range of values. | range step |
| repeat | Repeats a step a specified number of times. Used for looping. | repeat step |
| sample | Used to sample results returned by the traversal. | sample step |
| select | Used to project the results returned by the traversal. | select step |
| store | This step is used for non-blocking aggregation of results returned by traversal | store step |
| tree | Aggregate the paths in vertices into a tree. | tree step |
| unfold | Unfolds an iterator as a step. | unfold step |
| union | Merge the results returned by multiple traversals. | union step |
| V | These are the steps required for traversing between vertices and edges: V, E, out, in, both, outE, inE, bothE, outV, inV, bothV, and otherV. | vertex steps |
| where | Used to filter the results returned by a traversal. Supports eq, neq, lt, lte, gt, gte, and between operators. | where step |
7.2 - HugeGraph Examples
1 Overview
This example uses the TitanDB Getting Started guide as a template to demonstrate how to use HugeGraph. By comparing HugeGraph and TitanDB, you can understand the differences between them.
1.1 Similarities and Differences between HugeGraph and TitanDB
Both HugeGraph and TitanDB are graph databases based on the Apache TinkerPop3 framework. They both support the Gremlin graph query language and share many similarities in terms of usage and interfaces. However, HugeGraph is a completely new design and development, characterized by its clear code structure, richer features, and more user-friendly interfaces.
Compared to TitanDB, HugeGraph’s main features are as follows:
- HugeGraph currently offers a comprehensive suite of tools, including HugeGraph-API, HugeGraph-Client, HugeGraph-Loader, HugeGraph-Studio, and HugeGraph-Spark. These components facilitate system integration, data loading, visual graph querying, Spark connectivity, and other functionalities.
- HugeGraph incorporates the concepts of Server and Client, allowing third-party systems to connect via multiple methods such as JAR references, clients, and APIs. In contrast, TitanDB only supports connections via JAR references.
- HugeGraph requires explicit schema definition, and all insertions and queries must pass strict schema validation. Implicit schema creation is not supported at the moment.
- HugeGraph makes full use of the characteristics of the underlying storage system to achieve efficient data access, whereas TitanDB ignores the differences of the backend with a unified Kv structure.
- HugeGraph’s update operations can be performed on-demand (e.g., updating a specific attribute), offering better performance. TitanDB uses a read-and-update approach for updates.
- Both VertexId and EdgeId in HugeGraph support concatenation, allowing for automatic deduplication and better query performance. In TitanDB, all IDs are auto-generated and require indexing for queries.
1.2 Character Relationship Graph
This example uses the Property Graph Model to describe the relationships between characters in Greek mythology, also known as the character relationship graph. The specific relationships are shown in the diagram below.
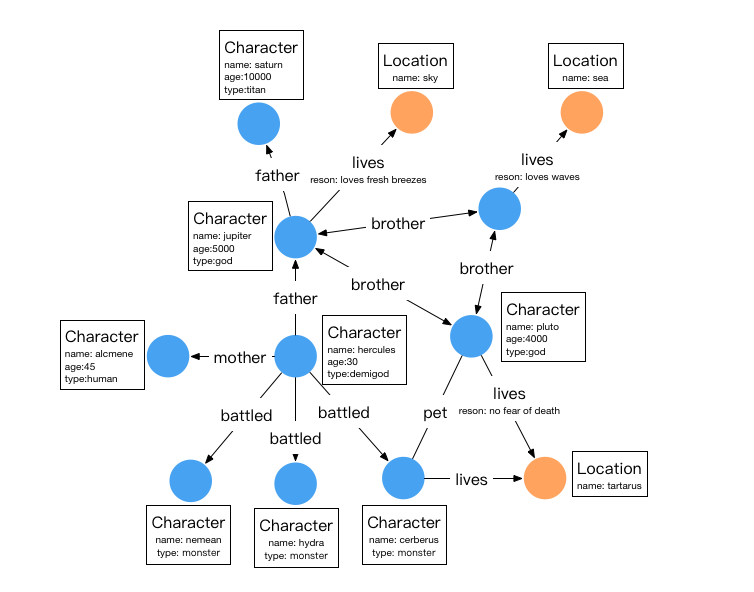
In the diagram, circular nodes represent entities (Vertices), arrows represent relationships (Edges), and the content in the boxes represents attributes.
There are two types of vertices in this graph: characters and locations, as shown in the table below:
| Name | Type | Attributes |
|---|---|---|
| character | vertex | name,age,type |
| location | vertex | name |
There are six types of relationships: father, mother, brother, battled, lives, and pet. The details of these relationships are as follows:
| Name | Type | Source Vertex Label | Target Vertex Label | Attributes |
|---|---|---|---|---|
| father | edge | character | character | - |
| mother | edge | character | character | - |
| brother | edge | character | character | - |
| battled | edge | character | character | time |
| pet | edge | character | character | - |
| lives | edge | character | location | reason |
An edge label can be linked to more than one pair of source and target vertex labels: call link(sourceLabel, targetLabel) once per pair when creating it. The deprecated sourceLabel() and targetLabel() builder methods accept only a single pair.
In this example, the original TitanDB’s monster, god, human, and demigod are all represented using the same vertex label: character in HugeGraph, with an additional type attribute to indicate the type of character. The edge labels remain consistent with the original TitanDB.
2 Graph Schema and Data Ingest Examples
HugeGraph requires explicit schema creation, which involves creating PropertyKeys, VertexLabels, and EdgeLabels in sequence. If indexing is needed, IndexLabels must also be created.
2.1 Graph Schema
The snippets assume a local Groovy script has opened HugeGraph as graph and set g = graph.traversal(). Start with the Gremlin Console local-mode example, whose scripts/example.groovy creates both variables. In a remote Console, g is a Server-side traversal-source alias and there is no local graph object; use the Schema REST API for remote schema creation.
2.2 Graph Data
2.3 Indices
HugeGraph by default automatically generates IDs. However, if a user specifies the primaryKeys field list for a VertexLabel through primaryKeys, the ID strategy for that VertexLabel will automatically switch to the primaryKeys strategy. Once the primaryKeys strategy is enabled, HugeGraph generates VertexId by concatenating vertexLabel+primaryKeys, which allows for automatic deduplication. Additionally, there is no need to create extra indexes to use the properties in primaryKeys for fast querying. For example, both “character” and “location” have the primaryKeys("name") attribute, so without creating additional indexes, vertices can be queried using g.V().hasLabel('character').has('name','hercules').
3 Graph Traversal Examples
3.1 Traversal Query
1. Find the grandfather of hercules
It can also be done using the repeat method:
2. Find the name of Hercules’s father
3. Find the characters with age > 100
4. Find who are pluto’s cohabitants
5. Find pluto can’t be his own cohabitant
6. Pluto’s Brothers
It is recommended to use HugeGraph-Hubble to execute the above code visually. Additionally, the code can be executed through various other methods such as HugeGraph-Client, HugeGraph-Api, GremlinConsole, and GremlinDriver.
3.2 Summary
HugeGraph currently supports Gremlin syntax, and users can implement various query requirements through Gremlin / REST-API.
8 - PERFORMANCE
⚠️ The performance chapter is being reworked
The benchmark, API performance, and Loader performance reports in this chapter are based on historical versions, test methods, or test environments. Their results do not represent current releases and should not be used directly for version comparisons or capacity planning. The test methods, software and hardware environments, and reports will be updated consistently, and the old reports will then be archived.
Available benchmark pages:
- HugeGraph 0.5.6 Benchmark — historical report, pending a rerun with the unified methodology; it contains the HugeGraph 0.4.4 historical benchmark.
8.1 - HugeGraph BenchMark Performance
Note:
The current performance metrics are based on an earlier version. The latest version has significant improvements in both performance and functionality. We encourage you to refer to the most recent release featuring autonomous distributed storage and enhanced computational push down capabilities. Alternatively, you may wait for the community to update the data with these enhancements.
The HugeGraph 0.4.4 historical benchmark in this directory uses data collected in 2018 and is provided for historical reference only.
1 Test environment
1.1 Hardware information
| CPU | Memory | 网卡 | 磁盘 |
|---|---|---|---|
| 48 Intel(R) Xeon(R) CPU E5-2650 v4 @ 2.20GHz | 128G | 10000Mbps | 750GB SSD |
1.2 Software information
1.2.1 Test cases
Testing is done using the graphdb-benchmark, a benchmark suite for graph databases. This benchmark suite mainly consists of four types of tests:
- Massive Insertion, which involves batch insertion of vertices and edges, with a certain number of vertices or edges being submitted at once.
- Single Insertion, which involves the immediate insertion of each vertex or edge, one at a time.
- Query, which mainly includes the basic query operations of the graph database:
- Find Neighbors, which queries the neighbors of all vertices.
- Find Adjacent Nodes, which queries the adjacent vertices of all edges.
- Find the Shortest Path, which queries the shortest path from the first vertex to 100 random vertices.
- Clustering, which is a community detection algorithm based on the Louvain Method.
1.2.2 Test dataset
Tests are conducted using both synthetic and real data.
MIW, SIW, and QW use SNAP datasets:
CW uses synthetic data generated by the LFR-Benchmark generator.
The size of the datasets used in this test is not mentioned.
| Name | Number of Vertices | Number of Edges | File Size |
|---|---|---|---|
| email-enron.txt | 36,691 | 367,661 | 4MB |
| com-youtube.ungraph.txt | 1,157,806 | 2,987,624 | 38.7MB |
| amazon0601.txt | 403,393 | 3,387,388 | 47.9MB |
| com-lj.ungraph.txt | 3997961 | 34681189 | 479MB |
1.3 Service configuration
HugeGraph version: 0.5.6, RestServer and Gremlin Server and backends are on the same server
- RocksDB version: rocksdbjni-5.8.6
Titan version: 0.5.4, using thrift+Cassandra mode
- Cassandra version: cassandra-3.10, commit-log and data use SSD together
Neo4j version: 2.0.1
The Titan version adapted by graphdb-benchmark is 0.5.4.
2 Test results
2.1 Batch insertion performance
The chart and original table show historical HugeGraph 0.5.6 results, not current-version performance. Hardware, software versions and backend conditions are listed in the test environment above.
The chart uses a logarithmic scale for batch insertion time in seconds. Click legend entries to toggle series; the original table remains available for exact values.
{
"tooltip": {
"trigger": "axis",
"confine": true
},
"legend": {
"data": [
"HugeGraph",
"Titan",
"Neo4j"
]
},
"grid": {
"left": 75,
"right": 30,
"top": 55,
"bottom": 75
},
"xAxis": {
"type": "category",
"data": [
"email-enron (30w)",
"amazon0601 (300w)",
"YouTube (300w)",
"LiveJournal (3000w)"
],
"axisLabel": {
"rotate": 10
}
},
"yAxis": {
"type": "log",
"name": "Time / seconds (log)"
},
"series": [
{
"name": "HugeGraph",
"type": "bar",
"data": [
0.629,
5.711,
5.243,
67.033
]
},
{
"name": "Titan",
"type": "bar",
"data": [
10.15,
108.569,
150.266,
1217.944
]
},
{
"name": "Neo4j",
"type": "bar",
"data": [
3.884,
18.938,
24.89,
281.537
]
}
]
}| Backend | email-enron(30w) | amazon0601(300w) | com-youtube.ungraph(300w) | com-lj.ungraph(3000w) |
|---|---|---|---|---|
| HugeGraph | 0.629 | 5.711 | 5.243 | 67.033 |
| Titan | 10.15 | 108.569 | 150.266 | 1217.944 |
| Neo4j | 3.884 | 18.938 | 24.890 | 281.537 |
Instructions
- The data scale is in the table header in terms of edges
- The data in the table is the time for batch insertion, in seconds
- For example, HugeGraph(RocksDB) spent 5.711 seconds to insert 3 million edges of the amazon0601 dataset.
Conclusion
- The performance of batch insertion: HugeGraph(RocksDB) > Neo4j > Titan(thrift+Cassandra)
2.2 Traversal performance
2.2.1 Explanation of terms
- FN(Find Neighbor): Traverse all vertices, find the adjacent edges based on each vertex, and use the edges and vertices to find the other vertices adjacent to the original vertex.
- FA(Find Adjacent): Traverse all edges, get the source vertex and target vertex based on each edge.
2.2.2 FN performance
| Backend | email-enron(3.6w) | amazon0601(40w) | com-youtube.ungraph(120w) | com-lj.ungraph(400w) |
|---|---|---|---|---|
| HugeGraph | 4.072 | 45.118 | 66.006 | 609.083 |
| Titan | 8.084 | 92.507 | 184.543 | 1099.371 |
| Neo4j | 2.424 | 10.537 | 11.609 | 106.919 |
Instructions
- The data in the table header “()” represents the data scale, in terms of vertices.
- The data in the table represents the time spent traversing vertices in seconds.
- For example, HugeGraph uses the RocksDB backend to traverse all vertices in amazon0601, and search for adjacent edges and another vertex, which takes a total of 45.118 seconds.
2.2.3 FA performance
| Backend | email-enron(30w) | amazon0601(300w) | com-youtube.ungraph(300w) | com-lj.ungraph(3000w) |
|---|---|---|---|---|
| HugeGraph | 1.540 | 10.764 | 11.243 | 151.271 |
| Titan | 7.361 | 93.344 | 169.218 | 1085.235 |
| Neo4j | 1.673 | 4.775 | 4.284 | 40.507 |
Explanation
- The data size in the header “()” is based on the number of vertices.
- The data in the table is the time it takes to traverse the vertices in seconds.
- For example, HugeGraph with RocksDB backend traverses all vertices in the amazon0601 dataset, and it looks up adjacent edges and other vertices, taking a total of 45.118 seconds.
Conclusion
- Traversal performance: Neo4j > HugeGraph(RocksDB) > Titan(thrift+Cassandra)
2.3 Performance of Common Graph Analysis Methods in HugeGraph
Terminology Explanation
- FS (Find Shortest Path): finding the shortest path between two vertices
- K-neighbor: all vertices that can be reached by traversing K hops (including 1, 2, 3…(K-1) hops) from the starting vertex
- K-out: all vertices that can be reached by traversing exactly K out-edges from the starting vertex.
FS performance
| Backend | email-enron(30w) | amazon0601(300w) | com-youtube.ungraph(300w) | com-lj.ungraph(3000w) |
|---|---|---|---|---|
| HugeGraph | 0.494 | 0.103 | 3.364 | 8.155 |
| Titan | 11.818 | 0.239 | 377.709 | 575.678 |
| Neo4j | 1.719 | 1.800 | 1.956 | 8.530 |
Explanation
- The data in the header “()” represents the data scale in terms of edges
- The data in the table is the time it takes to find the shortest path from the first vertex to 100 randomly selected vertices in seconds
- For example, HugeGraph using the RocksDB backend to find the shortest path from the first vertex to 100 randomly selected vertices in the amazon0601 graph took a total of 0.103s.
Conclusion
- In scenarios with small data size or few vertex relationships, HugeGraph outperforms Neo4j and Titan.
- As the data size increases and the degree of vertex association increases, the performance of HugeGraph and Neo4j tends to be similar, both far exceeding Titan.
K-neighbor Performance
| Vertex | Depth | Degree 1 | Degree 2 | Degree 3 | Degree 4 | Degree 5 | Degree 6 |
|---|---|---|---|---|---|---|---|
| v1 | Time | 0.031s | 0.033s | 0.048s | 0.500s | 11.27s | OOM |
| v111 | Time | 0.027s | 0.034s | 0.115s | 1.36s | OOM | – |
| v1111 | Time | 0.039s | 0.027s | 0.052s | 0.511s | 10.96s | OOM |
Explanation
- HugeGraph-Server’s JVM memory is set to 32GB and may experience OOM when the data is too large.
K-out performance
| Vertex | Depth | 1st Degree | 2nd Degree | 3rd Degree | 4th Degree | 5th Degree | 6th Degree |
|---|---|---|---|---|---|---|---|
| v1 | Time | 0.054s | 0.057s | 0.109s | 0.526s | 3.77s | OOM |
| Degree | 10 | 133 | 2453 | 50,830 | 1,128,688 | ||
| v111 | Time | 0.032s | 0.042s | 0.136s | 1.25s | 20.62s | OOM |
| Degree | 10 | 211 | 4944 | 113150 | 2,629,970 | ||
| v1111 | Time | 0.039s | 0.045s | 0.053s | 1.10s | 2.92s | OOM |
| Degree | 10 | 140 | 2555 | 50825 | 1,070,230 |
Explanation
- The JVM memory of HugeGraph-Server is set to 32GB, and OOM may occur when the data is too large.
Conclusion
- In the FS scenario, HugeGraph outperforms Neo4j and Titan in terms of performance.
- In the K-neighbor and K-out scenarios, HugeGraph can achieve results returned within seconds within 5 degrees.
2.4 Comprehensive Performance Test - CW
| Database | Size 1000 | Size 5000 | Size 10000 | Size 20000 |
|---|---|---|---|---|
| HugeGraph(core) | 20.804 | 242.099 | 744.780 | 1700.547 |
| Titan | 45.790 | 820.633 | 2652.235 | 9568.623 |
| Neo4j | 5.913 | 50.267 | 142.354 | 460.880 |
Explanation
- The “scale” is based on the number of vertices.
- The data in the table is the time required to complete community discovery in seconds. For example, if HugeGraph uses the RocksDB backend and operates on a dataset of 10,000 vertices, and the community aggregation is no longer changing, it takes 744.780 seconds.
- The CW test is a comprehensive evaluation of CRUD operations.
- In this test, HugeGraph, like Titan, did not use the client and directly operated on the core.
Conclusion
- Performance of community detection algorithm: Neo4j > HugeGraph > Titan
8.2 - HugeGraph-API Performance
The HugeGraph API performance test mainly tests HugeGraph-Server’s ability to concurrently process RESTful API requests, including:
- Single insertion of vertices/edges
- Batch insertion of vertices/edges
- Vertex/Edge Queries
For the performance test of the RESTful API of each release version of HugeGraph, please refer to:
Updates coming soon, stay tuned!
8.2.1 - v0.5.6 Stand-alone(RocksDB)
Note:
The current performance metrics are based on an earlier version. The latest version has significant improvements in both performance and functionality. We encourage you to refer to the most recent release featuring autonomous distributed storage and enhanced computational push down capabilities. Alternatively, you may wait for the community to update the data with these enhancements.
1 Test environment
Compressed machine information:
| CPU | Memory | 网卡 | 磁盘 |
|---|---|---|---|
| 48 Intel(R) Xeon(R) CPU E5-2650 v4 @ 2.20GHz | 128G | 10000Mbps | 750GB SSD,2.7T HDD |
- Information about the machine used to generate loads: configured the same as the machine that is being tested under load.
- Testing tool: Apache JMeter 2.5.1
Note: The load-generating machine and the machine under test are located in the same local network.
2 Test description
2.1 Definition of terms (the unit of time is ms)
- Samples: The total number of threads completed in the current scenario.
- Average: The average response time.
- Median: The statistical median of the response time.
- 90% Line: The response time below which 90% of all threads fall.
- Min: The minimum response time.
- Max: The maximum response time.
- Error: The error rate.
- Throughput: The number of requests processed per unit of time.
- KB/sec: Throughput measured in terms of data transferred per second.
2.2 Underlying storage
RocksDB is used for backend storage, HugeGraph and RocksDB are both started on the same machine, and the configuration files related to the server remain as default except for the modification of the host and port.
3 Summary of performance results
- The speed of inserting a single vertex and edge in HugeGraph is about 1w per second
- The batch insertion speed of vertices and edges is much faster than the single insertion speed
- The concurrency of querying vertices and edges by id can reach more than 13000, and the average delay of requests is less than 50ms
4 Test results and analysis
4.1 batch insertion
4.1.1 Upper limit stress testing
Test methods
The upper limit of stress testing is to continuously increase the concurrency and test whether the server can still provide services normally.
Stress Parameters
Duration: 5 minutes
Maximum insertion speed for vertices:

in conclusion:
- With a concurrency of 2200, the throughput for vertices is 2026.8. This means that the system can process data at a rate of 405360 per second (2026.8 * 200).
Maximum insertion speed for edges

Conclusion:
- With a concurrency of 900, the throughput for edges is 776.9. This means that the system can process data at a rate of 388450 per second (776.9 * 500).
4.2 Single insertion
4.2.1 Stress limit testing
Test Methods
Stress limit testing is a process of continuously increasing the concurrency level to test the upper limit of the server’s ability to provide normal service.
Stress parameters
- Duration: 5 minutes.
- Service exception indicator: Error rate greater than 0.00%.
Single vertex insertion

Conclusion:
- With a concurrency of 11500, the throughput is 10730. This means that the system can handle a single concurrent insertion of vertices at a concurrency level of 11500.
Single edge insertion

Conclusion:
- With a concurrency of 9000, the throughput is 8418. This means that the system can handle a single concurrent insertion of edges at a concurrency level of 9000.
4.3 Search by ID
4.3.1 Stress test upper limit
Testing method
Continuously increasing the concurrency level to test the upper limit of the server’s ability to provide service under normal conditions.
stress parameters
- Duration: 5 minutes
- Service abnormality indicator: error rate greater than 0.00%
Querying vertices by ID

Conclusion:
- Concurrency is 14,000, throughput is 12,663. The concurrency capacity for querying vertices by ID is 14,000, with an average delay of 44ms.
Querying edges by ID

Conclusion:
- Concurrency is 13,000, throughput is 12,225. The concurrency capacity for querying edges by ID is 13,000, with an average delay of 12ms.
8.2.2 - v0.5.6 Cluster(Cassandra)
Note:
The current performance metrics are based on an earlier version. The latest version has significant improvements in both performance and functionality. We encourage you to refer to the most recent release featuring autonomous distributed storage and enhanced computational push down capabilities. Alternatively, you may wait for the community to update the data with these enhancements.
1 Test environment
Compressed machine information
| CPU | Memory | 网卡 | 磁盘 |
|---|---|---|---|
| 48 Intel(R) Xeon(R) CPU E5-2650 v4 @ 2.20GHz | 128G | 10000Mbps | 750GB SSD,2.7T HDD |
- Starting Pressure Machine Information: Configure the same as the compressed machine.
- Testing tool: Apache JMeter 2.5.1.
Note: The machine used to initiate the load and the machine being tested are located in the same data center (or server room)
2 Test Description
2.1 Definition of terms (the unit of time is ms)
- Samples – The total number of threads completed in this scenario.
- Average – The average response time.
- Median – The median response time in statistical terms.
- 90% Line – The response time below which 90% of all threads fall.
- Min – The minimum response time.
- Max – The maximum response time.
- Error – The error rate.
- Throughput – The number of transactions processed per unit of time.
- KB/sec – The throughput measured in terms of data transmitted per second.
2.2 Low-Level Storage
A 15-node Cassandra cluster is used for backend storage. HugeGraph and the Cassandra cluster are located on separate servers. Server-related configuration files are modified only for host and port settings, while the rest remain default.
3 Summary of Performance Results
- The speed of a single vertex and edge insertion in HugeGraph is 9000 and 4500 per second, respectively.
- The speed of bulk vertex and edge insertion is 50,000 and 150,000 per second, respectively, which is much higher than the single insertion speed.
- The concurrency for querying vertices and edges by ID can reach more than 12,000, and the average request delay is less than 70ms.
4 Test Results and Analysis
4.1 Batch Insertion
4.1.1 Pressure Upper Limit Test
Test Method
Continuously increase the concurrency level to test the upper limit of the server’s ability to provide services.
Pressure Parameters
Duration: 5 minutes.
Maximum Insertion Speed of Vertices:

Conclusion:
- At a concurrency level of 3500, the throughput of vertices is 261, and the amount of data processed per second is 52,200 (261 * 200).
Maximum Insertion Speed of Edges:

Conclusion:
- At a concurrency level of 1000, the throughput of edges is 323, and the amount of data processed per second is 161,500 (323 * 500).
4.2 Single Insertion
4.2.1 Pressure Upper Limit Test
Test Method
Continuously increase the concurrency level to test the upper limit of the server’s ability to provide services.
Pressure Parameters
- Duration: 5 minutes.
- Service exception mark: Error rate greater than 0.00%.
Single Insertion of Vertices:

Conclusion:
- At a concurrency level of 9000, the throughput is 8400, and the single-insertion concurrency capability for vertices is 9000.
Single Insertion of Edges:

Conclusion:
- At a concurrency level of 4500, the throughput is 4160, and the single-insertion concurrency capability for edges is 4500.
4.3 Query by ID
4.3.1 Pressure Upper Limit Test
Test Method
Continuously increase the concurrency and test the upper limit of the pressure that the server can still provide services normally.
Pressure Parameters
- Duration: 5 minutes
- Service exception flag: error rate greater than 0.00%
Query by ID for vertices

Conclusion:
- The concurrent capacity of the vertex search by ID is 14500, with a throughput of 13576 and an average delay of 11ms.
Edge search by ID

Conclusion:
- For edge ID-based queries, the server’s concurrent capacity is up to 12,000, with a throughput of 10,688 and an average latency of 63ms.
8.3 - HugeGraph-Loader Performance
Note:
The current performance metrics are based on an earlier version. The latest version has significant improvements in both performance and functionality. We encourage you to refer to the most recent release featuring autonomous distributed storage and enhanced computational push down capabilities. Alternatively, you may wait for the community to update the data with these enhancements.
Use Cases
When the number of graph data to be batch inserted (including vertices and edges) is at the billion level or below, or the total data size is less than TB, the HugeGraph-Loader tool can be used to continuously and quickly import graph data.
Performance
The test uses the edge data of website.
RocksDB single-machine performance (Update: multi-raft + rocksdb cluster is supported now)
- When the label index is turned off, 228k edges/s.
- When the label index is turned on, 153k edges/s.
Cassandra cluster performance
- When label index is turned on by default, 63k edges/s.
8.4 - HugeGraph 0.4.4 Benchmark
⚠️ Historical data — do not use it to evaluate current releases
This page records a HugeGraph 0.4.4 benchmark whose data was collected in 2018. The test environment, software versions, and implementation differ substantially from current releases, so these results are provided for historical reference only and must not be used to assess current performance.
A benchmark report for a current release will be added later, after which this page will be archived. Use the updated report for current performance conclusions.
1 测试环境
1.1 硬件信息
| CPU | Memory | 网卡 | 磁盘 |
|---|---|---|---|
| 48 Intel(R) Xeon(R) CPU E5-2650 v4 @ 2.20GHz | 128G | 10000Mbps | 750GB SSD |
1.2 软件信息
1.2.1 测试用例
测试使用graphdb-benchmark,一个图数据库测试集。该测试集主要包含4类测试:
Massive Insertion,批量插入顶点和边,一定数量的顶点或边一次性提交
Single Insertion,单条插入,每个顶点或者每条边立即提交
Query,主要是图数据库的基本查询操作:
- Find Neighbors,查询所有顶点的邻居
- Find Adjacent Nodes,查询所有边的邻接顶点
- Find Shortest Path,查询第一个顶点到100个随机顶点的最短路径
Clustering,基于Louvain Method的社区发现算法
1.2.2 测试数据集
测试使用人造数据和真实数据
MIW、SIW和QW使用SNAP数据集
CW使用LFR-Benchmark generator生成的人造数据
本测试用到的数据集规模
| 名称 | vertex数目 | edge数目 | 文件大小 |
|---|---|---|---|
| email-enron.txt | 36,691 | 367,661 | 4MB |
| com-youtube.ungraph.txt | 1,157,806 | 2,987,624 | 38.7MB |
| amazon0601.txt | 403,393 | 3,387,388 | 47.9MB |
1.3 服务配置
- HugeGraph版本:0.4.4,RestServer和Gremlin Server和backends都在同一台服务器上
- Cassandra版本:cassandra-3.10,commit-log 和data共用SSD
- RocksDB版本:rocksdbjni-5.8.6
- Titan版本:0.5.4, 使用thrift+Cassandra模式
graphdb-benchmark适配的Titan版本为0.5.4
2 测试结果
2.1 Batch插入性能
| Backend | email-enron(30w) | amazon0601(300w) | com-youtube.ungraph(300w) |
|---|---|---|---|
| Titan | 9.516 | 88.123 | 111.586 |
| RocksDB | 2.345 | 14.076 | 16.636 |
| Cassandra | 11.930 | 108.709 | 101.959 |
| Memory | 3.077 | 15.204 | 13.841 |
说明
- 表头"()“中数据是数据规模,以边为单位
- 表中数据是批量插入的时间,单位是s
- 例如,HugeGraph使用RocksDB插入amazon0601数据集的300w条边,花费14.076s,速度约为21w edges/s
结论
- RocksDB和Memory后端插入性能优于Cassandra
- HugeGraph和Titan同样使用Cassandra作为后端的情况下,插入性能接近
2.2 遍历性能
2.2.1 术语说明
- FN(Find Neighbor), 遍历所有vertex, 根据vertex查邻接edge, 通过edge和vertex查other vertex
- FA(Find Adjacent), 遍历所有edge,根据edge获得source vertex和target vertex
2.2.2 FN性能
| Backend | email-enron(3.6w) | amazon0601(40w) | com-youtube.ungraph(120w) |
|---|---|---|---|
| Titan | 7.724 | 70.935 | 128.884 |
| RocksDB | 8.876 | 65.852 | 63.388 |
| Cassandra | 13.125 | 126.959 | 102.580 |
| Memory | 22.309 | 207.411 | 165.609 |
说明
- 表头”()“中数据是数据规模,以顶点为单位
- 表中数据是遍历顶点花费的时间,单位是s
- 例如,HugeGraph使用RocksDB后端遍历amazon0601的所有顶点,并查找邻接边和另一顶点,总共耗时65.852s
2.2.3 FA性能
| Backend | email-enron(30w) | amazon0601(300w) | com-youtube.ungraph(300w) |
|---|---|---|---|
| Titan | 7.119 | 63.353 | 115.633 |
| RocksDB | 6.032 | 64.526 | 52.721 |
| Cassandra | 9.410 | 102.766 | 94.197 |
| Memory | 12.340 | 195.444 | 140.89 |
说明
- 表头”()“中数据是数据规模,以边为单位
- 表中数据是遍历边花费的时间,单位是s
- 例如,HugeGraph使用RocksDB后端遍历amazon0601的所有边,并查询每条边的两个顶点,总共耗时64.526s
结论
- HugeGraph RocksDB > Titan thrift+Cassandra > HugeGraph Cassandra > HugeGraph Memory
2.3 HugeGraph-图常用分析方法性能
术语说明
- FS(Find Shortest Path), 寻找最短路径
- K-neighbor,从起始vertex出发,通过K跳边能够到达的所有顶点, 包括1, 2, 3…(K-1), K跳边可达vertex
- K-out, 从起始vertex出发,恰好经过K跳out边能够到达的顶点
FS性能
| Backend | email-enron(30w) | amazon0601(300w) | com-youtube.ungraph(300w) |
|---|---|---|---|
| Titan | 11.333 | 0.313 | 376.06 |
| RocksDB | 44.391 | 2.221 | 268.792 |
| Cassandra | 39.845 | 3.337 | 331.113 |
| Memory | 35.638 | 2.059 | 388.987 |
说明
- 表头”()“中数据是数据规模,以边为单位
- 表中数据是找到从第一个顶点出发到达随机选择的100个顶点的最短路径的时间,单位是s
- 例如,HugeGraph使用RocksDB查找第一个顶点到100个随机顶点的最短路径,总共耗时2.059s
结论
- 在数据规模小或者顶点关联关系少的场景下,Titan最短路径性能优于HugeGraph
- 随着数据规模增大且顶点的关联度增高,HugeGraph最短路径性能优于Titan
K-neighbor性能
| 顶点 | 深度 | 一度 | 二度 | 三度 | 四度 | 五度 | 六度 |
|---|---|---|---|---|---|---|---|
| v1 | 时间 | 0.031s | 0.033s | 0.048s | 0.500s | 11.27s | OOM |
| v111 | 时间 | 0.027s | 0.034s | 0.115 | 1.36s | OOM | – |
| v1111 | 时间 | 0.039s | 0.027s | 0.052s | 0.511s | 10.96s | OOM |
说明
- HugeGraph-Server的JVM内存设置为32GB,数据量过大时会出现OOM
K-out性能
| 顶点 | 深度 | 一度 | 二度 | 三度 | 四度 | 五度 | 六度 |
|---|---|---|---|---|---|---|---|
| v1 | 时间 | 0.054s | 0.057s | 0.109s | 0.526s | 3.77s | OOM |
| 度 | 10 | 133 | 2453 | 50,830 | 1,128,688 | ||
| v111 | 时间 | 0.032s | 0.042s | 0.136s | 1.25s | 20.62s | OOM |
| 度 | 10 | 211 | 4944 | 113150 | 2,629,970 | ||
| v1111 | 时间 | 0.039s | 0.045s | 0.053s | 1.10s | 2.92s | OOM |
| 度 | 10 | 140 | 2555 | 50825 | 1,070,230 |
说明
- HugeGraph-Server的JVM内存设置为32GB,数据量过大时会出现OOM
结论
- FS场景,HugeGraph性能优于Titan
- K-neighbor和K-out场景,HugeGraph能够实现在5度范围内秒级返回结果
2.4 图综合性能测试-CW
| 数据库 | 规模1000 | 规模5000 | 规模10000 | 规模20000 |
|---|---|---|---|---|
| Titan | 45.943 | 849.168 | 2737.117 | 9791.46 |
| Memory(core) | 41.077 | 1825.905 | * | * |
| Cassandra(core) | 39.783 | 862.744 | 2423.136 | 6564.191 |
| RocksDB(core) | 33.383 | 199.894 | 763.869 | 1677.813 |
说明
- “规模"以顶点为单位
- 表中数据是社区发现完成需要的时间,单位是s,例如HugeGraph使用RocksDB后端在规模10000的数据集,社区聚合不再变化,需要耗时763.869s
- “*“表示超过10000s未完成
- CW测试是CRUD的综合评估
- 后三者分别是HugeGraph的不同后端,该测试中HugeGraph跟Titan一样,没有通过client,直接对core操作
结论
- HugeGraph在使用Cassandra后端时,性能略优于Titan,随着数据规模的增大,优势越来越明显,数据规模20000时,比Titan快30%
- HugeGraph在使用RocksDB后端时,性能远高于Titan和HugeGraph的Cassandra后端,分别比两者快了6倍和4倍
9 - Contribution Guidelines
Read the contribution process before submitting code or documentation. Separate pages cover committer nominations, mailing-list subscriptions, and release validation. Contributor agreements follow the official ASF ICLA/CCLA process.
9.1 - Contribute to the HugeGraph Community
Choose How to Contribute
You can report problems through GitHub Issues, or contribute code, tests, or documentation. Before starting a substantial change, consider opening an issue that explains its scope to avoid duplicated work.
The following example uses apache/hugegraph. The same process applies to other HugeGraph repositories, but follow each repository’s README.md, AGENTS.md, and CI configuration for its build and test commands.
Prepare the Repository
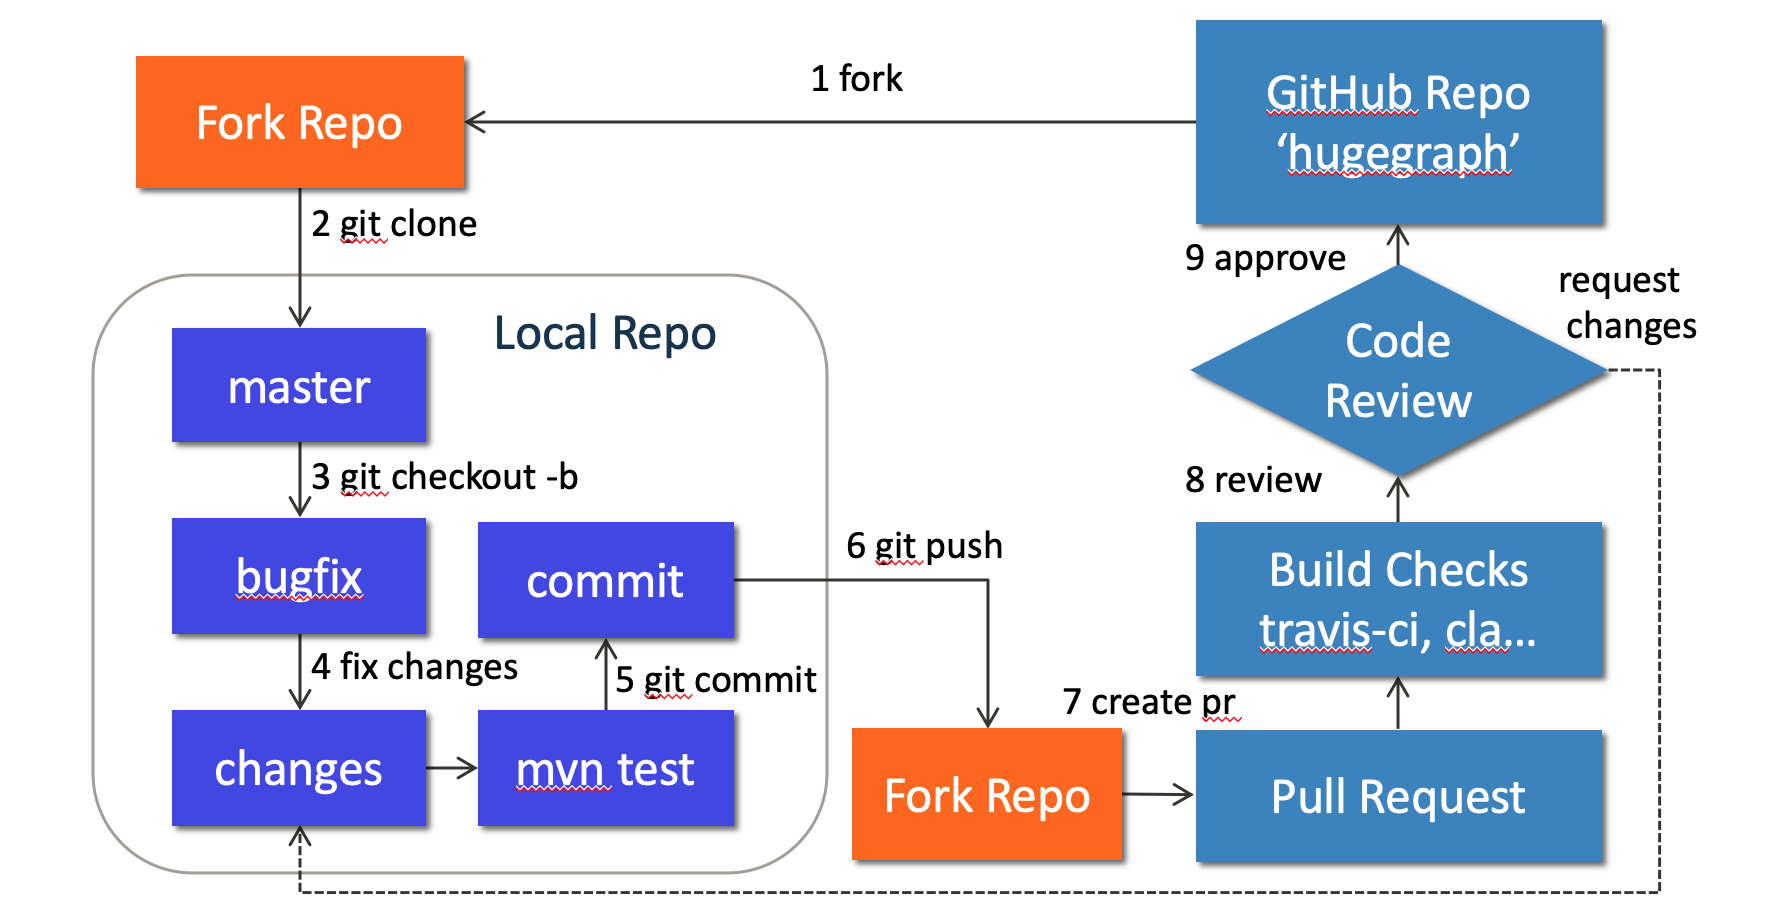
Fork apache/hugegraph on GitHub, then clone your fork:
Do not develop directly on master. Use a separate branch for each change:
Make and Verify Changes
HugeGraph Server code is under hugegraph-server/. For example, the core module is located at:
Current top-level Maven modules are listed below. Server’s hugegraph-server/hugegraph-hstore/ storage adapter is distinct from the standalone hugegraph-store/ storage-node project.
| Path | Submodules |
|---|---|
hugegraph-server/ | hugegraph-core/, hugegraph-api/, hugegraph-example/, hugegraph-dist/, hugegraph-test/, hugegraph-rocksdb/, hugegraph-hbase/, hugegraph-hstore/ |
hugegraph-pd/ | hg-pd-common/, hg-pd-client/, hg-pd-core/, hg-pd-service/, hg-pd-dist/, hg-pd-cli/, hg-pd-grpc/, hg-pd-test/ |
hugegraph-store/ | hg-store-common/, hg-store-client/, hg-store-core/, hg-store-node/, hg-store-dist/, hg-store-cli/, hg-store-grpc/, hg-store-rocksdb/, hg-store-test/ |
hugegraph-commons/ | hugegraph-common/, hugegraph-rpc/ |
hugegraph-cluster-test/ | hugegraph-clustertest-minicluster/, hugegraph-clustertest-dist/, hugegraph-clustertest-test/ |
| Independent root modules | hugegraph-struct/, install-dist/ |
These names come from the root and subproject pom.xml files. Use the structure of the branch you are working on.
For the 1.8.0 shared-foundation changes merged into Server master, see the
shared-foundation ownership and Java migration guide.
Build current Server master with Java 17 and Maven 3.6.3 or later.
CI-friendly versions are flattened during process-resources, so installed and deployed POMs contain concrete versions.
Run the reactor with install before building modules separately, and keep Maven Resolver validation enabled, including with Maven 3.10.
Run the tests directly related to your change first. Common Server test commands include:
GitHub requires a username and token for Git authentication instead of a username and password. Create a personal access token at https://github.com/settings/tokens:
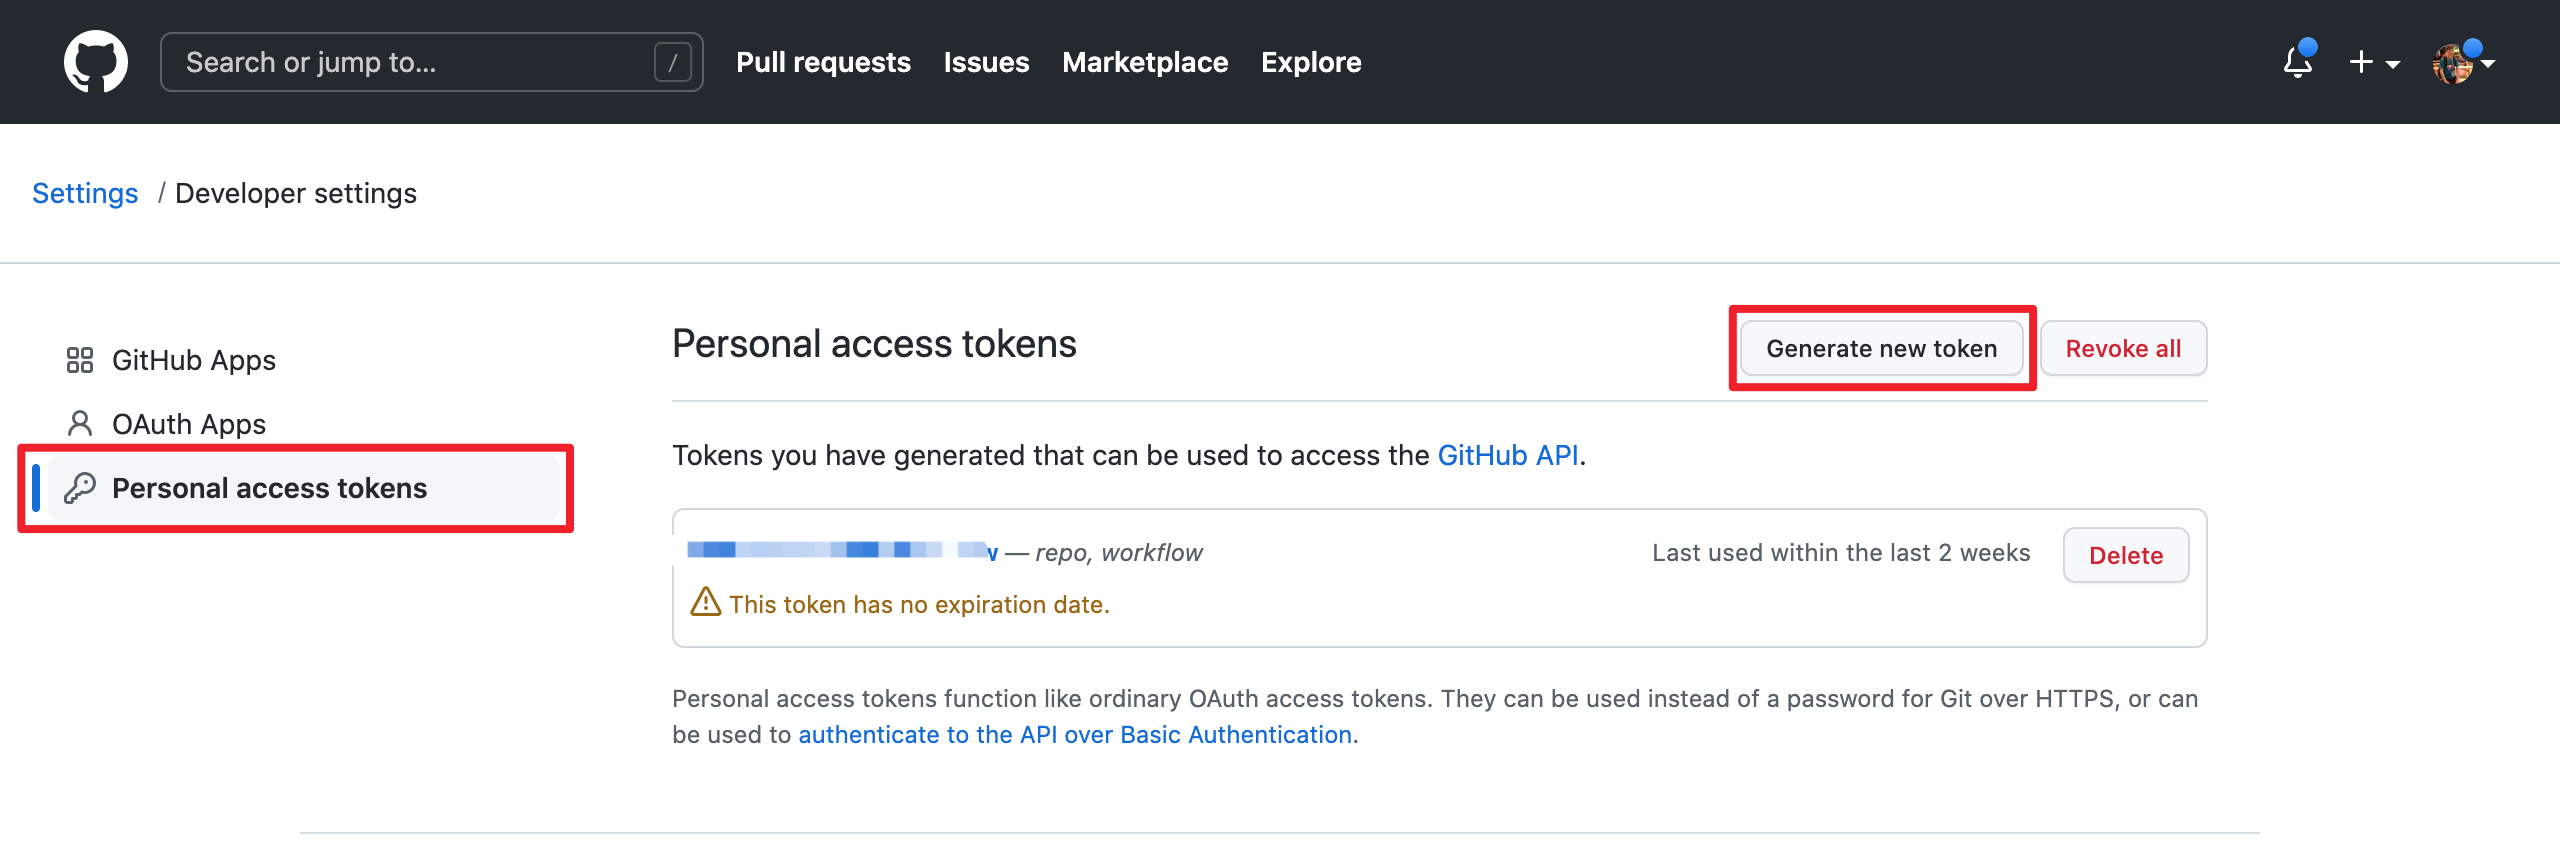
When adding a third-party dependency, also update the license information included in the distribution:
Add the dependency’s license file to
install-dist/release-docs/licenses/.Update
install-dist/release-docs/LICENSE. If the dependency includes a NOTICE file, updateNOTICEas well.From the repository root, prepare the current revision’s Server, PD and Store distribution libraries before regenerating the inventory:
Clean rebuilds the current revision’s distributions to avoid stale dependency jars. It also removes every
*.tarand*.tar.gzfile directly underhugegraph-server/,hugegraph-pd/andhugegraph-store/, plus the current revision’sapache-hugegraph-<revision>.tar.gzin the repository root; directories of other revisions remain.This build skips tests. Collection combines Maven runtime dependencies with actual flat and nested distribution jars, including Spring Boot
BOOT-INF/libdependencies introduced by repackaging. Missing distributions must fail collection; POM inspection alone does not establish the complete shipped inventory. Review strict additions/removals ininstall-dist/scripts/dependency/known-dependencies.txtand their license/NOTICE coverage, including release platform/profile variants.
Submit a Pull Request
GitHub no longer accepts an account username and password for pushing code. If you need a personal access token, create one with the necessary permissions in token settings.
Make sure the email address used for your commits is associated with your GitHub account. Use email settings:
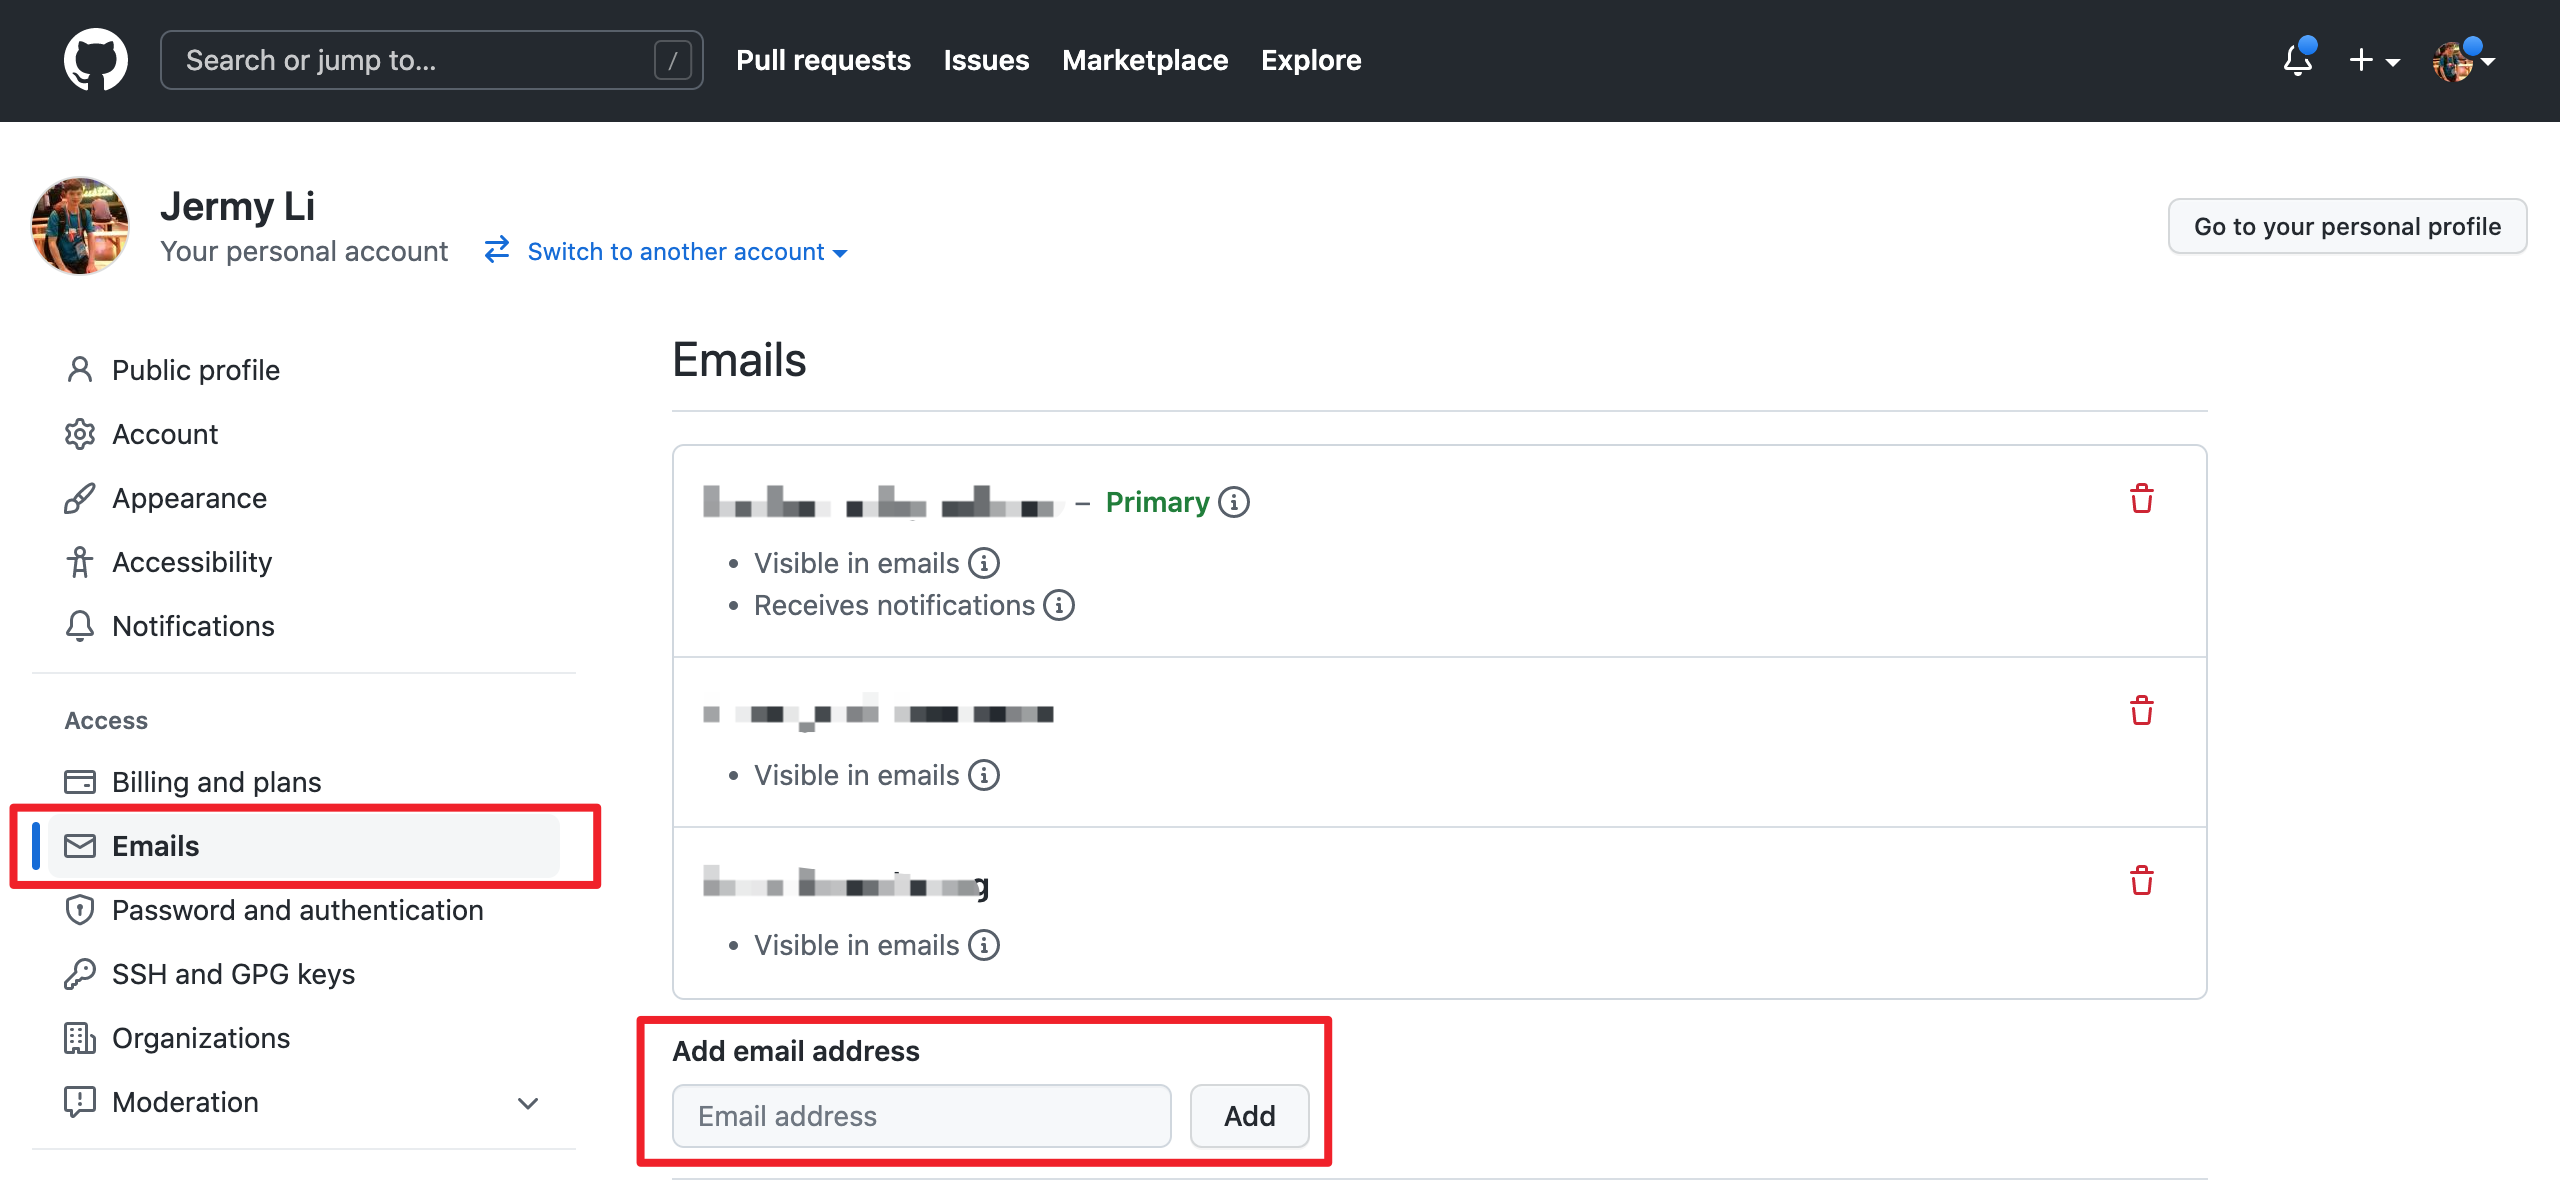
Use the type(module): message format for commit messages, for example:
Then open a pull request from your fork branch to apache/hugegraph:master. Explain the problem, the implementation, and the validation commands you actually ran. Include screenshots for UI changes.
Address Review Feedback
If CI fails or a reviewer requests changes, continue committing and pushing to the same branch. Rebase when you need to synchronize with upstream:
Do not overwrite the remote branch with plain --force. After all CI and review requirements are satisfied, a project maintainer will merge the pull request.
Contributor agreements follow the official ASF process. See the Contributor Agreement.
9.2 - Subscribe to the Community Mailing List
HugeGraph uses dev@hugegraph.apache.org for development and usage discussions. Subscribe before sending messages to the list; messages from non-subscribers may be rejected.
Subscribe
- From the email address you want to subscribe, send a message with any subject and body to dev-subscribe@hugegraph.apache.org.
- Reply directly to the confirmation message.
- After receiving the subscription confirmation, you can send messages to dev@hugegraph.apache.org.
If the confirmation does not arrive, check your spam folder and automatic mail categories. If it is still missing, wait a while and send the subscription message again.
You can browse public messages in the ASF Mailing List Archives without subscribing.
Unsubscribe
- From your subscribed address, send a message to dev-unsubscribe@hugegraph.apache.org.
- Reply directly to the confirmation message from
dev-help@hugegraph.apache.org. - Unsubscription is complete when you receive a message whose subject contains
GOODBYE.
For general ASF mailing-list guidance, see Apache Mailing Lists.
9.3 - Validate Apache Release
Note: this doc will be updated continuously. Use Java 17 to build and verify HugeGraph 1.8.0 release packages (the Maven build accepts only JDK 17); use Java 11 for 1.7.0. Since version 1.5.0, components other than the client no longer support Java 8.
Graduation note: Apache HugeGraph graduated in January 2026. Official release voting is now completed within the HugeGraph community (PMC binding votes on
dev@hugegraph.apache.org), and no longer requires Incubatorgeneral@incubator.apache.orgapproval.
Automated release validation
The workflow and dist/validate-release.sh use the same Java 17 checks. Specify the package version and SVN RC path separately,
and use the Maven staging repository from the vote email. The four Server/Toolchain source and binary archives are required.
The same directory may also contain AI and Computer source archives. Every archive must include SHA512 and GPG signatures;
unknown packages and mismatched versions are rejected. All present archives receive integrity, contents and license checks;
Computer sources are also rebuilt with Maven. AI and Computer product runtime validation remains a separate task.
Strict RC validation builds with fresh, separate Maven repositories and does not preinstall a local Server SDK.
It validates both source-built and downloaded binaries through Server, Client, ordinary Loader, Tools and Hubble business assertions.
Logs remain available after failures. The source-prevalidation workflow mode uses exact Server/Toolchain commit SHAs and unsigned archives;
its result does not prove real RC signatures, downloads or remote staging dependency resolution.
Review license-review-*.txt for license choices and exceptions; explicit Category-X-only dependencies block validation.
Automatic success does not approve the release.
The console and GitHub Job Summary show the result, failed phase, review notes and log location. Source prevalidation is clearly separate from RC acceptance.
See the validator instructions for local prevalidation and evidence paths.
Verification
When the internal temporary release and packaging work is completed, other community developers ( especially PMC) need to participate in verification based on ASF release policy and checklist references:
- ASF release policy
- Incubator checklist (historical reference) To ensure the “correctness + completeness” of someone’s published version, here requires **everyone ** to participate as much as possible, and then explain which items you have checked in the subsequent email reply.(The following are the core items)
1. prepare
If there is no svn or gpg or wget environment locally, it is recommended to install it first
(windows recommend using WSL2 environment, or at least git-bash), also make sure to install java
(Java 17 for HugeGraph 1.8.0+, Java 11 for 1.7.0) and maven software (≥ 3.6.3)
2. check hash value
First you need to check the file integrity of the source + binary package, Verify by shasum to
ensure that it is consistent with the hash value published on apache/GitHub (Usually sha512), Here
is the same as the last step of 0x02 inspection.
3. check gpg signature
This is to ensure that the published package is uploaded by a reliable person. Assuming tom signs and uploads, others should download A’s public key and then perform signature confirmation.
Related commands:
Require exit code zero and a VALIDSIG fingerprint matching the vote signer. When a signing subkey is used, compare its reported
primary-key fingerprint. A key-trust warning alone does not invalidate a signature; do not infer success from localized Good signature text.
Stop on REVKEYSIG, EXPKEYSIG or EXPSIG, even alongside VALIDSIG or exit code zero; ask the release manager to review or update the candidate.
See the GnuPG status format.
First confirm the overall integrity/consistency, and then confirm the specific content (key)
4. Check the archive contents
Check the contents of the archive downloaded from preparation work. Divided into two aspects: source code package + binary package, The source code package is stricter, it can be said that the core part (Because it is longer, For a complete list refer to the official Wiki)
A. source package
After decompressing *hugegraph*src.tar.gz, Do the following checks:
- package/folder naming should match the release line (historical releases may still contain
incubating), and no empty files/folders LICENSE+NOTICEexist and the content is normal;DISCLAIMERis required for historical incubating artifacts- does not exist binaries (without LICENSE)
- The source code files all contain the standard
ASF Licenseheader (this could be done with theMaven-MATplugin) - Check whether the
pom.xmlversion number of each parent/child module is consistent (and meet expectations) - Finally, make sure the source code works/compiles correctly
The manual Maven command must use settings pointing to the staging repository from the vote email and a fresh local repository. Do not preinstall local Server SDK artifacts to hide missing staged dependencies. The automated validator configures these settings for you.
B. binary package
After decompressing xxx-hugegraph.tar.gz, perform the following checks:
- package/folder naming should match the release line (historical releases may still contain
incubating) LICENSEandNOTICEfile exists and the content is normal (DISCLAIMERapplies to historical incubating artifacts)- start server
Note: If a third-party dependency is introduced in the binary package, you need to update the LICENSE and add the third-party dependent LICENSE; if the third-party dependent LICENSE is Apache 2.0, and the corresponding project contains NOTICE, you also need to update Our NOTICE file
5. Check the official website and GitHub and other pages
- Make sure that the official website at least meets apache website check, and no circular links, etc.
- Update download link and release notes updated
- …
Mail Template
After the check & test, you should reply to the mail with the following content: (normal devs & PMC)
and the PMC members should reply with binding, it’s important for summary the valid votes:
9.4 - Setup Server in IDEA (Dev)
Scope: These IDEA instructions are based on the HugeGraph 1.2.0 release tag and retained as historical debugging steps. For current source layout and verification commands, see the contribution process and Server quick start. Do not infer the current module list from this page.
Background
The Quick Start section provides instructions on how to start and stop HugeGraph-Server using scripts. In this guide, we will explain how to run and debug HugeGraph-Server on the Linux platform using IntelliJ IDEA.
The core steps for local startup are the same as starting with scripts:
- Initialize the database backend by executing the
InitStoreclass to initialize the graph. - Start HugeGraph-Server by executing the
HugeGraphServerclass to load the initialized graph information and start the server.
Before proceeding with the following process, make sure that you have cloned the source code of HugeGraph
and have configured the development environment, such as Java 17 for HugeGraph 1.8.0+ (Java 11 for 1.7.0) & you could config your local environment
with this config-doc
Steps
1. Copy Configuration Files
To avoid the impact of configuration file changes on Git tracking, it is recommended to copy the required configuration files to a separate folder. Run the following command to copy the files:
Replace path-to-your-directory with the path to the directory where you want to copy the files. Run the command from the repository root, the hugegraph-dist module lives under the top-level hugegraph-server directory.
The following ToplingDB steps apply only to historical custom builds. Current master contains neither
preload-topling.shnor the ToplingDB module; skip this note when debugging current master.
2. Configure InitStore to initialize the graph
First, you need to configure the database backend in the configuration files. In this example, we will use RocksDB. Open path-to-your-directory/conf/graphs/hugegraph.properties and configure it as follows:
Next, open the Run/Debug Configurations panel in IntelliJ IDEA and create a new Application configuration. Follow these steps for the configuration:
- Select
hugegraph-distas theUse classpath of module. - Set the
Main classtoorg.apache.hugegraph.cmd.InitStore. - Set the program arguments to
conf/rest-server.properties. Note that the path here is relative to the working directory, so make sure to set the working directory topath-to-your-directory. - (Optional, ToplingDB builds only) ToplingDB requires preloading dynamic libraries via the
LD_PRELOADmechanism. Developers need to set two environment variables:LD_LIBRARY_PATHshould point to thelibrarydirectory extracted bypreload-topling.sh, andLD_PRELOADshould be set tolibjemalloc.so:librocksdbjni-linux64.soto ensure the necessary libraries are correctly loaded at runtime.- LD_LIBRARY_PATH=/path/to/your/library:$LD_LIBRARY_PATH
- LD_PRELOAD=libjemalloc.so:librocksdbjni-linux64.so
If user authentication (authenticator) is configured for HugeGraph-Server in the Java 11 environment, you need to refer to the script configuration in the binary package and add the following VM options:
Otherwise, an error will occur:
Once the configuration is completed, run it. If the execution is successful, the following runtime logs will be displayed:
3. Running HugeGraphServer
Similarly, open the Run/Debug Configurations panel in IntelliJ IDEA and create a new Application configuration. Follow these steps for the configuration:
- Select
hugegraph-distas theUse classpath of module. - Set the
Main classtoorg.apache.hugegraph.dist.HugeGraphServer. - Set the program arguments to
conf/gremlin-server.yaml conf/rest-server.properties. Similarly, note that the path here is relative to the working directory, so make sure to set the working directory topath-to-your-directory.
bin/hugegraph-server.shin the binary package does not start this class directly. It startsorg.apache.hugegraph.bootstrap.HugeGraphServerBootstrap, which takes a leadingtrue/falsesecurity-check flag before the two configuration paths, installsHugeSecurityManagerwhen that flag istrue, and then hands over toHugeGraphServer. RunningHugeGraphServerfrom IDEA skips that wrapper, so the security manager is not installed, which is normally what you want while debugging.
Similarly, if user authentication (authenticator) is configured for HugeGraph-Server in the Java 11 environment, you need to refer to the script configuration in the binary package and add the following VM options:
Otherwise, an error will occur:
Once the configuration is completed, run it. If you see the following logs, it means that HugeGraphServer has been successfully started:
4. Debugging HugeGraphServer (optional)
After completing the above configuration, you can try debugging HugeGraphServer. Run HugeGraphServer in debug mode and set a breakpoint at the following location:
Then use the RESTful API to request HugeGraphServer:
At this point, you can view detailed variable information in the debugger.
5. Log4j2 Configuration
By default, when running InitStore and HugeGraphServer, the Log4j2 configuration file path read is hugegraph-server/hugegraph-dist/src/main/resources/log4j2.xml, not path-to-your-directory/conf/log4j2.xml. This configuration file is read when starting HugeGraph-Server using the script.
To avoid maintaining two separate configuration files, you can modify the Log4j2 configuration file path when running and debugging HugeGraph-Server in IntelliJ IDEA:
- Open the previously created
Applicationconfiguration. - Click on
Modify options-Add VM options. - Set the VM options to
-Dlog4j.configurationFile=conf/log4j2.xml.
Possible Issues
1. java: package sun.misc does not exist
The reason may be that cross-compilation is triggered when using Java 11 to compile, causing the symbol of sun.misc.Unsafe used in the project to not be found. There are two possible solutions:
- In IntelliJ IDEA, go to
Preferences/Settingsand find theJava Compilerpanel. Then, disable the--releaseoption (recommended). - Set the Project SDK to 8 (Deprecated soon).
2. java: *.store.raft.rpc.RaftRequests does not exist (RPC Generated Files)
The reason is that the source code didn’t include the RPC-generated files. You could try 2 ways to fix it:
- [CMD]
mvn clean compilein the root directory (Recommend) - [UI] right click on the
hugegraphrepo and selectMaven->Generate Sources and Update Folders. This will rebuild the repo and correctly generate the required files.
3. Unable to Print Location Information (%l) in Log4j2
This is because Log4j2 uses asynchronous loggers. You can refer to the official documentation for configuration details.
References
9.5 - Apache HugeGraph Committer Guide
This document outlines the requirements and process for becoming an Apache Committer. The corresponding ASF official document can be found at: https://community.apache.org/newcommitter.html
Candidate Requirements
- Candidates must adhere to the Apache Code of Conduct.
- PMC members will assess candidates’ interactions with others and contributions through mailing lists, issues, pull requests, and official documentation.
- Considerations for evaluating candidates as potential Committers include:
- Ability to collaborate with community members
- Mentorship capabilities
- Community involvement
- Level of contribution
- Personal skills/abilities
Nomination Process
Discussion → Vote → Invitation → Announcement
Initiate Community Discussion (DISCUSS)
Any PMC member of HugeGraph can initiate a voting discussion. After identifying valuable contributions from a community contributor and obtaining the candidate’s consent, a discussion can be initiated via private@hugegraph.apache.org. The initiator of the discussion should clearly state the candidate’s contributions in the discussion email and provide URLs or other information for confirming the contributions, facilitating discussion and analysis.
Below is a template for HugeGraph emails: (For reference only)
Note: The term
xxxwill be used to refer to the candidate. Typically,xxxrepresents an easily readable name (e.g.,Simon Jay).ASF-INFRA recommends avoiding the use of less readable
IDdirectly as a reference to the person in emails (e.g., avoidsimon321orwh0isSim0n😄).In addition, it is best to choose the “pure text” mode, otherwise the typesetting may be chaotic in the ASF Mailing-list UI
For contribution links in discussion emails, you can use the statistical feature of GitHub Search by entering corresponding keywords as needed. You can also adjust parameters and add new repositories such as repo:apache/hugegraph-computer. Pay special attention to adjusting the time range (below is a template reference, please adjust the parameters accordingly):
- Number of PR submissions
is:pr author:xxx repo:apache/hugegraph repo:apache/hugegraph-doc created:>2023-06-01 updated:<2023-12-25
- Lines of code submissions/changes
- Number of PR submissions associated with issues
linked:issue involves:xxx repo:apache/hugegraph repo:apache/hugegraph-doc created:>2023-06-01 updated:<2023-12-25
- Number of PR reviews
type:pr reviewed-by:xxx repo:apache/hugegraph repo:apache/hugegraph-doc created:>2023-06-01 updated:<2023-12-25
- Number of merge commits
type:pr author:xxx repo:apache/hugegraph repo:apache/hugegraph-doc created:>2023-06-01 updated:<2023-12-25
- Effective lines merged
- Number of issue submissions
type:issue author:xxx repo:apache/hugegraph repo:apache/hugegraph-doc created:>2023-06-01 updated:<2023-12-25
- Number of issue fixes
- Based on the number of issue submissions, select those with a closed status.
- Number of issue participations
type:issue involves:xxx repo:apache/hugegraph repo:apache/hugegraph-doc created:>2023-06-01 updated:<2023-12-25
- Number of issue comments
type:issue commenter:xxx repo:apache/hugegraph repo:apache/hugegraph-doc created:>2023-06-01 updated:<2023-12-25
- Number of PR comments
type:pr commenter:xxx repo:apache/hugegraph repo:apache/hugegraph-doc created:>2023-06-01 updated:<2023-12-25
For participation in mailing lists, you can use https://lists.apache.org/list?dev@hugegraph.apache.org:lte=10M:xxx.
Initiate Community Voting Email (VOTE)
If there are no dissenting opinions within the specified time frame of the discussion email, the initiator of the discussion needs to initiate a voting email for the committer election at private@hugegraph.apache.org.
Below is the corresponding email template:
Then, PMC members reply to the email with +1 or -1 to express their opinions. Generally, at least 3 votes of +1 are needed to conclude the vote.
Announcement of Voting Results (RESULT)
After the voting email concludes, the initiator of the vote needs to remind the end of the voting in the email. Additionally, the initiator needs to announce the voting results via email to private@hugegraph.apache.org. The email template can be as follows:
Send Invitation Email to Candidate (INVITE)
After the announcement of the voting results email is sent, the initiator of the vote should send an invitation email to the candidate. The invitation email is addressed to the candidate and cc’d to private@hugegraph.apache.org. The invited candidate must reply to the specified email address to accept or reject the invitation.
Below is a template for reference:
Candidate Accepts Invitation (ACCEPT)
The candidate should reply to the aforementioned email (select reply all) to indicate acceptance of the invitation. Below is a template for the email:
Of course, the candidate may also choose to decline the invitation, in which case there is no template:)
Once the invitation is accepted, the candidate needs to complete the following tasks:
- Subscribe to dev@hugegraph.apache.org, for specific steps/filtering configurations, please refer to the documentation
- Sign the ICLA, follow the steps below↓
ICLA Signing Process
- Download the ICLA
- Open the PDF and fill in the required information. All fields must be filled in English. It is recommended to use a PDF tool to edit and sign.
- Full name: First name followed by last name
- Public name: Optional, defaults to the same as
Full name - Check the box only if you entered names with your family name first
- Postal Address: English address, starting from small to large, including detailed street address
- Country: Country of residence in English
- E-mail: Email address, preferably the same as the one used in the invitation email
- (optional) preferred Apache id(s): Choose an SVN ID that is not listed on the Apache committer page
- (optional) notify project: Apache HugeGraph
- Signature: Must be handwritten using a PDF tool
- Date: Format as xxxx-xx-xx
- After signing, rename
icla.pdftoname-pinyin-icla.pdf - Send the following email and attach
name-pinyin-icla.pdfas a reference.
For more details, please refer to https://github.com/apache/hugegraph/issues/1732.
PMC members will await confirmation of the ICLA record from the Apache secretary team. Candidates and PMC members will receive the following email:
Setting Up Apache Account and Development Environment (CONFIG)
After the record is completed, the candidate will receive an email from root@apache.org with the subject Welcome to the Apache Software Foundation. At this point, the candidate needs to follow the steps in the email to set up the Apache account and development environment:
- Reset the password at https://id.apache.org/reset/enter.
- Configure personal information at https://whimsy.apache.org/roster/committer/xxx.
- Associate GitHub account at https://gitbox.apache.org/boxer.
- This step requires configuring GitHub Two-Factor Authentication (2FA).
- The nominating PMC member must add the new Committer to the official list of committers via the Roster page. (Important, otherwise repository permissions will not take effect).
- After this step, the candidate becomes a new Committer and gains write access to the GitHub HugeGraph repository.
- (Optional) The new Committer can apply for free use of JetBrains’ full range of products with their Apache account here.
Announcing via Email (ANNOUNCE)
After the candidate completes the above steps, they will officially become a Committer of HugeGraph. At this point, they need to send an announcement email to dev@hugegraph.apache.org. Below is a template for the email:
Update Governance Information
Since Apache HugeGraph graduated in January 2026, governance information is maintained in ASF committee/project data rather than Incubator clutch pages.
Please check:
If an update is required but does not appear automatically, coordinate with Apache Community Development or ASF Infra according to the official process.
References
- https://community.apache.org/newcommitter.html (ASF official documentation)
- https://infra.apache.org/new-committers-guide.html
- https://www.apache.org/dev/pmc.html#newcommitter
- https://linkis.apache.org/zh-CN/community/how-to-vote-a-committer-pmc
- https://www.apache.org/licenses/contributor-agreements.html#submitting
- https://www.apache.org/licenses/cla-faq.html#printer
- https://linkis.apache.org/zh-CN/community/how-to-sign-apache-icla
- https://github.com/apache/hugegraph/issues/1732 (HugeGraph ICLA related issue)
10 - CHANGELOGS
10.1 - HugeGraph 1.7.0 Release Notes
WIP: This doc is under construction, please wait for the final version (BETA)
Operating Environment / Version Description
For 1.7.0 version hugegraph, related components only support Java11.
hugegraph
API Changes
- BREAKING CHANGE: Disable legacy backends include MySQL/PG/c*(.etc) #2746
- BREAKING CHANGE: Release version 1.7.0 [server + pd + store] #2889
Feature Changes
- Support MemoryManagement for graph query framework #2649
- LoginAPI support token_expire field #2754
- Add option for task role election #2843
- Optimize perf by avoid boxing long #2861
- StringId hold bytes to avoid decode/encode #2862
- Add PerfExample5 and PerfExample6 #2860
- RocksDBStore remove redundant checkOpened() call #2863
- Add path filter #2898
- Init serena memory system & add memories #2902
Bug Fixes
- Filter dynamice path(PUT/GET/DELETE) with params cause OOM #2569
- JRaft Histogram Metrics Value NaN #2631
- Update server image desc #2702
- Kneigbor-api has unmatched edge type with server #2699
- Add license for swagger-ui & reset use stage to false in ci yml #2706
- Fix build pd-store arm image #2744
- Fix graph server cache notifier mechanism #2729
- Tx leak when stopping the graph server #2791
- Ensure backend is initialized in gremlin script #2824
- Fix some potential lock & type cast issues #2895
- Fix npe in getVersion #2897
- Fix the support for graphsapi in rocksdb and add testing for graphsapi #2900
- Remove graph path in auth api path #2899
- Migrate to LTS jdk11 in all Dockerfile #2901
- Remove the judgment for java8 compatibility in the init-store #2905
- Add missing license and remove binary license.txt & fix tinkerpop ci & remove duplicate module #2910
Option Changes
- Remove some outdated configuration #2678
Other Changes
- Update outdated docs for release 1.5.0 #2690
- Fix licenses and remove empty files #2692
- Update repo artifacts references #2695
- Adjust release fury version #2698
- Fix the JSON license issue #2697
- Add debug info for tp test #2688
- Enhance words in README #2734
- Add collaborators in asf config #2741
- Adjust the related filters of sofa-bolt #2735
- Reopen discussion in .asf.yml config #2751
- Fix typo in README #2806
- Centralize version management in project #2797
- Update notice year #2826
- Improve maven Reproducible Builds → upgrade plugins #2874
- Enhance docker instruction with auth opened graph #2881
- Remove the package existing in java8 #2792
- Revise Docker usage instructions in README #2882
- Add DeepWiki badge to README #2883
- Update guidance for store module #2894
- Update test commands and improve documentation clarity #2893
- Bump rocksdb version from 7.2.2 to 8.10.2 #2896
hugegraph-toolchain
API Changes
- Support graphspace #633
Feature Changes
- Support jdbc date type & sync .editorconfig #648
- Add a useSSL option for mysql #650
- Patch for father sub edge #654
- Improve user experience for user script #666
- Support concurrent readers, short-id & Graphsrc #683
- Init serena onboarding & project memory files #692
Bug Fixes
- Typo word in display #655
- Patch up missing classes and methods for hubble #657
- Adjust Client to 1.7.0 server #689
- Remove json license for release 1.7.0 #698
Other Changes
- Update hugegraph source commit id #640
- Add collaborators in asf config #656
- Update pom for version-1.7.0 #681
- Add DeepWiki badge to README #684
- Adjust APIs to compatible with 1.7.0 server #685
- Adjust LoadContext to 1.7.0 version #687
- Migrate to LTS jdk11 in all Dockerfile #691
- Update copyright year in NOTICE file #697
hugegraph-computer
Feature Changes
- Migration Vermeer to hugegraph-computer #316
- Make startChan’s size configurable #328
- Assign WorkerGroup via worker configuration #332
- Support task priority based scheduling #336
- Avoid 800k #340
Bug Fixes
- Fix docker file build #341
Other Changes
- Update release version to 1.5.0 #318
- Update go depends module & fix headers #321
- Update go version to 1.23 #322
- Add collaborator in .asf.yaml #323
- Update the Go version in docker image #333
- Add DeepWiki badge to README #337
- Bump project version to 1.7.0 (RELEASE) #338
- Update copyright year in NOTICE file #342
hugegraph-ai
API Changes
- Support choose template in api #135
- Add post method for paths-api #162
- Support switch graph in api & add some query configs #184
- Text2gremlin api #258
- Support switching prompt EN/CN #269
- BREAKING CHANGE: Update keyword extraction method #282
Feature Changes
- Added the process of text2gql in graphrag V1.0 #105
- Use pydantic-settings for config management #122
- Timely execute vid embedding & enhance some HTTP logic #141
- Use retry from tenacity #143
- Modify the summary info and enhance the request logic #147
- Automatic backup graph data timely #151
- Add a button to backup data & count together #153
- Extract topk_per_keyword & topk_return_results to .env #154
- Modify clear buttons #156
- Support intent recognition V1 #159
- Change vid embedding x:yy to yy & use multi-thread #158
- Support mathjax in rag query block V1 #157
- Use poetry to manage the dependencies #149
- Return schema.groovy first when backup graph data #161
- Merge all logs into one file #171
- Use uv for the CI action #175
- Use EN prompt for keywords extraction #174
- Support litellm LLM provider #178
- Improve graph extraction default prompt #187
- Replace vid by full vertexes info #189
- Support asynchronous streaming generation in rag block by using async_generator and asyncio.wait #190
- Generalize the regex extraction func #194
- Create quick_start.md #196
- Support Docker & K8s deployment way #195
- Multi-stage building in Dockerfile #199
- Support graph checking before updating vid embedding #205
- Disable text2gql by default #216
- Use 4.1-mini and 0.01 temperature by default #214
- Enhance the multi configs for LLM #212
- Textbox to Code #217
- Replace the IP + Port with URL #209
- Update gradio’s version #235
- Use asyncio to get embeddings #215
- Change QPS -> RPM for timer decorator #241
- Support batch embedding #238
- Using nuitka to provide a binary/perf way for the service #242
- Use uv instead poetry #226
- Basic compatible in text2gremlin generation #261
- Enhance config path handling and add project root validation #262
- Add vermeer python client for graph computing #263
- Use uv in client & ml modules & adapter the CI #257
- Use uv to manage pkgs & update README #272
- Limit the deps version to handle critical init problems #279
- Support semi-automated prompt generation #281
- Support semi-automated generated graph schema #274
- Unify all modules with uv #287
- Add GitHub Actions for auto upstream sync and update SEALData subsample logic #289
- Add a basic LLM/AI coding instruction file #290
- Add rules for AI coding guideline - V1.0 #293
- Replace QianFan by OpenAI-compatible format #285
- Optimize vector index with asyncio embedding #264
- Refactor embedding parallelization to preserve order #295
- Support storing vector data for a graph instance by model type/name #265
- Add AGENTS.md as new document standard #299
- Add Fixed Workflow Execution Engine: Flow, Node, and Scheduler Architecture #302
- Support vector db layer V1.0 #304
Bug Fixes
- Limit the length of log & improve the format #121
- Pylint in ml #125
- Critical bug with pylint usage #131
- Multi vid k-neighbor query only return the data of first vid #132
- Replace getenv usage to settings #133
- Correct header writing errors #140
- Update prompt to fit prefix cache #137
- Extract_graph_data use wrong method #145
- Use empty str for llm config #155
- Update gremlin generate prompt to apply fuzzy match #163
- Enable fastapi auto reload function #164
- Fix tiny bugs & optimize reranker layout #202
- Enable tasks concurrency configs in Gradio #188
- Align regex extraction of json to json format of prompt #211
- Fix documentation sample code error #219
- Failed to remove vectors when updating vid embedding #243
- Skip empty chunk in LLM steaming mode #245
- Ollama batch embedding bug #250
- Fix Dockerfile to add pyproject.toml anchor file #266
- Add missing ‘properties’ in gremlin prompt formatting #298
- Fixed cgraph version #305
- Ollama embedding API usage and config param #306
Option Changes
- Remove enable_gql logic in api & rag block #148
Other Changes
- Update README for python-client/SDK #150
- Enable pip cache #142
- Enable discussion & change merge way #201
- Synchronization with official documentation #273
- Fix grammar errors #275
- Improve README clarity and deployment instructions #276
- Add docker-compose deployment and improve container networking instructions #280
- Update docker compose command #283
- Reduce third-party library log output #244
- Update README with improved setup instructions #294
- Add collaborators in asf config #182
Release Details
Please check the release details/contributor in each repository:
10.2 - HugeGraph 1.5.0 Release Notes
WIP: This doc is under construction, please wait for the final version (BETA)
Operating Environment / Version Description
- From
hugegraphversion 1.5.0 and later, related components only support Java11.
PS: In the future, HugeGraph components will evolve through versions of Java 11 -> Java 17 -> Java 21.
hugegraph
This version introduces many new features and optimizations, particularly support for the new distributed backend HStore(Raft + RocksDB).
API Changes
- BREAKING CHANGE: Support “parent & child”
EdgeLabeltype #2662
Feature Changes
- Integrate
pd-grpc,pd-common, andpd-client#2498 - Integrate
store-grpc,store-common, andstore-client#2476 - Integrate
store-rocksdbsubmodule #2513 - Integrate
pd-coreinto HugeGraph #2478 - Integrate
pd-serviceinto HugeGraph #2528 - Integrate
pd-distinto HugeGraph and add core tests, client tests, and REST tests for PD #2532 - Integrate
server-hstoreinto HugeGraph #2534 - Integrate
store-coresubmodule #2548 - Integrate
store-nodesubmodule #2537 - Support new backend Hstore #2560
- Support Docker deployment for PD and Store #2573
- Add a tool method
encode#2647 - Add basic
MiniClustermodule for distributed system testing #2615 - Support disabling RocksDB auto-compaction via configuration #2586
Bug Fixes
- Switch RocksDB backend to memory when executing Gremlin examples #2518
- Avoid overriding backend config in Gremlin example scripts #2519
- Update resource references #2522
- Randomly generate default values #2568
- Update build artifact path for Docker deployment #2590
- Ensure thread safety for range attributes in PD #2641
- Correct server Docker copy source path #2637
- Fix JRaft Timer Metrics bug in Hstore #2602
- Enable JRaft MaxBodySize configuration #2633
Option Changes
- Mark old raft configs as deprecated #2661
- Enlarge bytes write limit and remove
bigparameter when encoding/decoding string ID length #2622
Other Changes
- Add Swagger-UI LICENSE files #2495
- Translate CJK comments and punctuations to English across multiple modules #2536, #2623, #2645
- Introduce
install-distmodule in root #2552 - Enable up-to-date checks for UI (CI) #2609
- Minor improvements for POM properties #2574
- Migrate HugeGraph Commons #2628
- Tar source and binary packages for HugeGraph with PD-Store #2594
- Refactor: Enhance cache invalidation of the partition → leader shard in
ClientCache#2588 - Refactor: Remove redundant properties in
LogMetaandPartitionMeta#2598
hugegraph-toolchain
API Changes
- Support “parent & child”
EdgeLabeltype #624
Feature Changes
- Support English interface & add a script/doc for it in Hubble #631
Bug Fixes
- Serialize source and target label for non-father EdgeLabel #628
- Encode/decode Chinese error after building Hubble package #627
- Configure IPv4 to fix timeout of
yarn installin Hubble #636 - Remove debugging output to speed up the frontend construction in Hubble #638
Other Changes
- Bump
expressfrom 4.18.2 to 4.19.2 in Hubble Frontend #598 - Make IDEA support IssueNavigationLink #600
- Update
yarn.lockfor Hubble #605 - Introduce
editorconfig-maven-pluginfor verifying code style defined in.editorconfig#614 - Upgrade distribution version to 1.5.0 #639
Documentation Changes
- Clarify the contributing guidelines #604
- Enhance the README file for Hubble #613
- Update README style referring to the server’s style #615
hugegraph-ai
API Changes
- Added local LLM API and version API. #41, #44
- Implemented new API and optimized code structure. #63
- Support for graphspace and refactored all APIs. #67
Feature Changes
- Added openai’s apibase configuration and asynchronous methods in RAG web demo. #41, #58
- Support for multi reranker and enhanced UI. #73
- Node embedding, node classify, and graph classify with models based on DGL. #83
- Graph learning algorithm implementation (10+). #102
- Support for any openai-style API (standard). #95
Bug Fixes
- Fixed fusiform_similarity test in traverser for server 1.3.0. #37
- Avoid generating config twice and corrected e_cache type. #56, #117
- Fixed null value detection on vid attributes. #115
- Handled profile regenerate error. #98
Option Changes
- Added auth for fastapi and gradio. #70
- Support for multiple property types and importing graph from the entire doc. #84
Other Changes
- Reformatted documentation and updated README. #36, #81
- Introduced a black for code format in GitHub actions. #47
- Updated dependencies and environment preparations. #45, #65
- Enhanced user-friendly README. #82
hugegraph-computer
Feature Changes
Bug Fixes
- Fix: base-ref/head-ref Missed in Dependency-Review on Schedule Push #304
Option Changes
- Refactor(core): StringEncoding #300
Other Changes
- Improve(algorithm): Random Walk Vertex Inactive #301
- Upgrade Version to 1.3.0 #305
- Doc(readme): Clarify the Contributing Guidelines #306
- Doc(readme): Add Hyperlink to Apache 2.0 #308
- Migrate Project to Computer Directory #310
- Update for Release 1.5 #317
- Fix Path When Exporting Source Package #319
Release Details
Please check the release details/contributor in each repository:
10.3 - HugeGraph 1.3.0 Release Notes
Operating Environment / Version Description
- consider using Java 11 in
hugegraph/toolchain/commons, also compatible with Java 8 now. hugegraph-computerrequired to use Java 11, not compatible with Java 8!- Using Java8 may loss some security ensured, we recommend using Java 11 in production env with AuthSystem enabled.
1.3.0 is the last major version compatible with Java 8, compatibility with Java 8 will end in
next release(1.5.0) when PD/Store merged into
master branch (Except for the java-client).
PS: In the future, we will gradually upgrade the java version from Java 11 -> Java 17 -> Java 21.
hugegraph
In this version, we have fixed some SEC-related issues. If used in an online service or exposed to the public, please upgrade to the latest version and enable authorization authentication
API Changes
- feat(api): optimize adjacent-edges query (#2408)
Feature Changes
- feat: support docker use the auth when starting (#2403)
- feat: added the OpenTelemetry trace support (#2477)
Bug Fix
- fix(core): task restore interrupt problem on restart server (#2401)
- fix(server): reinitialize the progress to set up graph auth friendly (#2411)
- fix(chore): remove zgc in dockerfile for ARM env (#2421)
- fix(server): make CacheManager constructor private to satisfy the singleton pattern (#2432)
- fix(server): unify the license headers (#2438)
- fix: format and clean code in dist and example modules (#2441)
- fix: format and clean code in core module (#2440)
- fix: format and clean code in modules (#2439)
- fix(server): clean up the code (#2456)
- fix(server): remove extra blank lines (#2459)
- fix(server): add tip for gremlin api NPE with an empty query (#2467)
- fix(server): fix the metric name when promthus collects hugegraph metric, see issue (#2462)
- fix(server):
serverStartederror when execute gremlin example (#2473) - fix(auth): enhance the URL check (#2422)
Option Changes
- refact(server): enhance the storage path in RocksDB & clean code (#2491)
Other Changes
- chore: add a license link (#2398)
- doc: enhance NOTICE info to keep it clear (#2409)
- chore(server): update swagger info for default server profile (#2423)
- fix(server): unify license header for protobuf file (#2448)
- chore: improve license header checker confs and pre-check header when validating (#2445)
- chore: unify to call SchemaLabel.getLabelId() (#2458)
- chore: refine the hg-style.xml specification (#2457)
- chore: Add a newline formatting configuration and a comment for warning (#2464)
- chore(server): clear context after req done (#2470)
hugegraph-toolchain
API Changes
Feature Changes
- fix(loader): update shade plugin for spark loader (#566)
- fix(hubble): yarn install timeout in arm64 (#583)
- fix(loader): support file name with prefix for hdfs source (#571)
- feat(hubble): warp the exception info in HugeClientUtil (#589)
Bug Fix
- fix: concurrency issue causing file overwrite due to identical filenames (#572)
Option Changes
- feat(client): support user defined OKHTTPClient configs (#590)
Other Changes
- doc: update copyright date(year) in NOTICE (#567)
- chore(deps): bump ip from 1.1.5 to 1.1.9 in /hugegraph-hubble/hubble-fe (#580)
- refactor(hubble): enhance maven front plugin (#568)
- chore(deps): bump es5-ext from 0.10.53 to 0.10.63 in /hugegraph-hubble/hubble-fe (#582)
- chore(hubble): Enhance code style in hubble (#592)
- chore: upgrade version to 1.3.0 (#596)
- chore(ci): update profile commit id for 1.3 (#597)
hugegraph-commons
Feature Changes
- feat: support user defined RestClientConfig/HTTPClient params (#140)
Bug Fix
Other Changes
- chore: disable clean flatten for deploy (#141)
hugegraph-ai
This is the first release version of hugegraph-ai, it contains a variety of features, including an initialized Python client, knowledge graph construction capabilities through LLM, and the integration of RAG based on HugeGraph.
It also adds significant functionalities on python-client such as variable APIs, auth, metric, traverser, and task APIs, as well as interactive and visual demo creation with Gradio. In addition to these features, the release addresses several bugs and issues, ensuring a more stable and error-free user experience. Maintenance tasks such as dependency updates, project structure improvements, and the addition of basic CI further enhance the project’s robustness and developer workflow.
This release encapsulates the collaborative efforts of the HugeGraph community, with contributions from various members, ensuring the project’s continuous growth and improvement.
Feature Changes
- feat: initialize hugegraph python client (#5)
- feat(llm): knowledge graph construction by llm (#7)
- feat: initialize rag based on HugeGraph (#20)
- feat(client): add variables api and test (#24)
- feat: add llm wenxinyiyan & config util & spo_triple_extract (#27)
- feat: add auth&metric&traverser&task api and ut (#28)
- feat: refactor construct knowledge graph task (#29)
- feat: Introduce gradio for creating interactive and visual demo (#30)
Bug Fix
- fix: invalid GitHub label (#3)
- fix: import error (#13)
- fix: function getEdgeByPage(): the generated query url does not include the parameter page (#15)
- fix: issue template (#23)
- fix: base-ref/head-ref missed in dependency-check-ci on branch push (#25)
Other Changes
- chore: add asf.yaml and ISSUE_TEMPLATE (#1)
- Bump urllib3 from 2.0.3 to 2.0.7 in /hugegraph-python (#8)
- chore: create .gitignore file for py (#9)
- refact: improve project structure & add some basic CI (#17)
- chore: Update LICENSE and NOTICE (#31)
- chore: add release scripts (#33)
- chore: change file chmod 755 (#34)
Release Details
Please check the release details/contributor in each repository:
10.4 - HugeGraph 1.2.0 Release Notes
Java version statement
In the future, we will gradually upgrade the java version, Java 11 -> Java 17 -> Java 21.
- hugegraph, hugegraph-toolchain, hugegraph-commons consider use Java 11, also compatible with Java 8 now.
- hugegraph-computer required to use Java 11, not compatible with Java 8 now!
v1.2.0 may be the last major version compatible with Java 8, compatibility with Java 8 will totally end in v1.5 when PD/Store merged into master branch (Except for the java-client).
hugegraph
API Changes
- feat(api&core): in oltp apis, add statistics info and support full info about vertices and edges (#2262)
- feat(api): support embedded arthas agent in hugegraph-server (#2278,#2337)
- feat(api): support metric API Prometheus format & add statistic metric api (#2286)
- feat(api-core): support label & property filtering for both edge and vertex & support kout dfs mode (#2295)
- feat(api): support recording slow query log (#2327)
Feature Changes
- feat: support task auto manage by server role state machine (#2130)
- feat: support parallel compress snapshot (#2136)
- feat: use an enhanced CypherAPI to refactor it (#2143)
- feat(perf): support JMH benchmark in HG-test module (#2238)
- feat: optimising adjacency edge queries (#2242)
- Feat: IP white list (#2299)
- feat(cassandra): adapt cassandra from 3.11.12 to 4.0.10 (#2300)
- feat: support Cassandra with docker-compose in server (#2307)
- feat(core): support batch+parallel edges traverse (#2312)
- feat: adapt Dockerfile for new project structur (#2344)
- feat(server):swagger support auth for standardAuth mode by (#2360)
- feat(core): add IntMapByDynamicHash V1 implement (#2377)
Bug Fix
- fix: transfer add_peer/remove_peer command to leader (#2112)
- fix query dirty edges of a vertex with cache (#2166)
- fix exception of vertex-drop with index (#2181)
- fix: remove dup ‘From’ in filterExpiredResultFromFromBackend (#2207)
- fix: jdbc ssl mode parameter redundant (#2224)
- fix: error when start gremlin-console with sample script (#2231)
- fix(core): support order by id (#2233)
- fix: update ssl_mode value (#2235)
- fix: optimizing ClassNotFoundException error message for MYSQL (#2246)
- fix: asf invalid notification scheme ‘discussions_status’ (#2247)
- fix: asf invalid notification scheme ‘discussions_comment’ (#2250)
- fix: incorrect use of ‘NO_LIMIT’ variable (#2253)
- fix(core): close flat mapper iterator after usage (#2281)
- fix(dist): avoid var PRELOAD cover environmnet vars (#2302)
- fix: base-ref/head-ref missed in dependency-review on master (#2308)
- fix(core): handle schema Cache expandCapacity concurrent problem (#2332)
- fix: in wait-storage.sh, always wait for storage with default rocksdb (#2333)
- fix(api): refactor/downgrade record logic for slow log (#2347)
- fix(api): clean some code for release (#2348)
- fix: remove redirect-to-master from synchronous Gremlin API (#2356)
- fix HBase PrefixFilter bug (#2364)
- chore: fix curl failed to request https urls (#2378)
- fix(api): correct the vertex id in the edge-existence api (#2380)
- fix: github action build docker image failed during the release 1.2 process (#2386)
- fix: TinkerPop unit test lack some lables (#2387)
Option Changes
- feat(dist): support pre-load test graph data in docker container (#2241)
Other Changes
- refact: use standard UTF-8 charset & enhance CI configs (#2095)
- move validate release to hugegraph-doc (#2109)
- refact: use a slim way to build docker image on latest code & support zgc (#2118)
- chore: remove stage-repo in pom due to release done & update mail rule (#2128)
- doc: update issue template & README file (#2131)
- chore: cmn algorithm optimization (#2134)
- add github token for license check comment (#2139)
- chore: disable PR up-to-date in branch (#2150)
- refact(core): remove lock of globalMasterInfo to optimize perf (#2151)
- chore: async remove left index shouldn’t effect query (#2199)
- refact(rocksdb): clean & reformat some code (#2200)
- refact(core): optimized batch removal of remaining indices consumed by a single consumer (#2203)
- add com.janeluo.ikkanalyzer dependency to core model (#2206)
- refact(core): early stop unnecessary loops in edge cache (#2211)
- doc: update README & add QR code (#2218)
- chore: update .asf.yaml for mail rule (#2221)
- chore: improve the UI & content in README (#2227)
- chore: add pr template (#2234)
- doc: modify ASF and remove meaningless CLA (#2237)
- chore(dist): replace wget to curl to download swagger-ui (#2277)
- Update StandardStateMachineCallback.java (#2290)
- doc: update README about start server with example graph (#2315)
- README.md tiny improve (#2320)
- doc: README.md tiny improve (#2331)
- refact: adjust project structure for merge PD & Store[Breaking Change] (#2338)
- chore: disable raft test in normal PR due to timeout problem (#2349)
- chore(ci): add stage profile settings (#2361)
- refact(api): update common 1.2 & fix jersey client code problem (#2365)
- chore: move server info into GlobalMasterInfo (#2370)
- chore: reset hugegraph version to 1.2.0 (#2382)
hugegraph-computer
Feature Changes
- feat: implement fast-failover for MessageRecvManager and DataClientManager (#243)
- feat: implement parallel send data in load graph step (#248)
- feat(k8s): init operator project & add webhook (#259, #263)
- feat(core): support load vertex/edge snapshot (#269)
- feat(k8s): Add MinIO as internal(default) storage (#272)
- feat(algorithm): support random walk in computer (#274, #280)
- feat: use ‘foreground’ delete policy to cancel k8s job (#290)
Bug Fix
- fix: superstep not take effect (#237)
- fix(k8s): modify inconsistent apiGroups (#270)
- fix(algorithm): record loop is not copied (#276)
- refact(core): adaptor for common 1.2 & fix a string of possible CI problem (#286)
- fix: remove okhttp1 due to conflicts risk (#294)
- fix(core): io.grpc.grpc-core dependency conflic (#296)
Option Changes
- feat(core): isolate namespace for different input data source (#252)
- refact(core): support auth config for computer task (#265)
Other Changes
- remove apache stage repo & update notification rule (#232)
- chore: fix empty license file (#233)
- chore: enhance mailbox settings & enable require ci (#235)
- fix: typo errors in start-computer.sh (#238)
- [Feature-241] Add PULL_REQUEST_TEMPLATE (#242, #257)
- chore: change etcd url only for ci (#245)
- doc: update readme & add QR code (#249)
- doc(k8s): add building note for missing classes (#254)
- chore: reduce mail to dev list (#255)
- add: dependency-review (#266)
- chore: correct incorrect comment (#268)
- refactor(api): ListValue.getFirst() replaces ListValue.get(0) (#282)
- Improve: Passing workerId to WorkerStat & Skip wait worker close if master executes failed (#292)
- chore: add check dependencies (#293)
- chore(license): update license for 1.2.0 (#299)
hugegraph-toolchain
API Changes
- feat(client): support edgeExistence api (#544)
- refact(client): update tests for new OLTP traverser APIs (#550)
Feature Changes
- feat(spark): support spark-sink connector for loader (#497)
- feat(loader): support kafka as datasource (#506)
- feat(client): support go client for hugegraph (#514)
- feat(loader): support docker for loader (#530)
- feat: update common version and remove jersey code (#538)
Bug Fix
- fix: convert numbers to strings (#465)
- fix: hugegraph-spark-loader shell string length limit (#469)
- fix: spark loader meet Exception: Class is not registered (#470)
- fix: spark loader Task not serializable (#471)
- fix: spark with loader has dependency conflicts (#480)
- fix: spark-loader example schema and struct mismatch (#504)
- fix(loader): error log (#499)
- fix: checkstyle && add suppressions.xml (#500)
- fix(loader): resolve error in loader script (#510)
- fix: base-ref/head-ref missed in dependency-check-ci on branch push (#516, #551)
- fix yarn network connection on linux/arm64 arch (#519)
- fix(hubble): drop-down box could not display all options (#535)
- fix(hubble): build with node and yarn (#543)
- fix(loader): loader options (#548)
- fix(hubble): parent override children dep version (#549)
- fix: exclude okhttp1 which has different groupID with okhttp3 (#555)
- fix: github action build docker image failed (#556, #557)
- fix: build error with npm not exist & tiny improve (#558)
Option Changes
- set default data when create graph (#447)
Other Changes
- chore: remove apache stage repo & update mail rule (#433, #474, #479)
- refact: clean extra store file in all modules (#434)
- chore: use fixed node.js version 16 to avoid ci problem (#437, #441)
- chore(hubble): use latest code in Dockerfile (#440)
- chore: remove maven plugin for docker build (#443)
- chore: improve spark parallel (#450)
- doc: fix build status badge link (#455)
- chore: keep hadoop-hdfs-client and hadoop-common version consistent (#457)
- doc: add basic contact info & QR code in README (#462, #475)
- chore: disable PR up-to-date in branch (#473)
- chore: auto add pr auto label by path (#466, #528)
- chore: unify the dependencies versions of the entire project (#478)
- chore(deps): bump async, semver, word-wrap, browserify-sign in hubble-fe (#484, #491, #494, #529)
- chore: add pr template (#498)
- doc(hubble): add docker-compose to start with server (#522)
- chore(ci): add stage profile settings (#536)
- chore(client): increase the api num as the latest server commit + 10 (#546)
- chore(spark): install hugegraph from source (#552)
- doc: adjust docker related desc in readme (#559)
- chore(license): update license for 1.2 (#560, #561)
hugegraph-commons
Feature Changes
- feat(common): replace jersey dependencies with OkHttp (Breaking Change) (#133)
Bug Fix
- fix(common): handle spring-boot2/jersey dependency conflicts (#131)
- fix: Assert.assertThrows() should check result of exceptionConsumer (#135)
- fix(common): json param convert (#137)
Other Changes
- refact(common): add more construction methods for convenient (#132)
- add: dependency-review (#134)
- refact(common): rename jsonutil to avoid conflicts with server (#136)
- doc: update README for release (#138)
- update licence (#139)
Release Details
Please check the release details in each repository:
10.5 - HugeGraph 1.0.0 Release Notes
OLTP API & Client Changes
API Changes
- feat(api): support hot set trace through /exception/trace API.
- feat(api): support query by Cypher language.
- feat(api): support swagger UI to viewing API.
Client Changes
- feat(client) support Cypher query API.
- refact(client): change ’limit’ type from long to int.
- feat(client): server bypass for hbase writing (Beta).
Core & Server
Feature Changes
- feat: support Java 11.
- feat(core): support adamic-adar & resource-allocation algorithms.
- feat(hbase): support hash rowkey & pre-init tables.
- feat(core): support query by Cypher language.
- feat(core): support automatic management and fail-over for cluster role.
- feat(core): support 16 OLAP algorithms, like: LPA, Louvain, PageRank, BetweennessCentrality, RingsDetect.
- feat: prepare for Apache release.
Bug Fix
- fix(core): can’t query edges by multi labels + properties.
- fix(core): occasionally NoSuchMethodError Relations().
- fix(core): limit max depth for cycle detection.
- fix(core): traversal contains Tree step has different result.
- fix edge batch update error.
- fix unexpected task status.
- fix(core): edge cache not clear when update or delete associated vertex.
- fix(mysql): run g.V() is error when it’s MySQL backend.
- fix: close exception and server-info EXPIRED_INTERVAL.
- fix: export ConditionP.
- fix: query by within + Text.contains.
- fix: schema label race condition of addIndexLabel/removeIndexLabel.
- fix: limit admin role can drop graph.
- fix: ProfileApi url check & add build package to ignore file.
- fix: can’t shut down when starting with exception.
- fix: Traversal.graph is empty in StepStrategy.apply() with count().is(0).
- fix: possible extra comma before where statement in MySQL backend.
- fix: JNA UnsatisfiedLinkError for Apple M1.
- fix: start RpcServer NPE & args count of ACTION_CLEARED error & example error.
- fix: rpc server not start.
- fix: User-controlled data in numeric cast & remove word dependency.
- fix: closing iterators on errors for Cassandra & Mysql.
Option Changes
- move
raft.endpointoption from graph scope to server scope.
Other Changes
- refact(core): enhance schema job module.
- refact(raft): improve raft module & test & install snapshot and add peer.
- refact(core): remove early cycle detection & limit max depth.
- cache: fix assert node.next==empty.
- fix apache license conflicts: jnr-posix and jboss-logging.
- chore: add logo in README & remove outdated log4j version.
- refact(core): improve CachedGraphTransaction perf.
- chore: update CI config & support ci robot & add codeQL SEC-check & graph option.
- refact: ignore security check api & fix some bugs & clean code.
- doc: enhance CONTRIBUTING.md & README.md.
- refact: add checkstyle plugin & clean/format the code.
- refact(core): improve decode string empty bytes & avoid array-construct columns in BackendEntry.
- refact(cassandra): translate ipv4 to ipv6 metrics & update cassandra dependency version.
- chore: use .asf.yaml for apache workflow & replace APPLICATION_JSON with TEXT_PLAIN.
- feat: add system schema store.
- refact(rocksdb): update rocksdb version to 6.22 & improve rocksdb code.
- refact: update mysql scope to test & clean protobuf style/configs.
- chore: upgrade Dockerfile server to 0.12.0 & add editorconfig & improve ci.
- chore: upgrade grpc version.
- feat: support updateIfPresent/updateIfAbsent operation.
- chore: modify abnormal logs & upgrade netty-all to 4.1.44.
- refact: upgrade dependencies & adopt new analyzer & clean code.
- chore: improve .gitignore & update ci configs & add RAT/flatten plugin.
- chore(license): add dependencies-check ci & 3rd-party dependency licenses.
- refact: Shutdown log when shutdown process & fix tx leak & enhance the file path.
- refact: rename package to apache & dependency in all modules (Breaking Change).
- chore: add license checker & update antrun plugin & fix building problem in windows.
- feat: support one-step script for apache release v1.0.0 release.
Computer (OLAP)
Algorithm Changes
- feat: implement page-rank algorithm.
- feat: implement wcc algorithm.
- feat: implement degree centrality.
- feat: implement triangle_count algorithm.
- feat: implement rings-detection algorithm.
- feat: implement LPA algorithm.
- feat: implement kcore algorithm.
- feat: implement closeness centrality algorithm.
- feat: implement betweenness centrality algorithm.
- feat: implement cluster coefficient algorithm.
Platform Changes
- feat: init module computer-core & computer-algorithm & etcd dependency.
- feat: add Id as base type of vertex id.
- feat: init Vertex/Edge/Properties & JsonStructGraphOutput.
- feat: load data from hugegraph server.
- feat: init basic combiner, Bsp4Worker, Bsp4Master.
- feat: init sort & transport interface & basic FileInput/Output Stream.
- feat: init computation & ComputerOutput/Driver interface.
- feat: init Partitioner and HashPartitioner
- feat: init Master/WorkerService module.
- feat: init Heap/LoserTree sorting.
- feat: init rpc module.
- feat: init transport server, client, en/decode, flowControl, heartbeat.
- feat: init DataDirManager & PointerCombiner.
- feat: init aggregator module & add copy() and assign() methods to Value class.
- feat: add startAsync and finishAsync on client side, add onStarted and onFinished on server side.
- feat: init store/sort module.
- feat: link managers in worker sending end.
- feat: implement data receiver of worker.
- feat: implement StreamGraphInput and EntryInput.
- feat: add Sender and Receiver to process compute message.
- feat: add seqfile fromat.
- feat: add ComputeManager.
- feat: add computer-k8s and computer-k8s-operator.
- feat: add startup and make docker image code.
- feat: sort different type of message use different combiner.
- feat: add HDFS output format.
- feat: mount config-map and secret to container.
- feat: support java11.
- feat: support partition concurrent compute.
- refact: abstract computer-api from computer-core.
- refact: optimize data receiving.
- fix: release file descriptor after input and compute.
- doc: add operator deploy readme.
- feat: prepare for Apache release.
Toolchain (loader, tools, hubble)
- feat(loader): support use SQL to construct graph.
- feat(loader): support Spark-Loader mode(include jdbc source).
- feat(loader): support Flink-CDC mode.
- fix(loader): fix NPE when loading ORC data.
- fix(loader): fix schema is not cached with Spark/Flink mode.
- fix(loader): fix json deserialize error.
- fix(loader): fix jackson conflicts & missing dependencies.
- feat(hubble): supplementary algorithms UI.
- feat(hubble): support highlighting and hints for Gremlin text.
- feat(hubble): add docker-file for hubble.
- feat(hubble): display packaging log output progress while building.
- fix(hubble): fix port-input placeholder UI.
- feat: prepare for Apache release.
Commons (common,rpc)
- feat: support assert-throws method returning Future.
- feat: add Cnm and Anm to CollectionUtil.
- feat: support custom content-type.
- feat: prepare for Apache release.
Release Details
Please check the release details in each repository:
11 - Apache Contributor Agreements
Apache Contributor Agreements
HugeGraph uses the standard Apache Software Foundation (ASF) contributor agreements. It no longer uses a project-specific CLA or the GitHub CLA Assistant workflow.
Routine, small contributions are submitted under Section 5 of the Apache License 2.0. Before becoming a committer, or when making a substantial contribution, you must sign the ASF Individual Contributor License Agreement (ICLA). If a company owns the intellectual property in your contribution, a Corporate Contributor License Agreement (CCLA) may also be required; a CCLA does not replace your individual ICLA.
Refer to the official ASF pages for the agreement text, completion instructions, and submission process:
After reading and signing the agreement as instructed, send the completed file as a standalone attachment to secretary@apache.org. Do not send it to the HugeGraph developer mailing list or commit it to a GitHub repository.