This is the multi-page printable view of this section. .
Quick Start
- 1: HugeGraph (OLTP)
- 2: HugeGraph ToolChain
- 3: HugeGraph-AI
- 3.1: HugeGraph-LLM
- 3.2: HugeGraph-ML
- 3.3: HugeGraph-LLM Workflow
- 3.4: Configuration Reference
- 3.5: HugeGraph-LLM REST API
- 3.6: Vermeer Python Client
- 4: HugeGraph Computing (OLAP)
- 5: HugeGraph Client
Choose the quick-start guide for Server, Toolchain, graph computing, or HugeGraph-AI according to your needs. Each component is released independently, so check the runtime requirements and version of the corresponding repository before installation.
1 - HugeGraph (OLTP)
This section covers the HugeGraph Server standalone quick start and the PD and Store guides needed for distributed deployments.
See the DeepWiki project overview. For installation, configuration, and runtime behavior, use the documentation and code for the relevant HugeGraph version.
Start with the Server standalone quick start, which distinguishes ASF 1.7.0 release packages from builds of master. HStore deployments also require PD and Store.
GitHub Access: https://github.com/apache/hugegraph
1.1 - HugeGraph Server Quick Start
1 HugeGraph Server Overview
apache/hugegraph is the main repository for the HugeGraph graph database. Its top-level modules include hugegraph-server, hugegraph-pd, and hugegraph-store. This page describes the hugegraph-server module and the service it runs.
The hugegraph-server module contains hugegraph-core, hugegraph-api, hugegraph-dist, and storage adapters. Core implements the property graph model, transactions, and TinkerPop interfaces. API provides the HTTP service and delegates client requests to Core. Graph data is stored in RocksDB (the default standalone backend), HStore (distributed), or HBase.
Version scope: Download examples use the ASF HugeGraph 1.7.0 release. Source builds, configuration defaults, and startup behavior follow apache/hugegraph master. A master build is not an ASF release artifact, even if its version number matches 1.7.0. This guide covers RocksDB, HStore, and HBase; see 1.5.x documentation for other legacy backends.
Naming:
HugeGraphmeans the overall project or main repository,hugegraph-serveris its Server module, andHugeGraphServeris the Java service class. Server below means the running graph database service.
flowchart TD
    A{Choose installation source}
    A -->|Release| R["HugeGraph 1.7.0 archive"]
    R --> V[Verify SHA-512]
    V --> X[Extract and use bundled configuration]
    A -->|Development| M["master source"]
    M --> B["mvn package -DskipTests"]
    B --> C[Check RocksDB configuration in conf/graphs]
    C --> I[bin/init-store.sh]
    I --> S["bin/start-hugegraph.sh -p true"]
    S --> Q["Request /versions and graph vertices"]
The map uses short labels for the repository modules described above. server, core, api, dist, pd, and store refer to the corresponding
hugegraph- modules; dist packages the distribution.
---
markmap:
  spacingHorizontal: 40
---
# HugeGraph
## server
- core
- api
- dist
## pd
## store
2 Dependency for Building/Running
2.1 Install Java 11 (JDK 11)
The hugegraph-server module in HugeGraph 1.7.0 is compiled with Java 11. Running and building it from source require Java 11 or later.
Before continuing, run java -version to confirm your JDK version.
Java 8 is no longer supported starting from 1.7.0.
bin/hugegraph-server.shrefuses to start on anything older than Java 11.
The security check is on by default and installs
HugeSecurityManager, which needs Java 11 to 23. JDK 24 removed the Security Manager (JEP 486), so on Java 24 or later you must start the service with the check disabled:bin/start-hugegraph.sh -s false.
Building from source also needs Maven 3.5.0 or later.
3 Deploy
There are four ways to deploy the Server service:
- Docker container Quickly start a Server service for testing or development.
- ASF release archive Download a released tarball and verify it before installation.
- master source Build the development branch; its output is not an ASF release archive.
- Legacy one-click deployment (outdated) Reference for the older deployment workflow.
Production requires authentication and restricted network access
HugeGraph disables user authentication by default. Enable authentication and authorization, maintain an IP allowlist, and grant minimum permissions. Do not expose Gremlin, Cypher, or other query APIs directly to the public Internet. Retain Server audit-*.log and restrict read access. auth.audit_log_rate limits per-user output rate rather than turning audit logging on or off. See the security guide.
3.1 Use Docker container (Convenient for Test/Dev)
You can refer to the Docker deployment guide.
You can use docker run -itd --name=server -p 8080:8080 -e PASSWORD=xxx hugegraph/hugegraph:1.7.0 to quickly start a Server instance using the RocksDB backend.
Optional:
- You can use
docker exec -it server bashto enter the container for troubleshooting or other maintenance operations. - You can use
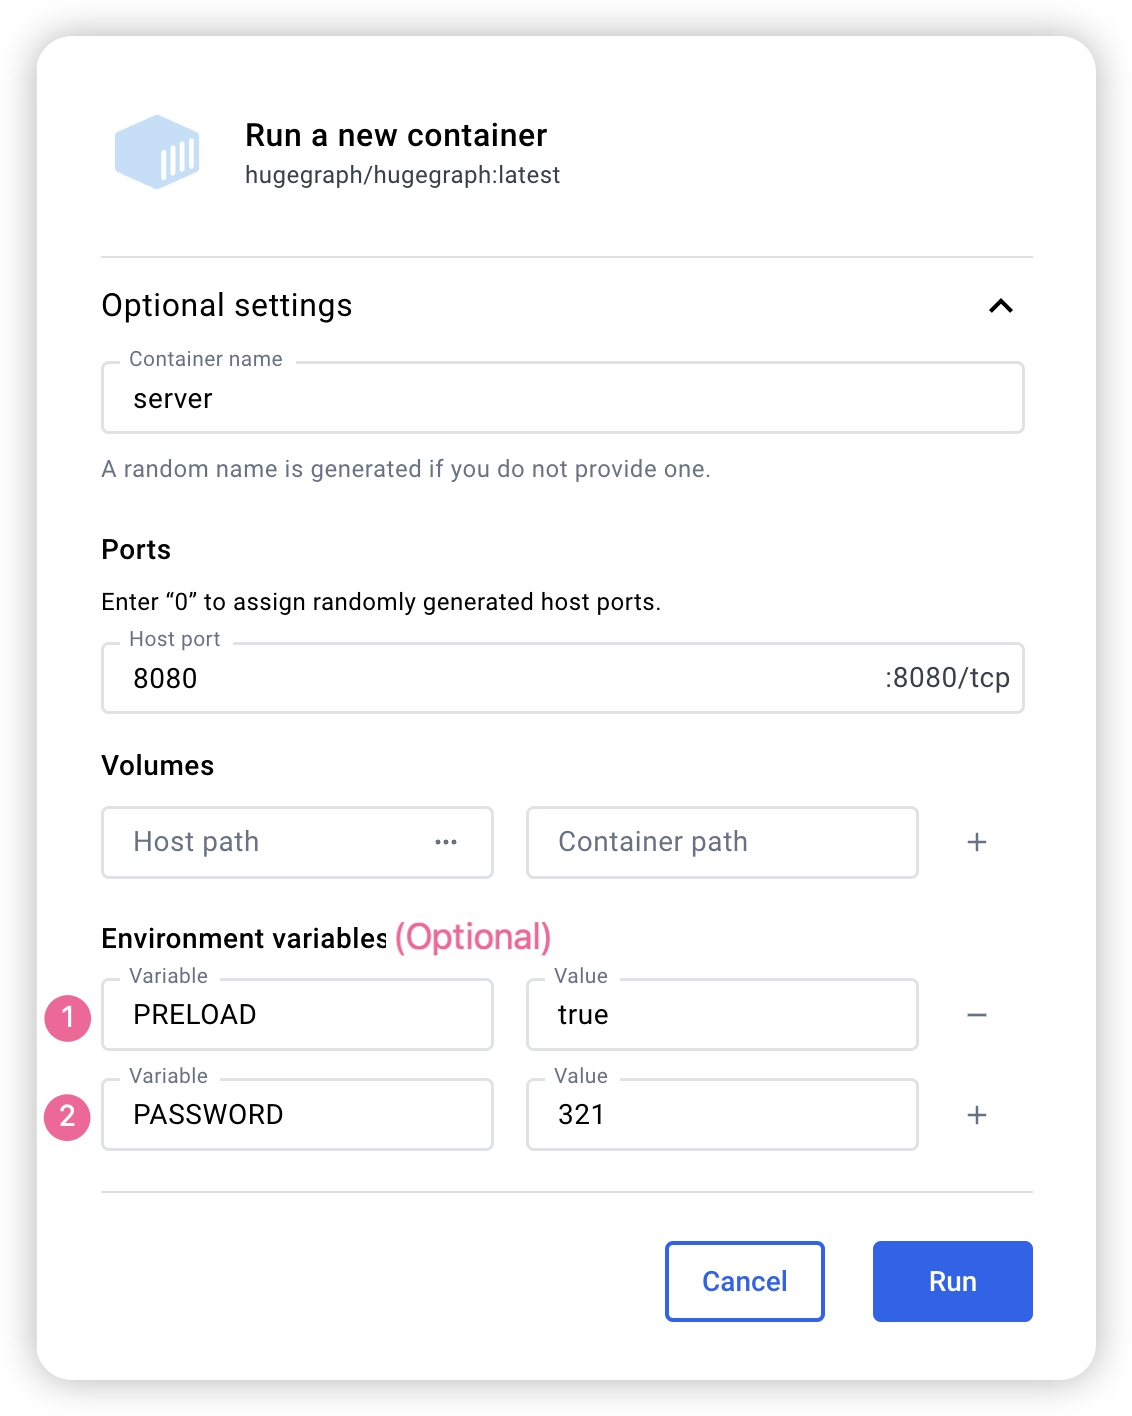
docker run -itd --name=server -p 8080:8080 -e PRELOAD="true" hugegraph/hugegraph:1.7.0to preload a built-in sample graph at startup. You can verify it through theRESTful API. See 5.1.4 for details. - You can use
-e PASSWORD=xxxto enable authentication mode and set the admin password. See Config Authentication for details.
If you use Docker Desktop, you can set the options as follows:
The Docker Compose files use bridge networking (hg-net) and work on Linux and Mac (Docker Desktop). For the 3-node distributed cluster on Mac (Docker Desktop), allocate at least 12 GB of memory (Settings → Resources → Memory). On Linux, Docker uses host memory directly.
Use docker compose to manage multiple HugeGraph services from one configuration. Four Compose files are available in the docker/ directory:
| Topology | Compose file | Services |
|---|---|---|
| Standalone (start here) | docker-compose.yml | 1 RocksDB Server + 1 Hubble |
| Minimal HStore (current master) | docker-compose-hstore.yml | 1 PD + 1 Store + 1 Server + 1 Hubble; locally built master images required |
| HA reference (current master) | docker-compose-3pd-3store-3server.yml | 3 PD + 3 Store + 3 Server + 1 Hubble; locally built master images required |
| Source build override for the minimal HStore topology | docker-compose.dev.yml | (used together with docker-compose-hstore.yml) |
The standalone topology publishes the Server on port 8080 and Hubble on 127.0.0.1:8088. HUGEGRAPH_VERSION selects the Server, PD, and Store image tags; Hubble is selected separately with HUBBLE_IMAGE.
The standalone docker-compose.yml example uses hugegraph/hugegraph:1.7.0; its docker/conf/hubble/standalone.properties is bundled in source. Compose reads the administrator password from HUGEGRAPH_ADMIN_PASSWORD and JWT secret from HUGEGRAPH_AUTH_TOKEN_SECRET, normally in docker/.env. A nonempty password enables authentication, automatically detected by Hubble. With docker run, use -e PASSWORD=xxx. Master HStore Compose files cannot be combined with 1.7.0 PD/Store/Server release images.
JWT version differences: Master-built Server maps HUGEGRAPH_AUTH_TOKEN_SECRET to HG_SERVER_AUTH_TOKEN_SECRET and writes startup configuration; preserve the secret across recreation. The 1.7.0 entrypoint handles older variables such as PASSWORD, ignoring HG_SERVER_AUTH_TOKEN_SECRET. To keep a stable JWT secret in 1.7.0, persist auth.token_secret in that version’s conf/graphs/hugegraph.properties. With a randomly generated default, do not assume issued JWTs survive Server restarts.
See docker/README.md for the full setup guide.
HugeGraph Docker images are provided as a convenient way to start HugeGraph quickly, but they are not official ASF distribution artifacts. You can find more details in the ASF Release Distribution Policy.
We recommend using a release tag (such as
1.7.0or1.x.0) for stable deployments. Use thelatesttag only if you want the newest features still under development.
3.2 Download a Released Archive
This example uses HugeGraph 1.7.0. For other versions, confirm the release and filenames in the ASF download directory. A master source build is not a released binary.
Extract only after SHA-512 verification succeeds. You can also verify the PGP signature following Apache release procedures:
Trust publisher keys only after verifying them through Apache project channels. Signature verification can complement SHA-512 checks.
3.3 Build from master Source
These commands build the development branch, not the 1.7.0 release.
Install wget or curl before building.
Download HugeGraph source:
Compile and package:
A successful build logs:
The build creates an aggregate master archive under repository-root target/ (the current source version property is 1.7.0):
The filename version comes from source revision; it does not make the build an ASF release artifact. The build also creates repository-root apache-hugegraph-1.7.0/, containing a Server directory named by that module’s final.name, currently apache-hugegraph-server-1.7.0. If retaining only the archive, first run tar zxf target/apache-hugegraph-1.7.0.tar.gz, then enter the Server directory.
Default builds bundle rocksdb, hbase, and hstore modules, listed in backends within backend.properties in the hugegraph-dist JAR. For a RocksDB-only distribution, add -Drocksdb-only:
3.4 One-click deployment (Outdated)
Outdated This status applies only to this one-click deployment entry.
HugeGraph-Tools provides a one-click deployment command that downloads, extracts, configures, and starts the Server service and HugeGraph-Hubble. These tools are included in the HugeGraph-Toolchain distribution.
Of course, you should download the tarball of HugeGraph-Toolchain first.
note:
${version}is the version, The latest version can refer to Download Page, or click the link to download directly from the Download page
The general entry script for HugeGraph-Tools is bin/hugegraph, Users can use the help command to view its usage, here only the commands for one-click deployment are introduced.
{hugegraph-version} is the Server service and HugeGraphStudio version; see conf/version-mapping.yaml for supported mappings. {install-path} is the installation directory, while {download-path-prefix} optionally overrides the tarball download location. For example, deploy version 0.6 with bin/hugegraph deploy -v 0.6 -p services.
4 Configuration
Server archives include conf/rest-server.properties, conf/gremlin-server.yaml, and conf/graphs/hugegraph.properties; source builds assemble them from hugegraph-server/hugegraph-dist/src/assembly/static/conf/. Edit them inside the extracted Server directory without a separate generation step. Defaults vary by release; the following defaults and startup behavior describe master.
For standalone RocksDB, confirm backend=rocksdb and serializer=binary in conf/graphs/hugegraph.properties. Normal Server initialization scans conf/graphs/ and loads local graphs without requiring graph.load_from_local_config=true. This option defaults to false and controls constructor preloading and rescanning on reload().
See the configuration guide and option reference for details.
5 Startup
5.1 Use a startup script to startup
Startup is divided into “first startup” and “non-first startup”. On the first startup, you need to initialize the backend database before starting the service.
If the service was stopped manually, or needs to be started again for any other reason, you can usually start it directly because the backend database is persistent.
When HugeGraphServer starts, it connects to the backend storage and checks its version information. If the backend has not been initialized, or if it was initialized with an incompatible version (for example, old-version data), HugeGraphServer will fail to start and report an error.
If you need to access HugeGraphServer externally, modify the restserver.url configuration item in rest-server.properties (the default is http://127.0.0.1:8080) and change it to the machine name or IP address.
Since the configuration (hugegraph.properties) and startup steps required by various backends are slightly different, the following will introduce the configuration and startup of each backend one by one.
Configure authentication before production startup
Enable Server authentication and authorization with a strong, nondefault administrator password, an IP allowlist, and minimum business-user permissions.
5.1.1 Distributed Storage (HStore)
First deploy PD and Store; see the PD Quick Start and Store Quick Start.
umask 077 protects the new .env, but set-hubble-pd-password.sh sets generated .local.properties permissions to 0644, making the PD secret readable by other local users. This example assumes trusted local users. On shared hosts, set ownership and read permissions for the Hubble runtime user so Hubble can read the files while unauthorized users cannot. Keeping files untracked does not replace file permission controls.
Distributed storage, introduced after HugeGraph 1.5.0, uses HugeGraph-PD and HugeGraph-Store for distributed data storage and computing.
After PD and Store are running:
- Edit Server
hugegraph.properties:
The distribution includes conf/graphs/hstore.properties.template; copy it over conf/graphs/hugegraph.properties and adjust pd.peers.
This example uses cluster=hg in rest-server.properties and pd.cluster=hg in graph configuration, matching the master Compose cluster below. These are separate keys for the Server process and graph respectively, not one setting. Select an appropriate cluster name. Likewise, pd.peers in each file has its own configuration scope; this example supplies the same PD RPC addresses to both.
The backend selects the task scheduler: HStore uses distributed scheduling; others use local scheduling. task.scheduler_type is unnecessary and is ignored with a warning when retained for compatibility.
- Edit Server
rest-server.properties:
These addresses support multiple Server processes on one machine; 127.0.0.1 is local only. Across hosts, use routable IPs or DNS for restserver.url, gremlinserver.url, pd.peers, Gremlin host, and rpc.server_host. Advertised RPC addresses and ports must be mutually reachable.
For multiple Servers, edit each node’s rest-server.properties:
Node 1 (master):
Node 2 (worker):
Also configure each node’s gremlin-server.yaml ports:
Node 1:
Node 2:
Start Server:
Distributed startup order:
- Start HugeGraph-PD
- Start HugeGraph-Store
- Start Server
PD and Store manage HStore metadata and storage, so init-store skips that backend. With authentication enabled, init-store still creates the built-in admin account. If storage already holds this account, set init_store.enabled=false in rest-server.properties to skip the entire step, as Docker HStore topologies do.
Verify startup:
Stop in reverse order:
- Stop Server
- Stop HugeGraph-Store
- Stop HugeGraph-PD
Docker HStore HA Cluster (Current Master)
docker-compose-3pd-3store-3server.yml uses master HG_PD_*, HG_STORE_*, and HG_SERVER_* variables unsupported by 1.7.0 release images. Build PD, Store, and Server from the same master source, all tagged local:
Create the authentication environment in docker/ and generate HStore Hubble configuration. Replace the example administrator password; because .env uses single quotes, the password must contain neither single quotes nor newlines. The script generates random JWT and PD secrets and writes the PD secret to two untracked .local.properties files mounted by HStore Compose:
Start HA from docker/. HUGEGRAPH_VERSION=local selects the locally built PD, Store, and Server images; Compose pull_policy: missing uses existing local tags first. HUBBLE_IMAGE still selects Hubble independently:
Generate HG_PD_AUTH_SECRET_KEY once for new data directories and reuse it on restart or when retaining data. Do not commit .env or generated conf/hubble/*.local.properties. Services communicate through container hostnames on the hg-net bridge. Server replicas need the shared JWT secret as well as the administrator password; set HUGEGRAPH_AUTH_TOKEN_SECRET. See the Docker cluster guide and docker/README.md for all variables.
Verify the cluster:
Master PD /v1/stores requires Basic authentication; this uses the generated, loaded HG_PD_AUTH_SECRET_KEY as the hg password.
Inspect runtime logs with docker logs <container-name>, such as docker logs hg-pd0.
See docker/README.md for variables, ports, and troubleshooting.
5.1.2 RocksDB / ToplingDB
The minimal standalone flow below uses a master build and preloads sample data to verify graph reads and writes.
- Check Java against the master build requirements.
- Build master source; the commands below use its nested Server directory.
- Confirm RocksDB configuration, then enter the build output’s nested Server directory.
- Initialize storage, then start the service with sample data using the commands below.
- Request
/versionsand sample graph vertices, and check the actual response contents.
RocksDB is embedded and needs no separate deployment. GCC ≥ 4.3.0 (GLIBCXX_3.4.10) is required; upgrade first if needed.
Master conf/graphs/hugegraph.properties already sets backend=rocksdb and serializer=binary. Keep the defaults if using default data directories; otherwise check your backend and paths before initialization.
Initialize storage on first startup or after adding graph configuration under conf/graphs/:
Start Server and preload the built-in sample graph:
The startup script polls /graphs at configured restserver.url and exits nonzero on timeout or process failure. Check service version, then read sample vertices:
The first response should contain versions; the second should contain vertices with sample names such as marko and lop. A process check or HTTP status alone does not prove backend and business request health.
ToplingDB (Beta): A high-performance RocksDB alternative; see the ToplingDB Quick Start.
5.1.3 HBase
users need to install HBase by themselves, requiring version 2.0 or above,download link
Update hugegraph.properties
Initialize the database (required on the first startup, or a new configuration was manually added under ‘conf/graphs/’)
Start server
5.1.4 Create an example graph when startup
Pass the -p true argument when starting the script to enable preload, which creates a sample graph.
And use the RESTful API to request HugeGraphServer and get the following result:
This indicates the successful creation of the sample graph.
5.1.5 Startup script options
bin/start-hugegraph.sh accepts the following options. Every one of them takes a value, so write -d false, not a bare -d.
| Option | Values | Default | Purpose |
|---|---|---|---|
-d | true, false | true | Daemon mode. With -d false the script stays in the foreground and forwards SIGTERM/SIGINT to the server. |
-g | zgc or ZGC | omit for G1GC | Garbage collector to use. Only ZGC is accepted, any other value aborts the startup. ZGC needs Java 11 or later. |
-m | true, false | false | Install the cron-based monitor task (bin/start-monitor.sh). For VM and bare-metal deployments only. |
-p | true, false | false | Preload the sample graph, as in 5.1.4. |
-s | true, false | true | Run with the security check (HugeSecurityManager) enabled. It requires Java 11 to 23 and a readable conf/java-security.properties. |
-j | JVM options | empty | Extra JVM options appended to the server command line. |
-t | seconds | 30 | How long to wait for the service to answer before reporting a failed startup. |
-y | true, false | false | Enable the OpenTelemetry agent for traces. |
bin/stop-hugegraph.sh accepts -m true|false (default true), which controls whether the cron monitor task is removed along with the service.
5.2 Use Docker to startup
In 3.1 Use Docker container, we introduced how to deploy hugegraph-server with Docker. You can also switch storage backends or preload a sample graph by setting the corresponding parameters.
5.2.1 Create an example graph when starting a server
Set the environment variable PRELOAD=true when starting Docker so that sample data is loaded during startup.
Use
docker runUse
docker run -itd --name=server -p 8080:8080 -e PRELOAD=true hugegraph/hugegraph:1.7.0Use
docker-composeCreate a
docker-compose.ymlfile like the following and setPRELOAD=truein the environment.example.groovyis a predefined script used to preload sample data. If needed, you can mount a newexample.groovyscript to change the preload data.Use
docker compose up -dto start the container.
And use the RESTful API to request HugeGraphServer and get the following result:
This indicates that the sample graph was created successfully.
6. Access server
6.1 Service startup status check
Use jps to see a service process
curl request RESTfulAPI
HTTP 2xx with a JSON versions field confirms REST responsiveness. HugeGraphServer in jps confirms only process existence; verify backend health by preloading the sample graph and requesting vertices as above.
6.2 Request Server
The RESTful API of HugeGraphServer includes various types of resources, typically including graph, schema, gremlin, traverser and task.
graphcontainsvertices、edgesschemacontainsvertexlabels、propertykeys、edgelabels、indexlabelsgremlincontains variousGremlinstatements, such asg.v(), which can be executed synchronously or asynchronouslytraversercontains various advanced queries including shortest paths, intersections, N-step reachable neighbors, etc.taskcontains query and delete with asynchronous tasks
6.2.1 Get vertices and its related properties in hugegraph
explanation
Server can compress vertex, edge, and other list responses. Use
curl --compressedfor automatic decompression:The default listener is
127.0.0.1, inaccessible directly from other machines.
Changing the Server listener
Setting 0.0.0.0 listens on every interface. In production, enable authentication and authorization, an IP allowlist, and minimum permissions; retain and protect audit logs. Do not expose Gremlin or Cypher directly to the public Internet.
response body:
For the detailed API, please refer to RESTful-API
You can also visit localhost:8080/swagger-ui/index.html to check the API.
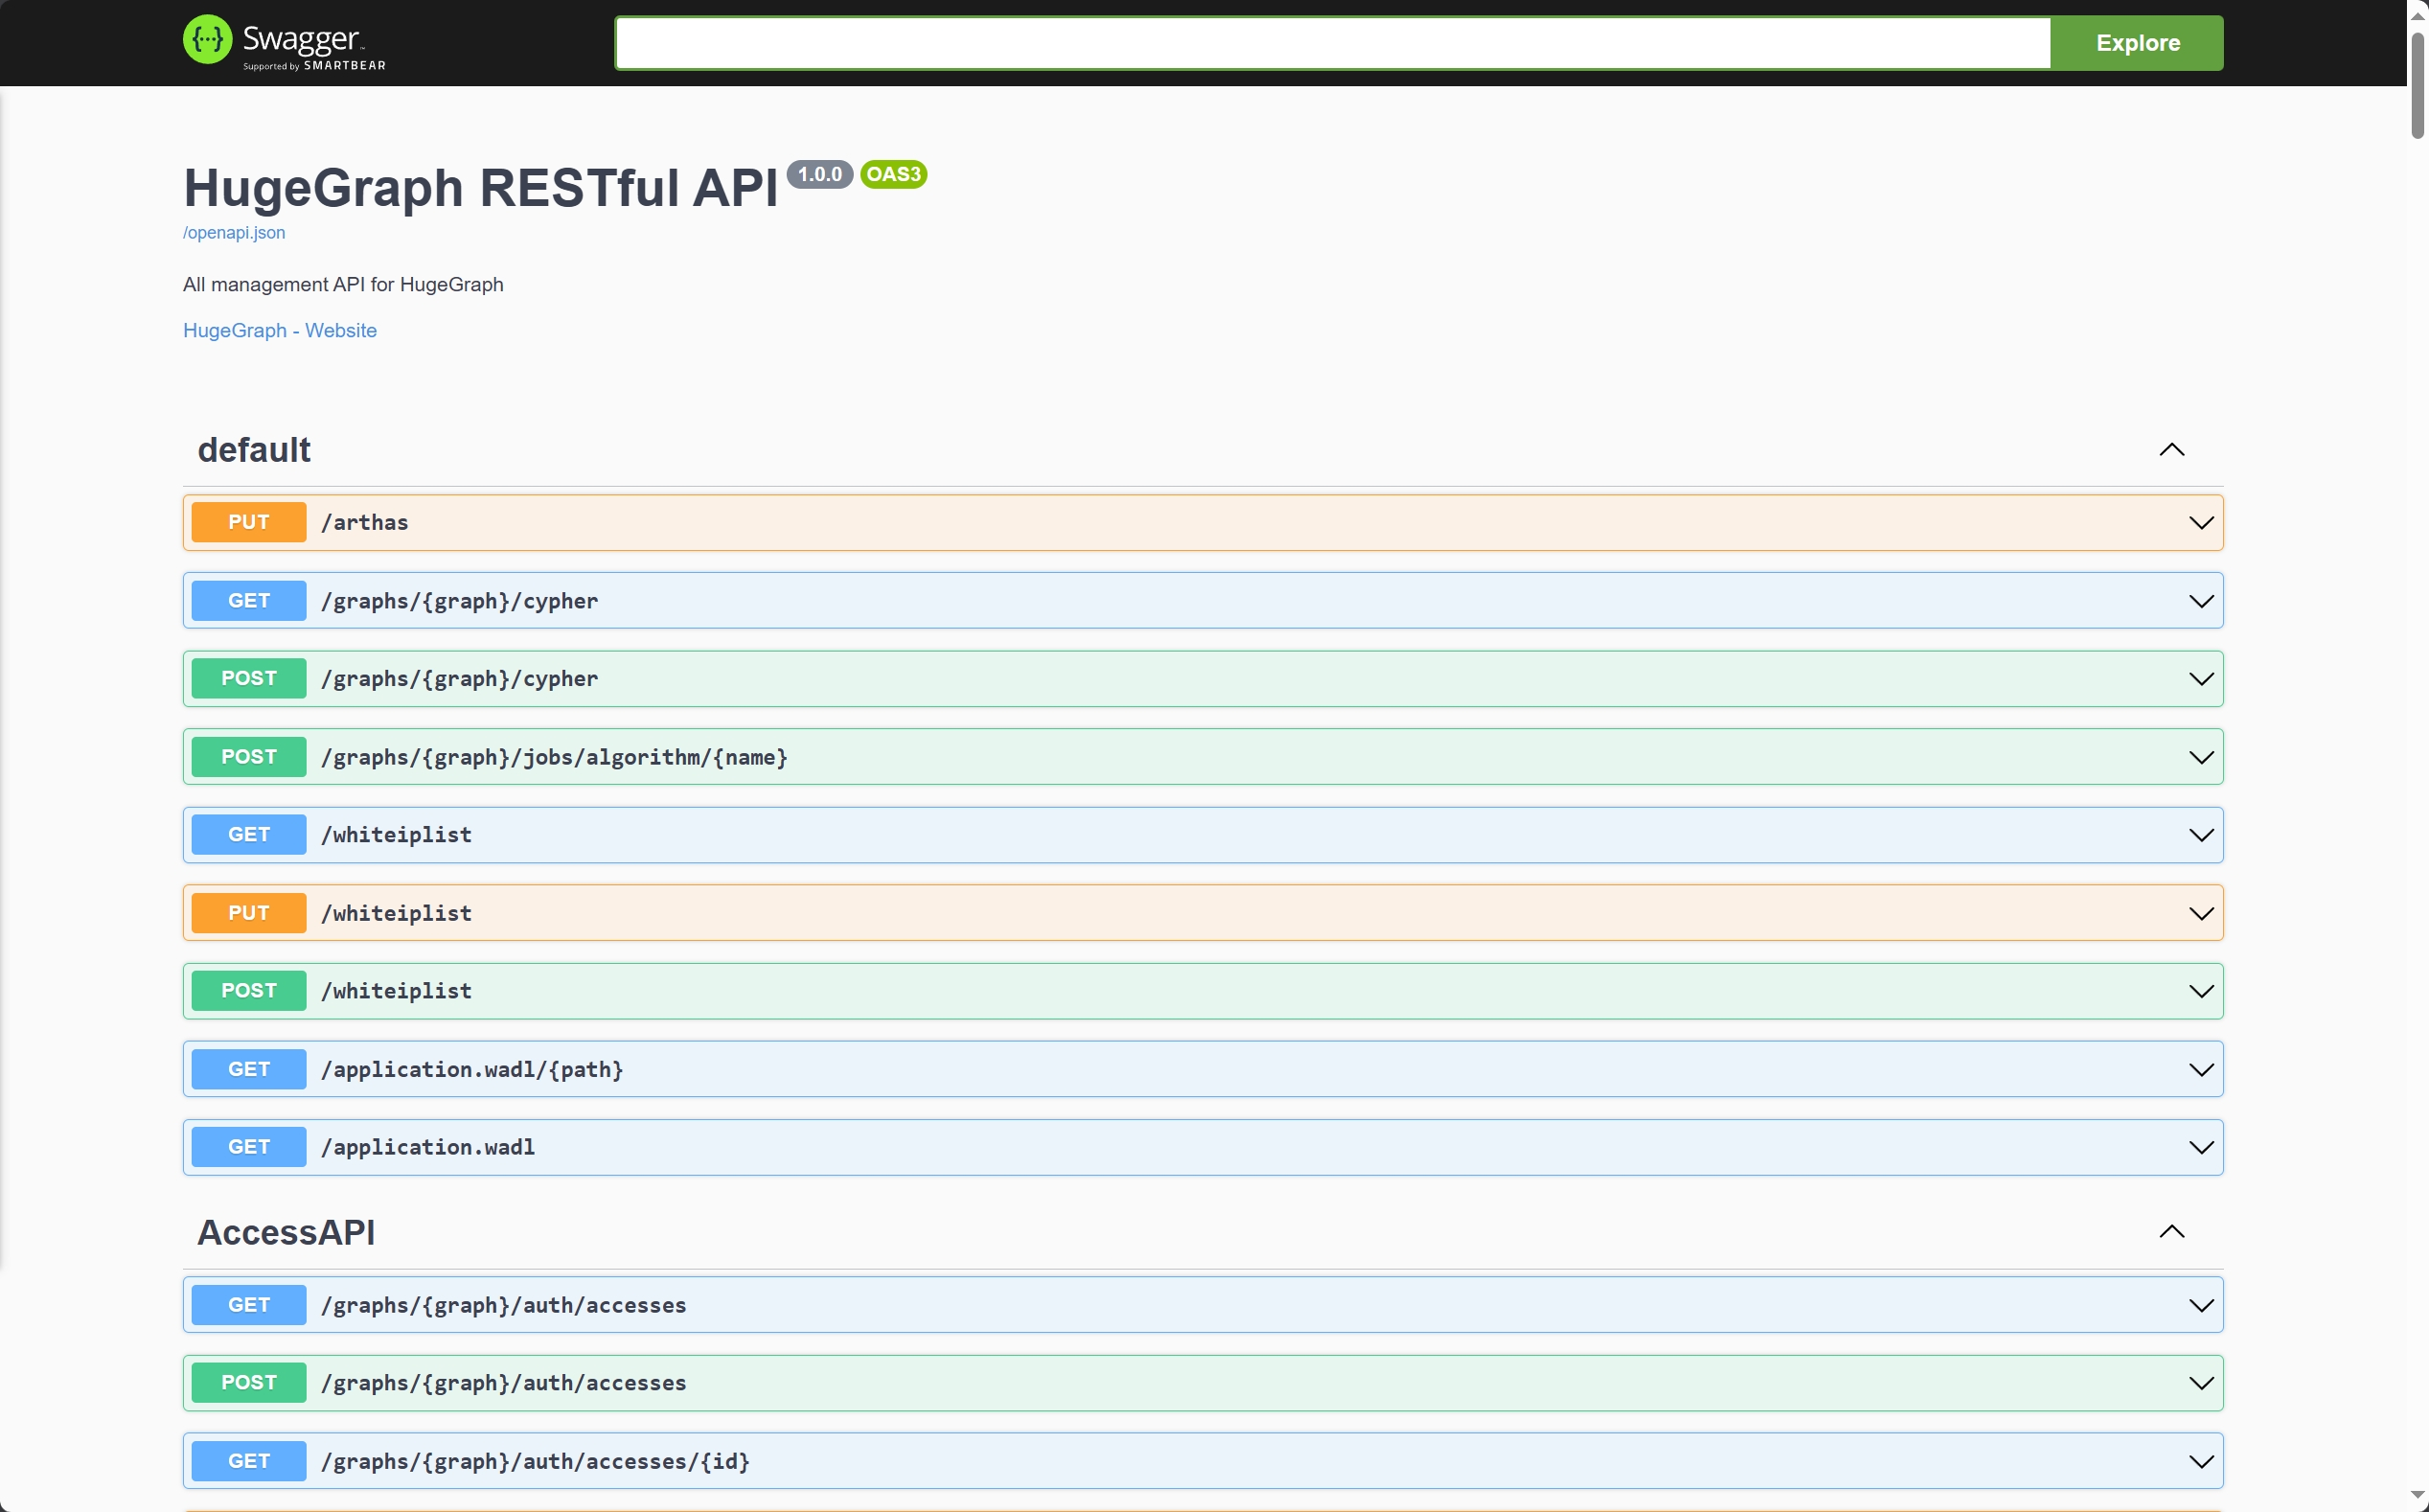
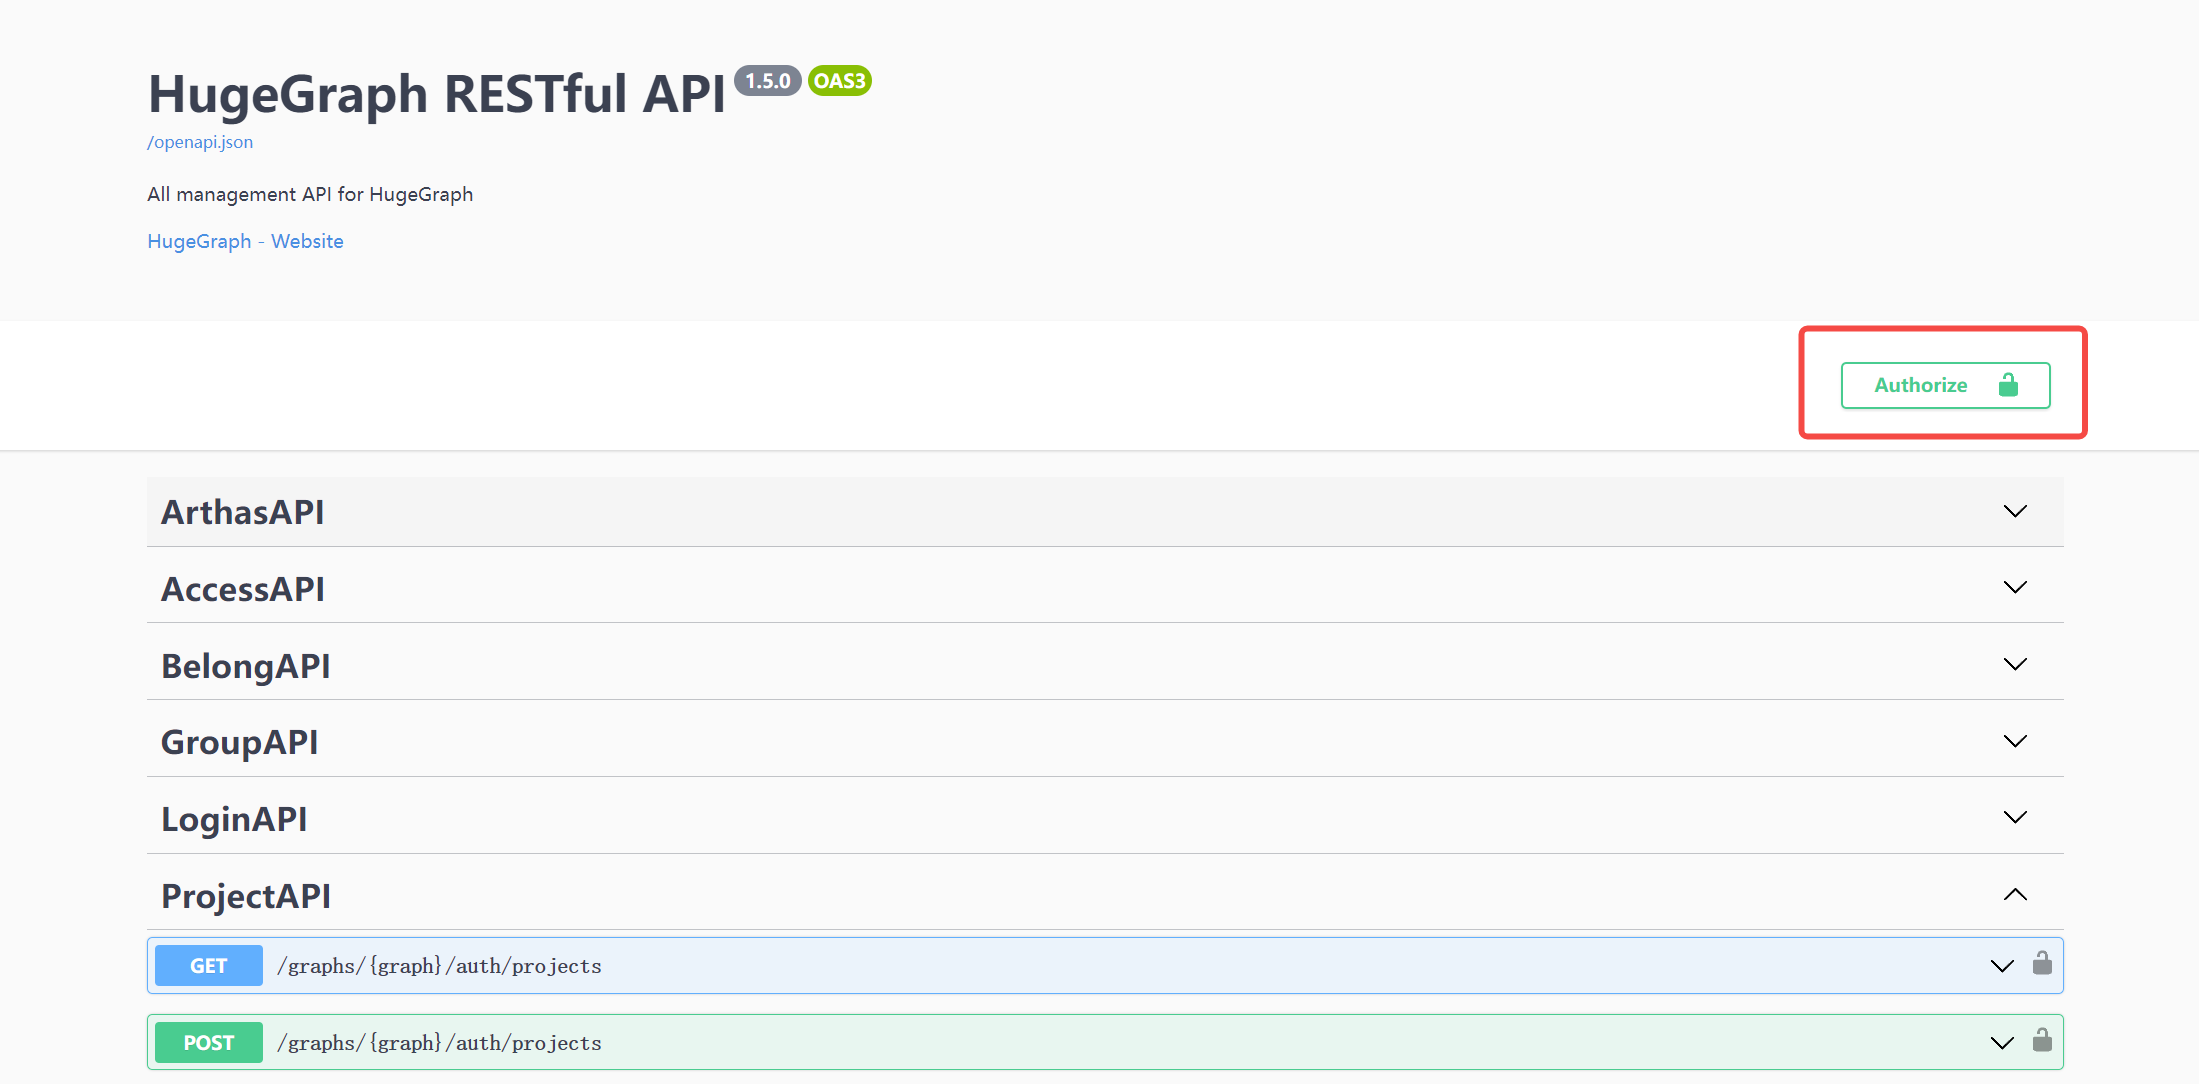
When using Swagger UI to debug the API provided by HugeGraph, if HugeGraph Server turns on authentication mode, you can enter authentication information on the Swagger page.
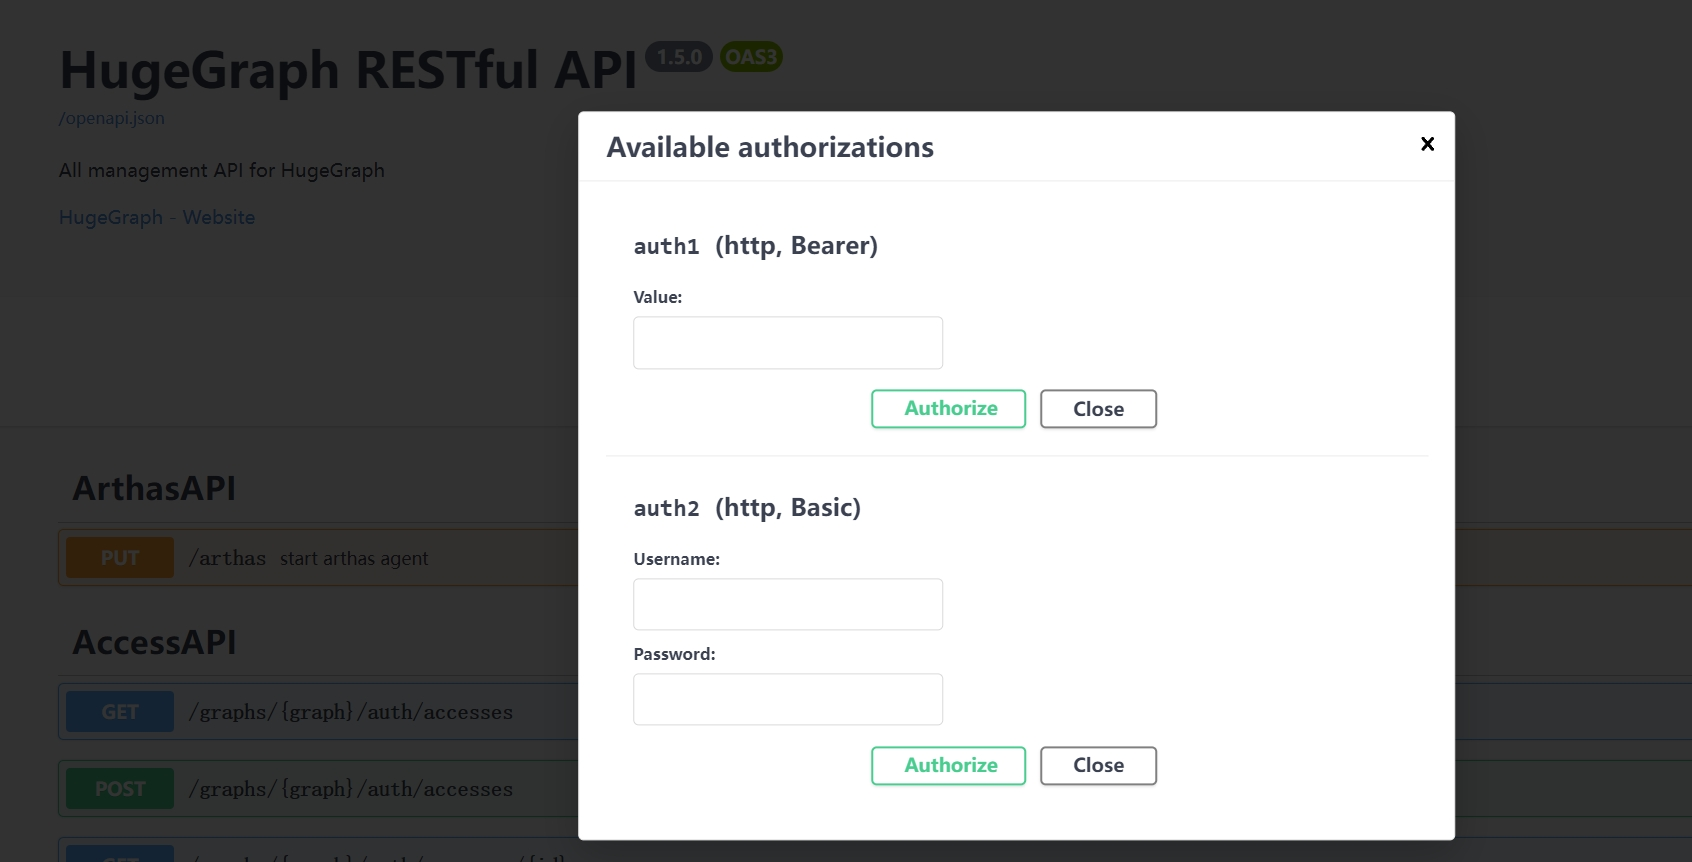
Currently, HugeGraph supports setting authentication information in two forms: Basic and Bearer.
7 Stop Server
8 Debug Server with IntelliJ IDEA
Please refer to Setup Server in IDEA
1.2 - HugeGraph-PD Quick Start
1 HugeGraph-PD Overview
HugeGraph-PD (Placement Driver) is the metadata management component of HugeGraph’s distributed version, responsible for managing the distribution of graph data and coordinating storage nodes. It plays a central role in distributed HugeGraph, maintaining cluster status and coordinating HugeGraph-Store storage nodes.
PD keeps cluster metadata in an embedded RocksDB store under pd.data-path and replicates it across PD nodes with Raft, so a 3-node or 5-node PD cluster keeps serving while a minority of nodes is down. On top of that it registers and activates Store nodes, allocates and rebalances partitions, tracks Store heartbeats, and answers service discovery queries from Store and Server.
PD listens on three ports:
| Port | Default | Configured by | Used by |
|---|---|---|---|
| gRPC | 8686 | grpc.port | Store and Server clients |
| REST | 8620 | server.port | Management, health checks, metrics |
| Raft | 8610 | raft.address | The other PD nodes only |
2 Prerequisites
2.1 Requirements
- Operating System: Linux or macOS (Windows has not been fully tested)
- Java version: ≥ 11
- Maven version: ≥ 3.5.0
3 Deployment
There are two ways to deploy the HugeGraph-PD component:
- Method 1: Download the tar package
- Method 2: Compile from source
3.1 Download the tar package
Apache downloads currently provide the complete 1.7.0 binary bundle containing PD, Store, and Server, without a separate PD binary. Verify version, signatures, and SHA512 on the official download page. This historical incubating release retains incubating in archive and extracted directory names:
3.2 Compile from source
To build only the PD distribution and the modules it depends on:
The unpacked distribution contains just three directories: bin (start and stop scripts), conf (application.yml, application.yml.template, log4j2.xml, verify-license.json) and lib (the hg-pd-service jar).
3.3 Docker Deployment
HG_PD_* mappings and /v1/ready are features of current master; the Server 1.7.0 source tag lacks these Docker mappings and readiness API. The following examples require images built from current master and tagged local. For release 1.7.0 assets, use bundled configuration and version-specific instructions:
To run master-built PD alone, first set a deployment-specific secret and replace example addresses with addresses reachable by the container:
| Variable | Required | Default | Configuration key | Description |
|---|---|---|---|---|
HG_PD_GRPC_HOST | Yes | None | grpc.host | Advertised gRPC hostname/IP; use container hostnames within a container network. |
HG_PD_RAFT_ADDRESS | Yes | None | raft.address | This PD node’s Raft address. |
HG_PD_RAFT_PEERS_LIST | Yes | None | raft.peers-list | Raft addresses of every PD node, including this node. |
HG_PD_INITIAL_STORE_LIST | Yes | None | pd.initial-store-list | Expected Store gRPC addresses. |
HG_PD_AUTH_SECRET_KEY | Yes | None | auth.secret-key | REST Basic password shared by all PD REST clients. |
HG_PD_GRPC_PORT | No | 8686 | grpc.port | gRPC service port. |
HG_PD_REST_PORT | No | 8620 | server.port | REST API port. |
HG_PD_DATA_PATH | No | /hugegraph-pd/pd_data | pd.data-path | Metadata path. |
HG_PD_INITIAL_STORE_COUNT | No | 1 | pd.initial-store-count | Minimum Store count needed for cluster availability. |
HG_PD_ACTUATOR_EXPOSURE | No | health,metrics,prometheus | management.endpoints.web.exposure.include | Public Actuator endpoint allowlist; * is forbidden. |
The master entrypoint requires all five mandatory variables, builds SPRING_APPLICATION_JSON overrides, then starts PD. Other settings come from image conf/application.yml; JAVA_OPTS is passed to the JVM. Deprecated GRPC_HOST, RAFT_ADDRESS, RAFT_PEERS, and PD_INITIAL_STORE_LIST remain supported with warnings.
Docker HEALTHCHECK polls /v1/health every 15 seconds, confirming only REST listener liveness, not a Raft quorum. Compose uses the same liveness check; verify /v1/ready separately before starting Store. Containers run Java in the foreground and exit when Java exits; automatic restart requires a Docker restart policy. Inspect logs with docker logs <container-name>.
See the Store Docker section and docker/README.md for master Compose and the minimal topology. When starting the full topology with Hubble, first generate the untracked Hubble configuration described in that README.
4 Configuration
PD startup reads installation conf/application.yml. Match this file to the installed version: 1.7.0 configuration or master configuration. Master leaves auth.secret-key empty, causing protected REST calls to be rejected until configured. Startup does not read application.yml.template.
4.1 Configuration Reference
These tables were checked against hg-pd-dist configuration and Java defaults at Server master commit 2f827d6e8c9c62ae858f2fc122b3a192d015e2f4; they do not describe every 1.7.0 behavior. Use original tagged configuration with release binaries and master configuration with master builds.
gRPC and REST
| Key | Master distribution value | Built-in default | Description |
|---|---|---|---|
grpc.host | 127.0.0.1 | none, required | Address this PD advertises for gRPC. Store and Server connect here, so set it to a reachable IPv4 address or hostname, never 127.0.0.1 or 0.0.0.0, in a distributed deployment. |
grpc.port | 8686 | none, required | gRPC port. |
server.port | 8620 | none, required | REST API port. Also the port reported in Raft member information. |
application.yml.template also carries grpc.netty-server.max-inbound-message-size: 100MB, but PD sets the gRPC server’s inbound message limit to 1 GB in code, so that key has no effect.
Raft
| Key | Master distribution value | Built-in default | Description |
|---|---|---|---|
raft.address | 127.0.0.1:8610 | none, required | Raft address of this node as host:port. Must be unique per node and must appear in raft.peers-list. |
raft.peers-list | 127.0.0.1:8610 | none, required | Comma separated Raft addresses of every PD node, including this one. Must be identical on all nodes. |
raft.enable | not set | true | When true, metadata writes go through the Raft state machine. When false, PD writes straight to its local store with no replication. |
raft.ip-whitelist.enabled | not set | true | When true, the Raft RPC port accepts connections only from the addresses resolved from raft.peers-list; other clients are dropped and logged as Blocked connection from <ip>. The allowlist is re-resolved when the peer list changes, but a peer that keeps its hostname and changes IP (a restarted container, for example) needs a PD restart. |
raft.snapshotInterval | not set | 300 | Seconds between Raft snapshots. |
raft.rpc-timeout | not set | 10000 | Raft RPC connect, request and install-snapshot timeout, in milliseconds. |
PD core
| Key | Master distribution value | Built-in default | Description |
|---|---|---|---|
pd.data-path | ./pd_data | none, required | Metadata directory. Holds the RocksDB store in rocksdb/ and the Raft log, metadata and snapshots in pd_raft/. |
pd.patrol-interval | 1800 | 300 | Seconds between patrol runs, which check partition health across stores and rebalance partition counts. |
pd.initial-store-count | 1 | 3 | Minimum number of active Store nodes. Below this the cluster state becomes Cluster_Not_Ready and the cluster is treated as unavailable. Set it to the number of stores you deploy. |
pd.initial-store-list | 127.0.0.1:8500 | empty | Comma separated Store gRPC addresses (ip:port) that are activated automatically when they register. An entry may also carry a group id as store_address/group_id. |
pd.cluster_id | not set | 1 | Cluster id, used to keep separate PD clusters apart. |
Store management
| Key | Master distribution value | Built-in default | Description |
|---|---|---|---|
store.keepAlive-timeout | not set | 300 | Seconds without a heartbeat after which a Store is treated as temporarily unavailable and its partition leaders move to other replicas. |
store.max-down-time | 172800 | 1800 | Seconds after which a Store is treated as permanently unavailable and its replicas are reallocated to other machines. |
store.monitor_data_enabled | true | false | Whether to persist Store monitoring samples. |
store.monitor_data_interval | 1 minute | 1 minute | Sampling interval, written as <number> <unit> with unit one of second, minute, hour, day, month, year. The number defaults to 1 when omitted. |
store.monitor_data_retention | 1 day | 1 day | How long monitoring samples are kept, same format as above. |
Partitions
| Key | Master distribution value | Built-in default | Description |
|---|---|---|---|
partition.default-shard-count | 1 | 3 | Number of replicas per partition. Use 3 for a production cluster. |
partition.store-max-shard-count | 12 | 24 | Maximum number of partition replicas one Store holds. |
The initial partition count is derived from these two values and the size of pd.initial-store-list:
Discovery, license and metrics
| Key | Master distribution value | Built-in default | Description |
|---|---|---|---|
discovery.heartbeat-try-count | not set | 3 | Number of missed heartbeats after which a registered client’s discovery entry is deleted. |
license.verify-path | ./conf/verify-license.json | None; required configuration key | The PD distribution includes this JSON file; current master has no runtime read of this configuration option. |
license.license-path | ./conf/hugegraph.license | None; required configuration key | No license file is bundled at this path. Internal gRPC putLicense writes uploads here. Master REST GET /v1/license returns an empty object; a missing file does not block startup. |
auth.secret-key | Empty | Empty | Master PD REST Basic password for usernames hg, store, hubble, or vermeer. Docker requires it; bare-metal PD can start with an empty secret, but rejects protected REST calls. |
management.metrics.export.prometheus.enabled | true | Spring Boot default | Exposes /actuator/prometheus. |
management.endpoints.web.exposure.include | health,metrics,prometheus | Spring Boot exposes only health by default | Actuator allowlist; these endpoints bypass the PD REST Basic interceptor. |
logging.config | file:./conf/log4j2.xml | none | Log4j2 configuration. Writes logs/hugegraph-pd.log, logs/hugegraph-pd_raft.log and logs/audit-hugegraph-pd.log. |
Thread pools
| Key | Built-in default | Description |
|---|---|---|
thread.pool.grpc.core | 600 | Core size of the pool that serves gRPC calls. |
thread.pool.grpc.max | 1000 | Maximum size of that pool. |
thread.pool.grpc.queue | unbounded | Queue capacity of that pool. |
job.uninterruptibleThreadPool.core | 0 | Core size of the background metadata job pool. A value of 0 or less means half the available processors. |
job.uninterruptibleThreadPool.max | 256 | Maximum size of that pool. |
job.uninterruptibleThreadPool.queue | unbounded | Queue capacity of that pool. |
4.2 Single-node configuration
For master-built distributions, start with conf/application.yml, adjust per-node gRPC/Raft addresses and data paths, and set auth.secret-key. The following values are for development and testing. One PD node provides no majority fault tolerance; partition.default-shard-count: 1 means one replica per partition.
Generate a deployment secret with openssl rand -hex 24; Docker supplies it through HG_PD_AUTH_SECRET_KEY. See REST API authentication for the different 1.7.0 behavior.
4.3 Three-node cluster configuration
For a production cluster run 3 or 5 PD nodes, an odd number so Raft always has a quorum. A 3-node cluster tolerates one node failure. raft.peers-list must list every node and must be byte-for-byte identical on all of them, while grpc.host and raft.address differ per node.
Node 1 (192.168.1.10):
Node 2 (192.168.1.11) and node 3 (192.168.1.12) use the same file with grpc.host and raft.address changed to their own address:
To put all three PD nodes on one machine for testing, give each node its own pd.data-path and its own ports, for example raft 8610/8611/8612, gRPC 8686/8687/8688 and REST 8620/8621/8622.
In Docker bridge networking the same configuration comes from environment variables and uses container hostnames instead of IP addresses:
5 Start and Stop
5.1 Start PD
In the PD installation directory, execute:
The script requires a JDK of at least version 11 on PATH or in JAVA_HOME, and it exits without doing anything if it finds a Java process already using this installation’s conf directory.
Supported flags:
| Flag | Values | Default | Description |
|---|---|---|---|
-d | true, false | true | Daemon mode. See the note below. |
-g | zgc, ZGC | not set | Garbage collector. Leave the flag off for the default G1GC. Any other value, g1 included, aborts the start. |
-j | JVM options | empty | Extra JVM options, for example -j "-Xmx8g -Xms8g". |
-y | true, false | false | Attach the OpenTelemetry Java agent. The agent is downloaded into plugins/ on first use, its MD5 is verified, and traces are exported over gRPC to http://127.0.0.1:4317. |
The -d flag controls daemon mode:
-d true(default): run as a background daemon; the script returns immediately.-d false: run in foreground. The scriptexecs Java, so the container or supervisor process IS Java. Use this when running under Docker or a process supervisor (systemd, supervisord) so crashes are detected and the service is restarted automatically.
Each flag also has an environment variable equivalent: DAEMON, GC_OPTION, USER_OPTION and OPEN_TELEMETRY. Setting JAVA_OPTIONS replaces the computed heap settings entirely; otherwise the script sizes the heap between 512 MB and 32 GB from available memory. Setting STDOUT_MODE=true leaves the JVM output on stdout instead of redirecting it to logs/hugegraph-pd-stdout.log, which is what the Docker image does.
After successful startup, you can see logs similar to the following in logs/hugegraph-pd-stdout.log:
The process id is written to bin/pid.
5.2 Stop PD
In the PD installation directory, execute:
The script reads bin/pid, sends the process a termination signal, waits up to 30 seconds for it to exit, and removes the pid file. If bin/pid is missing it reports that and exits successfully.
6 Startup Order in a Distributed Cluster
Start the components in this order:
- All PD nodes. Form the Raft group and elect a leader. Check
GET /v1/readyon each node; start Store only after HTTP200withready:true./v1/healthchecks REST listener liveness only. - All Store nodes. Register with PD; wait for
/v1/storesto show every target Store asUp. - All Server nodes. Start after PD and Store are ready.
sequenceDiagram
    participant Operator
    participant PD
    participant Store
    participant Server
    Operator->>PD: GET /v1/ready (check each PD)
    PD-->>Operator: HTTP 200 and ready=true
    Operator->>Store: Start Store
    Store->>PD: gRPC registration and heartbeat
    Operator->>PD: GET /v1/stores (Basic authentication)
    PD-->>Operator: Every target Store is Up
    Operator->>Server: Start Server
    Server->>PD: gRPC partitions and discovery
    Server->>Store: gRPC graph data access
Master Compose waits on PD /v1/health through Store depends_on: condition: service_healthy, and on Store REST liveness before Server. Server also polls PD /v1/stores for an Up Store before starting. Therefore, docker compose up --wait does not replace PD Raft readiness and Store registration checks.
PD is also the last component to stop: shut down Server, then Store, then PD.
7 Verification
7.1 REST API Authentication
Current master requires HTTP Basic Authorization for all PD REST paths except /actuator/*, /v1/health, /v1/ready, and /v1/prom/targets/*. Username must be hg, store, hubble, or vermeer, and password must equal auth.secret-key. A missing secret or wrong password returns HTTP 401. Query Stores using the same secret configured at PD startup:
bin/wait-storage.sh uses the same credentials through PD_AUTH_USER and PD_AUTH_PASSWORD. Release 1.7.0 checks only internal service usernames and does not compare passwords; do not apply this older behavior to master builds.
Protect Server and PD ports separately in production
Enable Server authentication and authorization, an IP allowlist, and minimum graph API permissions; retain and protect Server audit-*.log. These controls do not protect PD. Master PD REST uses auth.secret-key, whereas 1.7.0 checks usernames only. Keep raft.ip-whitelist.enabled enabled for configured peers and restrict PD REST/gRPC to trusted networks. Unauthenticated /v1/health, /v1/ready, and Actuator probes require network restrictions too. Protect master PD audit logs at logs/audit-hugegraph-pd.log.
7.2 Health Checks
Unauthenticated GET /v1/health returns 200 with an empty body, confirming only PD REST listener startup:
Spring Boot Actuator also provides a readable health response:
Actuator {"status":"UP"} does not confirm an available PD Raft leader. Master GET /v1/ready returns HTTP 200 with ready:true when the PD Raft node is active and sees a leader; otherwise it returns HTTP 503 with ready:false:
7.3 Cluster and member status
Check the PD members and which node is the Raft leader:
The response carries pdList, the elected pdLeader, numOfService, numOfNormalService and a stateCountMap. In a healthy 3-node PD cluster numOfService and numOfNormalService are both 3 and exactly one member has role: "Leader".
GET /v1/cluster returns the same member list together with the Store list, graph list and overall cluster state, and GET / returns a short summary (leader address, cluster state, member count, store count, graph count, partition count).
7.4 Store status
You can also verify Store node status through the PD API:
If the response shows state as Up, the corresponding Store node is running normally. The example below shows a single Store node. In a healthy 3-node deployment, the storeId list should contain three IDs, and stateCountMap.Up, numOfService, and numOfNormalService should all be 3.
7.5 Other REST endpoints
All paths below are relative to http://<pd-host>:8620 and need the Basic header from section 7.1 unless noted.
| Method and path | Description |
|---|---|
GET / | Brief cluster statistics: leader, state, member count, store count, graph count, partition count |
GET /v1/health | Liveness only; HTTP 200 does not imply Raft readiness; no authentication |
GET /v1/ready | Master readiness: HTTP 200 with ready:true means an active node that sees a leader; no authentication |
GET /v1/cluster | Full cluster statistics: PD members, stores, graphs, partitions |
GET /v1/members | PD member list with roles and the elected leader |
POST /v1/members/change | Change the Raft peer list, body {"peerList": "..."} |
GET /v1/stores | Registered Store nodes with state and per-store statistics |
GET /v1/store/{storeId} | One Store node |
POST /v1/store/{storeId} | Update a Store’s state, body {"storeState": "..."} |
DELETE /v1/store/{storeId} | Remove a Store from the cluster |
POST /v1/store/log | Store state change log, body {"startTime": "...", "endTime": "..."} |
GET /v1/storesAndStats | Raw Store metadata, for debugging |
GET /v1/store_monitor/{storeId} | Store monitoring samples as text |
GET /v1/store_monitor/json/{storeId} | Store monitoring samples as JSON |
GET /v1/shards | Every shard of every partition, with store id, role, state and progress |
GET /v1/shardGroups | Shard groups |
GET /v1/shardGroupsCache | Shard groups from PD’s in-memory cache |
GET /v1/shardLeaders | Partition leaders grouped by Store raft address |
GET /v1/balanceLeaders | Rebalance partition leaders across Stores |
GET /v1/partitions | Partition list with state and statistics |
GET /v1/highLevelPartitions | Partitions with per-graph key counts and data sizes |
GET /v1/partitionsAndStats | Raw partition metadata, for debugging |
POST /v1/partitions/log | Partition change log, body {"startTime": "...", "endTime": "..."} |
GET /v1/resetPartitionState | Reset the state of every partition |
GET /v1/graphs | Graph list |
GET /v1/graph/** | One graph by name |
POST /v1/graph/** | Update a graph’s partition count, body {"partitionCount": N} |
GET /v1/graph/partitionSizeRange | Minimum and maximum partition count the cluster accepts |
GET /v1/graph-spaces | Graph space list |
GET /v1/graph-spaces/** | One graph space |
POST /v1/graph-spaces/** | Update a graph space |
POST /v1/registry | Register a service instance for discovery |
POST /v1/registryInfo | Query registered instances |
GET /v1/allInfo | All registered instances |
GET /v1/license | Legacy endpoint; current master returns an empty object |
GET /v1/license/machineInfo | IP and MAC addresses seen by the license check |
GET /v1/task/patrolStores | Run the store patrol task now |
GET /v1/task/patrolPartitions | Run the partition patrol task now |
GET /v1/task/balancePartitions | Rebalance partitions across Stores |
GET /v1/task/splitPartitions | Run automatic partition splitting now |
GET /v1/task/balanceLeaders | Rebalance partition leaders |
GET /v1/task/compact | Instruct Store nodes to compact the RocksDB files of their partitions |
GET /v1/prom/targets/{appName} | Prometheus service discovery targets, no authentication required |
GET /v1/prom/targets-all | Prometheus targets for all app types |
GET /v1/prom/sd_config | Prometheus HTTP service discovery config |
GET /actuator/health | Spring Boot health, no authentication required |
GET /actuator/metrics | Spring Boot metrics, no authentication required |
GET /actuator/prometheus | Prometheus scrape endpoint, no authentication required |
The two log endpoints take a time range as {"startTime": "...", "endTime": "..."}; yyyy-MM-dd HH:mm:ss and yyyy-MM-dd are among the accepted formats.
PD registers its own meters under the hg prefix, so /actuator/prometheus exposes hg_up, hg_graphs, hg_stores and hg_terms alongside the standard JVM metrics, plus per-graph partition and size meters once graphs exist.
1.3 - HugeGraph-Store Quick Start
1 HugeGraph-Store Overview
HugeGraph-Store is the storage node component of HugeGraph’s distributed version, responsible for actually storing and managing graph data. It works in conjunction with HugeGraph-PD to form HugeGraph’s distributed storage engine, providing high availability and horizontal scalability.
Each Store node keeps graph data in RocksDB and replicates it with Raft (JRaft): every partition is a separate Raft group, so a partition survives the loss of a minority of its replicas. Store nodes do not know about each other directly. They register with PD, receive their partition assignment from PD, and report state back over a heartbeat. HugeGraph-Server reaches Store over gRPC after looking up partition locations in PD.
2 Prerequisites
2.1 Requirements
- Operating System: Linux or macOS (Windows has not been fully tested)
- Java version: ≥ 11 (enforced by the build and re-checked by
bin/start-hugegraph-store.sh) - Maven version: ≥ 3.5.0
- Deploy HugeGraph-PD first for multi-node deployment
3 Deployment
There are two ways to deploy the HugeGraph-Store component:
- Method 1: Download the tar package
- Method 2: Compile from source
3.1 Download the tar package
Apache downloads currently provide the complete 1.7.0 binary bundle containing PD, Store, and Server, without a separate Store binary. Verify version, signatures, and SHA512 on the official download page. This historical incubating release retains incubating in archive and directory names:
3.2 Compile from source
To build Store alone instead of the whole repository, build hugegraph-struct first, because Store depends on it:
The assembled directory contains only bin/, conf/ and lib/hg-store-node-{version}.jar.
3.3 Docker Deployment
HG_STORE_* mappings are current master features, absent from Server tag 1.7.0. These Docker examples require PD, Store, and HStore Server images built from the same current master source with matching local tags:
Before first startup, create .env in docker/ following the authentication environment instructions.
The procedure uses umask 077 and refuses to overwrite existing files. Keep an existing .env and add missing entries. Never regenerate HG_PD_AUTH_SECRET_KEY for initialized data directories. Although .gitignore excludes this file, do not commit it.
In every new shell, load the same file from docker/ before Compose or PD REST commands:
Load the same secret before subsequent restarts or PD REST calls; do not regenerate it for initialized directories. Explicitly include HUGEGRAPH_VERSION=local and HUGEGRAPH_PULL_POLICY=never in every Compose lifecycle command.
To start Hubble, use the topology-specific untracked configuration: minimal docker-compose-hstore.yml mounts conf/hubble/hstore.local.properties;
HA docker-compose-3pd-3store-3server.yml mounts conf/hubble/hstore-ha.local.properties.
The README initialization creates both files with the shared PD secret. If missing or requiring updates, load existing .env from docker/ and run:
Multi-node service names are pd0–pd2, store0–store2, and server0–server2. This master Compose file also requires matching locally built images; do not mix HUGEGRAPH_VERSION=1.7.0 release images with master Compose.
To run master-built Store alone, replace example addresses with actual routable Store and PD addresses:
Current Master Docker Environment Variables:
| Variable | Required | Default | Configuration key | Description |
|---|---|---|---|---|
HG_STORE_PD_ADDRESS | Yes | None | pdserver.address | Comma-separated PD gRPC addresses. |
HG_STORE_GRPC_HOST | Yes | None | grpc.host | Advertised hostname/IP; use a container hostname within a container network. |
HG_STORE_RAFT_ADDRESS | Yes | None | raft.address | This node’s Raft address. |
HG_STORE_GRPC_PORT | No | 8500 | grpc.port | gRPC service port. |
HG_STORE_REST_PORT | No | 8520 | server.port | REST API port. |
HG_STORE_DATA_PATH | No | /hugegraph-store/storage | app.data-path | Data path. |
The master entrypoint writes these values into SPRING_APPLICATION_JSON, overriding image conf/application.yml. Other options still come from that file and application-pd.yml; Java runs in the foreground. Deprecated PD_ADDRESS, GRPC_HOST, and RAFT_ADDRESS remain supported with warnings.
PD and Store Docker HEALTHCHECK use /v1/health, confirming only local REST responses. Compose depends_on uses the same startup gate; separately verify PD /v1/ready and Up Store state in /v1/stores. Store defaults to STDOUT_MODE=true; its Dockerfile declares only EXPOSE 8520, so publish gRPC 8500 and Raft 8510 separately if needed outside the Docker network.
4 Configuration
Store reads two files under conf/. Release 1.7.0 sources: application.yml, application-pd.yml. Master sources: application.yml, application-pd.yml. Master places RocksDB settings in the second file, included through spring.profiles.include: pd; startup selects application.yml.
application.yml: Main PD address, ports, Raft, and data path settings.application-pd.yml: Included throughspring.profiles.include: pd; RocksDB memory and Actuator exposure.
4.1 application.yml
The following tables were checked against distribution values and Java defaults at Server master commit 2f827d6e8c9c62ae858f2fc122b3a192d015e2f4. Use tagged configuration for release 1.7.0 without replacing it with another version’s files.
4.2 application-pd.yml
This file contains only rocksdb and Actuator exposure settings.
Protect Server and Store ports separately in production
Enable Server authentication and authorization, an IP allowlist, and minimum graph API permissions; retain and protect Server audit-*.log. These settings do not protect Store: master exposes all Actuator endpoints without PD-style Basic authentication. Restrict Store REST, gRPC, and Raft to cluster nodes and trusted operations networks.
4.3 Configuration reference
“Master distribution value” comes from the two master files above. “Code default” is the fallback when a key is absent; rely on code defaults for options omitted from the distribution files.
Core
| Key | Master distribution value | Code default | Meaning |
|---|---|---|---|
pdserver.address | localhost:8686 | required | PD gRPC endpoints, comma separated. Store registers itself here and receives its partition assignment. Must be PD’s grpc.port, not its REST port. |
grpc.host | 127.0.0.1 | required | Address this node advertises for its own gRPC service. Set it to a routable IP or hostname, 127.0.0.1 is only usable for a single-machine setup. |
grpc.port | 8500 | required | gRPC port. Server and the Store client connect here. |
grpc.netty-server.max-inbound-message-size | 1000MB | gRPC default | Maximum size of a single inbound gRPC message. Bound by the grpc-spring-boot-starter Netty server. |
grpc.server.wait-time | not set | 3600 | Seconds a scan stream waits for the client to consume a page before the server aborts it. |
server.port | 8520 | required | REST and Actuator port. Also reported to PD as the rest.port label. |
Raft
| Key | Master distribution value | Code default | Meaning |
|---|---|---|---|
raft.address | 127.0.0.1:8510 | required | Raft service address of this node, host:port. Must be reachable from every other Store node. There is no peer list to configure: PD tells each node which peers belong to a partition’s Raft group. |
raft.disruptorBufferSize | 1024 | 0 | Raft task queue size. 0 derives it from rocksdb.total_memory_size, by rounding that size in GB to the nearest power of two and multiplying by 32. |
raft.max-log-file-size | 600000000000 | 50000000000 | Maximum byte size of Raft logs. |
raft.snapshotInterval | 1800 | 300 | Seconds between Raft snapshots. |
raft.snapshotLogIndexMargin | not set | 0 | Minimum applied-index distance since the last snapshot before a snapshot is actually written. 0 disables the distance check. |
raft.rpc-timeout | not set | 10000 | Raft RPC timeout in milliseconds. |
raft.metrics | not set | true | Collect JRaft node metrics, readable at /metrics/raft. |
raft.useRocksDBSegmentLogStorage | not set | true | Store Raft logs in the RocksDB segment log storage. |
raft.maxSegmentFileSize | not set | 67108864 | Segment log file size in bytes (64 MB). |
raft.maxReplicatorInflightMsgs | not set | 256 | Maximum in-flight replication requests per follower. |
raft.maxEntriesSize | not set | 256 | Maximum number of entries in one AppendEntries request. |
raft.maxBodySize | not set | 524288 | Maximum byte size of one AppendEntries request. |
ave-logEntry-size-ratio | not set | 0.95 | Smoothing ratio used to estimate the average log entry size. Note that this key sits at the top level, not under raft. |
Storage and labels
| Key | Master distribution value | Code default | Meaning |
|---|---|---|---|
app.data-path | ./storage | store | RocksDB data directory. Multiple paths separated by commas spread partitions over several disks. |
app.raft-path | commented out | empty | Directory for Raft logs and snapshots. Falls back to app.data-path when empty. |
app.fake-pd | not set | false | Built-in PD mode for standalone testing. Do not use it in production. |
app.placeholder-size | not set | 10 | Size in GB of a placeholder file created in each data path at startup, so space can be freed in an emergency. 0 disables it. |
app.label.<name> | not set | none | Arbitrary key/value labels sent to PD in the store heartbeat. The node adds rest.port on its own. |
RocksDB
| Key | Master distribution value | Code default | Meaning |
|---|---|---|---|
rocksdb.total_memory_size | 32000000000 | 51539607552 | Memory budget shared by all RocksDB instances on this node. When absent or 0, the node uses the JVM max heap instead. |
rocksdb.write_buffer_size | 32000000 | 33554432 | Memtable size in bytes. When absent or 0, the node uses total_memory_size / 1000. |
rocksdb.min_write_buffer_number_to_merge | 16 | 16 | Number of memtables merged together before a flush. |
rocksdb.write_buffer_ratio | not set | 0.66 | Share of total_memory_size given to the write cache. The rest becomes the block cache. |
Any other option defined in org/apache/hugegraph/rocksdb/access/RocksDBOptions.java can be added under the same rocksdb: block, for example rocksdb.max_background_jobs, rocksdb.level0_file_num_compaction_trigger or rocksdb.bloom_filter_bits_per_key.
Thread pools
| Key | Code default | Meaning |
|---|---|---|
thread.pool.grpc.core | 600 | Core threads serving gRPC requests. |
thread.pool.grpc.max | 1000 | Maximum gRPC threads. |
thread.pool.grpc.queue | 2147483647 | gRPC task queue capacity. |
thread.pool.scan.core | 128 | Core threads serving scans. 0 means 4 times the CPU count. |
thread.pool.scan.max | 1000 | Maximum scan threads. |
thread.pool.scan.queue | 0 | Scan task queue capacity. |
gRPC callback queue (1.8.0)
Store uses an unbounded queue for gRPC callbacks so that a full queue does not discard cancellation or completion notifications and leave requests unfinished.
You can keep thread.pool.grpc.queue in the configuration, but it no longer limits this queue.
thread.pool.grpc.core and thread.pool.grpc.max still configure the thread pool. Because callbacks can continue to queue, a backlog normally does not grow
the pool from core to max; increasing max alone does not increase callback processing capacity.
Sustained overload can still grow the queue and increase memory usage. Limit client concurrency and size the scan and query worker pools for the node’s
resources; do not rely on thread.pool.grpc.queue for load control. Version 1.7.0 still uses the configured gRPC queue capacity.
Query pushdown
| Key | Code default | Meaning |
|---|---|---|
query.push-down.threads | 1500 | Thread pool size for pushed-down queries. |
query.push-down.fetch_batch | 20000 | Rows fetched per request. |
query.push-down.fetch_timeout | 300000 | Fetch timeout in milliseconds. |
query.push-down.memory_limit_count | 50000 | Row limit for in-memory operations such as sorting. |
query.push-down.index_size_limit_count | 50000 | Index sst file size limit in kB. |
Background jobs
| Key | Code default | Meaning |
|---|---|---|
job.interruptableThreadPool.core | 128 | Core threads of the TTL cleaner pool. 0 means the CPU count. |
job.interruptableThreadPool.max | 256 | Maximum threads of the TTL cleaner pool. 0 means 4 times the CPU count. |
job.interruptableThreadPool.queue | 2147483647 | Queue capacity of the TTL cleaner pool. |
job.uninterruptibleThreadPool.core | 0 | Core threads of the engine’s uninterruptible job pool. 0 means the CPU count. |
job.uninterruptibleThreadPool.max | 256 | Maximum threads of the uninterruptible job pool. |
job.uninterruptibleThreadPool.queue | 2147483647 | Queue capacity of the uninterruptible job pool. |
job.cleaner.batch.size | 10000 | Keys deleted per batch by the TTL cleaner. |
job.start-time | 0 | Hour of day (0 to 23) at which the daily TTL cleanup runs. Values outside that range fall back to 19. |
Built-in PD mode
Only for single-node development and debugging, activated by app.fake-pd: true. The node then plays PD’s role itself and ignores pdserver.address.
| Key | Code default | Meaning |
|---|---|---|
fake-pd.store-list | '' | gRPC addresses of the Store nodes in the fake cluster. |
fake-pd.peers-list | '' | Raft addresses of the same nodes. |
fake-pd.partition-count | 3 | Number of partitions. |
fake-pd.shard-count | 3 | Replicas per partition. |
Diagnostics
| Key | Code default | Meaning |
|---|---|---|
arthas.telnetPort | 8566 | Arthas telnet port, used when /v1/arthasstart is called. |
arthas.httpPort | 8565 | Arthas HTTP port. |
arthas.ip | 0.0.0.0 | Arthas bind address. |
arthas.disabledCommands | jad | Arthas commands to disable. |
4.4 Per-node changes
For multi-node deployment, you need to modify the following configurations for each Store node:
grpc.hostandgrpc.port(the address other components dial)raft.address(Raft protocol address)server.port(REST port)app.data-path(data storage path)
pdserver.address is the same on every node, it lists the whole PD cluster.
5 Start and Stop
5.1 Start Store
Ensure that the PD service is already started, then in the Store installation directory, execute:
The script accepts four flags:
| Flag | Values | Default | Description |
|---|---|---|---|
-d | true, false | true | Daemon mode. See below. |
-g | ZGC, zgc | not set | Garbage collector. Omit the flag for G1, which is the default. Any value other than ZGC or zgc aborts the start, including g1, even though the script’s own usage line suggests it. |
-j | JVM options string | empty | Extra JVM options, for example -j "-Xmx16g -Xms8g". |
-y | true, false | false | Attach the OpenTelemetry Java agent, downloading it into plugins/ on first use, and export traces to 127.0.0.1:4317. |
Daemon mode:
-d true(default): run as a background daemon. The script returns immediately and writes the Java pid tobin/pid.-d false: run in the foreground. The scriptexecs Java, so the container or supervisor process is Java itself. Use this under Docker or a process supervisor (systemd, supervisord) so crashes are detected and the service is restarted automatically.
JVM memory, unless you set JAVA_OPTIONS yourself: -Xms512m, and -Xmx set to half the free memory, clamped to the 512 MB to 2048 MB range. The script also adds -XX:MetaspaceSize=256M, a heap dump on out-of-memory into logs/, and a rolling GC log at logs/gc.log. Production nodes normally need a much larger heap, so pass one explicitly, for example -j "-Xmx32g -Xms32g".
The script refuses to start if ulimit -n or ulimit -u is below 1024, and it preloads jemalloc on x86_64 and arm64 when the shared object can be downloaded and verified.
After successful startup, you can see logs similar to the following in logs/hugegraph-store-server.log:
5.2 Stop Store
In the Store installation directory, execute:
The script reads bin/pid, signals that process, and waits up to 30 seconds for it to exit before removing the pid file. If bin/pid is missing it exits without doing anything.
5.3 Restart Store
It sources the stop script and then the start script, and forwards the flags from section 5.1.
5.4 Startup order
- All PD nodes first. Each Store’s
grpc.host:grpc.portmust appear in PDpd.initial-store-list, or the node remainsPendinginstead ofUp, blocking partition allocation. On master, verify HTTP200withready:truefrom every PD/v1/readyfirst;/v1/healthis liveness only. - Store next. Registration retries while PD is unreachable, logging
store heartbeat error: PD UNREACHABLE. - Server last. Every Store should report
Up; partitions must be ready before opening or initializing graphs.
Master Compose uses depends_on: condition: service_healthy for local liveness, but PD and Store Docker checks only call /v1/health; they do not confirm Raft quorum or Store registration. Server waits for PD to report at least one Up Store. Operators should still check PD /v1/ready and /v1/stores.
6 Multi-Node Deployment Example
Below is a configuration example for a three-node deployment:
6.1 Three-Node Configuration Reference
- 3 PD nodes
- raft ports: 8610, 8611, 8612
- rpc ports: 8686, 8687, 8688
- rest ports: 8620, 8621, 8622
- 3 Store nodes
- raft ports: 8510, 8511, 8512
- rpc ports: 8500, 8501, 8502
- rest ports: 8520, 8521, 8522
6.2 Store Node Configuration
For the three Store nodes, the main configuration differences are as follows:
Node A:
Node B:
Node C:
All nodes should point to the same PD cluster:
And every PD node should list all three Store gRPC addresses:
6.3 Docker Distributed Cluster Configuration
The distributed Store cluster definition is included in docker/docker-compose-3pd-3store-3server.yml. Each Store node gets its own hostname and environment variables:
The container ports stay 8500/8510/8520 on every node, only the published host ports differ. The PD nodes set HG_PD_INITIAL_STORE_LIST: store0:8500,store1:8500,store2:8500 to match.
Store nodes start only after all PD nodes pass healthchecks (/v1/health), enforced via depends_on: condition: service_healthy.
To view runtime logs for a running Store container use docker logs <container-name> (e.g. docker logs hg-store0).
See docker/README.md for the full setup guide.
7 Verify Store Service
Confirm that the Store service is running properly:
Actuator {"status":"UP"} confirms local Store application health, without proving registration as Up in PD.
GET /v1/health is the lighter check used by the Docker image and the compose files. It answers HTTP 200 with an empty body, so use curl -fsS and check the exit code rather than the output:
7.1 Store REST endpoints
The Store node exposes these read-only endpoints on server.port:
| Method | Path | Description |
|---|---|---|
| GET | /v1/health | Liveness probe, HTTP 200 with an empty body |
| GET | /actuator/health | Spring Boot Actuator health, {"status":"UP"} |
| GET | /actuator/prometheus | Prometheus scrape endpoint |
| GET | / | Node summary, leaderCount and partitionCount |
| GET | /-/state | Operator-set STARTING, ONLINE, or STOPPING flag; distinct from PD registration state |
| GET | /-/echo?name=<text> | Echo check |
| GET | /-/scan | State of the running scan streams |
| GET | /v1/partitions | All Raft groups on this node with per-partition metrics. Add ?flags=accurate for exact key counts, which is slower. |
| GET | /v1/partition/{id} | One Raft group by partition id, including role, leader, peers and committed index |
| GET | /metrics/system | Host CPU and memory metrics |
| GET | /metrics/drive | Disk metrics for the data paths |
| GET | /metrics/raft | JRaft node metrics, needs raft.metrics: true |
Master Store configuration exposes all Actuator endpoints with management.endpoints.web.exposure.include: "*" and enables Prometheus. These endpoints lack PD REST Basic protection; restrict Store REST network access.
The node also serves maintenance endpoints that change state or run heavy work: PUT /-/state, GET /-/cleaner, GET /v1/partition/dump/{id}, GET /v1/partition/clean/{id}, POST /v1/compat?id=<partition>, GET /v1/arthasstart, POST /raft/options, and the /fix/* and /test/* groups. Use them only for troubleshooting, and keep the REST port off untrusted networks.
7.2 Check registration from PD
You can also check Store node status through the PD API:
For master builds, PD REST usernames must be hg, store, hubble, or vermeer, and the password must equal PD auth.secret-key. HG_PD_AUTH_SECRET_KEY configures PD and Server in Compose. /v1/health, /v1/ready, /actuator/*, and /v1/prom/targets/* require no authentication. Release 1.7.0 checks only usernames, without comparing passwords; do not use that old behavior for master builds.
If Store is configured successfully, the response should include status information for the current node, and state: "Up" means the node is running normally. A node stuck at Pending is usually missing from PD’s pd.initial-store-list.
The example below shows a single Store node. If all three nodes are configured correctly and running, the storeId list should contain three IDs, and stateCountMap.Up, numOfService, and numOfNormalService should all be 3.
7.3 Minimal Graph Read/Write Verification
After Store appears as Up in PD, start an HStore-backed Server connected to the same PD cluster. See the Server Quick Start. Once GET /versions responds and the default hugegraph graph is loaded, create a property key, vertex label, and vertex, then read it:
The final response should contain vertex ID pd-store-demo-1 and property pd_store_demo_name. If Server authentication is enabled, add credentials to each request.
2 - HugeGraph ToolChain
HugeGraph Toolchain includes the Java and Go clients, Loader, Hubble, Tools, Spark Connector, and SeaTunnel Sink/Source. Choose an entry by the task you need to complete, then open the component guide for its configuration and commands.
| Task | Start here | Best for |
|---|---|---|
| Visualize graphs | Hubble | Viewing and managing graphs in a Web UI |
| Import graph data | Loader, SeaTunnel Sink, Spark Connector | Importing data directly or connecting an existing pipeline |
| Export or migrate graph data | Tools, SeaTunnel Source | Backup, export, cross-graph migration, and continuous reads |
Testing Guide: For running toolchain tests locally, please refer to HugeGraph Toolchain Local Testing Guide
DeepWiki provides real-time updated project documentation with more comprehensive and accurate content, suitable for quickly understanding the latest project information.
Source repository: apache/hugegraph-toolchain
2.1 - Graph visualization
Hubble provides a Web interface for HugeGraph data, schema, queries, and imports. Start with a standalone deployment without PD, then read the distributed differences when needed.
- Hubble basics with standalone RocksDB: startup, sample graphs, modeling, imports, and queries.
- Hubble with an HStore cluster: PD discovery, GraphSpaces, and cluster operations.
2.1.1 - Manage an HStore Cluster with Hubble
This guide covers the differences between HStore + PD and standalone RocksDB.
For modeling, importing data, and querying, see the Hubble standalone guide.
This guide follows Toolchain master.
The main repository’s docker/docker-compose-hstore.yml
already combines PD, Store, Server, and Hubble. Follow the adjacent
Docker README to prepare .env and generated Hubble local configuration,
then start it from docker/; do not maintain another deployment YAML.
The settings below explain connection differences and do not replace the README’s PD credential and service-readiness requirements.
The screenshots use Hubble built from Toolchain 1.8.0 with Server, PD, and Store 1.7.0. Hubble currently returns the static value 3.0.0
from /about, which does not identify its build version. This pairing describes the screenshot environment; latest is mutable.
Metrics and permission APIs vary by version.
Connect to a distributed cluster
Hubble still manages graph data through the Server graph API. In distributed mode, it discovers Servers through PD and collects cluster information from PD and Store. Hubble does not read or write graph data directly in Store.
For the official Compose deployment, prepare .env in the main repository’s docker/ directory following its README, then generate the Hubble configuration:
The script reads the loaded HG_PD_AUTH_SECRET_KEY and writes the PD operations password to the host file
docker/conf/hubble/hstore.local.properties. Edit this generated file to customize connection or operations settings, preserving
operations.pd.password so it matches PD’s secret. Do not replace it with the tracked .example template. Compose mounts it read-only at
/hubble/conf/hugegraph-hubble.properties inside the container; do not edit it there. Do not commit the generated file or .env.
Running the script again overwrites the generated file, so reapply custom settings afterward.
Start the services from the same docker/ directory and confirm Server registration and Store readiness:
For separately deployed services, follow the PD deployment guide and
HStore deployment guide. A source or binary Hubble deployment instead uses the package’s
conf/hugegraph-hubble.properties. These settings match the official minimal topology; use backend-reachable addresses for other deployments:
| Setting | Purpose | Bundled value |
|---|---|---|
pd.enabled | Explicitly enable PD mode; server.direct_url is not used in this mode. | false |
cluster | Cluster name used for Server discovery; it must match the registration. | hg |
pd.peers | PD gRPC addresses, separated by commas. | 127.0.0.1:8686 |
pd.server | PD REST address for cluster operations, not a list of gRPC peers. | 127.0.0.1:8620 |
Do not interchange ports 8686 and 8620, or retain 127.0.0.1 for connections between containers.
The bundled file explicitly sets pd.enabled=false, while the Java fallback for a missing key is true; set it explicitly in either deployment.
Restart source or binary Hubble deployments after configuration changes. For Compose, recreate the Hubble container from docker/ after editing
or regenerating the host file so the read-only bind mount loads it again; retain the original project name and all -f arguments:
You do not enter a Server host and port for each graph in the UI.
Organize graphs and permissions with GraphSpaces
A GraphSpace groups graphs, Schema templates, and access permissions. For example, create sales and research spaces
so each team can work with its own graphs. Modeling, importing, and querying within a space follow the standalone guide.
Create and adjust a GraphSpace
With Server authentication enabled, creating, editing, and deleting GraphSpaces require super administrator access.
Start with a globally unique GraphSpace name, an optional display alias, and the maximum graph count.
For example, use research as the API identifier and “Research_graph” as the display alias.
The name cannot change after creation. The alias and description can change; aliases do not participate in URLs or permission matching.
Choose GraphSpace administrators from existing accounts.
“Advanced deployment and resource limits” includes CPU and memory limits for graph query/write services and asynchronous compute tasks, plus the storage capacity limit. These are deployment and quota settings, not current usage or a promise to resize Docker containers when the form is saved. Defaults are 100 graphs, 64 CPU cores and 128 GB of memory for each of the graph and compute services, and 1000000 GB of storage. Keep the defaults for a container trial. Configure Kubernetes namespaces, Operator images, and algorithm images only for the corresponding deployment or compute use.
Select a space before opening a graph. Check the current graph after switching spaces, especially when spaces contain identically named graphs. The list reflects account access. If a space is missing, check membership permissions before creating more graphs.
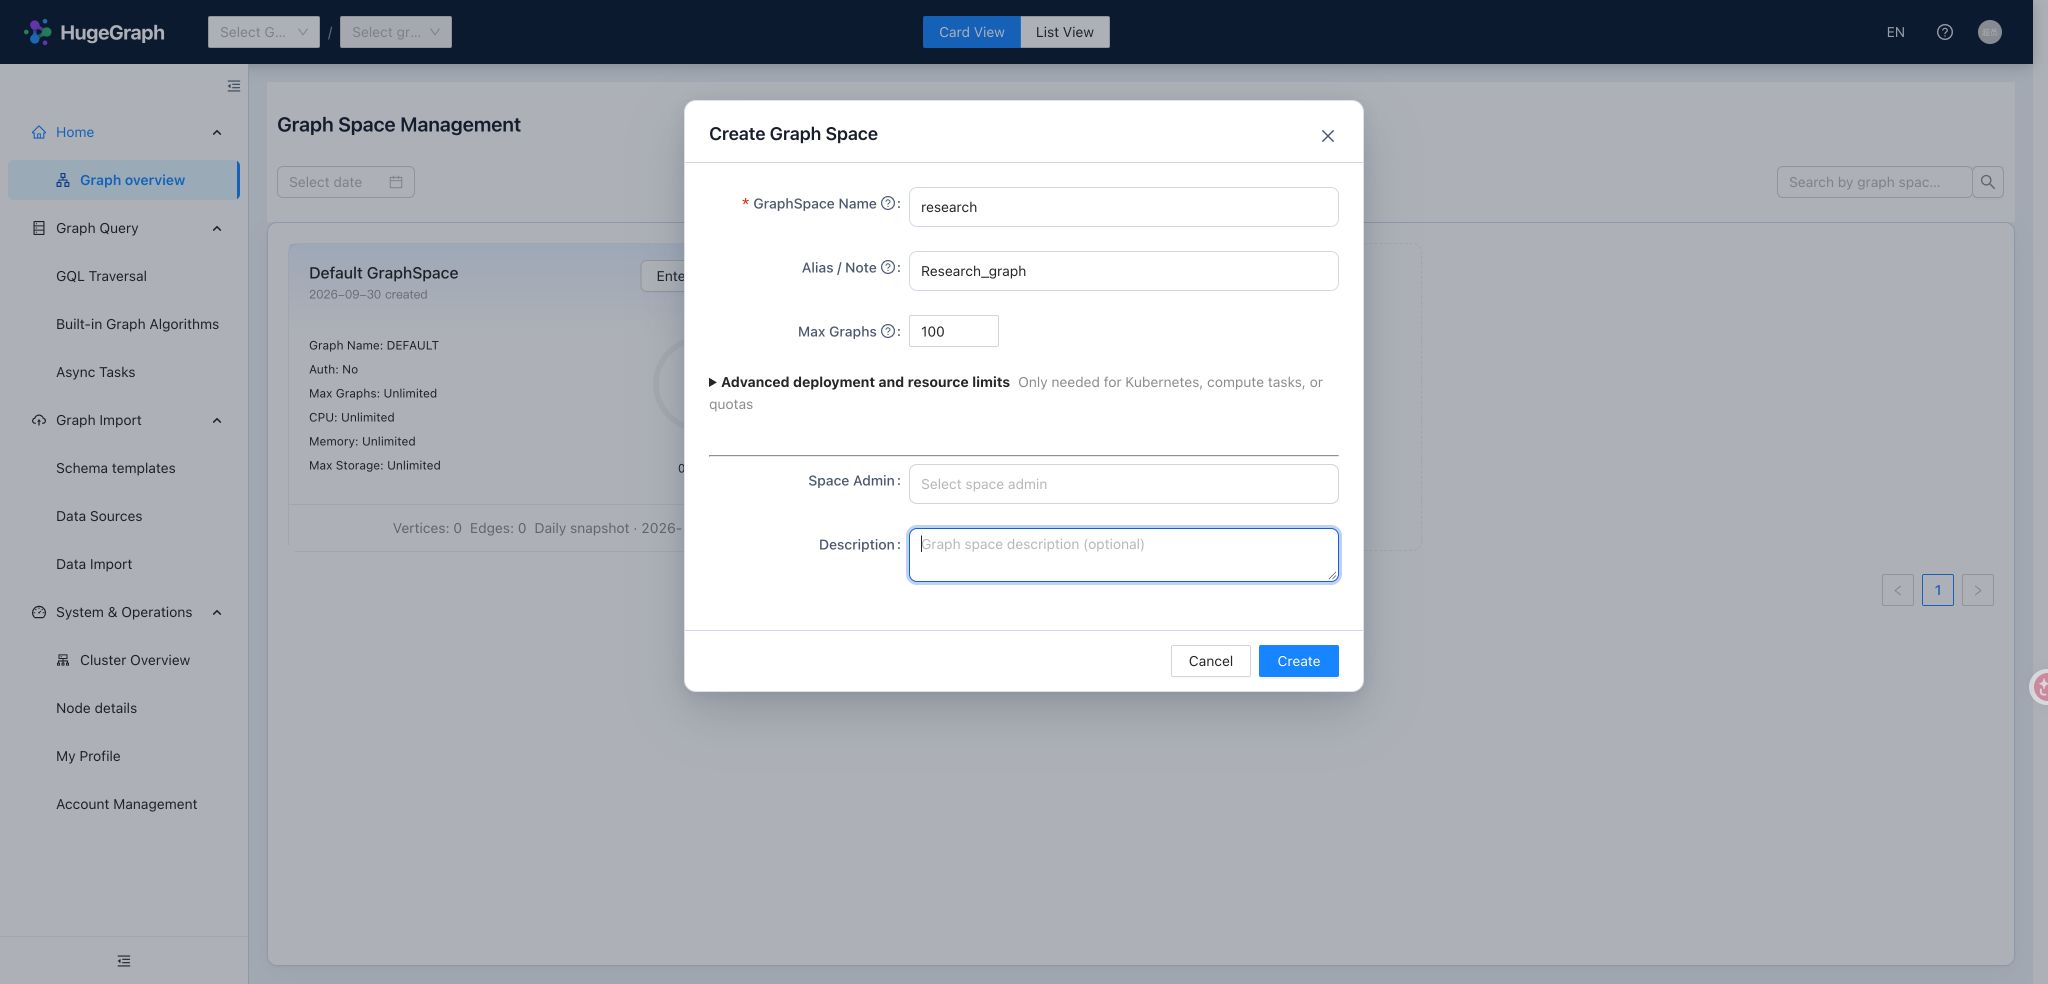
Reuse Schema templates
User-defined Schema templates require PD mode and persist reusable Groovy Schema within a GraphSpace.
When several business graphs share vertex labels, edge labels, and indexes, save the model as a template and select it when creating subsequent graphs.
For example, a user template in research can be reused for new graphs in that space. After switching spaces, select a template belonging to the new space.
User templates differ from the built-in sample templates in the main guide: built-in templates help explore preset models, while user templates preserve your own models for future use. A template is not an import of data; loading sample data is a separate graph creation choice. With Server authentication enabled, creating a user template requires write access to its space. Updating or deleting it also requires ownership or the corresponding administrative permission. Anonymous mode does not enforce per-user permissions or template ownership checks. Standalone mode does not provide user template management.
Assign access to a GraphSpace
For account creation, login, and personal details, see the standalone guide. Distributed mode adds “Manage GraphSpace members” to assign permissions between existing accounts and selected spaces. Servers supporting permission presets provide these common choices:
| Preset | Intended user | Scope |
|---|---|---|
| GraphSpace read-only | Users who inspect and query graph data | Selected spaces. |
| GraphSpace read-write | Users who model, import, and maintain graph data | Selected spaces. |
| GraphSpace administrator | Owners managing a space’s members and graph resources | Selected spaces; does not grant GraphSpace creation/editing or cluster operations access. |
| Super administrator | Operators managing accounts, GraphSpaces, and the cluster | Global; assign according to responsibilities. |
An account may have different access in different spaces, such as read-write in research and read-only in sales.
Accounts and space memberships are managed separately; removing a member does not delete the global account.
After creating an account, continue directly to assigning space access. When changing an existing membership, check the selected space and preset
and preserve permissions still needed in other spaces. Enabling pd.enabled grants no permissions;
legacy custom roles on older Servers are not interchangeable with these presets.
See Server authentication and authorization.
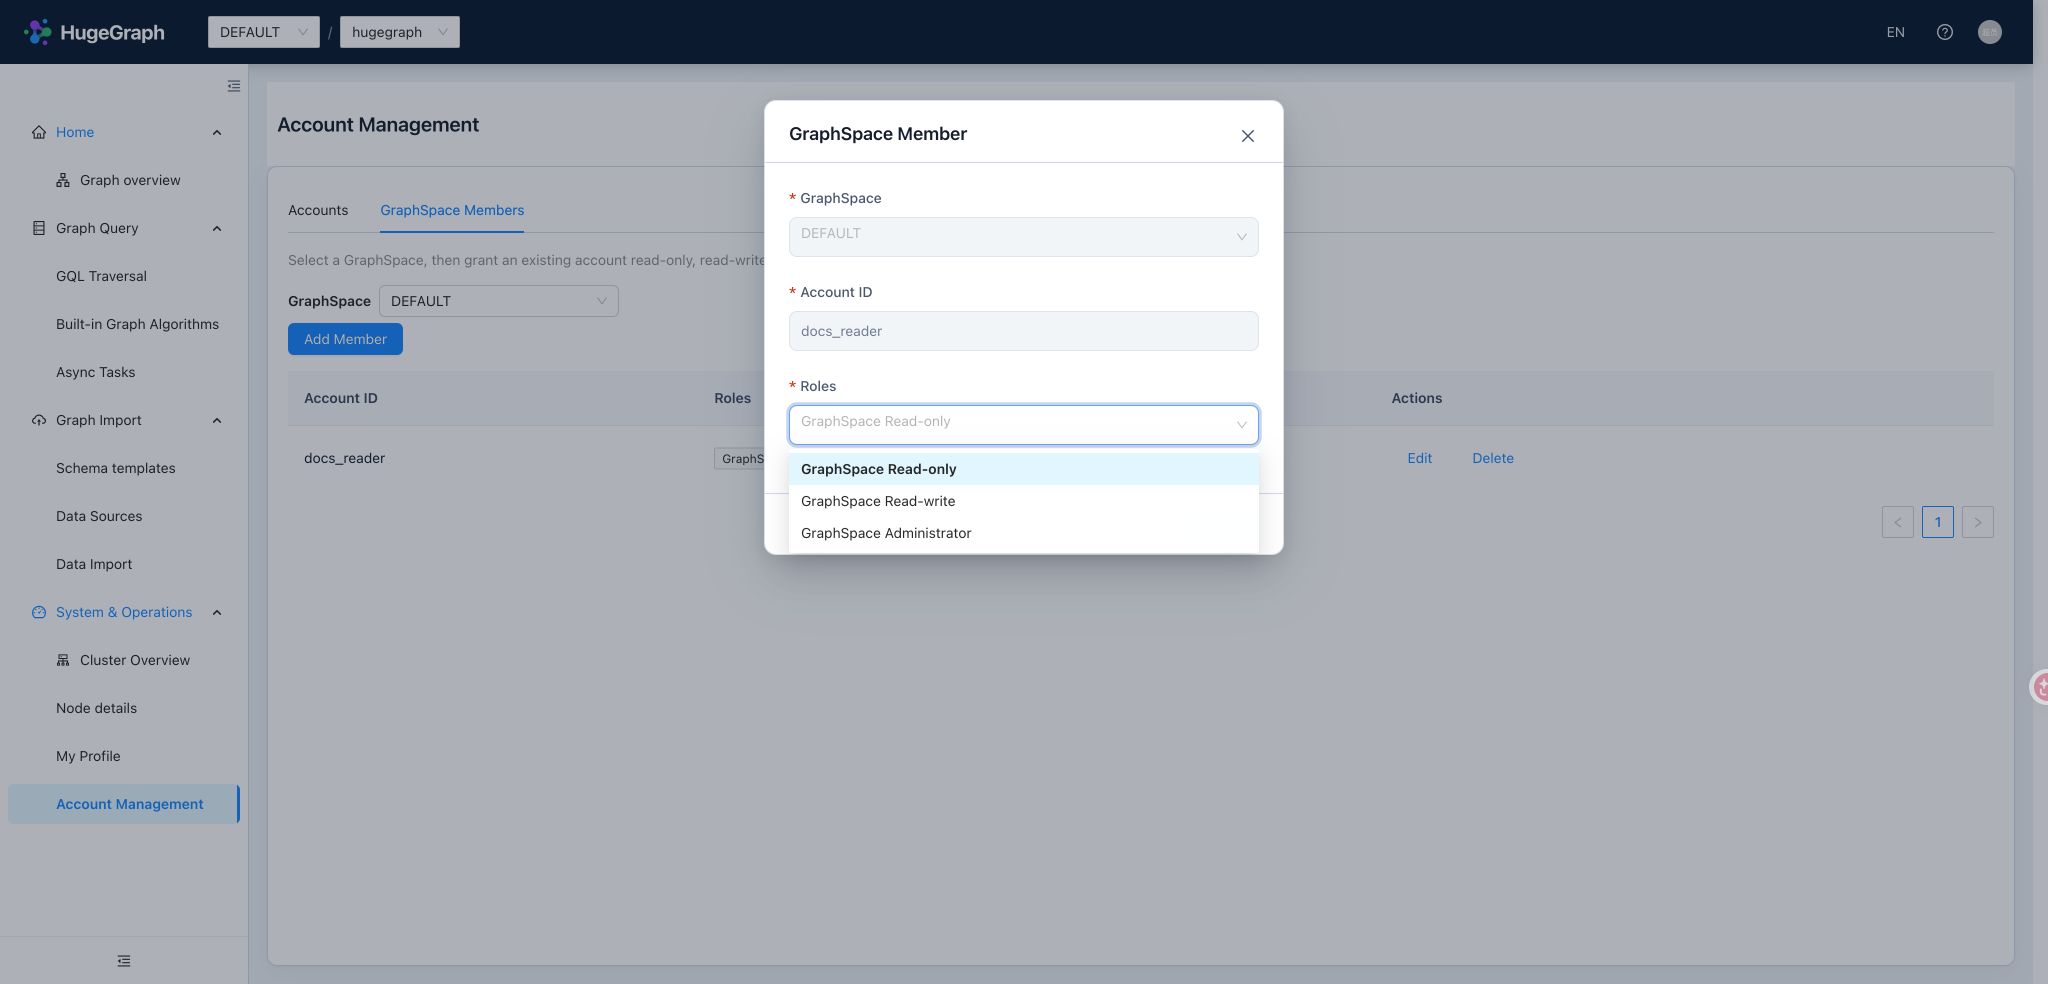
Locate problems through the cluster overview
The overview presents Server → PD → Store in one topology. Switch to the node list to filter by type, status, or name. PD Leader, online Store count, graphs, partitions, replicas, and data size help identify cluster scale and nodes requiring attention. Partitions and replicas describe data distribution. Data size is observed usage, distinct from a GraphSpace’s configured storage limit.
Start with cluster and source status, then inspect an affected node. UP indicates a successful collection from the source;
DEGRADED indicates a cluster or partial source issue, and DOWN indicates that the corresponding probe failed.
Graphs may remain queryable when topology is available but some metrics are missing.
The UI distinguishes unsupported, unavailable, stale, and failed collections and includes observation times.
An empty value is not zero, and an older value is not a current observation.
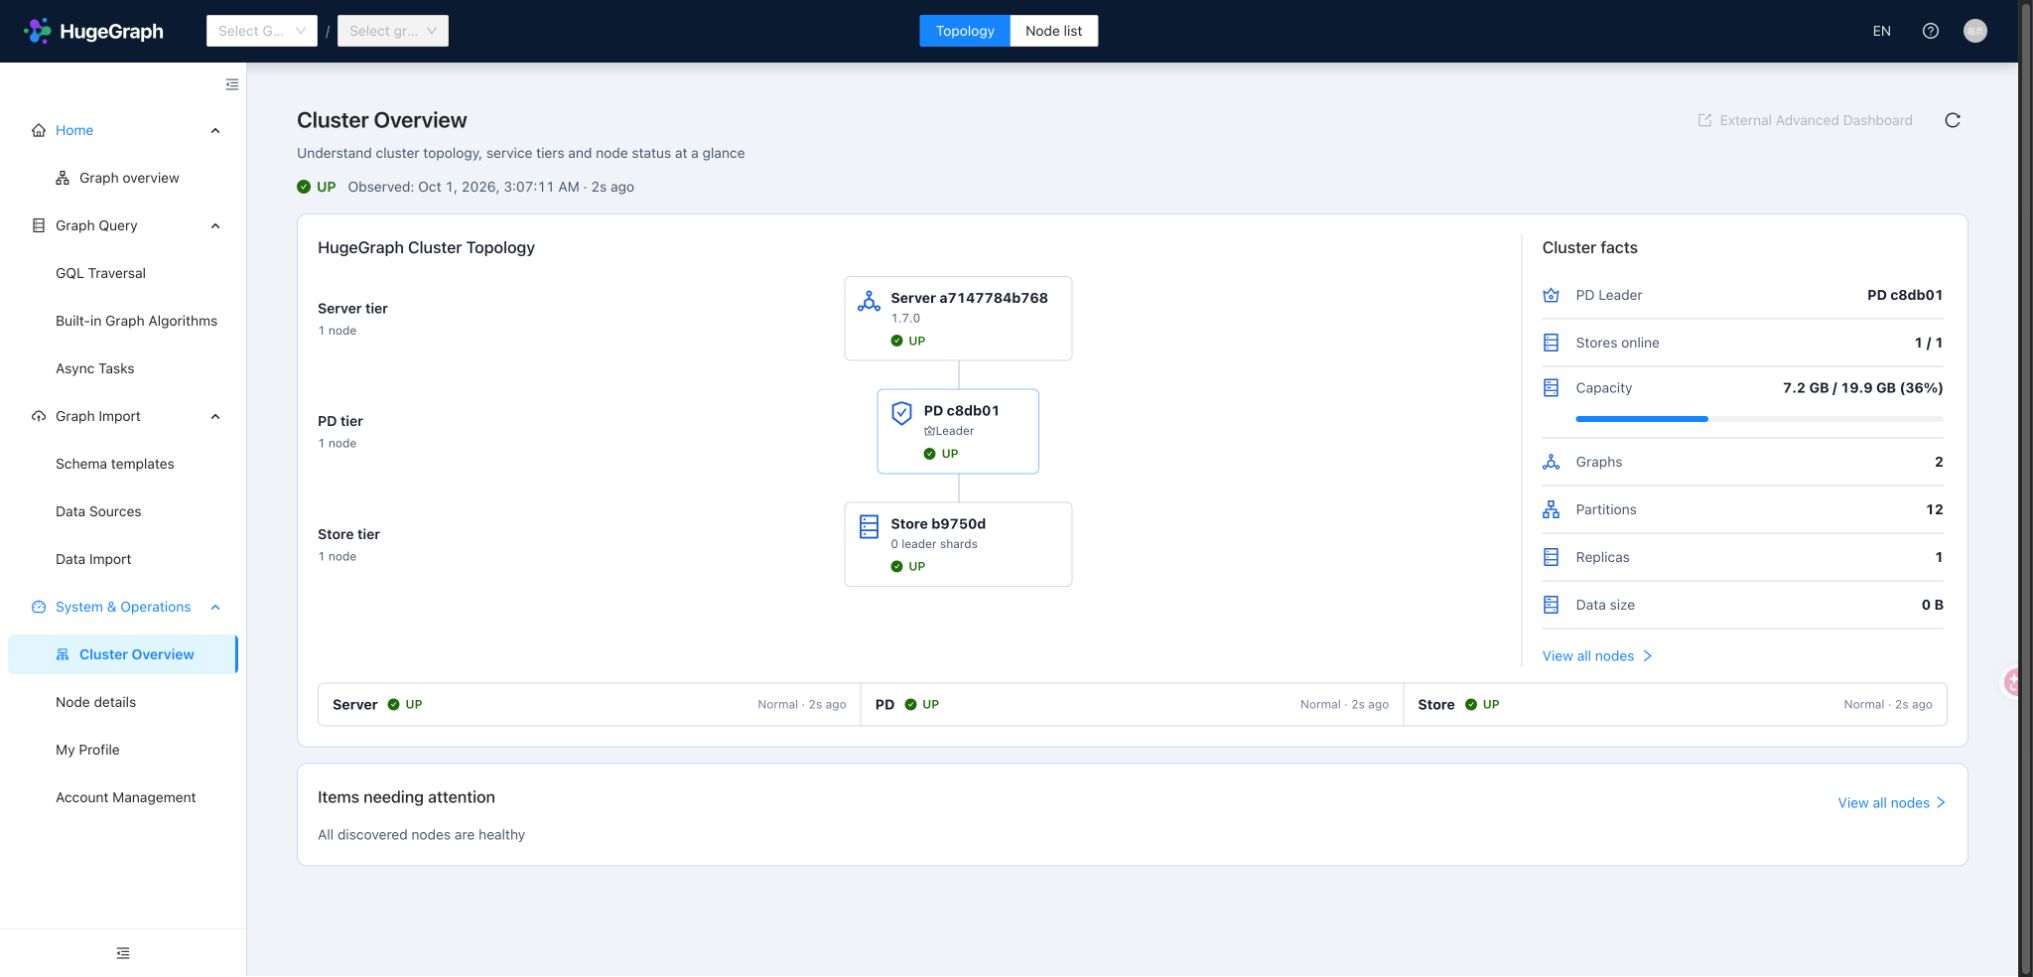
Read node details
| Node | Main observations | Use |
|---|---|---|
| Server | Availability, JVM/CPU/memory, and backend metrics | Check the query/write entrypoint and resource pressure. |
| PD | Leader/Follower role, status, and runtime metrics supplied upstream | Check the metadata/scheduling entrypoint; do not infer a role when Leader information is absent. |
| Store | Partition and Leader partition counts, system/disk metrics, Raft group and enabled group counts | Inspect storage nodes and replica service and compare distribution across nodes. |
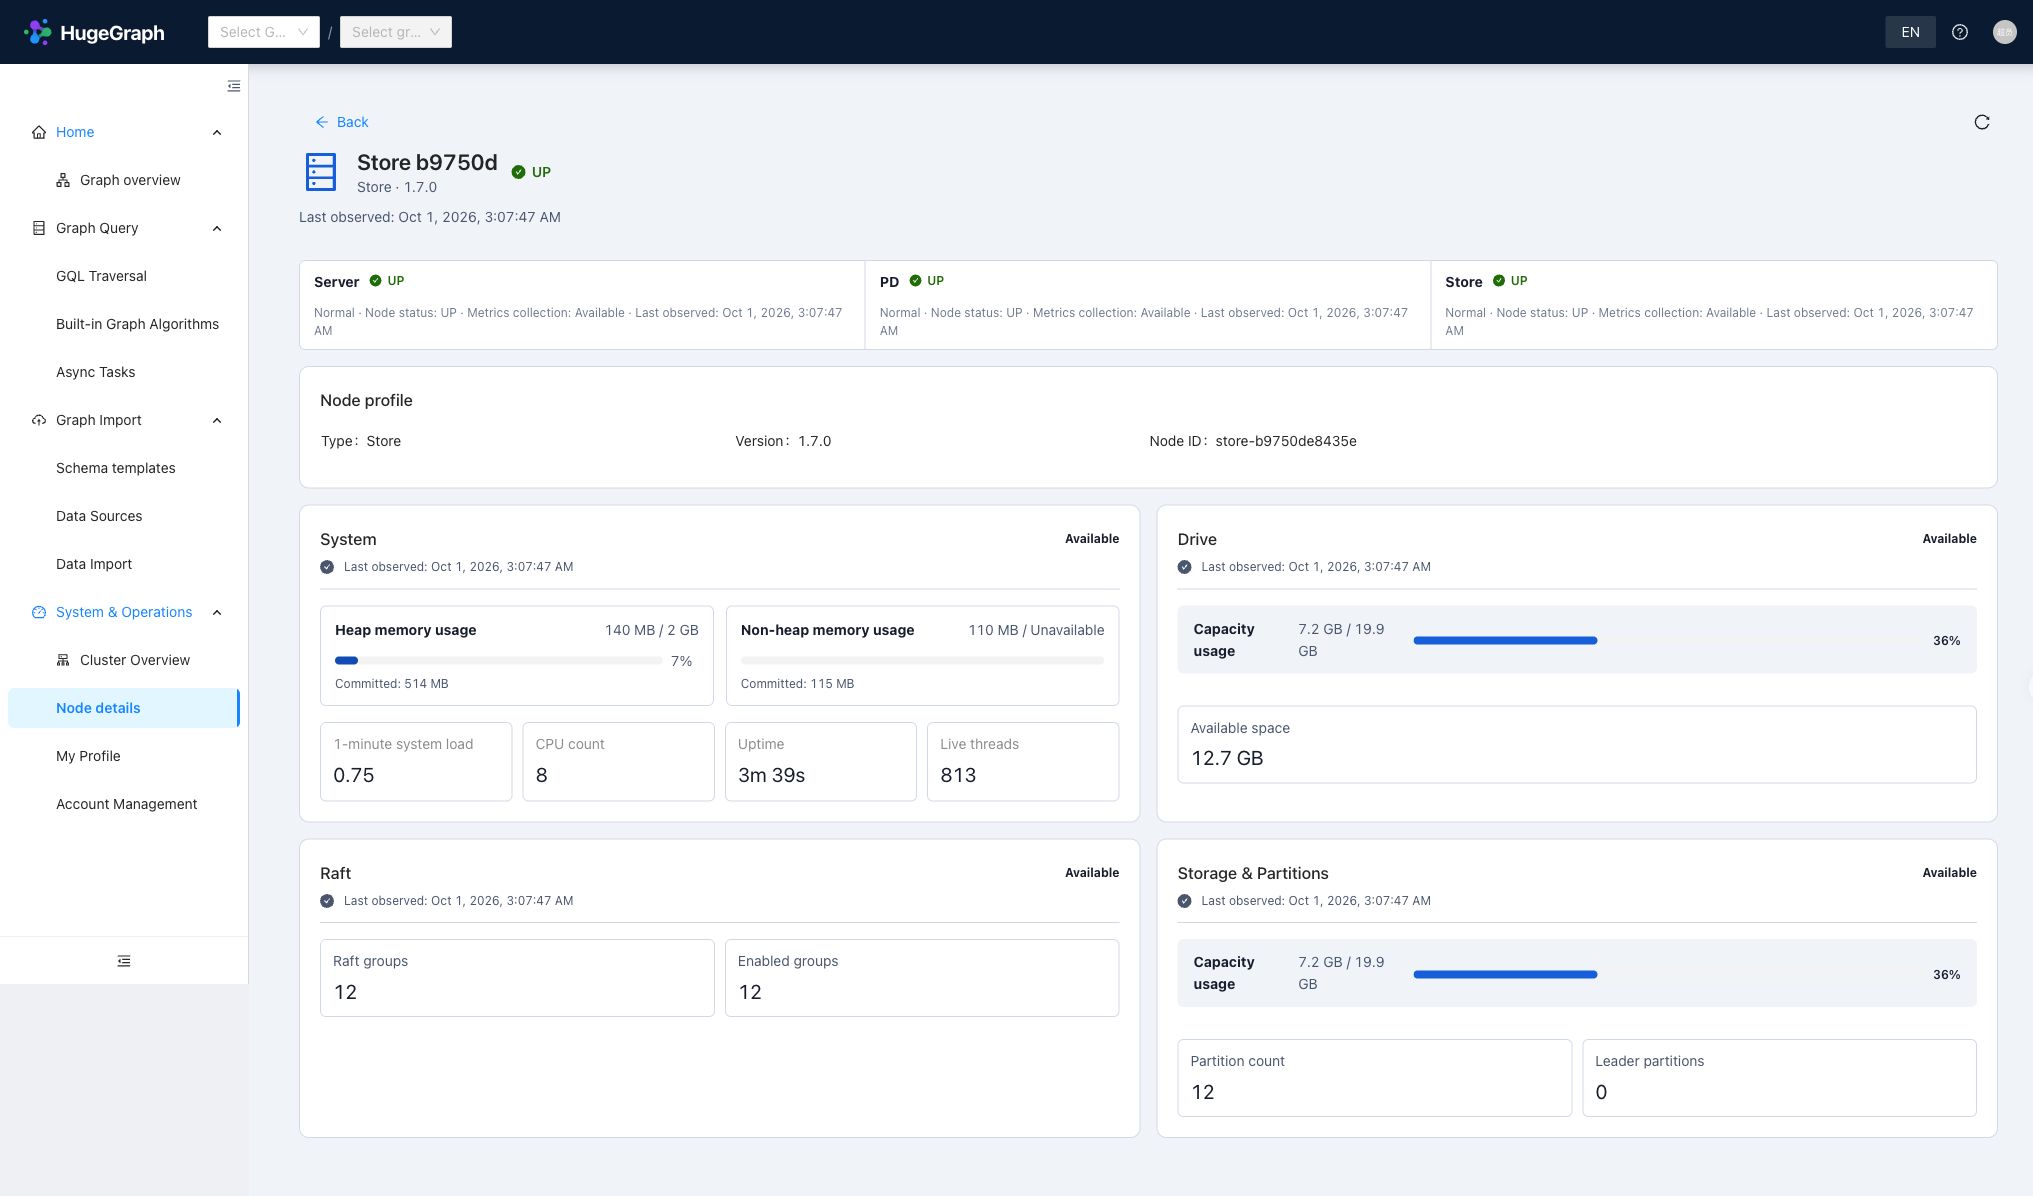
The PD Leader and Store Leader partitions serve different purposes: PD coordinates cluster metadata, while a Store leads the respective data partition’s Raft group. Hubble displays upstream observations and does not replace a full Raft replica consistency check. Available metrics vary by component version.
With Server authentication enabled, cluster operations require a super administrator (ADMIN level).
GraphSpace administrators and ordinary members do not inherit cluster access.
Use container isolation, a trusted HTTPS entrypoint, Server authentication, and network allowlists; avoid publishing Hubble or component ports directly.
Configure operations access
Hubble’s backend uses the PD/Store operations credentials, separately from the Server account used to log in through the browser.
For Compose, edit the generated host file docker/conf/hubble/hstore.local.properties; other deployments use the Hubble package configuration.
The script-generated PD password must match the secret in .env. Configure the Store service account when Store authentication is enabled.
Do not include passwords in documentation, screenshots, or committed configuration:
| Setting | Bundled default | Configuration |
|---|---|---|
operations.pd.username / operations.pd.password | Username hubble, empty password | Match PD operations REST authentication. |
operations.store.username / operations.store.password | Username hubble, empty password | Set the service account when upstream Store REST authentication is enabled. |
operations.store.allowed_targets | [http://127.0.0.1:8520,http://[::1]:8520] | List trusted Store metric origins. |
For example, when a containerized Store advertises store:8520, set:
For multiple nodes, list each trusted origin. Every entry must use http or https with an explicit port and no path, credentials, or wildcard,
and must match the Store metric target returned by PD. Adding an origin to this list does not register or discover a node.
If topology is available but metrics are incomplete, check backend connectivity and authentication to PD REST, the Store REST/metric targets returned by PD, and their match with the allowlist. A partially available overview means some sources could not be collected; it does not imply that all graph APIs are unavailable.
2.2 - Graph Visualization with Hubble: Standalone Quick Start
Hubble is the HugeGraph Web management and graph visualization interface. Use one workspace to manage schema, import data, run queries, and switch between graph, table, and JSON results. This guide uses standalone RocksDB Server + Hubble, without PD or Store.
For HStore, read the shared operations here first, then follow the distributed supplement.
This guide follows Toolchain master (currently 1.8.0); Docker latest is mutable, so check the actual running versions.
Do not expose Hubble or Server directly to the public network. In production, use HTTPS, containers, authentication and authorization, and an access allowlist.
Start the standalone pair
Use the main repository’s docker/docker-compose.yml instead of writing another Compose file. It already combines RocksDB Server and Hubble, with networking, health checks, and data volumes. See the adjacent README for deployment details.
If you already have the main repository, enter its docker/ directory. Compose mounts
conf/hubble/standalone.properties
from that directory. It sets pd.enabled=false and server.direct_url=http://server:8080;
both services communicate over one Docker network, without a Server address configured per graph.
Do not download only the YAML and start it from another directory: relative configuration files may be missing.
Hubble defaults to host loopback port 8088; Server publishes 8080. For a trial on your machine only, change Server’s
ports entry to 127.0.0.1:8080:8080 to avoid exposing the anonymous API to other machines.
Choose an unused project name for this trial and keep these variables in the same terminal. Restore this project name if you use another terminal.
Once services are healthy, open http://127.0.0.1:8088. In a fresh directory without HUGEGRAPH_ADMIN_PASSWORD,
Server allows anonymous access and Hubble opens the home page directly. For authentication, follow the Docker README to configure
an administrator password and JWT secret in .env, then sign in with a Server account. Hubble has no separate account database.
Personal and account-management pages depend on the authentication mode and your permissions. Do not overwrite an existing .env.
Use latest to try current features, and pin a published image version or digest for production.
Images are convenience distributions; official release archives are on the download page.
The algorithm and account screenshots use Hubble built from Toolchain 1.8.0 with Server 1.7.0. Hubble currently returns the static value
3.0.0 from /about, which does not identify the build version. This pairing describes those screenshots, not a fixed meaning of latest.
Available controls depend on Server capabilities.
Compose’s server-data and hubble-data retain graph data and Hubble metadata respectively. For further persistence and production settings,
see the Server deployment guide.
Home: find the right starting point
Home groups the workspace into graph overview, data preparation, and graph queries. Use it to understand the workflow,
then return to any section through the sidebar. The top graph selector determines the target of queries, schema operations, and async tasks;
check the current graph after changing pages. Standalone mode has only the DEFAULT GraphSpace and needs no PD configuration.
| Section | Purpose |
|---|---|
| Graph Overview and details | Select a graph, load samples, inspect its size, then model or query it |
| Schema configuration | Define properties, vertex/edge labels, and indexes |
| GQL Traversal | Write queries and explore graph, table, and JSON results |
| Built-in Algorithms | Explore neighbors, paths, and similarity with parameter forms |
| Async Tasks | Track background queries, schema changes, and index operations |
| Data Source Management | Upload files or configure external readers |
| Data Import | Map source fields to the graph model and run or schedule ingestion |
| Profile and Account Management | Update personal details/passwords and manage accounts or space members according to permissions |
| Operations | Inspect Server nodes; PD mode also includes cluster overview and PD/Store nodes |
Interface at a glance
Explore the graph overview, schema, and query workspaces in this gallery. Click an image to zoom; the operation sections below retain full-size screenshots for following each step.
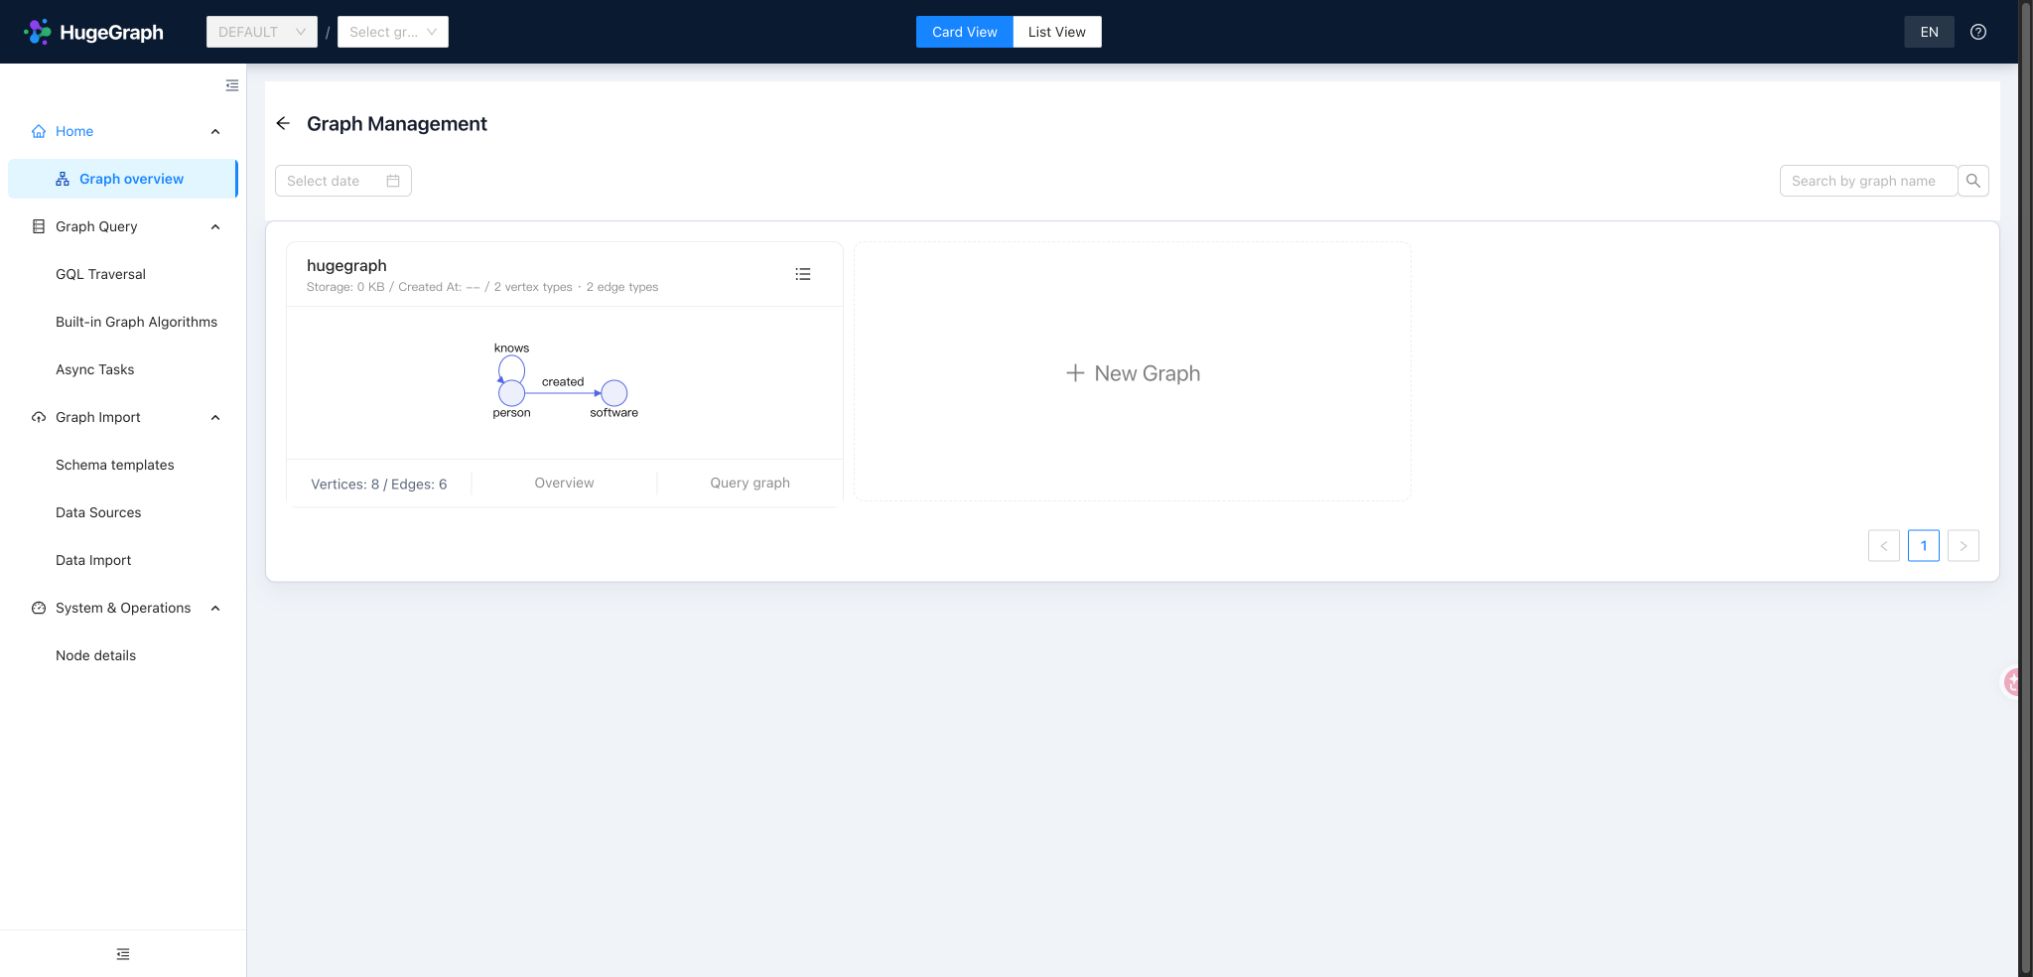
Graph overview: select a graph and inspect sample data
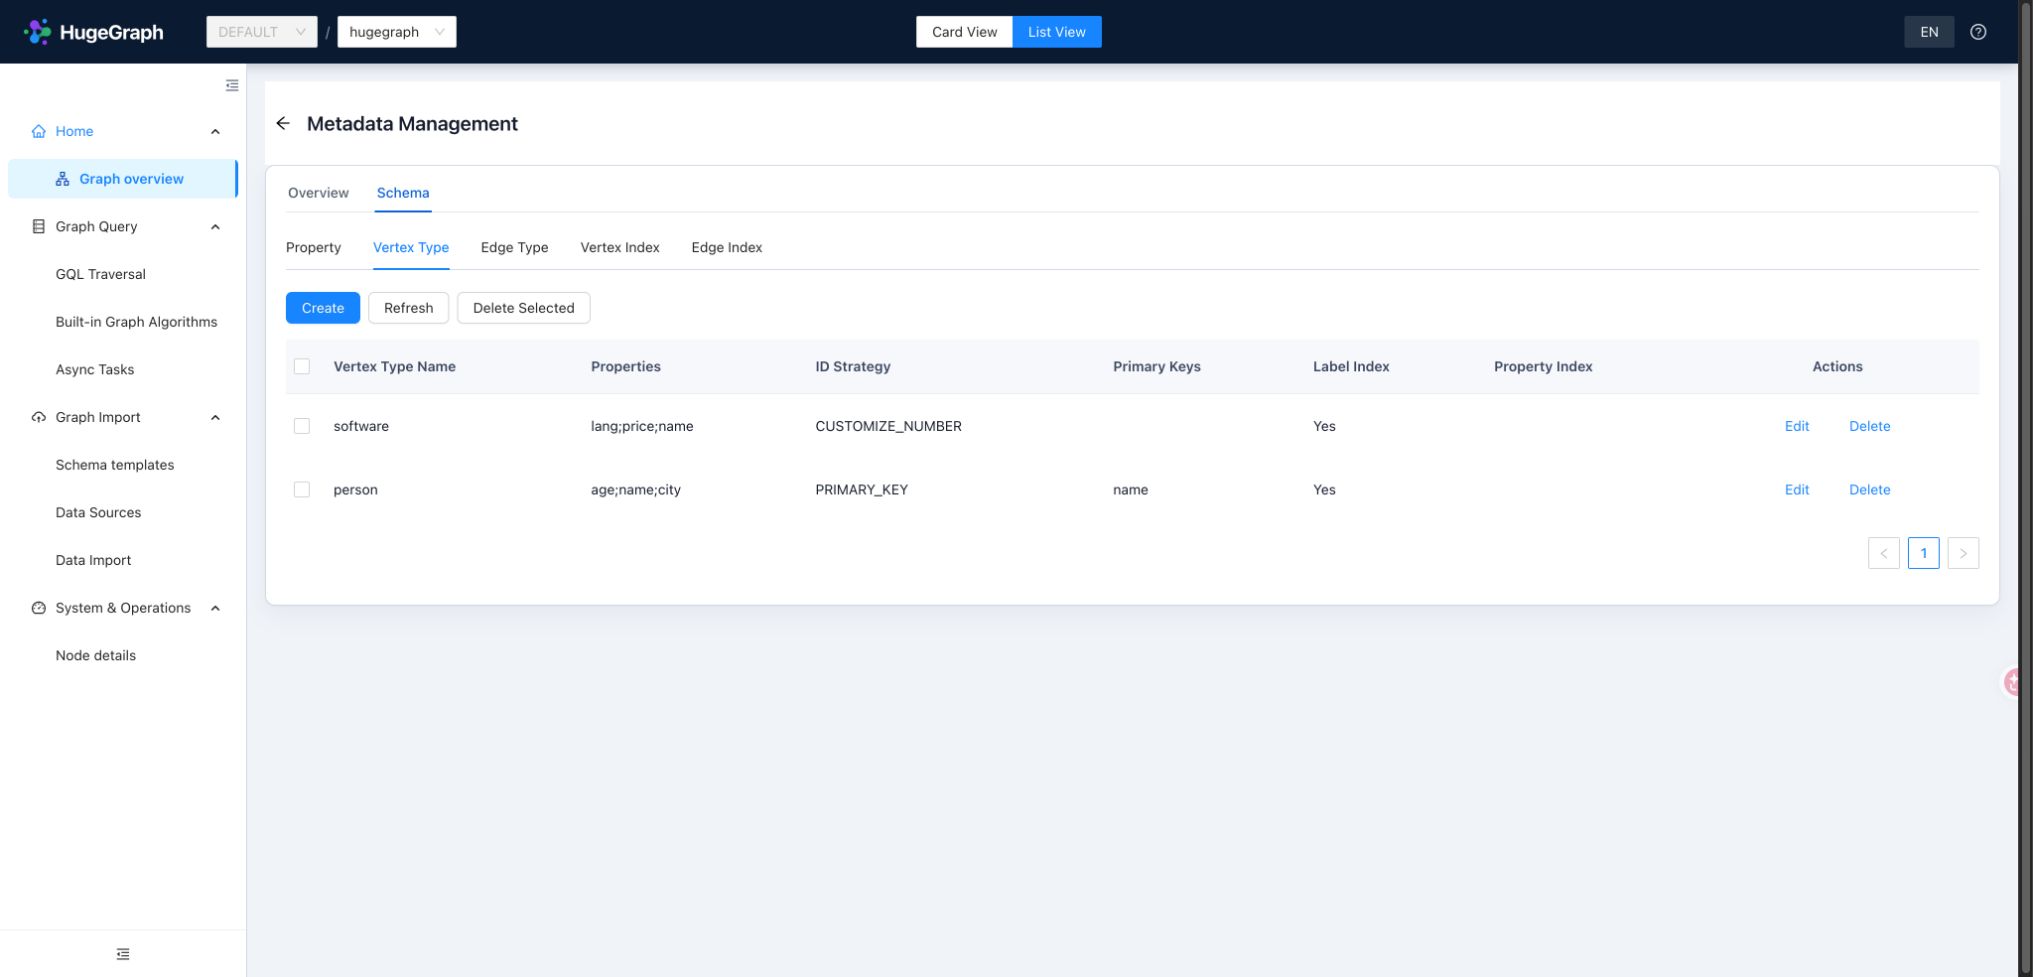
Schema: inspect vertex labels, primary keys, and ID strategies
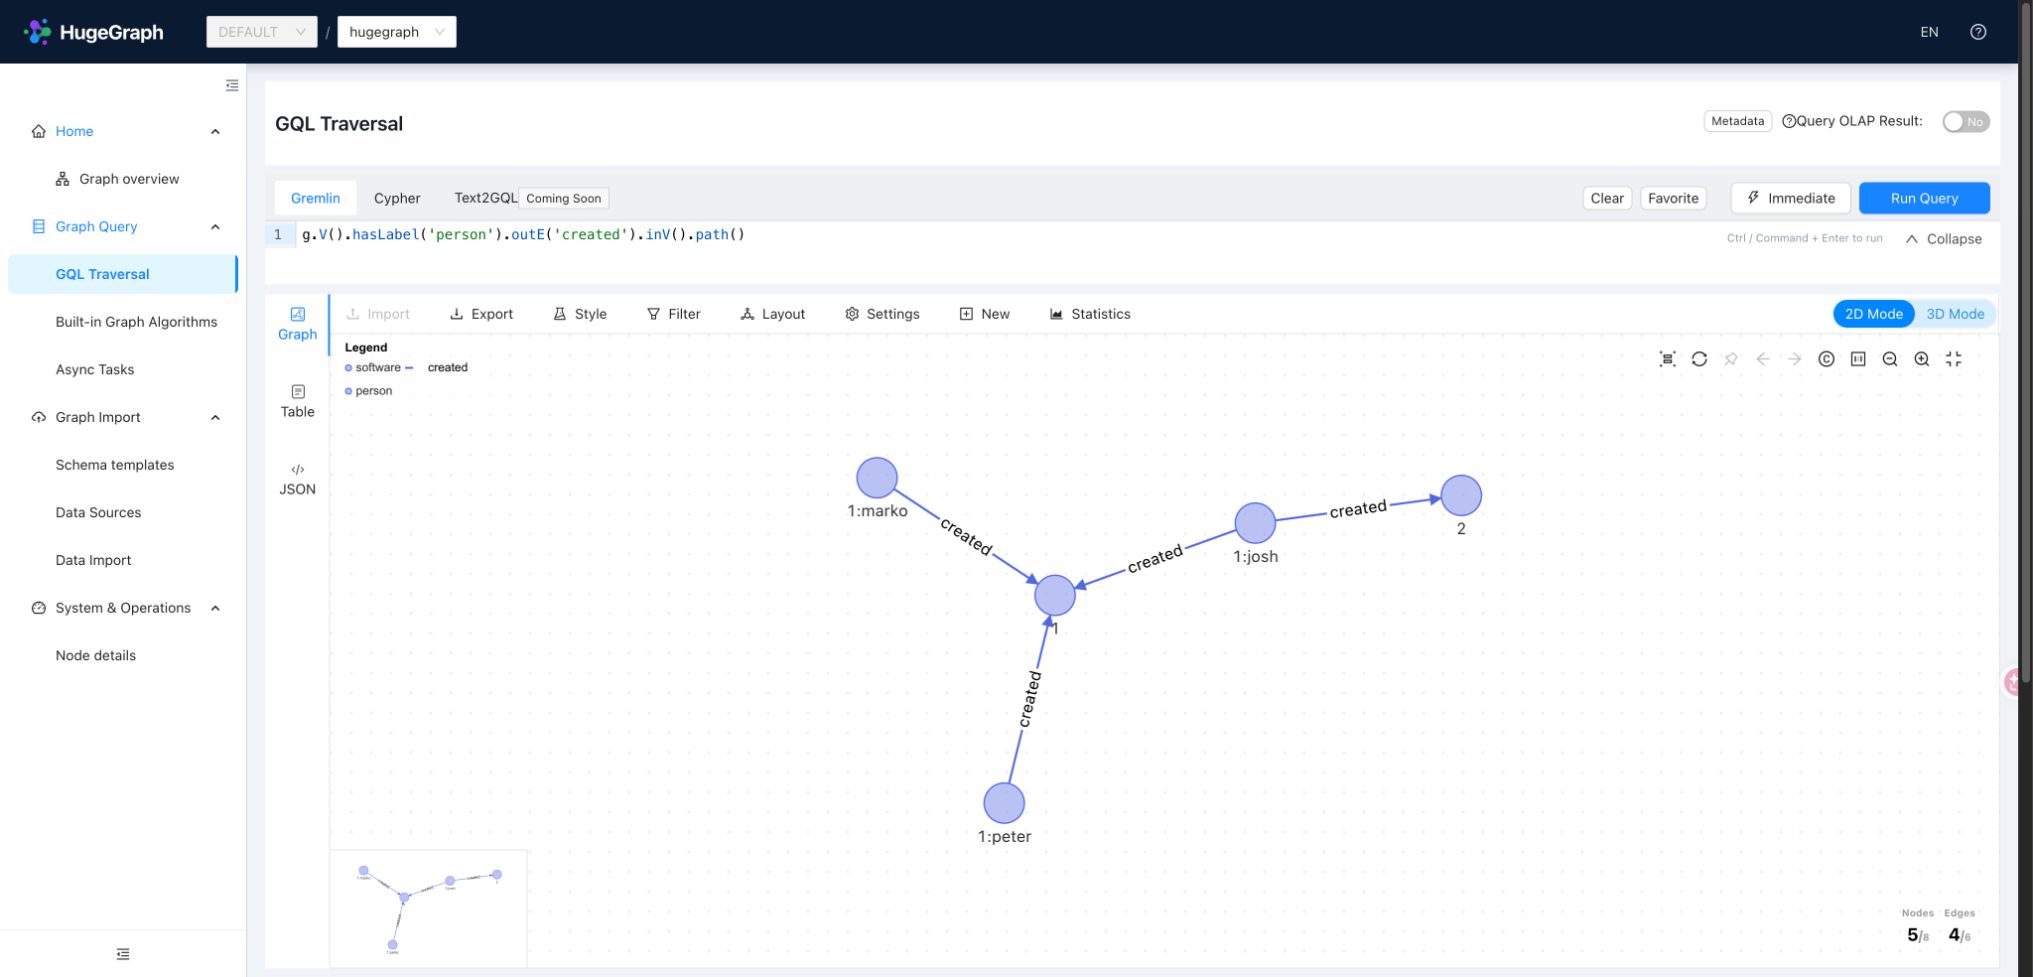
Graph query: run Gremlin and explore graph results
Graph Overview and details: get to know a graph
Select the default graph hugegraph in Graph Overview. The overview provides graph entry points and action menus.
Graph details show schema and data statistics, with routes to modeling, data preparation, and queries.
Statistics describe overall size; update them after importing or modifying data.
Load the People & Software Demo Graph from the graph’s More actions menu. Samples add their schema and missing elements without clearing existing data. Start with an empty graph to avoid conflicting schema names. The remaining examples explore the people and software in this graph.
Graph creation depends on Server capabilities. Its form accepts a name, optional alias, and schema or sample; it does not configure a Server host or account per graph. The connection comes from Hubble configuration. User-defined schema templates require PD mode; see the distributed supplement.
Schema modeling: define the shape of your data
Schema determines valid properties and relationships, vertex ID generation, and query indexes. Open the graph’s schema configuration. List view is useful for maintaining definitions; graph view helps explain how labels connect.
| Definition | What to decide |
|---|---|
| Properties | Data type and cardinality; distinguish numbers from text |
| Vertex labels | Properties, nullable properties, ID strategy, and primary keys |
| Edge labels | Source/target labels, properties, frequency, and sort keys |
| Vertex / edge indexes | Index type and fields that match filtering and range queries |
In the person/software sample, person generates IDs from the primary key name, with nullable age and city.
software has custom numeric IDs, and created connects people to software. This matches the
Loader example.
For a new model, define properties, vertex labels, edge labels, then indexes. Associated-property and index information help inspect dependencies. Schema deletion and index creation/rebuild may submit background tasks. Acceptance of an operation is only the first step; confirm its final status in Async Tasks.
GQL workspace: query and explore relationships
Open GQL Traversal and confirm hugegraph is selected. The workspace puts the editor and results together,
with immediate or async execution, query favorites, and reusable execution history. Start with this Gremlin query:
Inspect person properties in table or JSON view. To visualize the people-to-software relationships, run:
Graph results support 2D / 3D. Click a vertex or edge to inspect its ID, label, and properties; double-click a vertex to expand its neighbors. Layout, styling, and filtering help highlight relevant relationships, while export helps share results. Use New to create elements, or edit existing data when authorized. Layout, colors, and display limits only change presentation; adding/editing elements and Gremlin writes change Server data.
Use Ctrl / Command + Enter to execute. Immediate mode suits small explorations; submit long queries asynchronously
and avoid returning an entire large graph. Cypher is available only when Server supports it.
Text2GQL is currently a UI preview with no model or query service connected; it cannot generate executable queries.
Built-in algorithms: explore with parameter forms
Use Built-in Algorithms when you prefer a form to writing traversal code. Search for an algorithm and supply its parameters. Neighbor exploration answers what surrounds a vertex, path algorithms connect two vertices, and similarity/ranking algorithms compare or select vertices. Start with a known vertex ID and limit direction, edge labels, depth, and result size before attempting broader computation.
Forms provide parameter guidance and documentation links, and restore common parameters when navigating away and back.
Results use graph or algorithm-specific panels. Consult the help and documentation links beside the algorithm title for definitions and parameters.
While the parameter form is focused, Ctrl / Command + Enter runs the current algorithm.
OLAP batch algorithms require external compute services such as Computer or Vermeer. The two containers in this example provide online graph operations, not those compute services.
For example, select K-neighbor (GET) with source=1:marko, max_depth=1, and limit=20.
After parameter validation, use the run button on the card or the form shortcut to explore one-hop neighbors.
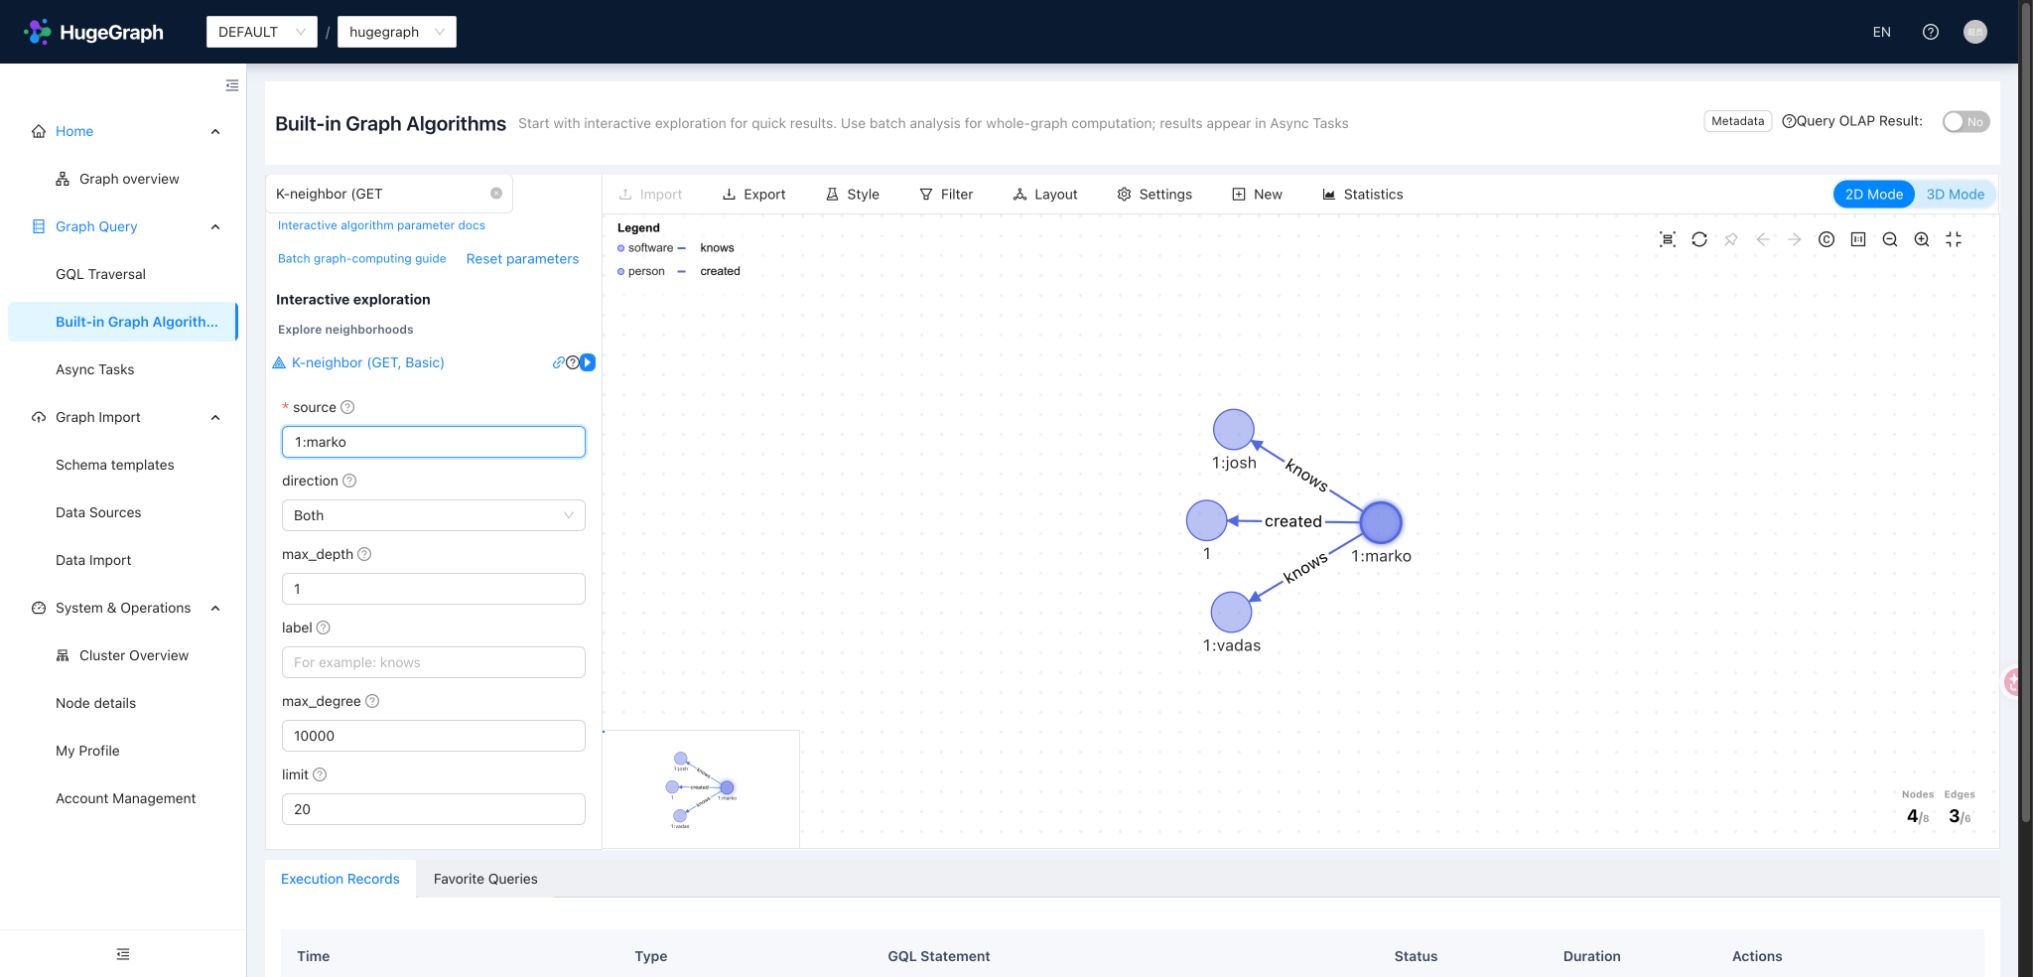
Async Tasks: confirm background results
Async Tasks lists background work for the current graph, including async queries and some schema/index operations. Filter by task type and status, inspect IDs, creation times, and execution states, open successful query results, or expand failure information. Completed task records can be deleted where the interface permits. These tasks are separate from import execution history.
For example, submit g.V().count() asynchronously, confirm success in the list, then inspect the returned count.
A successful submission means the request was accepted, not that computation or indexing has finished.
Use task errors and Server logs together when diagnosing failures.
Data Source Management: prepare the input
A data source defines where data comes from and how to parse it, and can be referenced by import tasks. Hubble supports FILE, HDFS, JDBC, and Kafka, each with its own path, connection, or subscription settings. FILE is an easy starting point: upload a file, configure its format, delimiter, encoding, and header, and check column names before mapping. Hubble configuration controls upload limits and permitted extensions.
Save this UTF-8 file as people.csv for the person example:
Create a FILE data source and upload it. Select CSV (comma separation and UTF-8 by default), with column names name,age,city.
Header, delimiter, and encoding belong to the data source, not mapping settings. The source fields must match the file.
Data Import: turn fields into a queryable graph
Data Import converts source rows into vertices and edges. Its four configuration sections identify the target, select fields,
map them to the graph, and choose execution timing. Use the preceding data source to create a person import into DEFAULT / hugegraph:
| Section | Settings for this example |
|---|---|
| Basic Information | Target graph, new data source, and a recognizable task name |
| Source Fields | Select name, age, and city, moving them to the selected field list |
| Mapping Fields | Add a person vertex mapping; use Auto Match for same-name properties, then verify types |
| Schedule | Choose one-time execution; confirmation submits the task immediately |
person uses PRIMARY_KEY, so do not select a separate ID column. Custom ID strategies require an ID column;
AUTOMATIC lets Server generate IDs, while PRIMARY_KEY derives them from mapped primary-key properties.
Edge mappings need source/target fields that follow the corresponding vertex ID rules.
The task list manages configuration and execution entry points; execution history in task details shows each instance’s state, count, and errors. Periodic schedules and real-time Kafka tasks are also available; choose an execution mode compatible with the source. After completion, verify the result in the GQL workspace:
The result should include both new people. Import counts are not necessarily counts of newly created vertices: reruns may update existing elements, and header processing can affect reader counts. If the import fails, check source fields, numeric types, nullable properties, and target schema. Use Hubble for small trials and HugeGraph Loader for production bulk ingestion.
Profile and account permissions
Hubble uses Server authentication and accounts, with no separate user database. Anonymous mode hides Profile and Account Management. After authentication is enabled, Profile shows the current account’s details and permissions and allows changing your password. Editing details such as a nickname requires Server support for the personal-profile API. Changing a password ends the current session; sign in again with the new password.
Standalone account management
In standalone mode, the administrator can create, inspect, edit, delete, and batch-create accounts. Ordinary standalone accounts created through Hubble receive read, write, delete, and execute permissions across all graphs; they are not read-only or isolated to one graph. Configure finer resource permissions through Server authentication and authorization rather than relying on GraphSpace presets.
GraphSpace permissions in PD mode
With a Server supporting default-role APIs, global accounts and space access can be managed separately. The administrator manages global accounts; a space administrator manages members only within authorized spaces. Ordinary members do not receive account-management or operations entry points. The following presets are for PD mode, and are not universally editable on older or standalone Servers:
| Preset | Scope and purpose |
|---|---|
SUPER_ADMIN | Global account, GraphSpace, and operations management; grant or revoke super-administrator access |
GS_ADMIN | Manage authorized spaces and their members, without granting other-space or global super-administrator access |
GS_READ_WRITE | Read and write graph data within authorized spaces, without managing global accounts |
GS_READ_ONLY | Read graph data within authorized spaces, without writes |
An account may have different permissions in different spaces. Select a space before adding an existing account or changing member permissions. Before replacing custom permissions with a preset, inspect the grants that need to be retained; complex permissions may not match a single preset. After changes, refresh permission context or sign in again and verify menus and space selection. Server still validates every request. Older Servers may hide or disable unsupported operations; a visible button alone does not establish resource authorization. See the distributed supplement for space management.
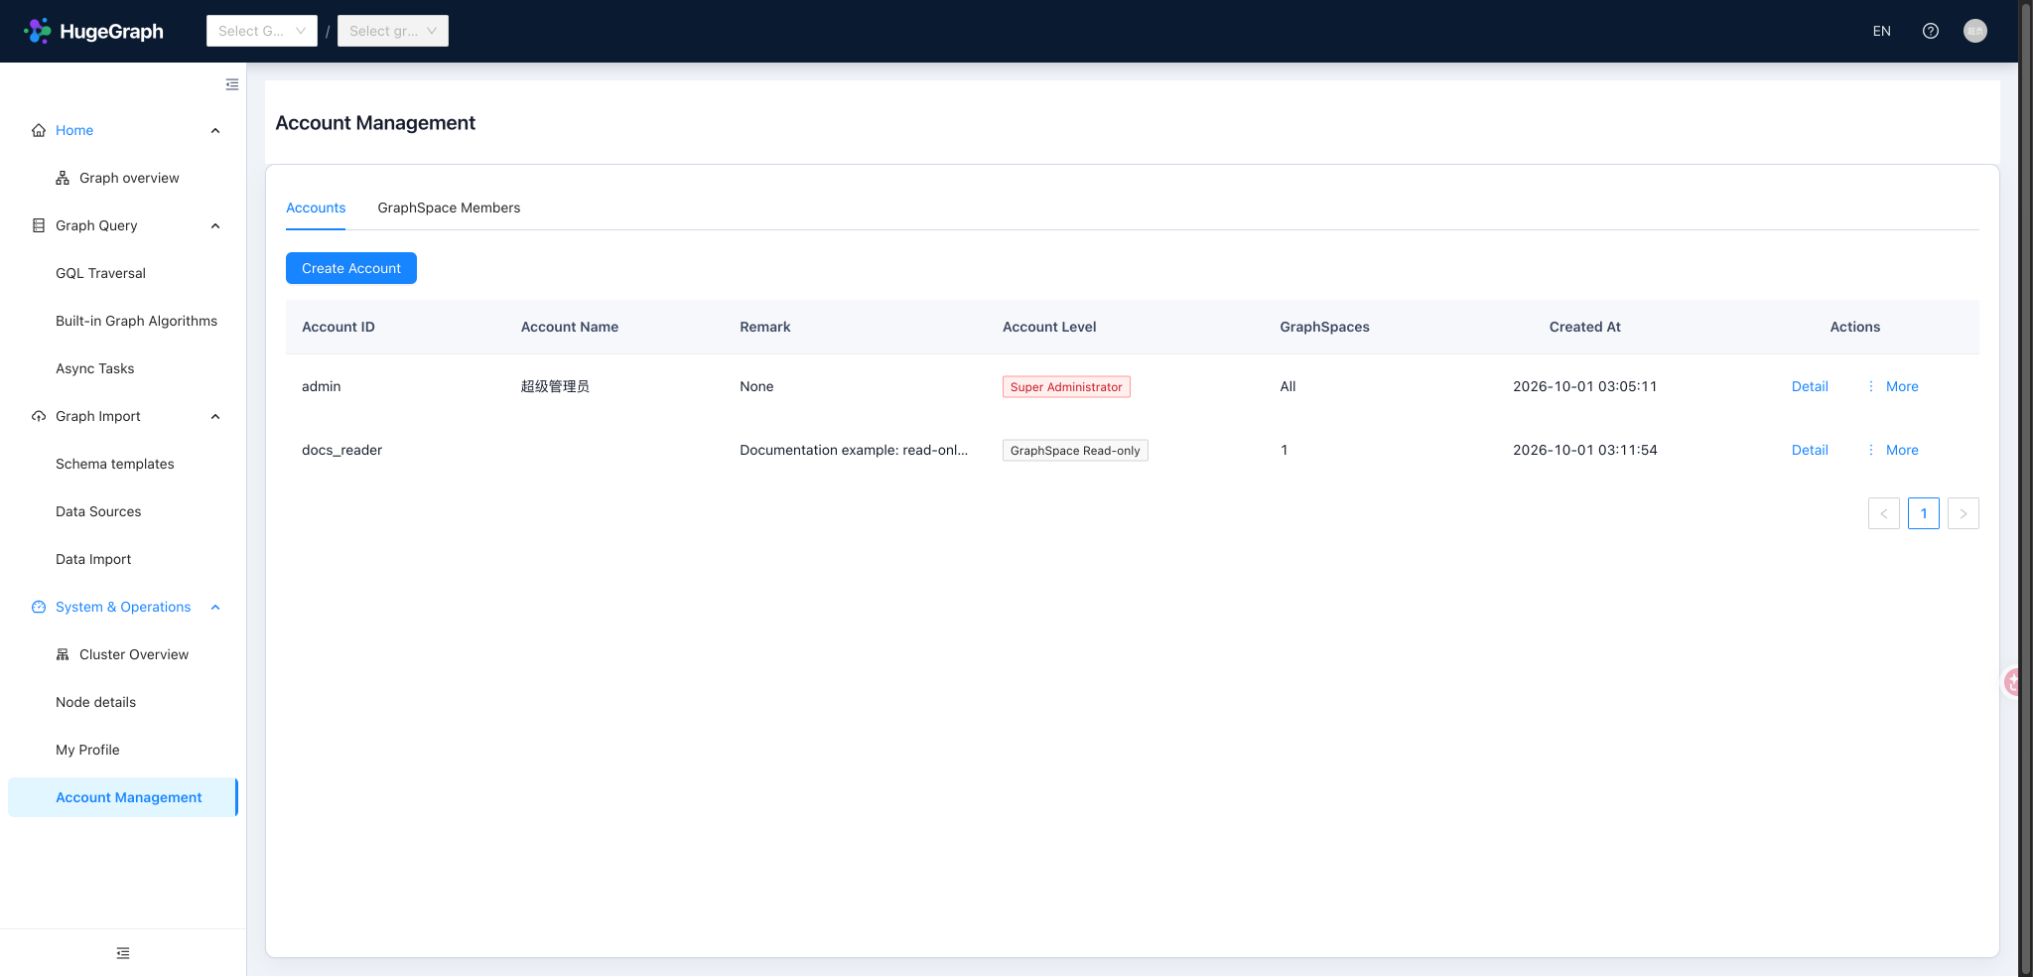
Operations: inspect the standalone Server
Standalone Operations provides Node Information for Server only, with no PD/Store nodes or cluster overview. Search nodes, filter health status, and open node details to inspect available version, system, JVM, and Server-backend metrics. When metrics are unavailable or stale, use collection state and the last successful observation time; a missing value is neither zero nor proof of health.
Anonymous mode can read operations information. With authentication enabled, operations are available only to administrators with the capability. This is an observation and diagnosis interface, not a start/stop or scaling console. The distributed supplement covers cluster overview and the PD/Store node hierarchy.
Keyboard shortcuts and graph interactions
Use the topbar shortcut-help button to see key bindings. Their scope differs: typing ? in an input does not trigger global help.
| Action | Key or gesture | Scope |
|---|---|---|
| Open / close shortcut help | ? | Outside inputs and editors |
| Execute query | Ctrl with Enter / Command with Enter | Query editor |
| Run current algorithm | Ctrl with Enter / Command with Enter | Algorithm parameter form |
| Toggle graph fullscreen | F | Click to focus the graph canvas first; not a global binding |
| Inspect element details | Click a vertex or edge | Graph result |
| Expand neighboring relationships | Double-click a vertex | Graph result |
Diagnose connection and result issues
| Symptom | Check first |
|---|---|
| The Hubble page does not open | Check container status and docker compose -p "$HUBBLE_DEMO_PROJECT" -f docker-compose.yml logs hubble |
| The page opens but graphs are unavailable | Server health, a server.direct_url reachable from Hubble, and a shared network |
| Login appears or write actions are missing | Server authentication and account permissions; Hubble has no independent authentication switch |
| Expected data is missing | Current graph, sample load result, matching labels/properties; distinguish canvas display from stored data |
| No cluster overview | This example has no PD; see the distributed supplement |
Configuration can affect displayed query size. gremlin.suffix_limit defaults to 250 and supplies .limit(N) appended to applicable Gremlin queries;
it is not a universal hard limit. gremlin.vertex_degree_limit (100) and gremlin.edges_total_limit (500) constrain expansion.
FILE uploads allow csv,txt by default, with 1 GB per file and 10 GB total. Override upload_file.* settings when needed.
Stop the trial or build from source
When finished, run this in the main repository’s docker/ directory:
This removes the project’s containers, network, named volumes, and anonymous volume, losing the sample data and Hubble import tasks.
To retain data, omit --volumes when taking the deployment down and reuse the same project name when starting it again.
To obtain an exact master build, use JDK 11 and Maven. The Maven plugin installs the required Node/Yarn; you do not need to install them separately. These commands skip tests:
The bundled configuration binds to localhost:8088. bin/stop-hubble.sh requests graceful shutdown before forcing termination on timeout.
For development and testing, see the Toolchain local test guide.
2.3 - Graph import
Choose an import tool when you need to write file, database, or message data into HugeGraph. Use Loader for a direct import, SeaTunnel Sink when an existing Source, Transform, and Sink pipeline should be reused, or Spark Connector from a Spark job.
2.3.1 - Import Graph Data with SeaTunnel Sink
SeaTunnel connects data sources such as databases and Kafka to HugeGraph. The connector has two parts: Source reads data and Sink writes data[1][2], with SeaTunnel transform components available between them. To export or migrate data from HugeGraph, see the SeaTunnel Source export and migration guide.
Version requirement: This guide targets SeaTunnel 3.0+. All examples use the
mappingsconfiguration available in SeaTunnel 3.0+.
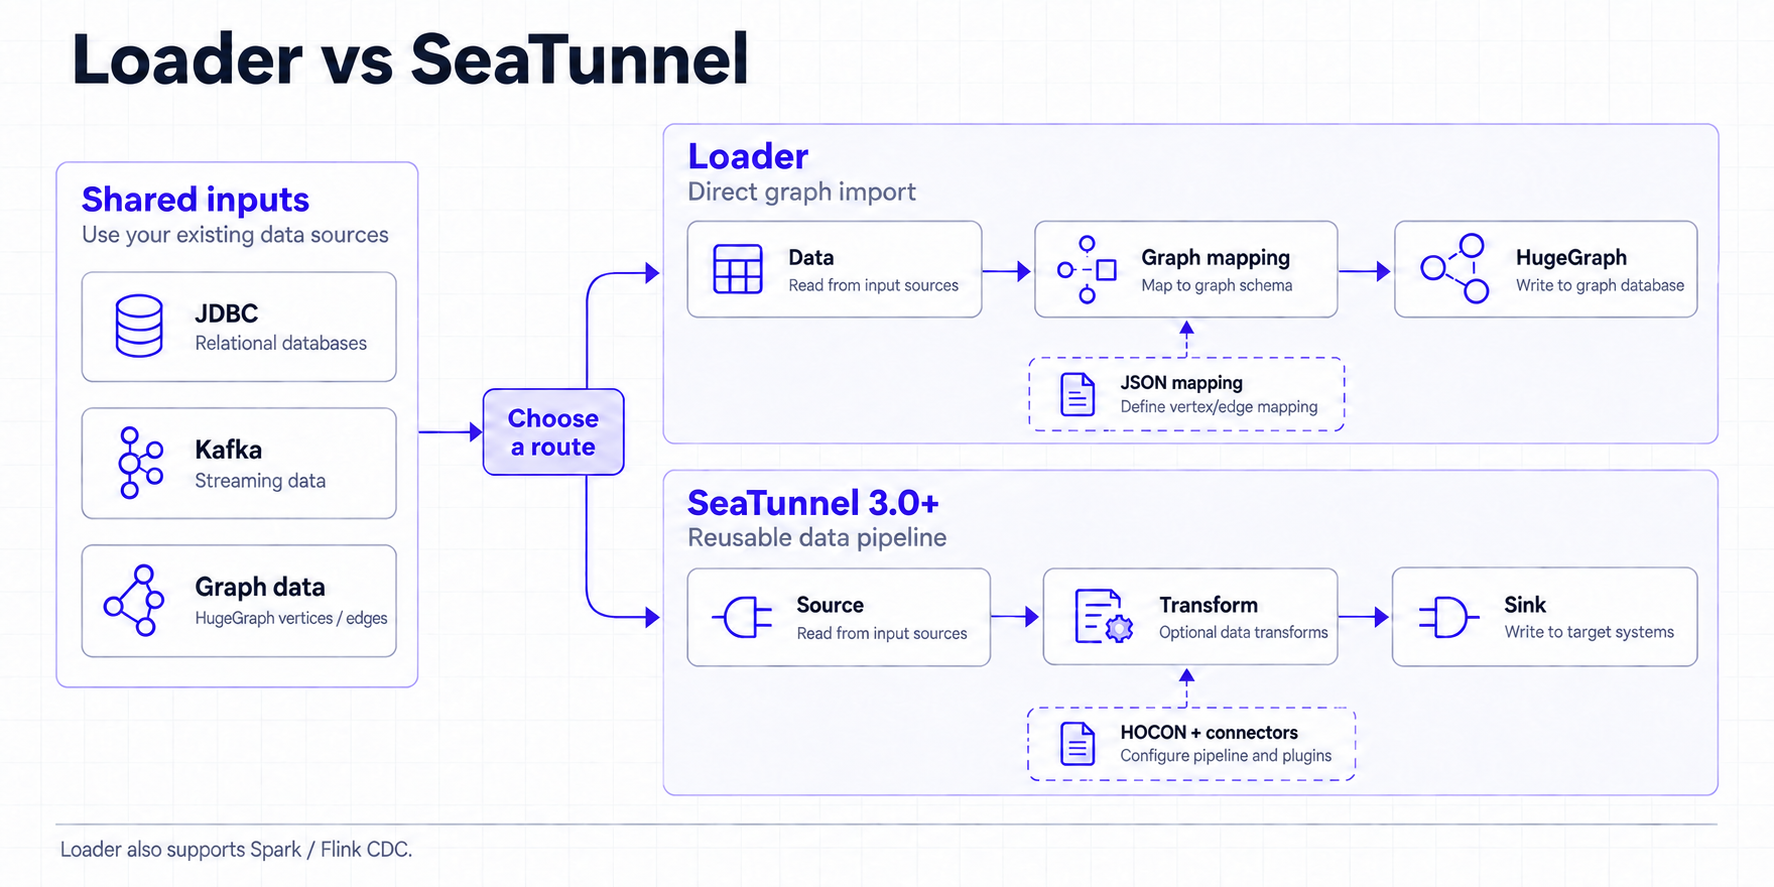
Click a diagram to view the original size.
1 Loader, Tools, and SeaTunnel
HugeGraph-Loader is suited to direct imports from common data sources. HugeGraph-Tools focuses on standalone graph management, backup, and export. SeaTunnel organizes a job as Source → Transform → Sink, so you can reuse existing connectors, transforms, and data pipelines.
Table legend
✅ Supported natively; ⚠️ conditional support or requires an extra component/external platform; ❌ not provided
| Comparison | Loader | Tools | SeaTunnel |
|---|---|---|---|
| Task coverage | ✅ Direct graph imports | ✅ Backup, restore, and export | ✅ Import, export, and migration with composable Source, Transform, and Sink stages |
| Job configuration | JSON mapping file describing the source, vertices, and edges | Command-line options and operations | HOCON job file[3] combining Source, Transform, and Sink |
| Default deployment | ✅ Standalone CLI; ⚠️ Spark Loader can extend it | ✅ Standalone CLI | ✅ Standalone; ✅ distributed |
| Execution engine | ⚠️ Mainly CLI; Spark Loader is a separate extension | ❌ Does not provide a Spark/Flink execution engine | ✅ HugeGraph Source and Sink support Zeta, Spark, and Flink[1][2][7][8][9][10] |
| Frontend and observability | ❌ No built-in frontend; inspect CLI logs | ❌ No built-in frontend; inspect CLI logs | ✅ Built-in Web UI job panel for task status and runtime information |
| Input and output | ⚠️ Focused on graph imports and common files, JDBC, Kafka, and similar sources | ⚠️ Focused on graph data and backup files in common storage | ✅ Dozens of connectors, including JDBC, Kafka, and SQL-CDC |
| Scheduling and resource management | ❌ No unified cross-task scheduling or resource allocation | ❌ No unified cross-task scheduling or resource allocation | ⚠️ Can integrate with DolphinScheduler for scheduling and task management |
| Simplicity | ✅ Focused and simple; a future binary CLI will make quick use easier | ✅ Direct commands for standalone operations | ⚠️ More runtime components, suited to long-lived data pipelines |
| High-throughput import | ✅ Supports bypass-server and other optimizations; measured peaks can reach 1-2 million records/s with specific backends and hardware, so benchmark the actual setup | ⚠️ Focuses on backup and export rather than bulk-import throughput | ✅ Scales throughput through parallelism, distributed engines, and connectors |
SeaTunnel covers Loader’s graph-import and Tools’ export and migration scenarios in one expandable pipeline, and it also supports SQL-CDC and dozens of input and output types. Loader and Tools normally run on one machine, while SeaTunnel supports both standalone and distributed deployments and scales with data and task volume. Tools’ schedule-backup can create a crontab entry, but it does not provide unified workflow orchestration and resource management.
Existing Spark/Flink daily jobs
Both HugeGraph Source and Sink list SeaTunnel Engine (Zeta), Spark, and Flink as supported engines in SeaTunnel 3.0+. If you express the daily job as a SeaTunnel job and submit it to that engine, records can move directly from Source to Transform to Sink without an intermediate file. If you keep the existing Spark/Flink DAG, SeaTunnel does not automatically take over its in-memory DataFrame or stream. Adapt it into a SeaTunnel job or expose the data through a Source connector
Loader and Tools are focused, direct, and quick to start. Use Loader for a direct graph import; use Tools for backup, restore, export, or daily operations. If a SeaTunnel job already exists, adding HugeGraph to that pipeline is usually simpler. For higher import throughput, Loader’s bypass-server path and other import optimizations are a better fit; measured peaks of 1-2 million records/s require a specific backend, data set, and hardware configuration and are not a general performance guarantee. For new SeaTunnel jobs, use 3.0+ and mappings. Recheck the connector configuration when using another version.
2 Prepare the environment
2.1 Get SeaTunnel 3.0+
Use JDK 11 and set JAVA_HOME; the official deployment guide
lists Java 8 and 11 as prerequisites. Choose a 3.0+ binary distribution from the
official release page[4] and verify its checksum or signature using the files linked there.
The commands below use 3.0.0 as an example; set SEATUNNEL_VERSION to the release you downloaded.
The binary distribution does not include connector plugins. In config/plugin_config, select the connectors needed by the examples:
Install the matching released plugins using the upstream plugin installation instructions[5]:
Run the remaining commands from this installation directory and keep the engine and connector plugins at the same version.
This guide uses the bundled Zeta engine in local mode[6][7]. Check that connectors/ contains HugeGraph, JDBC, and Kafka
as needed[11][12]. The JDBC examples also require the MySQL driver JAR in lib/, with driver class com.mysql.cj.jdbc.Driver.
2.2 Prepare HugeGraph and data sources
Start HugeGraph Server and create a graph for testing. The examples use the hugegraph graph in the DEFAULT graph space. Adjust these names to match the server configuration; graph space names are case-sensitive. If authentication is enabled, provide username and password in the HugeGraph Source and Sink configurations.
The following graph model is shared by the JDBC and Kafka examples. mappings creates missing PropertyKey, VertexLabel, and EdgeLabel definitions by default; existing schema definitions must be compatible.
| Graph element | Name and properties |
|---|---|
| Properties | name is Text; age and since are Int |
| Vertex | person, primary key name, properties name and age |
| Edge | knows, from person to person, property since |
The mysql, kafka, and hugegraph host names in the examples are placeholders. Replace them with addresses reachable from the SeaTunnel runtime. Inside a container, 127.0.0.1 points to that container; services on the same Docker network can use their service names. Set host to a host name or IP address, and set the port separately.
3 Import from a relational database (sql2graph)
Use two jobs for this import: write the person table as vertices first, then write the knows table as edges. Both edge endpoints will already exist when the edge job runs.
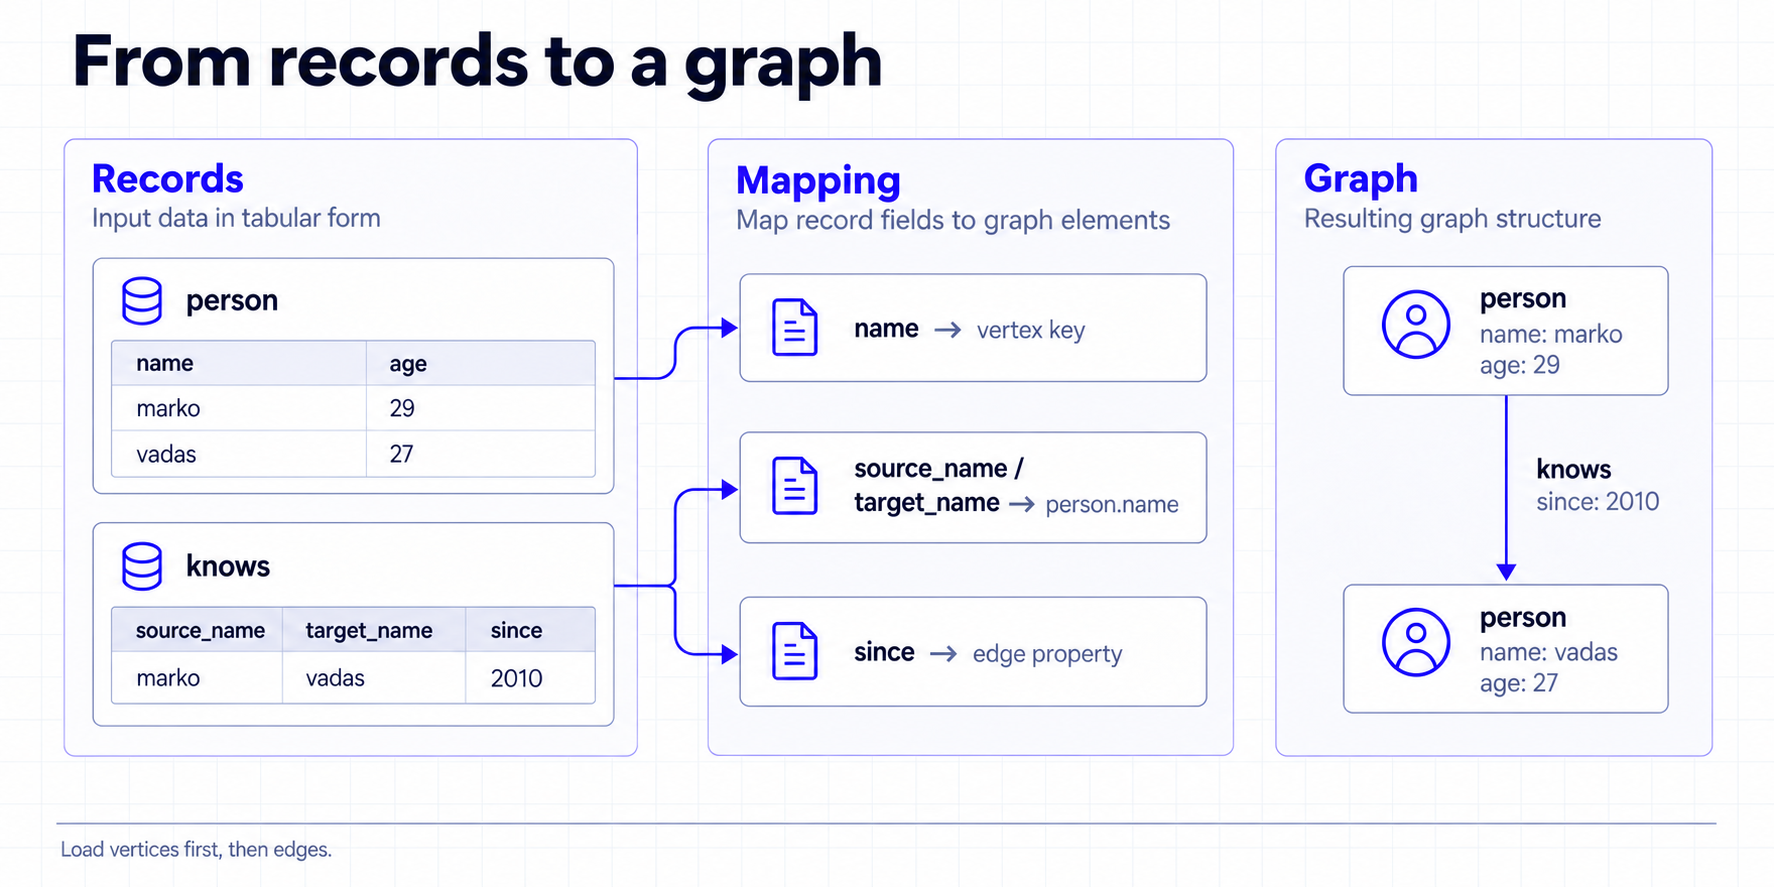
3.1 Import vertices
Prepare the sample data in the MySQL demo database and grant the configured account read access:
Save the following as config/sql2graph-person.conf and replace the database user name and password:
Check the result in Hubble or Gremlin. You should find marko and vadas with their ages:
idFields = ["name"] uses the name to generate the primary key. Importing the same name again writes to the same vertex. properties lists the source fields to write.
3.2 Import edges
Prepare the relation table. Its two endpoint fields correspond to person.name from the vertex job:
After the vertex job succeeds, run the edge job:
The following query should return a knows edge from marko to vadas with since set to 2010:
sourceConfig and targetConfig identify the endpoint fields. fieldMapping maps them to the vertex primary key name, and properties = ["since"] writes only the edge property. The example enables check_vertex = true and disables per-record fallback after a batch failure (batch_failure_fallback = false), so a missing endpoint or write failure causes the job to fail.
If the relation table has only numeric foreign keys while the graph uses names as primary keys, join the names in SQL before passing the records to the Sink. See MySQL CDC Source[13] for MySQL CDC integration.
4 Import from Kafka (kafka2graph)
Kafka is useful for a continuous stream of events. Create the user-events topic and publish the following JSON message. Each message becomes one person vertex:
Save the following as config/kafka2graph.conf:
Use the Gremlin query from section 3.1 to check the data. The streaming job keeps running. checkpoint.interval saves job state every 10 seconds, while sink.flush.interval asks Zeta to flush every 5 seconds so a small number of messages does not wait for a full batch.
HugeGraph Sink writes with at-least-once semantics, so recovery can replay records. PRIMARY_KEY sends the same name to the same vertex, but it does not make every update exactly-once. Scheduled flushing is provided by Zeta and does not apply to Spark or Flink engines.
5 Common configuration and troubleshooting
The following table applies to the SeaTunnel 3.0+ version used by this guide:
| Configuration | Purpose |
|---|---|
host, port | Set the HugeGraph host and port |
graph_name, graph_space | Select an existing graph and graph space |
mappings | Define how input fields become vertices or edges |
properties | List the source fields written by each mapping |
schema_save_mode | mappings creates missing schema by default; existing schema must still be compatible |
batch_size | Number of records per batch; default 500 |
env.sink.flush.interval | Zeta scheduled flush interval in milliseconds |
check_vertex | Check edge endpoints; the edge job in this guide sets it to true |
batch_failure_fallback[2] | Defaults to true, so a failed batch falls back to record-by-record retries, capped by max_insert_errors; the examples explicitly set false so a batch failure stops the job |
max_insert_errors | Number of failed records that record-by-record fallback may skip; default 500, -1 for unlimited, and only applies when batch_failure_fallback is enabled |
Use these checks when a job fails:
mappingsis unknown or HugeGraph Source is missing: Check that the engine and HugeGraph connector come from the same SeaTunnel 3.0+ build.- Connection failure: Check the host, port, graph space, authentication details, and whether the SeaTunnel runtime can reach the service.
- Schema incompatibility: Check the ID strategy, property types, and edge endpoints. Automatic creation does not change an existing
PRIMARY_KEYlabel intoCUSTOMIZE_STRING. - Small Kafka batches do not appear promptly: Confirm that the job uses Zeta and set
sink.flush.intervalinenv. In this version,batch_interval_msis retained only for compatibility and cannot replace it.
6 Choosing a tool
Choose a tool based on the work to complete. Use Tools for graph management, Gremlin, backup, or cloning. Use Loader for a direct graph import. Choose SeaTunnel when you need to reuse a Source, Transform, and Sink pipeline. For SeaTunnel graph reads and migrations, prepare the environment using the SeaTunnel 3.0+ version used by this guide.
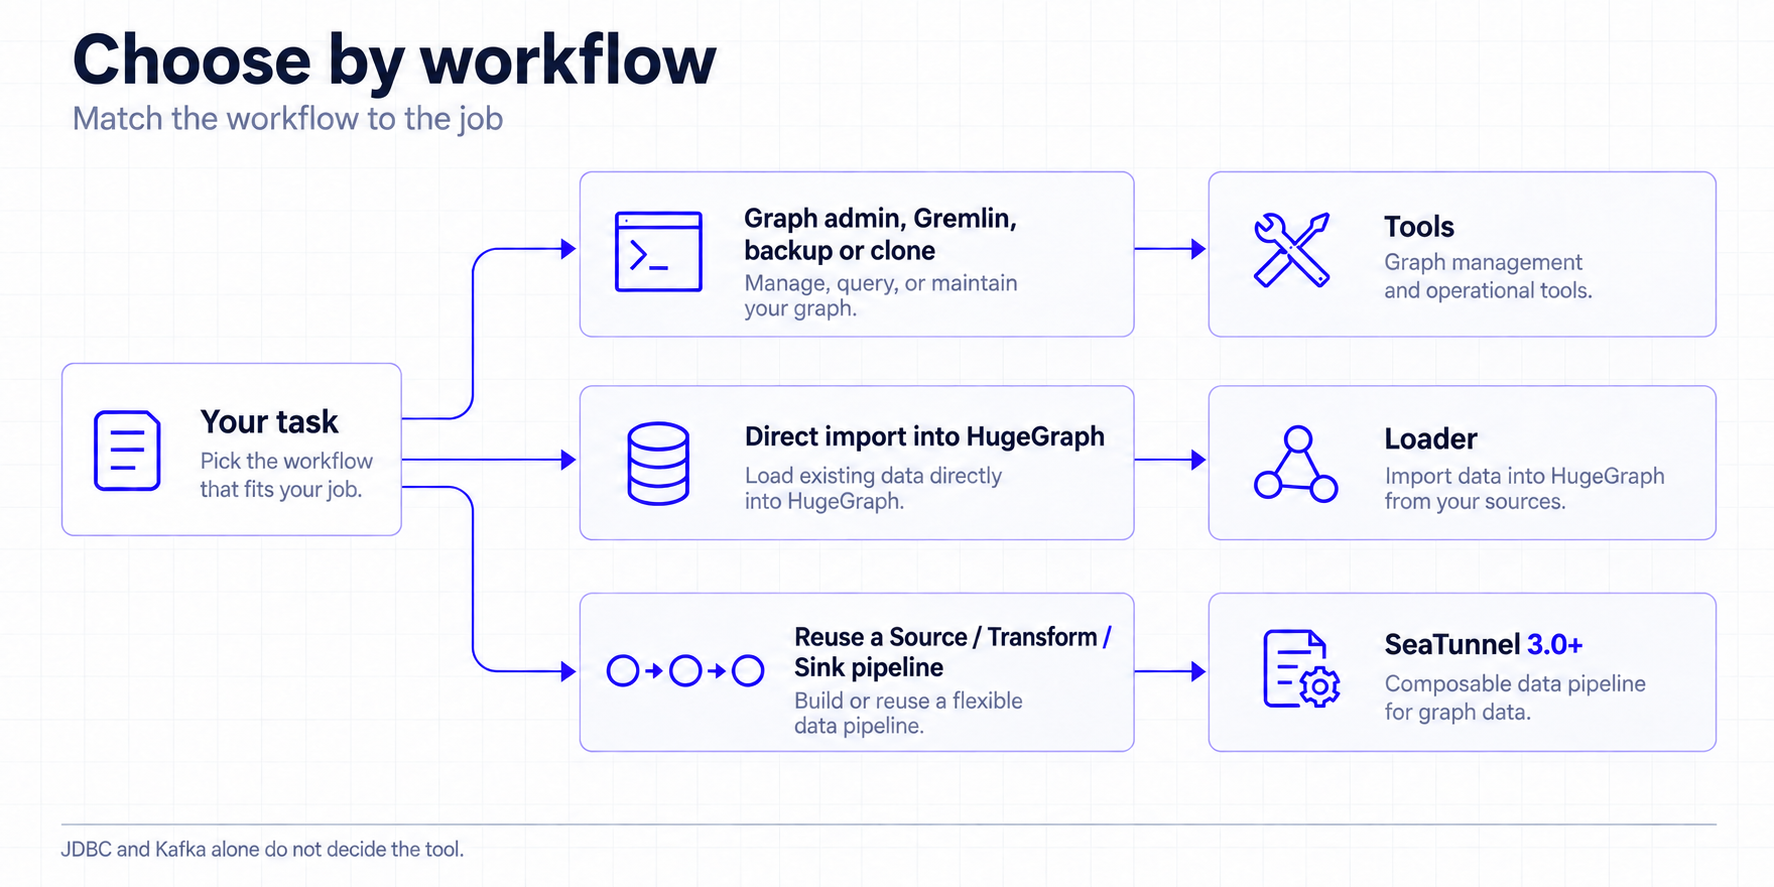
7 References
HugeGraph connectors
[1] HugeGraph Source
[2] HugeGraph Sink
Configuration and deployment
[3] HOCON job configuration
[4] SeaTunnel 3.0+ release download
[5] Connector plugin installation
[6] SeaTunnel local deployment
Execution engines
[7] SeaTunnel Engine Overview
[8] SeaTunnel Spark Engine
[9] SeaTunnel Flink Engine
[10] Connector V2 multi-engine support
Data source connectors
[11] JDBC Source
[12] Kafka Source
[13] MySQL CDC Source
2.4 - HugeGraph-Loader Quick Start
This guide follows Toolchain master (currently 1.8.0). Released packages and Docker latest may differ from source;
check the version you use and build from source for unreleased functionality.
1 HugeGraph-Loader Overview
HugeGraph-Loader is the data import component of HugeGraph, which can convert data from various data sources into graph vertices and edges and import them into the graph database in batches.
Currently supported data sources include:
- Local disk file or directory, supports TEXT, CSV and JSON format files, supports compressed files
- HDFS file or directory supports compressed files
- Mainstream relational databases, such as MySQL, PostgreSQL, Oracle, SQL Server
- Kafka topic
- An existing HugeGraph graph, used to copy data from one graph into another
Local disk files and HDFS files support resumable uploads.
It will be explained in detail below.
Note: HugeGraph-Loader requires HugeGraph Server service, please refer to HugeGraph-Server Quick Start to download and start Server
Testing Guide: For running HugeGraph-Loader tests locally, please refer to HugeGraph Toolchain Local Testing Guide
2 Get HugeGraph-Loader
HugeGraph-Loader is available in the following three ways:
- Use docker image (Convenient for Test/Dev)
- Download the compiled tarball
- Clone source code then compile and install
2.1 Use Docker image (Convenient for Test/Dev)
We can deploy the loader service using docker run -itd --name loader hugegraph/loader:latest. For the data that needs to be loaded, it can be copied into the loader container either by mounting -v /path/to/data/file:/loader/file or by using docker cp.
Alternatively, to start the loader using docker-compose, the command is docker-compose up -d. An example of the docker-compose.yml is as follows:
This combination is for local anonymous testing; the Server API is published only on the local host.
The specific data loading process can be referenced under 4.5 User Docker to load data
Note:
The docker image of hugegraph-loader is a convenience release to start hugegraph-loader quickly, but not official distribution artifacts. You can find more details from ASF Release Distribution Policy.
Pin a published version tag or image digest in production.
latestis mutable and does not guarantee alignment withmaster.
2.2 Download the compiled archive
Choose a published Toolchain archive from the download page and extract it.
A release may not include all master functionality; use the source build below for the implementation described here.
2.3 Clone source code to compile and install
Clone the master branch:
Compile and generate tar package:
For Oracle input, obtain a JDBC driver JAR compatible with your Oracle/JDK versions and place it in the extracted Loader lib/ directory.
The startup script loads JARs there; installing a driver only in the local Maven repository does not put it on Loader’s runtime classpath.
3 How to use
The basic process of using HugeGraph-Loader is divided into the following steps:
- Write graph schema
- Prepare data files
- Write input source map files
- Execute command import
3.1 Construct graph schema
This step is the modeling process. Users need to have a clear idea of their existing data and the graph model they want to create, and then write the schema to build the graph model.
For example, if you want to create a graph with two types of vertices and two types of edges, the vertices are “people” and “software”, the edges are “people know people” and “people create software”, and these vertices and edges have some attributes, For example, the vertex “person” has: “name”, “age” and other attributes, “Software” includes: “name”, “sale price” and other attributes; side “knowledge” includes: “date” attribute and so on.
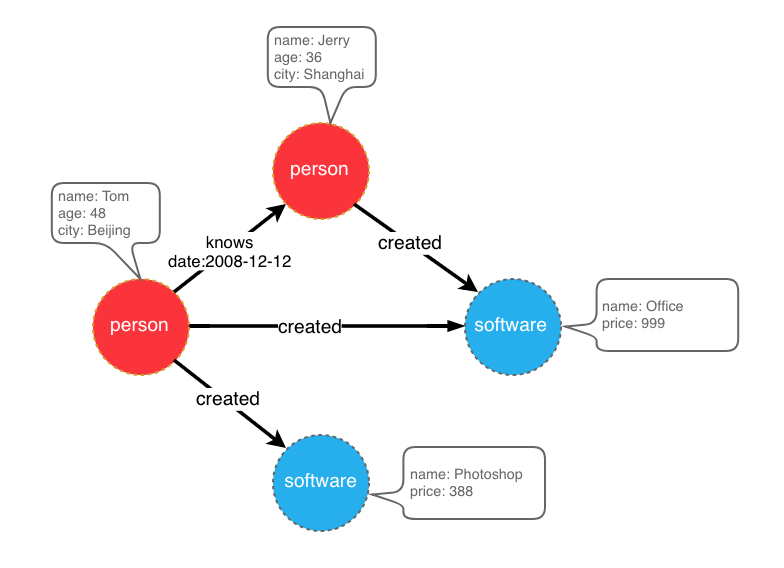
graph model example
After designing the graph model, we can use groovy to write the definition of schema and save it to a file, here named schema.groovy.
Please refer to the corresponding section in hugegraph-client for the detailed description of the schema.
3.2 Prepare data
The data sources currently supported by HugeGraph-Loader include:
- local disk file or directory
- HDFS file or directory
- Partial relational database
- Kafka topic
- An existing HugeGraph graph
3.2.1 Data source structure
3.2.1.1 Local disk file or directory
The user can specify a local disk file as the data source. If the data is scattered in multiple files, a certain directory is also supported as the data source, but multiple directories are not supported as the data source for the time being.
For example, my data is scattered in multiple files, part-0, part-1 … part-n. To perform the import, it must be ensured that they are placed in one directory. Then in the loader’s mapping file, specify path as the directory.
Supported file formats include:
- TEXT
- CSV
- JSON
TEXT is a text file with custom delimiters, the first line is usually the header, and the name of each column is recorded, and no header line is allowed (specified in the mapping file). Each remaining row represents a record, which will be converted into a vertex/edge; each column of the row corresponds to a field, which will be converted into the id, label or attribute of the vertex/edge;
An example is as follows:
CSV is a TEXT file with commas , as delimiters. When a column value itself contains a comma, the column value needs to be enclosed in double quotes, for example:
The JSON file requires that each line is a JSON string, and the format of each line needs to be consistent.
3.2.1.2 HDFS file or directory
Users can also specify HDFS files or directories as data sources, all of the above requirements for local disk files or directories apply here. In addition, since HDFS usually stores compressed files, loader also provides support for compressed files, and local disk file or directory also supports compressed files.
Currently supported compressed file types include: GZIP, BZ2, XZ, LZMA, SNAPPY_RAW, SNAPPY_FRAMED, Z, DEFLATE, LZ4_BLOCK, LZ4_FRAMED, ORC, and PARQUET.
3.2.1.3 Mainstream relational database
The loader also supports some relational databases as data sources, and currently supports MySQL, PostgreSQL, Oracle, and SQL Server.
However, the requirements for the table structure are relatively strict at present. If association query needs to be done during the import process, such a table structure is not allowed. The associated query means: after reading a row of the table, it is found that the value of a certain column cannot be used directly (such as a foreign key), and you need to do another query to determine the true value of the column.
For example, Suppose there are three tables, person, software and created
If the id strategy of person or software is specified as PRIMARY_KEY when modeling (schema), choose name as the primary key (note: this is the concept of vertex-label in hugegraph), when importing edge data, the source vertex and target need to be spliced out. For the id of the vertex, you must go to the person/software table with p_id/s_id to find the corresponding name. In the case of the schema that requires additional query, the loader does not support it temporarily. In this case, the following two methods can be used instead:
- The id strategy of person and software is still specified as PRIMARY_KEY, but the id column of the person table and software table is used as the primary key attribute of the vertex, so that the id can be generated by directly splicing p_id and s_id with the label of the vertex when importing an edge;
- Specify the id policy of person and software as CUSTOMIZE, and then directly use the id column of the person table and the software table as the vertex id, so that p_id and s_id can be used directly when importing edges;
The key point is to make the edge use p_id and s_id directly, don’t check it again.
3.2.2 Prepare vertex and edge data
3.2.2.1 Vertex Data
The vertex data file consists of data line by line. Generally, each line is used as a vertex, and each column is used as a vertex attribute. The following description uses CSV format as an example.
- person vertex data (the data itself does not contain a header)
- software vertex data (the data itself contains the header)
3.2.2.2 Edge data
The edge data file consists of data line by line. Generally, each line is used as an edge. Some columns are used as the IDs of the source and target vertices, and other columns are used as edge attributes. The following uses JSON format as an example.
- knows edge data
- created edge data
3.3 Write data source mapping file
3.3.1 Mapping file overview
The mapping file of the input source is used to describe how to establish the mapping relationship between the input source data and the vertex type/edge type of the graph. It is organized in JSON format and consists of multiple mapping blocks, each of which is responsible for mapping an input source. Mapped to vertices and edges.
Specifically, each mapping block contains an input source and multiple vertex mapping and edge mapping blocks, and the input source block corresponds to the local disk file or directory, HDFS file or directory and relational database are responsible for describing the basic information of the data source, such as where the data is, what format, what is the delimiter, etc. The vertex map/edge map is bound to the input source, which columns of the input source can be selected, which columns are used as ids, which columns are used as attributes, and what attributes are mapped to each column, the values of the columns are mapped to what values of attributes, and so on.
In the simplest terms, each mapping block describes: where is the file to be imported, which type of vertices/edges each line of the file is to be used as which columns of the file need to be imported, and the corresponding vertices/edges of these columns. what properties, etc.
Note: The format of the mapping file before version 0.11.0 and the format after 0.11.0 has changed greatly. For the convenience of expression, the mapping file (format) before 0.11.0 is called version 1.0, and the version after 0.11.0 is version 2.0. And unless otherwise specified, the “map file” refers to version 2.0.
Two versions of the mapping file are given directly here (the above graph model and data file are described)
The 1.0 version of the mapping file is centered on the vertex and edge, and sets the input source; while the 2.0 version is centered on the input source, and sets the vertex and edge mapping. Some input sources (such as a file) can generate both vertices and edges. If you write in the 1.0 format, you need to write an input block in each of the vertex and edge mapping blocks. The two input blocks are exactly the same; and the 2.0 version only needs to write input once. Therefore, compared with version 1.0, version 2.0 can save some repetitive writing of input.
In the bin directory of hugegraph-loader-{version}, there is a script tool mapping-convert.sh that can directly convert the mapping file of version 1.0 to version 2.0. The usage is as follows:
A struct-v2.json will be generated in the same directory as struct.json.
The bin directory also ships utf8-bom-to-utf8.sh, which strips the UTF-8 BOM from a single data file, or from every file under a directory. It is useful when a CSV or TEXT file exported by a Windows tool fails to parse because its first header column carries an invisible BOM:
3.3.2 Input Source
Input sources are currently divided into five categories: FILE, HDFS, JDBC, KAFKA and GRAPH, which are distinguished by the type node. We call them local file input sources, HDFS input sources, JDBC input sources, KAFKA input sources and GRAPH input source, which are described below.
3.3.2.1 Local file input source
- id: The id of the input source. This field is used to support some internal functions. It is not required (it will be automatically generated if it is not filled in). It is strongly recommended to write it, which is very helpful for debugging;
- skip: whether to skip the input source, because the JSON file cannot add comments, if you do not want to import an input source during a certain import, but do not want to delete the configuration of the input source, you can set it to true to skip it, the default is false, not required;
- input: input source map block, composite structure
- type: an input source type, file or FILE must be filled;
- path: the path of the local file or directory, an absolute path or a path relative to the Loader process working directory (not the mapping file). An absolute path is recommended; required;
- file_filter: filter files with compound conditions from
path, compound structure, currently only supports configuration extensions, represented by child nodeextensions, the default is “*”, which means to keep all files; - format: the format of the local file, the optional values are CSV, TEXT and JSON, which must be uppercase, the default is CSV, optional;
- header: column names; if omitted, the first data line supplies them. With an explicit header, an identical first line is still skipped by default (see has_header). JSON does not require a header; optional;
- has_header: for CSV and TEXT, the first line of every file is dropped when it is identical to the header, so a header repeated in each part file of a directory is not imported as data. Set this to
falseto turn that check off when the first line of a file is real data that happens to equal the header, optional; - delimiter: The column delimiter of the file line. The default depends on
format: a comma","for CSV and a tab"\t"for TEXT; a CSV file accepts no other delimiter. TheJSONfile does not need to be specified, optional; - charset: the encoded character set of the file, the default is
UTF-8, optional; - date_format: custom date format, the default value is yyyy-MM-dd HH:mm:ss, optional; if the date is presented in the form of a timestamp, this item must be written as
timestamp(fixed writing); - extra_date_formats: a list of fallback date formats, tried when a value does not match
date_format, empty by default, optional; - time_zone: Set which time zone the date data is in, the default value is
GMT+8, optional; - skipped_line: The line to be skipped, compound structure, currently only the regular expression of the line to be skipped can be configured, described by the child node
regex. The default regex is(^#|^//).*|, which skips lines starting with#or//and empty lines; to keep such lines, setregexto a pattern that matches nothing, optional; - compression: The compression format of the file, the optional values are NONE, GZIP, BZ2, XZ, LZMA, SNAPPY_RAW, SNAPPY_FRAMED, Z, DEFLATE, LZ4_BLOCK, LZ4_FRAMED, ORC and PARQUET, the default is NONE, which means a non-compressed file, optional; for ORC and PARQUET the header is matched case-insensitively;
- list_format: When a column of the file (non-JSON) is a collection structure (the Cardinality of the PropertyKey in the corresponding figure is Set or List), you can use this item to set the start character, separator, and end character of the column, compound structure :
- start_symbol: The start character of the collection structure column (the default value is the empty string
"", JSON format currently does not support specification) - elem_delimiter: the delimiter of the collection structure column (the default value is
|, and it must differ fromdelimiter; JSON format currently only supports native,delimiter) - end_symbol: the end character of the collection structure column (the default value is the empty string
"", the JSON format does not currently support specification) - ignored_elems: the elements dropped after the column is split, the default value is
[""], so empty elements are ignored
- start_symbol: The start character of the collection structure column (the default value is the empty string
3.3.2.2 HDFS input source
The nodes and meanings of the above local file input source are basically applicable here. Only the different and unique nodes of the HDFS input source are listed below.
- type: input source type, must fill in hdfs or HDFS, required;
- path: the path of the HDFS file or directory, it must be the absolute path of HDFS, required;
- core_site_path: the path of the core-site.xml file of the HDFS cluster, the key point is to specify the address of the NameNode (
fs.default.name) and the implementation of the file system (fs.hdfs.impl), required; - hdfs_site_path: the path of the hdfs-site.xml file of the HDFS cluster, optional;
- dir_filter: when
pathis a directory, decides which sub-directories are walked into, compound structure, optional:- include_regex: only directories whose name matches this regular expression are read, empty by default, which places no restriction;
- exclude_regex: directories whose name matches this regular expression are skipped, empty by default;
- kerberos_config: how to authenticate against a Kerberos-secured HDFS cluster, compound structure, optional:
- enable: whether to authenticate with Kerberos, the default is false;
- krb5_conf: the path of the krb5.conf file, required when
enableis true; - principal: the Kerberos principal, required when
enableis true; - keytab: the path of the keytab file, required when
enableis true;
3.3.2.3 JDBC input source
As mentioned above, it supports multiple relational databases, but because their mapping structures are very similar, they are collectively referred to as JDBC input sources, and then use the vendor node to distinguish different databases.
- type: input source type, must fill in jdbc or JDBC, required;
- vendor: database type, optional options are [MySQL, PostgreSQL, Oracle, SQLServer], case-insensitive, required;
- driver: the JDBC driver class, optional; when it is left out, the default driver of the
vendorlisted in the tables below is used; - url: the url of the database that jdbc wants to connect to, required;
- database: the name of the database to be connected, required;
- schema: The name of the schema to be connected, different databases have different requirements, and the details are explained below;
- table: the name of the table to be connected, at least one of
tableorcustom_sqlis required; - custom_sql: custom SQL statement, at least one of
tableorcustom_sqlis required; - username: username to connect to the database, required;
- password: password for connecting to the database, required;
- where: an extra condition appended to the generated
selectstatement, written without thewherekeyword, optional; - batch_size: The size of one page when obtaining table data by page, the default is 500, optional;
MYSQL
| Node | Fixed value or common value |
|---|---|
| vendor | MYSQL |
| driver | com.mysql.cj.jdbc.Driver |
| url | jdbc:mysql://127.0.0.1:3306 |
schema: nullable, if filled in, it must be the same as the value of database
POSTGRESQL
| Node | Fixed value or common value |
|---|---|
| vendor | POSTGRESQL |
| driver | org.postgresql.Driver |
| url | jdbc:postgresql://127.0.0.1:5432 |
schema: nullable, default is “public”
ORACLE
| Node | Fixed value or common value |
|---|---|
| vendor | ORACLE |
| driver | oracle.jdbc.driver.OracleDriver |
| url | jdbc:oracle:thin:@127.0.0.1:1521 |
schema: nullable, the default value is the username in upper case
SQLSERVER
| Node | Fixed value or common value |
|---|---|
| vendor | SQLSERVER |
| driver | com.microsoft.sqlserver.jdbc.SQLServerDriver |
| url | jdbc:sqlserver://127.0.0.1:1433 |
schema: required
3.3.2.4 Kafka input source
- type: input source type,
kafkaorKAFKA, required; - bootstrap_server: the list of kafka bootstrap servers, required;
- topic: the topic to subscribe to, required;
- group: group of Kafka consumers, required;
- from_beginning: sets
auto.offset.resettoearliestwhen true, orlatestwhen false (default). It applies only when no valid committed offset exists; otherwise consumption resumes from the committed offset. Optional; - format: format of each message, options are CSV, TEXT and JSON, must be uppercase, required;
- header: column name of each column of a message; no header line is read from the topic, so it has to be given for CSV and TEXT, while JSON messages do not need it;
- delimiter: delimiter of the message columns, used by TEXT only, since CSV always splits on
,, optional; - charset: encoding charset of the messages, default is UTF-8, optional;
- date_format: customized date format, default value is yyyy-MM-dd HH:mm:ss, optional; if the date is presented in the form of timestamp, this item must be written as timestamp (fixed);
- extra_date_formats: a customized list of another date formats, empty by default, optional; each item in the list is an alternate date format to the date_format specified date format;
- time_zone: set which time zone the date data is in, default is GMT+8, optional;
- skipped_line: current master
KafkaReaderdoes not implement this filter. Kafka messages go directly to the parser, so configuring this field does not skip blank or comment messages; preprocess them upstream or in the consumer to avoid parse failures; - batch_size: the maximum number of records fetched in one poll (
max.poll.records), default is 500, optional; - early_stop: the record pulled from Kafka broker at a certain time is empty, stop the task, default is false, only for debugging, optional;
3.3.2.5 GRAPH input Source
The GRAPH input source reads vertices and edges out of another HugeGraph graph, reached through HugeGraph-PD, and writes them into the target graph. When a mapping file contains a GRAPH input source, every input source in it that is not skipped has to be a GRAPH input source as well, and the loader puts the target graph into RESTORING mode for the duration of the import.
- type: Data source type; must be filled in as
graphorGRAPH(required); - graphspace: Source graphSpace name (required);
- graph: Source graph name (required);
- username: HugeGraph username; the
--usernamecommand-line option is used when this is empty; - password: HugeGraph password; the
--passwordcommand-line option is used when this is empty; - selected_vertices: the vertex labels to copy, each item written as
{"label": "...", "properties": [...], "query": {...}}, wherepropertiesnarrows the copied properties andqueryis an optional filter passed to the source graph; - ignored_vertices: the vertex labels to skip, each item written as
{"label": "...", "properties": [...]}; - selected_edges: the edge labels to copy, items have the same shape as in
selected_vertices; - ignored_edges: the edge labels to skip, items have the same shape as in
ignored_vertices; - pd-peers: HugeGraph-PD node addresses of the source cluster; the
--pd-peersoption is used when this is empty; - meta-endpoints: Meta service endpoints of the source cluster; the
--meta-endpointsoption is used when this is empty; - cluster: Source cluster name; the
--clusteroption is used when this is empty; - batch_size: Batch size for reading data from the source graph; default is 500;
3.3.3 Vertex and Edge Mapping
The nodes of vertex and edge mapping (a key in the JSON file) have a lot of the same parts. The same parts are introduced first, and then the unique nodes of vertex map and edge map are introduced respectively.
Nodes of the same section
- label:
labelto which the vertex/edge data to be imported belongs, required; - skip: whether to skip this vertex/edge mapping while the input source and the other mappings stay active, the default is false, optional;
- field_mapping: Map the column name of the input source column to the attribute name of the vertex/edge, optional;
- value_mapping: map the data value of the input source to the attribute value of the vertex/edge, optional;
- selected: select some columns to insert, other unselected ones are not inserted, cannot exist at the same time as
ignored, optional; - ignored: ignore some columns so that they do not participate in insertion, cannot exist at the same time as
selected, optional; - null_values: You can specify some strings to represent null values, such as “NULL”. If the vertex/edge attribute corresponding to this column is also a nullable attribute, the value of this attribute will not be set when constructing the vertex/edge, optional ;
- update_strategies: If the data needs to be updated in batches in a specific way, you can specify a specific update strategy for each attribute (see below for details), optional;
- unfold: Whether to unfold the column, each unfolded column will form a row with other columns, which is equivalent to unfolding into multiple rows; for example, the value of a certain column (id column) of the file is
[1,2,3], The values of other columns are18,Beijing. When unfold is set, this row will become 3 rows, namely:1,18,Beijing,2,18,Beijingand3,18, Beijing. Note that this will only expand the column selected as id. Default false, optional;
Update strategy supports 8 types: (requires all uppercase)
- Value accumulation:
SUM - Take the greater of the two numbers/dates:
BIGGER - Take the smaller of two numbers/dates:
SMALLER - Set property takes union:
UNION - Set attribute intersection:
INTERSECTION - List attribute append element:
APPEND - List/Set attribute delete element:
ELIMINATE - Override an existing property:
OVERRIDE
Note: If the newly imported attribute value is empty, the existing old data will be used instead of the empty value. For the effect, please refer to the following example
Note : After adopting the batch update strategy, the number of disk read requests will increase significantly, and the import speed will be several times slower than that of pure write coverage (at this time HDD disk [IOPS](https://en.wikipedia .org/wiki/IOPS) will be the bottleneck, SSD is recommended for speed)
Unique Nodes for Vertex Maps
- id: Specify a column as the id column of the vertex. When the vertex id policy is
CUSTOMIZE, it is required; when the id policy isPRIMARY_KEY, it must be empty;
Unique Nodes for Edge Maps
- source: Select certain columns of the input source as the id column of source vertex. When the id policy of the source vertex is
CUSTOMIZE, a certain column must be specified as the id column of the vertex; when the id policy of the source vertex isWhen PRIMARY_KEY, one or more columns must be specified for splicing the id of the generated vertex, that is, no matter which id strategy is used, this item is required; - target: Specify certain columns as the id columns of target vertex, similar to source, so I won’t repeat them;
- unfold_source: Whether to unfold the source column of the file, the effect is similar to that in the vertex map, and will not be repeated;
- unfold_target: Whether to unfold the target column of the file, the effect is similar to that in the vertex mapping, and will not be repeated;
3.4 Execute command import
After preparing the graph model, data file, and input source mapping relationship file, the data file can be imported into the graph database.
The import process is controlled by commands submitted by the user, and the user can control the specific process of execution through different parameters.
3.4.1 Parameter description
| Parameter | Default value | Required or not | Description |
|---|---|---|---|
-f or --file | Y | Path to configure script | |
-g or --graph | hugegraph | Graph name | |
--graphspace | DEFAULT | Graph space name | |
-s or --schema | Schema file path; optional when the Schema already exists | ||
-h or --host or -i | localhost | Address of HugeGraphServer | |
-p or --port | 8080 | Port number of HugeGraphServer | |
--username | null | When HugeGraphServer enables permission authentication, the username of the current graph | |
--password | null | When HugeGraphServer enables permission authentication, the password of the current graph | |
--create-graph | false | Whether to automatically create the graph if it does not exist | |
--token | null | When HugeGraphServer has enabled authorization authentication, the token of the current graph | |
--protocol | http | Protocol for sending requests to the server, optional http or https | |
--pd-peers | PD service node addresses | ||
--pd-token | Token for accessing PD service | ||
--meta-endpoints | Meta information storage service addresses | ||
--direct | false | Store direct mode is disabled in current master; imports still use Server API. Keep the default | |
--route-type | NODE_PORT | Route selection method (optional values: NODE_PORT / DDS / BOTH) | |
--cluster | hg | Cluster name | |
--trust-store-file | When the request protocol is https, the client’s certificate file path | ||
--trust-store-password | When the request protocol is https, the client certificate password | ||
--clear-all-data | false | Whether to clear the original data on the server before importing data | |
--clear-timeout | 240 | Timeout for clearing the original data on the server before importing data | |
--incremental-mode | false | Whether to use the breakpoint resume mode; only input sources FILE and HDFS support this mode. Enabling this mode allows starting the import from where the last import stopped | |
--failure-mode | false | When failure mode is true, previously failed data will be imported. Generally, the failed data file needs to be manually corrected and edited before re-importing | |
--batch-insert-threads | CPUs | Batch insert thread pool size (CPUs is the number of logical cores available to the current OS) | |
--single-insert-threads | 8 | Size of single insert thread pool | |
--max-conn | 4 * CPUs | The maximum number of HTTP connections between HugeClient and HugeGraphServer; while it is left at its default, it is raised automatically to 4 * --batch-insert-threads | |
--max-conn-per-route | 2 * CPUs | The maximum number of HTTP connections for each route between HugeClient and HugeGraphServer; while it is left at its default, it is raised automatically to 2 * --batch-insert-threads | |
--batch-size | 500 | The number of data items in each batch when importing data | |
--max-parse-errors | 1 | The maximum number of data parsing errors allowed (per line); the program exits when this value is reached | |
--max-insert-errors | 500 | The maximum number of data insertion errors allowed (per row); the program exits when this value is reached | |
--timeout | 60 | Timeout (seconds) for insert result return | |
--shutdown-timeout | 10 | Waiting time for multithreading to stop (seconds) | |
--retry-times | 3 | Maximum number of retries after a timeout | |
--retry-interval | 10 | Interval before retry (seconds) | |
--check-vertex | false | Whether to check if the vertices connected by the edge exist when inserting the edge | |
--print-progress | true | Whether to print the number of imported items in real time on the console | |
--dry-run | false | Enable this mode to only parse data without importing; usually used for testing | |
--help or -help | false | Print help information | |
--parser-threads or --parallel-count | max(2,CPUs/2) | Number of parallel read pipelines; --parallel-count is deprecated | |
--start-file | 0 | Start file index for partial loading | |
--end-file | -1 | End file index for partial loading | |
--scatter-sources | false | Scatter multiple sources for I/O optimization | |
--cdc-flush-interval | 30000 | The flush interval for Flink CDC | |
--cdc-sink-parallelism | 1 | The sink parallelism for Flink CDC | |
--max-read-errors | 1 | The maximum number of read error lines before exiting | |
--max-read-lines | -1L | The maximum number of read lines, task stops when reached | |
--test-mode | false | Whether the loader works in test mode | |
--use-prefilter | false | Whether to filter vertex in advance | |
--short-id | Map a customized vertex ID to a shorter generated ID, written as label:field:type, where type is one of boolean, byte, int, long, float, double, text, blob, date and uuid; repeat the option to cover several labels | ||
--vertex-edge-limit | -1L | The maximum number of vertex’s edges | |
--sink-type | true | spark-loader only: true writes through the HugeGraph server API, false generates HFiles and bulk-loads them into HBase | |
--vertex-partitions | 64 | The number of partitions of the HBase vertex table, used with --sink-type false | |
--edge-partitions | 64 | The number of partitions of the HBase edge table, used with --sink-type false | |
--vertex-table-name | HBase vertex table name, used with --sink-type false | ||
--edge-table-name | HBase edge table name, used with --sink-type false | ||
--hbase-zk-quorum | HBase ZooKeeper quorum, used with --sink-type false | ||
--hbase-zk-port | HBase ZooKeeper port, used with --sink-type false | ||
--hbase-zk-parent | HBase ZooKeeper parent, used with --sink-type false | ||
--restore | false | Set graph mode to RESTORING | |
--backend | hstore | The backend store type when creating graph if not exists | |
--serializer | binary | The serializer type when creating graph if not exists | |
--scheduler-type | distributed | The task scheduler type when creating graph if not exists | |
--batch-failure-fallback | true | Whether to fallback to single insert when batch insert fails |
The mapping file option --file (-f) is required; other options use their defaults. A valid minimal invocation is:
The launcher also accepts JCommander’s native @file syntax. Put each option and value on separate lines in loader.args:
This is equivalent to the minimal invocation above. Relative path values resolve from the Loader process working directory.
If the argument file contains credentials, restrict it to mode 0600 with chmod 0600 loader.args.
The @file form keeps credential values out of process arguments.
Loader must be able to create and write the mapping-prefix directory used for progress output.
Copy a mapping mounted from a read-only Kubernetes ConfigMap to a writable volume before running Loader.
3.4.2 Breakpoint Continuation Mode
Usually, the Loader task takes a long time to execute. If the import interrupt process exits for some reason, and next time you want to continue the import from the interrupted point, this is the scenario of using breakpoint continuation.
Set --incremental-mode to true to resume from a progress file. Loader records progress when it closes normally after a successful import
or a normal stop; an unexpected failure may prevent this write.
The progress file is in ${struct} and named load-progress_${timestamp}, where ${struct} is the mapping-file prefix and ${timestamp} is the
import start time, formatted as yyyyMMdd-HHmmss. For example, an import started at 2019-10-10 12:30:30 with mapping file struct-example.json
writes struct-example/load-progress_20191010-123030. When the directory holds several progress files, the resumed import reads the last one in name
order, which is the most recent one.
Note: A progress file is written after a successful import or a normal stop (including an error limit), regardless of
--incremental-modeor--print-progress. An import aborted by an unexpected failure may not write one.
If the data file formats are all legal and the import task is stopped by the user (CTRL + C or kill, kill -9 is not supported), that is to say, if there is no error record, the next import only needs to be set to Continue for the breakpoint.
But if the limit of –max-read-errors, –max-parse-errors or –max-insert-errors is reached because too much data is invalid or network abnormality is reached, Loader will record these original rows that failed into the failure file, after the user modifies the data lines in the failure file, set –failure-mode to true to import these “failure files” as input sources (does not affect the normal file import), Of course, if there is still a problem with the modified data line, it will be logged again to the failure file (don’t worry about duplicate lines, they are dropped when the file is closed). Failure mode lifts the three error limits above, so the whole failure file is scanned.
Each input source, that is each item of structs in the mapping file, gets its own failure file. The file is named after the id of that input source with the suffix .error and is stored in the ${struct}/failure-data directory.
Every failed line is written as a pair of lines: a tip line starting with #### READ ERROR:, #### PARSE ERROR: or #### INSERT ERROR:, followed by the original data line. When the input source has a header, that header is written as JSON to a sibling ${id}.header file, so the failure file can be read back with the right columns.
For example, if the mapping file has an input source with id 1 holding a vertex mapping person and an input source with id 3 holding an edge mapping knows, each of which has some error lines, you will see the following files in the ${struct}/failure-data directory when the Loader exits:
- 1.error: the failed lines of input source 1, each preceded by its tip line
- 1.header: the header of input source 1, written only when that input source has a header
- 3.error: the failed lines of input source 3
- 3.header: the header of input source 3
A
.errorfile that turns out to be empty is deleted when the Loader exits, so only the input sources that really had failed lines leave a file behind. In incremental mode new failures are appended to the existing file, otherwise the file is rewritten from scratch.
3.4.3 logs directory file description
The log and error data during program execution will be written into the hugegraph-loader.log file.
3.4.4 Execute command
Run bin/hugegraph-loader.sh and pass in parameters
The script runs the JVM under JAVA_HOME when that variable is set, and java from the PATH otherwise. It passes the contents of the JVM_OPTS environment variable, then -Xmx10g and the class path built from lib/, to that JVM, so JVM_OPTS is the place to add JVM flags. Logging is configured by conf/log4j2.xml.
3.4.5 Minimal Local-File Import
First start HugeGraph Server and ensure the current user can access hugegraph in graphspace DEFAULT, create schema, and write data. If authentication is enabled, add the appropriate --username, --password, or --token. This example requires only local files, without Kafka, HDFS, or JDBC.
From the extracted Loader installation directory, create data, schema, and a version 2.0 mapping file:
The CSV has no header row; input.header in the mapping supplies column names. input.path is relative to the Loader process working directory, so keep running from the installation directory. If Server runs in another container, set --host to a Server address reachable by Loader:
Expected result: two vertices and zero edges imported. This example uses dedicated schema names to avoid conflicts with a preloaded person label. In Hubble, run g.V().hasLabel('docs_smoke_person').values('docs_name') to confirm docs-smoke-alice and docs-smoke-bob.
4 Complete example
Given below is an example in the example directory of the hugegraph-loader package. (GitHub address)
4.1 Prepare data
Vertex file: example/file/vertex_person.csv
Vertex file: example/file/vertex_software.txt
Edge file: example/file/edge_knows.json
Edge file: example/file/edge_created.json
4.2 Write schema
person uses name as its primary key. Tom’s age and city are removed by null_values, so both properties must be nullable.
software uses custom numeric IDs: mapping id supplies the vertex ID and created.target_id supplies the edge’s target ID.
Run this example in an empty graph without these schema labels; ifNotExist() does not replace incompatible existing definitions.
4.3 Write the input source mapping file example/file/struct.json
4.4 Command to import
After the import is complete, statistics similar to the following will appear:
4.5 Use Docker to load data
4.5.1 Use docker exec to load data directly
4.5.1.1 Prepare data
If you just want to try out the loader, you can import the built-in example dataset without needing to prepare additional data yourself.
If using custom data, before importing data with the loader, we need to copy the data into the container.
First, following the steps in 4.1–4.3, we can prepare the data and then use docker cp to copy the prepared data into the loader container.
Suppose we’ve prepared the corresponding dataset following the above steps, stored in the hugegraph-dataset folder with the following file structure:
Copy the files into the container.
4.5.1.2 Data loading
Taking the built-in example dataset as an example, we can use the following command to load the data.
If you need to import your custom dataset, you need to modify the paths for -f (data script) and -s (schema) configurations.
You can refer to 3.4.1-Parameter description for the rest of the parameters.
If loading a custom dataset, following the previous example, you would use:
Also update every input.path in the custom struct.json to its actual container path, such as /loader/dataset/vertex_person.csv.
Changing only -f and -s does not change where Loader looks for data files.
If
loaderandserverare in the same Docker network, you can specify-h {server_container_name}; otherwise, you need to specify the IP of theserverhost (in our example,server_container_nameisserver).
Then we can see the result:
You can also use curl or hubble to observe the import result. Here’s an example using curl:
These requests use the GraphSpace-aware Server API. For an older Server, omit /graphspaces/DEFAULT from the path.
If you want to check the import result of edges, you can use curl --compressed "http://localhost:8080/graphspaces/DEFAULT/graphs/hugegraph/graph/edges".
4.5.2 Enter the docker container to load data
Besides using docker exec directly for data import, we can also enter the container for data loading. The basic process is similar to 4.5.1.
Enter the container by docker exec -it loader bash and execute the command:
The results of the execution will be similar to those shown in 4.5.1.
4.6 Import data by spark-loader
The current source uses Spark 3.2.2 and Scala 2.12. Other combinations need independent verification.
The parameters of spark-loader are divided into two parts. Note: Because the abbreviations of
these two-parameter names have overlapping parts, please use the full name of the parameter.
And there is no need to guarantee the order between the two parameters.
- hugegraph parameters (Reference: hugegraph-loader parameter description )
- Spark task submission parameters (Reference: Submitting Applications)
Example:
bin/hugegraph-spark-loader.sh submits org.apache.hugegraph.loader.spark.HugeGraphSparkLoader through ${SPARK_HOME}/bin/spark-submit, so SPARK_HOME has to point at a Spark installation. Every jar under lib/ is put on the class path. The Spark application name defaults to hugegraph-spark-loader and can be changed through the APP_NAME environment variable.
bin/get-params.sh splits the command line: only the options below are handed to the loader, every other argument is passed to spark-submit unchanged. The splitter matches long option names only, so short forms such as -f and -g are not recognised.
--file is treated separately: with --deploy-mode cluster the mapping file is shipped to the executors through --files and the loader receives only its base name, otherwise the path is passed through as written.
In this mode the loader reads FILE, HDFS and JDBC input sources; a KAFKA or GRAPH input source is rejected.
By default (--sink-type true) each Spark partition opens a HugeClient and writes vertices and edges through the HugeGraph server API. With --sink-type false the loader generates HFiles and bulk-loads them into HBase instead, taking the table names and ZooKeeper settings from --vertex-table-name, --edge-table-name, --hbase-zk-quorum, --hbase-zk-port, --hbase-zk-parent, --vertex-partitions and --edge-partitions.
4.7 Import data by flink-cdc-loader
The current source uses Flink 1.13.5 with flink-connector-mysql-cdc 2.2.1 and Scala 2.12. Other combinations need independent verification.
bin/hugegraph-flinkcdc-loader.sh submits org.apache.hugegraph.loader.flink.HugeGraphFlinkCDCLoader through ${FLINK_HOME}/bin/flink run, so FLINK_HOME has to be set. The job captures MySQL change events with Flink CDC and applies them to the graph, which keeps the graph in step with the source tables.
The mapping file uses the same format as for the command-line loader, but every input source has to be a JDBC input source over MySQL: the loader takes url, database, table, username and password from it and parses the host and port out of url. Vertex and edge mappings work as usual. --cdc-flush-interval and --cdc-sink-parallelism in 3.4.1 apply to this mode only.
The command line is split by bin/get-params.sh in the same way as for spark-loader, with the arguments that are not loader options going to flink run.
Example:
2.5 - Graph export and migration
Choose an export or migration tool when you need to back up, export, or move data between graphs. Tools is suited to standalone operations and backups; SeaTunnel Source connects graph reads to an expandable data pipeline.
2.5.1 - Export and Migrate Graph Data with SeaTunnel Source
If you need to copy data from one HugeGraph graph to another, use graph2graph: HugeGraph Source reads vertices and edges from the source graph (graph A), and HugeGraph Sink writes them to the target graph (graph B), with an optional Transform in between. The data path is graph A → HugeGraph Source → (optional Transform) → HugeGraph Sink → graph B. If you need to export graph data to a file, JDBC, Kafka, or another system, use graph2any, where a downstream Sink receives the records read by HugeGraph Source. This page covers both job types.
Version requirement: This guide targets SeaTunnel 3.0+
SeaTunnel 3.0+ provides HugeGraph Source, with schema auto-discovery and multi-label reads. See the official Source documentation for parallel-scan backend requirements and configuration limits.
Before starting, complete the shared environment and configuration steps on the import page. They cover JDK, HOCON, plugin installation, and the sample graph model.
1 Migrate a HugeGraph graph (graph2graph)
The following example migrates person vertices and knows edges from a source graph. Use a separate target graph. This section uses CUSTOMIZE_STRING to preserve vertex IDs. Do not reuse the person label created earlier with PRIMARY_KEY.
These two jobs migrate only the selected labels and properties. They do not copy every source schema setting, such as indexes and TTLs. Pause writes to the source graph during the migration so both jobs read a consistent point in time. Afterward, compare vertex and edge counts and sample properties.
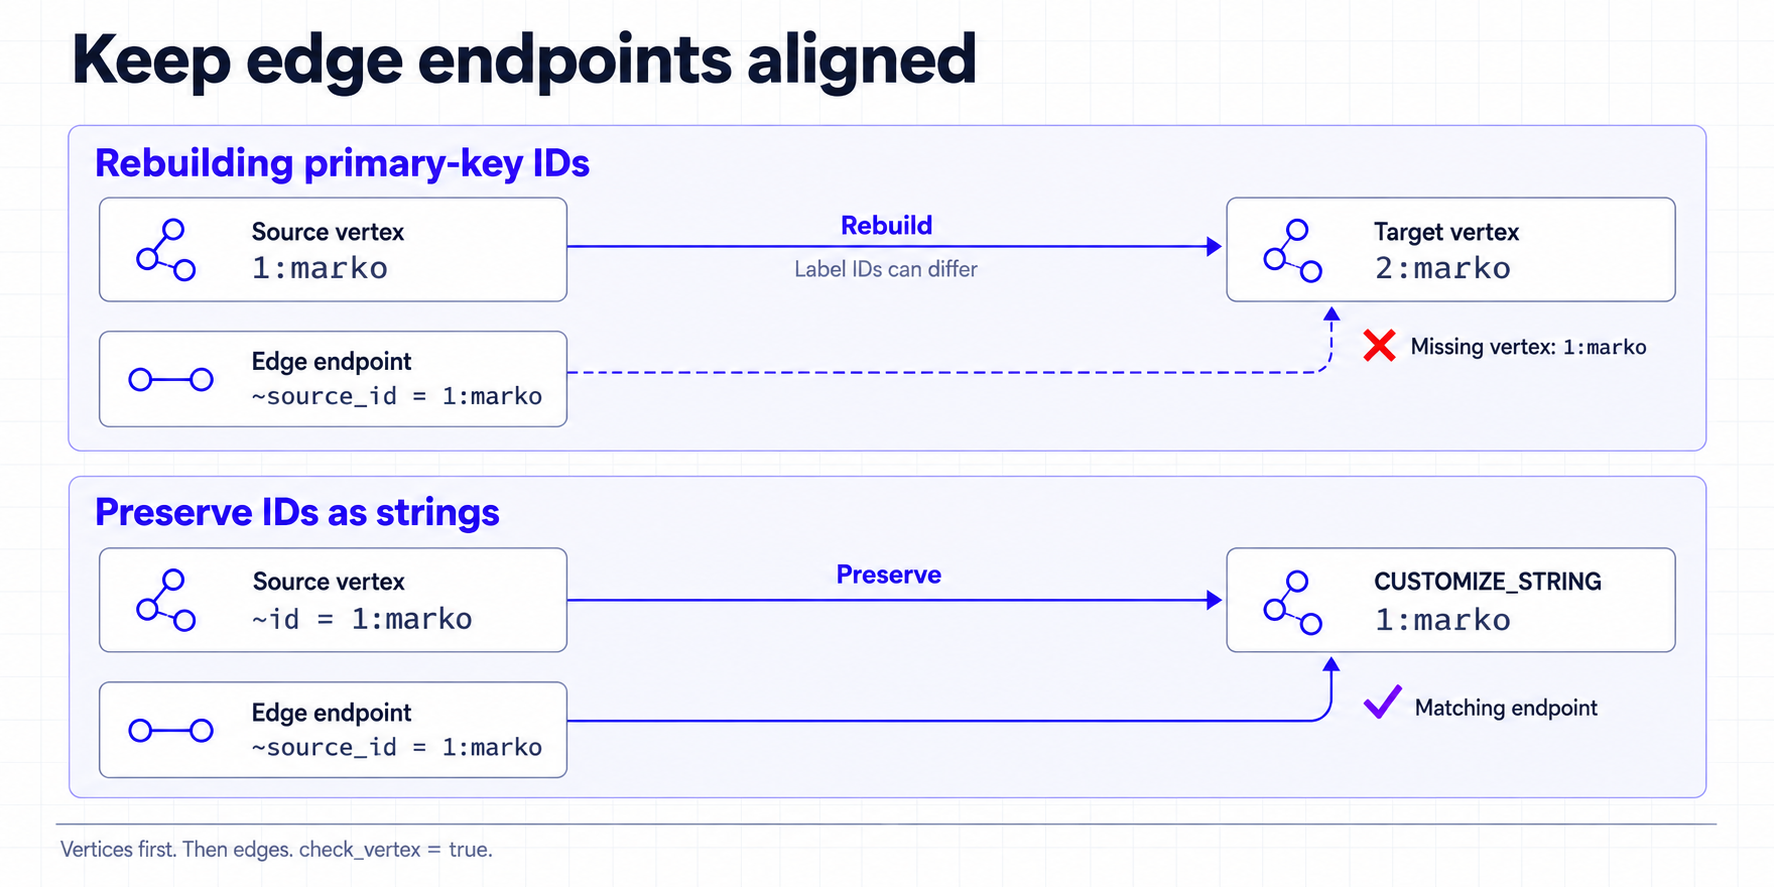
1.1 Migrate vertices first
Source adds a ~id column for the original ID, and Sink stores it as a string. Do not declare ~id in schema.fields; manually declaring this reserved column is rejected.
1.2 Migrate edges second
After the vertex job succeeds, use the ~source_id and ~target_id columns added by Source to locate endpoints. Because the previous job preserved the original IDs, these columns can refer directly to vertices in the target graph.
This example checks endpoints and makes write errors fail the job. The default check_vertex = false does not guarantee a consistent result: a missing endpoint can create a dangling edge, so a successful job is not a substitute for checking the migrated graph.
Why preserve IDs? A HugeGraph
PRIMARY_KEYID contains the internal ID of the vertex label, and that internal ID can differ between graphs. For example, a source vertex can be1:marko, while regenerating the primary key in the target graph can produce2:marko. Reusing the source edge endpoints after regenerating vertex IDs can connect edges to the wrong vertices. This example stores the original ID as a string, which changes the target graph’s ID strategy
When Source reads every label, omit label to read all labels of label_type (default VERTEX). It produces one output table per label. Bind each Sink mapping to its table with sourceTable, for example sourceTable = "default.person"; use the full table name shown in the Writer log for the exact value. Do not reuse the single-label configuration from this section. See the HugeGraph Source documentation for other limitations.
2 Export to another system (graph2any)
graph2any uses HugeGraph Source[1] to read vertices or edges and sends them to a downstream Sink. The example below exports person vertices to local JSON files; to export to JDBC, Kafka, or another system, replace LocalFile[2] and its options.
Save this as config/graph2file-person.conf and run it from the SeaTunnel installation directory:
To export edges, change the Source label to an edge label, set label_type = "EDGE", and declare the edge properties in schema.fields. Source also outputs the reserved columns ~source_id, ~source_label, ~target_id, and ~target_label; write them to the file or pass them to downstream transforms as needed.
This page covers row reads and writes. It does not copy source indexes, TTLs, or other schema settings. For the complete Source options and shared environment guidance, return to the SeaTunnel graph import guide[3].
3 References
Connectors
[1] HugeGraph Source
[2] LocalFile Sink
Related guide
2.6 - Tools Quick Start
1 HugeGraph-Tools Overview
HugeGraph-Tools is an automated deployment, management and backup/restore component of HugeGraph.
Testing Guide: For running HugeGraph-Tools tests locally, please refer to HugeGraph Toolchain Local Testing Guide
2 Get HugeGraph-Tools
HugeGraph-Tools is included in the Toolchain distribution. You can download the distribution or build it from source.
- Download the compiled tarball
- Clone source code then compile and install
2.1 Download the compiled archive
Download the latest version of the HugeGraph-Toolchain package:
2.2 Clone source code to compile and install
Please ensure that the wget command is installed before compiling the source code
Download the latest version of the HugeGraph-Tools source package:
Compile and generate tar package:
The package is generated as hugegraph-tools/target/apache-hugegraph-tools-${version}.tar.gz, and the unpacked directory hugegraph-tools/apache-hugegraph-tools-${version} (containing bin/ and lib/) is created next to it.
3 How to use
3.1 Function overview
After decompression, enter the apache-hugegraph-tools-${version} directory, you can use bin/hugegraph or bin/hugegraph help to view the usage information, and bin/hugegraph help <sub-command> to view the usage of a single sub-command. mainly divided:
- Graph management type, graph-mode-set, graph-mode-get, graph-list, graph-get, graph-clear, graph-create, graph-clone and graph-drop
- Asynchronous task management type, task-list, task-get, task-delete, task-cancel and task-clear
- Gremlin type, gremlin-execute and gremlin-schedule
- Backup/Restore type, backup, restore, migrate, schedule-backup and dump
- Authentication data backup/restore type, auth-backup and auth-restore
- Install deployment type, deploy, clear, start-all and stop-all
3.2 [options]-Global Variable
options is a global variable of HugeGraph-Tools, which can be configured in hugegraph-tools/bin/hugegraph, including:
- –graph,HugeGraph-Tools The name of the graph to operate on, the default value is hugegraph
- –url,The service address of HugeGraph-Server, the default is http://127.0.0.1:8080
- –user,When HugeGraph-Server opens authentication, pass username
- –password,When HugeGraph-Server opens authentication, pass the user’s password
- –timeout,Timeout when connecting to HugeGraph-Server, the default is 30s
- –trust-store-file,The path of the certificate file, when –url uses https, the truststore file used by HugeGraph-Client, the default is empty, which means using the built-in truststore file conf/hugegraph.truststore of hugegraph-tools
- –trust-store-password,The password of the certificate file, when –url uses https, the password of the truststore used by HugeGraph-Client, the default is empty, representing the password of the built-in truststore file of hugegraph-tools
- –throw-mode, whether HugeGraph-Tools throws the exception instead of printing the error message and exiting, the default is false (mainly used by tests)
The protocol is taken from the scheme of –url: use
https://...to connect over https. –trust-store-file and –trust-store-password can only be set when –url uses https, and both –user and –password must be given together or omitted together.
The above global variables can also be set through environment variables. One way is to use export on the command line to set temporary environment variables, which are valid until the command line is closed
| Global Variable | Environment Variable | Example |
|---|---|---|
| –url | HUGEGRAPH_URL | export HUGEGRAPH_URL=http://127.0.0.1:8080 |
| –graph | HUGEGRAPH_GRAPH | export HUGEGRAPH_GRAPH=hugegraph |
| –user | HUGEGRAPH_USERNAME | export HUGEGRAPH_USERNAME=admin |
| –password | HUGEGRAPH_PASSWORD | export HUGEGRAPH_PASSWORD=test |
| –timeout | HUGEGRAPH_TIMEOUT | export HUGEGRAPH_TIMEOUT=30 |
| –trust-store-file | HUGEGRAPH_TRUST_STORE_FILE | export HUGEGRAPH_TRUST_STORE_FILE=/tmp/trust-store |
| –trust-store-password | HUGEGRAPH_TRUST_STORE_PASSWORD | export HUGEGRAPH_TRUST_STORE_PASSWORD=xxxx |
Both forms below count vertices in the same graph; choose either form. The example uses a local Server without authentication. For an authenticated Server, also provide the username and password described above.
Another way is to set the environment variable in the bin/hugegraph script:
bin/hugegraph also reads JAVA_HOME (a warning is printed when it is not set, and it is needed for https) and JAVA_OPTIONS (JVM options; when it is empty the script uses -Xms512m plus an -Xmx computed from the free memory of the machine).
3.3 Graph Management Type, graph-mode-set, graph-mode-get, graph-list, graph-get, graph-clear, graph-create, graph-clone and graph-drop
- graph-mode-set, set graph restore mode
- –graph-mode or -m, required, specifies the mode to be set, legal values include [NONE, RESTORING, MERGING, LOADING]
- graph-mode-get, get graph restore mode
- graph-list, list all graphs in a HugeGraph-Server
- graph-get, get a graph and its storage backend type
- graph-clear, clear all schema and data of a graph
- –confirm-message or -c, required, delete confirmation information, manual input is required, double confirmation to prevent accidental deletion, “I’m sure to delete all data”, including double quotes
- graph-create, create a new graph with configuration file
- –name or -n, optional, the name of the new graph, default is g
- –file or -f, the path to the graph configuration file, the content of the file is sent to HugeGraph-Server as the config of the new graph
- graph-clone, clone an existing graph
- –name or -n, optional, the name of the cloned graph, default is g
- –clone-graph-name, optional, the name of the source graph to clone from, default is hugegraph
- graph-drop, drop a graph (different from graph-clear, this completely removes the graph)
- –confirm-message or -c, required, confirmation message “I’m sure to drop the graph”, including double quotes
graph-create, graph-clone, graph-clear and graph-drop raise –timeout to at least 300 seconds.
When you need to restore the backup graph to a new graph, you need to set the graph mode to RESTORING mode; when you need to merge the backup graph into an existing graph, you need to first set the graph mode to MERGING model.
3.4 Asynchronous task management Type,task-list、task-get、task-delete、task-cancel and task-clear
- task-list,List the asynchronous tasks in a graph, which can be filtered according to the status of the tasks
- –status,Optional, specify the status of the task to view, i.e. filter tasks by status, legal values include [UNKNOWN, NEW, QUEUED, RESTORING, RUNNING, SUCCESS, CANCELLED, FAILED] (case insensitive)
- –limit,Optional, specify the number of tasks to be obtained, the default is -1, which means to obtain all eligible tasks, a value passed explicitly must be positive
- task-get,Get detailed information about an asynchronous task
- –task-id,Required, specifies the ID of the asynchronous task
- task-delete,Delete information about an asynchronous task
- –task-id,Required, specifies the ID of the asynchronous task
- task-cancel,Cancel the execution of an asynchronous task
- –task-id,Required, the ID of the asynchronous task to cancel
- task-clear,Clean up completed asynchronous tasks
- –force,Optional. When set, it means to clean up all asynchronous tasks. Unfinished ones are canceled first, and then all asynchronous tasks are cleared. By default, only completed asynchronous tasks are cleaned up
3.5 Gremlin Type,gremlin-execute and gremlin-schedule
⚠️ SEC Reminder: The execution of Gremlin depends on the actual logic of the statements, which may involve scenarios such as large-scale data modification and high-risk system calls with potential implicit hazards. Please use this tool only in secure and trusted network environments. It is imperative to configure and secure HugeGraph-Server with the Authentication System (Auth) and an IP Whitelist to restrict execution requests on the server side. Never hand over the tool or expose the execution entry to unauthorized personnel.
- gremlin-execute, send Gremlin statements to HugeGraph-Server to execute query or modification operations, execute synchronously, and return results after completion
- –file or -f, specify the script file to execute, UTF-8 encoding, mutually exclusive with –script
- –script or -s, specifies the script string to execute, mutually exclusive with –file
- –aliases or -a, Gremlin alias settings, the format is: key1=value1,key2=value2,…
- –bindings or -b, Gremlin binding settings, the format is: key1=value1,key2=value2,…
- –language or -l, the language of the Gremlin script, the default is gremlin-groovy
–file and –script are mutually exclusive, one of them must be set
- gremlin-schedule, send Gremlin statements to HugeGraph-Server to perform query or modification operations, asynchronous execution, and return the asynchronous task id immediately after the task is submitted
- –file or -f, specify the script file to execute, UTF-8 encoding, mutually exclusive with –script
- –script or -s, specifies the script string to execute, mutually exclusive with –file
- –bindings or -b, Gremlin binding settings, the format is: key1=value1,key2=value2,…
- –language or -l, the language of the Gremlin script, the default is gremlin-groovy
–file and –script are mutually exclusive, one of them must be set
3.6 Backup/Restore Type
- backup, back up the schema or data in a certain graph out of the HugeGraph system, and store it on the local disk or HDFS in the form of JSON
- –format, the backup format, optional values include [json, text], the default is json
- –all-properties, whether to back up all properties of vertices/edges, only valid when –format is text, default false
- –label, the vertex label or edge label to be backed up, only applied when –format is text; when it is set, –huge-types must name exactly one type and that type must be vertex or edge, otherwise the command fails
- –properties, properties of vertices/edges to be backed up, separated by commas, only valid when –format is text, valid only when backing up vertices or edges
- –compress, whether to compress data during backup, the default is true
- –directory or -d, the directory to store schema or data, the default is ‘./{graphName}’ for local directory, and ‘{fs.default.name}/{graphName}’ for HDFS
- –huge-types or -t, the data types to be backed up, separated by commas, the optional value is ‘all’ or a combination of one or more [vertex, edge, vertex_label, edge_label, property_key, index_label], ‘all’ Represents all 6 types, namely vertices, edges and all schemas, ‘schema’ represents the 4 schema types [vertex_label, edge_label, property_key, index_label]
- –log or -l, specify the log directory, the default is ./logs
- –retry, specify the number of failed retries, the default is 3
- –thread-num or -T, the number of threads to use, default is Math.min(10, Math.max(4, CPUs / 2))
- –split-size or -s, specifies the size of splitting vertices or edges when backing up, the default is 1048576, and it must be at least 1048576 (1M)
- -D, use the mode of -Dkey=value to specify dynamic parameters, and specify HDFS configuration items when backing up data to HDFS, for example: -Dfs.default.name=hdfs://localhost:9000
If –timeout is less than 120 seconds, backup (and the backup step of migrate) uses 120 seconds
- restore, restore schema or data stored in JSON format to a new graph (RESTORING mode) or merge into an existing graph (MERGING mode)
- –directory or -d, the directory to store schema or data, the default is ‘./{graphName}’ for local directory, and ‘{fs.default.name}/{graphName}’ for HDFS
- –clean, whether to delete the directory specified by –directory after the recovery map is completed, the default is false
- –huge-types or -t, data types to restore, separated by commas, optional value is ‘all’ or a combination of one or more [vertex, edge, vertex_label, edge_label, property_key, index_label], ‘all’ Represents all 6 types, namely vertices, edges and all schemas, ‘schema’ represents the 4 schema types [vertex_label, edge_label, property_key, index_label]
- –log or -l, specify the log directory, the default is ./logs
- –retry, specify the number of failed retries, the default is 3
- –thread-num or -T, the number of threads to use, default is Math.min(10, Math.max(4, CPUs / 2))
- -D, use the mode of -Dkey=value to specify dynamic parameters, which are used to specify HDFS configuration items when restoring graphs from HDFS, for example: -Dfs.default.name=hdfs://localhost:9000
restore command can be used only if –format is executed as backup for json restore requires the graph to be in RESTORING or MERGING mode (set it with graph-mode-set first), otherwise the command fails
- migrate, migrate the currently connected graph to another HugeGraphServer
- –target-graph, the name of the target graph, the default is hugegraph
- –target-url, the HugeGraphServer where the target graph is located, the default is http://127.0.0.1:8081
- –target-user, the username used to access the target graph
- –target-password, the password to access the target map
- –target-timeout, the timeout for accessing the target map
- –target-trust-store-file, access the truststore file used by the target graph
- –target-trust-store-password, the password to access the truststore used by the target map
- –directory or -d, during the migration process, the directory where the schema or data of the source graph is stored. For a local directory, the default is ‘./{graphName}’; for HDFS, the default is ‘{fs.default.name}/ {graphName}’
- –huge-types or -t, the data types to be migrated, separated by commas, the optional value is ‘all’ or a combination of one or more [vertex, edge, vertex_label, edge_label, property_key, index_label], ‘all’ Represents all 6 types, namely vertices, edges and all schemas, ‘schema’ represents the 4 schema types [vertex_label, edge_label, property_key, index_label]
- –log or -l, specify the log directory, the default is ./logs
- –retry, specify the number of failed retries, the default is 3
- –thread-num or -T, the number of threads to use, default is Math.min(10, Math.max(4, CPUs / 2))
- –split-size or -s, specify the size of the vertex or edge block when backing up the source graph during the migration process, the default is 1048576, and it must be at least 1048576 (1M)
- -D, use the mode of -Dkey=value to specify dynamic parameters, which are used to specify HDFS configuration items when the data needs to be backed up to HDFS during the migration process, for example: -Dfs.default.name=hdfs://localhost: 9000
- –graph-mode or -m, the mode to set the target graph when restoring the source graph to the target graph, legal values include [RESTORING, MERGING], the default is RESTORING. The target graph is switched to this mode during the migration and switched back to its original mode afterwards
- –keep-local-data, whether to keep the backup of the source map generated in the process of migrating the map, the default is false, that is, the backup of the source map is not kept after the default migration map ends
- schedule-backup, periodically back up the graph and keep a certain number of the latest backups (currently only supports local file systems)
- –directory or -d, required, specifies the directory of the backup data
- –backup-num, optional, specifies the number of latest backups to save, defaults to 3
- –interval, an optional item, specifies the backup cycle, the format is the same as the Linux crontab format, the default is “0 0 * * *” (every day at 00:00)
schedule-backup adds a crontab entry that runs
backup -t allinto{directory}/{graph}/hugegraph-backup-{yyMMddHHmm}/and keeps only the latest –backup-num backups. A relative –directory is resolved against the hugegraph-tools home directory, and{directory}/{graph}must not exist yet - dump, export all vertices and edges in the graph, using the
vertex vertex-edge1 vertex-edge2...JSON format by default. To customize the format, implement aFormattersubclass such asCustomFormatterunderhugegraph-tools/src/main/java/org/apache/hugegraph/formatter, then select it when running the command:bin/hugegraph dump -f CustomFormatter- –formatter or -f, specify the formatter to use, the default is JsonFormatter
- –directory or -d, the directory where schema or data is stored, the default is ‘./{graphName}’ for local directory, and ‘{fs.default.name}/{graphName}’ for HDFS
- –log or -l, specify the log directory, the default is ./logs
- –retry, specify the number of failed retries, the default is 3
- –thread-num or -T, the number of threads to use, default is Math.min(10, Math.max(4, CPUs / 2))
- –split-size or -s, specifies the size of splitting vertices or edges when backing up, the default is 1048576, and it must be at least 1048576 (1M)
- -D, use the mode of -Dkey=value to specify dynamic parameters, and specify HDFS configuration items when backing up data to HDFS, for example: -Dfs.default.name=hdfs://localhost:9000
3.7 Authentication data backup/restore type
- auth-backup, backup authentication data to a specified directory
- –types or -t, types of authentication data to back up, separated by commas, optional value is ‘all’ or a combination of one or more [user, group, target, belong, access], ‘all’ represents all 5 types; ‘belong’ requires ‘user’ and ‘group’ to be included, ‘access’ requires ‘group’ and ’target’ to be included
- –directory, directory to store backup data, the default is ‘./auth-backup-restore’ for local directory, and ‘{fs.default.name}/auth-backup-restore’ for HDFS (this option has no -d short form)
- –retry, specify the number of failed retries, the default is 3
- -D, use the mode of -Dkey=value to specify dynamic parameters, and specify HDFS configuration items when backing up data to HDFS, for example: -Dfs.default.name=hdfs://localhost:9000
- auth-restore, restore authentication data from a specified directory
- –types or -t, types of authentication data to restore, separated by commas, optional value is ‘all’ or a combination of one or more [user, group, target, belong, access], ‘all’ represents all 5 types; ‘belong’ requires ‘user’ and ‘group’ to be included, ‘access’ requires ‘group’ and ’target’ to be included
- –directory, directory where backup data is stored, the default is ‘./auth-backup-restore’ for local directory, and ‘{fs.default.name}/auth-backup-restore’ for HDFS (this option has no -d short form)
- –retry, specify the number of failed retries, the default is 3
- –strategy, conflict handling strategy, optional values are [stop, ignore], default is stop. stop means stop restoring when encountering conflicts, ignore means ignore conflicts and continue restoring
- –init-password, initial password to set when restoring users, required when –types includes user
- -D, use the mode of -Dkey=value to specify dynamic parameters, which are used to specify HDFS configuration items when restoring data from HDFS, for example: -Dfs.default.name=hdfs://localhost:9000
3.8 Install the deployment type
- deploy, one-click download, install and start HugeGraph-Server and HugeGraph-Studio
- -v, required, specifies the HugeGraph-Server and HugeGraph-Studio version to install, must be one of the versions listed in bin/version-map.yaml (0.6, 0.7, 0.8, 0.9, 0.10), which maps it to the matching server and studio release versions
- -p, required, specifies the installed HugeGraph-Server and HugeGraph-Studio directories
- -u, optional, specifies the link to download the HugeGraph-Server and HugeGraph-Studio compressed packages
- clear, clean up HugeGraph-Server and HugeGraph-Studio directories and tarballs (refuses to run while a matching server or studio process is still alive, and prompts before each removal)
- -p, required, specifies the directory of HugeGraph-Server and HugeGraph-Studio to be cleaned
- start-all, start HugeGraph-Server and HugeGraph-Studio with one click
- -v, required, specifies the installed HugeGraph-Server and HugeGraph-Studio version to start, same values as deploy
- -p, required, specifies the directory where HugeGraph-Server and HugeGraph-Studio are installed
- stop-all, close HugeGraph-Server and HugeGraph-Studio with one click
deploy, start-all, clear and stop-all are handed by
bin/hugegraphstraight to the shell scriptsbin/deploy.sh,bin/start-all.sh,bin/clear.shandbin/stop-all.sh, so the global options and environment variables in 3.2 do not apply to them.
There is an optional parameter -u in the deploy command. When provided, the specified download address will be used instead of the default download address to download the tar package, and the address will be written into the
~/hugegraph-download-url-prefixfile; if no address is specified later When -u and~/hugegraph-download-url-prefixare not specified, the tar package will be downloaded from the address specified by~/hugegraph-download-url-prefix; if there is neither -u nor~/hugegraph-download-url-prefix, it will be downloaded from the default download addresshttps://github.com/hugegraph
3.9 Specific command parameters
The specific parameters of each subcommand are as follows:
3.10 Specific command example
1. gremlin statement
2. Show task status
3. Set and show graph mode
4. Cleanup Graph
5. Backup Graph
6. Periodic Backup Graph
7. Recovery Graph
8. Graph Migration
2.7 - HugeGraph-Spark-Connector Quick Start
1 HugeGraph-Spark-Connector Overview
HugeGraph-Spark-Connector uses the Spark DataFrame API to write bulk data to HugeGraph. The current implementation provides vertex and edge writers.
Reading from HugeGraph is not implemented yet: the table only implements SupportsWrite, so spark.read.format(...) is not supported. The connector supports the CUSTOMIZE and PRIMARY_KEY vertex id strategies; the AUTOMATIC strategy is rejected.
2 Environment Requirements
- Java 8+
- Maven 3.6+
- Spark 3.2.x (the module is built against Spark 3.2.2 with
providedscope, so your Spark runtime must supply the Spark jars) - Scala 2.12 (built with Scala 2.12.11)
3 Building
3.1 Build without executing tests
3.2 Build with default tests
Both commands produce a fat jar at hugegraph-spark-connector/target/hugegraph-spark-connector-${revision}-jar-with-dependencies.jar (Spark itself is not bundled). Pass it to spark-submit --jars when you do not manage the dependency through Maven.
4 Usage
Add the dependency to pom.xml, replacing ${revision} with the release version you use:
The format string must be the full class name org.apache.hugegraph.spark.connector.DataSource; the connector does not register a short name with Spark’s DataSourceRegister service loader. When HugeGraphServer has authentication enabled, add .option("username", ...) and .option("token", ...) to the examples below.
4.1 Schema Definition Example
If we have a graph, the schema is defined as follows:
4.2 Vertex Sink (Scala)
4.3 Edge Sink (Scala)
4.4 Vertex Sink with PRIMARY_KEY id strategy (Scala)
For a vertex label that uses primaryKeys(...), do not set the id option: the id is spliced from the primary key columns. Columns that are not part of the schema can be dropped with ignored-fields.
4.5 Edge Sink with mixed id strategies (Scala)
source-name and target-name follow the id strategy of their own vertex label. Below, person uses a customized string id (one column) while software uses a primary key (its name column):
Note on save modes: SaveMode.Overwrite and SaveMode.Append both insert the rows. The overwrite path does not delete existing data from the graph first.
5 Configuration Parameters
Option keys are matched case-insensitively and trimmed. data-type and label are always required; source-name and target-name are required when data-type is edge; all other options have defaults.
5.1 Client Configs
Client Configs are used to configure hugegraph-client.
| Parameter | Default Value | Description |
|---|---|---|
host | localhost | Address of HugeGraphServer. A bare host name or IP, or a full http:// / https:// prefix |
port | 8080 | Port of HugeGraphServer |
graph | hugegraph | Graph name |
protocol | http | Protocol for sending requests to the server, optional http or https |
username | null | Username of the current graph when HugeGraphServer enables permission authentication. When unset, the graph name is used as the username |
token | null | Token of the current graph when HugeGraphServer has enabled authorization authentication |
timeout | 60 | Timeout (seconds) for inserting results to return |
max-conn | CPUS * 4 | The maximum number of HTTP connections between HugeClient and HugeGraphServer |
max-conn-per-route | CPUS * 2 | The maximum number of HTTP connections for each route between HugeClient and HugeGraphServer |
trust-store-file | null | The client’s certificate file path when the request protocol is https. When unset under https, the connector reads conf/hugegraph.truststore under the directory given by the JVM system property connector.home.path, which must then be set |
trust-store-token | null | The client’s certificate password when the request protocol is https. When unset under https, hugegraph is used |
5.2 Graph Data Configs
Graph Data Configs describe how DataFrame columns map to vertices or edges.
| Parameter | Default Value | Description |
|---|---|---|
data-type | Required. Graph data type, must be vertex or edge | |
label | Required. Label to which the vertex/edge data to be imported belongs | |
id | Specify a column as the id column of the vertex. When the vertex id policy is CUSTOMIZE, it is required; when the id policy is PRIMARY_KEY, it must be empty. The AUTOMATIC id policy is not supported | |
source-name | Required when data-type is edge. Select certain columns of the input source as the id column of source vertex. When the id policy of the source vertex is CUSTOMIZE, a certain column must be specified as the id column of the vertex; when the id policy of the source vertex is PRIMARY_KEY, one or more columns must be specified for splicing the id of the generated vertex, that is, no matter which id strategy is used, this item is required. Multiple columns are separated by , (the delimiter option does not apply here) | |
target-name | Required when data-type is edge. Specify certain columns as the id columns of target vertex, similar to source-name | |
selected-fields | Select some columns to insert, other unselected ones are not inserted, cannot exist at the same time as ignored-fields | |
ignored-fields | Ignore some columns so that they do not participate in insertion, cannot exist at the same time as selected-fields | |
batch-size | 500 | The number of data items in each batch when importing data. Applied per Spark task: each partition writer flushes its buffer to the server once it holds this many vertices/edges, and again at commit for the remainder |
5.3 Common Configs
Common Configs contains some common configurations.
| Parameter | Default Value | Description |
|---|---|---|
delimiter | , | Separator of selected-fields and ignored-fields. source-name and target-name are always split on , |
6 Notes and Limitations
- Each Spark write task opens its own HugeClient, switches the graph to
LOADINGmode before writing and sets it back toNONEat commit or abort. - Vertex ids are limited to 128 bytes (UTF-8). This applies to customized string ids and to ids spliced from primary keys.
- The
AUTOMATICvertex id strategy is not supported; the write fails with anIllegalArgumentExceptionwhen the writer is created. - Properties with
SETorLISTcardinality are not supported yet; onlySINGLEcardinality values are converted. - Date properties: string values must use the format
yyyy-MM-dd HH:mm:ssand are parsed in theGMT+8time zone; numeric values are treated as epoch milliseconds. - Boolean properties given as strings accept
true,1,yes,yandfalse,0,no,n(case-insensitive). - Rows whose customized string id, or any primary key value, is an empty string are skipped. A null id or primary key value raises an error instead.
7 License
The same as HugeGraph, hugegraph-spark-connector is also licensed under Apache 2.0 License.
3 - HugeGraph-AI
hugegraph-ai provides Python clients for HugeGraph, graph machine learning tools, and LLM tools for knowledge graph construction and GraphRAG applications.
Apache License 2.0 · Ask DeepWiki
Modules
- hugegraph-llm: knowledge graph construction, GraphRAG, and natural-language graph queries.
- hugegraph-ml: reads graph data from HugeGraph and runs graph learning models.
- hugegraph-python-client: a Python SDK for managing schemas and graph data and running Gremlin queries.
- vermeer-python-client: a Python SDK for the Vermeer graph computing service.
The repository uses a uv workspace whose members are hugegraph-llm and hugegraph-python-client. hugegraph-ml and vermeer-python-client are editable path dependencies rather than workspace members. The current repository version is 1.7.0. The client source directory is named hugegraph-python-client, but its distribution name is hugegraph-python.
Requirements
- HugeGraph-AI root workspace: Python 3.10 or later; HugeGraph-LLM additionally requires a version below 3.12
- HugeGraph-ML: Python 3.10 or later
- PyPI
hugegraph-python1.5.0: Python 3.9 or later; current repository source uses Python 3.10 or later with the workspace - Vermeer Python client: current source requires Python 3.10 or later, although package metadata still says
>=3.9; see the client guide uv0.7 or later- HugeGraph Server 1.5.0 or later; the current workspace client rejects detectable older versions
Optional Dependency Groups
The root project declares one extra per module plus a few combined ones:
| Extra | Installs |
|---|---|
llm | hugegraph-llm |
ml | hugegraph-ml |
python-client | hugegraph-python (source directory hugegraph-python-client) |
vermeer | vermeer-python-client |
dev | pytest, pytest-cov, coverage, pylint, ruff, mypy, ty, pre-commit |
nk-llm | hugegraph-llm, hugegraph-python-client, and Nuitka for the compiled image |
all | all four module packages |
hugegraph-llm itself declares a vectordb extra that adds pymilvus and qdrant-client.
Deploy with Docker Compose
The repository includes a Compose file that starts both HugeGraph Server and the RAG service:
Default addresses:
- HugeGraph Server:
http://localhost:8080 - RAG service and Web UI:
http://localhost:8001
Start the RAG Service from Source
uv sync creates .venv at the repository root. Installing from the root resolves workspace members and path dependencies together. The repository does not track uv.lock; uv sync resolves the declarations and version constraints in pyproject.toml.
Install ML Dependencies
Example scripts are under hugegraph-ml/src/hugegraph_ml/examples/.
Next Steps
3.1 - HugeGraph-LLM
HugeGraph-LLM supports knowledge graph construction, GraphRAG, and natural-language graph queries. Its demo service hosts Gradio and FastAPI in one process. Source launches listen locally at 127.0.0.1:8001, accessible at http://localhost:8001; explicitly use --host 127.0.0.1 for local-only access. Dockerfile.llm overrides this to 0.0.0.0:8001; do not use loopback inside the container, or published ports will not reach the service.
Production requires HugeGraph-LLM login (ENABLE_LOGIN=True, replacing USER_TOKEN and ADMIN_TOKEN) and a source IP allowlist at the firewall or network entry point. Separately enable Server authentication and authorization, retain Server audit logs (normally audit-*.log), and grant GRAPH_USER only the permissions this service needs. AI service tokens authenticate the LLM UI and API, not HugeGraph Server.
Requirements
AI-generated project documentation: Ask DeepWiki
- Python 3.10 or 3.11 (
>=3.10,<3.12) uv0.7 or later- HugeGraph Server 1.5.0 or later; the current workspace client rejects detectable older versions
Deploy with Docker Compose
Prepare the environment files from the HugeGraph-AI repository root:
After startup, HugeGraph Server is available at http://localhost:8080, and the RAG service and Web UI are available at http://localhost:8001.
The Compose file mounts ${PROJECT_PATH}/hugegraph-llm/.env into the container at /home/work/hugegraph-llm/.env, so the file has to exist before the container starts. The resource directory hugegraph-llm/src/hugegraph_llm/resources can be mounted the same way; the mount is commented out by default.
The application reads GRAPH_URL; Compose-provided HUGEGRAPH_HOST and HUGEGRAPH_PORT do not override it. Set GRAPH_URL=server:8080 and matching Server credentials in the container’s .env.
Container Images
| Build recipe | Description |
|---|---|
docker/Dockerfile.llm | Source runtime image recipe; starts python -m hugegraph_llm.demo.rag_demo.app --host 0.0.0.0 --port 8001 |
docker/Dockerfile.nk | Nuitka binary image recipe using the nk-llm extra; starts ./app.dist/app.bin |
Compose references untagged hugegraph/rag, which resolves to latest. scripts/build_llm_image.sh builds docker/Dockerfile.llm locally as hugegraph/graphrag:1.7.0. These are different images: building locally does not replace Compose’s image. To run the build, change Compose’s image to hugegraph/graphrag:1.7.0. The script builds but does not push. Both Dockerfiles expose 8001, run as non-root user work, declare a resource-directory volume, and use curl -f http://localhost:8001/ as their health check.
Deploy on Kubernetes
docker/charts/hg-llm is a Helm chart for the RAG service. It deploys the hugegraph/graphrag image and, by default, publishes a NodePort service that maps node port 8039 and service port 8080 onto container port 8001. The release name is fixed to hg-llm-service. Ingress and horizontal pod autoscaling are present but disabled by default.
The chart deploys only the RAG service, not HugeGraph Server. Set GRAPH_URL in the mounted .env to a Server address reachable from the Pod, with matching credentials.
image.tag still defaults to v0.0.1. The build script produces local hugegraph/graphrag:1.7.0; before deployment, push the image to a registry reachable by the cluster or load it onto cluster nodes, then set matching tag and pull policy values.
The .env and prompt YAML mounts are commented out in values.yaml. Prompt YAML can use a ConfigMap, but .env may contain secrets and passwords: use a Secret and change the env-config volume from configMap to secret. Create them separately:
Uncomment the volumeMounts entries and enable the prompt ConfigMap volume/mount if needed. Helm renders these volume definitions directly from values.yaml.
Start from Source
Install dependencies through the workspace at the repository root:
To use a custom address and port:
Set HG_DEV_RELOAD=1 to start uvicorn with auto-reload during development.
The service stores model, HugeGraph, and login settings in hugegraph-llm/.env. Prompts are stored separately in hugegraph-llm/src/hugegraph_llm/resources/demo/config_prompt.yaml. The configuration code creates missing files with default values.
The .env location is resolved in this order: HUGEGRAPH_LLM_ENV_PATH if it is set, then hugegraph-llm/.env when the package runs from a source checkout, then .env in the current working directory.
Main Capabilities
Build RAG Indexes
The first Web UI tab splits text into a chunk vector index, extracts vertices and edges according to a schema, writes the graph to HugeGraph, and updates the vertex vector index. Input can be typed into the text tab or uploaded through the file tab, which accepts .txt, .docx, and .pdf files and allows selecting several at once. Encrypted PDFs and scanned PDFs without an extractable text layer are rejected.
The schema can be inline JSON or the name of an existing graph. Through the REST API, a graph name requires a matching client_config.graph; inline JSON neither connects to HugeGraph nor accepts client_config.
The tab also carries two generators. Graph Schema Generator derives a schema from query examples plus a few-shot example. Graph Extraction Prompt Generator writes an extraction prompt from a described scenario and a selected reference example. A Graph Extraction Split Type dropdown chooses document, paragraph, or sentence granularity before extraction.
GraphRAG
The query pipeline can combine direct LLM answers, chunk-vector retrieval, and graph retrieval. Graph retrieval first extracts keywords and matches vertices, then attempts Text2Gremlin. If generation or execution fails, it can fall back to predefined graph traversals. Request parameters control result limits, vector distance thresholds, template counts, and reranking.
The same tab has a batch back-testing panel that reads questions from an .xlsx or .csv file, answers each one, and returns a downloadable file. A template file is offered for download next to the upload control.
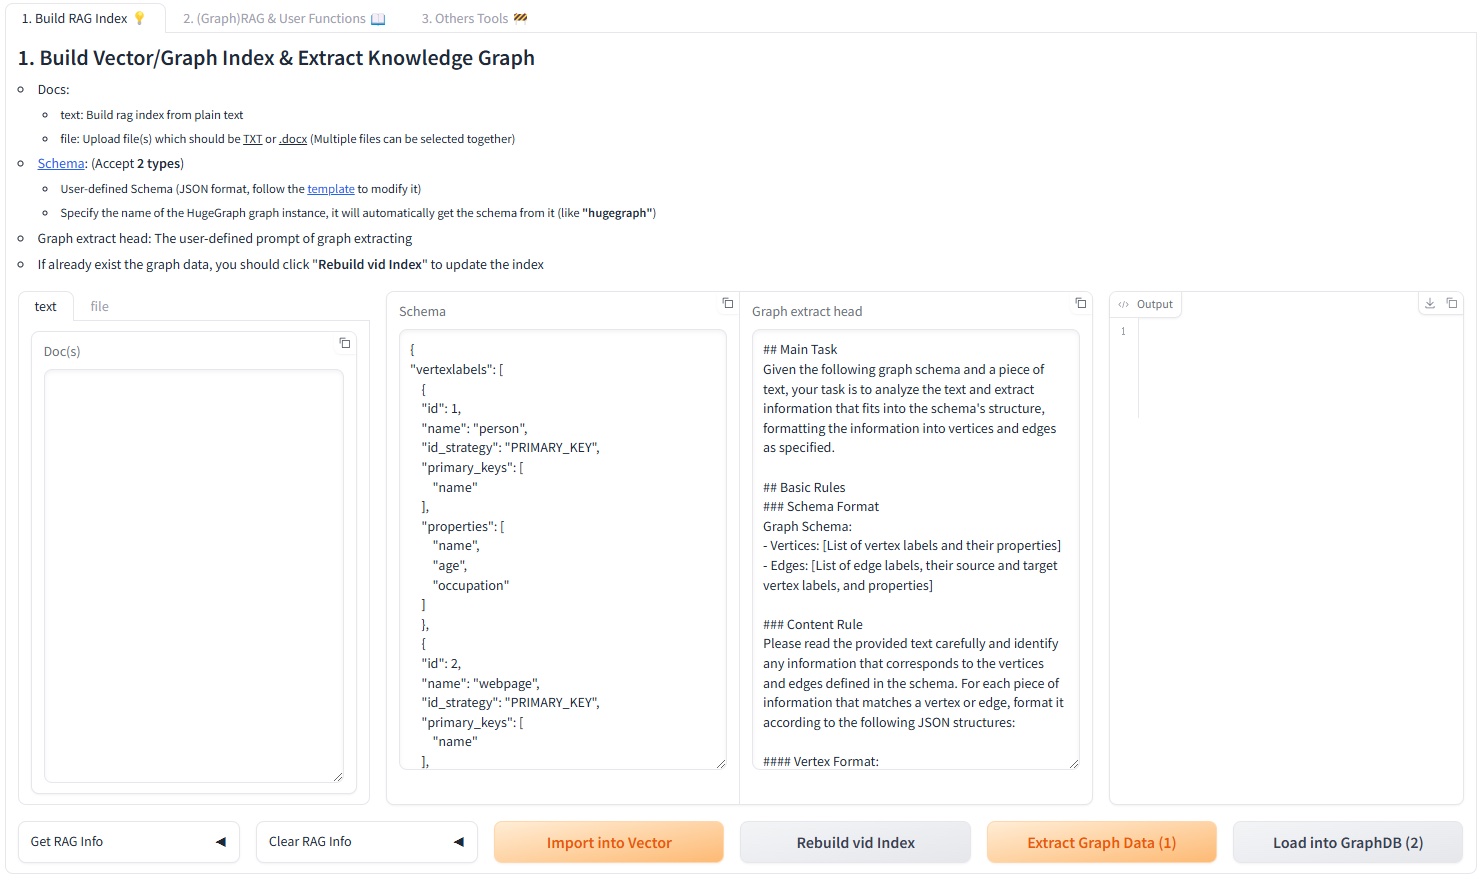
Text2Gremlin
POST /text2gremlin generates Gremlin from natural language, the graph schema, and optional examples. A custom prompt must retain {query}, {schema}, {example}, and {vertices}.
The matching UI tab can first build the example vector index from a .json or .csv file of question and Gremlin pairs. The bundled resources/demo/text2gremlin.csv is used when no file is supplied.
Graph and Admin Tools
The Graph Tools tab runs a Gremlin query directly, triggers a manual graph backup, and can initialize demo data in HugeGraph. The Admin Tools tab shows the last lines of logs/llm-server.log behind an ADMIN_TOKEN prompt, and can refresh or clear that file.
Two background tasks run for the lifetime of the process: a cron job that backs up the graph every day at 01:00, and a task that keeps vertex-id embeddings up to date.
Models and Vector Backends
Chat, information extraction, and Text2Gremlin can independently use an OpenAI-compatible endpoint, Ollama, or LiteLLM. The embedding model is configured separately and supports the same three providers. Reranking supports Cohere and SiliconFlow.
FAISS is the default vector index. CUR_VECTOR_INDEX selects Faiss, Milvus, or Qdrant, and the same choice is available in the 5. Set up the vector engine. panel of the Web UI. Milvus and Qdrant require the optional dependencies:
See the workflow guide, the configuration reference, and the REST API for details.
Programmatic Use
The former RAGPipeline and KgBuilder classes were replaced by a pipeline scheduler. Call a flow by name through SchedulerSingleton:
The registered flow names are rag_raw, rag_vector_only, rag_graph_only, rag_graph_vector, text2gremlin, build_examples_index, build_vector_index, graph_extract, import_graph_data, update_vid_embeddings, get_graph_index_info, build_schema, and prompt_generate. schedule_stream_flow is the async streaming variant.
Development Checks
Install the module and the development tools from the repository root, then run the checks that mirror CI:
Git hooks are available through pre-commit:
3.2 - HugeGraph-ML
HugeGraph-ML reads graph data from HugeGraph and converts it to DGL graphs for tasks such as node embedding, node classification, graph classification, link prediction and fraud detection. Model implementations are under hugegraph-ml/src/hugegraph_ml/models/.
Requirements
- Python 3.10 or later
- HugeGraph Server 1.5.0 or later; the current workspace client rejects detectable older versions
uv0.7 or later
All server access goes through hugegraph-python-client (the pyhugegraph package) from the same repository. HugeGraph2DGL pulls vertices and edges over the Gremlin endpoint with g.V().hasLabel(...) and g.E().hasLabel(...), and the dataset importers write through the schema and batch vertex/edge APIs in batches of 500.
The repository root declares ML version constraints under [tool.uv] constraint-dependencies:
| Package | Constraint |
|---|---|
torch | ==2.2.0 |
dgl | ~=2.1.0 |
ogb | ~=1.3.6 |
torchdata | ~=0.7.0 |
catboost | ~=1.2.3 |
category-encoders | ~=2.6.3 |
numpy | ~=1.24.4 |
pandas | ~=2.2.3 |
These constraints limit versions but do not select CPU or CUDA builds. Tasks that support gpu default to -1 for CPU. GPU use requires mutually compatible CUDA builds of torch and dgl.
Installation
HugeGraph-ML is a path dependency of the root project but is not a uv workspace member. Select the ml extra at the repository root so uv installs it and its local client dependency according to workspace configuration.
Implemented Models
Every module below lives in hugegraph-ml/src/hugegraph_ml/models/. models/__init__.py re-exports nothing, so import from the module file directly.
| Model | Module | Entry class | Used for | Paper |
|---|---|---|---|---|
| AGNN | agnn.py | AGNN | Node classification | 1803.03735 |
| APPNP | appnp.py | APPNP | Node classification | 1810.05997 |
| ARMA | arma.py | ARMA4NC | Node classification | 1901.01343 |
| BGNN | bgnn.py | BGNNPredictor | Gradient boosting over node features combined with a GNN; the bundled example runs regression | 2101.08543 |
| BGRL | bgrl.py | BGRL | Self-supervised node embedding | 2102.06514 |
| CARE-GNN | care_gnn.py | CAREGNN | Fraud detection | 2008.08692 |
| Cluster-GCN | cluster_gcn.py | SAGE | Node classification with subgraph sampling | 1905.07953 |
| C&S | correct_and_smooth.py | MLP, CorrectAndSmooth, LabelPropagation | Correcting and smoothing base predictions | 2010.13993 |
| DAGNN | dagnn.py | DAGNN | Node classification | 2007.09296 |
| DeeperGCN | deepergcn.py | DeeperGCN | Node classification with edge features | 2006.07739 |
| DGI | dgi.py | DGI | Self-supervised node embedding | 1809.10341 |
| DiffPool | diffpool.py | DiffPool | Graph classification | 1806.08804 |
| GATNE | gatne.py | DGLGATNE | Heterogeneous network embedding | 1905.01669 |
| GIN | gin_global_pool.py | GIN | Graph classification | |
| GRACE | grace.py | GRACE | Self-supervised node embedding | 2006.04131 |
| GRAND | grand.py | GRAND | Node classification | 2005.11079 |
| JKNet | jknet.py | JKNet | Node classification | 1806.03536 |
| MLP | mlp.py | MLPClassifier | Downstream classifier over learned embeddings | |
| P-GNN | pgnn.py | PGNN | Link prediction | you19b |
| SEAL | seal.py | DGCNN, SEALData | Link prediction | 1802.09691 |
GIN accepts pooling values sum (default), mean, max, global_attention and set2set.
Reading Graph Data
HugeGraph2DGL in hugegraph-ml/src/hugegraph_ml/data/hugegraph2dgl.py opens a PyHugeClient and converts query results into DGL objects:
| Method | Returns | Notes |
|---|---|---|
convert_graph(vertex_label, edge_label, feat_key="feat", label_key="label", mask_keys=None) | dgl.DGLGraph | mask_keys falls back to ["train_mask", "val_mask", "test_mask"] |
convert_hetero_graph(vertex_labels, edge_labels, feat_key="feat", label_key="label", mask_keys=None) | DGL heterograph | Takes lists of labels |
convert_graph_dataset(graph_vertex_label, vertex_label, edge_label, feat_key="feat", label_key="label") | HugeGraphDataset | Fills info with n_graphs, max_n_nodes, n_feat_dim, n_classes |
convert_graph_nx(vertex_label, edge_label) | networkx.Graph | Used by P-GNN |
convert_graph_with_edge_feat(vertex_label, edge_label, node_feat_key="feat", edge_feat_key="edge_feat", label_key="label", mask_keys=None) | dgl.DGLGraph | Also fills edata["feat"] |
convert_graph_ogb(vertex_label, edge_label, split_label) | (dgl.DGLGraph, split_edge) | Used by SEAL |
convert_hetero_graph_bgnn(vertex_labels, edge_labels, feat_key="feat", label_key="class", cat_key="cat_features", mask_keys=None) | DGL heterograph | Used by BGNN |
Node features land in ndata["feat"], labels in ndata["label"] and each mask in ndata[<mask key>]. NodeEmbed requires feat only; NodeClassify, NodeClassifyWithEdge and NodeClassifyWithSample require feat, label, train_mask, val_mask and test_mask and raise ValueError when one is missing.
Importing Sample Datasets
hugegraph_ml.utils.dgl2hugegraph_utils writes DGL, OGB and NetworkX datasets into HugeGraph so the conversion layer has something to read. Every function takes the same url, graph, user, pwd and graphspace arguments as HugeGraph2DGL, and most upper-case the dataset name before matching it.
| Function | Accepted datasets | Labels created |
|---|---|---|
import_graph_from_dgl | CORA, CITESEER, PUBMED | <NAME>_vertex, <NAME>_edge |
import_graphs_from_dgl | MUTAG, COLLAB, NCI1, PROTEINS, PTC, ENZYMES, DD | <NAME>_graph_vertex, <NAME>_vertex, <NAME>_edge |
import_hetero_graph_from_dgl | ACM | <NAME>_<ntype>_v, <NAME>_<etype>_e |
import_hetero_graph_from_dgl_no_feat | AMAZONGATNE | <NAME>_<ntype>_v, <NAME>_<etype>_e |
import_hetero_graph_from_dgl_bgnn | AVAZU | <NAME>_<ntype>_v, <NAME>_<etype>_e |
import_graph_from_nx | CAVEMAN | <NAME>_vertex, <NAME>_edge |
import_graph_from_dgl_with_edge_feat | CORA, CITESEER, PUBMED | <NAME>_edge_feat_vertex, <NAME>_edge_feat_edge |
import_graph_from_ogb | ogbl-collab, matched without upper-casing | <NAME>_vertex, <NAME>_edge |
import_split_edge_from_ogb | ogbl-collab, matched without upper-casing | <NAME>_split_edge |
Any other name raises ValueError("dataset not supported"). import_split_edge_from_ogb additionally requires the idx_to_vertex_id mapping and a max_nodes cap returned by the vertex import.
clear_all_data() drops every vertex and edge in the target graph. The test fixture calls it, loads CORA, MUTAG and ACM, and calls it again on teardown.
AMAZONGATNE and AVAZU are not fetched automatically. Their archive URLs are recorded in comments above import_hetero_graph_from_dgl_no_feat and import_hetero_graph_from_dgl_bgnn.
Tasks
Task classes live in hugegraph-ml/src/hugegraph_ml/tasks/. Each one takes the converted graph and a model instance.
| Class | Module | Entry points |
|---|---|---|
NodeEmbed | node_embed.py | train_and_embed(add_self_loop=True, lr=1e-3, weight_decay=0, n_epochs=200, patience=inf, gpu=-1) returns the graph with ndata["feat"] replaced by the embedding |
NodeClassify | node_classify.py | train(lr, weight_decay, n_epochs, patience, early_stopping_monitor, gpu) then evaluate(), which returns {"accuracy": ..., "loss": ...} |
NodeClassifyWithEdge | node_classify_with_edge.py | Same shape, for models that also read edata["feat"] |
NodeClassifyWithSample | node_classify_with_sample.py | Cluster-GCN style training on ClusterGCNSampler partitions; runs on CPU and takes no gpu argument |
GraphClassify | graph_classify.py | train(batch_size=20, lr, weight_decay, n_epochs, patience, early_stopping_monitor, clip=2.0, gpu) over a HugeGraphDataset, split 70/20/10 |
DetectorCaregnn | fraud_detector_caregnn.py | CARE-GNN training; evaluate() reports recall and ROC AUC and reads ndata["feature"] rather than ndata["feat"] |
HeteroSampleEmbedGATNE | hetero_sample_embed_gatne.py | train_and_embed(lr=1e-3, n_epochs=200, gpu=-1) |
LinkPredictionPGNN | link_prediction_pgnn.py | train(lr, weight_decay, n_epochs, gpu) |
LinkPredictionSeal | link_prediction_seal.py | The constructor calls data_prepare() itself, then train(lr=1e-3, n_epochs=200, gpu=-1) |
patience defaults to float("inf"). EarlyStopping in utils/early_stopping.py monitors either loss or accuracy, keeps a copy of the best weights and restores them when training stops.
Runnable Examples
Scripts sit in hugegraph-ml/src/hugegraph_ml/examples/. From hugegraph-ml/src, run one with:
Each script also exposes a function of the same name, so it can be imported and called with a smaller epoch count.
| Script | Model | Task | Reads |
|---|---|---|---|
agnn_example.py | AGNN | NodeClassify | CORA_vertex, CORA_edge |
appnp_example.py | APPNP | NodeClassify | CORA_vertex, CORA_edge |
arma_example.py | ARMA4NC | NodeClassify | CORA_vertex, CORA_edge |
bgnn_example.py | BGNNPredictor | Its own fit() | AVAZU__N_v, AVAZU__E_e |
bgrl_example.py | BGRL | NodeEmbed, NodeClassify | CORA_vertex, CORA_edge |
care_gnn_example.py | CAREGNN | DetectorCaregnn | AMAZON_user_v plus AMAZON_net_upu_e, AMAZON_net_usu_e, AMAZON_net_uvu_e |
cluster_gcn_example.py | SAGE | NodeClassifyWithSample | CORA_vertex, CORA_edge |
correct_and_smooth_example.py | MLP from correct_and_smooth | NodeClassify | CORA_vertex, CORA_edge |
dagnn_example.py | DAGNN | NodeClassify | CORA_vertex, CORA_edge |
deepergcn_example.py | DeeperGCN | NodeClassifyWithEdge | CORA_vertex, CORA_edge through convert_graph_with_edge_feat |
dgi_example.py | DGI | NodeEmbed, NodeClassify | CORA_vertex, CORA_edge |
diffpool_example.py | DiffPool | GraphClassify | MUTAG_graph_vertex, MUTAG_vertex, MUTAG_edge |
gatne_example.py | DGLGATNE | HeteroSampleEmbedGATNE | AMAZONGATNE__N_v, AMAZONGATNE_1_e, AMAZONGATNE_2_e |
gin_example.py | GIN | GraphClassify | MUTAG_graph_vertex, MUTAG_vertex, MUTAG_edge |
grace_example.py | GRACE | NodeEmbed, NodeClassify | CORA_vertex, CORA_edge |
grand_example.py | GRAND | NodeClassify | CORA_vertex, CORA_edge |
jknet_example.py | JKNet | NodeClassify | CORA_vertex, CORA_edge |
pgnn_example.py | PGNN | LinkPredictionPGNN | CAVEMAN_vertex, CAVEMAN_edge |
seal_example.py | DGCNN | LinkPredictionSeal | ogbl-collab_vertex, ogbl-collab_edge, ogbl-collab_split_edge |
DGI Node Embedding Example
First import DGL’s Cora dataset into HugeGraph. The name is upper-cased before use, so cora and CORA both produce the CORA_vertex and CORA_edge labels:
Read the graph and train DGI:
evaluate() returns a dictionary such as {'accuracy': 0.82, 'loss': 0.5714246034622192}. The complete script is hugegraph-ml/src/hugegraph_ml/examples/dgi_example.py.
GRAND Node Classification Example
GRAND returns a list of logits per augmentation sample, and NodeClassify masks each element of that list before computing the loss. The complete script is hugegraph-ml/src/hugegraph_ml/examples/grand_example.py.
Troubleshooting
- Connection failures: check the HugeGraph Server address, port, and credentials.
- Schema mismatches: the examples use
CORA_vertexandCORA_edge; pass the actual labels for your own data. ValueError: Graph is missing required node attribute ...: the node classification tasks needfeat,label,train_mask,val_maskandtest_maskinndata. Import a dataset that carries masks, or pass your ownmask_keystoconvert_graph.ValueError: dataset not supported: the importer only accepts the names in the table above, andimport_graph_from_ogbmatchesogbl-collabwithout upper-casing.- DGL or PyTorch import failures: rerun
uv sync --extra mlfrom the repository root and confirm that Python comes from the root.venv. bgrl_example.pycurrently fails on import: it asks forMLP_Predictorfromhugegraph_ml.models.bgrl, but that module defines the class asMLPPredictor.care_gnn_example.pyreadsAMAZON_user_vand the threeAMAZON_net_*_eedge labels. No bundled importer creates them, so load that dataset yourself before running the script.
3.3 - HugeGraph-LLM Workflow
This page explains the processing flow in the HugeGraph-LLM Web UI. See HugeGraph-LLM for startup instructions.
0. Configuration Panel
Above the tabs sits a collapsible configuration panel with five sections: 1. Set up the HugeGraph server., 2. Set up the LLM., 3. Set up the Embedding., 4. Set up the Reranker., and 5. Set up the vector engine.. Each section has its own apply button, and applying a change writes the supported fields back to .env. The header also shows the current prompt language.
1. Build RAG Indexes
The first tab splits documents into a chunk vector index. It also extracts vertices and edges according to a schema, writes them to HugeGraph, and maintains a vertex vector index.
flowchart TD
    A[Input document] --> B[Split text]
    B --> C[Generate chunk vectors]
    C --> D[Write vector index]
    B --> E[LLM extracts vertices and edges from schema]
    E --> F[Write to HugeGraph]
    F --> G[Update vertex vector index]
Input comes from either the text sub-tab or the file sub-tab. Uploads accept .txt, .docx, and .pdf, and several files can be selected at once.
Common operations are Import into Vector, Extract Graph Data (1), Load into GraphDB (2), and Update Vid Embedding. Load into GraphDB (2) also refreshes the vertex vector index, so the separate Update Vid Embedding step is only needed when the graph already held data. The Graph Extraction Split Type dropdown next to these buttons chooses document, paragraph, or sentence. document keeps the whole input as one unit; the other two split long documents before extraction.
The page can also inspect or clear chunk indexes, vertex indexes, and graph data. Clearing removes existing data, so first confirm that the current graph and indexes are not still used by other queries.
Two collapsed helpers sit below the main controls:
Graph Schema Generatortakes query examples and a few-shot example and produces a schema for the Graph Schema field.Graph Extraction Prompt Generatortakes an expected scenario, such as social relationships or a financial knowledge graph, and a selected reference example, and produces a Graph Extract Prompt Header.
2. GraphRAG Queries
The second tab can answer directly with the LLM, use only chunk-vector retrieval, use only graph retrieval, or combine graph and vector retrieval.
flowchart TD
    Q[Question] --> V[Query chunk vector index]
    Q --> K[Extract keywords]
    K --> M[Match graph vertices]
    M --> T[Generate and execute Gremlin]
    T -->|Failure| B[Fallback to BFS graph traversal]
    T --> R[Prepare graph results]
    B --> R
    V --> S[Merge and rerank]
    R --> S
    S --> A[Generate answer]
Graph retrieval first matches HugeGraph vertices exactly by keyword and then uses vector similarity if no exact match exists. The matched vertices are passed to Text2Gremlin. If generation or execution fails, the pipeline can fall back to a predefined traversal.
Template Num controls how Text2Gremlin participates in graph retrieval:
- A negative value skips Text2Gremlin entirely, so graph retrieval goes straight to the predefined traversal.
0generates Gremlin without any examples (zero-shot).- A positive value retrieves that many similar examples from the example index and uses the template-guided result. The example count is clamped to the range 0 to 10.
Other controls on this tab are Rerank method (bleu or reranker), Graph Ratio, Near neighbor first, and Query related information, plus editable Query Prompt and Keywords Extraction Prompt fields.
Below the single-question panel is a batch back-testing panel. Upload an .xlsx or .csv file of questions, set Max Lines To Show, and click Generate Answer (Batch). The answers appear in a preview table and can be downloaded as a file. A template file is offered next to the upload control.
3. Text2Gremlin
The third tab has two parts. The upper part builds the example vector index from a .json or .csv file of question and Gremlin pairs; the bundled resources/demo/text2gremlin.csv is used when no file is uploaded.
The lower part reads the graph schema, retrieves similar natural-language and Gremlin examples, fills the prompt with the question, schema, examples, and matched vertices, then generates Gremlin and optionally executes it. Number of refer examples sets how many examples are retrieved, from 0 to 10, and defaults to 2. The results appear in four fields: Gremlin with a template, Gremlin without a template, and the execution output for each.
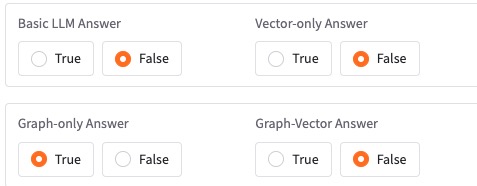
A custom prompt must contain {query}, {schema}, {example}, and {vertices}. The REST API rejects a request if any placeholder is missing.
4. Graph and Administration Tools
Graph Tools runs a Gremlin query directly against the configured graph, triggers a manual graph backup, and can initialize demo data in HugeGraph through a beta action. A background job also backs up the graph every day at 01:00, and a second background task keeps vertex-id embeddings up to date while the process runs.
Admin Tools is password protected. Entering the configured ADMIN_TOKEN reveals the tail of logs/llm-server.log, which refreshes every 60 seconds, along with buttons to refresh or clear it. Access is refused while ADMIN_TOKEN is empty or still set to the placeholder xxxx.
When ENABLE_LOGIN=True, the Web UI asks for basic credentials with the fixed user name rag and USER_TOKEN as the password, and the REST API requires USER_TOKEN as a Bearer token. The log endpoint additionally requires a separately configured, secure ADMIN_TOKEN.
In production, enable HugeGraph-LLM login, replace USER_TOKEN and ADMIN_TOKEN, and enforce a source IP allowlist at the firewall or network entry point. Separately enable Server authentication and authorization, retain Server audit logs (normally audit-*.log), and grant GRAPH_USER minimum required permissions. AI service tokens do not replace Server authentication.
5. Prompt Language
Set LANGUAGE=EN or LANGUAGE=CN in hugegraph-llm/.env, then restart the service. This selects the language of built-in prompts; it does not translate input documents and is not a field in the /rag request body.
6. REST Calls
The Web UI and REST API use the same pipeline. For application integration, use /rag, /rag/graph, /graph/extract, and /text2gremlin; see the REST API for request formats.
3.4 - Configuration Reference
HugeGraph-LLM reads runtime configuration from .env and prompts from config_prompt.yaml. These files have different path-resolution rules; the prompt file is not part of .env.
The .env path is resolved in this order:
HUGEGRAPH_LLM_ENV_PATH, if that environment variable is set. A leading~is expanded.hugegraph-llm/.env, when the package runs from a source checkout..envin the current working directory, for an installed package.
The path is selected when the configuration module is imported. Set HUGEGRAPH_LLM_ENV_PATH before starting Python, not inside the .env file that will be loaded. Relative overrides are resolved against the process working directory.
The prompt YAML path is resolved in this order:
HUGEGRAPH_LLM_PROMPT_CONFIG_PATHfrom the process environment, expanding a leading~.hugegraph-llm/src/hugegraph_llm/resources/demo/config_prompt.yamlwhen running from source.${XDG_CONFIG_HOME:-~/.config}/hugegraph-llm/config_prompt.yamlfor an installed package.
Set path overrides before starting the process. Relative paths use its working directory. The source Docker image points PYTHONPATH at the source tree, so its default prompt path remains under hugegraph-llm/src/hugegraph_llm/resources/demo/.
Create or update files from configuration-class defaults with:
--update is enabled by default, so running without arguments has the same effect. On first configuration-module import, missing .env and prompt YAML files are created from defaults. The generator asks interactively before overwriting existing files. It handles HugeGraph, administrator, LLM, index, and prompt settings without overwriting existing files silently.
.env contains keys and passwords. Do not commit it to version control.
Basic Options
| Setting | Default | Description |
|---|---|---|
LANGUAGE | EN | Prompt language: EN or CN |
CHAT_LLM_TYPE | openai | Answer model: openai, litellm, or ollama/local |
EXTRACT_LLM_TYPE | openai | Information extraction model; same choices as above |
TEXT2GQL_LLM_TYPE | openai | Text2Gremlin model; same choices as above |
EMBEDDING_TYPE | openai | Embedding model; same choices as above, or empty |
RERANKER_TYPE | empty | cohere or siliconflow |
KEYWORD_EXTRACT_TYPE | llm | llm, textrank, or hybrid |
WINDOW_SIZE | 3 | TextRank window size, from 1 to 10 |
HYBRID_LLM_WEIGHTS | 0.5 | Weight of LLM results in hybrid mode, from 0 to 1 |
OpenAI-Compatible APIs
Chat, extraction, and Text2Gremlin can use different endpoints, keys, and models.
| Purpose | API base | Key | Model | Default maximum tokens |
|---|---|---|---|---|
| Answer | OPENAI_CHAT_API_BASE | OPENAI_CHAT_API_KEY | OPENAI_CHAT_LANGUAGE_MODEL | OPENAI_CHAT_TOKENS=8192 |
| Extraction | OPENAI_EXTRACT_API_BASE | OPENAI_EXTRACT_API_KEY | OPENAI_EXTRACT_LANGUAGE_MODEL | OPENAI_EXTRACT_TOKENS=256 |
| Text2Gremlin | OPENAI_TEXT2GQL_API_BASE | OPENAI_TEXT2GQL_API_KEY | OPENAI_TEXT2GQL_LANGUAGE_MODEL | OPENAI_TEXT2GQL_TOKENS=4096 |
| Embedding | OPENAI_EMBEDDING_API_BASE | OPENAI_EMBEDDING_API_KEY | OPENAI_EMBEDDING_MODEL | Not applicable |
The default API base is https://api.openai.com/v1. The default language model for all three tasks is gpt-4.1-mini, and the default embedding model is text-embedding-3-small.
OPENAI_BASE_URL and OPENAI_API_KEY provide general fallback values. Embeddings also support OPENAI_EMBEDDING_BASE_URL and OPENAI_EMBEDDING_API_KEY as fallback values.
LiteLLM
| Purpose | API base | Key | Model | Default maximum tokens |
|---|---|---|---|---|
| Answer | LITELLM_CHAT_API_BASE | LITELLM_CHAT_API_KEY | LITELLM_CHAT_LANGUAGE_MODEL | LITELLM_CHAT_TOKENS=8192 |
| Extraction | LITELLM_EXTRACT_API_BASE | LITELLM_EXTRACT_API_KEY | LITELLM_EXTRACT_LANGUAGE_MODEL | LITELLM_EXTRACT_TOKENS=256 |
| Text2Gremlin | LITELLM_TEXT2GQL_API_BASE | LITELLM_TEXT2GQL_API_KEY | LITELLM_TEXT2GQL_LANGUAGE_MODEL | LITELLM_TEXT2GQL_TOKENS=4096 |
| Embedding | LITELLM_EMBEDDING_API_BASE | LITELLM_EMBEDDING_API_KEY | LITELLM_EMBEDDING_MODEL | Not applicable |
The default language model is openai/gpt-4.1-mini, and the default embedding model is openai/text-embedding-3-small. Model names generally use the provider/model form; supported values depend on the LiteLLM service.
Ollama
| Purpose | Host | Port | Model |
|---|---|---|---|
| Answer | OLLAMA_CHAT_HOST | OLLAMA_CHAT_PORT | OLLAMA_CHAT_LANGUAGE_MODEL |
| Extraction | OLLAMA_EXTRACT_HOST | OLLAMA_EXTRACT_PORT | OLLAMA_EXTRACT_LANGUAGE_MODEL |
| Text2Gremlin | OLLAMA_TEXT2GQL_HOST | OLLAMA_TEXT2GQL_PORT | OLLAMA_TEXT2GQL_LANGUAGE_MODEL |
| Embedding | OLLAMA_EMBEDDING_HOST | OLLAMA_EMBEDDING_PORT | OLLAMA_EMBEDDING_MODEL |
The default host is 127.0.0.1 and the default port is 11434. Model names have no defaults; pull the required models in Ollama before use.
Reranking
| Setting | Default | Description |
|---|---|---|
COHERE_BASE_URL | https://api.cohere.com/v1/rerank | Cohere rerank endpoint; CO_API_URL is a fallback |
RERANKER_API_KEY | empty | Cohere or SiliconFlow key |
RERANKER_MODEL | empty | Model name supported by the service |
HugeGraph Connection and Retrieval Limits
| Setting | Default | Description |
|---|---|---|
GRAPH_URL | 127.0.0.1:8080 | HugeGraph address; it is not split into IP and port |
GRAPH_NAME | hugegraph | Graph name |
GRAPH_USER | admin | User name |
GRAPH_PWD | xxx | Password |
GRAPH_SPACE | empty | GraphSpace name |
LIMIT_PROPERTY | False | Whether to limit returned properties; read as a string by the configuration class |
MAX_GRAPH_PATH | 10 | Maximum graph path length |
MAX_GRAPH_ITEMS | 30 | Maximum number of graph retrieval items |
EDGE_LIMIT_PRE_LABEL | 8 | Result limit for each edge label |
VECTOR_DIS_THRESHOLD | 0.9 | Results beyond this vector-distance threshold are ignored |
TOPK_PER_KEYWORD | 1 | Candidates per keyword |
TOPK_RETURN_RESULTS | 20 | Results returned after reranking |
Vector Index Backend
| Setting | Default | Description |
|---|---|---|
CUR_VECTOR_INDEX | Faiss | Active vector store: Faiss, Milvus, or Qdrant |
QDRANT_HOST | empty | |
QDRANT_PORT | 6333 | |
QDRANT_API_KEY | empty | |
MILVUS_HOST | empty | |
MILVUS_PORT | 19530 | |
MILVUS_USER | empty | |
MILVUS_PASSWORD | empty |
FAISS is local and needs no extra dependency. Selecting Milvus or Qdrant without the optional dependencies raises an error that names the missing package, so install them first:
The same choice is available in the 5. Set up the vector engine. panel of the Web UI, which also persists the connection settings for the selected engine.
Login and Log API
| Setting | Default | Description |
|---|---|---|
ENABLE_LOGIN | False | Whether to require a Bearer token; read as a string by the configuration class |
USER_TOKEN | 4321 | Token for the Web UI and regular APIs |
ADMIN_TOKEN | xxxx | Administrator token used by /logs |
/logs returns 403 when ADMIN_TOKEN is empty or still set to xxxx.
In production, set ENABLE_LOGIN=True, replace USER_TOKEN and ADMIN_TOKEN, and enforce a source IP allowlist at the firewall or network entry point. This protects only HugeGraph-LLM. Separately enable Server authentication and authorization, retain Server audit logs (normally audit-*.log), and grant GRAPH_USER minimum required permissions. The two services use different credentials.
Minimal OpenAI Configuration
Configuration Loading
Configuration classes supply code defaults. During initialization, values from the selected .env are written into the process environment before the configuration objects are created, overriding same-named shell variables. Missing keys use defaults; empty values and unknown keys are ignored. The Web UI and configuration APIs can update settings and write supported fields back to .env. Restart after manual .env edits; prompt YAML is read at service startup or page load.
Keys are matched case-insensitively.
Configuration definitions are in:
hugegraph-llm/src/hugegraph_llm/config/llm_config.pyhugegraph-llm/src/hugegraph_llm/config/hugegraph_config.pyhugegraph-llm/src/hugegraph_llm/config/index_config.pyhugegraph-llm/src/hugegraph_llm/config/admin_config.pyhugegraph-llm/src/hugegraph_llm/config/prompt_config.pyhugegraph-llm/src/hugegraph_llm/config/models/base_config.pyfor the loading and file-sync behaviour
3.5 - HugeGraph-LLM REST API
The HugeGraph-LLM demo process serves both the Web UI and REST API. The default address is http://localhost:8001:
All endpoints are POST:
| Path | Success status | Purpose |
|---|---|---|
/rag | 200 | Answer a question with the selected retrieval modes |
/rag/graph | 200 | Graph retrieval only, without a final answer |
/graph/extract | 200 | Extract vertices and edges from text |
/text2gremlin | 200 | Generate Gremlin from natural language |
/config/graph | 201 | Update the HugeGraph connection |
/config/llm | 201 | Update the language model |
/config/embedding | 201 | Update the embedding model |
/config/rerank | 201 | Update the reranker |
/logs | 200 | Stream the server log |
Authentication
Enable login in .env:
Requests then require a Bearer token:
The same setting puts the Gradio UI behind basic authentication, with the fixed user name rag and USER_TOKEN as the password. A wrong token returns 401 with a WWW-Authenticate: Bearer header. When ENABLE_LOGIN is left at False, every endpoint is open.
Production requires HugeGraph-LLM login and a source IP allowlist at the firewall or network entry point. This protects only the LLM UI and REST API. Separately enable Server authentication and authorization, retain Server audit logs (normally audit-*.log), and grant GRAPH_USER minimum permissions. USER_TOKEN does not replace Server authentication.
RAG
POST /rag
Returns one or more answer types according to the switches. When none is explicitly selected, only graph_only is enabled.
The response contains only enabled answer fields:
Other optional parameters include graph_ratio (default 0.5), rerank_method (bleu or reranker, default bleu), near_neighbor_first (default false), custom_priority_info, and the three custom prompt fields answer_prompt, keywords_extract_prompt, and gremlin_prompt. Omitting a prompt field uses the value from config_prompt.yaml.
gremlin_tmpl_num selects how Text2Gremlin runs during graph retrieval. A negative value skips Text2Gremlin and goes straight to the predefined traversal, 0 generates Gremlin without examples, and a positive value retrieves that many examples from the example index.
An empty or whitespace-only query returns 400.
POST /rag/graph
Runs graph retrieval without generating a final natural-language answer:
graph_recall in the response can contain query, keywords, match_vids, graph_result_flag, gremlin, graph_result, and vertex_degree_list. Set get_vertex_only=true to return immediately after vertex matching; the endpoint then replaces match_vids with the full vertex details.
An empty query returns 400, a type error in the request returns 400, and any other failure returns 500.
Graph Extraction
POST /graph/extract
An inline schema does not connect to HugeGraph:
Request fields:
| Field | Default | Notes |
|---|---|---|
texts | required | A string or an array of strings; empty or blank entries are dropped and an empty result is rejected |
schema | required | Inline JSON object or string, or the name of an existing graph |
example_prompt | prompt YAML value | Extraction prompt header |
extract_type | property_graph | Only value currently accepted |
language | zh | zh or en, used for chunk splitting |
split_type | document | document, paragraph, or sentence |
include_meta | false | Adds vertex_count, edge_count, and text_count to meta |
client_config | none | Only allowed with a graph-name schema |
An inline schema must be an object with vertexlabels and edgelabels lists. Every vertex label needs a non-empty name and a non-empty properties list; every edge label needs a non-empty name, source_label, and target_label. propertykeys is optional and must be a list when present.
When schema is an existing graph name, also pass client_config, and make client_config.graph match that name. client_config here accepts only graph, user, pwd, and gs; unknown fields are rejected, and there is no url field:
A successful response always contains status (always succeeded), result.vertices, result.edges, warnings, and meta. meta stays empty unless include_meta is true.
Text2Gremlin
POST /text2gremlin
output_types can contain:
match_resulttemplate_gremlinraw_gremlintemplate_execution_resultraw_execution_result
If omitted, only template_gremlin is returned by default. An empty array lets the implementation return all outputs. A custom gremlin_prompt must contain {query}, {schema}, {example}, and {vertices}; a missing placeholder fails request validation and names the placeholders that are absent.
example_num defaults to 0, which means no templates, and is clamped to the range 0 to 10. client_config overrides the HugeGraph connection for the request; the schema used for generation is the active graph name. An empty query returns 400, and a generation failure returns 500.
Runtime Configuration
POST /config/graph
user and pwd default to empty strings, and gs is optional.
POST /config/llm and POST /config/embedding
Both endpoints use the same request model. /config/llm sets chat_llm_type, extract_llm_type, and text2gql_llm_type to the same value; per-task types can only be set separately through .env or the Web UI. OpenAI or LiteLLM example:
Ollama requests still require the common fields; api_key and api_base can be empty strings:
POST /config/rerank
reranker_type accepts cohere or siliconflow. Cohere also accepts cohere_base_url.
All four configuration endpoints return 201 on success. They change the process’s active configuration and may write values back to .env. /config/llm, /config/embedding, and /config/rerank restore the previous values if applying a change raises; /config/graph does not.
client_config in /rag, /rag/graph, and /text2gremlin overrides the HugeGraph connection for one request, and only the fields actually present in the request are applied. The current implementation still changes process-global settings temporarily, so do not issue long-running requests with different connections concurrently.
Logs
POST /logs
This endpoint requires ADMIN_TOKEN in .env to be changed to a secure value. Example request body:
log_file defaults to llm-server.log, must be a file name under logs/, and cannot be absolute, contain path separators, or resolve to . or ... Invalid names return 400.
An unset or placeholder ADMIN_TOKEN returns 403 before the token is even compared, and a wrong token returns a 403 body with the message Invalid admin_token.
The successful response is a text/plain stream that first replays the last 125 lines of the file and then follows it, in the manner of tail -f.
3.6 - Vermeer Python Client
vermeer-python-client is the Python SDK for Vermeer, the memory-first graph computing engine written in Go. The SDK wraps the REST API of the Vermeer master so you can list graphs, submit load and compute tasks, and read task state from Python. The import package is pyvermeer.
The module does not pin a Vermeer server version. It talks to the Vermeer master over HTTP using the endpoints listed in API Surface.
Requirements
- Current source requires Python 3.10 or later because its type annotations use Python 3.10 features, although packaging metadata still declares
>=3.9. - A running Vermeer master reachable over HTTP on its default port
6688. Docker deployments must publish6688:6688; see the Vermeer quick start. uv(recommended) orpip
Runtime dependencies: requests, urllib3, python-dateutil, decorator, rich, and setuptools.
Installation
The distribution name in the packaging metadata is vermeer-python-client and the version is managed independently of the repository version. The package is not published on PyPI yet, so install it from source.
From the root of the HugeGraph-AI repository, the vermeer extra installs it into the shared virtual environment:
vermeer-python-client is wired in as an editable path dependency rather than a uv workspace member, so a plain uv sync at the repository root does not install it. You have to ask for the extra (or for --all-extras).
To install the module standalone:
Connect to a Vermeer Master
Constructor parameters:
| Parameter | Type | Default | Description |
|---|---|---|---|
ip | str | required | Host name or IP address of the Vermeer master |
port | int | required | REST port of the Vermeer master |
token | str | required | Sent verbatim as the Authorization request header |
timeout | (float, float) or None | None | Connect and read timeouts in seconds |
log_level | str | "INFO" | Level applied to the shared VermeerClient logger |
For a client running on the host, use a master address reachable from that host. For a container client, use its container-network address. The client connects only to the master HTTP API; PD and Store addresses must be reachable from the Vermeer nodes that perform loading.
Behavior worth knowing before you connect:
tokenmay be an empty string when the master does not check authorization, but it cannot beNone. The session raisesValueError("Vermeer Token must be provided.")in that case.timeoutis a(connect, read)pair.VermeerConfighas its own default of(0.5, 15.0), but the client always forwards its own argument, so omittingtimeoutstoresNoneand the request waits without a deadline. Pass the pair explicitly if you want one.- The base URL is always built as
http://{ip}:{port}/, so the client speaks plain HTTP. - Every request sets
Content-Type: application/jsonand serializesparamsinto the request body, including forGETrequests. - The session configures up to 3 retries on HTTP 500, 502, and 504 with backoff factor
0.1. Status retries follow urllib3’s default allowed methods, which excludePOST; do not rely on automatic retries for task submission. log_levelsets the level of the shared logger namedVermeerClient. Its console handler is fixed atINFO, soDEBUGrecords are not printed to the console today.
End-to-End Example
The module ships vermeer-python-client/src/pyvermeer/demo/task_demo.py. This extended example polls with a deadline, waits for loading, reads the graph, and submits PageRank. It reads PD peers and the HugeGraph password from environment variables. The worker group must match the task-space allocation; a single-worker quick start can use worker_group=$. Bind a named group to the task space first, as shown in the Vermeer quick start.
Loading succeeds with loaded; computation succeeds with complete. error or canceled stops the example. Set VERMEER_PD_PEERS to a JSON array string, for example export VERMEER_PD_PEERS='["hugegraph-pd:8686"]'. The master must reach these PD addresses, and workers must reach the Store addresses returned by PD. Set VERMEER_TOKEN only if the master uses token authentication; an empty string works without it.
output.type=local writes results to the executing worker’s local filesystem with file-name prefix result/pagerank. Mount its result directory to read container output from the host. poll_timeout is the client polling deadline; requests between checks remain subject to HTTP timeouts and SDK retries, so completion can exceed that deadline. A timeout stops client waiting, not the Server task.
Never hardcode a real HugeGraph password into a script or configuration file. Use an environment variable or credential store.
Save and Run the Documentation Example
Save the complete extended example above as vermeer_client_example.py at the hugegraph-ai/ repository root. Run it with the workspace’s vermeer extra:
Enter the password and press Enter. Replace hugegraph-pd:8686 with a PD address reachable from the Vermeer master. If token authentication is enabled, supply VERMEER_TOKEN through your local credential-management method. These commands run the extended documentation example, not the bundled demo.
Original Bundled Demo
vermeer-python-client/src/pyvermeer/demo/task_demo.py is a separate minimal example. It hardcodes client port 8688, PD address 127.0.0.1:8686, and placeholder credentials xxx. It does not read the extended example’s environment variables, poll task state, or compute PageRank. Adjust its addresses and credentials separately if running it; it does not replace the documentation commands above.
API Surface
PyVermeerClient exposes its API groups as attributes. Two groups are registered today, graph and tasks.
client.graph
| Method | Vermeer endpoint | Returns |
|---|---|---|
get_graphs() | GET /graphs | GraphsResponse |
get_graph(graph_name) | GET /graphs/{graph_name} | GraphResponse |
client.tasks
| Method | Vermeer endpoint | Returns |
|---|---|---|
get_tasks() | GET /tasks | TasksResponse |
get_task(task_id) | GET /task/{task_id} | TaskResponse |
create_task(create_task) | POST /tasks/create | TaskCreateResponse |
pyvermeer/api/master.py and pyvermeer/api/worker.py contain only the license header, and neither group is registered on the client. Master and worker information is therefore not reachable from the client yet, even though MasterResponse and WorkersResponse already exist under pyvermeer/structure/.
client.send_request(method, endpoint, params) is the shared entry point behind both groups. You can call it directly to reach a Vermeer endpoint that has no wrapper yet; it returns the decoded JSON body as a plain dict.
Requests and Responses
TaskCreateRequest(task_type, graph_name, params) is serialized as {"task_type": ..., "graph": ..., "params": ...}. Note that graph_name becomes graph on the wire, which matches the payload documented for the Vermeer REST API.
Every response type extends BaseResponse and exposes errcode and message, plus a to_dict() helper. errcode is 0 on success and 1 on error; -1 means the field was missing from the response body.
GraphsResponse.graphsandGraphResponse.graphyieldVermeerGraphobjects withname,space_name,status,create_time,update_time,vertex_count,edge_count,workers,worker_group,use_out_edges,use_property,use_out_degree,use_undirected,on_disk, andbackend_option.TasksResponse.tasks,TaskResponse.task, andTaskCreateResponse.taskyieldTaskInfoobjects withid,state,create_user,create_type,create_time,start_time,update_time,graph_name,space_name,params,workers, anderror_message.- Timestamps are parsed with
python-dateutilintodatetimeobjects. An empty timestamp string becomesNone.
Server returns the task type as task_type, but SDK TaskInfo.type reads type, so that property is currently empty. The SDK also drops Server statistics_result. Use TaskInfo.state for polling. This is a field-contract mismatch in current source.
Task Parameters
The client does not validate params. Keys and values are passed straight through to Vermeer, so the accepted names come from the engine, not from the SDK. For the load parameters and the parameters of the supported algorithms, see the Vermeer quick start.
The usual sequence is the same as with the REST API directly: create a load task to read the graph into Vermeer, wait for it to finish, then create computation tasks against the loaded graph.
Errors
pyvermeer.utils.exception defines four exceptions, all raised from the underlying requests or JSON failure:
| Exception | Raised when |
|---|---|
ConnectError | requests.ConnectionError, the master is unreachable |
TimeOutError | requests.Timeout, the connect or read deadline expired |
JsonDecodeError | The response body is not valid JSON |
UnknownError | Any other failure during the request |
The client does not check the HTTP status code of the response, so inspect errcode and message on the returned object to tell success from a Vermeer-side error.
Development Checks
Run the formatting and static checks from the root of the HugeGraph-AI repository:
The source lives under vermeer-python-client/src/pyvermeer/. A few structure tests are available under src/tests/structure/test_task_data.py; they do not cover HTTP API integration.
References
4 - HugeGraph Computing (OLAP)
The HugeGraph-Computer repository contains two graph computing systems with different deployment and runtime models. Start with Go Vermeer for general graph algorithms; use Computer when you need distributed Java BSP/Pregel computation. Both can connect to HugeGraph, but their configuration and job entry points are not interchangeable.
Default entry: Go Vermeer
flowchart TB
    Master["Master"] --> Workers["Workers"]
    Master -->|PD| PD["PD"]
    Workers -->|Scan| Store["Store"]
    Workers -.->|REST| Server["Server"]
With load.type=hugegraph, the Vermeer master queries PD for partition metadata and workers scan HStore Store partitions directly. Workers write results through the Server REST API only when output.type=hugegraph; other input sources or output settings do not require those connections.
Java Computer
flowchart TB
    Config["Job configuration"] --> Master["Master"] --> Workers["Workers"]
    Master -. BSP .-> Etcd["etcd"]
    Workers <-->|REST| Server["Server"]
    Workers <-->|HDFS| HDFS["HDFS (optional)"]
Job configuration can be submitted through the Kubernetes Operator or YARN. Workers read graph data through the HugeGraph Server REST API and can write results back according to the output configuration. With HDFS input or output, workers access HDFS directly. The master uses etcd to coordinate BSP jobs.
4.1 - HugeGraph-Vermeer Quick Start
1. Overview of Vermeer
1.1 Architecture
Vermeer is a high-performance, memory-first graph computing framework written in Go: start once and execute repeatedly. It supports fast execution of 15+ OLAP algorithms, often in seconds to minutes; actual time depends on graph size, algorithm parameters, and resources. A single master currently schedules multiple workers.
The master handles communication, forwarding, and aggregation, with modest computation and resource usage. Workers store graph data and execute tasks, consuming most memory and CPU. gRPC handles internal communication; REST provides external APIs.
At startup, built-in defaults are loaded first, followed by the [default] section of config/<env>.ini under the working directory, then explicit command-line overrides. For example, --env=master reads config/master.ini. The Docker image copies repository configuration to /go/bin/config/ and works from /go/bin/. A host bind mount hides the bundled files, so it must contain every ini file used. The configuration reader does not read environment variables.
Default ports:
| Role | Configuration key | Default address | Purpose |
|---|---|---|---|
| master | http_peer | 0.0.0.0:6688 | REST API for host-side clients |
| master | grpc_peer | 0.0.0.0:6689 | Workers connect to master |
| worker | http_peer | 0.0.0.0:6788 | Worker HTTP service |
| worker | grpc_peer | 0.0.0.0:6789 | Worker gRPC listener, also advertised to master for node communication |
The Docker examples publish only master HTTP on host loopback 127.0.0.1:6688:6688; master and worker gRPC ports stay within the container network.
flowchart LR
  Client["curl / Python client"] -->|"HTTP :6688"| Master["master"]
  Worker["worker"] <-->|"Bidirectional gRPC: master :6689, worker :6789"| Master
  Master -->|"gRPC partition lookup"| PD["HugeGraph PD"]
  Worker -->|"gRPC partition scan"| Store["HugeGraph Store"]
1.2 Running Vermeer
In production, enable Server authentication and authorization, an IP allowlist, and minimum permissions; retain audit-*.log. Server Auth does not protect independent Vermeer, PD, or Store APIs. Restrict these HTTP/gRPC ports to trusted networks and callers, and configure access controls at the Vermeer external entry point.
master.ini defaults to auth=none, disabling authentication for ordinary and administrative APIs. Local examples publish loopback only. Before remote access, enable auth=token or restrict callers through a protected network or gateway.
Both Docker options need a host configuration directory. From the Vermeer repository root, copy the supplied master.ini and worker.ini templates. The mount hides image configuration under /go/bin/config, so never mount an empty directory or your entire home directory there:
Keep master HTTP/gRPC listeners at 0.0.0.0:6688 and 0.0.0.0:6689. The Compose example assigns 172.20.0.10 to master and 172.20.0.11 to worker; set these options in the copied worker.ini:
This single-worker example uses literal worker_group=$, the general group used when no named group is bound. The repository template defaults to worker_group=default; if retaining that named group, bind it to the task space or graph before submitting tasks. For default space $DEFAULT, use:
An errcode=0 response confirms binding; with token authentication, also supply the authorization header. master_peer must reach master gRPC from the worker network. grpc_peer is both the listener and advertised worker address, so do not advertise 0.0.0.0, which other containers cannot reach. Update these IPs when changing the subnet or addresses; each additional worker needs a unique, mutually reachable grpc_peer.
- Option 1: Docker Compose (Recommended)
Run from the Vermeer repository root. Modify existing docker-compose.yaml or use the following example. The repository file currently mounts all of ~/ as configuration and does not publish master HTTP; replace the mount and add the port mapping before starting:
Replace /home/user/vermeer-config with your actual absolute configuration directory. Changing the subnet or static IPs of vermeer_network also requires updating grpc_peer and master_peer in worker.ini. Do not use the default grpc_peer=0.0.0.0:6789 as an advertised container address.
Build and start from the project directory:
View logs / stop / remove:
- Option 2: Separate docker run Commands (Manual Network and Static IPs)
Set CONFIG_DIR to the prepared configuration directory, with grpc_peer and master_peer matching the static container addresses. Replace the example CONFIG_DIR with your actual absolute path.
Build the image:
Create a custom bridge network (once):
Run master (use your absolute CONFIG_DIR and adjust IPs as needed):
Run worker:
View logs / stop / remove:
- Option 3: Build from Source
Build following the Vermeer README.
Start from the Vermeer root directory with ./vermeer --env=master and ./vermeer --env=worker01. In worker01.ini, set grpc_peer to an address bindable locally and reachable by master and other workers; point master_peer to master gRPC.
After starting master, check its HTTP port from the host:
Expect HTTP 200 and JSON errcode=0.
2. Task Creation REST API
2.1 Introduction
Submit a load task, wait for loading to finish, then submit a compute task. A loaded graph can support repeated computations and is not deleted after completion. Asynchronous APIs return creation results and task information, including ID, before completion; synchronous APIs wait for success or failure, so client and proxy HTTP timeouts must be sufficiently long. Query task states: loaded for successful loading, complete for successful computation, error for failure, and canceled for cancellation; other states remain waiting or running. Graphs loading or in an error state cannot be computed. Deletion requires a deletable graph state and no current usage.
Available URLs:
- Asynchronous:
POST http://master_ip:port/tasks/create; read the ID from responsetask.id. - Synchronous:
POST http://master_ip:port/tasks/create/sync; returns after the task ends. - Query task:
GET http://master_ip:port/task/{task_id}.errcode=0indicates a successful query; inspecttask.statefor task status. Set a client polling deadline for asynchronous jobs; reaching it stops client waiting without canceling the server task.
2.2 Loading Graph Data
The examples list common load parameters. Each loader reads its own keys; unused keys do not change behavior.
Vermeer provides three loading methods:
- Local files
load.vertex_files and load.edge_files map worker address host portions to file paths read by those workers. With containers, mount data into the worker and use container paths. In the Compose example, mount a host data directory at worker /data (such as - /host/data:/data:ro) and use 172.20.0.11 from grpc_peer as the mapping key. Other deployments use the host portion of their advertised worker addresses.
Obtain a dataset such as Twitter-2010; the first twitter-2010.txt.gz file is sufficient.
Request example:
- HugeGraph
Request example:
Replace request addresses, graph name, and credentials with your actual connection settings.
Vermeer master connects to PD through load.hg_pd_peers to look up partitions; workers read data from the returned Store addresses. These services must be reachable from the corresponding Vermeer hosts or containers. Inside Docker, 127.0.0.1 identifies the container itself, not the host or another container.
- HDFS
Request example:
2.3 Outputting Computation Results
Current result writers support local, hdfs, and hugegraph through output.type; none disables output. Source retains an afs constant, but current master registers no AFS loader or writer. Set output.need_statistics=1 to put statistics into task information; supported statistics operators depend on each algorithm implementation.
The examples list common computation and output parameters; supported algorithm parameters depend on current Vermeer implementations.
Request example:
output.type=local writes to the executing worker’s local filesystem. For containers, mount the output directory if the host needs to read results.
3. Supported Algorithms
3.1 PageRank
The PageRank algorithm, also known as the web ranking algorithm, is a technique used by search engines to calculate the relevance and importance of web pages (nodes) based on their mutual hyperlinks.
- If a web page is linked to by many other web pages, it indicates that the web page is relatively important, and its PageRank value will be relatively high.
- If a web page with a high PageRank value links to other web pages, the PageRank value of the linked web pages will also increase accordingly.
The PageRank algorithm is suitable for scenarios such as web page ranking and identifying key figures in social networks.
Request example:
3.2 WCC (Weakly Connected Components)
The weakly connected components algorithm calculates all connected subgraphs in an undirected graph and outputs the weakly connected subgraph ID to which each vertex belongs, indicating the connectivity between points and distinguishing different connected communities.
Request example:
3.3 LPA (Label Propagation Algorithm)
The label propagation algorithm is a graph clustering algorithm commonly used in social networks to discover potential communities.
Request example:
3.4 Degree Centrality
The degree centrality algorithm calculates the degree centrality value of each node in the graph, supporting both undirected and directed graphs. Degree centrality is an important indicator of node importance; the more edges a node has with other nodes, the higher its degree centrality value, and the more important the node is in the graph. In an undirected graph, degree centrality is calculated based on edge information to count the number of times a node appears, resulting in the degree centrality value of the node. In a directed graph, it is based on the direction of the edges, filtering based on input or output-edge information to count the number of times a node appears, resulting in the in-degree or out-degree value of the node. It indicates the importance of each point, with more important points having higher degrees.
Request example:
3.5 Closeness Centrality
Closeness centrality is used to calculate the inverse of the shortest distance from a node to all other reachable nodes, accumulating and normalizing the value. Closeness centrality can be used to measure the time it takes for information to be transmitted from the node to other nodes. The larger the closeness centrality of a node, the closer its position in the graph is to the center, suitable for scenarios such as identifying key nodes in social networks.
Request example:
3.6 Betweenness Centrality
The betweenness centrality algorithm determines the value of a node as a “bridge” node; the larger the value, the more likely it is to be a necessary path between two points in the graph. Typical examples include mutual followers in social networks. It is suitable for measuring the degree of aggregation around a node in a community.
Request example:
3.7 Triangle Count
The triangle count algorithm calculates the number of triangles passing through each vertex, suitable for calculating the relationships between users and whether the associations form triangles. The more triangles, the higher the degree of association between nodes in the graph, and the tighter the organizational relationship. In social networks, triangles indicate cohesive communities, and identifying triangles helps understand clustering and interconnections among individuals or groups in the network. In financial or transaction networks, the presence of triangles may indicate suspicious or fraudulent activities, and triangle counting can help identify transaction patterns that may require further investigation.
The output result is the Triangle Count corresponding to each vertex, i.e., the number of triangles the vertex is part of.
Note: This algorithm is for undirected graphs and ignores edge directions.
Request example:
3.8 K-Core
The K-Core algorithm marks all vertices with a degree of K, suitable for graph pruning and finding the core part of the graph.
Request example:
3.9 SSSP (Single Source Shortest Path)
The single source the shortest path algorithm calculates the shortest distance from one point to all other points.
Request example:
3.10 KOUT
Starting from a point, get the k-layer nodes of this point.
Request example:
3.11 Louvain
The Louvain algorithm is a community detection algorithm based on modularity. The basic idea is that nodes in the network try to traverse all neighbor community labels and choose the community label that maximizes the modularity increment. After maximizing modularity, each community is regarded as a new node, and the process is repeated until the modularity no longer increases.
The distributed Louvain algorithm implemented on Vermeer is affected by factors such as node order and parallel computation. Due to the random traversal order of the Louvain algorithm, community compression also has a certain randomness, leading to different results in multiple executions. However, the overall trend will not change significantly.
Request example:
3.12 Jaccard Similarity Coefficient
The Jaccard index, also known as the Jaccard similarity coefficient, is used to compare the similarity and diversity between finite sample sets. The larger the Jaccard coefficient value, the higher the similarity of the samples. It is used to calculate the Jaccard similarity coefficient between a given source point and all other points in the graph.
Request example:
3.13 Personalized PageRank
The goal of personalized PageRank is to calculate the relevance of all nodes relative to user u. Starting from the node corresponding to user u, at each node, there is a probability of 1-d to stop walking and start again from u, or a probability of d to continue walking, randomly selecting a node from the nodes pointed to by the current node to walk down. It is used to calculate the personalized PageRank score starting from a given starting point, suitable for scenarios such as social recommendations.
Since the calculation requires using out-degree, load.use_out_degree needs to be set to 1 when reading the graph.
Request example:
3.14 Global Kout
Calculate the k-degree neighbors of all nodes in the graph (excluding themselves and 1~k-1 degree neighbors). Due to the severe memory expansion of the global kout algorithm, k is currently limited to 1 and 2. Additionally, the global kout algorithm supports filtering functions (parameters such as “compute.filter”:“risk_level==1”), and the filtering condition is judged when calculating the k-degree. The final result set includes those that meet the filtering condition. The algorithm’s final output is the number of neighbors that meet the condition.
Request example:
3.15 Clustering Coefficient
The clustering coefficient represents the coefficient of the clustering degree of nodes in a graph. In real networks, especially in specific networks, nodes tend to establish a tightly organized relationship due to relatively high-density connection points. The clustering coefficient algorithm (Cluster Coefficient) is used to calculate the clustering degree of nodes in the graph. This algorithm is for local clustering coefficients. The local clustering coefficient can measure the clustering degree around each node in the graph.
Request example:
3.16 SCC (Strongly Connected Components)
In the mathematical theory of directed graphs, if every vertex of a graph can be reached from any other point in the graph, the graph is said to be strongly connected. The parts of any directed graph that can achieve strong connectivity are called strongly connected components. It indicates the connectivity between points and distinguishes different connected communities.
Request example:
🚧, further updates and improvements will be made at any time. Suggestions and feedback are welcome.
4.2 - HugeGraph-Computer Quick Start
1. Component Overview
HugeGraph-Computer is a Java distributed graph computing framework based on BSP (Bulk Synchronous Parallel), with algorithms running in iterative supersteps. Kubernetes Operator or YARN can schedule jobs; master and worker processes can also run on one machine for small trial jobs.
Computer and Vermeer, in the same repository, are separate implementations: Computer uses a Java/BSP runtime for distributed computing, while Vermeer is a Go in-memory graph computing platform with a master-worker architecture. They share HugeGraph data sources, but their deployment and job configurations are not interchangeable.
Computer reads graph data from HugeGraph or HDFS and writes results to either system. The runtime can spill some data to disk; whether a job completes still depends on input size, resources, and configuration. Disk spilling does not remove resource limits.
2. Prerequisites and Connections
Building and running require JDK 11 or later; source builds also require Maven 3.5 or later. The PageRank example needs a running HugeGraph-Server with graph data, plus etcd reachable by the master and workers.
| Service | Example address or port | Purpose |
|---|---|---|
| HugeGraph-Server | http://127.0.0.1:8080 | Read graph data and write algorithm results; configured by hugegraph.url. |
| etcd | http://127.0.0.1:2379 | BSP job coordination; configured by bsp.etcd_endpoints. |
| Computer master RPC | TCP 8190 | Workers connect to master; port in the distribution configuration. |
| Computer worker data transfer | OS-assigned locally; K8s Operator defaults to 8099 | Transfer vertices and messages between workers. Advertised addresses and ports must be reachable across hosts. |
| MinIO (K8s manifests) | HTTP 9000 | Input partition snapshots. Computer 1.7.0 manifests incorrectly map Service port 9000 to MinIO Console port 9090; change targetPort to 9000 before enabling snapshots. Defaults are snapshot.write=false and snapshot.load=false, so MinIO access is unnecessary when snapshots are disabled. |
| cert-manager (K8s) | In-cluster service | Operator manifests use cert-manager.io/v1 Certificate, Issuer, and CA injection. Install a compatible version before deploying the Operator. |
| HDFS | Cluster-specific | Required only when input or output uses HDFS. |
For Kubernetes jobs, hugegraph.url must be reachable from all computing Pods; do not use a localhost address available only on your computer. If HugeGraph authentication is enabled, configure the username and password and supply matching credentials for REST queries.
In production, enable Server authentication and authorization, retain Server audit logs (normally audit-*.log), give Computer a dedicated account with only the read/write permissions required by its jobs, and configure a source IP allowlist for Server. hugegraph.username and hugegraph.password are credentials for connecting to Server, not a replacement for Server authentication.
See the Computer configuration reference for more options.
3. Obtain Source and Build a Distribution
The Apache HugeGraph download directory provides versioned Computer source archives, without separate precompiled Computer binaries. This example uses VERSION=1.7.0, whose source archive and build output names include -incubating-. For other versions, use the actual filenames in the download directory.
To build current master, clone and package the source:
The computer/computer-dist module assembles the distribution, including bin/start-computer.sh, runtime dependencies in lib/, built-in algorithms in algorithm/builtin-algorithm.jar, and default conf/computer.properties and conf/log4j2.xml. The source configuration is computer/computer-dist/src/assembly/static/conf/computer.properties. Release 1.7.0 build output includes -incubating-; current master omits it and takes its version from the POM. Use archive names matching the source you built.
4. Run PageRank Locally
Edit conf/computer.properties in the distribution directory with your HugeGraph URL, graph name, and credentials; point bsp.etcd_endpoints to reachable etcd. The default configuration selects built-in PageRankParams. Master and workers must use the same configuration and job.id; concurrent jobs need distinct job IDs.
Start processes from the distribution directory in two terminals. The script reads conf/computer.properties by default; use -c to select another file.
Master waits for the configured workers to register before running the job. Check both terminal outputs; the default logging configuration also writes master and worker logs under the distribution directory’s logs/. Process startup alone does not confirm completion: verify that input, superstep computation, and output all finish normally in the master log.
PageRank writes results to HugeGraph under page_rank. First ensure every target vertex label allows this property. Computer creates a DOUBLE, OLAP_COMMON property key but does not add it to vertex labels. If absent, create it:
If the property key already exists, verify its type is DOUBLE and write_type is OLAP_COMMON. List vertex labels, then add nullable page_rank to every label being computed; replace person with the actual label:
If the current read mode hides OLAP writes, an administrator can set it to ALL:
Query vertices to verify the result property:
When authentication is required, add --user "$HG_USER:$HG_PASSWORD" to curl. See the graph read-mode REST API for the endpoint and permissions.
5. Run PageRank on Kubernetes
Ensure computing Pods can reach HugeGraph-Server, then install a cluster-compatible cert-manager using its official installation guide. The Computer Operator manifests deploy the Operator, etcd, and MinIO. Use the same Computer release for the CRD and Operator manifests; this example uses 1.7.0:
The 1.7.0 MinIO Service maps S3 API port 9000 to Console port 9090. Fix this mapping before enabling snapshots and set snapshot.minio_endpoint to http://hugegraph-computer-operator-minio.hugegraph-computer-operator-system.svc:9000. Skip this when snapshots remain disabled.
Replace the HugeGraph URL with a service address reachable by computing Pods, then submit a HugeGraphComputerJob. This example uses the official Docker Hub image hugegraph/hugegraph-computer:latest and its built-in PageRank JAR. Custom algorithm JARs can be bundled in the image and selected with jarFile, or downloaded from HTTP(S) with remoteJarUri. The partition count must be at least the worker count.
Save the following YAML as pagerank-job.yaml, then apply it:
SUCCEEDED means the job completed. By default, the Operator deletes the CR and computing resources after completion. Expand the following instructions when you need to retain state or investigate a failed job.
The Operator defaults to AUTO_DESTROY_POD=true, so short jobs may lose their CR and Pods before inspection. Disable this before submitting the job, wait for the replacement Controller Pod to become ready, then submit. Change this setting in the Java Operator’s controller container:
Inspect runtime information or failure logs:
After checking results, delete the CR to clean up associated resources and restore the default policy:
After PageRank writes to HugeGraph, set the read mode and query as in the previous section. For HDFS output, results are under output.hdfs_path_prefix/<job.id>/; filenames and partition layout depend on job configuration.
See the CRD configuration reference for all fields.
6. Built-in Algorithms and Development
Current built-in algorithms include:
- Centrality: PageRank, Betweenness Centrality, Closeness Centrality, Degree Centrality.
- Communities and structure: Clustering Coefficient, K-core, LPA, Triangle Count, WCC.
- Paths and sampling: ring detection, filtered ring detection, single-source shortest path, Random Walk.
Implementations are in computer/computer-algorithm. Custom algorithms must follow the Computer API and be packaged as loadable JARs; see the Computer README for modules and development entry points.
4.3 - HugeGraph-Computer Configuration Reference
Computer Config Options
The defaults in the tables come from ComputerOptions.java in computer-api; explicit conf/computer.properties overrides are shown as “code default (distribution: actual value)”. Common options such as rpc.* come from HugeGraph Commons; distribution values are listed separately below.
Configuration Sources
- Source template:
computer/computer-dist/src/assembly/static/conf/computer.properties, withlog4j2.xmlin the same directory. Mavenpackagecopies these into distributionconf/, runtime dependencies intolib/, and built-in algorithm JARs intoalgorithm/. Templates are maintained in source; there is no separate configuration generator. - Standalone and YARN: startup scripts read distribution
conf/computer.propertiesby default. Override it withbin/start-computer.sh -c <configuration-path>; master and workers need the same job parameters. - Kubernetes Operator: users supply
spec.computerConfin the CRD; the Operator writes a ConfigMap mounted ascomputer.properties. It supplies job ID, worker count, Pod addresses, and etcd when unspecified. Unspecified or zero transfer/RPC ports become8099/8190;transport.server_hostandrpc.server_hostbecome Pod IPs. Job startup scripts substitute only${POD_IP},${HOSTNAME},${POD_NAME}, and${POD_NAMESPACE}. - Kubernetes job images must contain the Computer runtime. Bundle algorithm JARs and select them with
jarFile, or use an HTTP(S)remoteJarUrifor startup download. See the Computer Quick Start and CRD table below.
Apache downloads provide versioned Computer source archives without separate precompiled binaries. Release 1.7.0 source and distribution names include -incubating-; run mvn clean package -DskipTests in the tagged computer/ project to build them. Current master omits that marker and takes its version from the POM. Source archives cannot be started as built distributions.
Empty HugeGraph credentials and example MinIO keys below are for local demonstrations. In production, enable Server authentication and authorization, retain Server audit-*.log, use a Computer account with minimum required Server permissions, and configure a Server source IP allowlist. Do not use example MinIO keys in production.
1. Basic Configuration
Core job settings for HugeGraph-Computer.
| config option | default value | description |
|---|---|---|
| hugegraph.url | http://127.0.0.1:8080 | The HugeGraph server URL to load data and write results back. |
| hugegraph.name | hugegraph | The graph name to load data and write results back. |
| hugegraph.username | "" (empty) | The username for HugeGraph authentication (leave empty if authentication is disabled). |
| hugegraph.password | "" (empty) | The password for HugeGraph authentication (leave empty if authentication is disabled). |
| job.id | local_0001 (packaged: local_001) | The job identifier on YARN cluster or K8s cluster. |
| job.namespace | "" (empty) | Optional etcd job-key prefix for namespace isolation; distinct from Kubernetes metadata.namespace and not populated automatically by the Operator. |
| job.workers_count | 1 | The number of workers for one graph algorithm job. In K8s, this option is set by the Operator. |
| job.partitions_count | 1 | The number of partitions for computing one graph algorithm job. |
| job.partitions_thread_nums | 4 | The number of threads for partition parallel compute. |
2. Algorithm Configuration
Algorithm-specific configuration for computation logic.
| config option | default value | description |
|---|---|---|
| algorithm.params_class | ComputerOptions.Null placeholder class | Required. The class used to pass algorithm parameters before the algorithm runs. |
| algorithm.result_class | ComputerOptions.Null placeholder class | The vertex value class used to store computation results. |
| algorithm.message_class | ComputerOptions.Null placeholder class | The message class passed while computing a vertex. |
3. Input Configuration
Configuration for loading input data from HugeGraph or other sources.
3.1 Input Source
| config option | default value | description |
|---|---|---|
| input.source_type | hugegraph-server | The source type to load input data, allowed values: [‘hugegraph-server’, ‘hugegraph-loader’]. The ‘hugegraph-loader’ means use hugegraph-loader to load data from HDFS or file. If using ‘hugegraph-loader’, please configure ‘input.loader_struct_path’ and ‘input.loader_schema_path’. |
| input.loader_struct_path | "" (empty) | The structure path for Loader input. It takes effect only when input.source_type=hugegraph-loader. |
| input.loader_schema_path | "" (empty) | The schema path for Loader input. It takes effect only when input.source_type=hugegraph-loader. |
3.2 Input Splits
| config option | default value | description |
|---|---|---|
| input.split_size | 1048576 (1 MB) | The input split size in bytes. |
| input.split_max_splits | 10000000 | The maximum number of input splits. |
| input.split_page_size | 500 | The page size for streamed load input split data. |
| input.split_fetch_timeout | 300 | The timeout in seconds to fetch input splits. |
3.3 Input Processing
| config option | default value | description |
|---|---|---|
| input.filter_class | org.apache.hugegraph.computer.core.input.filter.DefaultInputFilter | The class to create input-filter object. Input-filter is used to filter vertex edges according to user needs. |
| input.edge_direction | OUT | The direction of edges to load, allowed values: [OUT, IN, BOTH]. When the value is BOTH, edges in both OUT and IN directions will be loaded. |
| input.edge_freq | MULTIPLE | The frequency of edges that can exist between a pair of vertices, allowed values: [SINGLE, SINGLE_PER_LABEL, MULTIPLE]. SINGLE means only one edge can exist between a pair of vertices (identified by sourceId + targetId); SINGLE_PER_LABEL means each edge label can have one edge between a pair of vertices (identified by sourceId + edgeLabel + targetId); MULTIPLE means many edges can exist between a pair of vertices (identified by sourceId + edgeLabel + sortValues + targetId). |
| input.max_edges_in_one_vertex | 200 | The maximum number of adjacent edges allowed to be attached to a vertex. The adjacent edges will be stored and transferred together as a batch unit. |
3.4 Input Performance
| config option | default value | description |
|---|---|---|
| input.send_thread_nums | 4 | The number of threads for parallel sending of vertices or edges. |
4. Snapshot & Storage Configuration
HugeGraph-Computer supports snapshot functionality to save vertex/edge partitions to local storage or MinIO object storage, enabling checkpoint recovery or accelerating repeated computations.
4.1 Basic Snapshot Configuration
| config option | default value | description |
|---|---|---|
| snapshot.write | false | Whether to write snapshots of input vertex/edge partitions. |
| snapshot.load | false | Whether to load from snapshots of vertex/edge partitions. |
| snapshot.name | "" (empty) | User-defined snapshot name to distinguish different snapshots. |
4.2 MinIO Integration (Optional)
MinIO can be used as a distributed object storage backend for snapshots in K8s deployments.
| config option | default value | description |
|---|---|---|
| snapshot.minio_endpoint | "" (empty) | MinIO service endpoint (e.g., http://minio:9000). Required when using MinIO. |
| snapshot.minio_access_key | minioadmin | MinIO access key for authentication. |
| snapshot.minio_secret_key | minioadmin | MinIO secret key for authentication. |
| snapshot.minio_bucket_name | "" (empty) | MinIO bucket name for storing snapshot data. |
Usage Scenarios:
- Checkpoint Recovery: Resume from snapshots after job failures, avoiding data reloading
- Repeated Computations: Load data from snapshots when running the same algorithm multiple times
- A/B Testing: Save multiple snapshot versions of the same dataset to test different algorithm parameters
Example: Local Snapshot (in computer.properties):
Example: MinIO Snapshot (in K8s CRD computerConf):
5. Worker & Master Configuration
Configuration for worker and master computation logic.
5.1 Master Configuration
| config option | default value | description |
|---|---|---|
| master.computation_class | org.apache.hugegraph.computer.core.master.DefaultMasterComputation | Master-computation is computation that can determine whether to continue to the next superstep. It runs at the end of each superstep on the master. |
5.2 Worker Computation
| config option | default value | description |
|---|---|---|
| worker.computation_class | org.apache.hugegraph.computer.core.config.Null | The class to create worker-computation object. Worker-computation is used to compute each vertex in each superstep. |
| worker.combiner_class | org.apache.hugegraph.computer.core.config.Null | Combiner can combine messages into one value for a vertex. For example, PageRank algorithm can combine messages of a vertex to a sum value. |
| worker.partitioner | org.apache.hugegraph.computer.core.graph.partition.HashPartitioner | The partitioner that decides which partition a vertex should be in, and which worker a partition should be in. |
5.3 Worker Combiners
| config option | default value | description |
|---|---|---|
| worker.vertex_properties_combiner_class | org.apache.hugegraph.computer.core.combiner.OverwritePropertiesCombiner | The combiner can combine several properties of the same vertex into one properties at input step. |
| worker.edge_properties_combiner_class | org.apache.hugegraph.computer.core.combiner.OverwritePropertiesCombiner | The combiner can combine several properties of the same edge into one properties at input step. |
5.4 Worker Buffers
| config option | default value | description |
|---|---|---|
| worker.received_buffers_bytes_limit | 104857600 (100 MB) | The limit bytes of buffers of received data. The total size of all buffers can’t exceed this limit. If received buffers reach this limit, they will be merged into a file (spill to disk). |
| worker.write_buffer_capacity | 52428800 (50 MB) | The initial size of write buffer that used to store vertex or message. |
| worker.write_buffer_threshold | 52428800 (50 MB) | The threshold of write buffer. Exceeding it will trigger sorting. The write buffer is used to store vertex or message. |
5.5 Worker Data & Timeouts
| config option | default value | description |
|---|---|---|
| worker.data_dirs | [jobs] | The directories separated by ‘,’ that received vertices and messages can persist into. |
| worker.wait_sort_timeout | 600000 (10 minutes) | The max timeout (in ms) for message-handler to wait for sort-thread to sort one batch of buffers. |
| worker.wait_finish_messages_timeout | 86400000 (24 hours) | The max timeout (in ms) for message-handler to wait for finish-message of all workers. |
6. I/O & Output Configuration
Configuration for output computation results.
6.1 Output Class & Result
| config option | default value | description |
|---|---|---|
| output.output_class | org.apache.hugegraph.computer.core.output.LogOutput | The class to output the computation result of each vertex. Called after iteration computation. |
| output.result_name | value | The value is assigned dynamically by #name() of instance created by WORKER_COMPUTATION_CLASS. |
| output.result_write_type | OLAP_COMMON | The result write-type to output to HugeGraph, allowed values: [OLAP_COMMON, OLAP_SECONDARY, OLAP_RANGE]. |
6.2 Output Behavior
| config option | default value | description |
|---|---|---|
| output.with_adjacent_edges | false | Whether to output the adjacent edges of the vertex. |
| output.with_vertex_properties | false | Whether to output the properties of the vertex. |
| output.with_edge_properties | false | Whether to output the properties of the edge. |
6.3 Batch Output
| config option | default value | description |
|---|---|---|
| output.batch_size | 500 | The batch size of output. |
| output.batch_threads | 1 | The number of threads used for batch output. |
| output.single_threads | 1 | The number of threads used for single output. |
6.4 HDFS Output
| config option | default value | description |
|---|---|---|
| output.hdfs_url | hdfs://127.0.0.1:9000 | The HDFS URL for output. |
| output.hdfs_user | hadoop | The HDFS user for output. |
| output.hdfs_path_prefix | /hugegraph-computer/results | The directory of HDFS output results. |
| output.hdfs_delimiter | , (comma) | The delimiter of HDFS output. |
| output.hdfs_merge_partitions | true | Whether to merge output files of multiple partitions. |
| output.hdfs_replication | 3 | The replication number of HDFS. |
| output.hdfs_core_site_path | "" (empty) | The HDFS core site path. |
| output.hdfs_site_path | "" (empty) | The HDFS site path. |
| output.hdfs_kerberos_enable | false | Whether Kerberos authentication is enabled for HDFS. |
| output.hdfs_kerberos_principal | "" (empty) | The HDFS principal for Kerberos authentication. |
| output.hdfs_kerberos_keytab | "" (empty) | The HDFS keytab file for Kerberos authentication. |
| output.hdfs_krb5_conf | /etc/krb5.conf | Kerberos configuration file path. |
6.5 Retry & Timeout
| config option | default value | description |
|---|---|---|
| output.retry_times | 3 | The retry times when output fails. |
| output.retry_interval | 10 | The retry interval (in seconds) when output fails. |
| output.thread_pool_shutdown_timeout | 60 | The timeout (in seconds) of output thread pool shutdown. |
7. Network & Transport Configuration
Configuration for network communication between workers and master.
7.1 Server Configuration
| config option | default value | description |
|---|---|---|
| transport.server_host | 127.0.0.1 | Worker data listener and advertised address. It must be reachable by other workers across hosts; the Operator sets it to the Pod IP. |
| transport.server_port | 0 (distribution: 0; K8s Operator: 8099) | Worker data port. Locally, 0 lets the OS assign a port; the Operator uses fixed port 8099 by default for Pod communication. |
| transport.server_threads | 4 | The number of transport threads for server. |
7.2 Client Configuration
| config option | default value | description |
|---|---|---|
| transport.client_threads | 4 | The number of transport threads for client. |
| transport.client_connect_timeout | 3000 | The timeout (in ms) of client connect to server. |
7.3 Protocol Configuration
| config option | default value | description |
|---|---|---|
| transport.provider_class | org.apache.hugegraph.computer.core.network.netty.NettyTransportProvider | The transport provider, currently only supports Netty. |
| transport.io_mode | AUTO | The network IO mode, allowed values: [NIO, EPOLL, AUTO]. AUTO means selecting the appropriate mode automatically. |
| transport.tcp_keep_alive | true | Whether to enable TCP keep-alive. |
| transport.transport_epoll_lt | false | Whether to enable EPOLL level-trigger (only effective when io_mode=EPOLL). |
7.4 Buffer Configuration
| config option | default value | description |
|---|---|---|
| transport.send_buffer_size | 0 | The size of socket send-buffer in bytes. 0 means using system default value. |
| transport.receive_buffer_size | 0 | The size of socket receive-buffer in bytes. 0 means using system default value. |
| transport.write_buffer_high_mark | 67108864 (64 MB) | The high water mark for write buffer in bytes. It will trigger sending unavailable if the number of queued bytes > write_buffer_high_mark. |
| transport.write_buffer_low_mark | 33554432 (32 MB) | The low water mark for write buffer in bytes. It will trigger sending available if the number of queued bytes < write_buffer_low_mark. |
7.5 Flow Control
| config option | default value | description |
|---|---|---|
| transport.max_pending_requests | 8 | The max number of client unreceived ACKs. It will trigger sending unavailable if the number of unreceived ACKs >= max_pending_requests. |
| transport.min_pending_requests | 6 | The minimum number of client unreceived ACKs. It will trigger sending available if the number of unreceived ACKs < min_pending_requests. |
| transport.min_ack_interval | 200 | The minimum interval (in ms) of server reply ACK. |
7.6 Timeouts
| config option | default value | description |
|---|---|---|
| transport.close_timeout | 10000 | The timeout (in ms) of close server or close client. |
| transport.sync_request_timeout | 10000 | The timeout (in ms) to wait for response after sending sync-request. |
| transport.finish_session_timeout | 0 | The timeout (in ms) to finish session. 0 means using (transport.sync_request_timeout × transport.max_pending_requests). |
| transport.write_socket_timeout | 3000 | The timeout (in ms) to write data to socket buffer. |
| transport.server_idle_timeout | 360000 (6 minutes) | The max timeout (in ms) of server idle. |
7.7 Heartbeat
| config option | default value | description |
|---|---|---|
| transport.heartbeat_interval | 20000 (20 seconds) | The minimum interval (in ms) between heartbeats on client side. |
| transport.max_timeout_heartbeat_count | 120 | The maximum times of timeout heartbeat on client side. If the number of timeouts waiting for heartbeat response continuously > max_timeout_heartbeat_count, the channel will be closed from client side. |
7.8 Advanced Network Settings
| config option | default value | description |
|---|---|---|
| transport.max_syn_backlog | 511 | The capacity of SYN queue on server side. 0 means using system default value. |
| transport.recv_file_mode | true | Whether to enable receive buffer-file mode. It will receive buffer and write to file from socket using zero-copy if enabled. Note: Requires OS support for zero-copy (e.g., Linux sendfile/splice). |
| transport.network_retries | 3 | The number of retry attempts for network communication if network is unstable. |
7.9 Master RPC Configuration
These options come from HugeGraph Commons RPC configuration; the distribution template explicitly sets host and port. Kubernetes Operator advertises the Pod IP and defaults an unspecified or zero port to 8190.
| Option | Distribution value | Description |
|---|---|---|
| rpc.server_host | 127.0.0.1 (K8s: Pod IP) | Master RPC address, reachable by workers. |
| rpc.server_port | 8190 (K8s default: 8190) | Master RPC listener port; allow worker connections in security groups and network policies. |
8. Storage & Persistence Configuration
Configuration for HGKV (HugeGraph Key-Value) storage engine and value files.
8.1 HGKV Configuration
| config option | default value | description |
|---|---|---|
| hgkv.max_file_size | 2147483648 (2 GB) | The max number of bytes in each HGKV file. |
| hgkv.max_data_block_size | 65536 (64 KB) | The max byte size of HGKV file data block. |
| hgkv.max_merge_files | 10 | The max number of files to merge at one time. |
| hgkv.temp_file_dir | /tmp/hgkv | This folder is used to store temporary files during the file merging process. |
8.2 Value File Configuration
| config option | default value | description |
|---|---|---|
| valuefile.max_segment_size | 1073741824 (1 GB) | The max number of bytes in each segment of value-file. |
9. BSP & Coordination Configuration
Configuration for Bulk Synchronous Parallel (BSP) protocol and etcd coordination.
| config option | default value | description |
|---|---|---|
| bsp.etcd_endpoints | http://localhost:2379 (distribution: http://127.0.0.1:2379) | Comma-separated etcd client endpoints. The Operator uses INTERNAL_ETCD_URL only when computerConf does not specify this key. |
| bsp.max_super_step | 10 (packaged: 2) | The max super step of the algorithm. |
| bsp.register_timeout | 300000 (packaged: 100000) | The max timeout (in ms) to wait for master and workers to register. |
| bsp.wait_workers_timeout | 86400000 (24 hours) | The max timeout (in ms) to wait for workers BSP event. |
| bsp.wait_master_timeout | 86400000 (24 hours) | The max timeout (in ms) to wait for master BSP event. |
| bsp.log_interval | 30000 (30 seconds) | The log interval (in ms) to print the log while waiting for BSP event. |
10. Performance Tuning Configuration
Configuration for performance optimization.
| config option | default value | description |
|---|---|---|
| allocator.max_vertices_per_thread | 10000 | Maximum number of vertices per thread processed in each memory allocator. |
| sort.thread_nums | 4 | The number of threads performing internal sorting. |
11. System Administration Configuration
Kubernetes Operator fills or overrides these options. Avoid overriding them unless customizing the Operator or network. job.namespace is optional user configuration; see the basic configuration table.
| Option | Managed by | Description |
|---|---|---|
| bsp.etcd_endpoints | K8s Operator | Uses INTERNAL_ETCD_URL only when absent from computerConf. |
| transport.server_host | K8s Operator | Overrides with Pod IP; workers must reach each other. |
| transport.server_port | K8s Operator | Defaults unspecified or zero values to 8099, not a random port. |
| job.id | K8s Operator | Set from CRD job ID. |
| job.workers_count | K8s Operator | Set from CRD workerInstances. |
| rpc.server_host | K8s Operator | Overrides with master Pod IP. |
| rpc.server_port | K8s Operator | Defaults unspecified or zero values to 8190. |
| rpc.remote_url | Computer startup | Removed when configuration is read; do not set as job configuration. |
Why these values must match:
- BSP/RPC: Must match deployed etcd/RPC services for coordination.
- Job settings: Must match the CRD to provide the correct worker count.
- Transport: Workers need mutually reachable Pod IPs and ports; the K8s default is
8099.
K8s Operator Config Options
NOTE: Option needs to be converted through environment variable settings, e.g. k8s.internal_etcd_url => INTERNAL_ETCD_URL
| config option | default value | description |
|---|---|---|
| k8s.auto_destroy_pod | true | Delete the job CR after completion or failure; CR deletion triggers cleanup of associated computing resources. |
| k8s.close_reconciler_timeout | 120 | The max timeout (in ms) to close reconciler. |
| k8s.internal_etcd_url | Code: http://127.0.0.1:2379; manifest: http://hugegraph-computer-operator-etcd.hugegraph-computer-operator-system:2379 | etcd URL used by Operator jobs; the supplied manifest uses the etcd Service address. |
| k8s.internal_minio_url | Code: http://127.0.0.1:9000; manifest: http://hugegraph-computer-operator-minio.hugegraph-computer-operator-system:9000 | MinIO address supplied to jobs by the Operator; needed only for MinIO snapshots. |
| k8s.max_reconcile_retry | 3 | The max retry times of reconcile. |
| k8s.probe_backlog | 50 | The maximum backlog for serving health probes. |
| k8s.probe_port | 9892 | The port that the controller binds to for serving health probes. |
| k8s.ready_check_internal | 1000 | The time interval (ms) of check ready. |
| k8s.ready_timeout | 30000 | The max timeout (in ms) of check ready. |
| k8s.reconciler_count | Code: Runtime.getRuntime().availableProcessors(); manifest: 6 | Maximum reconciler thread count. |
| k8s.resync_period | 600000 | The minimum frequency at which watched resources are reconciled. |
| k8s.timezone | Asia/Shanghai | The timezone of computer job and operator. |
| k8s.watch_namespace | hugegraph-computer-operator-system | Namespace watched for custom resources; also used by the supplied manifest. Use * to watch all namespaces. |
HugeGraph-Computer CRD
| spec | default value | description | required |
|---|---|---|---|
| algorithmName | The name of algorithm. | true | |
| jobId | The job id. | true | |
| image | Job container image, which must include the Computer runtime. Bundle algorithm JARs or download them with remoteJarUri. | true | |
| computerConf | The map of computer config options. | true | |
| workerInstances | The number of worker instances, it will override the ‘job.workers_count’ option. | true | |
| pullPolicy | Kubernetes selects Always for latest, otherwise IfNotPresent, when unset | Explicit values: Always, Never, or IfNotPresent. The CRD has no default; see image pull policy. | false |
| pullSecrets | The pull-secrets of Image, detail please refer to: https://kubernetes.io/docs/concepts/containers/images/#specifying-imagepullsecrets-on-a-pod | false | |
| masterCpu | The cpu limit of master, the unit can be ’m’ or without unit detail please refer to: https://kubernetes.io/docs/concepts/configuration/manage-resources-containers/#meaning-of-cpu | false | |
| workerCpu | The cpu limit of worker, the unit can be ’m’ or without unit detail please refer to: https://kubernetes.io/docs/concepts/configuration/manage-resources-containers/#meaning-of-cpu | false | |
| masterMemory | The memory limit of master, the unit can be one of Ei、Pi、Ti、Gi、Mi、Ki detail please refer to: https://kubernetes.io/docs/concepts/configuration/manage-resources-containers/#meaning-of-memory | false | |
| workerMemory | The memory limit of worker, the unit can be one of Ei、Pi、Ti、Gi、Mi、Ki detail please refer to: https://kubernetes.io/docs/concepts/configuration/manage-resources-containers/#meaning-of-memory | false | |
| log4jXml | The content of log4j.xml for computer job. | false | |
| jarFile | Path to the algorithm JAR inside the image. | false | |
| remoteJarUri | HTTP(S) algorithm JAR URL, downloaded and loaded by the startup script. | false | |
| jvmOptions | The java startup parameters of computer job. | false | |
| envVars | please refer to: https://kubernetes.io/docs/tasks/inject-data-application/define-interdependent-environment-variables/ | false | |
| envFrom | please refer to: https://kubernetes.io/docs/tasks/inject-data-application/define-environment-variable-container/ | false | |
| masterCommand | bin/start-computer.sh | The run command of master, equivalent to ‘Entrypoint’ field of Docker. | false |
| masterArgs | ["-r master", “-d k8s”] | The run args of master, equivalent to ‘Cmd’ field of Docker. | false |
| workerCommand | bin/start-computer.sh | The run command of worker, equivalent to ‘Entrypoint’ field of Docker. | false |
| workerArgs | ["-r worker", “-d k8s”] | The run args of worker, equivalent to ‘Cmd’ field of Docker. | false |
| volumes | Please refer to: https://kubernetes.io/docs/concepts/storage/volumes/ | false | |
| volumeMounts | Please refer to: https://kubernetes.io/docs/concepts/storage/volumes/ | false | |
| secretPaths | The map of k8s-secret name and mount path. | false | |
| configMapPaths | The map of k8s-configmap name and mount path. | false | |
| podTemplateSpec | Please refer to: https://kubernetes.io/docs/reference/kubernetes-api/workload-resources/pod-template-v1/#PodTemplateSpec | false | |
| securityContext | Please refer to: https://kubernetes.io/docs/tasks/configure-pod-container/security-context/ | false |
KubeDriver Config Options
| config option | default value | description |
|---|---|---|
| k8s.build_image_bash_path | The path of command used to build image. | |
| k8s.enable_internal_algorithm | true | Whether enable internal algorithm. |
| k8s.framework_image_url | hugegraph/hugegraph-computer:latest | The image url of computer framework. |
| k8s.image_repository_password | The password for login image repository. | |
| k8s.image_repository_registry | The address for login image repository. | |
| k8s.image_repository_url | hugegraph/hugegraph-computer | The url of image repository. |
| k8s.image_repository_username | The username for login image repository. | |
| k8s.internal_algorithm | [pageRank] | The name list of all internal algorithm. Note: Algorithm names use camelCase here (e.g., pageRank), but algorithm implementations return underscore_case (e.g., page_rank). |
| k8s.internal_algorithm_image_url | hugegraph/hugegraph-computer:latest | The image url of internal algorithm. |
| k8s.jar_file_dir | /cache/jars/ | The directory where the algorithm jar will be uploaded. |
| k8s.kube_config | ~/.kube/config | The path of k8s config file. |
| k8s.log4j_xml_path | The log4j.xml path for computer job. | |
| k8s.namespace | hugegraph-computer-operator-system | Namespace of the HugeGraph-Computer system. |
| k8s.pull_secret_names | [] | The names of pull-secret for pulling image. |
5 - HugeGraph Client
The Java and Go clients are maintained in the HugeGraph Toolchain repository, while the Python client is maintained in the HugeGraph-AI repository. Their installation methods and APIs differ; see the corresponding pages for details.
5.1 - HugeGraph-Java-Client
1 Overview
HugeGraph Java Client translates Java APIs into REST requests to HugeGraph Server. It supports managing schemas and graph data, executing Gremlin queries, and calling Traverser APIs. See the Client API for detailed interfaces; this page shows how to use the client in a Java project.
For other languages, use the Go Client or the Python Client maintained in the HugeGraph-AI repository.
2 What You Need
- JDK 11 (used by the current CI; the source target remains Java 8)
- Maven 3.6+
3 How To Use
The basic steps to use HugeGraph-Client are as follows:
- Build a new Maven project by IDEA or Eclipse
- Add HugeGraph-Client dependency in a pom file;
- Create an object to invoke the interface of HugeGraph-Client
See the complete example in the following section for the detail.
4 Complete Example
4.1 Build New Maven Project
Using IDEA or Eclipse to create the project:
4.2 Add Hugegraph-Client Dependency In POM
The complete examples below use Schema, Graph, Gremlin and resource-cleanup APIs available in the published Client 1.7.0
and compatible with Toolchain master. Use the dependency above directly in your example project.
For new master APIs in the API reference, such as capability detection, use Client 1.8.0
from Toolchain master and change the POM version to 1.8.0. If that version is not published to Maven yet, run the following
command from the Toolchain source root to install the Client and its parent POM locally. The source build still needs
its dependencies available from your configured Maven repositories.
Client and Server versions need not match. Check the supported server API range and required capabilities before upgrading.
4.3 Example
4.3.1 SingleExample
4.3.2 BatchExample
4.4 Run The Example
Before running Example, you need to start the Server. For the startup process, seeHugeGraph-Server Quick Start.
4.5 More Information About Client-API
5.2 - HugeGraph Python Client Quick Start
hugegraph-python-client is the Python SDK for HugeGraph. It manages schemas, reads and writes graph data, and executes Gremlin queries. HugeGraph-LLM and HugeGraph-ML also use this client.
The module lives in the hugegraph-ai repository under hugegraph-python-client/. The import name is pyhugegraph.
Requirements
- The client and HugeGraph-AI workspace require Python 3.10 or later; CI runs client tests on 3.10 and 3.11.
- HugeGraph Server 1.5.0 or later. The client refuses to connect to older servers; use client v1.3.x for those.
uv(recommended) orpip
Runtime dependencies are decorator, requests, setuptools, urllib3 and rich.
Installation
The released package is published on PyPI as hugegraph-python:
These commands do not pin a version and install the latest release; see PyPI. The source directory is hugegraph-python-client, while the distribution is hugegraph-python. Install from the HugeGraph-AI workspace for master code.
To use the latest repository code, sync the workspace from the root of the HugeGraph-AI repository. hugegraph-python-client is a workspace member exposed through the python-client extra, so plain uv sync does not pull it in:
Connect and Write Data
Client Parameters
PyHugeClient(url, graph, user, pwd, graphspace=None, timeout=None)
| Parameter | Type | Default | Description |
|---|---|---|---|
url | str | required | Base URL of HugeGraph Server. If the value has no scheme, http:// is prepended, so 127.0.0.1:8080 also works. |
graph | str | required | Graph name. This is the second positional parameter. |
user | str | required | Username, sent as HTTP basic auth. |
pwd | str | required | Password, sent as HTTP basic auth. |
graphspace | str or None | None | GraphSpace name. See below for how None is resolved. |
timeout | tuple[float, float] or None | None | (connect, read) timeouts in seconds. None becomes (0.5, 15.0). |
Every HTTP session retries three times with a 0.1 backoff factor on 500, 502 and 504 responses.
Server Version and GraphSpace
The client resolves GraphSpace at construction time:
- A non-empty
graphspacestring turns GraphSpace mode on directly. - Otherwise the client sends
GET {url}/versionsand readsversions.core. - A server older than 1.5.0 raises
RuntimeErrorasking you to upgrade the server or use client v1.3.x. - A server newer than 1.5.0 gets
graphspaceset toDEFAULTand GraphSpace mode turned on, with a warning in the log. A server at exactly 1.5.0 keeps GraphSpace mode off. - If the probe fails for network reasons, GraphSpace mode stays off.
The mode decides the request prefix: /graphspaces/<graphspace>/graphs/<graph>/... when GraphSpace is on, /graphs/<graph>/... when it is off.
Managers on the Client
Each accessor builds its manager lazily and gives it a dedicated HTTP session.
| Accessor | Manager | Covers |
|---|---|---|
client.schema() | SchemaManager | Property keys, vertex labels, edge labels, index labels |
client.graph() | GraphManager | Vertex and edge CRUD, batch writes, paging |
client.gremlin() | GremlinManager | Gremlin execution |
client.graphs() | GraphsManager | Graph list, graph info, config, clear data |
client.traverser() | TraverserManager | Traversal and path algorithms |
client.variable() | VariableManager | Graph variables |
client.task() | TaskManager | Async task list, query, cancel, delete |
client.auth() | AuthManager | Users, groups, targets, belongs, accesses |
client.metrics() | MetricsManager | Server metrics |
client.version() | VersionManager | Server version |
RankManager, RebuildManager and ServicesManager also ship in pyhugegraph.api, but PyHugeClient does not expose accessors for them yet; construct them directly with a session if you need them.
Common Operations
Build the Schema
The schema builders are fluent. Call create() last, or append(), eliminate() and remove() to change an existing definition.
Query the Schema
Read, Update and Delete Graph Data
The graph API takes property dictionaries, not chained property builders:
addVertex returns a VertexData with id, label, type and properties. addEdge returns an EdgeData with id, label, type, outV, outVLabel, inV, inVLabel and properties.
Vertex ids passed to the client may be strings, integers or uuid.UUID values. Booleans are rejected, and integers must fit the Java signed long range.
Batch Writes
addVertices takes (label, properties) pairs, and addEdges takes (label, out_id, in_id, out_label, in_label, properties) tuples. Both return objects that carry only the generated ids.
Paging and Conditional Queries
Execute Gremlin
exec binds the graph and g aliases for you, based on the graph name and the resolved GraphSpace, and returns the result field of the server response. A response missing requestId, status or result raises ResponseParseError.
Traverse the Graph
TraverserManager wraps the server traverser endpoints. Its methods use snake_case.
The POST-based variants take request bodies: advanced_paths, customized_paths, template_paths, customized_crosspoints and fusiform_similarity.
Graph Variables
Async Tasks
Server Metrics and Graph Info
Authentication and Authorization
AuthManager follows the server routing: users, targets, belongs and accesses are mounted under /graphspaces/{graphspace}/auth/..., while groups stay at the server-level /auth/groups. On HugeGraph 1.7.0 and later a graphspace must be resolved, otherwise these calls raise ValueError before any request is sent.
Method Naming
Manager methods written in camelCase, such as addVertex and getVertexById, also get a snake_case alias generated at construction time. graph.add_vertex(...) and graph.addVertex(...) reach the same method. The camelCase spellings are marked deprecated in the debug log, so prefer snake_case in new code.
Error Handling
Exceptions live in pyhugegraph.utils.exceptions:
| Exception | Raised when |
|---|---|
NotAuthorizedError | The server answers 401 |
NotFoundError | The server answers 404, or a required argument is missing |
ServerError | Any other non-2xx response, with the server message attached |
ResponseParseError | A successful response cannot be parsed into the expected shape |
ServiceUnavailableError | The server reports ServiceUnavailableException |
InvalidParameterError, CreateError, RemoveError, UpdateError, DataFormatError | Raised by individual builders and structures |
Request and response bodies are logged with password, token and secret values redacted.
API parameters may change with the HugeGraph REST API version. If an interface is incompatible, first check the REST API documentation for the current server version and the client test cases.
Development Checks
Run formatting and static checks from the root of the HugeGraph-AI repository:
Run the tests the same way CI does:
CI runs the integration job against the hugegraph/hugegraph:1.7.0 image. HUGEGRAPH_GRAPHSPACE is also read when you need a non-default space.
The source code and tests are under hugegraph-python-client/src/pyhugegraph/ and hugegraph-python-client/src/tests/. A runnable example is at hugegraph-python-client/src/pyhugegraph/example/hugegraph_example.py.
5.3 - HugeGraph Go Client Quick Start
HugeGraph Go Client is the Go SDK in the Toolchain repository. It currently provides APIs for version queries, schemas (property keys, vertex labels, and edge labels), vertices, and Gremlin. An edge data API is not implemented yet.
This module is still under development. Refer to the source code under
hugegraph-client-go/api/v1for the currently available interfaces.
Requirements
- Go 1.19 or later
- An accessible HugeGraph Server; examples use
http://127.0.0.1:8080
Installation
Run the following command in a Go module project:
Initialize the Client
NewCommonClient requires Host to be an IP address and Port to be between 1 and 65535. The client always connects over plain HTTP. Leave the username and password empty when authentication is disabled; Basic Auth is sent only when both are set.
GraphSpace is applied only by the Vertex API, which then calls /graphspaces/{space}/graphs/{graph}/..., and by the default Gremlin aliases (an empty value is treated as DEFAULT). The schema entry points and Version() always call /graphs/{graph}/... and /versions, regardless of GraphSpace. Use DEFAULT for the default space; leaving GraphSpace empty makes the Vertex API fall back to the /graphs/{graph} path used by older servers.
The Versions value returned by Version() includes the HugeGraph Server, Core, Gremlin, and REST API versions. The NewDefaultCommonClient() helper in the source connects to the hugegraph graph at 127.0.0.1:8080 with admin/pa authentication and a ColorLogger that prints every request and response body. Production code should normally pass an explicit configuration instead.
Configuration Options
hugegraph.Config has the following fields:
| Field | Type | Description |
|---|---|---|
Host | string | HugeGraph Server IP address. Host names are rejected. |
Port | int | HugeGraph Server REST port, 1 to 65535 |
GraphSpace | string | Graph space; only used by the Vertex API and the default Gremlin aliases. Set an empty string when not needed. |
Graph | string | Graph name configured on the server |
Username | string | Server username; empty string when authentication is disabled |
Password | string | Server password; empty string when authentication is disabled |
Transport | http.RoundTripper | Custom HTTP transport; http.DefaultTransport when nil |
Logger | hgtransport.Logger | Request/response logger; no logging when nil |
The hgtransport package ships four loggers: TextLogger (plain text), ColorLogger (terminal colors), CurlLogger (runnable curl commands), and JSONLogger (JSON lines). Each has the same fields: Output (an io.Writer), EnableRequestBody, and EnableResponseBody.
Available Entry Points
CommonClient currently exposes the following entry points:
| Entry point | Purpose |
|---|---|
Version() | Query the server version |
Schema() | Query the complete schema |
Propertykey | Create, GetAll, GetByName, UpdateUserdata, DeleteByName |
VertexLabel | Create, GetAll, GetByName, UpdateUserdata, DeleteByName |
EdgeLabel | Create, GetAll, DeleteByName |
Vertex | Create, BatchCreate, UpdateProperties (with WithAction: append or eliminate) |
Gremlin | Get and Post. Post defaults language to gremlin-groovy, fills the graph/g aliases from GraphSpace and Graph, and returns the parsed result in Data. Get only returns the status code and prints the raw response to stdout. |
Each operation takes functional options named With... on the operation itself, for example client.Gremlin.Post.WithGremlin(...) or client.Propertykey.GetByName.WithName(...).
EdgeLabel.Create accepts Properties: nil or an empty []string{} in its request data to create an edge label without properties.
Typed APIs return err for request validation, transport, response reading, or JSON decoding failures.
An HTTP 4xx/5xx response can still return err == nil; for example, creating a vertex with a nonexistent label returns HTTP 400.
Check that response.StatusCode is in the 2xx range before reading result data. For Gremlin.Post, also check response.Data.Status.Code
for a successful Gremlin protocol status (2xx).
The
Vertexoperations takemodel.Vertex[any]values from theinternal/modelpackage. Go does not allow importing aninternalpackage from another module, so at the moment theVertexAPI can only be called from code inside the client module itself; its test file is also fully commented out.
For complete usage, see the tests in each API directory, such as version_test.go, gemlin_test.go, and vertexlabel_test.go.