这是本节的多页打印视图。 .
贡献指南
- 1: 参与 HugeGraph 社区
- 2: 订阅社区邮件列表
- 3: 验证 Apache 发版
- 4: 在 IDEA 中配置 Server 开发环境
- 5: Apache HugeGraph Committer 指南
提交代码或文档前,请先阅读贡献流程。Committer 提名、邮件列表订阅和版本验证分别由对应页面说明;贡献者协议使用 ASF 官方 ICLA/CCLA。
1 - 参与 HugeGraph 社区
选择贡献方式
可以通过 GitHub Issues 报告问题,也可以提交代码、测试或文档。准备较大的改动前,建议先创建 Issue 并说明范围,避免重复工作。
下面以 apache/hugegraph 为例。其他 HugeGraph 仓库的流程相同,但构建和测试命令应以各仓库的 README.md、AGENTS.md 和 CI 配置为准。
准备仓库
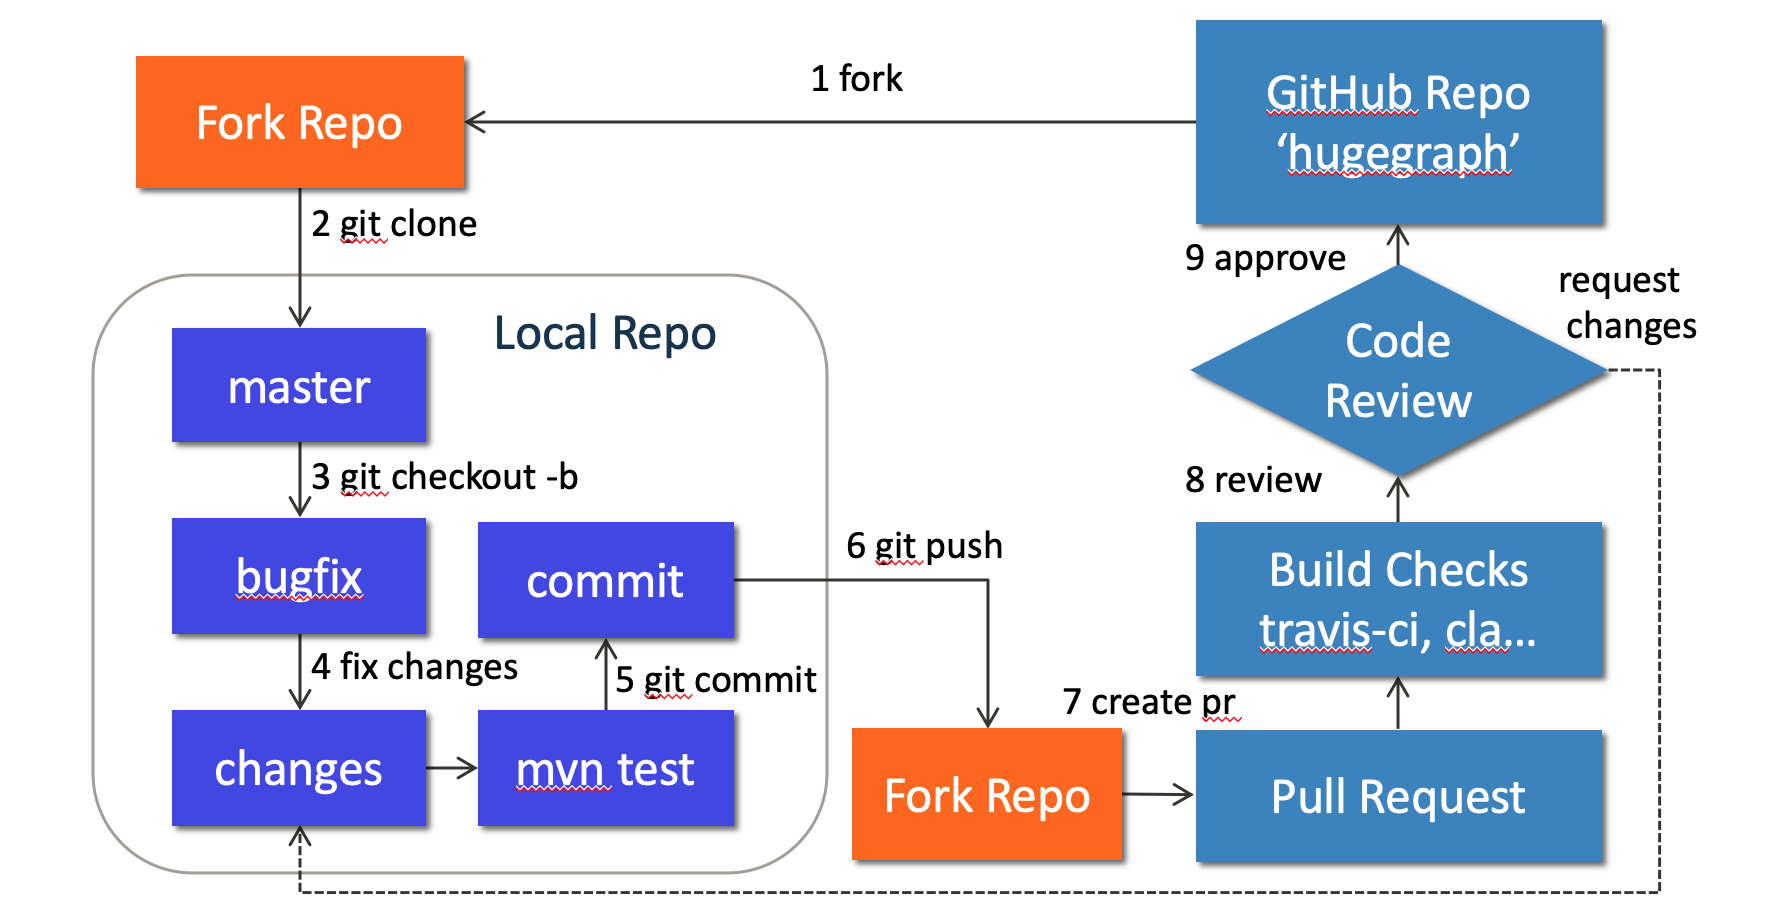
先在 GitHub 上 fork apache/hugegraph,再克隆自己的 fork:
不要直接在 master 上开发。每项改动使用单独分支:
修改和验证
HugeGraph Server 的代码位于 hugegraph-server/。例如,核心模块路径是:
当前主仓库根目录的 Maven 模块如下;Server 的存储适配器 hugegraph-server/hugegraph-hstore/ 与独立的存储节点项目 hugegraph-store/ 是不同模块。
| 路径 | 子模块 |
|---|---|
hugegraph-server/ | hugegraph-core/、hugegraph-api/、hugegraph-example/、hugegraph-dist/、hugegraph-test/、hugegraph-rocksdb/、hugegraph-hbase/、hugegraph-hstore/ |
hugegraph-pd/ | hg-pd-common/、hg-pd-client/、hg-pd-core/、hg-pd-service/、hg-pd-dist/、hg-pd-cli/、hg-pd-grpc/、hg-pd-test/ |
hugegraph-store/ | hg-store-common/、hg-store-client/、hg-store-core/、hg-store-node/、hg-store-dist/、hg-store-cli/、hg-store-grpc/、hg-store-rocksdb/、hg-store-test/ |
hugegraph-commons/ | hugegraph-common/、hugegraph-rpc/ |
hugegraph-cluster-test/ | hugegraph-clustertest-minicluster/、hugegraph-clustertest-dist/、hugegraph-clustertest-test/ |
| 独立根模块 | hugegraph-struct/、install-dist/ |
上述名称来自根 pom.xml 及各子项目 pom.xml;代码结构以正在使用的分支为准。
先运行与改动直接相关的测试。Server 常用测试入口如下:
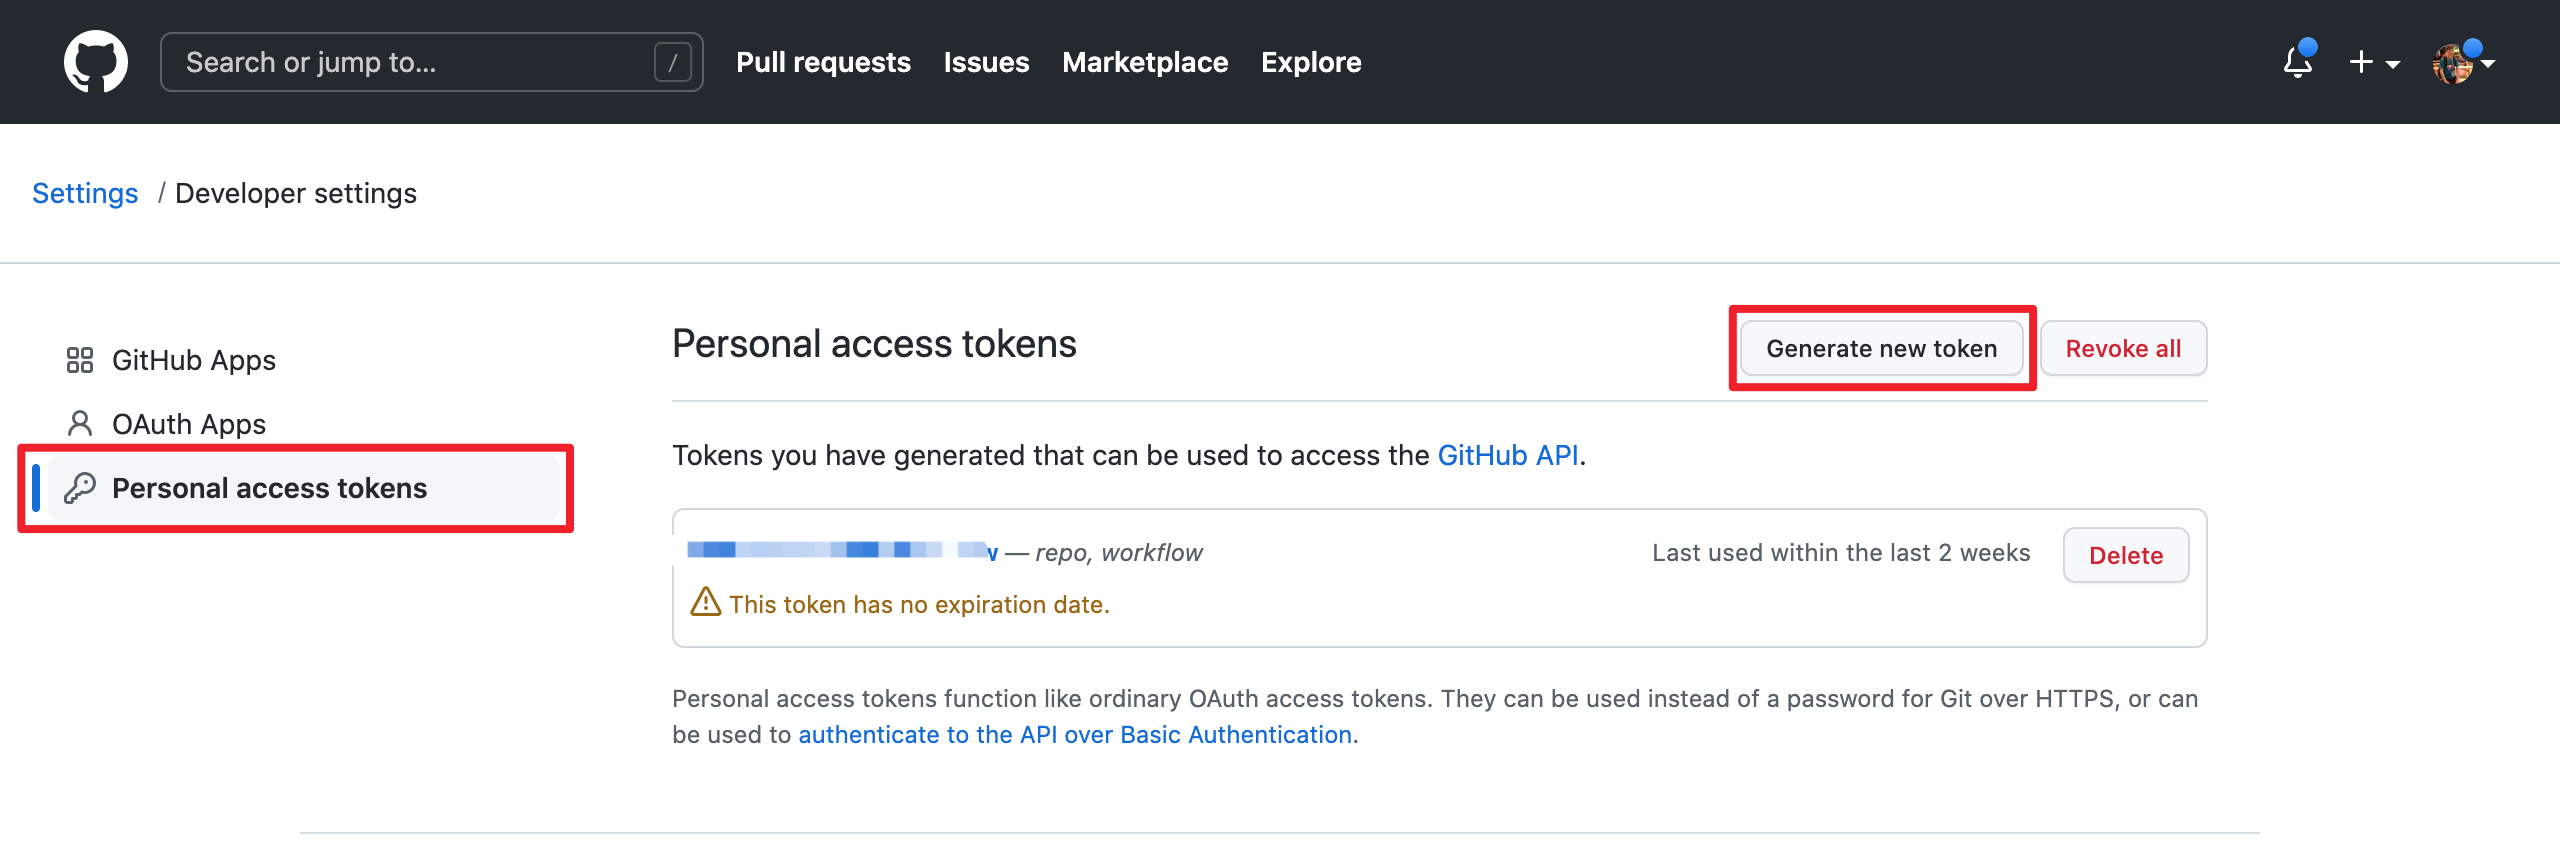
GitHub 已不支持通过用户名和密码直接推送代码。需要使用个人访问令牌时,请在令牌设置页创建并按需授权:
提交第三方依赖时,还要同步发行包中的许可证信息:
- 把依赖的许可证文件放入
hugegraph-server/hugegraph-dist/release-docs/licenses/。 - 更新
hugegraph-server/hugegraph-dist/release-docs/LICENSE;依赖包含 NOTICE 时,同时更新NOTICE。 - 运行
hugegraph-server/hugegraph-dist/scripts/dependency/regenerate_known_dependencies.sh,更新已知依赖清单。
提交 Pull Request
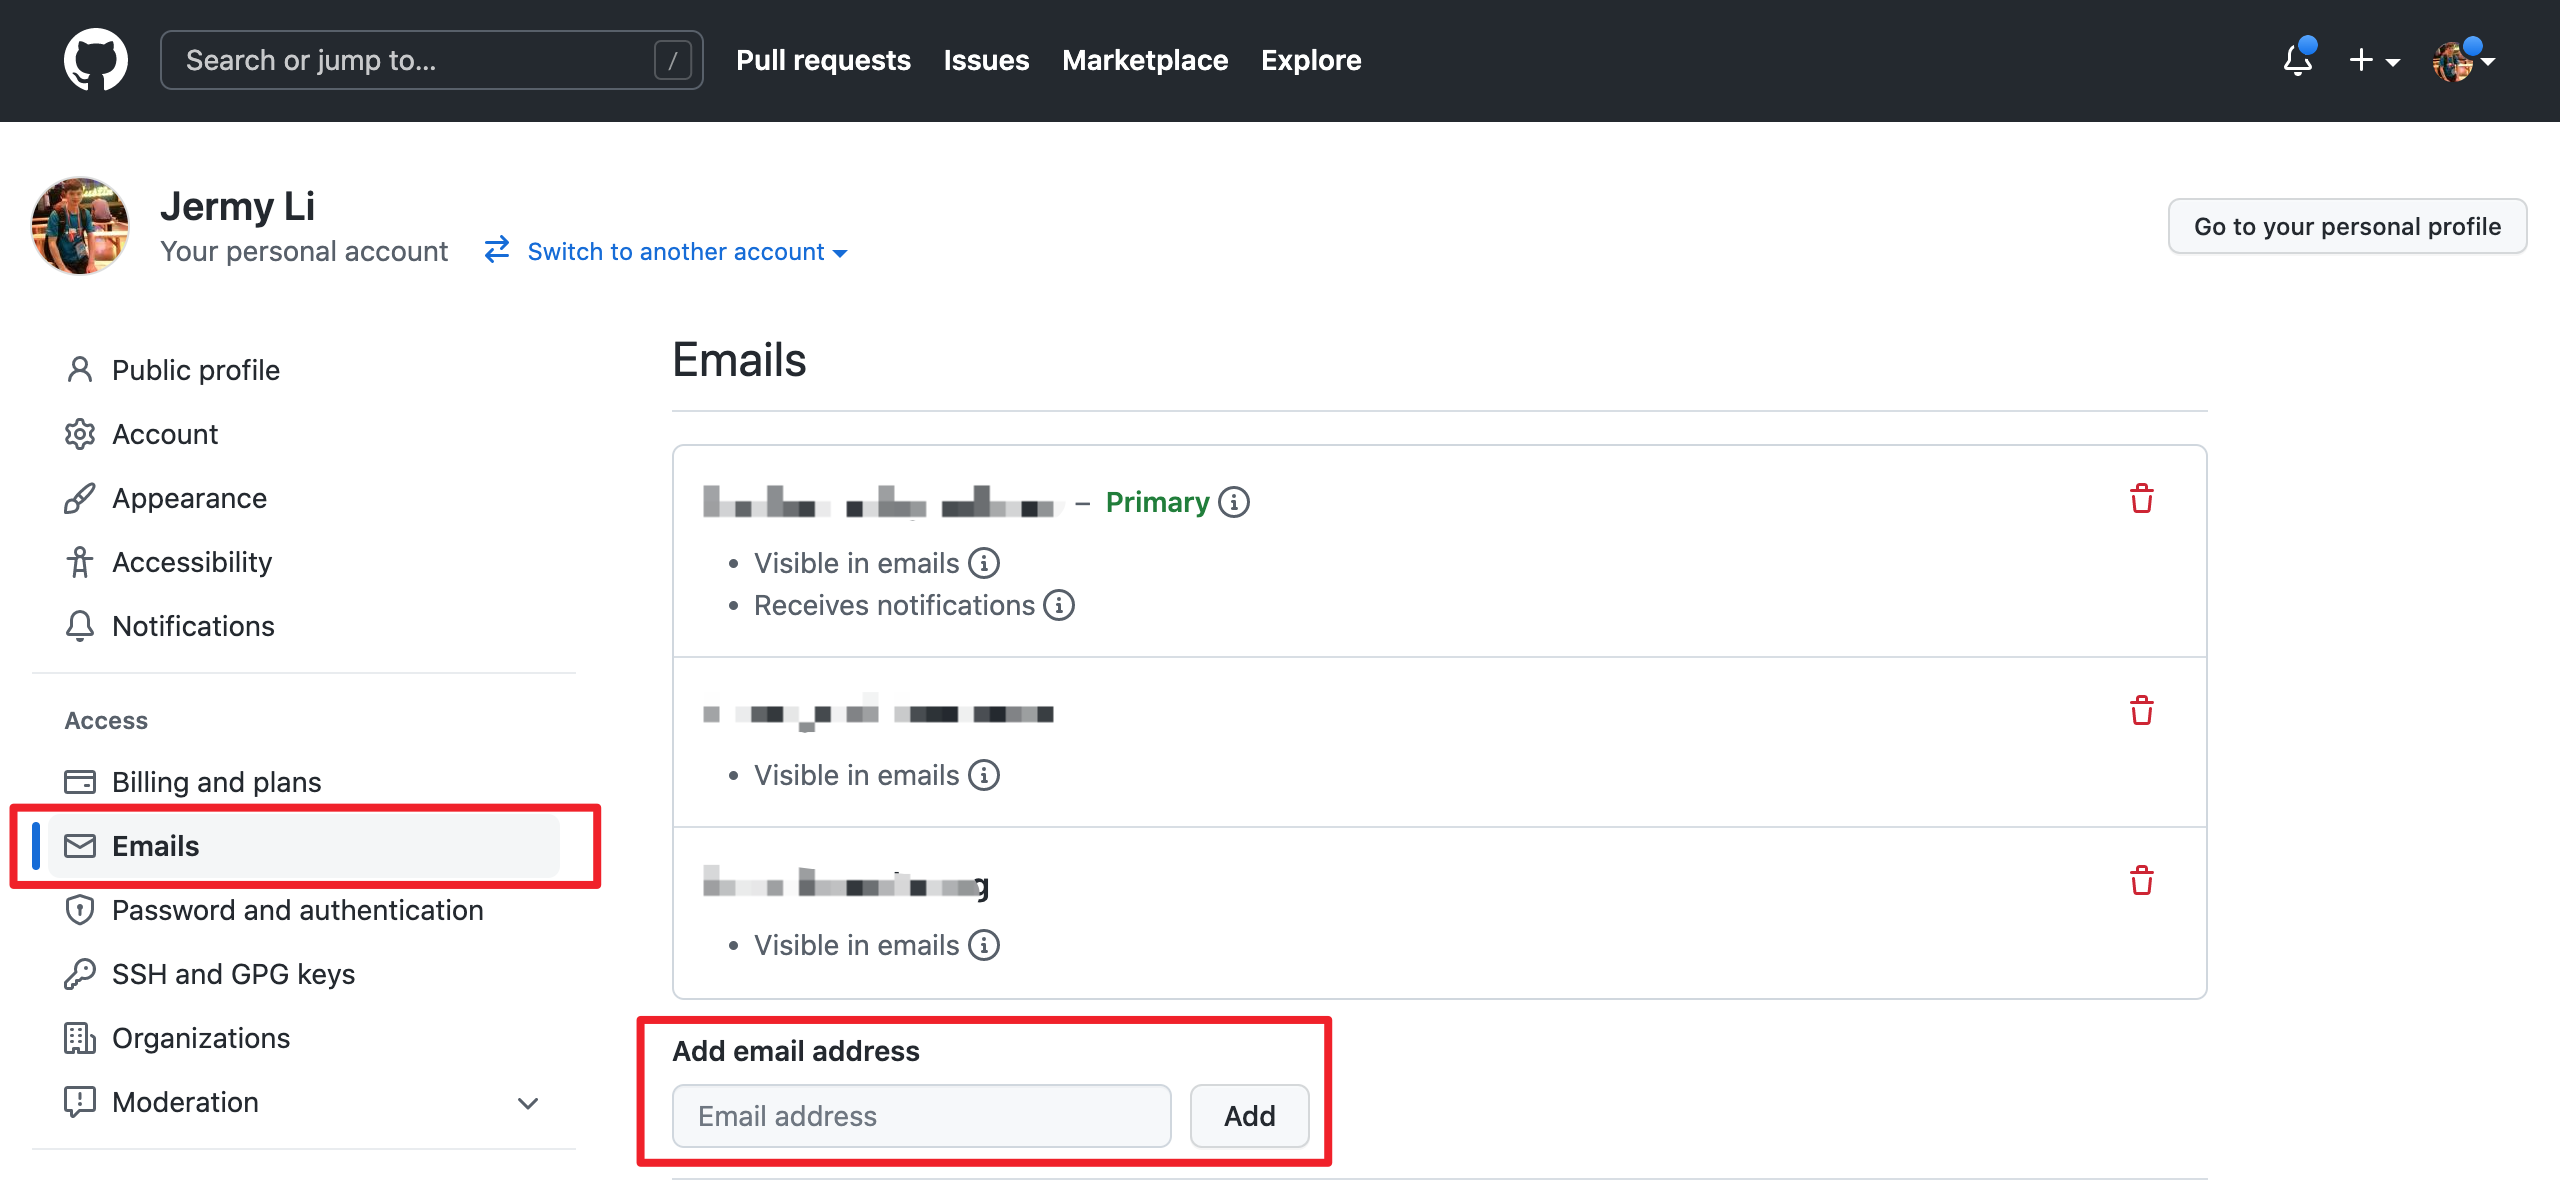
提交代码所用的邮箱需要绑定到 GitHub 账号。请在邮箱设置页完成绑定:
提交信息使用 type(module): message 格式,例如:
然后从 fork 分支向 apache/hugegraph:master 创建 Pull Request。说明问题、修改方法和实际运行的验证命令;界面变化应附截图。
处理 Review
CI 失败或 reviewer 要求修改时,在原分支继续提交并推送。需要同步上游时,可以 rebase:
不要使用普通 --force 覆盖远端分支。完成所有 CI 和 review 要求后,由项目 maintainer 合并 Pull Request。
Contributor Agreement 使用 ASF 官方流程,见贡献者协议。
2 - 订阅社区邮件列表
HugeGraph 使用 dev@hugegraph.apache.org 讨论开发和使用问题。向列表发信前需要先订阅,否则邮件可能被拦截。
订阅
- 使用准备订阅的邮箱向 dev-subscribe@hugegraph.apache.org 发送一封任意主题、任意内容的邮件。
- 收到确认邮件后直接回复。
- 收到订阅成功邮件后,即可向 dev@hugegraph.apache.org 发信。
如果没有收到确认邮件,先检查垃圾邮件和自动分类目录。仍未收到时,等待一段时间后重新发送订阅邮件。
未订阅也可以在 ASF Mailing List Archives 浏览公开邮件。
退订
- 使用订阅邮箱向 dev-unsubscribe@hugegraph.apache.org 发信。
- 收到
dev-help@hugegraph.apache.org的确认邮件后直接回复。 - 收到主题包含
GOODBYE的邮件后,退订完成。
ASF 邮件列表的通用说明见 Apache Mailing Lists。
3 - 验证 Apache 发版
Note: 这篇文档会持续更新。 HugeGraph 1.8.0 的源码构建与发行包运行验证统一使用 Java 17。
毕业说明:Apache HugeGraph 已于 2026 年 1 月毕业。正式发版投票现由 HugeGraph 社区内部完成(
dev@hugegraph.apache.org上的 PMC binding 投票),不再需要 Incubatorgeneral@incubator.apache.org审批。
自动化发版验证
Workflow 与 dist/validate-release.sh 共用 Java 17 校验逻辑。发行版本与 SVN RC 路径分别指定,
Maven staging repository 使用投票邮件中的地址。Server/Toolchain 四个源码和二进制包是必需项,
同一候选目录也可包含 AI、Computer 源码包。每个包均须附带 SHA512 与 GPG 签名;未知包名和版本不符会阻断验证。
所有包均检查完整性、内容和许可证,Computer 源码另执行 Maven 构建;AI、Computer 产品运行验证需另行完成。
严格 RC 模式使用全新、相互隔离的 Maven 仓库,不预装本地 Server SDK。
源码构建产物和下载的二进制包分别执行 Server、Client、普通 Loader、Tools 与 Hubble 业务断言,失败后保留日志。
Workflow 的 source-prevalidation 模式使用明确的 Server/Toolchain commit SHA 和无签名源码归档,
它不证明真实 RC 签名、下载及远端 staging 依赖解析已通过。
license-review-*.txt 中的许可选择和例外仍需人工复核,明确的 Category-X-only 依赖会阻断验证;自动成功不等于发布批准。
本地预验证和证据目录说明见验证脚本指南。
控制台和 GitHub Job Summary 汇总结果、失败阶段、复核提示及日志位置;源码预验证不会显示为 RC 验收通过。
验证阶段
当内部的临时发布和打包工作完成后,其他的社区开发者 (尤其是 PMC) 需要按 ASF 发版规范参与验证,可参考:
- ASF 发布策略
- Incubator 检查清单(历史参考) 确保某个人发布版本的"正确性 + 完整性", 这里需要每个人都尽量参与,然后后序邮件回复的时候说明自己 已检查了哪些项。(下面是核心项)
1. 准备工作
如果本地没有 svn 或 gpg 或 wget 环境,建议先安装一下 (windows 推荐使用 WSL2 环境,
或者至少是 git-bash), 同时确保安装 Java 17 和 maven 软件。
2. 检查 hash 值
首先需要检查 source + binary 包的文件完整性,通过 shasum 进行校验,确保和发布到 apache/github 上的
hash 值一致 (一般是 sha512)
3. 检查 gpg 签名
这个就是为了确保发布的包是由可信赖的人上传的,假设 tom 签名后上传,其他人应该下载 A 的公钥 然后进行签名确认, 相关命令:
必须同时确认验证退出码为零,且 VALIDSIG 中的指纹对应投票邮件的签名者;使用签名子密钥时,核对其报告的主密钥指纹。
密钥信任警告本身不表示签名无效,也不能只凭本地化的 Good signature 文本判断成功。
即使同时出现 VALIDSIG 或退出码为零,遇到 REVKEYSIG、EXPKEYSIG、EXPSIG 仍须停止,交由发版负责人复核或更新候选包。
格式见 GnuPG 状态说明。
先确认了整体的"完整性 + 一致性", 然后接下来确认具体的内容 (关键)
4. 检查压缩包内容
这里检查准备工作下载的压缩包内容。分源码包 + 二进制包两个方面,源码包更为严格,挑核心的部分说 (完整的列表可参考官方 Wiki, 比较长)
A. 源码包
解压 *hugegraph*src.tar.gz后,进行如下检查:
- 包名/目录名应符合当前发版命名(历史版本可能仍包含
incubating),且不存在空的文件/文件夹 - 存在
LICENSE+NOTICE且内容正常;历史版本若在项目孵化期发布,还需检查DISCLAIMER - 不存在 缺乏 License 的二进制文件
- 源码文件都包含标准
ASF License头 (这个用插件跑一下为主) - 检查每个父 / 子模块的
pom.xml版本号是否一致 (且符合期望) - 最后,确保源码可以正常 / 正确编译 (然后看看测试和规范)
PMC 同学请特别注意认真检查 LICENSE + NOTICE 文件,确保文件严格遵循了 ASF 的发版要求,
大部分的发版问题都与之相关
手动 Maven 命令的 settings 必须指向投票邮件中的 staging repository,并使用全新的本地仓库。 不要预装本地 Server SDK 来掩盖 staging 缺少依赖;自动化验证脚本会生成这些设置。
B. 二进制包
解压 xxx-hugegraph.tar.gz后,进行如下检查:
- 包名/目录名应符合当前发版命名(历史版本可能仍包含
incubating) - 存在
LICENSE+NOTICE且内容正常(历史版本若在项目孵化期发布,还需检查DISCLAIMER) - 服务启动
注: 如果二进制包里面引入了第三方依赖, 则需要更新 LICENSE, 加入第三方依赖的 LICENSE; 若第三方依赖 LICENSE 是 Apache 2.0, 且对应的项目中包含了 NOTICE, 则还需要更新我们的 NOTICE 文件
5. 检查官网以及 github 等页面
- 确保官网至少满足 apache website check, 以及没有死链等
- 更新下载链接存在,以及版本更新说明页面更新
- …
邮件模板
检查完成后,你应该按不同角色回复邮件:(普通开发者 & PMC 成员)
特别注意 PMC 成员必须使用 binding 标记回复邮件,这对于统计有效投票很重要;
4 - 在 IDEA 中配置 Server 开发环境
适用范围:下述 IDEA 配置基于 HugeGraph 1.2.0 发布标签,仅作为历史调试步骤保留。当前主线的源码目录和验证入口见贡献流程与 Server 快速上手;不要从本页推断当前模块清单。
背景
在 快速上手 部分已经介绍了使用脚本启停 HugeGraph-Server 的流程。下面以 Linux 平台为例,介绍使用 IntelliJ IDEA 运行与调试 HugeGraph-Server 的流程。
本地启动的核心与脚本启动是一样的:
- 初始化数据库后端,执行
InitStore类初始化图 - 启动 HugeGraph-Server,执行
HugeGraphServer类加载初始化的图信息启动
在执行下述流程之前,请确保已经克隆了 HugeGraph 的源代码,并且已经配置了 Java 11 环境 & 可以参考这个 配置文档
步骤
1. 配置文件拷贝
为了避免配置文件的更改影响 Git 的追踪,建议将所需的配置文件拷贝到一个单独的文件夹中:
将 path-to-your-directory 替换为你创建的文件夹的路径。命令需在仓库根目录执行,hugegraph-dist 模块位于顶层的 hugegraph-server 目录之下。
下列 ToplingDB 步骤仅适用于历史定制构建。当前主线源码不包含
preload-topling.sh或 ToplingDB 模块,按当前主线调试时跳过此说明。
2. InitStore 类初始化图
首先,需要在配置文件中配置数据库后端。以 RocksDB 为例,在 path-to-your-directory/conf/graphs/hugegraph.properties 文件中进行以下配置:
然后,打开 IntelliJ IDEA 的 Run/Debug Configurations 面板,创建一个新的 Application 配置,按照以下步骤进行配置:
- 在
Use classpath of module中选择hugegraph-dist - 将
Main class设置为org.apache.hugegraph.cmd.InitStore - 设置运行参数为
conf/rest-server.properties,这里的路径是相对于工作路径的,需要将工作路径设置为path-to-your-directory - (可选,仅 ToplingDB 构建) ToplingDB 需要通过
LD_PRELOAD机制预加载动态库,开发者需设置两个环境变量:LD_LIBRARY_PATH指向preload-topling.sh解压出的library目录,LD_PRELOAD设置为libjemalloc.so:librocksdbjni-linux64.so,以确保相关库在运行时被正确加载- LD_LIBRARY_PATH=/path/to/your/library:$LD_LIBRARY_PATH
- LD_PRELOAD=libjemalloc.so:librocksdbjni-linux64.so
若在 Java 11 环境下为 HugeGraph-Server 配置了用户认证 (authenticator),需要参考二进制包的脚本配置,添加下述 VM options:
否则会报错:
配置完成后运行,如果运行成功,将会输出以下类似运行日志:
3. 运行 HugeGraphServer
类似地,打开 IntelliJ IDEA 的 Run/Debug Configurations 面板,创建一个新的 Application 配置,按照以下步骤进行配置:
- 在
Use classpath of module中选择hugegraph-dist - 将
Main class设置为org.apache.hugegraph.dist.HugeGraphServer - 设置运行参数为
conf/gremlin-server.yaml conf/rest-server.properties,同样地,这里的路径是相对于工作路径的,需要将工作路径设置为path-to-your-directory
二进制包中的
bin/hugegraph-server.sh并不直接启动该类,而是启动org.apache.hugegraph.bootstrap.HugeGraphServerBootstrap:它在两个配置文件路径之前多接收一个true/false的安全检查开关,为true时安装HugeSecurityManager,随后再交给HugeGraphServer。从 IDEA 直接运行HugeGraphServer会跳过这层包装,因此不会安装 security manager,这通常正是调试时想要的效果。
类似的,若在 Java 11 环境下为 HugeGraph-Server 配置了用户认证 (authenticator),同样需要参考二进制包的脚本配置,添加下述 VM options:
否则会报错:
配置完成后运行,如果看到以下类似日志,表示 HugeGraphServer 已经成功启动:
4. 调试 HugeGraphServer (可选)
在完成上述配置后,可以尝试对 HugeGraphServer 进行调试。在调试模式下运行 HugeGraphServer,并在以下位置设置断点:
然后,使用 RESTful API 请求 HugeGraphServer:
此时,可以在调试器中查看详细的变量信息。
5. Log4j2 日志配置
默认情况下,运行 InitStore 和 HugeGraphServer 时,读取的 Log4j2 配置文件路径为 hugegraph-server/hugegraph-dist/src/main/resources/log4j2.xml,而不是 path-to-your-directory/conf/log4j2.xml,这个配置文件是使用脚本启动 HugeGraph-Server 时读取的。
为了避免同时维护两份配置文件,可以考虑在 IntelliJ IDEA 运行与调试 HugeGraph-Server 时,修改读取的 Log4j2 配置文件路径:
- 打开之前创建的
Application配置 - 点击
Modify options-Add VM options - 设置 VM options 为
-Dlog4j.configurationFile=conf/log4j2.xml
可能遇到的问题
1. java: package sun.misc does not exist
原因可能是在使用 Java 11 编译时触发了交叉编译,导致项目中使用的 sun.misc.Unsafe 找不到符号。有两种解决方案可供选择:
- 在 IntelliJ IDEA 的
Preferences/Settings中找到Java Compiler面板,然后关闭--release选项 (推荐) - 或者将项目的 SDK 版本设置为 8 (Deprecated soon)
2. java: *.store.raft.rpc.RaftRequests does not exist (RPC Generated Files)
原因是源代码没有包含 RPC-generated 文件。可以尝试两种方法来解决:
- [命令] 在根目录下运行
mvn clean compile -DskipTests(推荐) - [UI] 在 IDEA 中,右键点击
hugegraph模块,选择Manve -> Generate Sources and Update Folders
3. Log4j2 日志无法打印 %l 等位置信息
这是因为 Log4j2 中使用了 asynchronous loggers,可以参考官方文档进行配置
参考
5 - Apache HugeGraph Committer 指南
本文档概述了 Apache Committer 推选要求以及流程,对应的 ASF 官方文档可见:https://community.apache.org/newcommitter.html
候选人要求
- 候选人应遵守 Apache Code of Conduct
- PMC 成员将通过搜索邮件列表、issues、PRs、官网文档等方式,了解候选人如何与他人互动,以及他们所做的贡献
- 以下是在评估候选人是否适合成为 Committer 时需要考虑的一些要点:
- 与社区成员合作的能力
- 担任导师的能力
- 社区参与度
- 贡献程度
- 个人技能/能力
推选详细流程
讨论 (DISCUSS) → 投票 (VOTE) → 邀请 (INVITE) → 公告 (ANNOUNCE)
发起社区邮件讨论 (DISCUSS)
任何 HugeGraph 的 PMC 成员都可以发起投票讨论,在发现社区贡献者任何有价值的贡献并取得候选人本人同意后,可以在 private@hugegraph.apache.org 发起讨论。 讨论邮件里提议者要把候选人的贡献说清楚,并最好给出确认贡献的 URL 等信息,便于大家讨论分析。
下面是 HugeGraph 对应的邮件模板:(仅供参考)
Note: 后续将使用 xxx 指代候选人名,一般
xxx为一个容易读的名字 (例如Simon Jay)
ASF-INFRA建议避免使用不易读的ID直接作为邮件人名代指 (例如避免simon321或wh0isSim0n😄)另发送邮件最好选择 “纯文本” 模式,否则排版在 ASF Mail UI 中可能会乱
对于讨论邮件中贡献链接,可以使用 GitHub Search 的统计功能,按需输入如下对应关键词查询即可,可以在此基础上添加新的 repo 如 repo:apache/hugegraph-computer,特别注意调整时间范围 (下面是一个模板参考,请自行调整参数):
- PR 提交次数
is:pr author:xxx repo:apache/hugegraph repo:apache/hugegraph-doc created:>2023-06-01 updated:<2023-12-25
- 代码提交/修改行数
- PR 提交关联 Issue 次数
linked:issue involves:xxx repo:apache/hugegraph repo:apache/hugegraph-doc created:>2023-06-01 updated:<2023-12-25
- PR Review 个数
type:pr reviewed-by:xxx repo:apache/hugegraph repo:apache/hugegraph-doc created:>2023-06-01 updated:<2023-12-25
- PR Review 行数
- 合并次数
type:pr author:xxx repo:apache/hugegraph repo:apache/hugegraph-doc created:>2023-06-01 updated:<2023-12-25
- 有效合并行数
- Issue 提交数
type:issue author:xxx repo:apache/hugegraph repo:apache/hugegraph-doc created:>2023-06-01 updated:<2023-12-25
- Issue 修复数
- 在 Issue 提交数的基础上选取状态为 closed 的 Issues
- Issue 参与数
type:issue involves:xxx repo:apache/hugegraph repo:apache/hugegraph-doc created:>2023-06-01 updated:<2023-12-25
- 评论 Issue 数
type:issue commenter:xxx repo:apache/hugegraph repo:apache/hugegraph-doc created:>2023-06-01 updated:<2023-12-25
- 评论 PR 数
type:pr commenter:xxx repo:apache/hugegraph repo:apache/hugegraph-doc created:>2023-06-01 updated:<2023-12-25
Mailing Lists 的参与则可使用 https://lists.apache.org/list?dev@hugegraph.apache.org:lte=10M:xxx 查询。
发起社区邮件投票 (VOTE)
如果讨论邮件在规定时间内没有收到分歧信息,投票发起者需要在 private@hugegraph.apache.org 发起对 Committer 的选举投票。
下面是对应的邮件模板:
然后 PMC 成员回复 +1 或 -1 的邮件回复表达意见,一般来说至少需要 ≥3 票 +1 才能结束投票。
宣布投票结果 (RESULT)
投票邮件结束后,投票发起者需要邮件里提醒投票结束。同时,投票发起者需要发起邮件宣布投票结果,发送至 private@hugegraph.apache.org,邮件模板可参考:
向候选人发起邮件邀请 (INVITE)
宣布投票结果邮件发出后,投票发起人要给候选人发送邀请邮件。邀请邮件主送候选人,抄送 private@hugegraph.apache.org,被邀请的候选人必须通过指定的邮箱地址回复接受或者拒绝该邀请。
下面是对应可参考的邮件模板:
候选人接受邀请 (ACCEPT)
候选人应回复上述邮件 (选择 reply all),表明接受邀请,邮件模板可参考:
当然,候选人也可以选择拒绝邀请,这里就没有模板了:)
一旦邀请被接受,候选人需要完成以下事项:
- 订阅 dev@hugegraph.apache.org,具体步骤/过滤等配置请参考文档
- 签署 ICLA,具体步骤见下↓
ICLA 签署流程
- 下载 ICLA
- 打开 PDF 并填写相关内容,均需要全英文填写,建议使用 PDF 工具编辑并署名
- Full name: 名字在前,姓氏在后
- Public name: 可以不填,默认和
Full name相同 - 勾选 check this box only if you enter names with your family name first
- Postal Address: 英文地址,从小地方到大地方的顺序来写,需详细到门牌号
- Country: 所在国家英文
- E-mail: 邮箱地址,建议与上述邮件中使用的邮箱相同
- (optional) preferred Apache id(s): 选择一个 Apache committer 页面不存在的 SVN ID
- (optional) notify project:Apache HugeGraph
- 签名:务必使用 PDF 工具手写
- Date: 格式 xxxx-xx-xx
- 签署完之后将
icla.pdf重命名为姓名拼音-icla.pdf - 发送下述邮件,并附件引用
姓名拼音-icla.pdf
PMC 成员将等待 Apache secretary 团队确认 ICLA 备案,候选人和 PMC 成员将收到以下电子邮件:
设置 Apache 账号和开发环境 (CONFIG)
备案完成后,候选人将收到来自 root@apache.org 主题为 Welcome to the Apache Software Foundation 的邮件,此时需按照邮件中的步骤设置 Apache 账号和开发环境:
- 重置密码 https://id.apache.org/reset/enter
- 配置个人信息 https://whimsy.apache.org/roster/committer/xxx
- 关联 GitHub 账号 https://gitbox.apache.org/boxer
- 这一步需要配置 GitHub 双重身份验证 (2FA)
- 负责提名的 PMC 成员需通过 Roster 页面,将新的 Committer 添加到官方提交者列表中 (重要, 否则仓库权限不生效)
- 在这一步后,候选人即新的 Committer 才拥有对 GitHub HugeGraph 仓库的写权限
- (可选) 新的 Committer 可以使用 Apache 账号申请免费使用 Jetbrains 的全系列产品
发布公告邮件 (ANNOUNCE)
当候选人完成上述步骤后,候选人将正式成为 HugeGraph 的 Committer,此时需要向 dev@hugegraph.apache.org 发送公告邮件,邮件模板可参考:
更新治理信息入口
Apache HugeGraph 已于 2026 年 1 月毕业,治理信息不再通过 Incubator clutch 页面维护,而是通过 ASF committee/project 数据维护。
请优先检查:
若信息未自动同步,请按照 ASF 官方流程联系 Apache Community Development 或 ASF Infra 协助处理。
参考
- https://community.apache.org/newcommitter.html (ASF 官方文档)
- https://infra.apache.org/new-committers-guide.html
- https://www.apache.org/dev/pmc.html#newcommitter
- https://linkis.apache.org/zh-CN/community/how-to-vote-a-committer-pmc
- https://www.apache.org/licenses/contributor-agreements.html#submitting
- https://www.apache.org/licenses/cla-faq.html#printer
- https://linkis.apache.org/zh-CN/community/how-to-sign-apache-icla
- https://github.com/apache/hugegraph/issues/1732 (HugeGraph ICLA related issue)