# HugeGraph Server Quick Start
LLMS index: [llms.txt](/llms.txt)
---
## 1 HugeGraph Server Overview
`apache/hugegraph` is the main repository for the HugeGraph graph database. Its top-level modules include `hugegraph-server`, `hugegraph-pd`, and `hugegraph-store`. This page describes the `hugegraph-server` module and the service it runs.
The `hugegraph-server` module contains `hugegraph-core`, `hugegraph-api`, `hugegraph-dist`, and storage adapters. Core implements the property graph model, transactions, and TinkerPop interfaces. API provides the HTTP service and delegates client requests to Core. Graph data is stored in RocksDB (the default standalone backend), HStore (distributed), or HBase.
> ⚠️ **Version note**: This page follows HugeGraph 1.7.0 through the `master` branch and covers only RocksDB, HStore, and HBase. For other legacy backends and their configuration, see the [HugeGraph 1.5.x documentation](https://github.com/apache/hugegraph-doc/blob/release-1.5.0/content/en/docs/quickstart/hugegraph/hugegraph-server.md).
> Naming: `HugeGraph` means the overall project or main repository, `hugegraph-server` is the Server module in that repository, and `HugeGraphServer` is the Java class for the service process. This page uses "Server service" for a running graph database service.
## 2 Dependency for Building/Running
### 2.1 Install Java 11 (JDK 11)
The `hugegraph-server` module in HugeGraph 1.7.0 is compiled with Java 11. Running and building it from source require Java 11 or later.
**Before continuing, run `java -version` to confirm your JDK version.**
> Java 8 is no longer supported starting from 1.7.0. `bin/hugegraph-server.sh` refuses to start on anything older than Java 11.
> The security check is on by default and installs `HugeSecurityManager`, which needs Java 11 to 23. JDK 24 removed the Security Manager ([JEP 486](https://openjdk.org/jeps/486)), so on Java 24 or later you must start the service with the check disabled: `bin/start-hugegraph.sh -s false`.
> Building from source also needs Maven 3.5.0 or later.
## 3 Deploy
There are four ways to deploy the Server service:
- Method 1: Use Docker container (Convenient for Test/Dev)
- Method 2: Download the binary tarball
- Method 3: Source code compilation
- Method 4: One-click deployment
> Do not expose Gremlin, Cypher, or other query endpoints directly to the public Internet. In production, enable [authentication and authorization](/docs/config/config-authentication/), restrict network access, and retain audit logs. See the [Security Guide](/docs/guides/security/) for deployment guidance.
### 3.1 Use Docker container (Convenient for Test/Dev)
You can refer to the [Docker deployment guide](https://github.com/apache/hugegraph/blob/master/docker/README.md).
You can use `docker run -itd --name=server -p 8080:8080 -e PASSWORD=xxx hugegraph/hugegraph:1.7.0` to quickly start a Server instance using the `RocksDB` backend.
Optional:
1. You can use `docker exec -it server bash` to enter the container for troubleshooting or other maintenance operations.
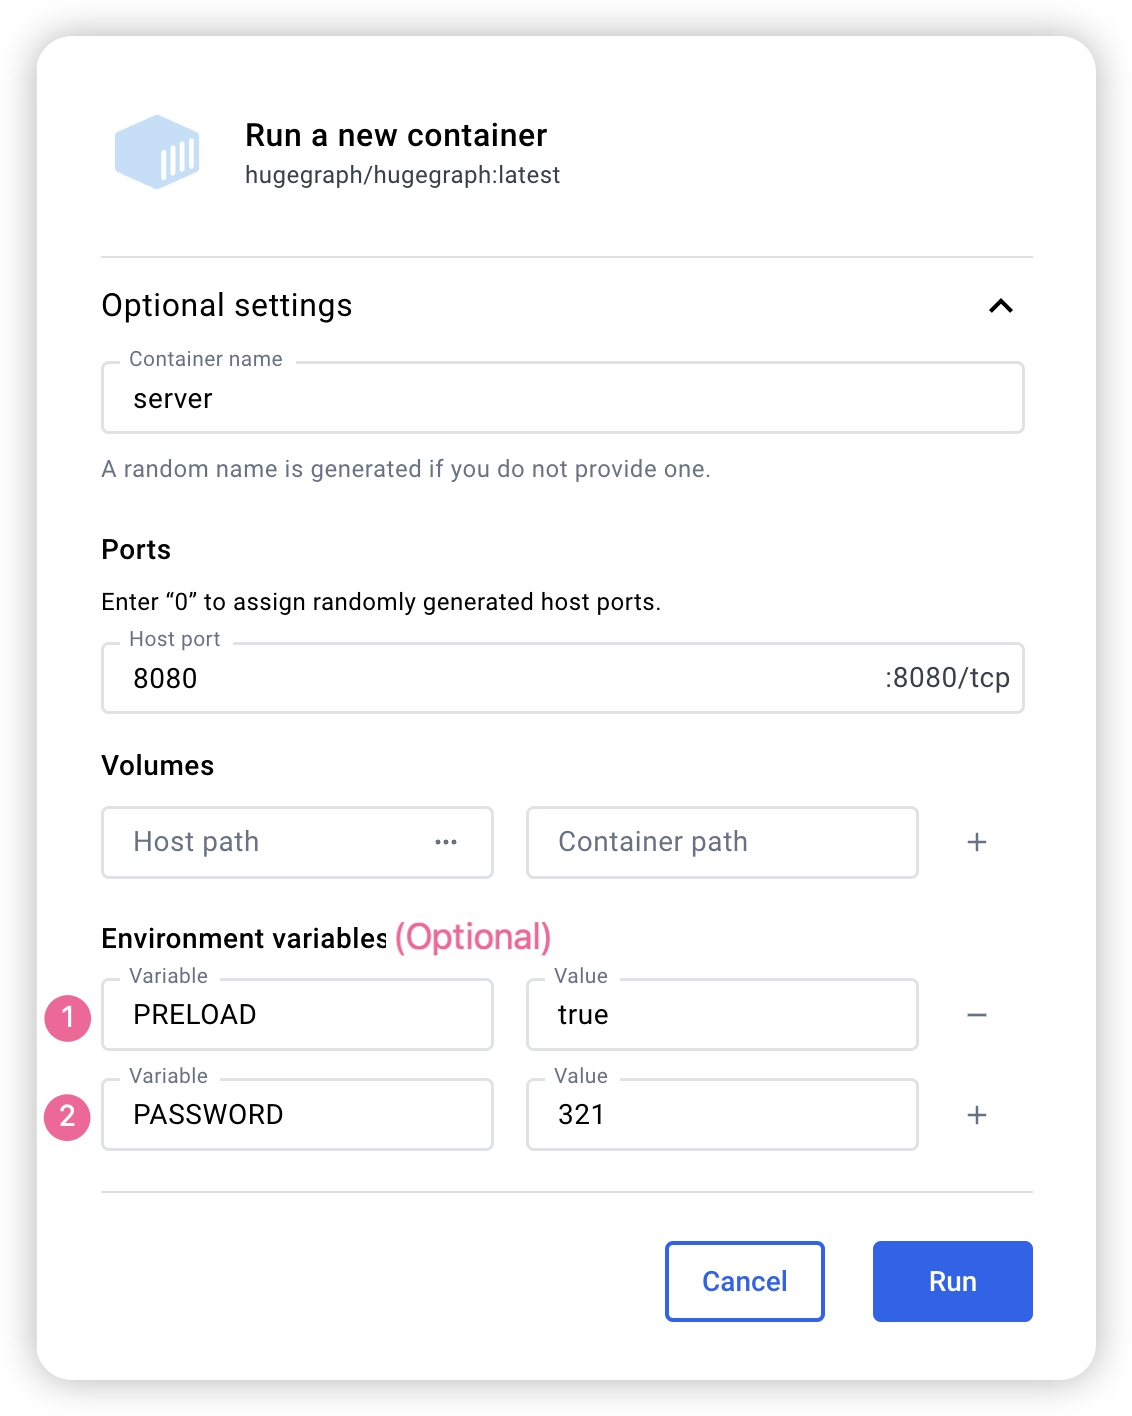
2. You can use `docker run -itd --name=server -p 8080:8080 -e PRELOAD="true" hugegraph/hugegraph:1.7.0` to preload a **built-in** sample graph at startup. You can verify it through the `RESTful API`. See [5.1.4](#514-create-an-example-graph-when-startup) for details.
3. You can use `-e PASSWORD=xxx` to enable authentication mode and set the admin password. See [Config Authentication](/docs/config/config-authentication#use-docker-to-enable-authentication-mode) for details.
If you use Docker Desktop, you can set the options as follows:
> **Note**: The Docker Compose files use bridge networking (`hg-net`) and work on Linux and Mac (Docker Desktop). For the 3-node distributed cluster on Mac (Docker Desktop), allocate at least **12 GB** of memory (Settings → Resources → Memory). On Linux, Docker uses host memory directly.
If you want a single, unified setup for multiple HugeGraph services, you can use `docker compose`.
Four compose files are available in the [`docker/`](https://github.com/apache/hugegraph/tree/master/docker) directory:
| Topology | Compose file | Services |
|---|---|---|
| Standalone (start here) | `docker-compose.yml` | 1 RocksDB Server + 1 Hubble |
| Minimal HStore | `docker-compose-hstore.yml` | 1 PD + 1 Store + 1 Server + 1 Hubble |
| HA reference | `docker-compose-3pd-3store-3server.yml` | 3 PD + 3 Store + 3 Server + 1 Hubble |
| Source build override for the minimal HStore topology | `docker-compose.dev.yml` | (used together with `docker-compose-hstore.yml`) |
```bash
cd hugegraph/docker
# Keep the version aligned with the latest release, for example 1.x.0
HUGEGRAPH_VERSION=1.7.0 docker compose -f docker-compose.yml up -d --wait
```
The standalone topology publishes the Server on port `8080` and Hubble on `127.0.0.1:8088`. `HUGEGRAPH_VERSION` selects the Server, PD, and Store image tags; Hubble is selected separately with `HUBBLE_IMAGE`.
The compose files read the administrator password from `HUGEGRAPH_ADMIN_PASSWORD` and the JWT secret from `HUGEGRAPH_AUTH_TOKEN_SECRET`, normally kept in a `docker/.env` file. A non-empty `HUGEGRAPH_ADMIN_PASSWORD` turns authentication on, and Hubble detects that mode by itself. With plain `docker run`, pass `-e PASSWORD=xxx` instead.
See [docker/README.md](https://github.com/apache/hugegraph/blob/master/docker/README.md) for the full setup guide.
> Note:
>
> 1. HugeGraph Docker images are provided as a convenient way to start HugeGraph quickly, but they are not official ASF distribution artifacts. You can find more details in the [ASF Release Distribution Policy](https://infra.apache.org/release-distribution.html#dockerhub).
>
> 2. We recommend using a release tag (such as `1.7.0` or `1.x.0`) for stable deployments. Use the `latest` tag only if you want the newest features still under development.
### 3.2 Download the binary tarball
You could download the binary tarball from the download page of the ASF site like this:
```bash
# 1.7.0 is a historical release from the incubation period, so its file name still includes "incubating"
wget https://downloads.apache.org/hugegraph/1.7.0/apache-hugegraph-incubating-1.7.0.tar.gz
tar zxf apache-hugegraph-incubating-1.7.0.tar.gz
# (Optional) verify the integrity with SHA512 (recommended)
shasum -a 512 apache-hugegraph-incubating-1.7.0.tar.gz
curl https://downloads.apache.org/hugegraph/1.7.0/apache-hugegraph-incubating-1.7.0.tar.gz.sha512
```
### 3.3 Source code compilation
Please ensure that the wget/curl commands are installed before compiling the source code
Download HugeGraph **source code** in either of the following 2 ways (so as the other HugeGraph repos/modules):
- download the stable/release version from the ASF site
- clone the unstable/latest version by GitBox(ASF) or GitHub
```bash
# Way 1. download release package from the ASF site
wget https://downloads.apache.org/hugegraph/{version}/apache-hugegraph-incubating-src-{version}.tar.gz
tar zxf *hugegraph*.tar.gz
# (Optional) verify the integrity with SHA512 (recommended)
shasum -a 512 apache-hugegraph-incubating-src-{version}.tar.gz
curl https://downloads.apache.org/hugegraph/{version}/apache-hugegraph-incubating-{version}-src.tar.gz.sha512
# Way2 : clone the latest code by git way (e.g GitHub)
git clone https://github.com/apache/hugegraph.git
```
Compile and generate tarball
```bash
cd *hugegraph
# (Optional) use "-P stage" param if you build failed with the latest code(during pre-release period)
mvn package -DskipTests -ntp
```
A successful build includes the following line:
```text
[INFO] BUILD SUCCESS
```
After a successful build, the generated distribution is the `*hugegraph-*.tar.gz` file in the repository root.
The default build bundles the `rocksdb`, `hbase`, and `hstore` backend modules, and records them in the `backends` option of the `backend.properties` resource inside the `hugegraph-dist` jar. To build a smaller distribution that carries RocksDB only, add `-Drocksdb-only`:
```bash
mvn package -DskipTests -ntp -Drocksdb-only
```
> [!DETAILS]- Outdated tools
> #### 3.4 One-click deployment (Outdated)
>
> HugeGraph-Tools provides a one-click deployment command that downloads, extracts, configures, and starts the Server service and HugeGraph-Hubble. These tools are included in the HugeGraph-Toolchain distribution.
>
> Of course, you should download the tarball of `HugeGraph-Toolchain` first.
>
> ```bash
> # download toolchain binary package, it includes loader + tool + hubble
> # please check the latest version (e.g. here is 1.7.0)
> wget https://downloads.apache.org/hugegraph/1.7.0/apache-hugegraph-toolchain-incubating-1.7.0.tar.gz
> tar zxf *hugegraph-*.tar.gz
>
> # enter the tool's package
> cd *hugegraph*/*tool*
> ```
>
> > note: `${version}` is the version, The latest version can refer to [Download Page](/docs/download/download), or click the link to download directly from the Download page
>
> The general entry script for HugeGraph-Tools is `bin/hugegraph`, Users can use the `help` command to view its usage, here only the commands for one-click deployment are introduced.
>
> ```bash
> bin/hugegraph deploy -v {hugegraph-version} -p {install-path} [-u {download-path-prefix}]
> ```
>
> `{hugegraph-version}` is the Server service and HugeGraphStudio version; see `conf/version-mapping.yaml` for supported mappings. `{install-path}` is the installation directory, while `{download-path-prefix}` optionally overrides the tarball download location. For example, deploy version 0.6 with `bin/hugegraph deploy -v 0.6 -p services`.
## 4 Config
If you need to quickly start HugeGraph just for testing, then you only need to modify a few configuration items (see next section).
For detailed configuration introduction, please refer to [configuration document](/docs/config/config-guide) and [introduction to configuration items](/docs/config/config-option)
## 5 Startup
### 5.1 Use a startup script to startup
Startup is divided into "first startup" and "non-first startup". On the first startup, you need to initialize the backend database before starting the service.
If the service was stopped manually, or needs to be started again for any other reason, you can usually start it directly because the backend database is persistent.
When HugeGraphServer starts, it connects to the backend storage and checks its version information. If the backend has not been initialized, or if it was initialized with an incompatible version (for example, old-version data), HugeGraphServer will fail to start and report an error.
If you need to access HugeGraphServer externally, modify the `restserver.url` configuration item in `rest-server.properties` (the default is `http://127.0.0.1:8080`) and change it to the machine name or IP address.
Since the configuration (hugegraph.properties) and startup steps required by various backends are slightly different, the following will introduce the configuration and startup of each backend one by one.
**Note:** Configure [Server Authentication](/docs/config/config-authentication/) before starting HugeGraphServer if you need Auth mode (especially for production or public network environments).
#### 5.1.1 Distributed Storage (HStore)
> [!DETAILS]- Click to expand/collapse Distributed Storage configuration and startup method
> > Distributed storage is a new feature introduced after HugeGraph 1.5.0, which implements distributed data storage and computation based on HugeGraph-PD and HugeGraph-Store components.
>
> To use the distributed storage engine, you need to deploy HugeGraph-PD and HugeGraph-Store first. See [HugeGraph-PD Quick Start](/docs/quickstart/hugegraph/hugegraph-pd/) and [HugeGraph-Store Quick Start](/docs/quickstart/hugegraph/hugegraph-hstore/).
>
> After ensuring that both PD and Store services are started, modify the `hugegraph.properties` configuration of HugeGraph-Server:
>
> ```properties
> backend=hstore
> serializer=binary
>
> # PD service address, multiple PD addresses are separated by commas, configure PD's RPC port
> pd.peers=127.0.0.1:8686,127.0.0.1:8687,127.0.0.1:8688
> ```
>
> ```properties
> # Simple example (with authentication)
> gremlin.graph=org.apache.hugegraph.auth.HugeFactoryAuthProxy
>
> # Specify storage backend hstore
> backend=hstore
> serializer=binary
> store=hugegraph
>
> # pd config
> pd.peers=127.0.0.1:8686
> ```
>
> A ready-made template for this backend ships as `conf/graphs/hstore.properties.template`. Copy it over `conf/graphs/hugegraph.properties` and adjust `pd.peers`.
>
> The task scheduler is picked from the backend, so `task.scheduler_type` does not need to be set. `hstore` uses the distributed scheduler and every other backend uses the local one. The key is still accepted for upgrade compatibility, but it is ignored and logs a warning.
>
> Then enable PD discovery in `rest-server.properties` (required for every HugeGraph-Server node):
>
> ```properties
> usePD=true
> # load the hugegraph.properties above from the graphs directory; the source default is false
> graph.load_from_local_config=true
>
> # notice: must have this conf in 1.7.0
> pd.peers=127.0.0.1:8686,127.0.0.1:8687,127.0.0.1:8688
> # If auth is needed
> # auth.authenticator=org.apache.hugegraph.auth.StandardAuthenticator
> ```
>
> If configuring multiple HugeGraph-Server nodes, you need to modify the `rest-server.properties` configuration file for each node, for example:
>
> Node 1 (Master node):
> ```properties
> usePD=true
> restserver.url=http://127.0.0.1:8081
> gremlinserver.url=http://127.0.0.1:8181
> pd.peers=127.0.0.1:8686
>
> rpc.server_host=127.0.0.1
> rpc.server_port=8091
>
> server.id=server-1
> server.role=master
> ```
>
> Node 2 (Worker node):
> ```properties
> usePD=true
> restserver.url=http://127.0.0.1:8082
> gremlinserver.url=http://127.0.0.1:8182
> pd.peers=127.0.0.1:8686
>
> rpc.server_host=127.0.0.1
> rpc.server_port=8092
>
> server.id=server-2
> server.role=worker
> ```
>
> Also, you need to modify the port configuration in `gremlin-server.yaml` for each node:
>
> Node 1:
> ```yaml
> host: 127.0.0.1
> port: 8181
> ```
>
> Node 2:
> ```yaml
> host: 127.0.0.1
> port: 8182
> ```
>
> Initialize the database:
>
> ```bash
> cd *hugegraph-${version}
> bin/init-store.sh
> ```
>
> PD and Store own the metadata and the store for the `hstore` backend, so `init-store` skips graphs configured with it. Running it still creates the built-in `admin` account when authentication is on. In a deployment where the storage side already holds that account, set `init_store.enabled=false` in `rest-server.properties` to skip the whole step, which is what the Docker HStore topologies do.
>
> Start the Server:
>
> ```bash
> bin/start-hugegraph.sh
> ```
>
> The startup sequence for using the distributed storage engine is:
> 1. Start HugeGraph-PD
> 2. Start HugeGraph-Store
> 3. Initialize the database (only for the first time)
> 4. Start HugeGraph-Server
>
> Verify that the service is started properly:
>
> ```bash
> curl http://localhost:8081/graphspaces/DEFAULT/graphs
> # Should return: {"graphs":["hugegraph"]}
> ```
>
> The sequence to stop the services should be the reverse of the startup sequence:
> 1. Stop HugeGraph-Server
> 2. Stop HugeGraph-Store
> 3. Stop HugeGraph-PD
>
> ```bash
> bin/stop-hugegraph.sh
> ```
>
> ##### Docker Distributed Cluster
>
> Run the full distributed cluster (3 PD + 3 Store + 3 Server) with Docker Compose:
>
> ```bash
> cd hugegraph/docker
> HUGEGRAPH_VERSION=1.7.0 docker compose -f docker-compose-3pd-3store-3server.yml up -d --wait
> ```
>
> Services communicate via container hostnames on the `hg-net` bridge network. Configuration is injected via environment variables:
>
> ```yaml
> # Server configuration, shared by server0, server1 and server2
> HG_SERVER_BACKEND: hstore
> HG_SERVER_PD_PEERS: pd0:8686,pd1:8686,pd2:8686
> HG_SERVER_CLUSTER: hg
> HG_SERVER_USE_PD: "true"
> HG_SERVER_MIN_FREE_MEMORY: "0"
> HG_SERVER_INIT_STORE_ENABLED: "false"
> HG_SERVER_REQUIRE_AUTH_TOKEN_SECRET: "true"
> STORE_REST: store0:8520
> # per node, for example on server0
> HG_SERVER_REST_URL: http://server0:8080
> ```
>
> Because this topology sets `HG_SERVER_REQUIRE_AUTH_TOKEN_SECRET: "true"`, the Servers refuse to start when a password is supplied without a shared JWT secret. Put both `HUGEGRAPH_ADMIN_PASSWORD` and `HUGEGRAPH_AUTH_TOKEN_SECRET` in `docker/.env` before starting it. The full variable reference is in the [Docker Cluster guide](/docs/guides/hugegraph-docker-cluster/).
>
> Verify the cluster:
> ```bash
> curl http://localhost:8080/versions
> curl http://localhost:8620/v1/stores
> ```
> To view runtime logs for any container use `docker logs ` (e.g. `docker logs hg-pd0`).
>
> See [docker/README.md](https://github.com/apache/hugegraph/blob/master/docker/README.md) for the full environment variable reference, port table, and troubleshooting guide.
#### 5.1.2 RocksDB / ToplingDB
> [!DETAILS]- Click to expand/collapse RocksDB configuration and startup methods
> > RocksDB is an embedded database that does not require manual installation and deployment. GCC version >= 4.3.0 (GLIBCXX_3.4.10) is required. If not, GCC needs to be upgraded in advance
>
> Update hugegraph.properties
>
> ```properties
> backend=rocksdb
> serializer=binary
> rocksdb.data_path=.
> rocksdb.wal_path=.
> ```
>
> Initialize the database (required on the first startup, or a new configuration was manually added under 'conf/graphs/')
>
> ```bash
> cd *hugegraph-${version}
> bin/init-store.sh
> ```
>
> Start server
>
> ```bash
> bin/start-hugegraph.sh
> Starting HugeGraphServer in daemon mode...
> Connecting to HugeGraphServer (http://127.0.0.1:8080/graphs)....OK
> Started [pid 21614]
> ```
>
> **ToplingDB (Beta)**: As a high-performance alternative to RocksDB, please refer to the configuration guide: [ToplingDB Quick Start](https://hugegraph.apache.org/blog/2025/10/09/toplingdb-quick-start/)
#### 5.1.3 HBase
> [!DETAILS]- Click to expand/collapse HBase configuration and startup methods
> > users need to install HBase by themselves, requiring version 2.0 or above,[download link](https://hbase.apache.org/downloads.html)
>
> Update hugegraph.properties
>
> ```properties
> backend=hbase
> serializer=hbase
>
> # hbase backend config
> hbase.hosts=localhost
> hbase.port=2181
> # Note: recommend to modify the HBase partition number by the actual/env data amount & RS amount before init store
> # it may influence the loading speed a lot
> #hbase.enable_partition=true
> #hbase.vertex_partitions=10
> #hbase.edge_partitions=30
> ```
>
> Initialize the database (required on the first startup, or a new configuration was manually added under 'conf/graphs/')
>
> ```bash
> cd *hugegraph-${version}
> bin/init-store.sh
> ```
>
> Start server
>
> ```bash
> bin/start-hugegraph.sh
> Starting HugeGraphServer in daemon mode...
> Connecting to HugeGraphServer (http://127.0.0.1:8080/graphs)....OK
> Started [pid 21614]
> ```
>
#### 5.1.4 Create an example graph when startup
Pass the `-p true` argument when starting the script to enable `preload`, which creates a sample graph.
```
bin/start-hugegraph.sh -p true
Starting HugeGraphServer in daemon mode...
Connecting to HugeGraphServer (http://127.0.0.1:8080/graphs)......OK
```
And use the RESTful API to request `HugeGraphServer` and get the following result:
```javascript
> curl "http://localhost:8080/graphspaces/DEFAULT/graphs/hugegraph/graph/vertices" | gunzip
{"vertices":[{"id":"2:lop","label":"software","type":"vertex","properties":{"name":"lop","lang":"java","price":328}},{"id":"1:josh","label":"person","type":"vertex","properties":{"name":"josh","age":32,"city":"Beijing"}},{"id":"1:marko","label":"person","type":"vertex","properties":{"name":"marko","age":29,"city":"Beijing"}},{"id":"1:peter","label":"person","type":"vertex","properties":{"name":"peter","age":35,"city":"Shanghai"}},{"id":"1:vadas","label":"person","type":"vertex","properties":{"name":"vadas","age":27,"city":"Hongkong"}},{"id":"2:ripple","label":"software","type":"vertex","properties":{"name":"ripple","lang":"java","price":199}}]}
```
This indicates the successful creation of the sample graph.
#### 5.1.5 Startup script options
`bin/start-hugegraph.sh` accepts the following options. Every one of them takes a value, so write `-d false`, not a bare `-d`.
| Option | Values | Default | Purpose |
|---|---|---|---|
| `-d` | `true`, `false` | `true` | Daemon mode. With `-d false` the script stays in the foreground and forwards `SIGTERM`/`SIGINT` to the server. |
| `-g` | `zgc` or `ZGC` | omit for G1GC | Garbage collector to use. Only ZGC is accepted, any other value aborts the startup. ZGC needs Java 11 or later. |
| `-m` | `true`, `false` | `false` | Install the cron-based monitor task (`bin/start-monitor.sh`). For VM and bare-metal deployments only. |
| `-p` | `true`, `false` | `false` | Preload the sample graph, as in 5.1.4. |
| `-s` | `true`, `false` | `true` | Run with the security check (`HugeSecurityManager`) enabled. It requires Java 11 to 23 and a readable `conf/java-security.properties`. |
| `-j` | JVM options | empty | Extra JVM options appended to the server command line. |
| `-t` | seconds | `30` | How long to wait for the service to answer before reporting a failed startup. |
| `-y` | `true`, `false` | `false` | Enable the OpenTelemetry agent for traces. |
`bin/stop-hugegraph.sh` accepts `-m true|false` (default `true`), which controls whether the cron monitor task is removed along with the service.
### 5.2 Use Docker to startup
In [3.1 Use Docker container](#31-use-docker-container-convenient-for-testdev), we introduced how to deploy `hugegraph-server` with Docker. You can also switch storage backends or preload a sample graph by setting the corresponding parameters.
#### 5.2.1 Create an example graph when starting a server
Set the environment variable `PRELOAD=true` when starting Docker so that sample data is loaded during startup.
1. Use `docker run`
Use `docker run -itd --name=server -p 8080:8080 -e PRELOAD=true hugegraph/hugegraph:1.7.0`
2. Use `docker-compose`
Create a `docker-compose.yml` file like the following and set `PRELOAD=true` in the environment. [`example.groovy`](https://github.com/apache/hugegraph/blob/master/hugegraph-server/hugegraph-dist/src/assembly/static/scripts/example.groovy) is a predefined script used to preload sample data. If needed, you can mount a new `example.groovy` script to change the preload data.
```yaml
version: '3'
services:
server:
image: hugegraph/hugegraph:1.7.0
container_name: server
environment:
- PRELOAD=true
- PASSWORD=xxx
volumes:
- /path/to/yourscript:/hugegraph-server/scripts/example.groovy
ports:
- 8080:8080
```
Use `docker compose up -d` to start the container.
And use the RESTful API to request `HugeGraphServer` and get the following result:
```javascript
> curl "http://localhost:8080/graphspaces/DEFAULT/graphs/hugegraph/graph/vertices" | gunzip
{"vertices":[{"id":"2:lop","label":"software","type":"vertex","properties":{"name":"lop","lang":"java","price":328}},{"id":"1:josh","label":"person","type":"vertex","properties":{"name":"josh","age":32,"city":"Beijing"}},{"id":"1:marko","label":"person","type":"vertex","properties":{"name":"marko","age":29,"city":"Beijing"}},{"id":"1:peter","label":"person","type":"vertex","properties":{"name":"peter","age":35,"city":"Shanghai"}},{"id":"1:vadas","label":"person","type":"vertex","properties":{"name":"vadas","age":27,"city":"Hongkong"}},{"id":"2:ripple","label":"software","type":"vertex","properties":{"name":"ripple","lang":"java","price":199}}]}
```
This indicates that the sample graph was created successfully.
## 6. Access server
### 6.1 Service startup status check
Use `jps` to see a service process
```bash
jps
6475 HugeGraphServer
```
`curl` request `RESTfulAPI`
```bash
echo `curl -o /dev/null -s -w %{http_code} "http://localhost:8080/graphspaces/DEFAULT/graphs/hugegraph/graph/vertices"`
```
Return 200, which means the server starts normally.
### 6.2 Request Server
The RESTful API of HugeGraphServer includes various types of resources, typically including graph, schema, gremlin, traverser and task.
- `graph` contains `vertices`、`edges`
- `schema` contains `vertexlabels`、 `propertykeys`、 `edgelabels`、`indexlabels`
- `gremlin` contains various `Gremlin` statements, such as `g.v()`, which can be executed synchronously or asynchronously
- `traverser` contains various advanced queries including shortest paths, intersections, N-step reachable neighbors, etc.
- `task` contains query and delete with asynchronous tasks
#### 6.2.1 Get vertices and its related properties in `hugegraph`
```bash
curl http://localhost:8080/graphspaces/DEFAULT/graphs/hugegraph/graph/vertices
```
_explanation_
1. Since there are many vertices and edges in the graph, for list-type requests, such as getting all vertices, getting all edges, etc., the server will compress the data and return it, so when use curl, you get a bunch of garbled characters, you can redirect to gunzip for decompression. It is recommended to use the Chrome browser + Restlet plugin to send HTTP requests for testing.
```
curl "http://localhost:8080/graphspaces/DEFAULT/graphs/hugegraph/graph/vertices" | gunzip
```
2. The current default configuration of HugeGraphServer can only be accessed locally, and the configuration can be modified so that it can be accessed on other machines.
```
vim conf/rest-server.properties
restserver.url=http://0.0.0.0:8080
```
response body:
```javasript
{
"vertices": [
{
"id": "2lop",
"label": "software",
"type": "vertex",
"properties": {
"price": [
{
"id": "price",
"value": 328
}
],
"name": [
{
"id": "name",
"value": "lop"
}
],
"lang": [
{
"id": "lang",
"value": "java"
}
]
}
},
{
"id": "1josh",
"label": "person",
"type": "vertex",
"properties": {
"name": [
{
"id": "name",
"value": "josh"
}
],
"age": [
{
"id": "age",
"value": 32
}
]
}
},
...
]
}
```
For the detailed API, please refer to [RESTful-API](/docs/clients/restful-api)
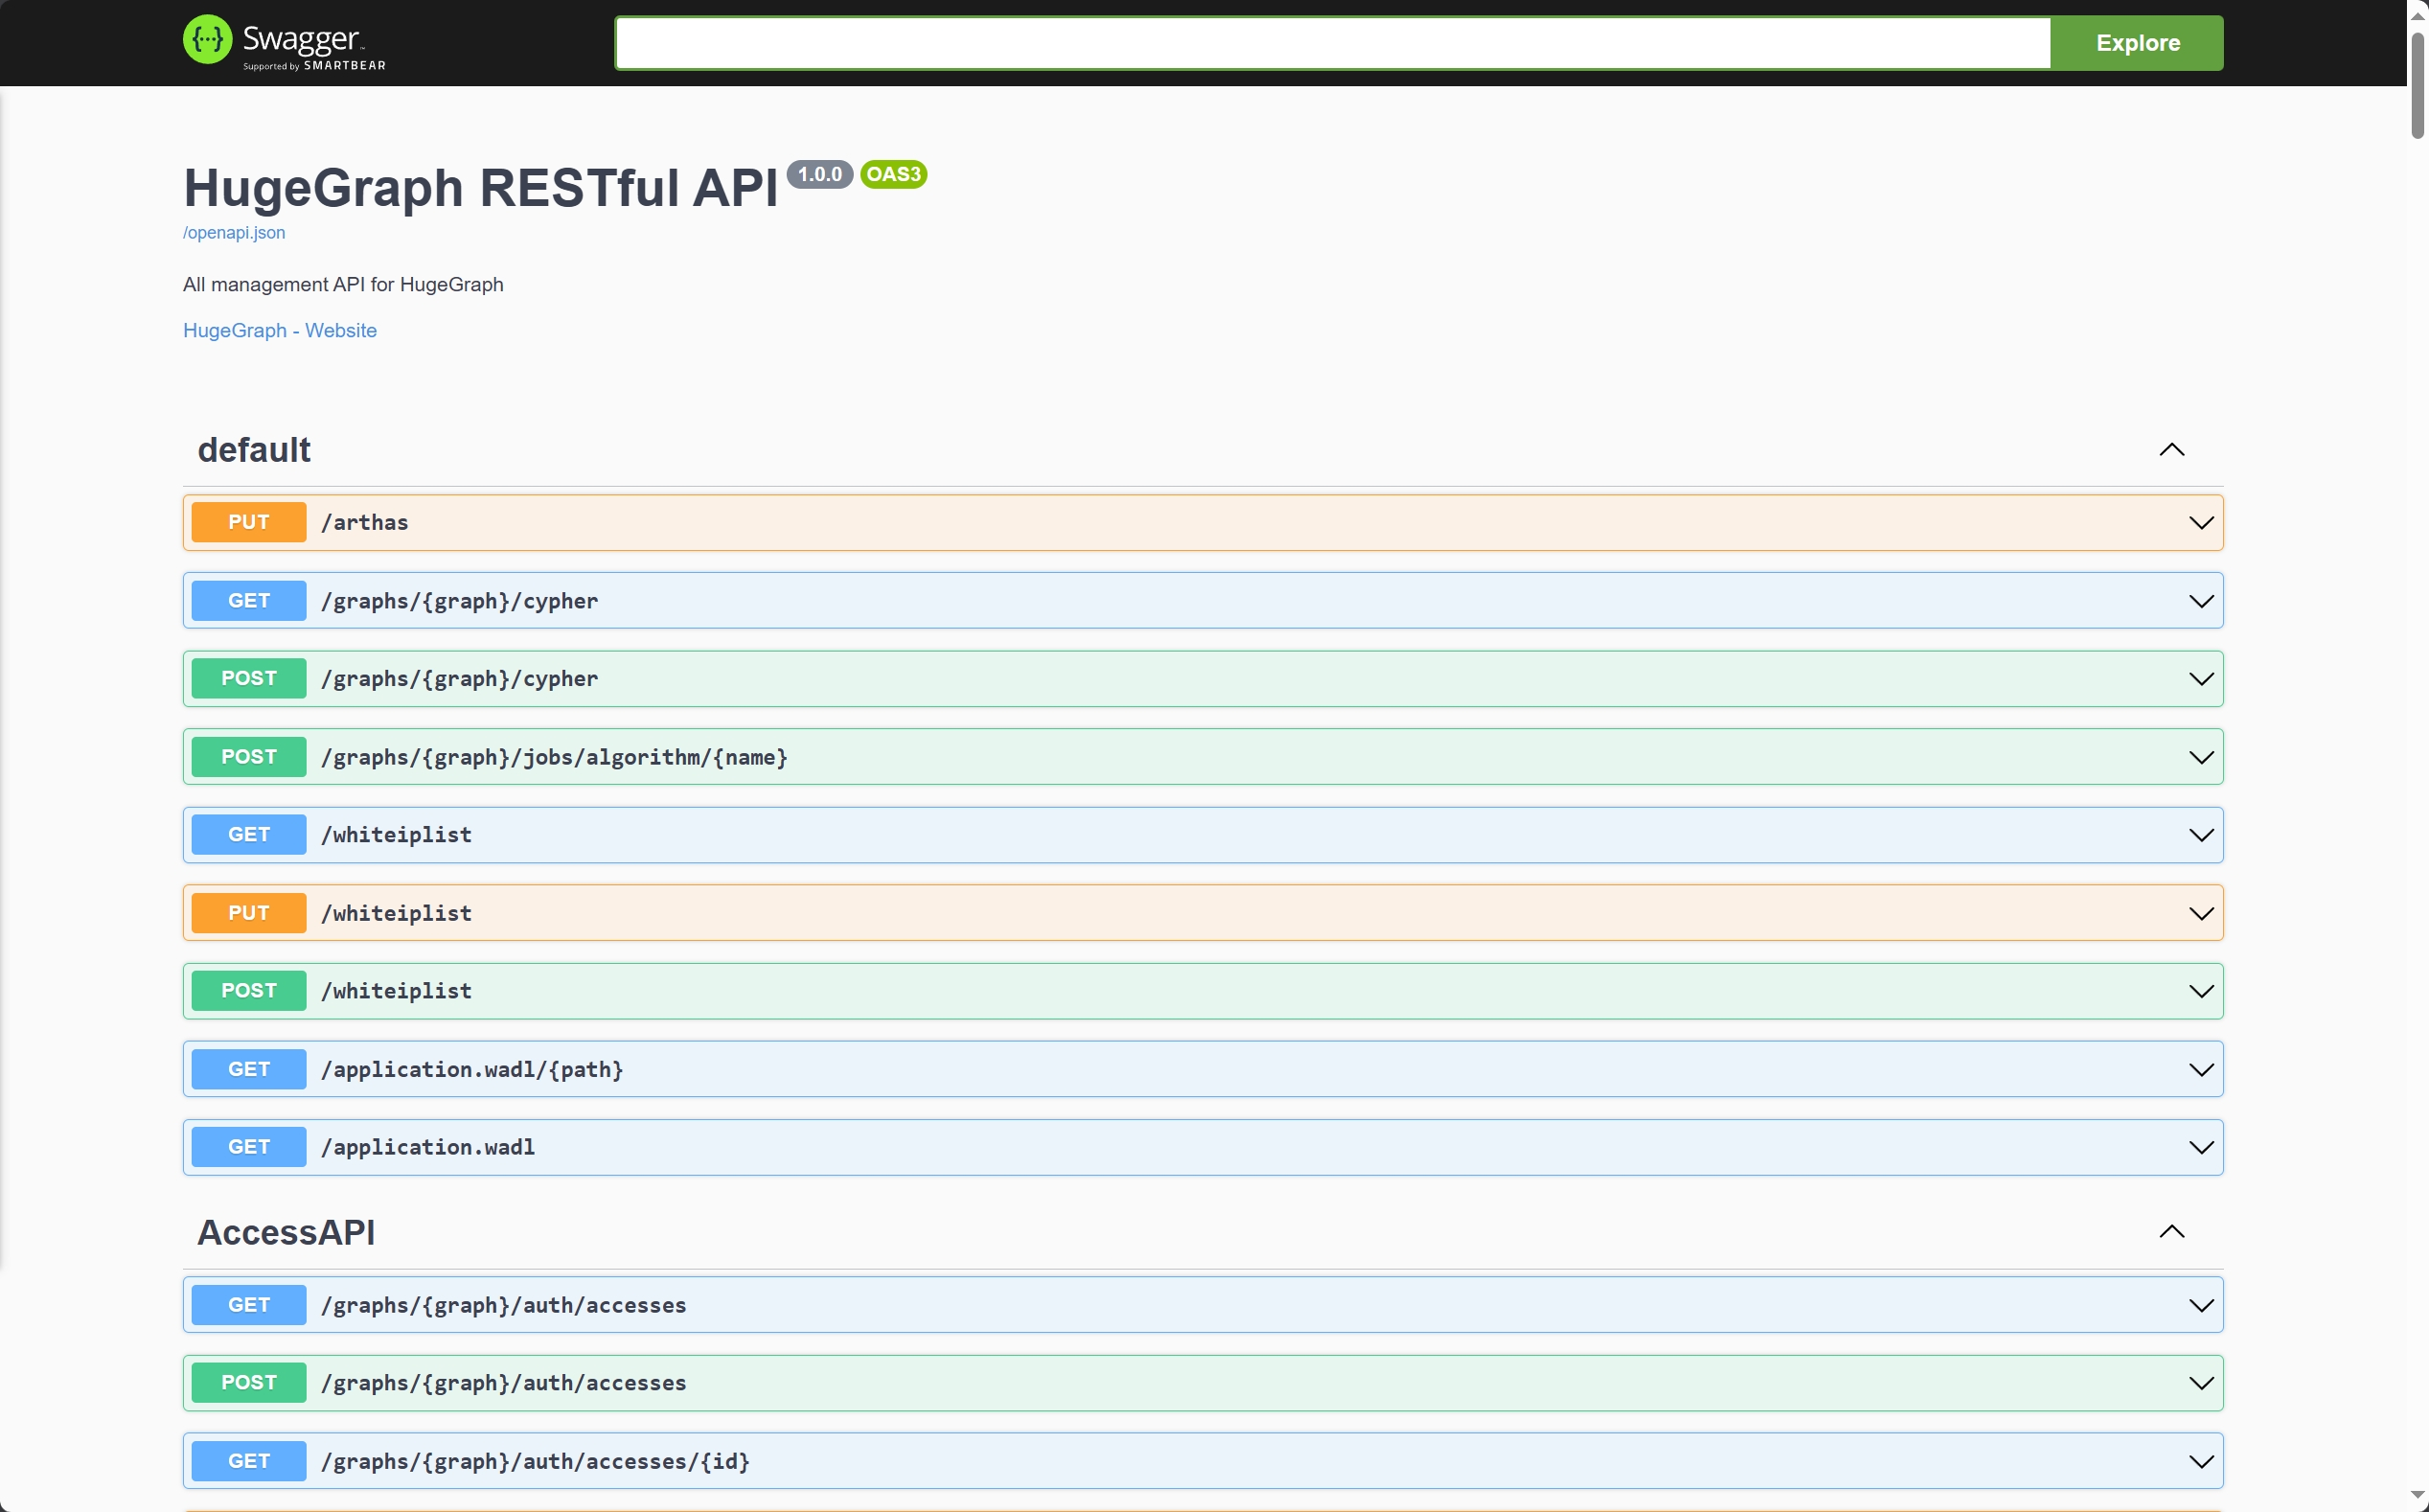
You can also visit `localhost:8080/swagger-ui/index.html` to check the API.
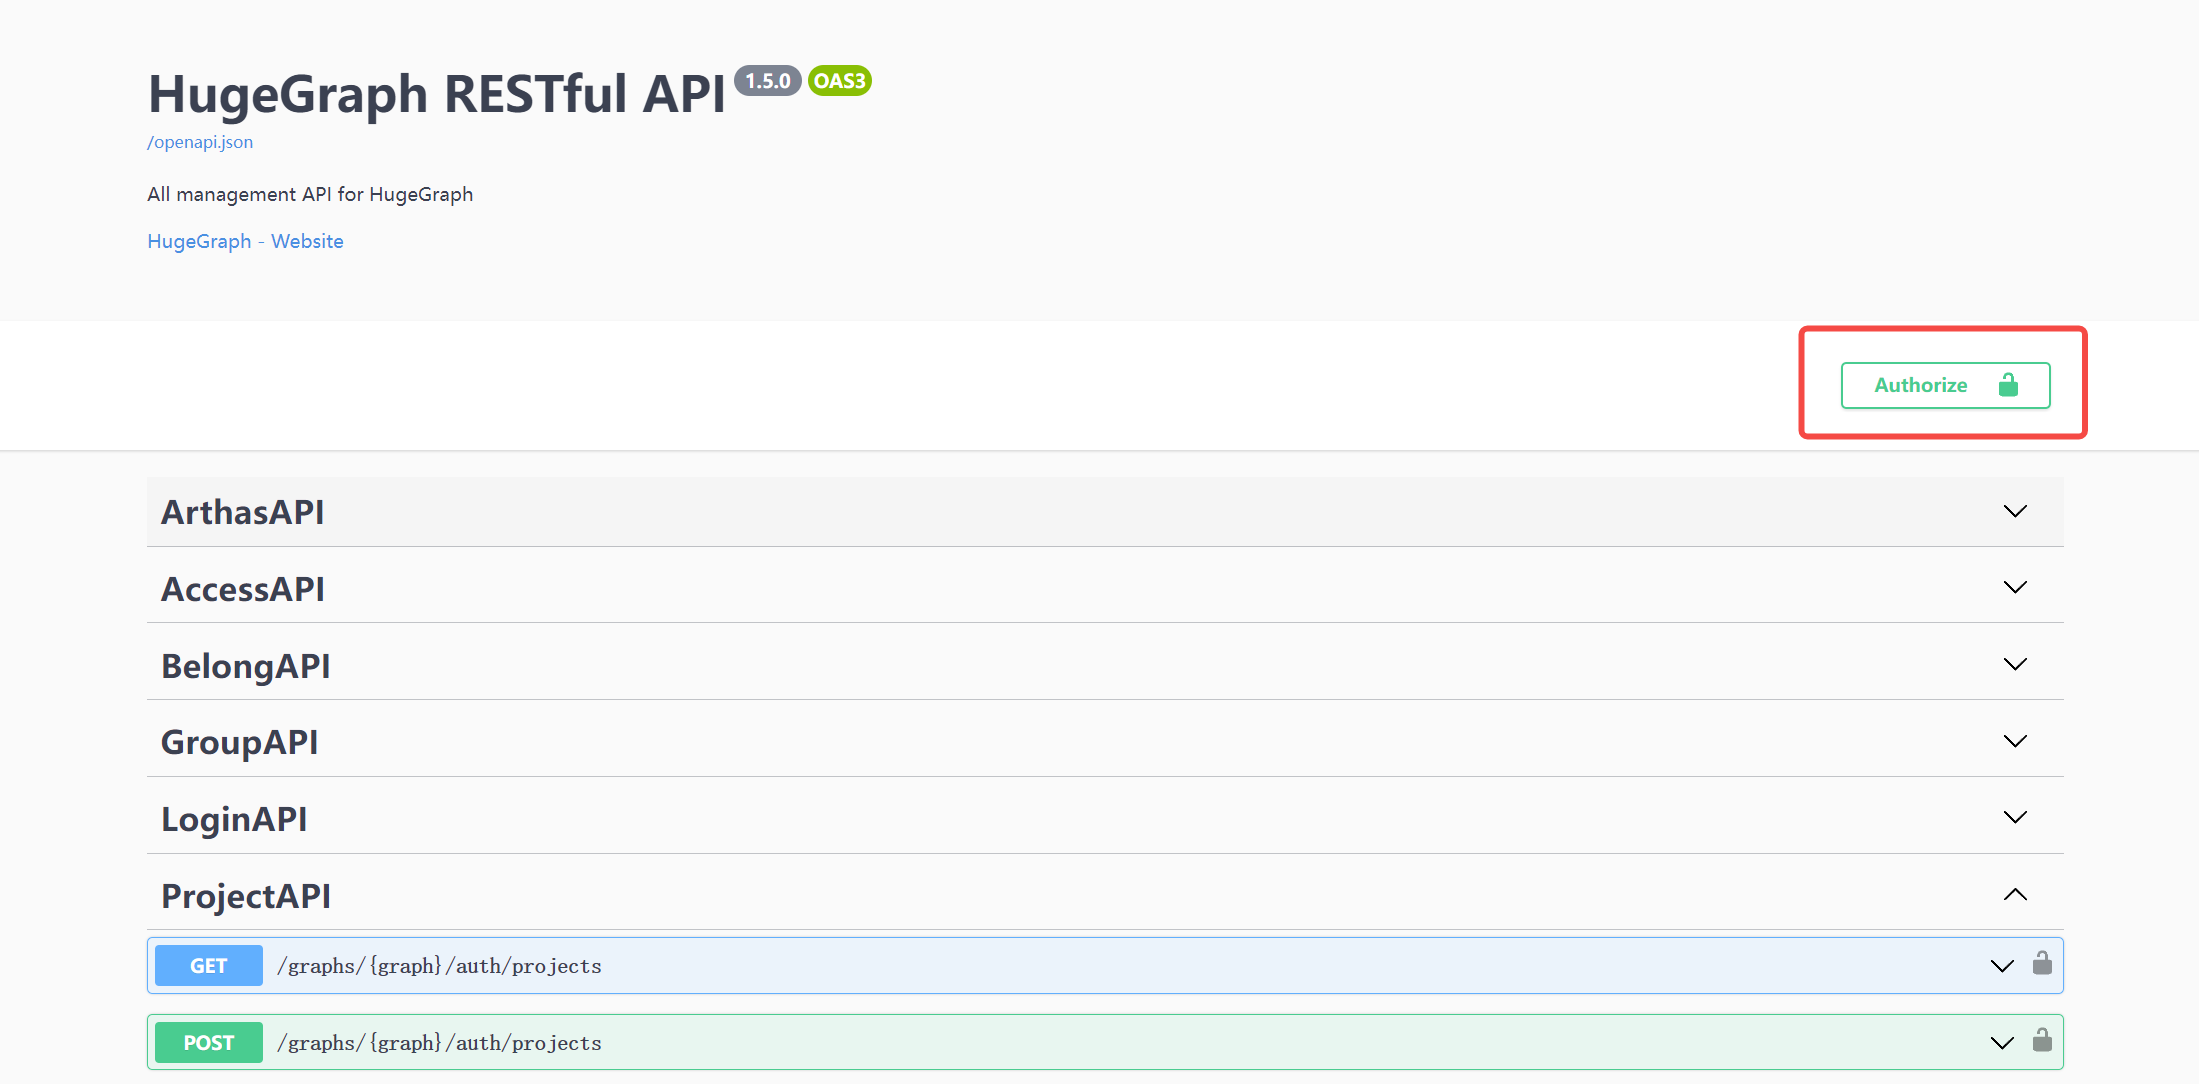
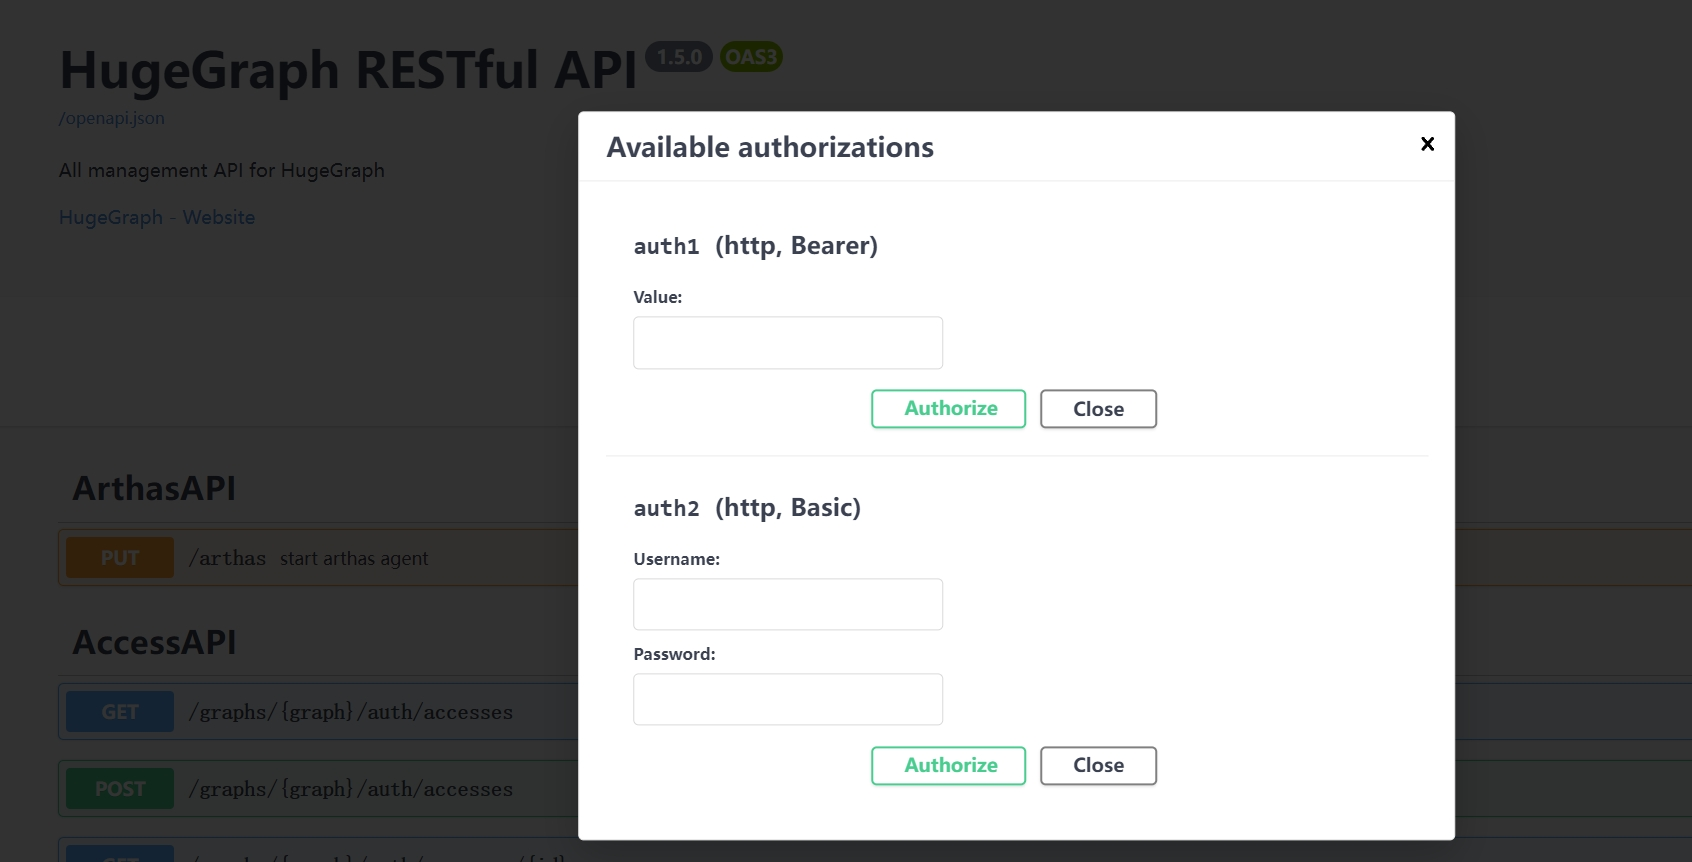
When using Swagger UI to debug the API provided by HugeGraph, if HugeGraph Server turns on authentication mode, you can enter authentication information on the Swagger page.
Currently, HugeGraph supports setting authentication information in two forms: Basic and Bearer.
## 7 Stop Server
```bash
cd apache-hugegraph-incubating-1.7.0/apache-hugegraph-server-incubating-1.7.0
bin/stop-hugegraph.sh
```
## 8 Debug Server with IntelliJ IDEA
Please refer to [Setup Server in IDEA](/docs/contribution-guidelines/hugegraph-server-idea-setup)