文档 1.5 版本已不再积极维护,你当前浏览的是一份归档快照。
最新文档请参阅 最新版本 。
HugeGraph-Server Quick Start 1 HugeGraph-Server 概述 HugeGraph-Server 是 HugeGraph 项目的核心部分,包含 graph-core、backend、API 等子模块。
Core 模块是 Tinkerpop 接口的实现,Backend 模块用于管理数据存储,目前支持的后端包括:Memory、Cassandra、ScyllaDB 以及 RocksDB,API 模块提供 HTTP Server,将 Client 的 HTTP 请求转化为对 Core 的调用。
文档中会出现 HugeGraph-Server 及 HugeGraphServer 这两种写法,其他组件也类似。
这两种写法含义上并明显差异,可以这么区分:HugeGraph-Server 表示服务端相关组件代码,HugeGraphServer 表示服务进程。
2 依赖 2.1 安装 Java 11 (JDK 11) 请优先考虑在 Java 11 的环境上启动 HugeGraph-Server(在 1.5.0 版前,会保留对 Java 8 的基本兼容)
在往下阅读之前先执行 java -version 命令确认 jdk 版本
注:使用 Java 8 启动 HugeGraph-Server 会失去一些安全性 的保障,也会降低性能相关指标 (请尽早升级/迁移)
3 部署 有四种方式可以部署 HugeGraph-Server 组件:
方式 1:使用 Docker 容器 (便于测试 ) 方式 2:下载 tar 包 方式 3:源码编译 方式 4:使用 tools 工具部署 (Outdated) 注意 生产或对外网暴露访问的环境必须使用 Java 11 并开启 Auth 权限认证 , 否则会有安全隐患。
3.1 使用 Docker 容器 (便于测试 ) 可参考 Docker 部署方式 。
我们可以使用 docker run -itd --name=server -p 8080:8080 -e PASSWORD=xxx hugegraph/hugegraph:1.5.0 去快速启动一个内置了 RocksDB 的 Hugegraph server.
可选项:
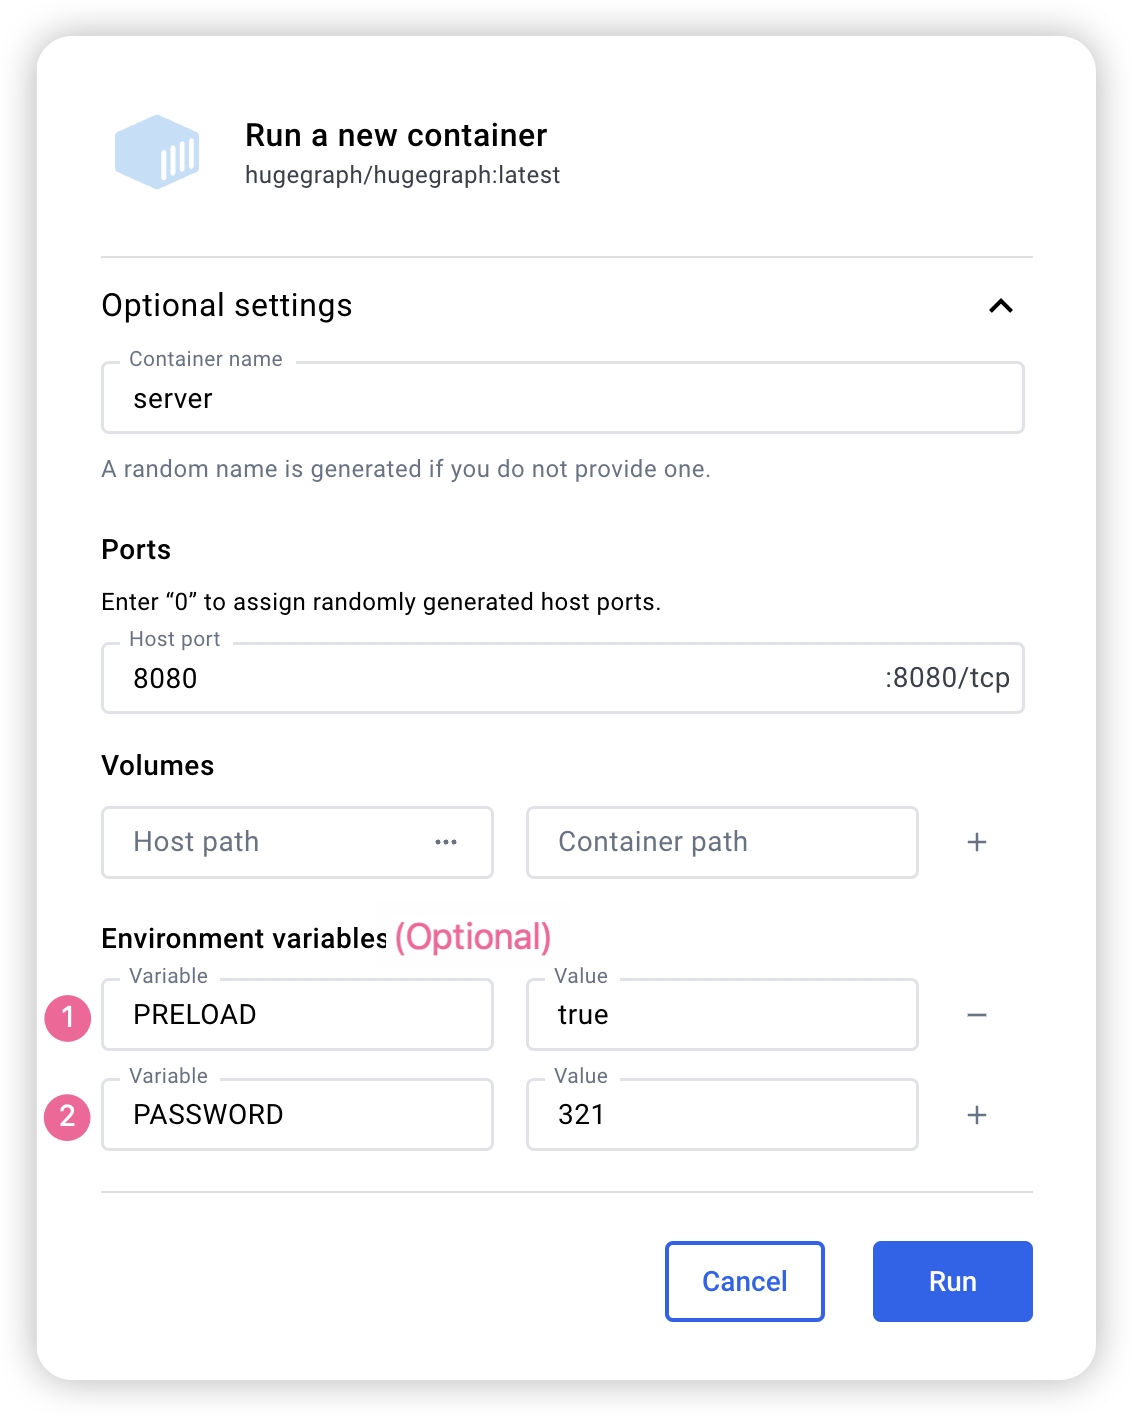
可以使用 docker exec -it server bash 进入容器完成一些操作 可以使用 docker run -itd --name=server -p 8080:8080 -e PRELOAD="true" hugegraph/hugegraph:1.5.0 在启动的时候预加载一个内置的 样例图。可以通过 RESTful API 进行验证。具体步骤可以参考 5.1.1 可以使用 -e PASSWORD=xxx 设置是否开启鉴权模式以及 admin 的密码,具体步骤可以参考 Config Authentication 如果使用 docker desktop,则可以按照如下的方式设置可选项:
另外,如果我们希望能够在一个文件中管理除了 server 之外的其他 Hugegraph 相关的实例,我们也可以使用 docker-compose完成部署,使用命令 docker-compose up -d,(当然只配置 server 也是可以的)以下是一个样例的 docker-compose.yml:
1 version : '3'
2 services :
3 server :
4 image : hugegraph/hugegraph:1.5.0
5 container_name : server
6 environment :
7 - PASSWORD=xxx
8 # - PASSWORD=xxx 为可选参数,设置的时候可以开启鉴权模式,并设置密码
9 # - PRELOAD=true
10 # - PRELOAD=true 为可选参数,为 True 时可以在启动的时候预加载一个内置的样例图
11 ports :
12 - 8080 : 8080 注意:
hugegraph 的 docker 镜像是一个便捷版本,用于快速启动 hugegraph,并不是官方发布物料包方式 。你可以从 ASF Release Distribution Policy 中得到更多细节。
推荐使用 release tag (如 1.5.0/1.x.0) 以获取稳定版。使用 latest tag 可以使用开发中的最新功能。
3.2 下载 tar 包
1 # use the latest version, here is 1.5.0 for example
2 wget https://downloads.apache.org/incubator/hugegraph/{ version} /apache-hugegraph-incubating-{ version} .tar.gz
3 tar zxf *hugegraph*.tar.gz 3.3 源码编译 源码编译前请确保本机有安装 wget/curl 命令
下载 HugeGraph 源代码
1 git clone https://github.com/apache/hugegraph.git 编译打包生成 tar 包
1 cd hugegraph
2 # (Optional) use "-P stage" param if you build failed with the latest code(during pre-release period)
3 mvn package -DskipTests 执行日志如下:
1 ......
2 [ INFO] Reactor Summary for hugegraph 1.5.0:
3 [ INFO]
4 [ INFO] hugegraph .......................................... SUCCESS [ 2.405 s]
5 [ INFO] hugegraph-core ..................................... SUCCESS [ 13.405 s]
6 [ INFO] hugegraph-api ...................................... SUCCESS [ 25.943 s]
7 [ INFO] hugegraph-cassandra ................................ SUCCESS [ 54.270 s]
8 [ INFO] hugegraph-scylladb ................................. SUCCESS [ 1.032 s]
9 [ INFO] hugegraph-rocksdb .................................. SUCCESS [ 34.752 s]
10 [ INFO] hugegraph-mysql .................................... SUCCESS [ 1.778 s]
11 [ INFO] hugegraph-palo ..................................... SUCCESS [ 1.070 s]
12 [ INFO] hugegraph-hbase .................................... SUCCESS [ 32.124 s]
13 [ INFO] hugegraph-postgresql ............................... SUCCESS [ 1.823 s]
14 [ INFO] hugegraph-dist ..................................... SUCCESS [ 17.426 s]
15 [ INFO] hugegraph-example .................................. SUCCESS [ 1.941 s]
16 [ INFO] hugegraph-test ..................................... SUCCESS [ 01:01 min]
17 [ INFO] ------------------------------------------------------------------------
18 [ INFO] BUILD SUCCESS
19 [ INFO] ------------------------------------------------------------------------
20 ...... 执行成功后,在 hugegraph 目录下生成 *hugegraph-*.tar.gz 文件,就是编译生成的 tar 包。
过时的 tools 工具安装
1 #### 3.4 使用 tools 工具部署 (Outdated)
2
3 HugeGraph-Tools 提供了一键部署的命令行工具,用户可以使用该工具快速地一键下载、解压、配置并启动 HugeGraph-Server 和 HugeGraph-Hubble,最新的 HugeGraph-Toolchain 中已经包含所有的这些工具,直接下载它解压就有工具包集合了
4
5 ``` bash
6 # download toolchain package, it includes loader + tool + hubble, please check the latest version (here is 1.5.0)
7 wget https://downloads.apache.org/incubator/hugegraph/1.5.0/apache-hugegraph-toolchain-incubating-1.5.0.tar.gz
8 tar zxf *hugegraph-*.tar.gz
9 # enter the tool's package
10 cd *hugegraph*/*tool* 注:${version} 为版本号,最新版本号可参考 Download 页面 ,或直接从 Download 页面点击链接下载
HugeGraph-Tools 的总入口脚本是 bin/hugegraph,用户可以使用 help 子命令查看其用法,这里只介绍一键部署的命令。
1 bin/hugegraph deploy -v { hugegraph-version} -p { install-path} [ -u { download-path-prefix}] {hugegraph-version} 表示要部署的 HugeGraphServer 及 HugeGraphStudio 的版本,用户可查看 conf/version-mapping.yaml 文件获取版本信息,{install-path} 指定 HugeGraphServer 及 HugeGraphStudio 的安装目录,{download-path-prefix} 可选,指定 HugeGraphServer 及 HugeGraphStudio tar 包的下载地址,不提供时使用默认下载地址,比如要启动 0.6 版本的 HugeGraph-Server 及 HugeGraphStudio 将上述命令写为 bin/hugegraph deploy -v 0.6 -p services 即可。
4 配置 如果需要快速启动 HugeGraph 仅用于测试,那么只需要进行少数几个配置项的修改即可(见下一节)。
详细的配置介绍请参考配置文档 及配置项介绍 。
5 启动 5.1 使用启动脚本启动 启动分为"首次启动"和"非首次启动",这么区分是因为在第一次启动前需要初始化后端数据库,然后启动服务。
而在人为停掉服务后,或者其他原因需要再次启动服务时,因为后端数据库是持久化存在的,直接启动服务即可。
HugeGraphServer 启动时会连接后端存储并尝试检查后端存储版本号,如果未初始化后端或者后端已初始化但版本不匹配时(旧版本数据),HugeGraphServer 会启动失败,并给出错误信息。
如果需要外部访问 HugeGraphServer,请修改 rest-server.properties 的 restserver.url 配置项(默认为 http://127.0.0.1:8080),修改成机器名或 IP 地址。
由于各种后端所需的配置(hugegraph.properties)及启动步骤略有不同,下面逐一对各后端的配置及启动做介绍。
注: 如果想要开启 HugeGraph 权限系统,在启动 Server 之前应按照 Server 鉴权配置 进行配置。(尤其是生产环境/外网环境须开启)
5.1.1 分布式存储 (HStore) 点击展开/折叠 分布式存储 配置及启动方法 分布式存储是 HugeGraph 1.5.0 之后推出的新特性,它基于 HugeGraph-PD 和 HugeGraph-Store 组件实现了分布式的数据存储和计算。
要使用分布式存储引擎,需要先部署 HugeGraph-PD 和 HugeGraph-Store,详见 HugeGraph-PD 快速入门 和 HugeGraph-Store 快速入门 。
确保 PD 和 Store 服务均已启动后,修改 HugeGraph-Server 的 hugegraph.properties 配置:
1 backend = hstore
2 serializer = binary
3 task.scheduler_type = distributed
4
5 # PD 服务地址,多个 PD 地址用逗号分割,配置 PD 的 RPC 端口
6 pd.peers = 127.0.0.1:8686,127.0.0.1:8687,127.0.0.1:8688 如果配置多个 HugeGraph-Server 节点,需要为每个节点修改 rest-server.properties 配置文件,例如:
节点 1(主节点):
1 restserver.url = http://127.0.0.1:8081
2 gremlinserver.url = http://127.0.0.1:8181
3
4 rpc.server_host = 127.0.0.1
5 rpc.server_port = 8091
6
7 server.id = server-1
8 server.role = master 节点 2(工作节点):
1 restserver.url = http://127.0.0.1:8082
2 gremlinserver.url = http://127.0.0.1:8182
3
4 rpc.server_host = 127.0.0.1
5 rpc.server_port = 8092
6
7 server.id = server-2
8 server.role = worker 同时,还需要修改每个节点的 gremlin-server.yaml 中的端口配置:
节点 1:
1 host : 127.0.0.1
2 port : 8181 节点 2:
1 host : 127.0.0.1
2 port : 8182 初始化数据库:
1 cd *hugegraph-${ version }
2 bin/init-store.sh 启动 Server:
使用分布式存储引擎的启动顺序为:
启动 HugeGraph-PD 启动 HugeGraph-Store 初始化数据库(仅首次) 启动 HugeGraph-Server 验证服务是否正常启动:
1 curl http://localhost:8081/graphs
2 # 应返回:{"graphs":["hugegraph"]} 停止服务的顺序应该与启动顺序相反:
停止 HugeGraph-Server 停止 HugeGraph-Store 停止 HugeGraph-PD 5.1.2 RocksDB 点击展开/折叠 RocksDB 配置及启动方法 RocksDB 是一个嵌入式的数据库,不需要手动安装部署,要求 GCC 版本 >= 4.3.0(GLIBCXX_3.4.10),如不满足,需要提前升级 GCC
修改 hugegraph.properties
1 backend = rocksdb
2 serializer = binary
3 rocksdb.data_path = .
4 rocksdb.wal_path = . 初始化数据库(第一次启动时或在 conf/graphs/ 下手动添加了新配置时需要进行初始化)
1 cd *hugegraph-${ version }
2 bin/init-store.sh 启动 server
1 bin/start-hugegraph.sh
2 Starting HugeGraphServer...
3 Connecting to HugeGraphServer ( http://127.0.0.1:8080/graphs) ....OK 提示的 url 与 rest-server.properties 中配置的 restserver.url 一致
5.1.3 HBase 点击展开/折叠 HBase 配置及启动方法 用户需自行安装 HBase,要求版本 2.0 以上,下载地址
修改 hugegraph.properties
1 backend = hbase
2 serializer = hbase
3
4 # hbase backend config
5 hbase.hosts = localhost
6 hbase.port = 2181
7 # Note: recommend to modify the HBase partition number by the actual/env data amount & RS amount before init store
8 # it may influence the loading speed a lot
9 #hbase.enable_partition=true
10 #hbase.vertex_partitions=10
11 #hbase.edge_partitions=30 初始化数据库(第一次启动时或在 conf/graphs/ 下手动添加了新配置时需要进行初始化)
1 cd *hugegraph-${ version }
2 bin/init-store.sh 启动 server
1 bin/start-hugegraph.sh
2 Starting HugeGraphServer...
3 Connecting to HugeGraphServer ( http://127.0.0.1:8080/graphs) ....OK 更多其它后端配置可参考配置项介绍
5.1.4 MySQL 点击展开/折叠 MySQL 配置及启动方法 由于 MySQL 是在 GPL 协议下,与 Apache 协议不兼容,用户需自行安装 MySQL,下载地址
下载 MySQL 的驱动包 ,比如 mysql-connector-java-8.0.30.jar,并放入 HugeGraph-Server 的 lib 目录下。
修改 hugegraph.properties,配置数据库 URL,用户名和密码,store 是数据库名,如果没有会被自动创建。
1 backend = mysql
2 serializer = mysql
3
4 store = hugegraph
5
6 # mysql backend config
7 jdbc.driver = com.mysql.cj.jdbc.Driver
8 jdbc.url = jdbc:mysql://127.0.0.1:3306
9 jdbc.username =
10 jdbc.password =
11 jdbc.reconnect_max_times = 3
12 jdbc.reconnect_interval = 3
13 jdbc.ssl_mode = false 初始化数据库(第一次启动时或在 conf/graphs/ 下手动添加了新配置时需要进行初始化)
1 cd *hugegraph-${ version }
2 bin/init-store.sh 启动 server
1 bin/start-hugegraph.sh
2 Starting HugeGraphServer...
3 Connecting to HugeGraphServer ( http://127.0.0.1:8080/graphs) ....OK 5.1.5 Cassandra 点击展开/折叠 Cassandra 配置及启动方法 用户需自行安装 Cassandra,要求版本 3.0 以上,下载地址
修改 hugegraph.properties
1 backend = cassandra
2 serializer = cassandra
3
4 # cassandra backend config
5 cassandra.host = localhost
6 cassandra.port = 9042
7 cassandra.username =
8 cassandra.password =
9 #cassandra.connect_timeout=5
10 #cassandra.read_timeout=20
11
12 #cassandra.keyspace.strategy=SimpleStrategy
13 #cassandra.keyspace.replication=3 初始化数据库(第一次启动时或在 conf/graphs/ 下手动添加了新配置时需要进行初始化)
1 cd *hugegraph-${ version }
2 bin/init-store.sh
3 Initing HugeGraph Store...
4 2017-12-01 11:26:51 1424 [ main] [ INFO ] org.apache.hugegraph.HugeGraph [] - Opening backend store: 'cassandra'
5 2017-12-01 11:26:52 2389 [ main] [ INFO ] org.apache.hugegraph.backend.store.cassandra.CassandraStore [] - Failed to connect keyspace: hugegraph, try init keyspace later
6 2017-12-01 11:26:52 2472 [ main] [ INFO ] org.apache.hugegraph.backend.store.cassandra.CassandraStore [] - Failed to connect keyspace: hugegraph, try init keyspace later
7 2017-12-01 11:26:52 2557 [ main] [ INFO ] org.apache.hugegraph.backend.store.cassandra.CassandraStore [] - Failed to connect keyspace: hugegraph, try init keyspace later
8 2017-12-01 11:26:53 2797 [ main] [ INFO ] org.apache.hugegraph.backend.store.cassandra.CassandraStore [] - Store initialized: huge_graph
9 2017-12-01 11:26:53 2945 [ main] [ INFO ] org.apache.hugegraph.backend.store.cassandra.CassandraStore [] - Store initialized: huge_schema
10 2017-12-01 11:26:53 3044 [ main] [ INFO ] org.apache.hugegraph.backend.store.cassandra.CassandraStore [] - Store initialized: huge_index
11 2017-12-01 11:26:53 3046 [ pool-3-thread-1] [ INFO ] org.apache.hugegraph.backend.Transaction [] - Clear cache on event 'store.init'
12 2017-12-01 11:26:59 9720 [ main] [ INFO ] org.apache.hugegraph.HugeGraph [] - Opening backend store: 'cassandra'
13 2017-12-01 11:27:00 9805 [ main] [ INFO ] org.apache.hugegraph.backend.store.cassandra.CassandraStore [] - Failed to connect keyspace: hugegraph1, try init keyspace later
14 2017-12-01 11:27:00 9886 [ main] [ INFO ] org.apache.hugegraph.backend.store.cassandra.CassandraStore [] - Failed to connect keyspace: hugegraph1, try init keyspace later
15 2017-12-01 11:27:00 9955 [ main] [ INFO ] org.apache.hugegraph.backend.store.cassandra.CassandraStore [] - Failed to connect keyspace: hugegraph1, try init keyspace later
16 2017-12-01 11:27:00 10175 [ main] [ INFO ] org.apache.hugegraph.backend.store.cassandra.CassandraStore [] - Store initialized: huge_graph
17 2017-12-01 11:27:00 10321 [ main] [ INFO ] org.apache.hugegraph.backend.store.cassandra.CassandraStore [] - Store initialized: huge_schema
18 2017-12-01 11:27:00 10413 [ main] [ INFO ] org.apache.hugegraph.backend.store.cassandra.CassandraStore [] - Store initialized: huge_index
19 2017-12-01 11:27:00 10413 [ pool-3-thread-1] [ INFO ] org.apache.hugegraph.backend.Transaction [] - Clear cache on event 'store.init' 启动 server
1 bin/start-hugegraph.sh
2 Starting HugeGraphServer...
3 Connecting to HugeGraphServer ( http://127.0.0.1:8080/graphs) ....OK 5.1.6 Memory 点击展开/折叠 Memory 配置及启动方法 修改 hugegraph.properties
1 backend = memory
2 serializer = text Memory 后端的数据是保存在内存中无法持久化的,不需要初始化后端,这也是唯一一个不需要初始化的后端。
启动 server
1 bin/start-hugegraph.sh
2 Starting HugeGraphServer...
3 Connecting to HugeGraphServer ( http://127.0.0.1:8080/graphs) ....OK 提示的 url 与 rest-server.properties 中配置的 restserver.url 一致
5.1.7 ScyllaDB 点击展开/折叠 ScyllaDB 配置及启动方法 用户需自行安装 ScyllaDB,推荐版本 2.1 以上,下载地址
修改 hugegraph.properties
1 backend = scylladb
2 serializer = scylladb
3
4 # cassandra backend config
5 cassandra.host = localhost
6 cassandra.port = 9042
7 cassandra.username =
8 cassandra.password =
9 #cassandra.connect_timeout=5
10 #cassandra.read_timeout=20
11
12 #cassandra.keyspace.strategy=SimpleStrategy
13 #cassandra.keyspace.replication=3 由于 scylladb 数据库本身就是基于 cassandra 的"优化版",如果用户未安装 scylladb,也可以直接使用 cassandra 作为后端存储,只需要把 backend 和 serializer 修改为 scylladb,host 和 post 指向 cassandra 集群的 seeds 和 port 即可,但是并不建议这样做,这样发挥不出 scylladb 本身的优势了。
初始化数据库(第一次启动时或在 conf/graphs/ 下手动添加了新配置时需要进行初始化)
1 cd *hugegraph-${ version }
2 bin/init-store.sh 启动 server
1 bin/start-hugegraph.sh
2 Starting HugeGraphServer...
3 Connecting to HugeGraphServer ( http://127.0.0.1:8080/graphs) ....OK 5.1.8 启动 server 的时候创建示例图 在脚本启动时候携带 -p true参数,表示 preload, 即创建示例图图
1 bin/start-hugegraph.sh -p true
2 Starting HugeGraphServer in daemon mode...
3 Connecting to HugeGraphServer (http://127.0.0.1:8080/graphs)......OK 并且使用 RESTful API 请求 HugeGraphServer 得到如下结果:
1 > curl "http://localhost:8080/graphs/hugegraph/graph/vertices" | gunzip
2
3 { "vertices" : [{ "id" : "2:lop" , "label" : "software" , "type" : "vertex" , "properties" : { "name" : "lop" , "lang" : "java" , "price" : 328 }},{ "id" : "1:josh" , "label" : "person" , "type" : "vertex" , "properties" : { "name" : "josh" , "age" : 32 , "city" : "Beijing" }},{ "id" : "1:marko" , "label" : "person" , "type" : "vertex" , "properties" : { "name" : "marko" , "age" : 29 , "city" : "Beijing" }},{ "id" : "1:peter" , "label" : "person" , "type" : "vertex" , "properties" : { "name" : "peter" , "age" : 35 , "city" : "Shanghai" }},{ "id" : "1:vadas" , "label" : "person" , "type" : "vertex" , "properties" : { "name" : "vadas" , "age" : 27 , "city" : "Hongkong" }},{ "id" : "2:ripple" , "label" : "software" , "type" : "vertex" , "properties" : { "name" : "ripple" , "lang" : "java" , "price" : 199 }}]} 代表创建示例图成功。
5.2 使用 Docker 在 3.3 使用 Docker 容器 中,我们已经介绍了如何使用 docker 部署 hugegraph-server, 我们还可以使用其他的后端存储或者设置参数在 sever 启动的时候加载样例图
5.2.1 使用 Cassandra 作为后端 点击展开/折叠 Cassandra 配置及启动方法 在使用 Docker 的时候,我们可以使用 Cassandra 作为后端存储。我们更加推荐直接使用 docker-compose 来对于 server 以及 Cassandra 进行统一管理
样例的 docker-compose.yml 可以在 github 中获取,使用 docker-compose up -d 启动。(如果使用 cassandra 4.0 版本作为后端存储,则需要大约两个分钟初始化,请耐心等待)
1 version : "3"
2
3 services :
4 server :
5 image : hugegraph/hugegraph
6 container_name : cas-server
7 ports :
8 - 8080 : 8080
9 environment :
10 hugegraph.backend : cassandra
11 hugegraph.serializer : cassandra
12 hugegraph.cassandra.host : cas-cassandra
13 hugegraph.cassandra.port : 9042
14 networks :
15 - ca-network
16 depends_on :
17 - cassandra
18 healthcheck :
19 test : [ "CMD" , "bin/gremlin-console.sh" , "--" , "-e" , "scripts/remote-connect.groovy" ]
20 interval : 10s
21 timeout : 30s
22 retries : 3
23
24 cassandra :
25 image : cassandra:4
26 container_name : cas-cassandra
27 ports :
28 - 7000 : 7000
29 - 9042 : 9042
30 security_opt :
31 - seccomp:unconfined
32 networks :
33 - ca-network
34 healthcheck :
35 test : [ "CMD" , "cqlsh" , "--execute" , "describe keyspaces;" ]
36 interval : 10s
37 timeout : 30s
38 retries : 5
39
40 networks :
41 ca-network :
42
43 volumes :
44 hugegraph-data: 在这个 yaml 中,需要在环境变量中以 hugegraph.<parameter_name>的形式进行参数传递,配置 Cassandra 相关的参数。
具体来说,在 hugegraph.properties 配置文件中,提供了 backend=xxx, cassandra.host=xxx 等配置项,为了配置这些配置项,在传递环境变量的过程之中,我们需要在这些配置项前加上 hugegrpah.,即 hugegraph.backend 和 hugegraph.cassandra.host。
其他配置可以参照 4 配置
5.2.2 启动 server 的时候创建示例图 在 docker 启动的时候设置环境变量 PRELOAD=true, 从而实现启动脚本的时候加载数据。
使用docker run
使用 docker run -itd --name=server -p 8080:8080 -e PRELOAD=true hugegraph/hugegraph:1.5.0
使用docker-compose
创建docker-compose.yml,具体文件如下,在环境变量中设置 PRELOAD=true。其中,example.groovyexample.groovy 脚本改变预加载的数据。
1 version : '3'
2 services :
3 server :
4 image : hugegraph/hugegraph:1.5.0
5 container_name : server
6 environment :
7 - PRELOAD=true
8 - PASSWORD=xxx
9 volumes :
10 - /path/to/yourscript:/hugegraph/scripts/example.groovy
11 ports :
12 - 8080 : 8080 使用命令 docker-compose up -d 启动容器
使用 RESTful API 请求 HugeGraphServer 得到如下结果:
1 > curl "http://localhost:8080/graphs/hugegraph/graph/vertices" | gunzip
2
3 { "vertices" : [{ "id" : "2:lop" , "label" : "software" , "type" : "vertex" , "properties" : { "name" : "lop" , "lang" : "java" , "price" : 328 }},{ "id" : "1:josh" , "label" : "person" , "type" : "vertex" , "properties" : { "name" : "josh" , "age" : 32 , "city" : "Beijing" }},{ "id" : "1:marko" , "label" : "person" , "type" : "vertex" , "properties" : { "name" : "marko" , "age" : 29 , "city" : "Beijing" }},{ "id" : "1:peter" , "label" : "person" , "type" : "vertex" , "properties" : { "name" : "peter" , "age" : 35 , "city" : "Shanghai" }},{ "id" : "1:vadas" , "label" : "person" , "type" : "vertex" , "properties" : { "name" : "vadas" , "age" : 27 , "city" : "Hongkong" }},{ "id" : "2:ripple" , "label" : "software" , "type" : "vertex" , "properties" : { "name" : "ripple" , "lang" : "java" , "price" : 199 }}]} 代表创建示例图成功。
6 访问 Server 6.1 服务启动状态校验 jps 查看服务进程
1 jps
2 6475 HugeGraphServercurl 请求 RESTful API
1 echo ` curl -o /dev/null -s -w %{ http_code} "http://localhost:8080/graphs/hugegraph/graph/vertices" ` 返回结果 200,代表 server 启动正常
6.2 请求 Server HugeGraphServer 的 RESTful API 包括多种类型的资源,典型的包括 graph、schema、gremlin、traverser 和 task
graph 包含 vertices、edgesschema 包含 vertexlabels、propertykeys、edgelabels、indexlabelsgremlin 包含各种 Gremlin 语句,如 g.v(),可以同步或者异步执行traverser 包含各种高级查询,包括最短路径、交叉点、N 步可达邻居等task 包含异步任务的查询和删除6.2.1 获取 hugegraph 的顶点及相关属性
1 curl http://localhost:8080/graphs/hugegraph/graph/vertices 说明
由于图的点和边很多,对于 list 型的请求,比如获取所有顶点,获取所有边等,Server 会将数据压缩再返回,所以使用 curl 时得到一堆乱码,可以重定向至 gunzip 进行解压。推荐使用 Chrome 浏览器 + Restlet 插件发送 HTTP 请求进行测试。
1 curl "http://localhost:8080/graphs/hugegraph/graph/vertices" | gunzip 当前 HugeGraphServer 的默认配置只能是本机访问,可以修改配置,使其能在其他机器访问。
1 vim conf/rest-server.properties
2
3 restserver.url=http://0.0.0.0:8080 响应体如下:
1 {
2 "vertices" : [
3 {
4 "id" : "2lop" ,
5 "label" : "software" ,
6 "type" : "vertex" ,
7 "properties" : {
8 "price" : [
9 {
10 "id" : "price" ,
11 "value" : 328
12 }
13 ],
14 "name" : [
15 {
16 "id" : "name" ,
17 "value" : "lop"
18 }
19 ],
20 "lang" : [
21 {
22 "id" : "lang" ,
23 "value" : "java"
24 }
25 ]
26 }
27 },
28 {
29 "id" : "1josh" ,
30 "label" : "person" ,
31 "type" : "vertex" ,
32 "properties" : {
33 "name" : [
34 {
35 "id" : "name" ,
36 "value" : "josh"
37 }
38 ],
39 "age" : [
40 {
41 "id" : "age" ,
42 "value" : 32
43 }
44 ]
45 }
46 },
47 ...
48 ]
49 }
详细的 API 请参考 RESTful-API 文档。
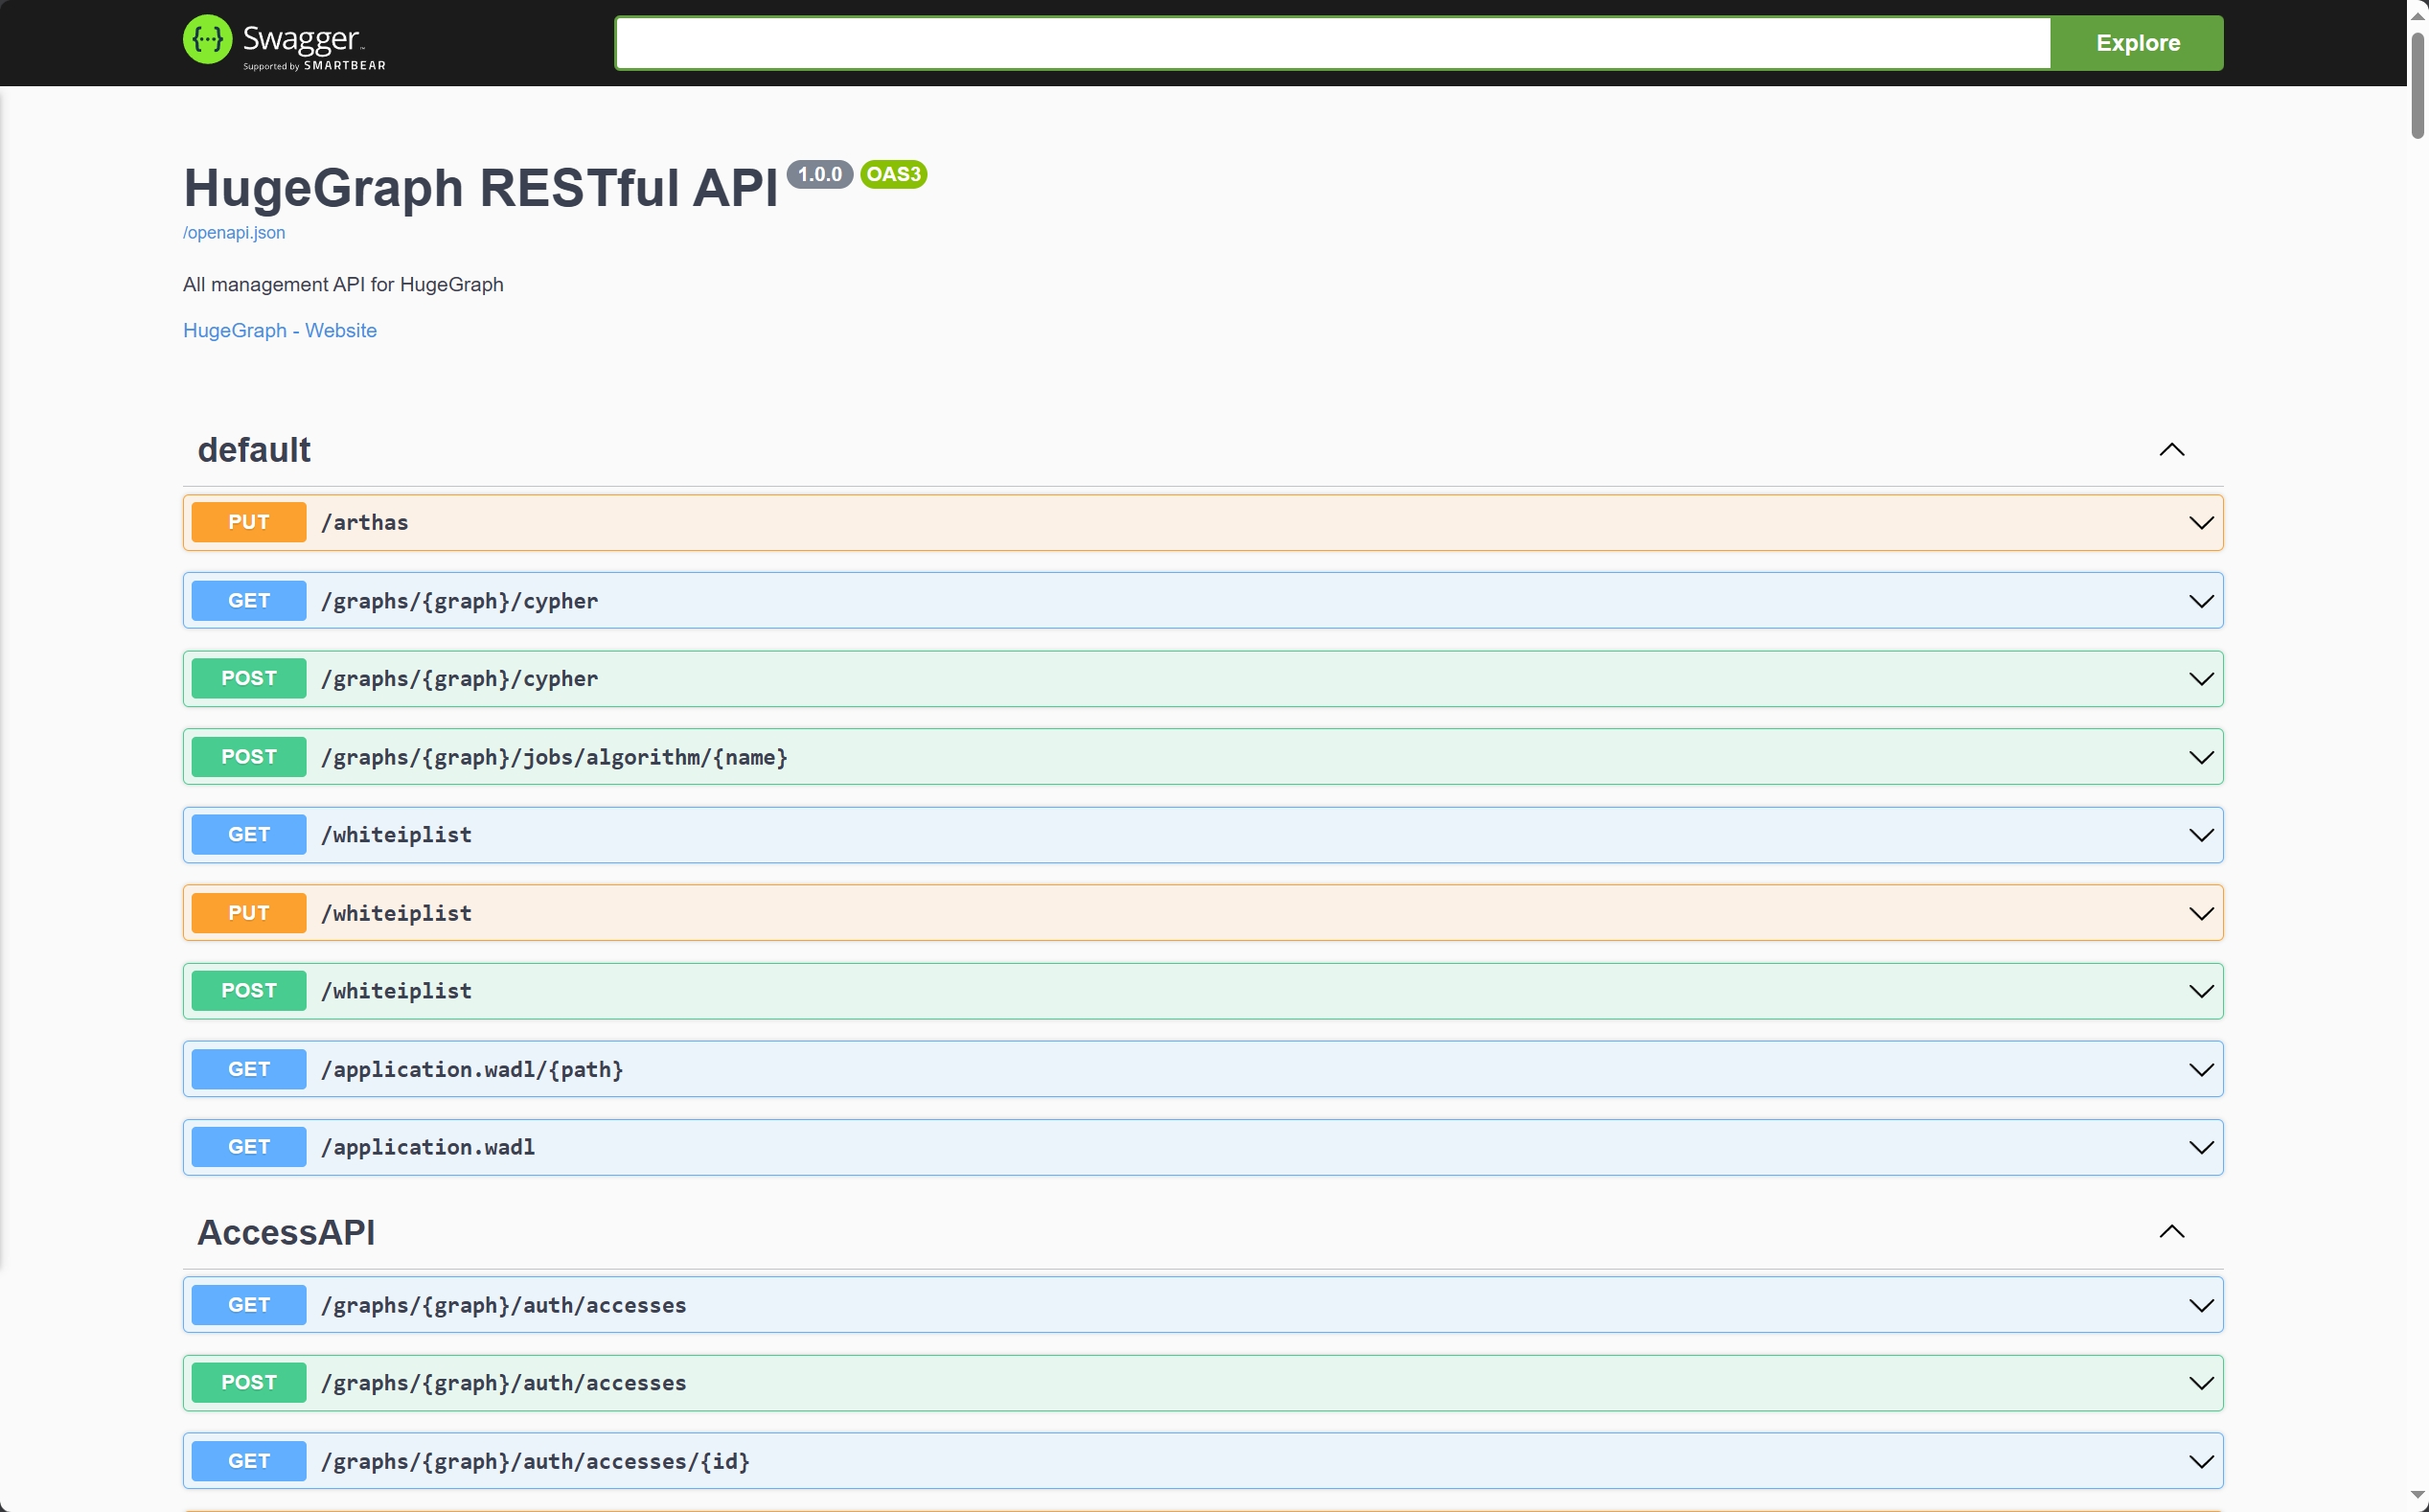
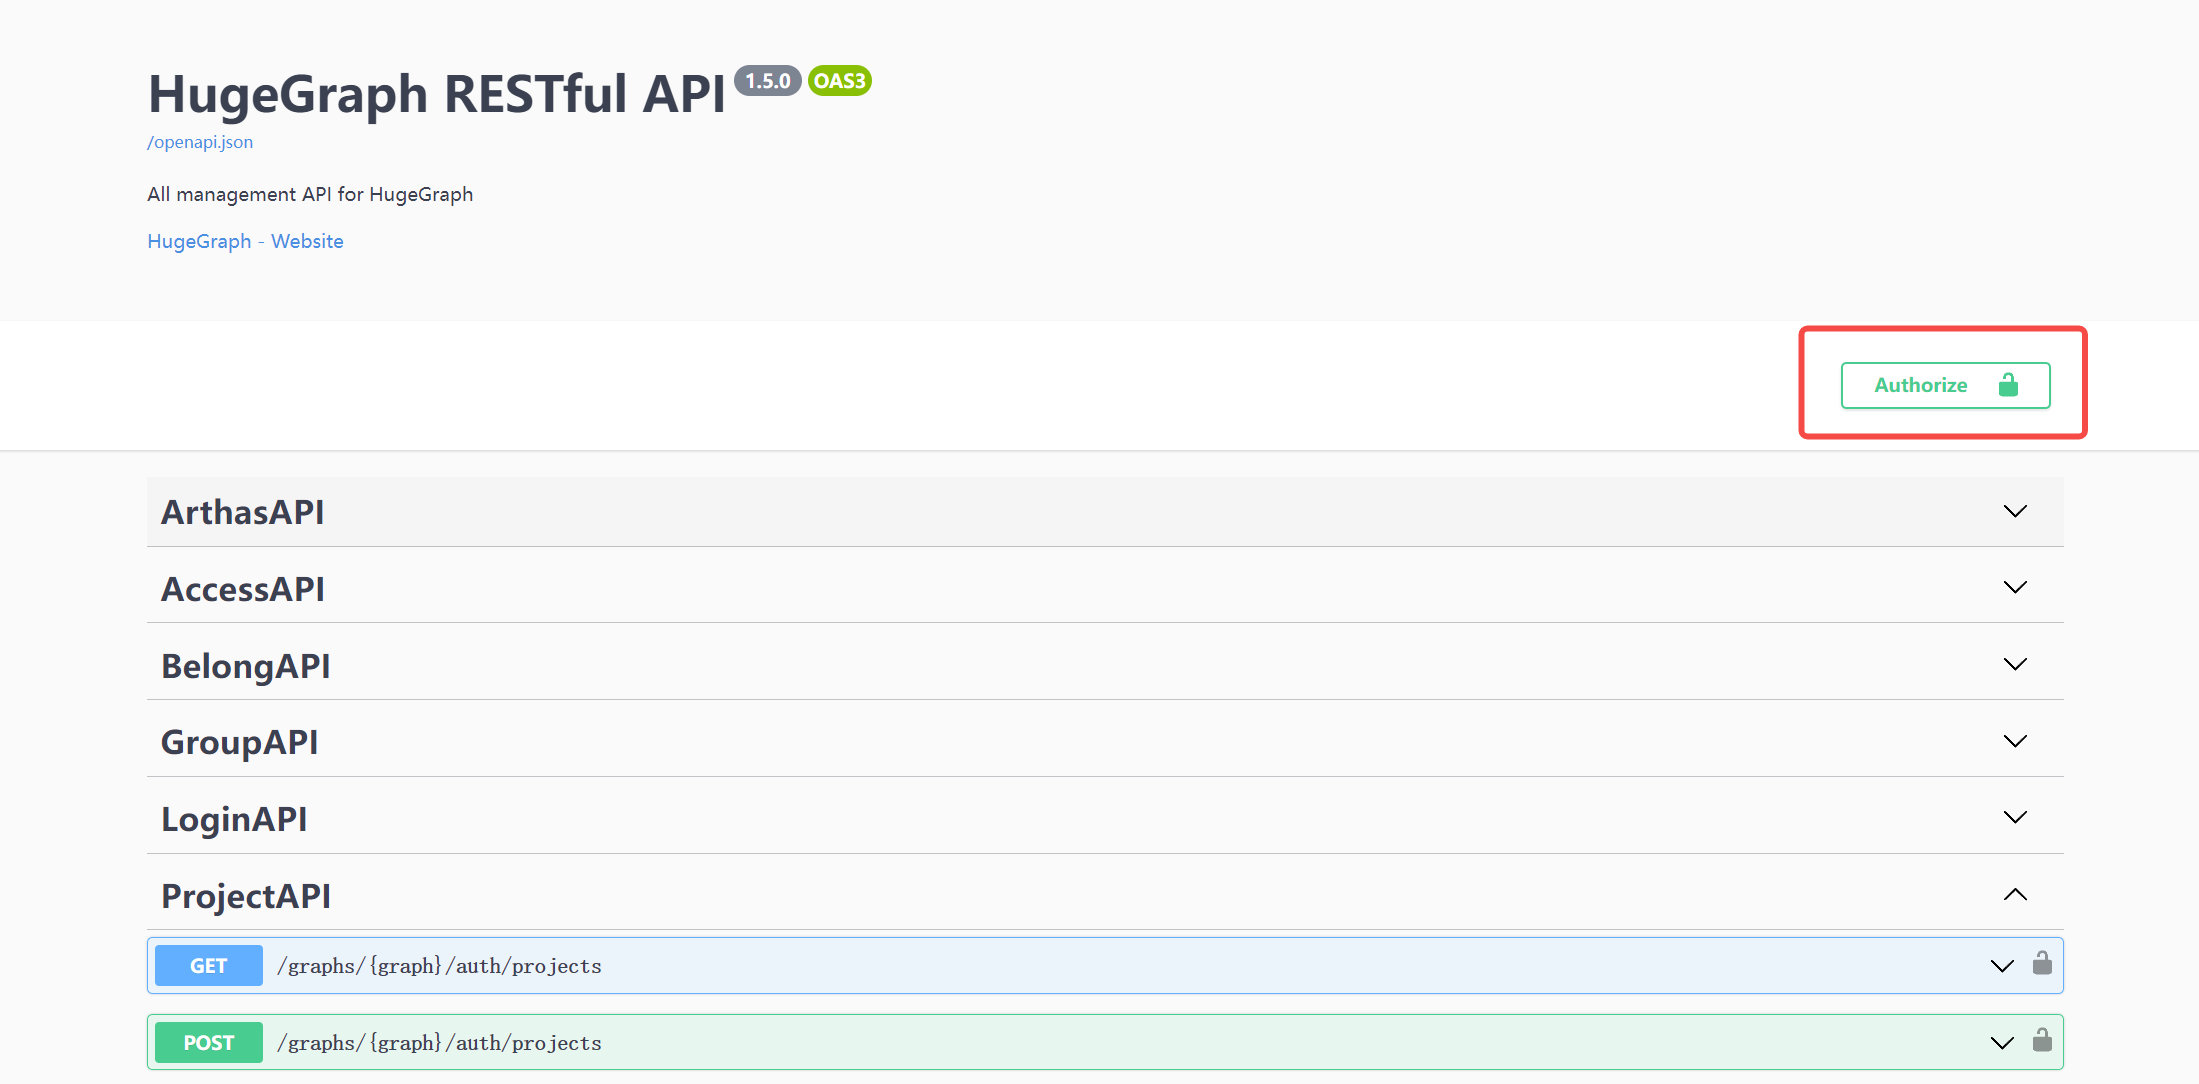
另外也可以通过访问 localhost:8080/swagger-ui/index.html 查看 API。
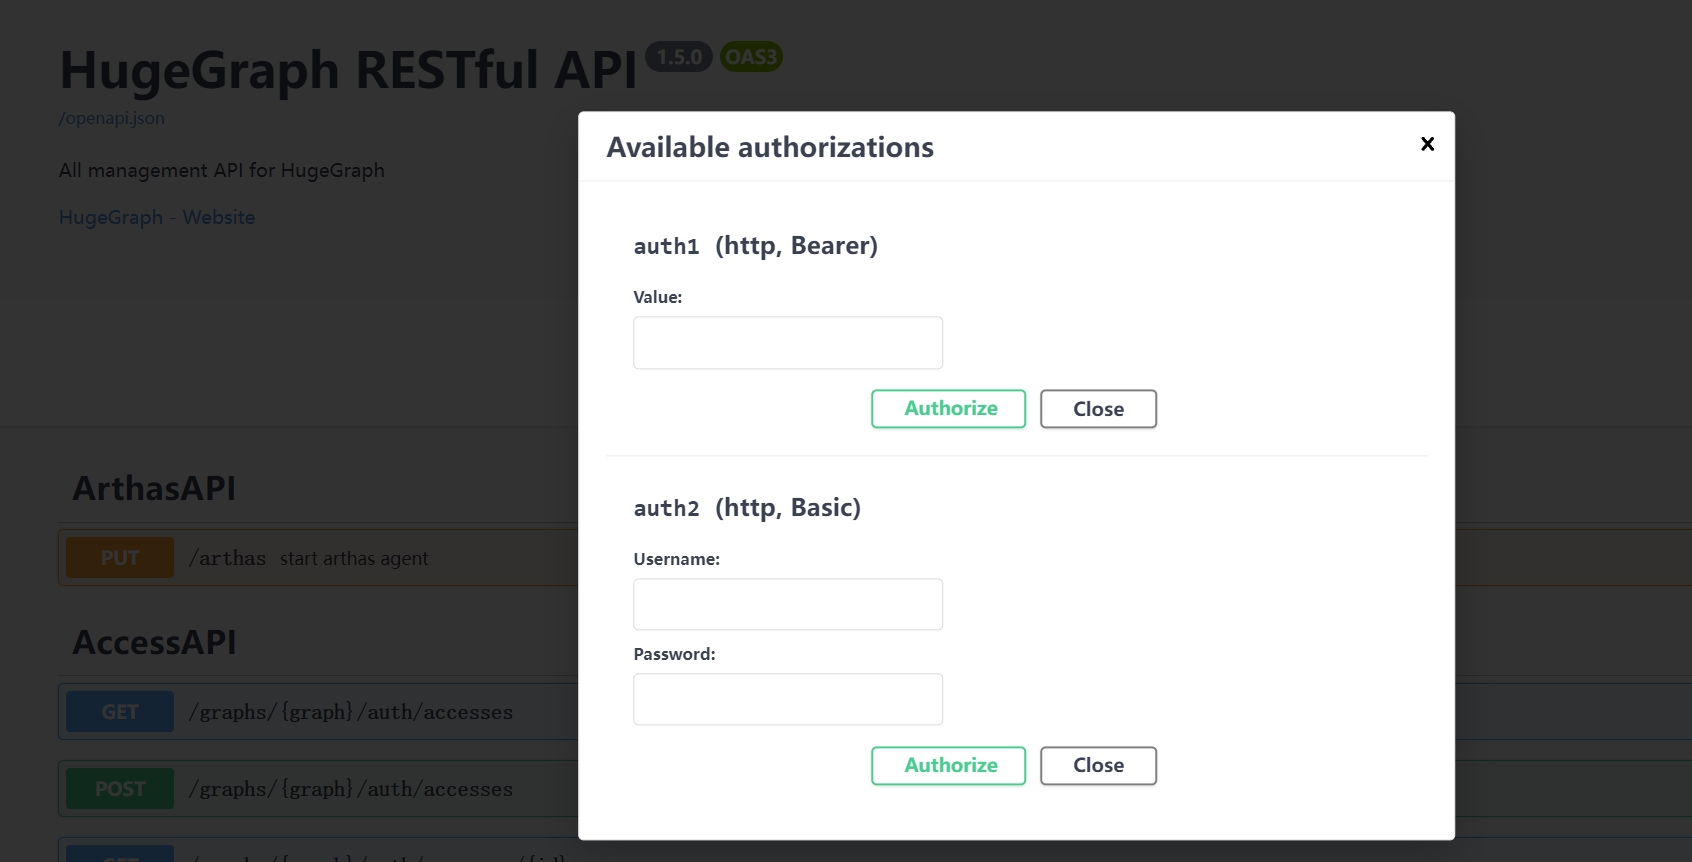
在使用 Swagger UI 调试 HugeGraph 提供的 API 时,如果 HugeGraph Server 开启了鉴权模式,可以在 Swagger 页面输入鉴权信息。
当前 HugeGraph 支持基于 Basic 和 Bearer 两种形式设置鉴权信息。
7 停止 Server
1 $cd *hugegraph-${ version }
2 $bin /stop-hugegraph.sh8 使用 IntelliJ IDEA 调试 Server 请参考在 IDEA 中配置 Server 开发环境